Dad's Truck Build
|
Banned User
|
I'm testing a better filtration system for my washer... I bought a roll of white landscape fabric https://www.amazon.com/dp/B005CERIZE and stapled it into the shape of my vat. Then I dropped it in right after the solvent was replaced, so it's perfectly clean outside, and used magnets to hold the fabric up on the walls of the vat. Now, there's ~300x as much surface area of "filter" between the dirty parts & the pump, and it's a much-finer filter, and it's disposable. When it gets grimy, I'll lift it out (slowly), drop in another (there's plenty on the roll), let the old one drip back into the vat for a day or 3, and then burn it. And it's for a manual transmission. The E4OD is a variant/improvement/modernization of the C6, and Ford sometimes uses the old name to refer to the revised part. Sometimes 4R100s are referred to as E4ODs. |
|
Administrator
|
My cleaner has 3 levels of filtration:
The replaceable filter is one of the cartride-style units typically used for water filters. I've experimented with different filters and now found one that works whereas all the others plugged pretty quickly. The one that works is a 50 micron unit instead of the 5, 10, or 20 microns I've tried. But, it was the fine screen filter that plugged, not the replaceable one. And it is easily pulled and rinsed, so that didn't take any time to solve.
But your plan should work nicely for your washer! As for the engine plate, yes the one on the left is for a manual tranny. As shown below, the automatic tranny used D1AZ 7007-A, and that was for 351M, 400's, and 460's. And, oddly enough, I'd missed that the catalog says that part number may be marked either "D1AE 6A372-AA" or "E7TE-EA".
So, I've learned two things from that. One, they apparently gave a new engineering/ID # to an old part number. Two, both the catalog and some vendors used shorthand for engineering/ID #'s. In this case the plate on the right is marked "E7TE 6A373-EA". But the catalog omits the "6A373" part of that. And the plate on the left is marked "D1TE-A" and omits the "6A372".
And, the screen grab below shows that there's a place for an E4OD in the catalog, but they didn't put a "1" in that column to show that the plate is used for that tranny. But, it obviously was.
Gary, AKA "Gary fellow": Profile
Dad's: '81 F150 Ranger XLT 4x4: Down for restomod: Full-roller "stroked 351M" w/Trick Flow heads & intake, EEC-V SEFI/E4OD/3.50 gears w/Kevlar clutches
|
|
Administrator
|
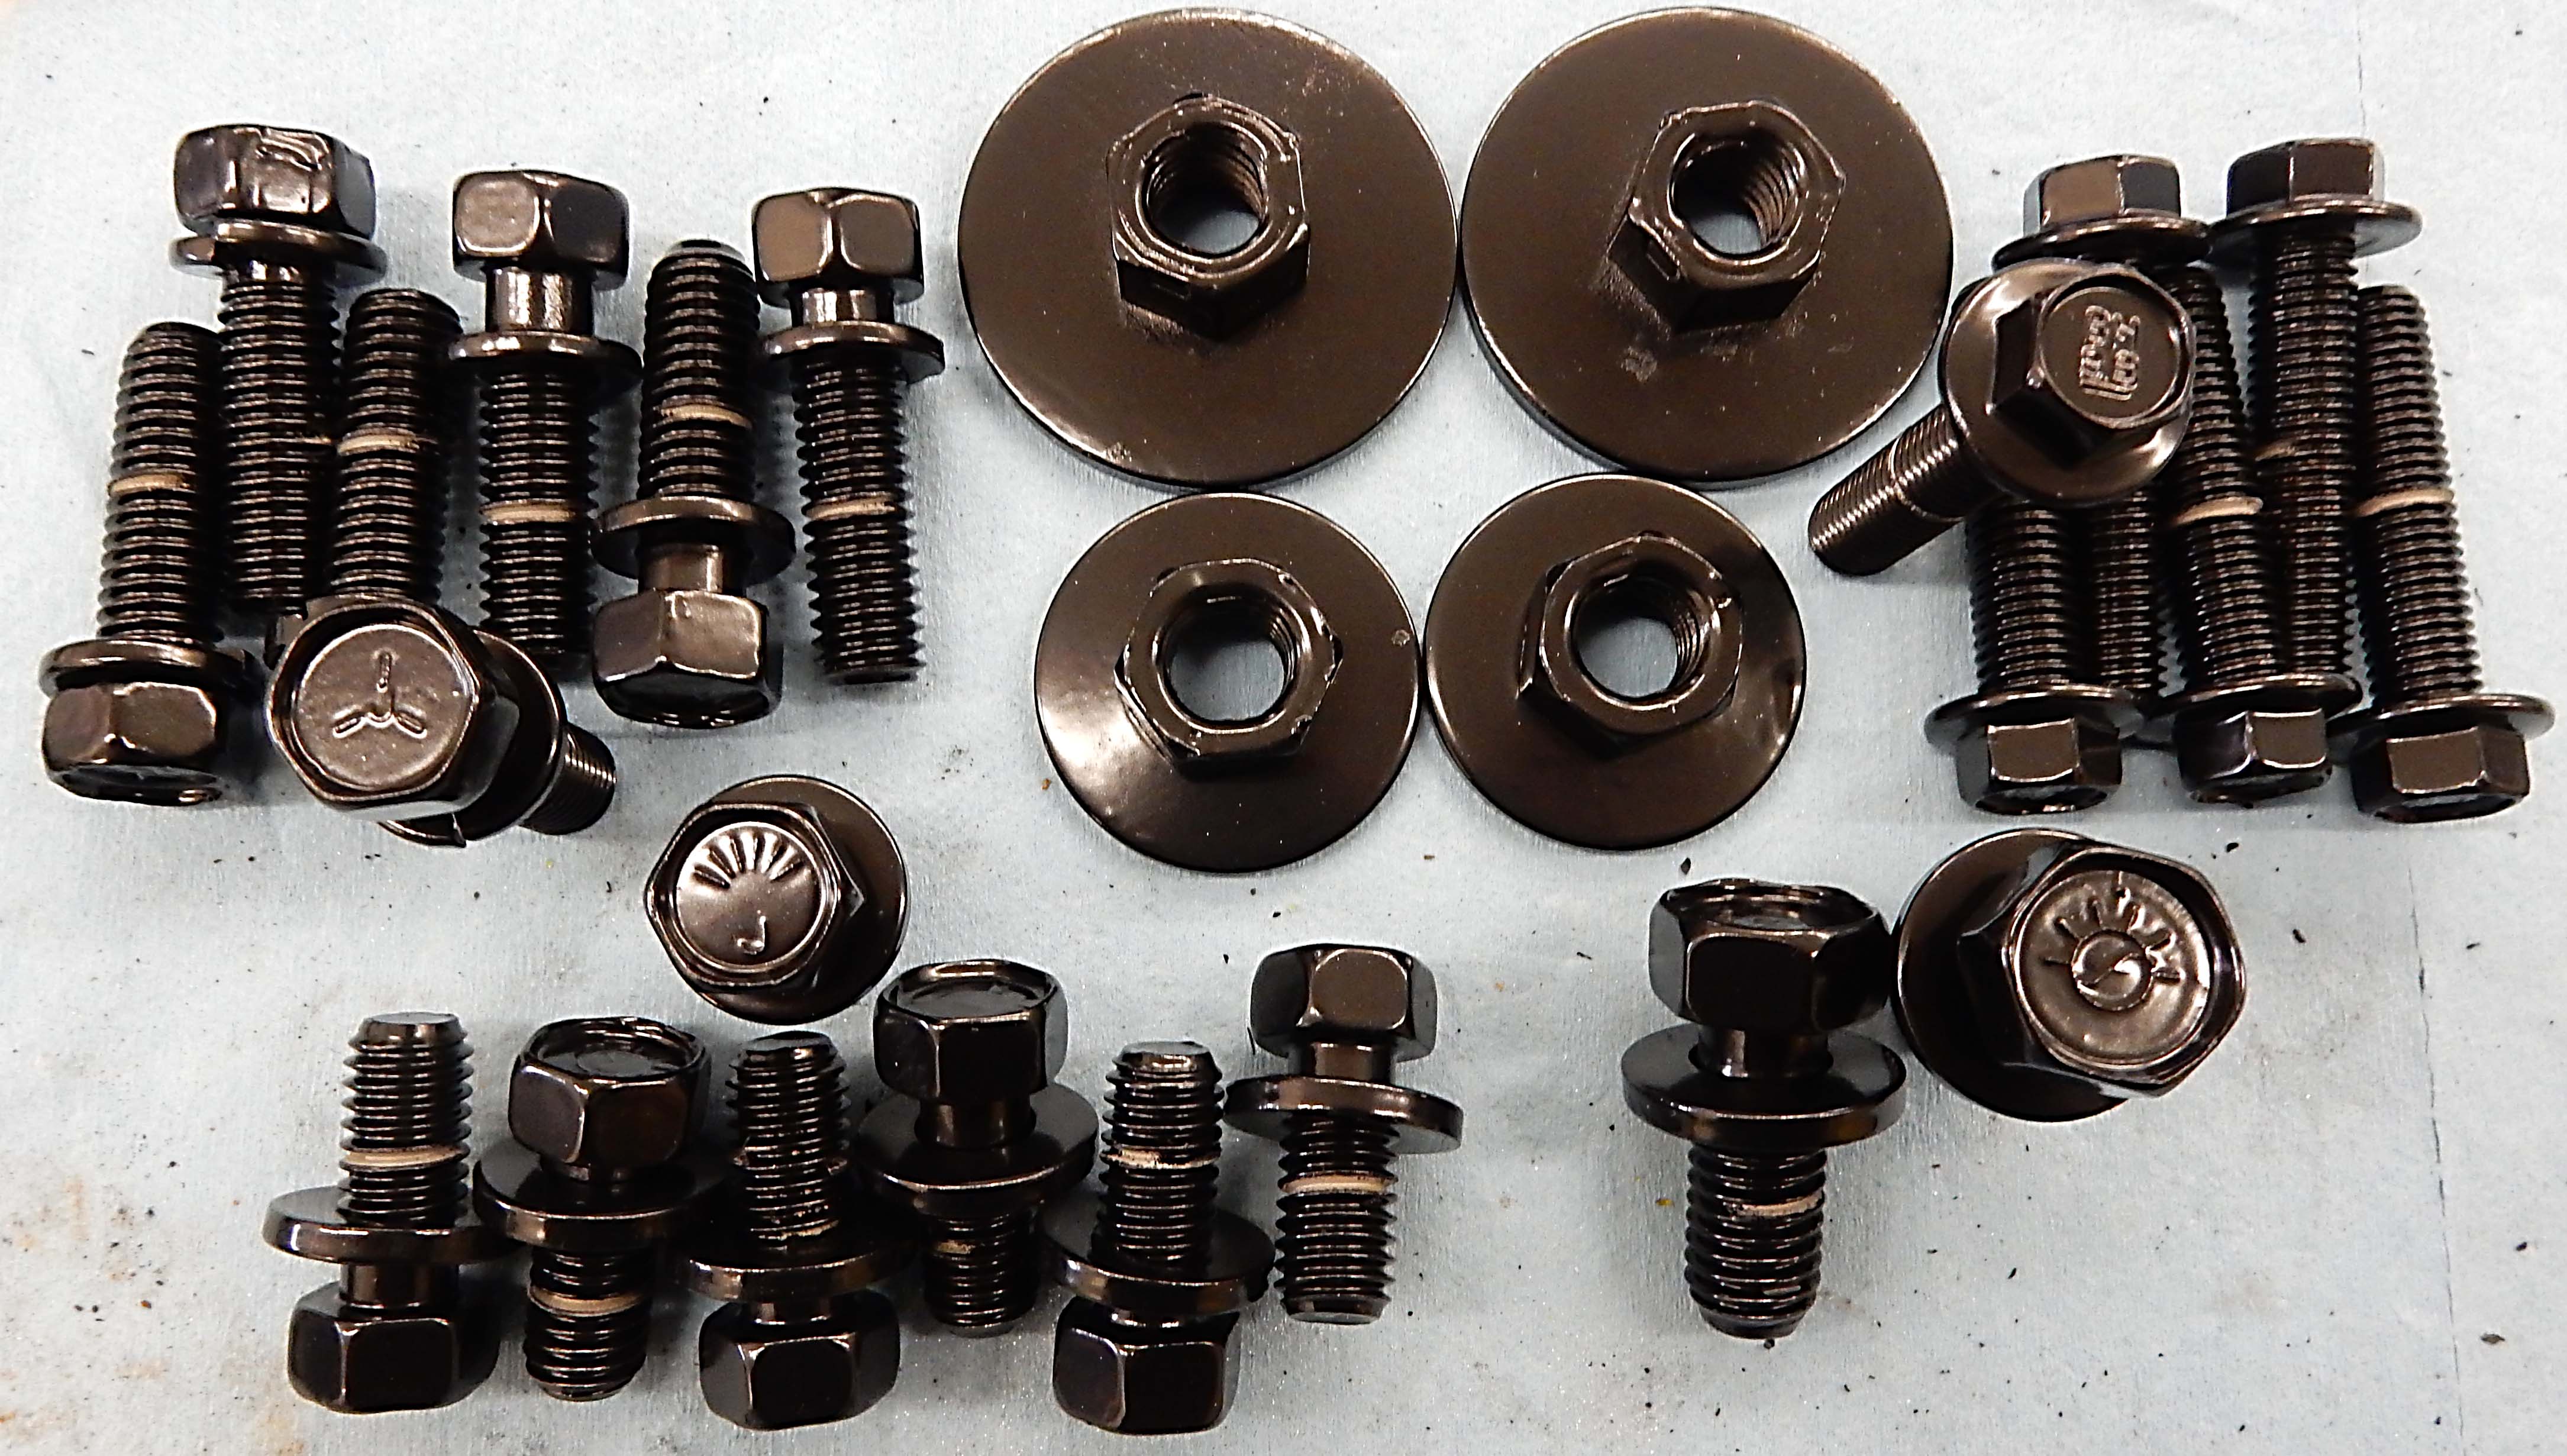
Got quite a bit done today. First, here's the fasteners for the driveline:
 And, here's the engine plate: 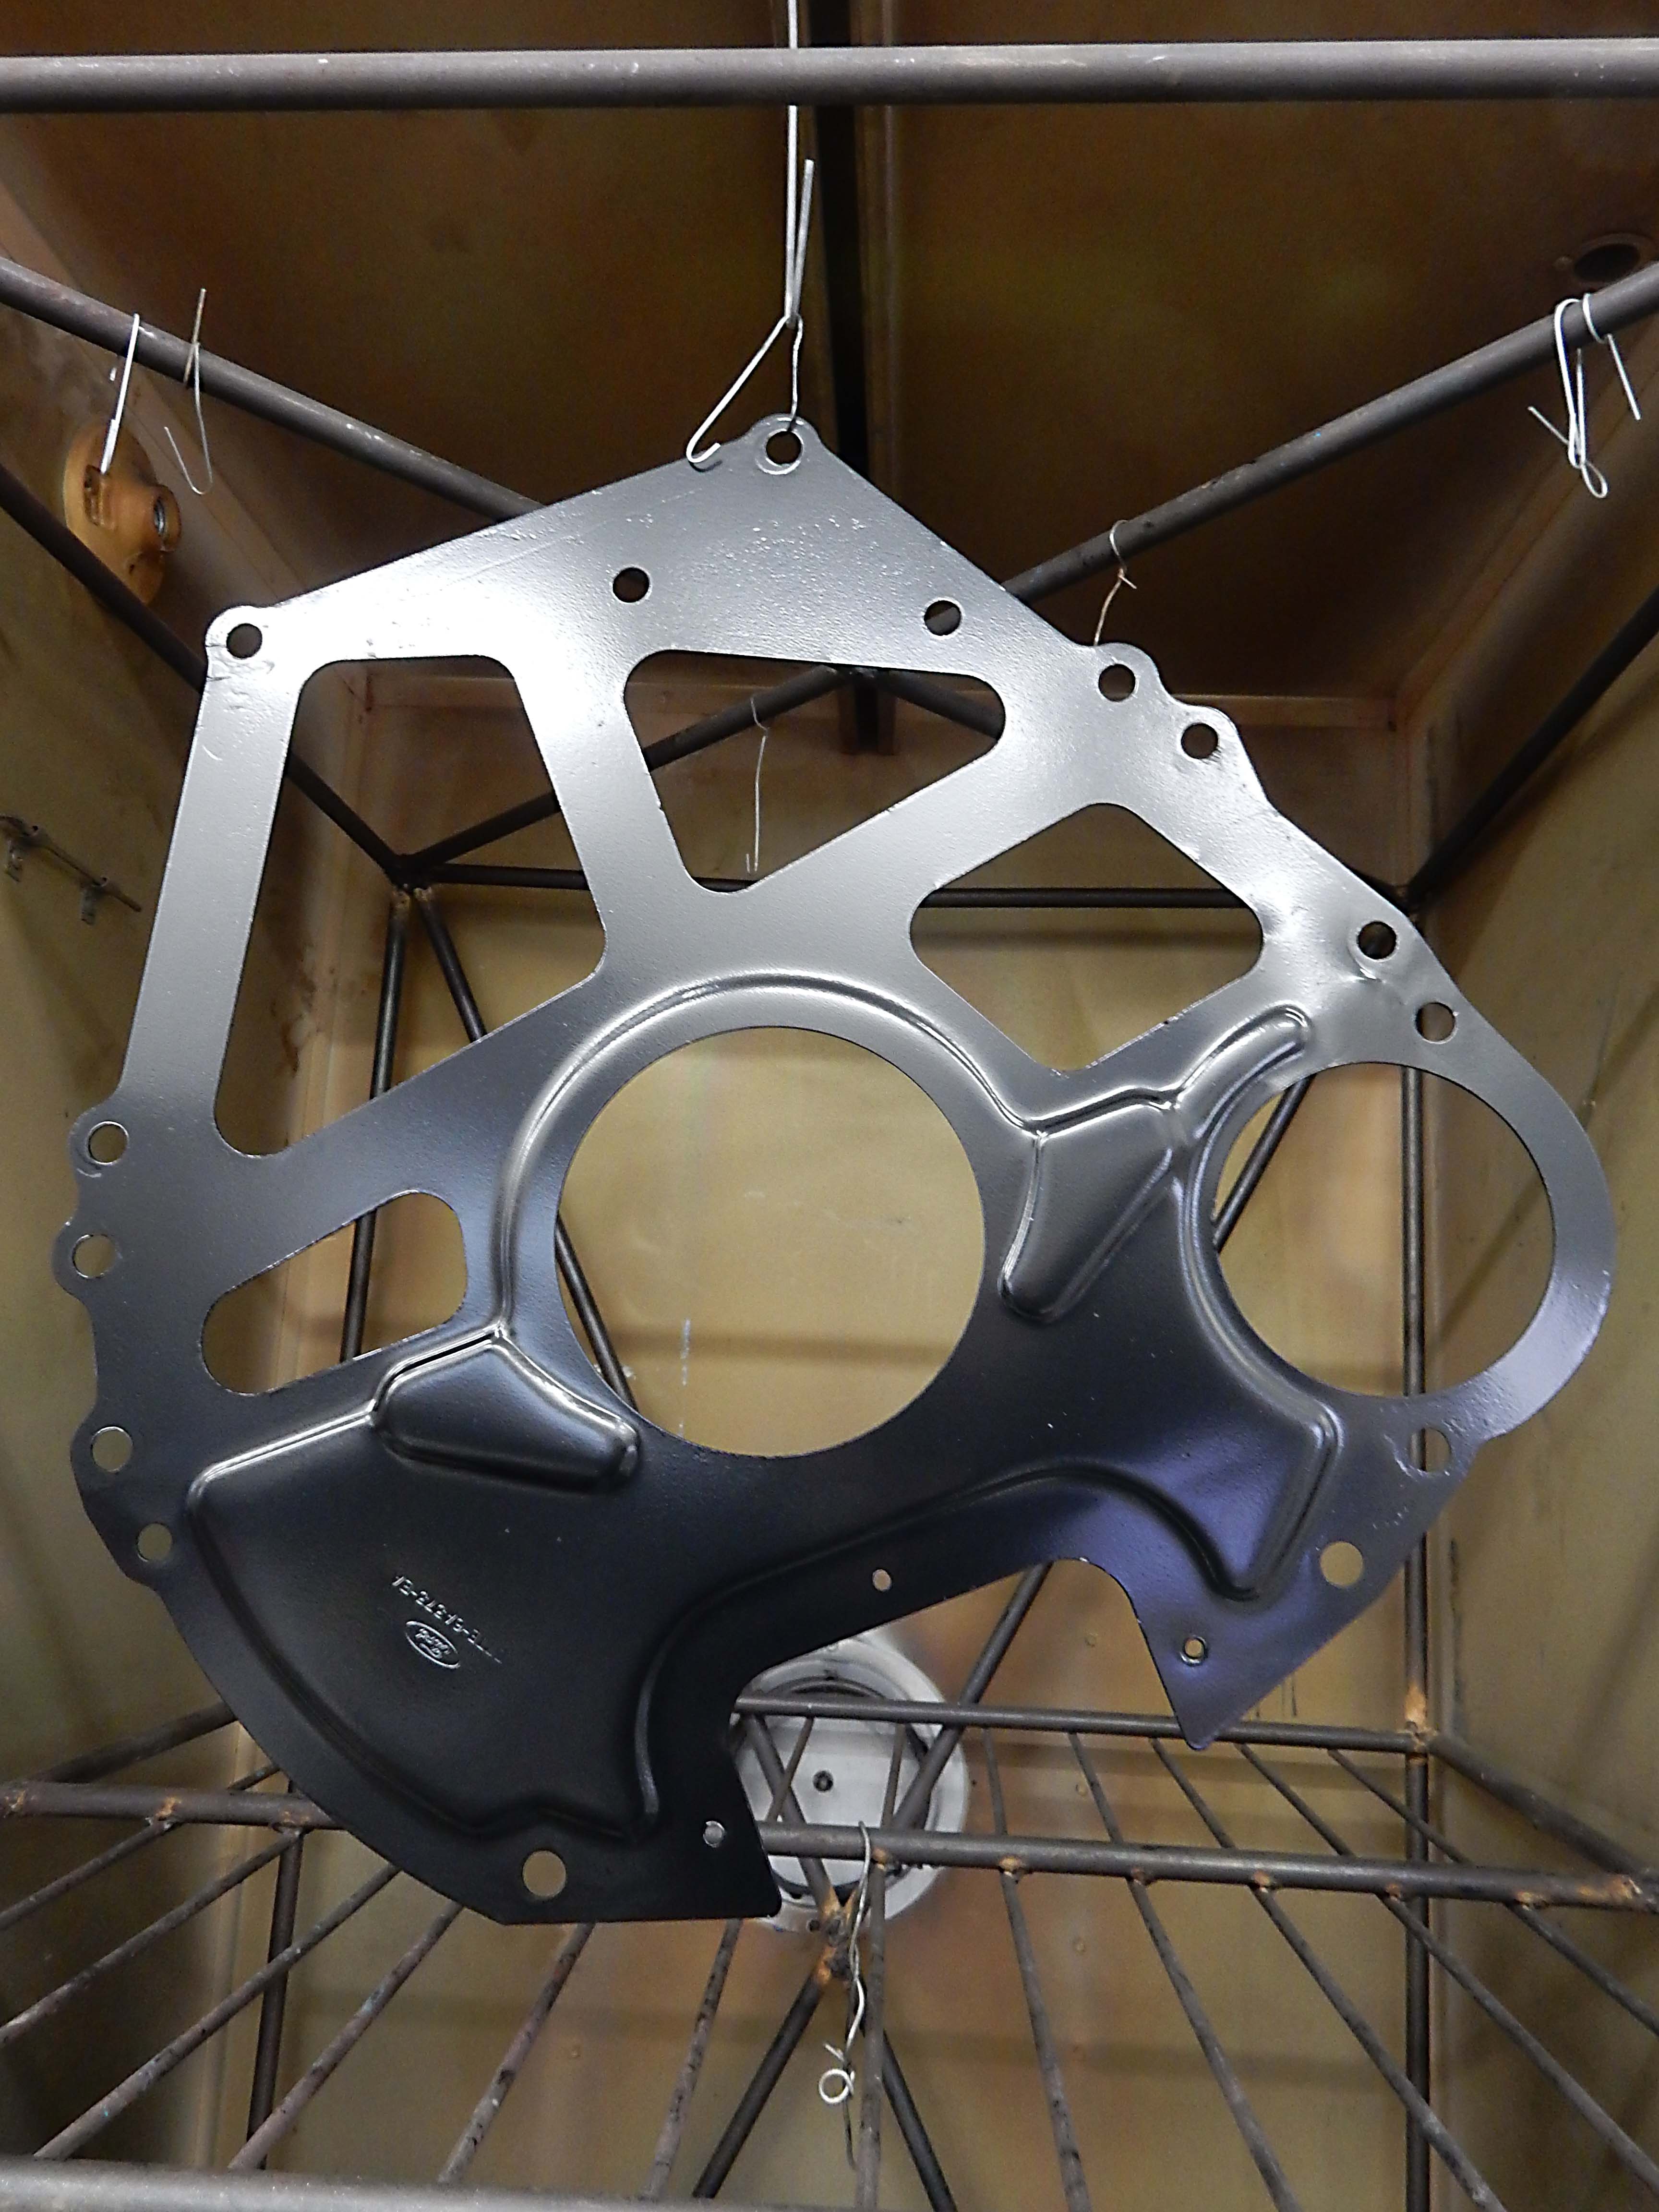 Then I turned to the engine mounts, and got them POR15'd and then sprayed with the satin black Rustoleum. They aren't dry yet, but I can say that using spray paint dramatically improves the experience of using POR15. 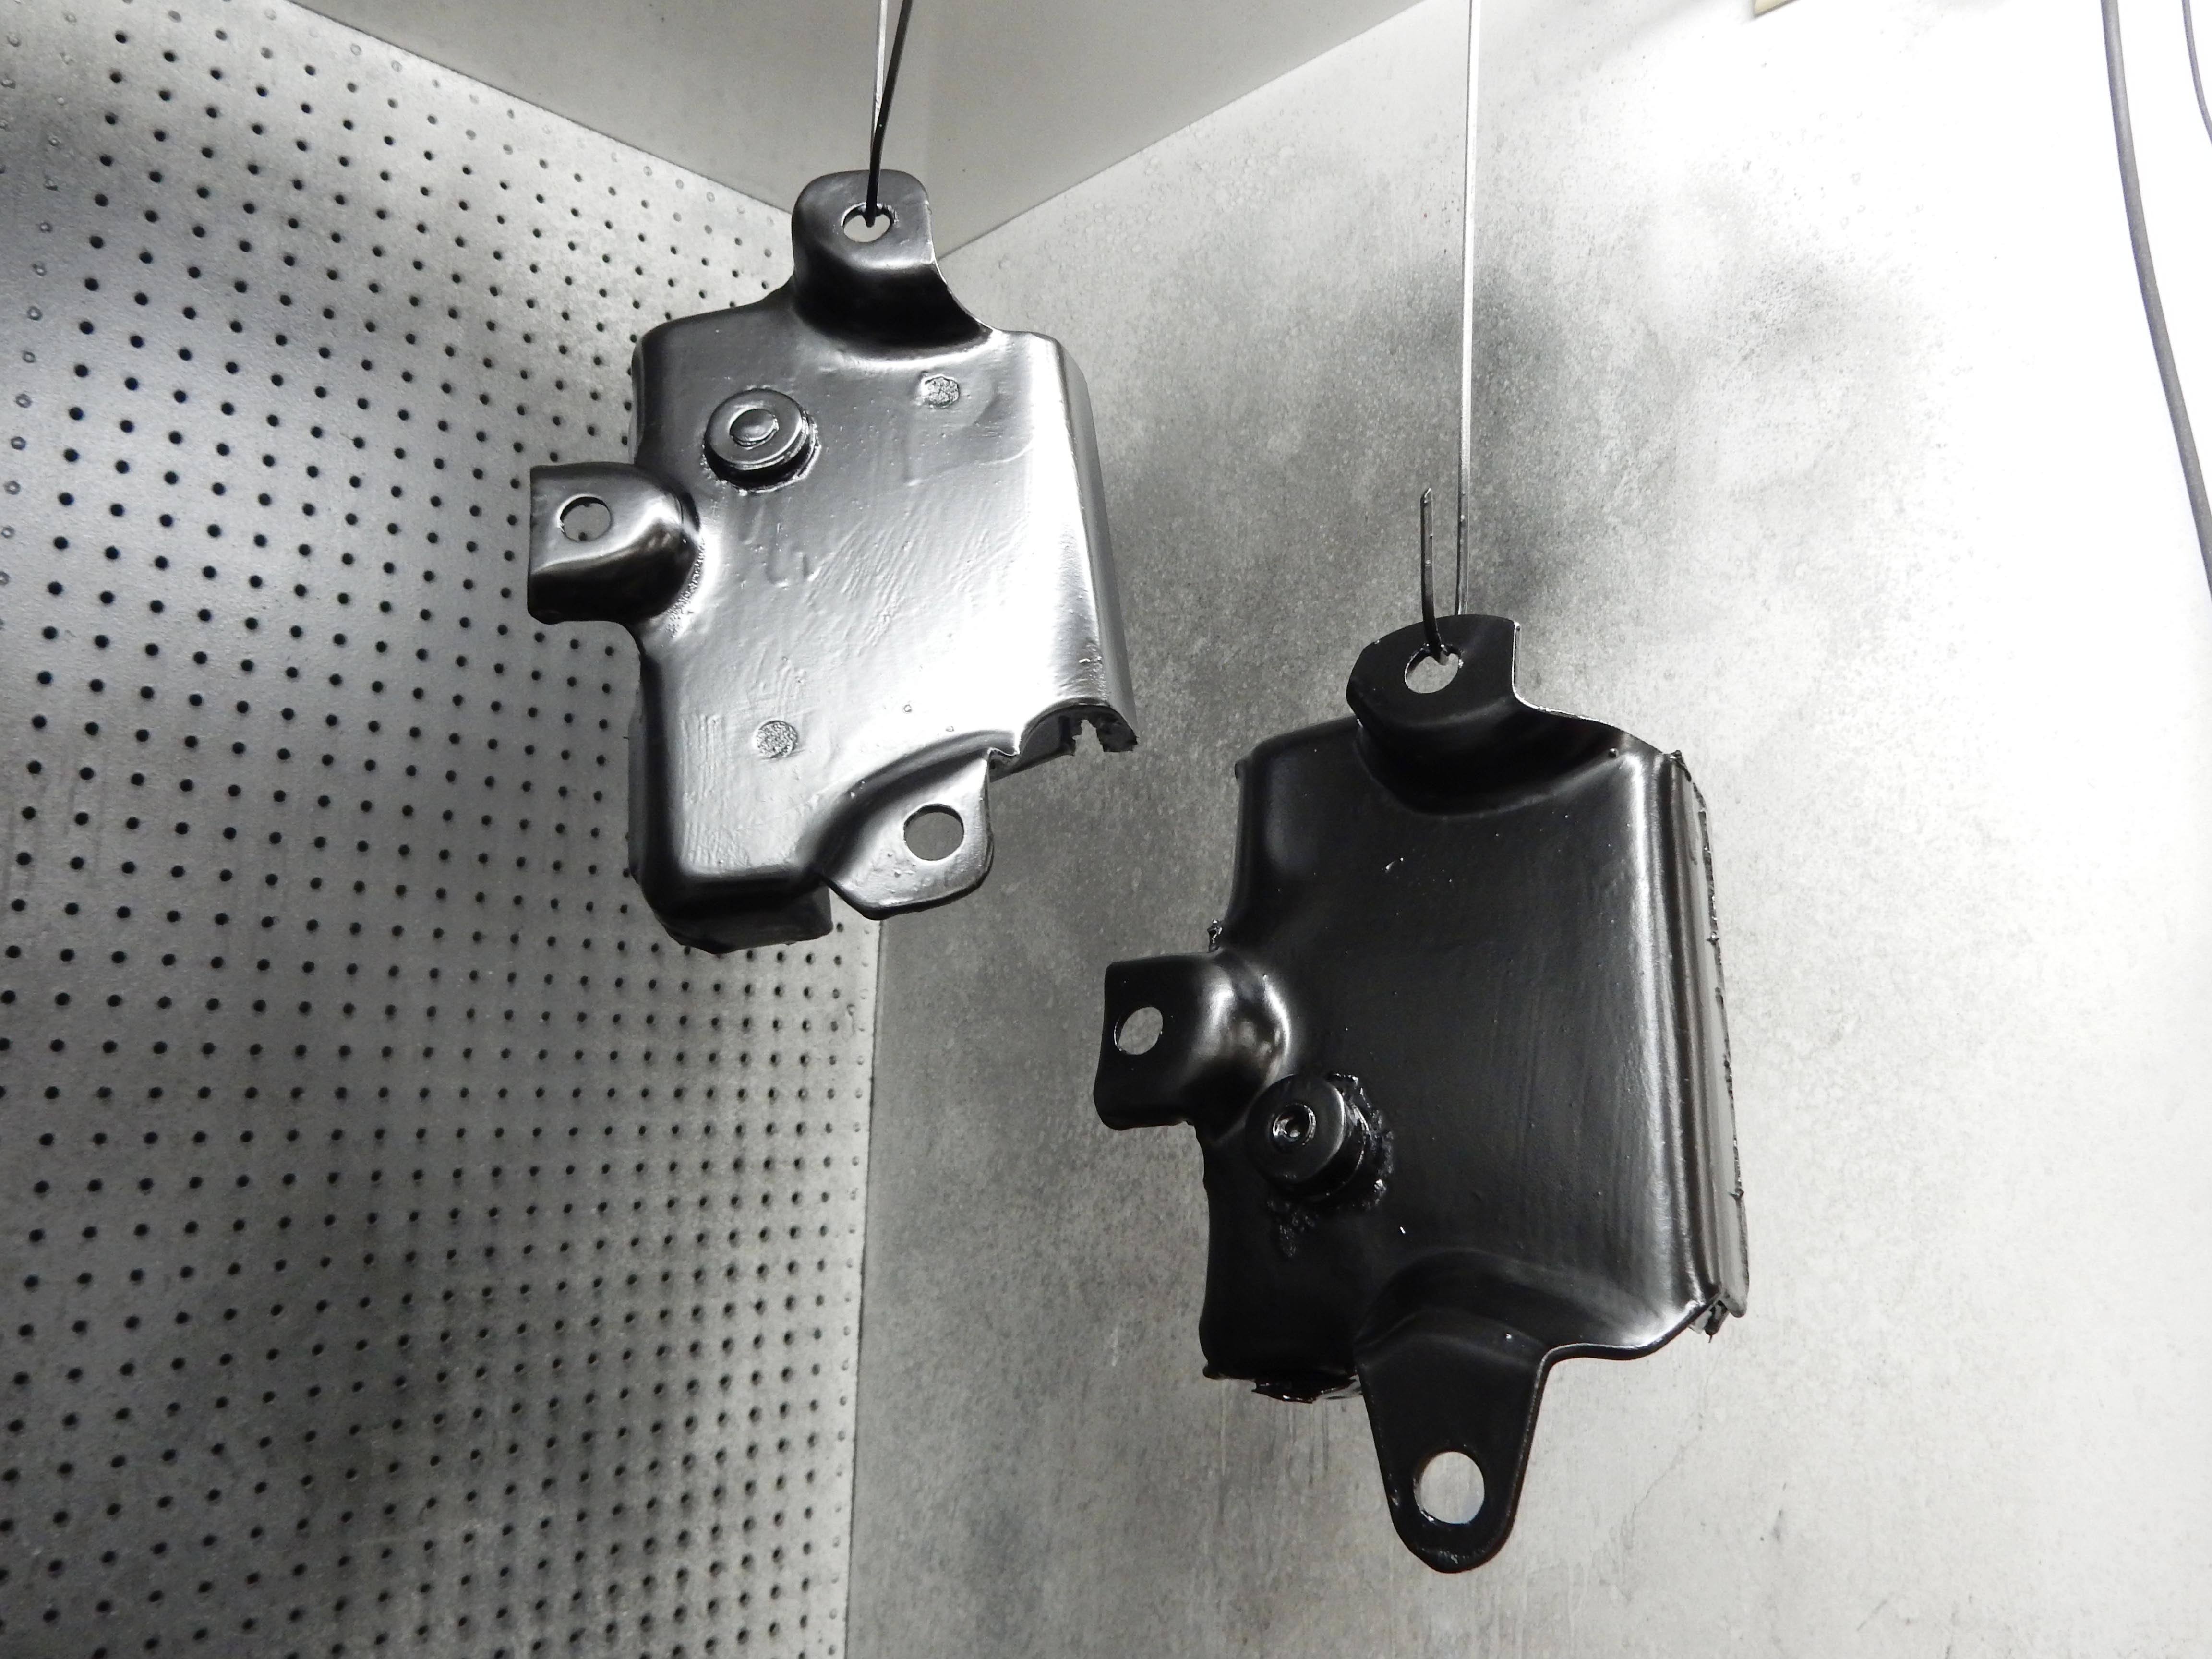 And, I can also say that POR15 sticks pretty well, even on un-prepared surfaces. My next task was to install the tie rods. But I quickly found that I had way too much paint, both POR and Rustoleum, on the threads to let the adjusters screw on. A trip to the wire wheel took the Rustoleum off fairly quickly, but the POR was still down there in the threads and took a lot more time. But the combination of the wire wheel and a thread file eventually got it off/out. And, here's the tie rods installed. I measured the old tie rods and made these the same length. But, I don't have them torqued down yet, although the fact that they are on is a huge step forward.  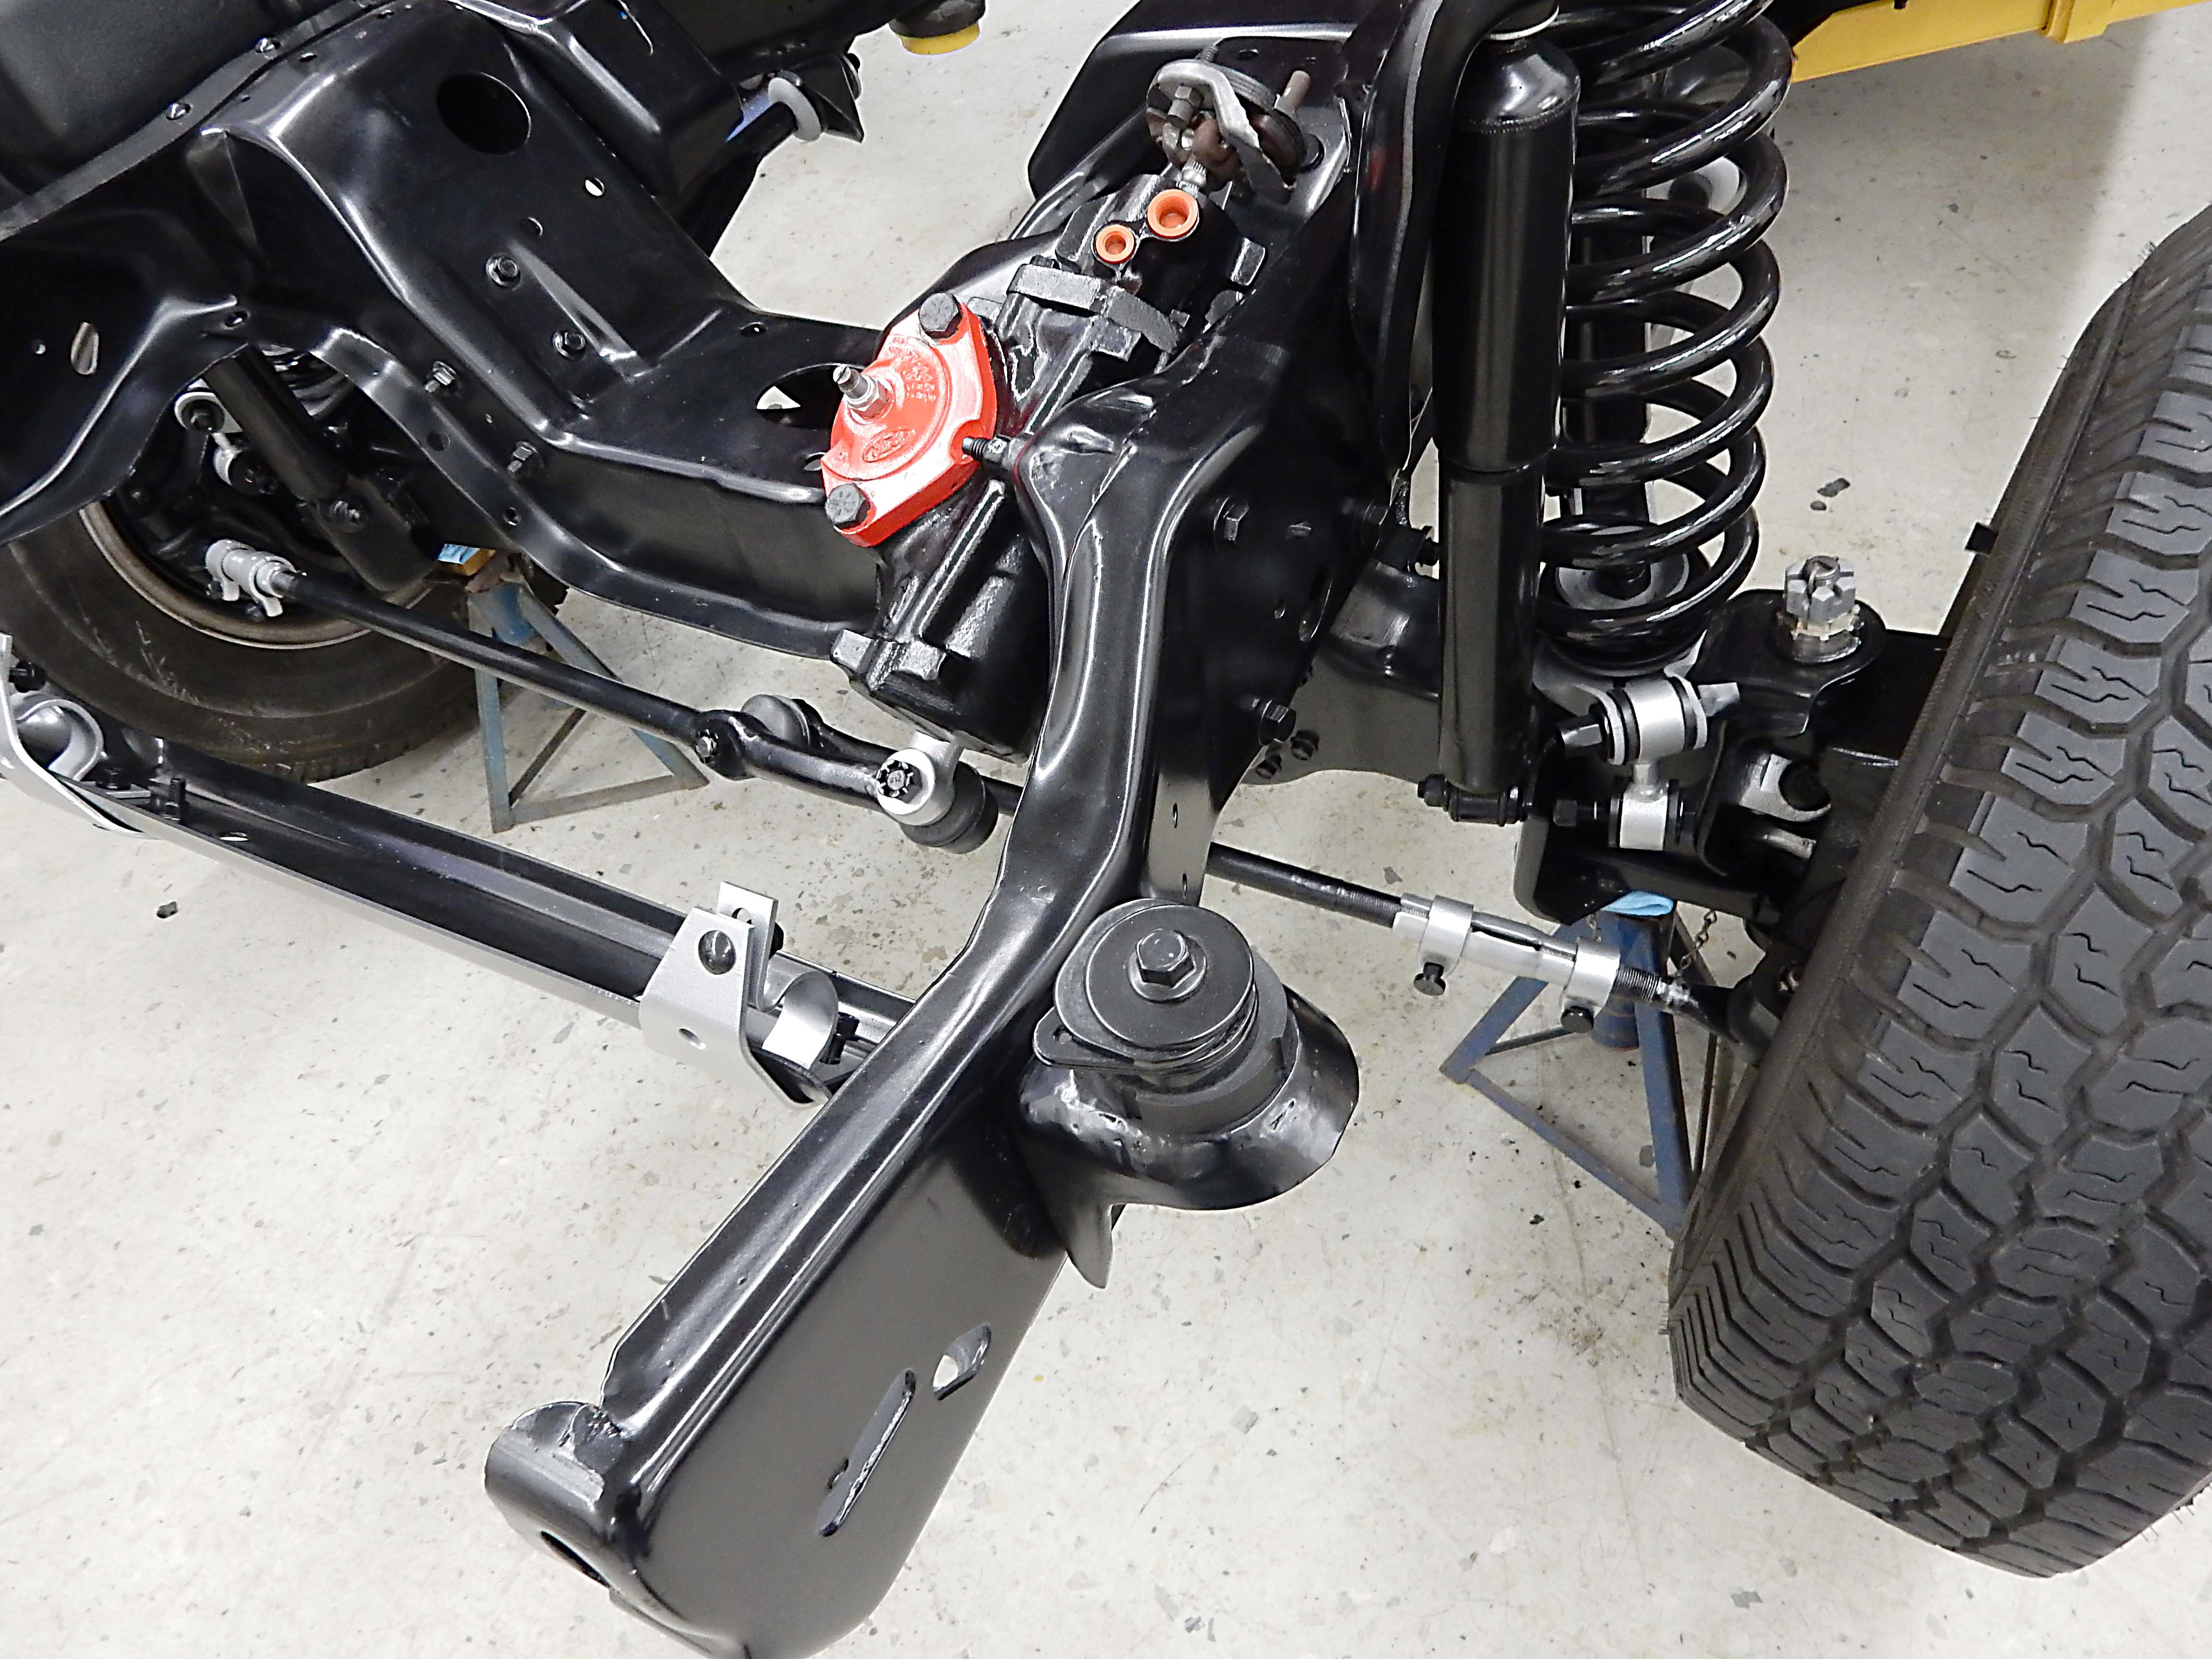 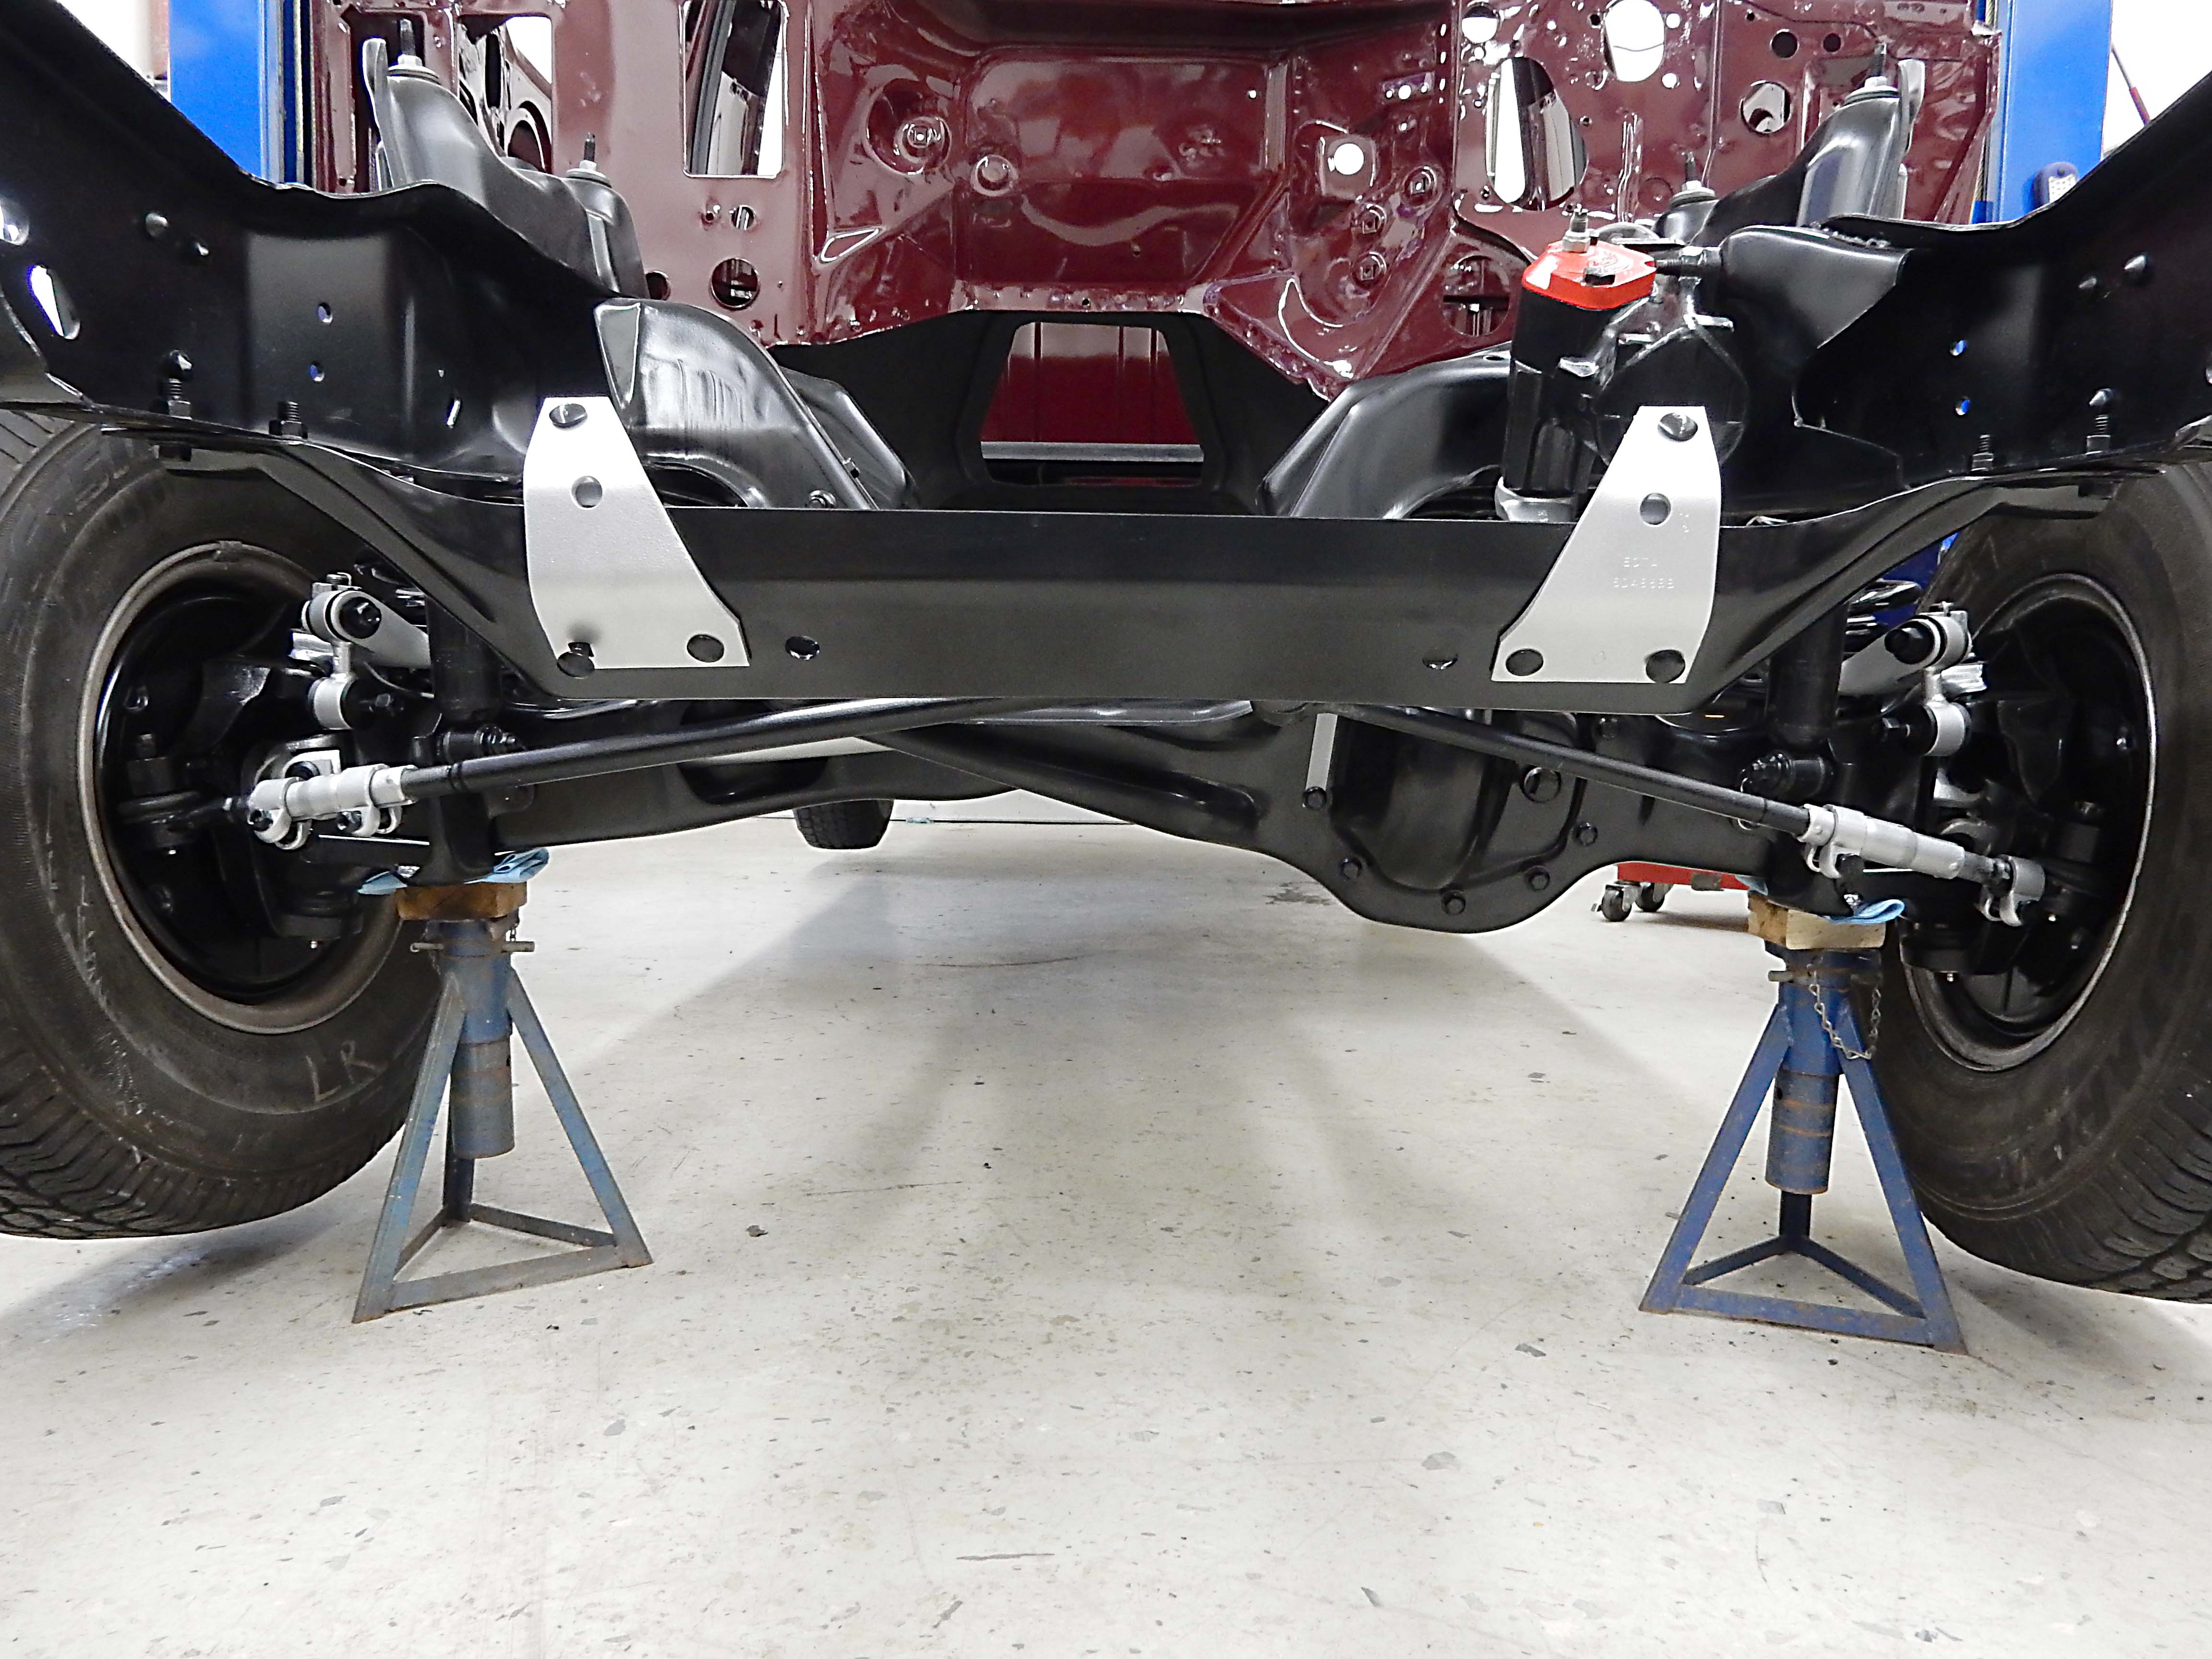
Gary, AKA "Gary fellow": Profile
Dad's: '81 F150 Ranger XLT 4x4: Down for restomod: Full-roller "stroked 351M" w/Trick Flow heads & intake, EEC-V SEFI/E4OD/3.50 gears w/Kevlar clutches
|
|
Man, looks nice! Good job!
Dane
1986 F250HD SC XLT Lariat 4x4 460 C6-Sold 1992 Bronco XLT 4x4 351W E4OD 1998 GMC Sierra SLE K1500 350 4L60E Arizona |
|
Administrator
|
Thanks! I'm on a mission to get ready for when my brother comes down to help. Gotta have lots of things done, but knocked out several of them today.
However, I want to have EVERYTHING lined out when he comes so there's no time wasted. Down to the point of having the fasteners laid out and electrical tape already on them, a list of tightening torques, etc. So, there is plenty to do.
Gary, AKA "Gary fellow": Profile
Dad's: '81 F150 Ranger XLT 4x4: Down for restomod: Full-roller "stroked 351M" w/Trick Flow heads & intake, EEC-V SEFI/E4OD/3.50 gears w/Kevlar clutches
|
|
Administrator
|
In reply to this post by Gary Lewis
Looks fantastic Gary! What are the silver color trapezoid shaped brackets bolted to the front cross member? What attaches to them? Mine did not have those. Are they related to the sway bars?
I know you are not using the ZF on Dad’s... but what’s with the 460 ZF engine plate? The “inspection cover” for the clutch is part of the plate. Does not do you much good for inspecting the clutch  looks like the older manual transmission engine plate for 335 was not like that. Perhaps a worthy upgrade when putting the ZF in Big Blue? The diesel ZF inspection cover is a separate piece since there is no engine plate aside from the 1” thick adapter. If the 335 series 4 speeds have a separate inspection cover perhaps it could be made to work on the ZF? Or modify a diesel one? looks like the older manual transmission engine plate for 335 was not like that. Perhaps a worthy upgrade when putting the ZF in Big Blue? The diesel ZF inspection cover is a separate piece since there is no engine plate aside from the 1” thick adapter. If the 335 series 4 speeds have a separate inspection cover perhaps it could be made to work on the ZF? Or modify a diesel one?
SHORT BED 4-DOOR DIESEL: 1986 F350 4x4 under construction-- 7.3 IDIT ZF5+GVOD
STRAIGHT SIX 4X4: 1981 F150 2wd to 4x4-- 300 I6 close ratio diesel T19, hydroboost brakes, Saginaw steering BIG F: 1995 F-Superduty under construction— converting to 6.9L IDI diesel ZF5+DNE2 |
|
Administrator
|
Jonathan - The silver plates hold the sway bar. I'll take some pics of that, maybe tomorrow.
But the engine plate I powder coated is a 335 and 358-series automatic plate, not manual. Oh, you meant the other one, which is at least a 335-Series manual plate, and would surely fit a 460. Yes, the 460's ZF plate is solid on the bottom and makes inspecting the clutch impossible. So, you are suggesting I could use it with the ZF5 on Big Blue? That's an idea! I'll have to think about that.  I think I modified the ZF cover when I had it on Dad's truck, so I'll look to see what I did and how the two plates compare. Cool!
Gary, AKA "Gary fellow": Profile
Dad's: '81 F150 Ranger XLT 4x4: Down for restomod: Full-roller "stroked 351M" w/Trick Flow heads & intake, EEC-V SEFI/E4OD/3.50 gears w/Kevlar clutches
|
|
Banned User
|
In reply to this post by Ford F834
That's very common on Ford parts & assemblies. The basic part is easily identified, so the base PN can be omitted; only the prefix & suffix are necessary.  I'm afraid you're going to have quite a few electrical problems soon & long into the future with so little bare metal-to-metal contact throughout the truck. You might have to overlay a trunk return wire system onto the truck to restore electrical grounding. That's another reason I prefer rubberized undercoating on the chassis - it doesn't interfere with threads, and it's easy to touch up after adjustments (like on those tie rods). There is no inspection plate for a clutch because it can't be inspected without removing the bellhousing. The clutch is on the backside of the flywheel, and that plate only allows access to the FRONT of a flexplate, to get at the torque converter nuts. |
|
In reply to this post by Gary Lewis
If I wanted to have a way to inspect my clutch lining, I like would look at how the class 8 trucks do with an access in the bell housing itself. On class 8 trucks, that's how you access the clutch adjustment.
1981 F 150 Custom 300 ci with a fully rebuilt 1968 240 head Carter YFA T-18 3.25 9" rear 2WD
dual gas tanks 1990 Lincoln Town Car 5.0 AOD Home town Mc Kenzie, TN |
|
Administrator
|
In reply to this post by Steve83
This makes no sense to me... why wouldn’t you want to be able to remove it and have a look at the edge of the friction disc to see how much material is left? Or have a better look at your ring gear teeth, or check for oil leaking onto the clutch surface or, or, or...??? The diesel ZF has a removable one and you can see a lot with it off. True, you can’t reallt ~do much of anything without taking the transmission out but you can inspect and diagnose problems by spinning out a couple small bolts instead of dropping the whole transmission just to have a look.
SHORT BED 4-DOOR DIESEL: 1986 F350 4x4 under construction-- 7.3 IDIT ZF5+GVOD
STRAIGHT SIX 4X4: 1981 F150 2wd to 4x4-- 300 I6 close ratio diesel T19, hydroboost brakes, Saginaw steering BIG F: 1995 F-Superduty under construction— converting to 6.9L IDI diesel ZF5+DNE2 |
|
Administrator
|
The diesel ZF and the 460 ZF main case are the same casting with different mounting and alignment dowel holes. On the diesel one you can even see some ghost marks where the 460 holes go. So there is no reason it couldn’t have the same type of removeable cover. The diesel 4 speed bell has a removeable cover that is virtually identical to the ZF. The covers do not interchange, but they have the same type of access. I’m thinking the 460 4-speed bellhousing is probably the same way? 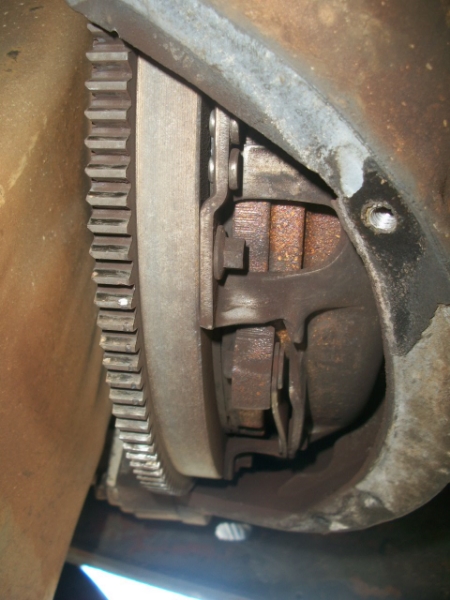
SHORT BED 4-DOOR DIESEL: 1986 F350 4x4 under construction-- 7.3 IDIT ZF5+GVOD
STRAIGHT SIX 4X4: 1981 F150 2wd to 4x4-- 300 I6 close ratio diesel T19, hydroboost brakes, Saginaw steering BIG F: 1995 F-Superduty under construction— converting to 6.9L IDI diesel ZF5+DNE2 |
|
Administrator
|
Steve - The truck is going to have lots of extra grounds, but you are right that the powder coating or painting of everything will be an issue. I'll have to remember that, big time.
All - I'll pull out the 460 ZF5 engine plate and take a pic for comparison. But my memory which, if I remember correctly, ( As for today, here's the plan:
As previously said, the 2x4's go between the rocker and the brace under the cab and allow me to pick up the cab w/o the pads of the lift touching it. But I have to rip the 2x4's down a bit to fit in there, and they need to be stacked as the depth of the rocker is 2+ or so. The jack stands are to support the back of the truck while we install the engine and tranny to ensure the added weight doesn't let the whole thing move as the rear spring shackle pivots. Normally I have lots of jack stands, but all of the others are in use, so that's my excuse.
The ratchet straps are to replace some that a young man lost or damaged when he borrowed them. The Lord says to loan w/o expecting to be repaid (Luke 6:35), but He didn't say you cannot improve your hand when you replace things.
And the quick links are to replace some I've lost or damaged. Like the one I used to lift Huck's 460 - w/o closing it. Anyway, that's the plan, Stan. But, plans are meant to be flexible, so .....
Gary, AKA "Gary fellow": Profile
Dad's: '81 F150 Ranger XLT 4x4: Down for restomod: Full-roller "stroked 351M" w/Trick Flow heads & intake, EEC-V SEFI/E4OD/3.50 gears w/Kevlar clutches
|
|
Administrator
|
Ok, here's a mid-afternoon update while I have another "cuppa".
Got the pics taken of the engine plates. Here's a shot showing the cut-down ZF5 plate vs the 335 manual tranny plate:  And here's another shot of it. You can see that I cut it down to be held on with just the two bolts into the "inspection cover" area of the ZF, as well as being pinched between the engine and tranny on the top. Not quite sure why I did that, but there it is. 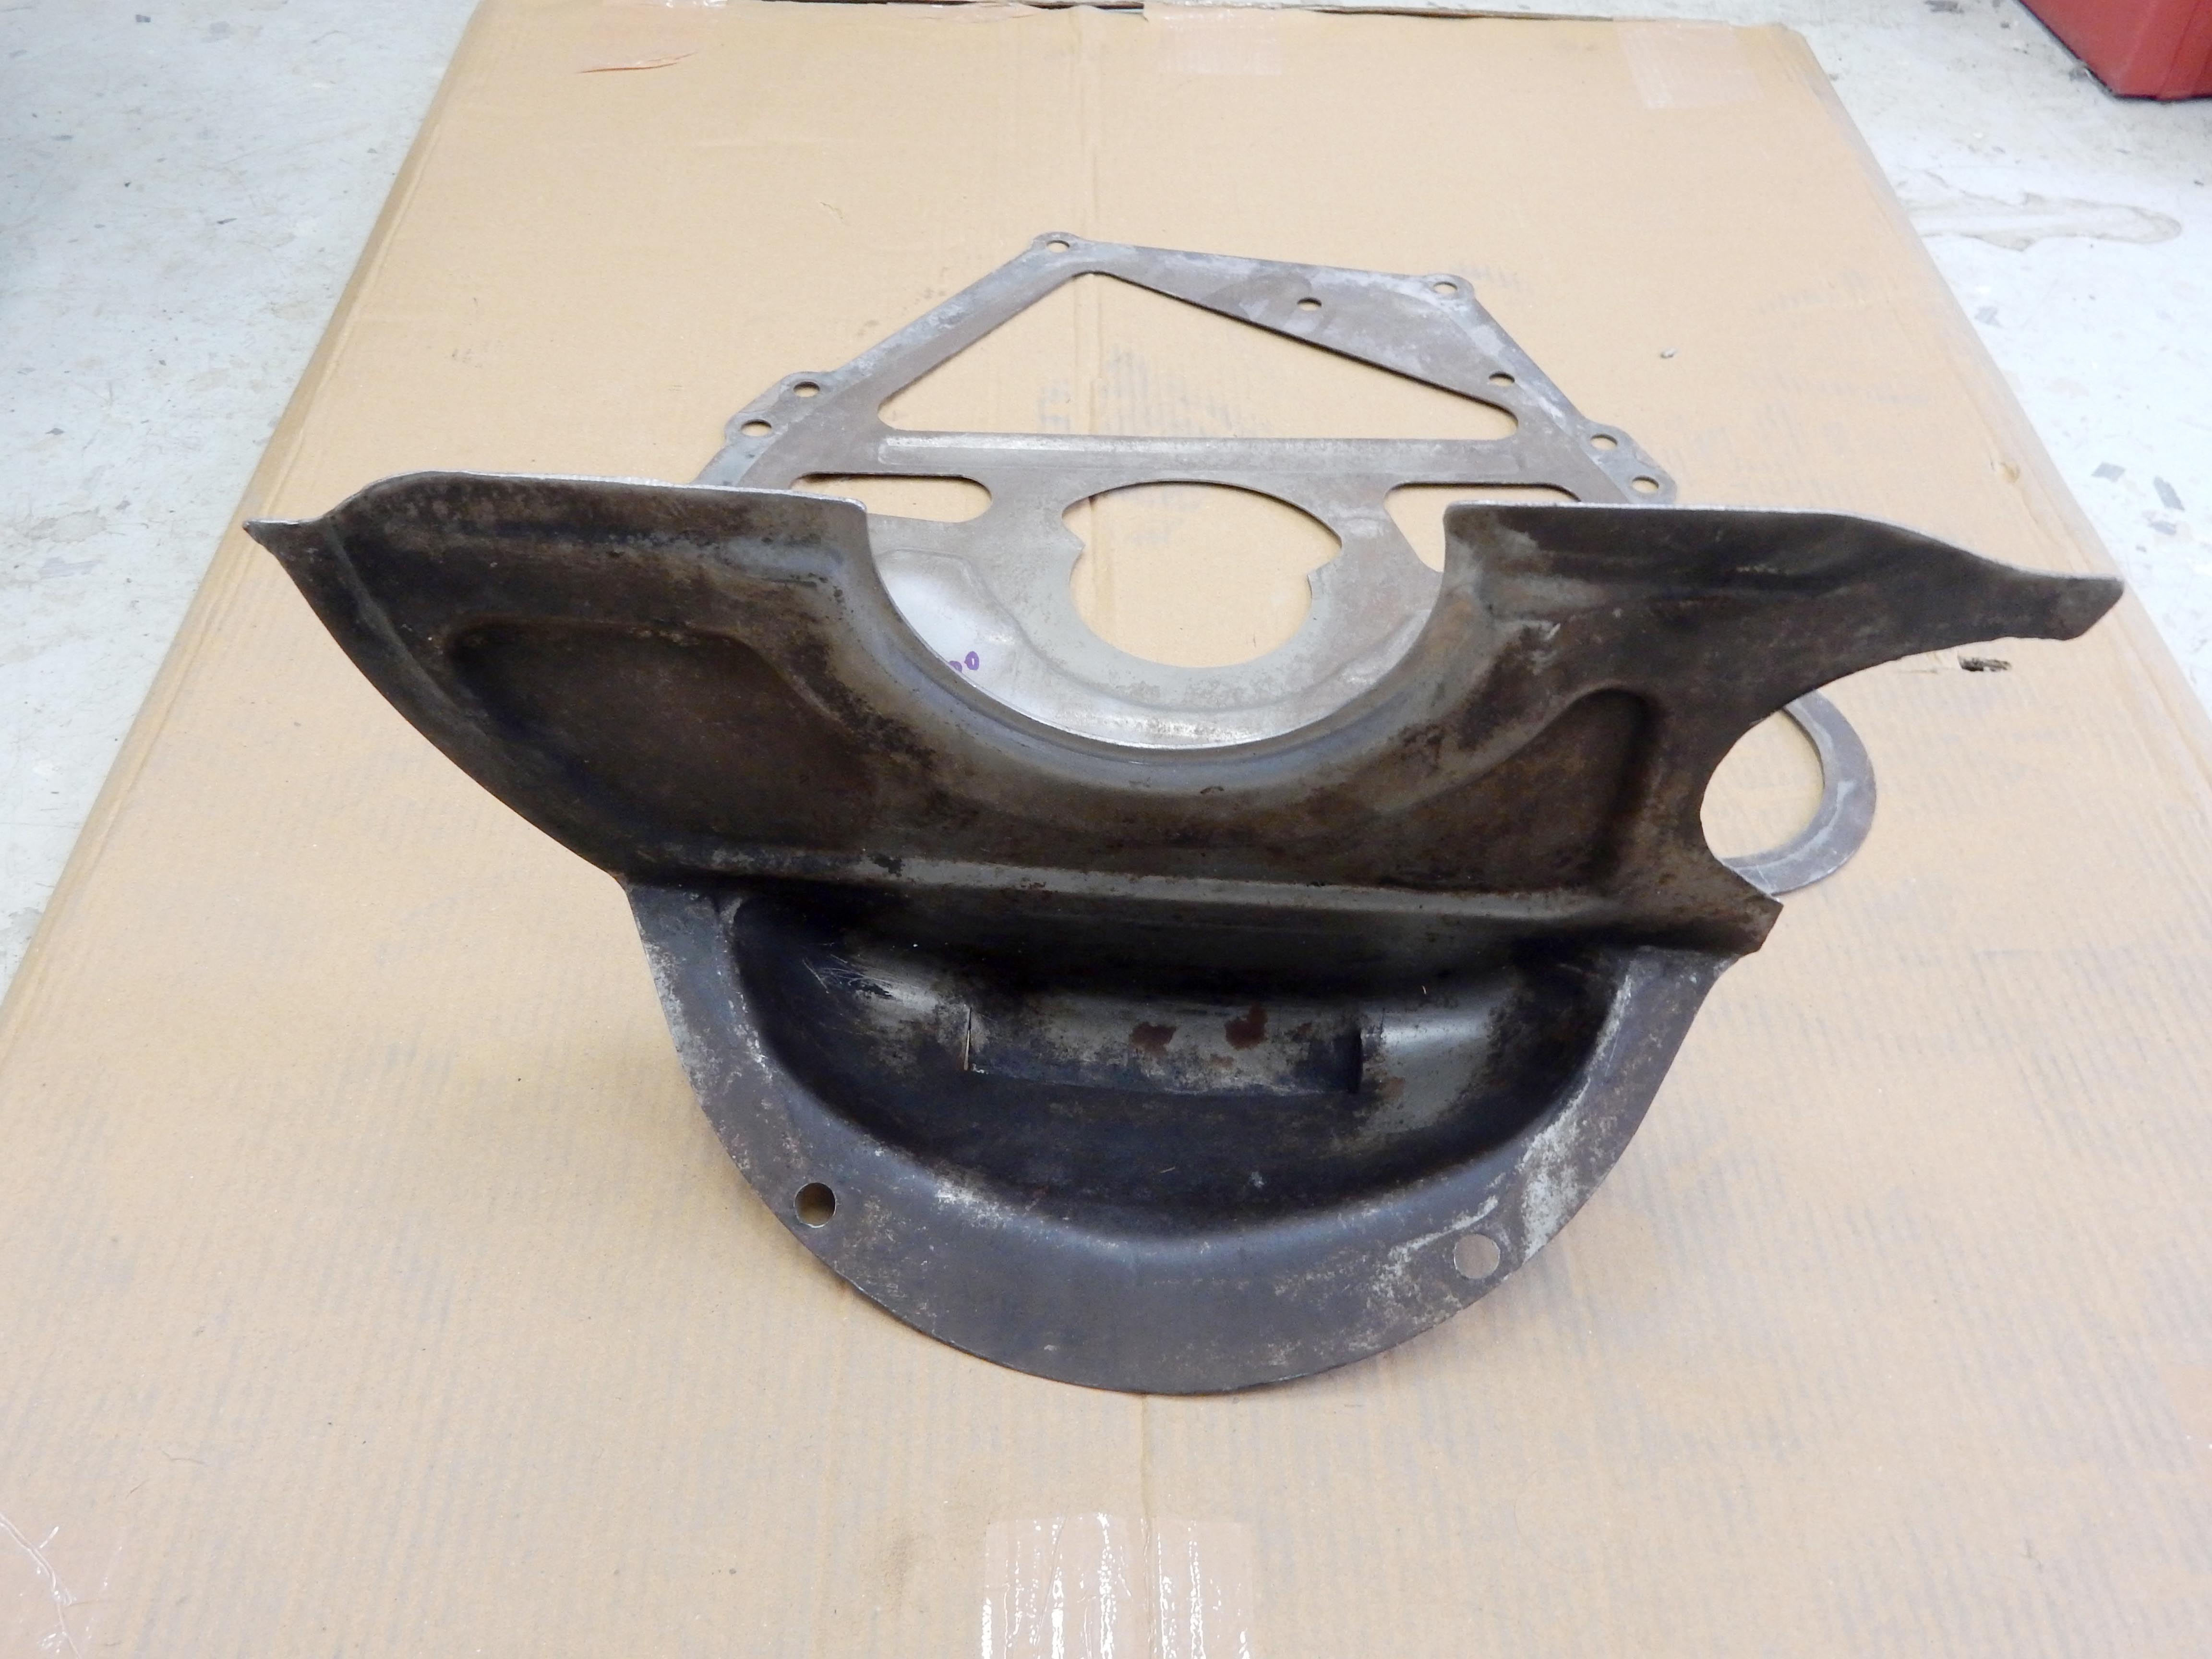 And here's a shot of the front of the tranny. You can see the two bolt holes where the cover is held on. So, a full engine plate would then cover the "inspection area". But I could cut the "cup" off of a full plate and cut the remainder such that it could be removed with the two bolts. Basically, just ensure the two parts don't touch so they won't vibrate against each other. Thoughts? 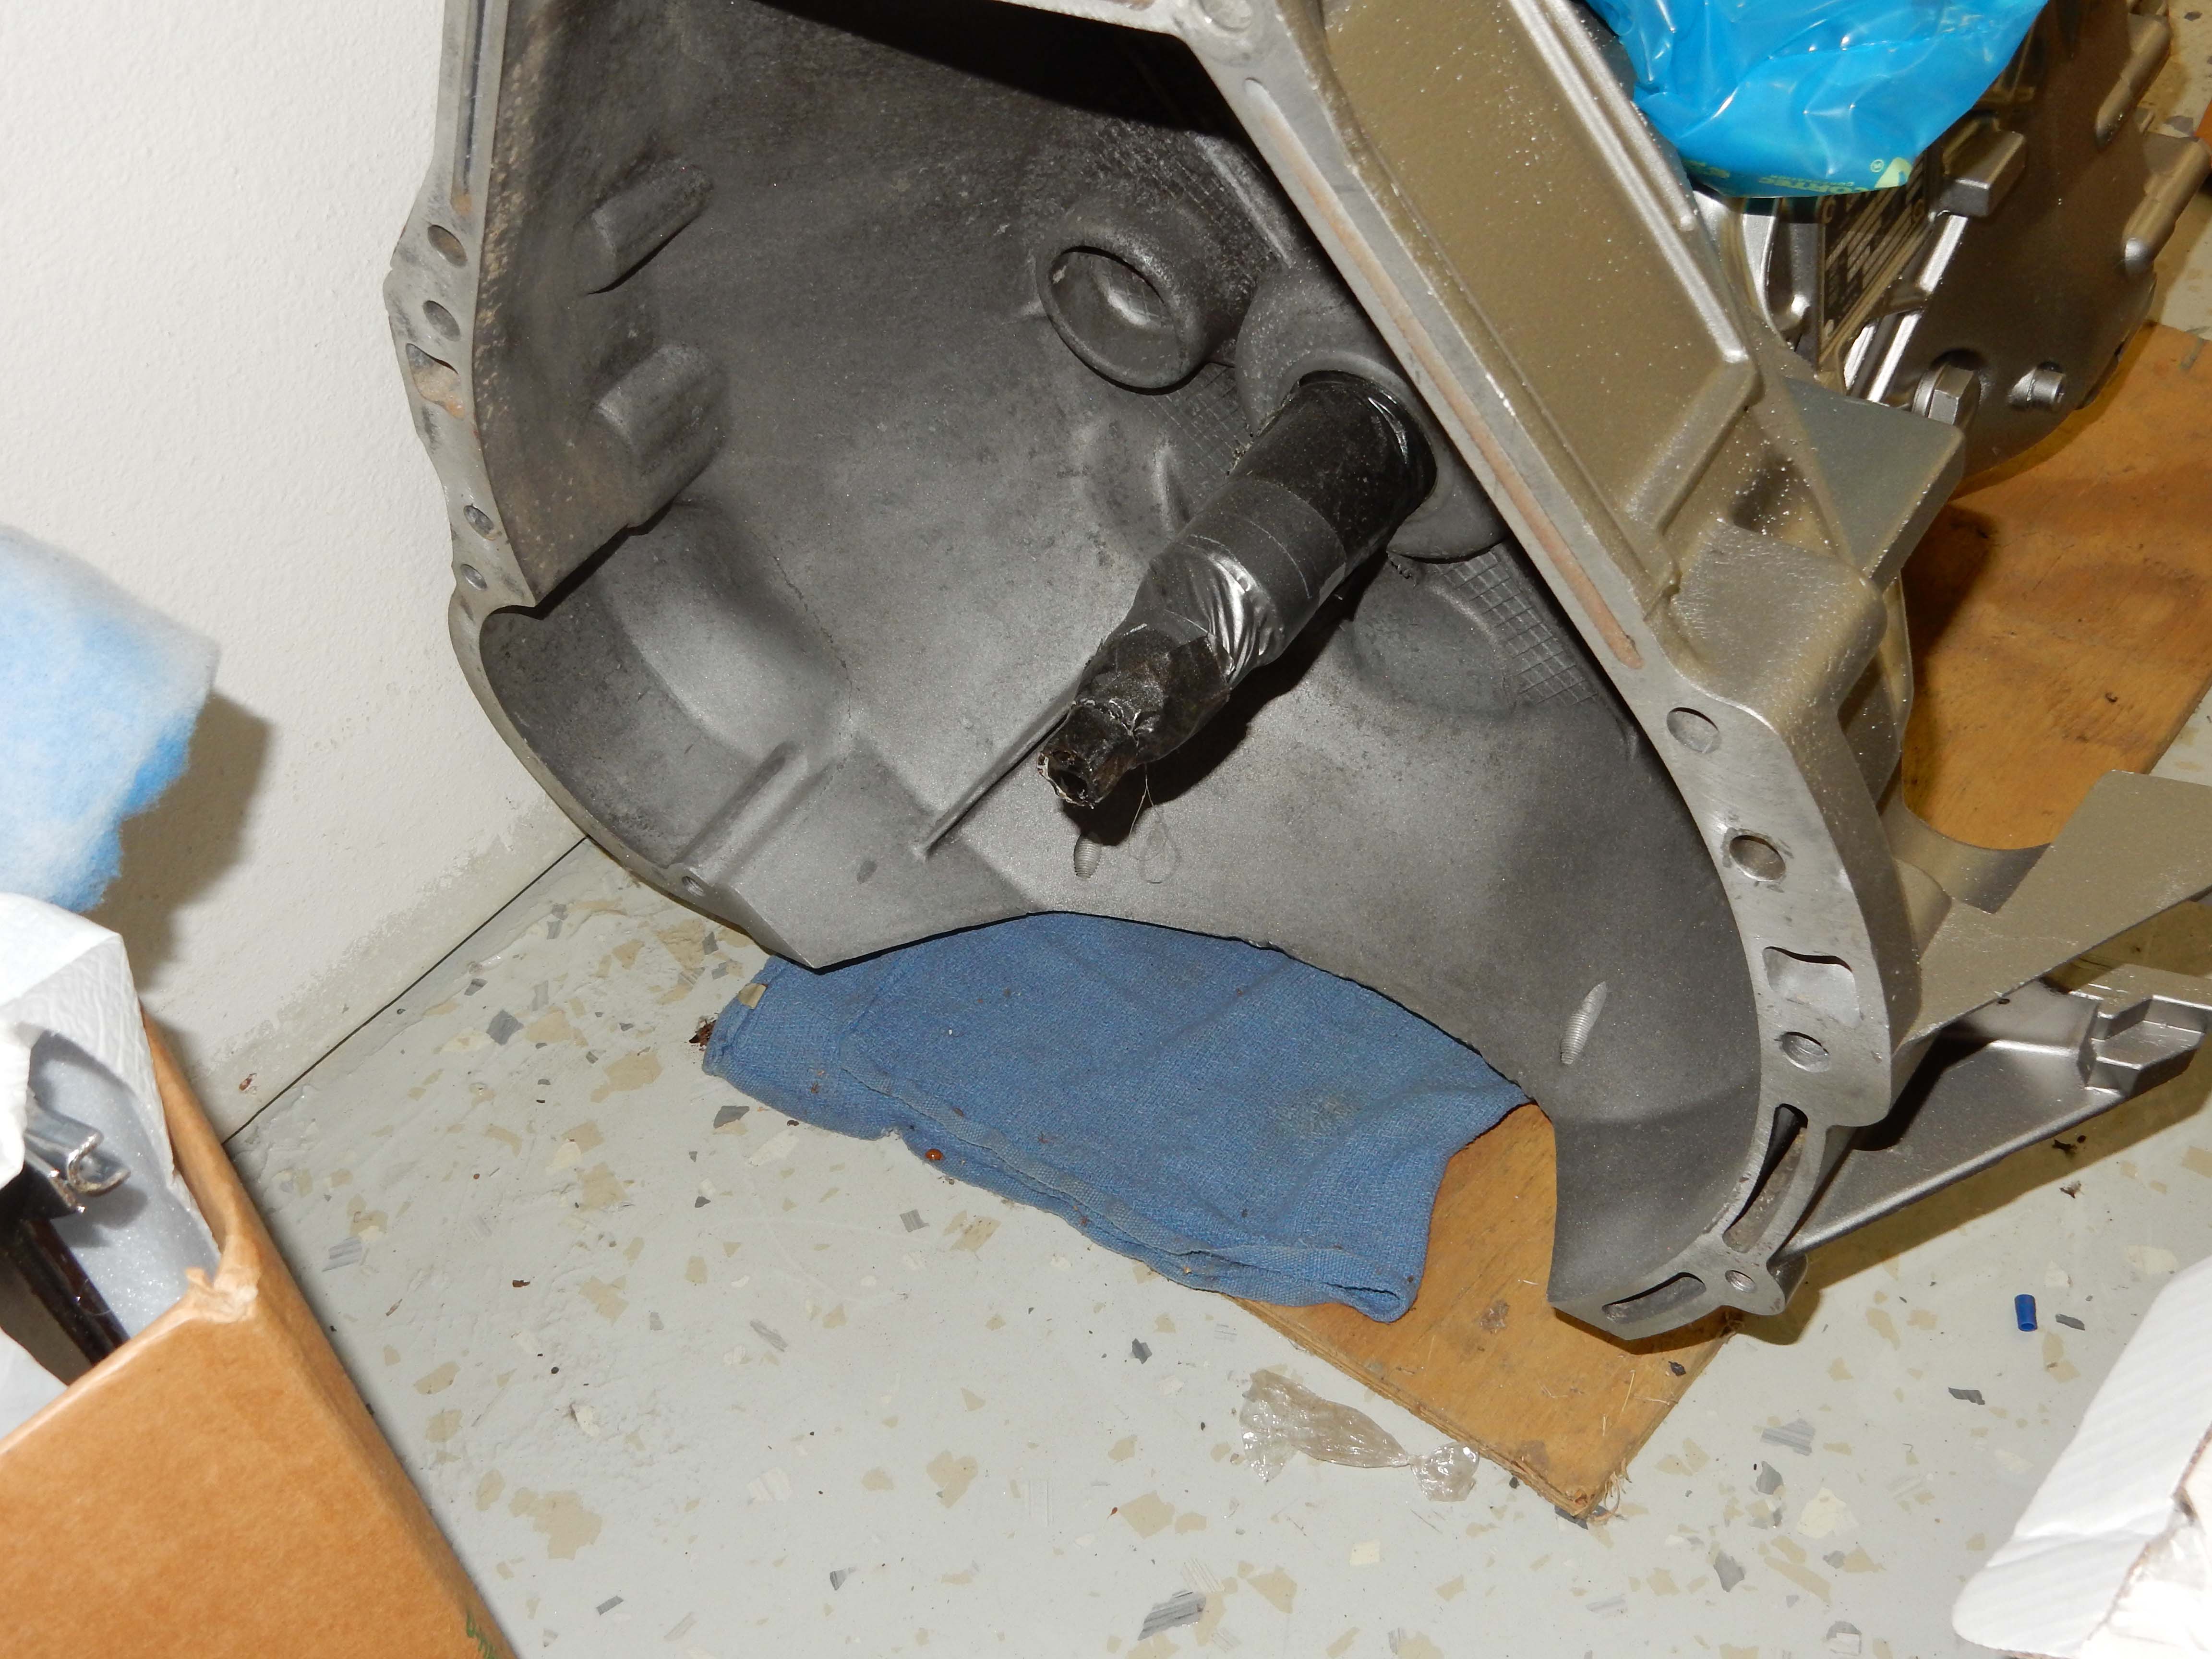 Then on to the sway bar. IT IS ON! But not without a battle. The new bushings that go around the bar are split like the originals, and you have to pry them open to get them over the bar. That in and of itself was a battle, but armed with a plastic interior panel tool and that sticky grease I won the battle. But then came the Battle Of The Bulge! The bushing didn't want to go into the U-shaped clamp far enough to let both bolt holes of the clamp line up with the holes in the crossmember at the same time. So here's how I did it - installed the bottom bolt tightly, then used two clamps, appropriately padded, to pull the clamp over the bushing. Both of those clamps are as tight as I dared make them, but the hole finally lined up. 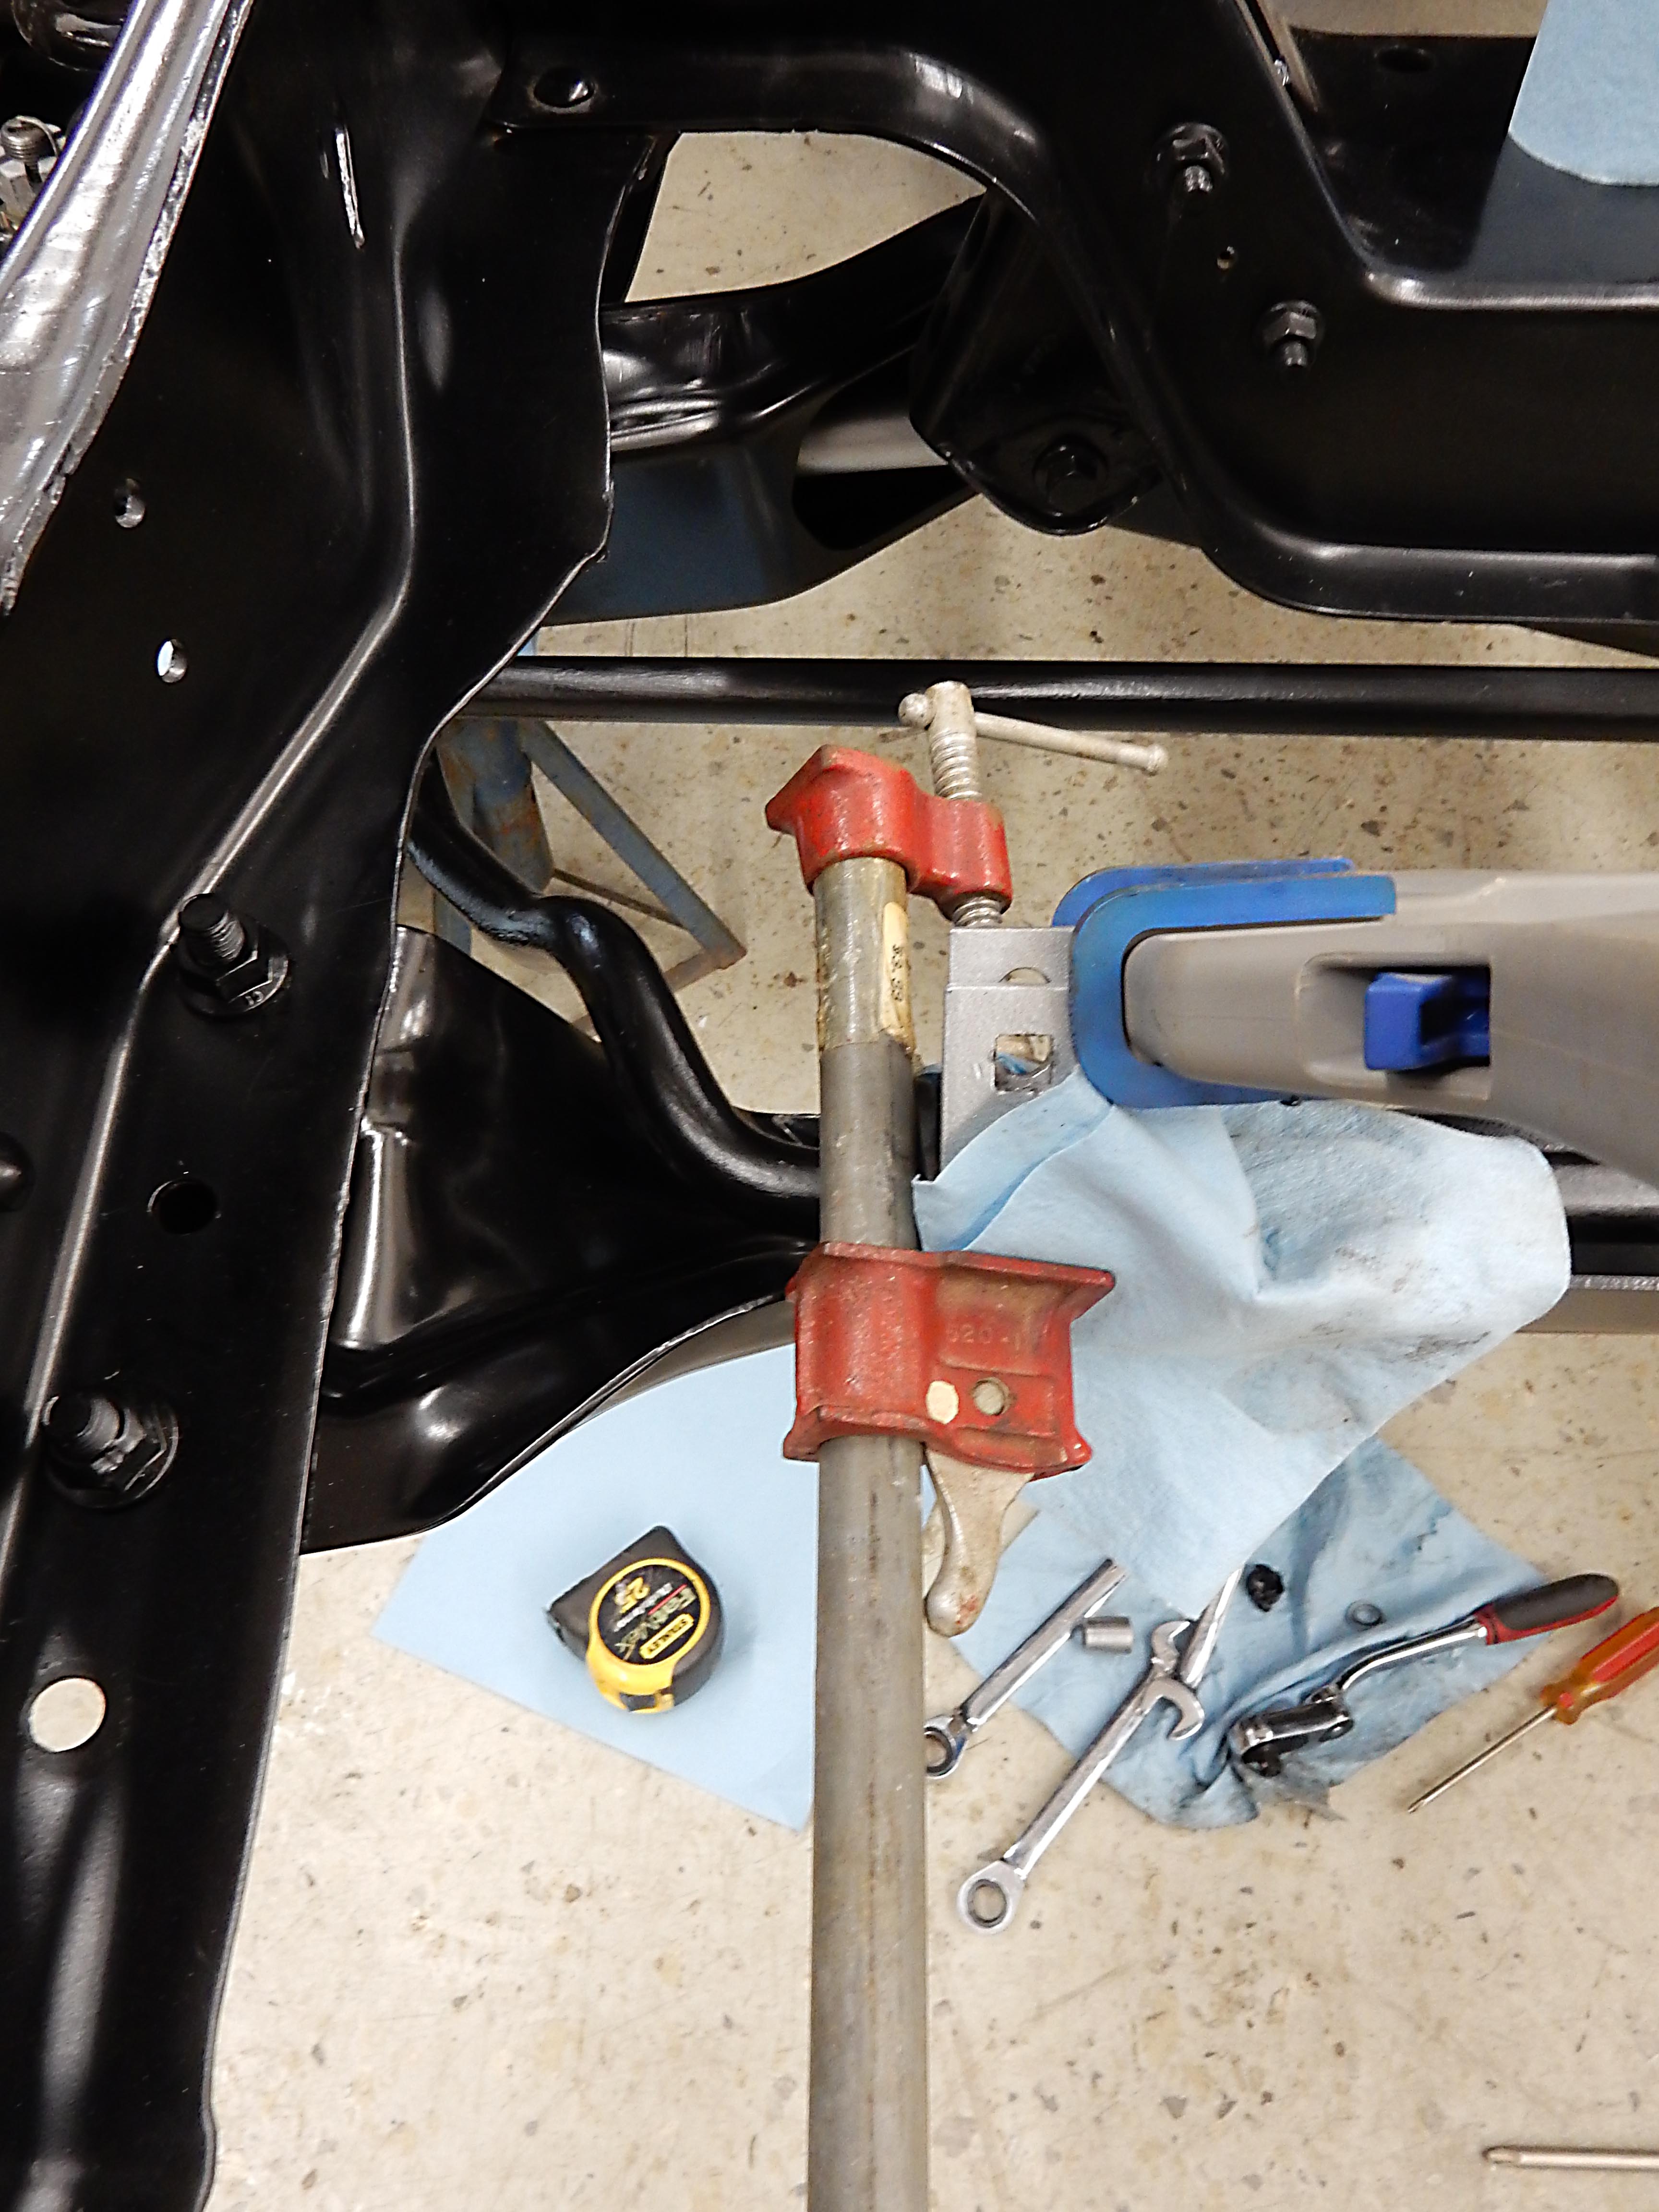 And here's the detail at the end of the sway bar with the link:  And here's the bracket that Jonathan asked about from the front: 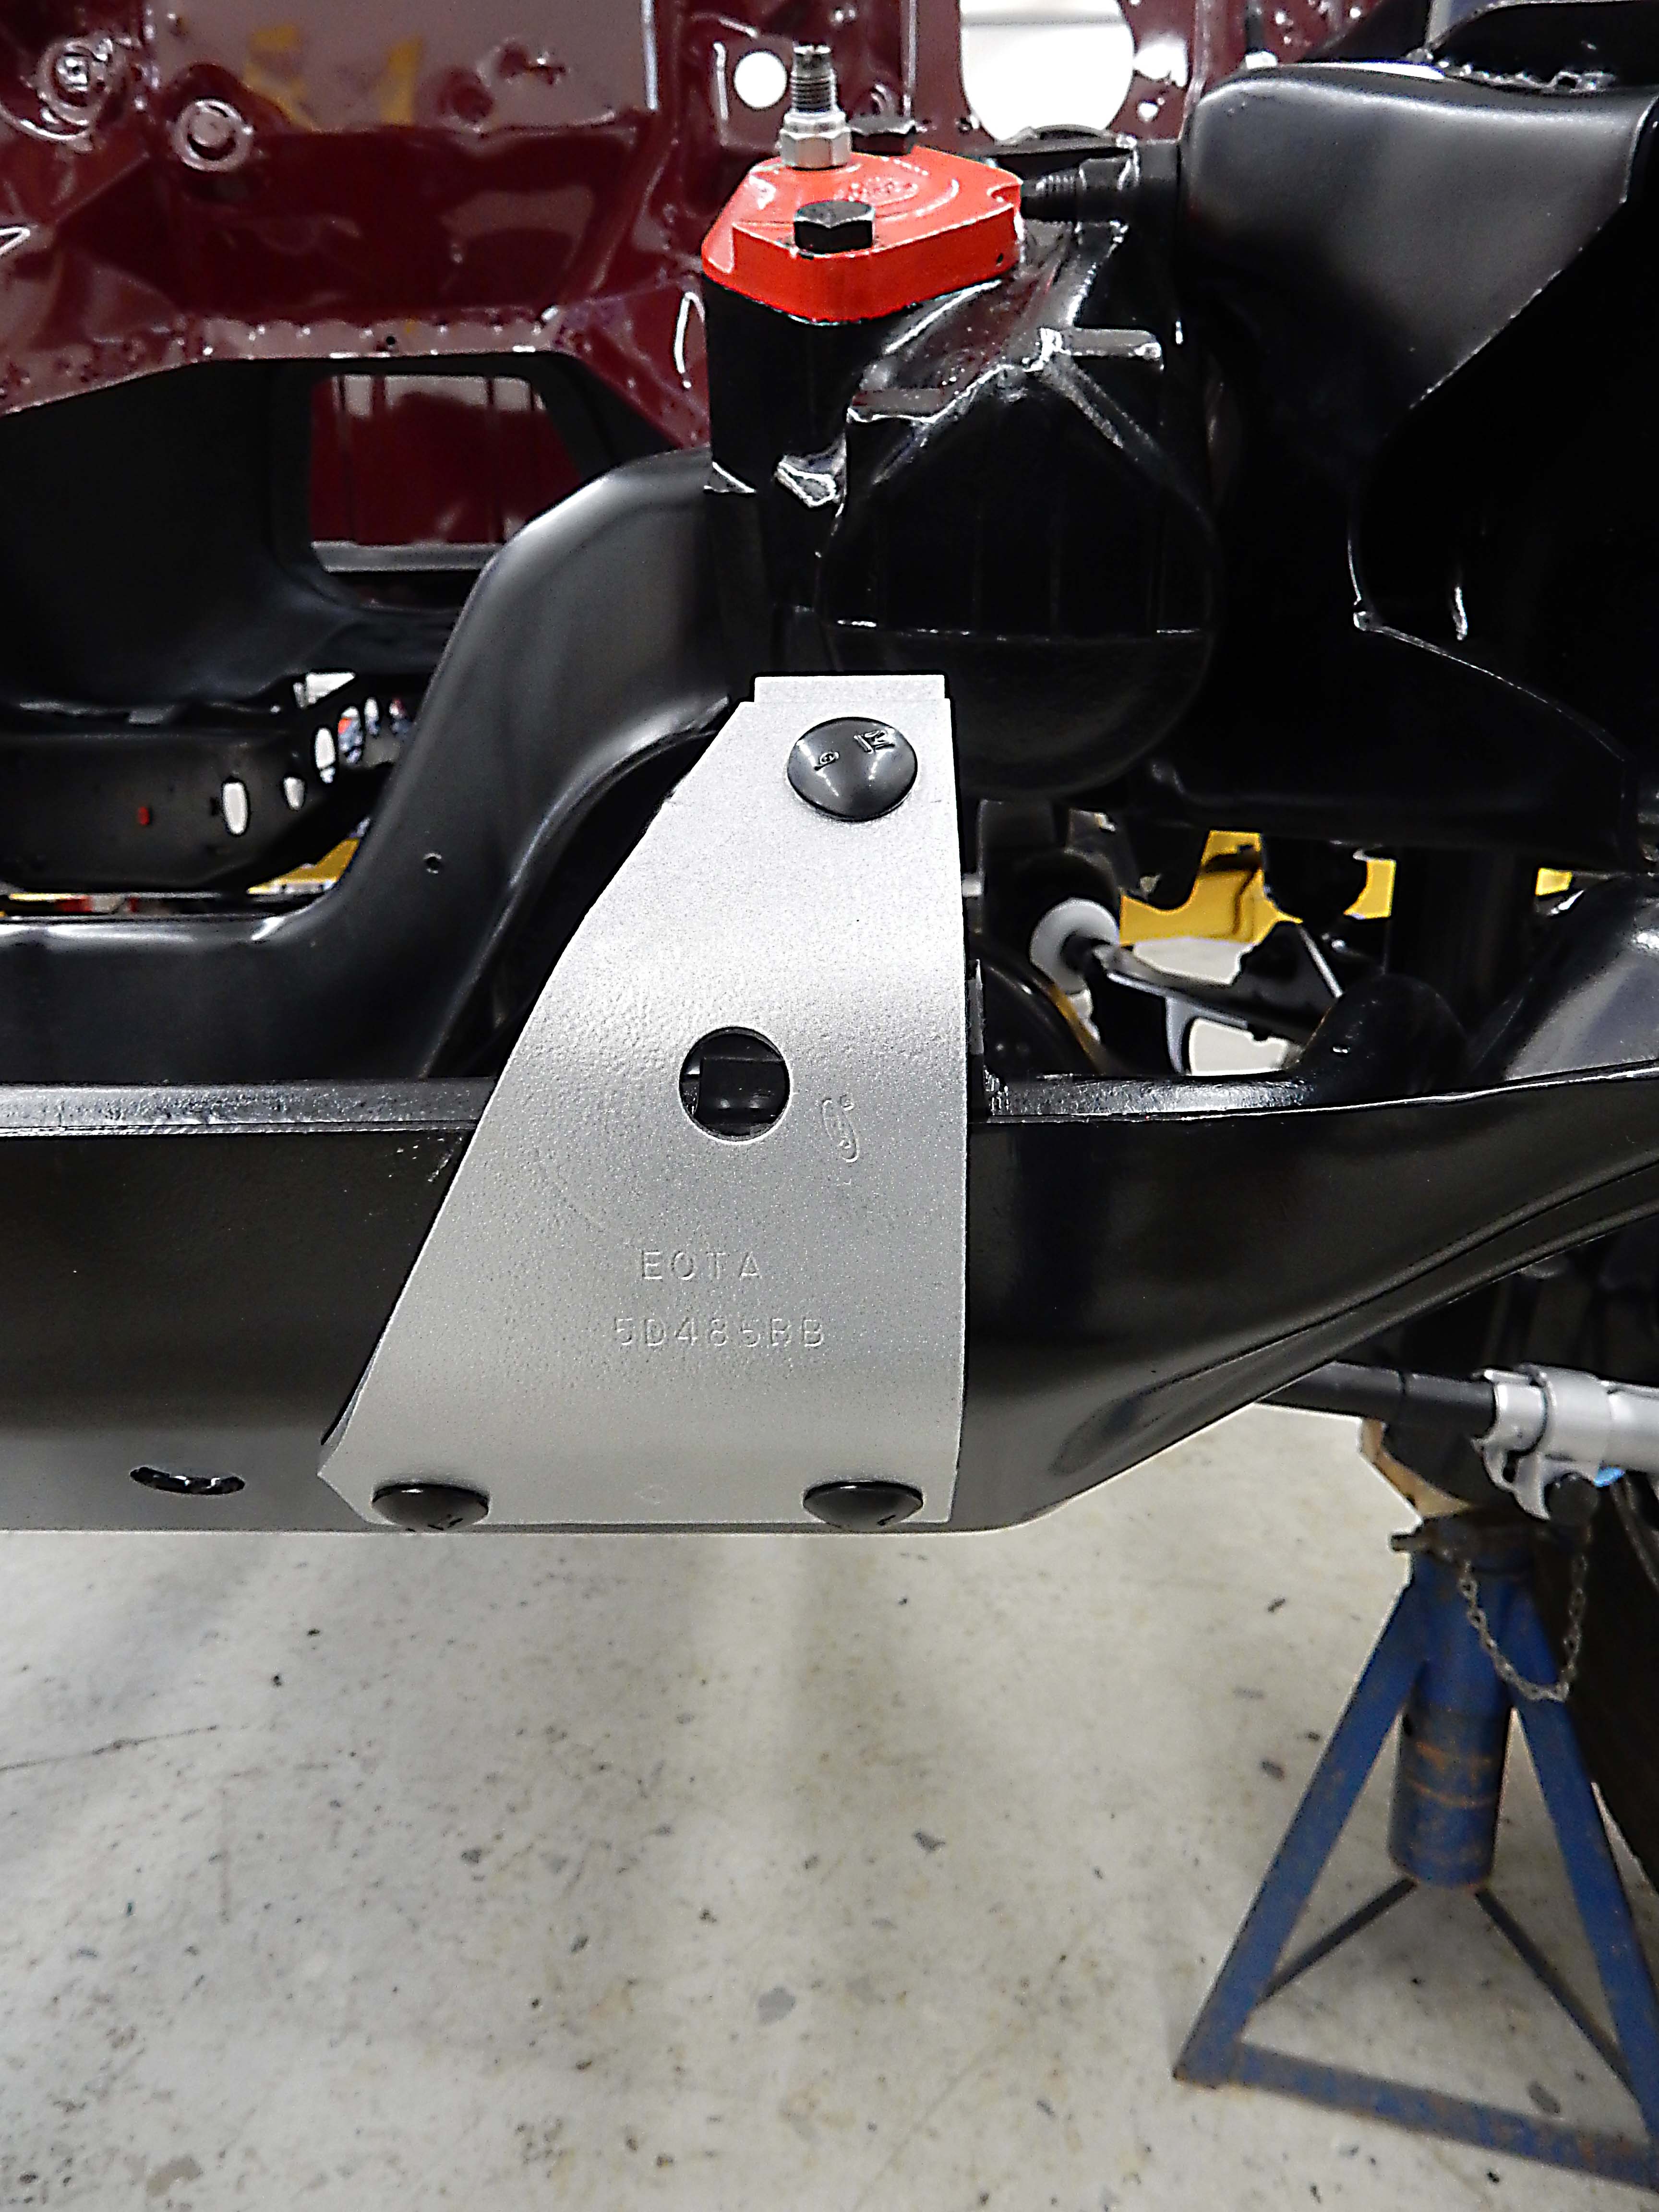 This is the backside, showing the u-clamp, bushing, etc: 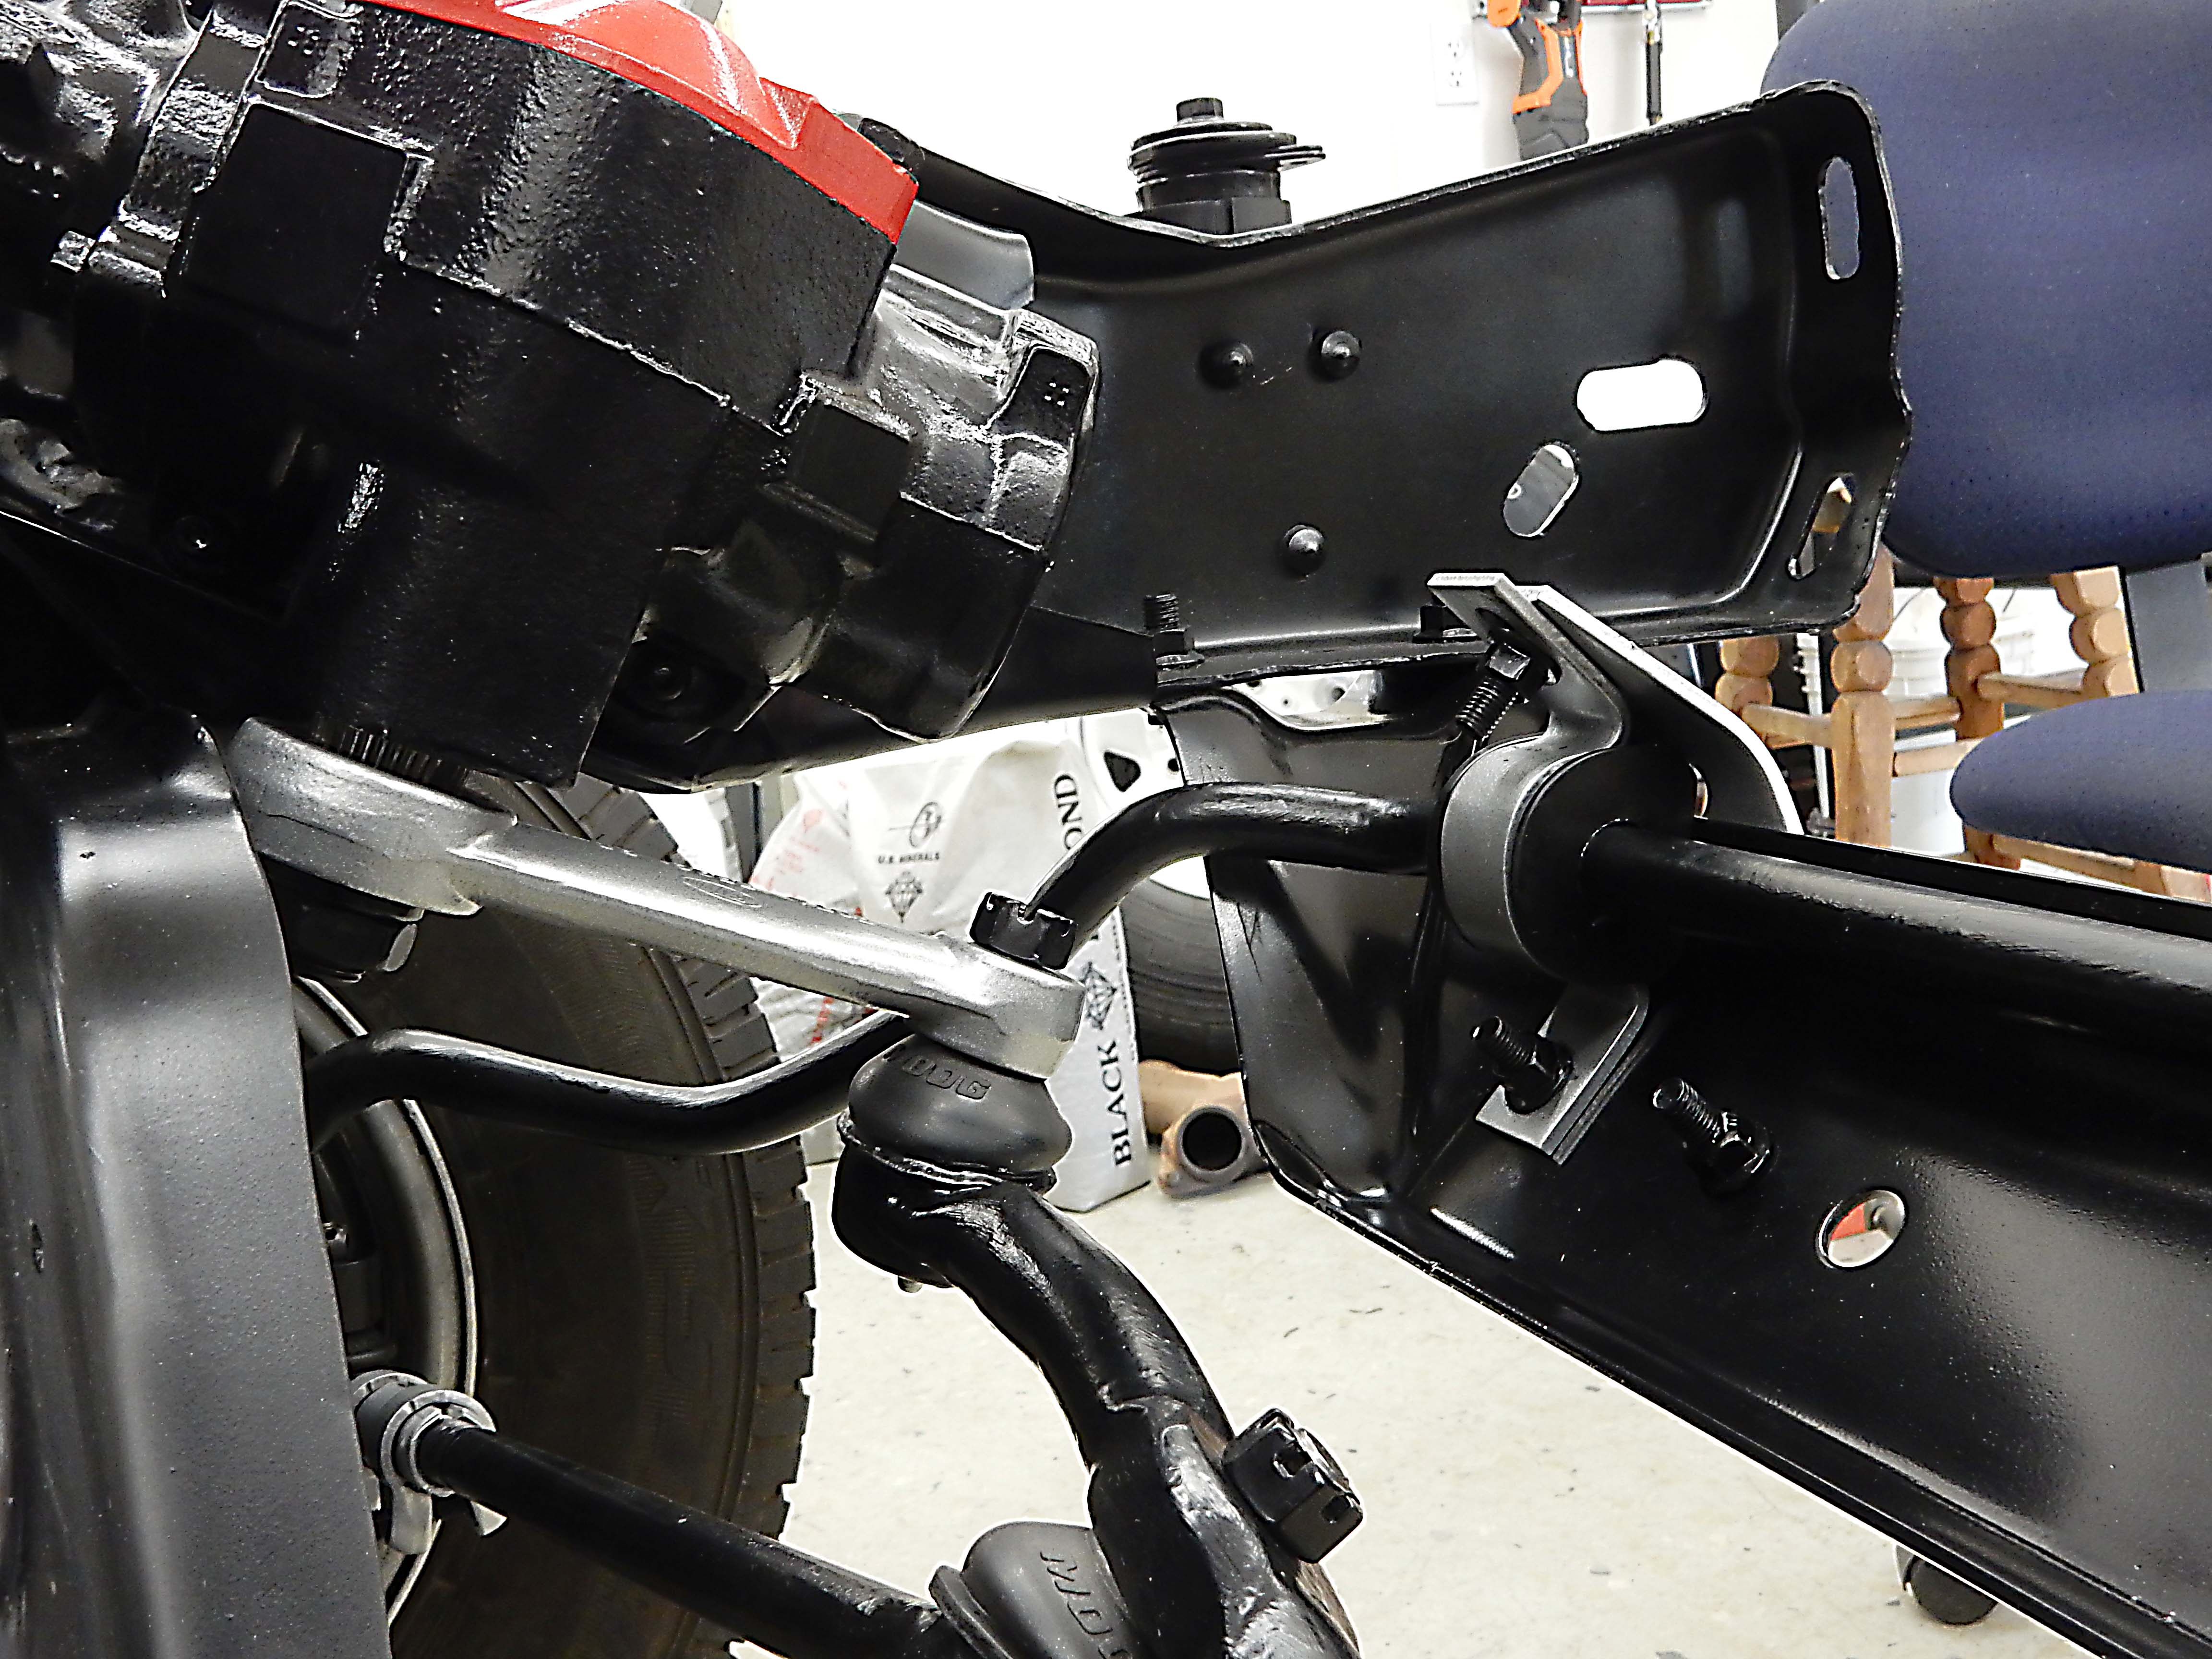 And now it is time for a drive in Big Blue! 
Gary, AKA "Gary fellow": Profile
Dad's: '81 F150 Ranger XLT 4x4: Down for restomod: Full-roller "stroked 351M" w/Trick Flow heads & intake, EEC-V SEFI/E4OD/3.50 gears w/Kevlar clutches
|
|
Administrator
|
Looks just amazing Gary! Wow. I really like the silver accents. Was the sway bar struggle a fight with the bushing elasticity or bar torsion or both?
Gary, I will have to tie a proverbial string around my finger to take pictures of the the diesel inspection cover in case it gives you any ideas on how to modify yours for Big Blue. I know there are at least three bolts, with one fastening through a flat flange on the driver side up by the oil pan.
SHORT BED 4-DOOR DIESEL: 1986 F350 4x4 under construction-- 7.3 IDIT ZF5+GVOD
STRAIGHT SIX 4X4: 1981 F150 2wd to 4x4-- 300 I6 close ratio diesel T19, hydroboost brakes, Saginaw steering BIG F: 1995 F-Superduty under construction— converting to 6.9L IDI diesel ZF5+DNE2 |
|
Administrator
|
Jonathan - Thanks! I like the silver accents so much that I had to show Janey, and she seemed to like them as well. (At least she said she did.)
The sway bar was a battle because of the stiffness of the Prothane bushings. At first blush they didn't appear to be split, but with some prying you could tell they were. However, they didn't want to open up enough to go around the sway bar, so needed to be pried open. And, since the sway bar is painted I didn't dare use a metal tool. But finally I grabbed a nylon interior panel tool and it gave me enough leverage to get a bit of a gap. Then, with plenty of sticky grease and some force it popped on. However, that turned out to be the easy part. Even with plenty of grease the u-shaped clamp didn't want to go over the bushing. Either the new bushing is bigger or much more rigid than the old bushing, and it took a lot of force to get the clamp over it. My guess is that the sway bar will be much more effective now. Anyway, I am interested in how the diesel inspection cover fits. In fact, I wonder if one couldn't be grafted onto a 460's ZF plate? Or, maybe this 335 manual tranny plate modified to accommodate the inspection cover?
Gary, AKA "Gary fellow": Profile
Dad's: '81 F150 Ranger XLT 4x4: Down for restomod: Full-roller "stroked 351M" w/Trick Flow heads & intake, EEC-V SEFI/E4OD/3.50 gears w/Kevlar clutches
|
|
Administrator
|
Gary, I can take more pics later if you need them, but here are some from oilburners showing the ZF vs T19 inspection covers for the IDI. I don’t know if this helps at all, but it might give you ideas for modifying the 460 one. I think the main thing would be trimming it and figuring out another attachment point or two:
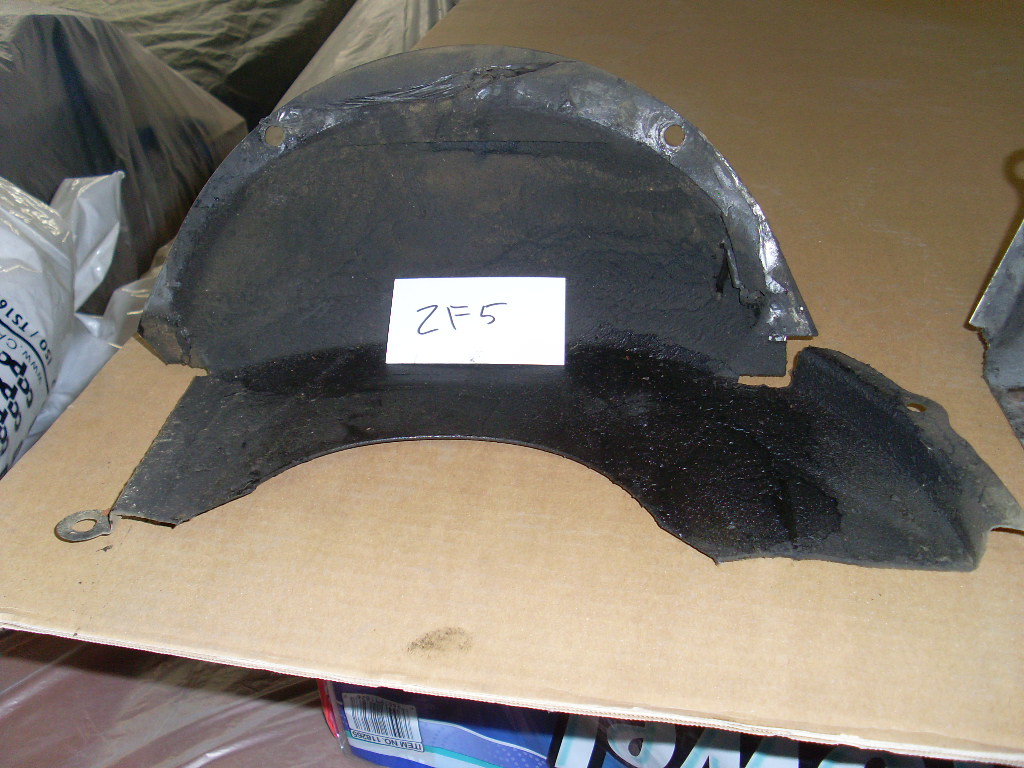 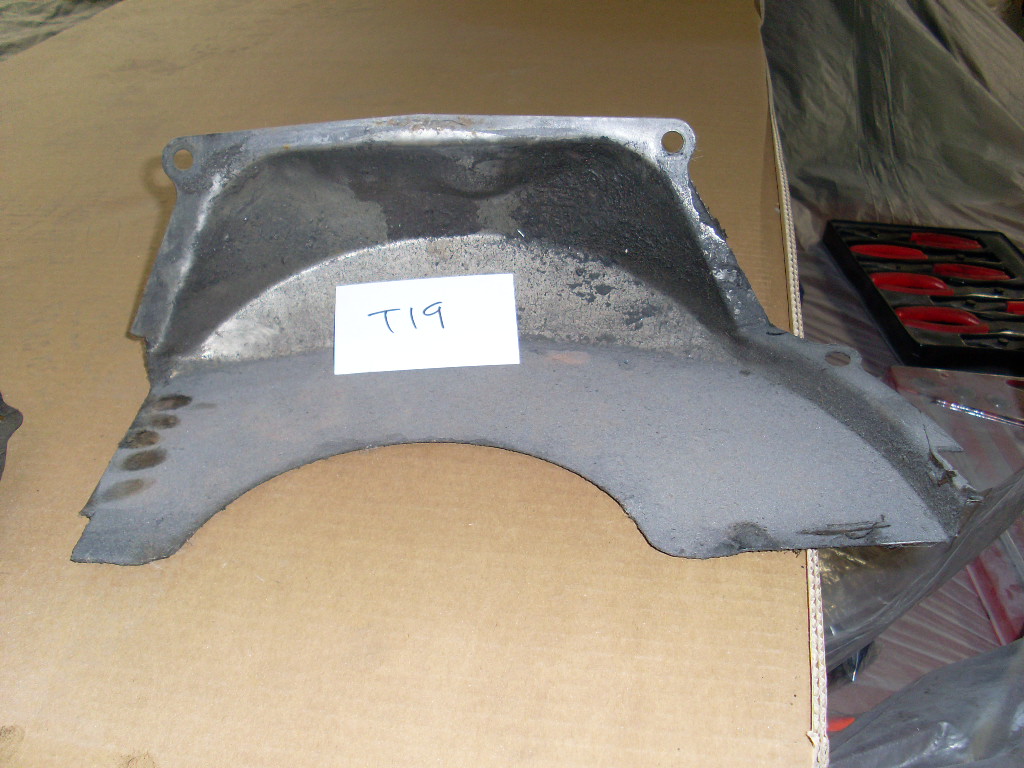 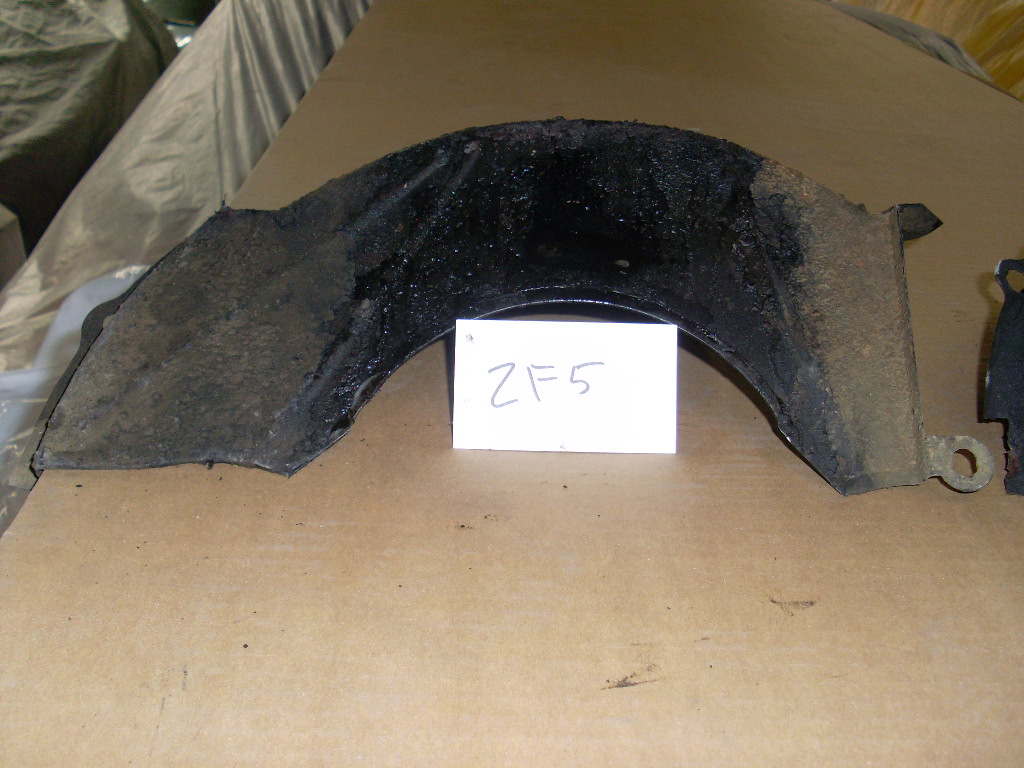 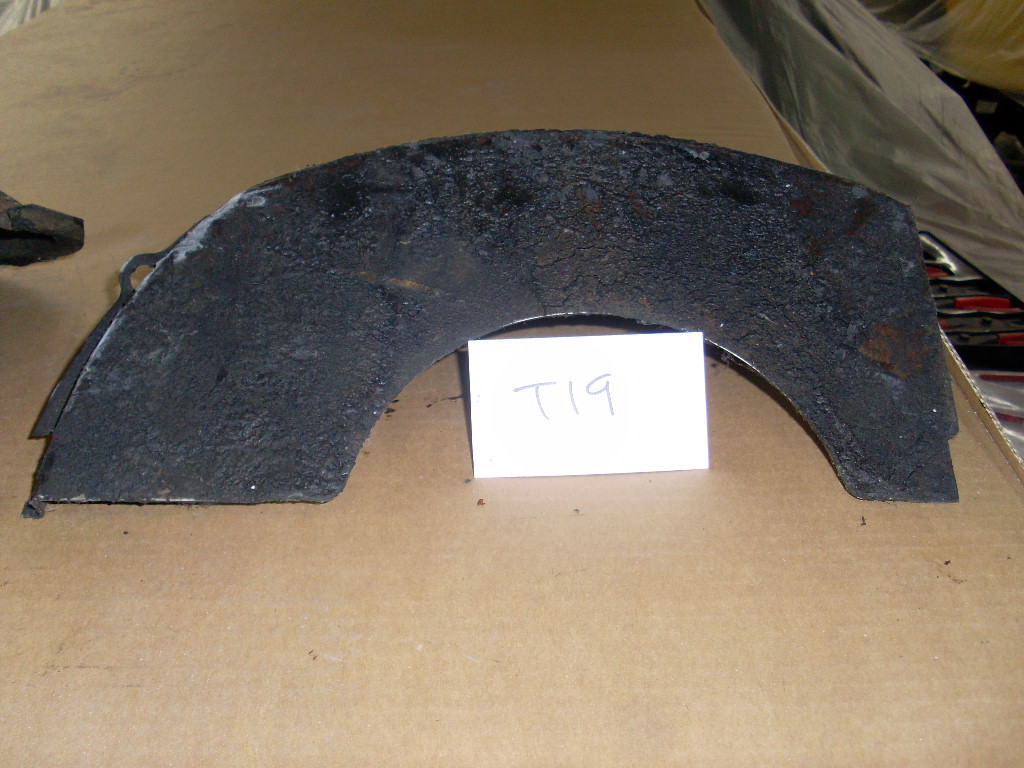 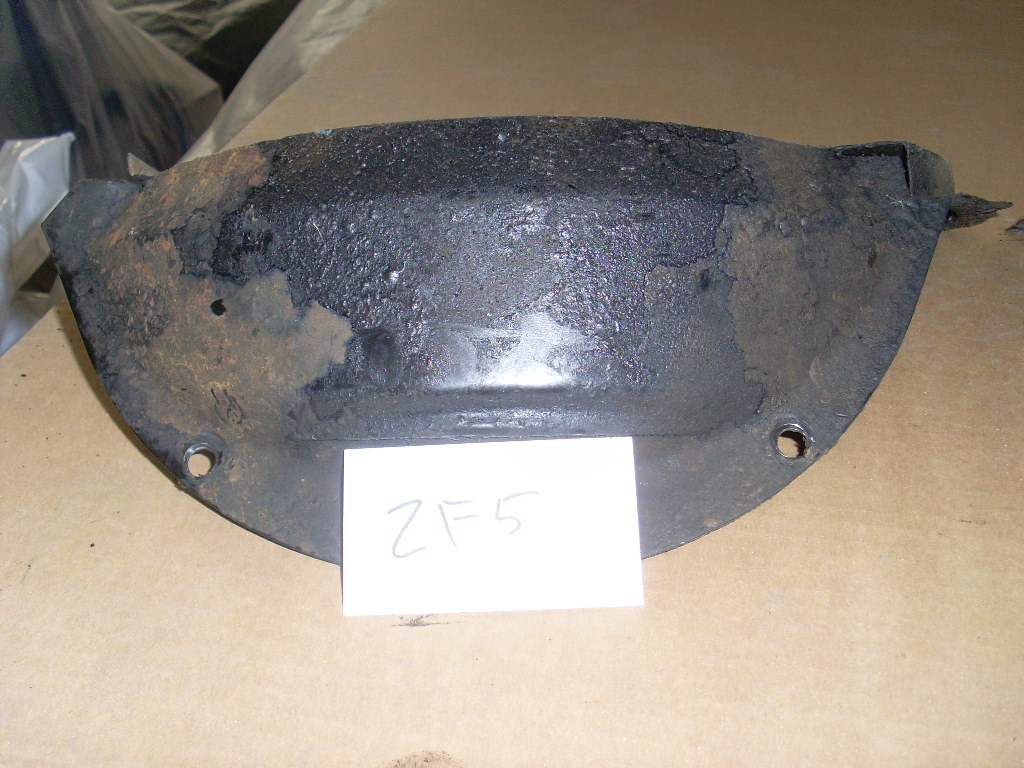 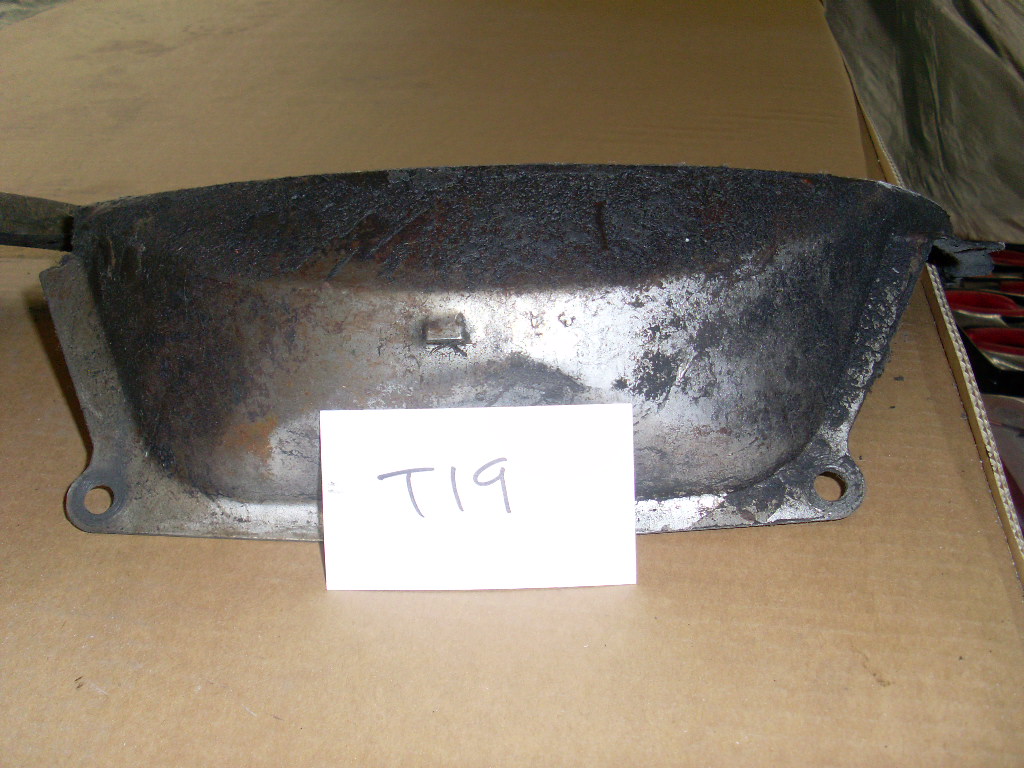 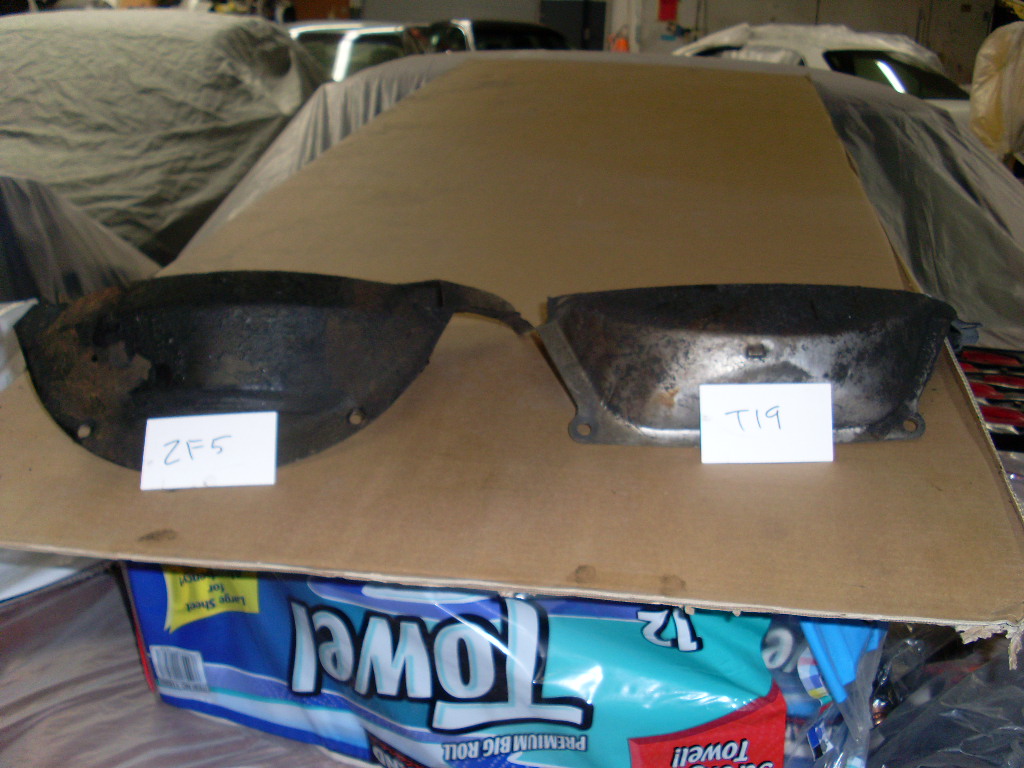 One unfortunate thing about the diesel cover being removeable is that it is often missing. It is no longer available and is therefore an “item” of interest and not particularly easy to find.
SHORT BED 4-DOOR DIESEL: 1986 F350 4x4 under construction-- 7.3 IDIT ZF5+GVOD
STRAIGHT SIX 4X4: 1981 F150 2wd to 4x4-- 300 I6 close ratio diesel T19, hydroboost brakes, Saginaw steering BIG F: 1995 F-Superduty under construction— converting to 6.9L IDI diesel ZF5+DNE2 |
|
Administrator
|
Jonathan - I think for now we have enough info and pics to allow me to think through this issue on Big Blue when the time comes. Thanks, a bunch.
But, just for help in getting back to it, here are a couple of links to FTE where I discussed how and where I cut the engine plate: - First discussed here - Later discussion here, where I said: Also, I cut on the original engine/tranny spacer some more. This time I took the part off that the starter would have been touching so that I'll get as much engagement of the starter with the ring gear as is possible. And, although I thought I'd have to drill and tap the tranny to secure the spacer, that isn't going to be necessary given the way it fits as the thing gets wedged between the engine and tranny such that it isn't going to vibrate.
Gary, AKA "Gary fellow": Profile
Dad's: '81 F150 Ranger XLT 4x4: Down for restomod: Full-roller "stroked 351M" w/Trick Flow heads & intake, EEC-V SEFI/E4OD/3.50 gears w/Kevlar clutches
|
|
Administrator
|
Before I get started, my brother plans to come down to help install the engine, tranny, and t-case next Monday. So I have one week to get ready.

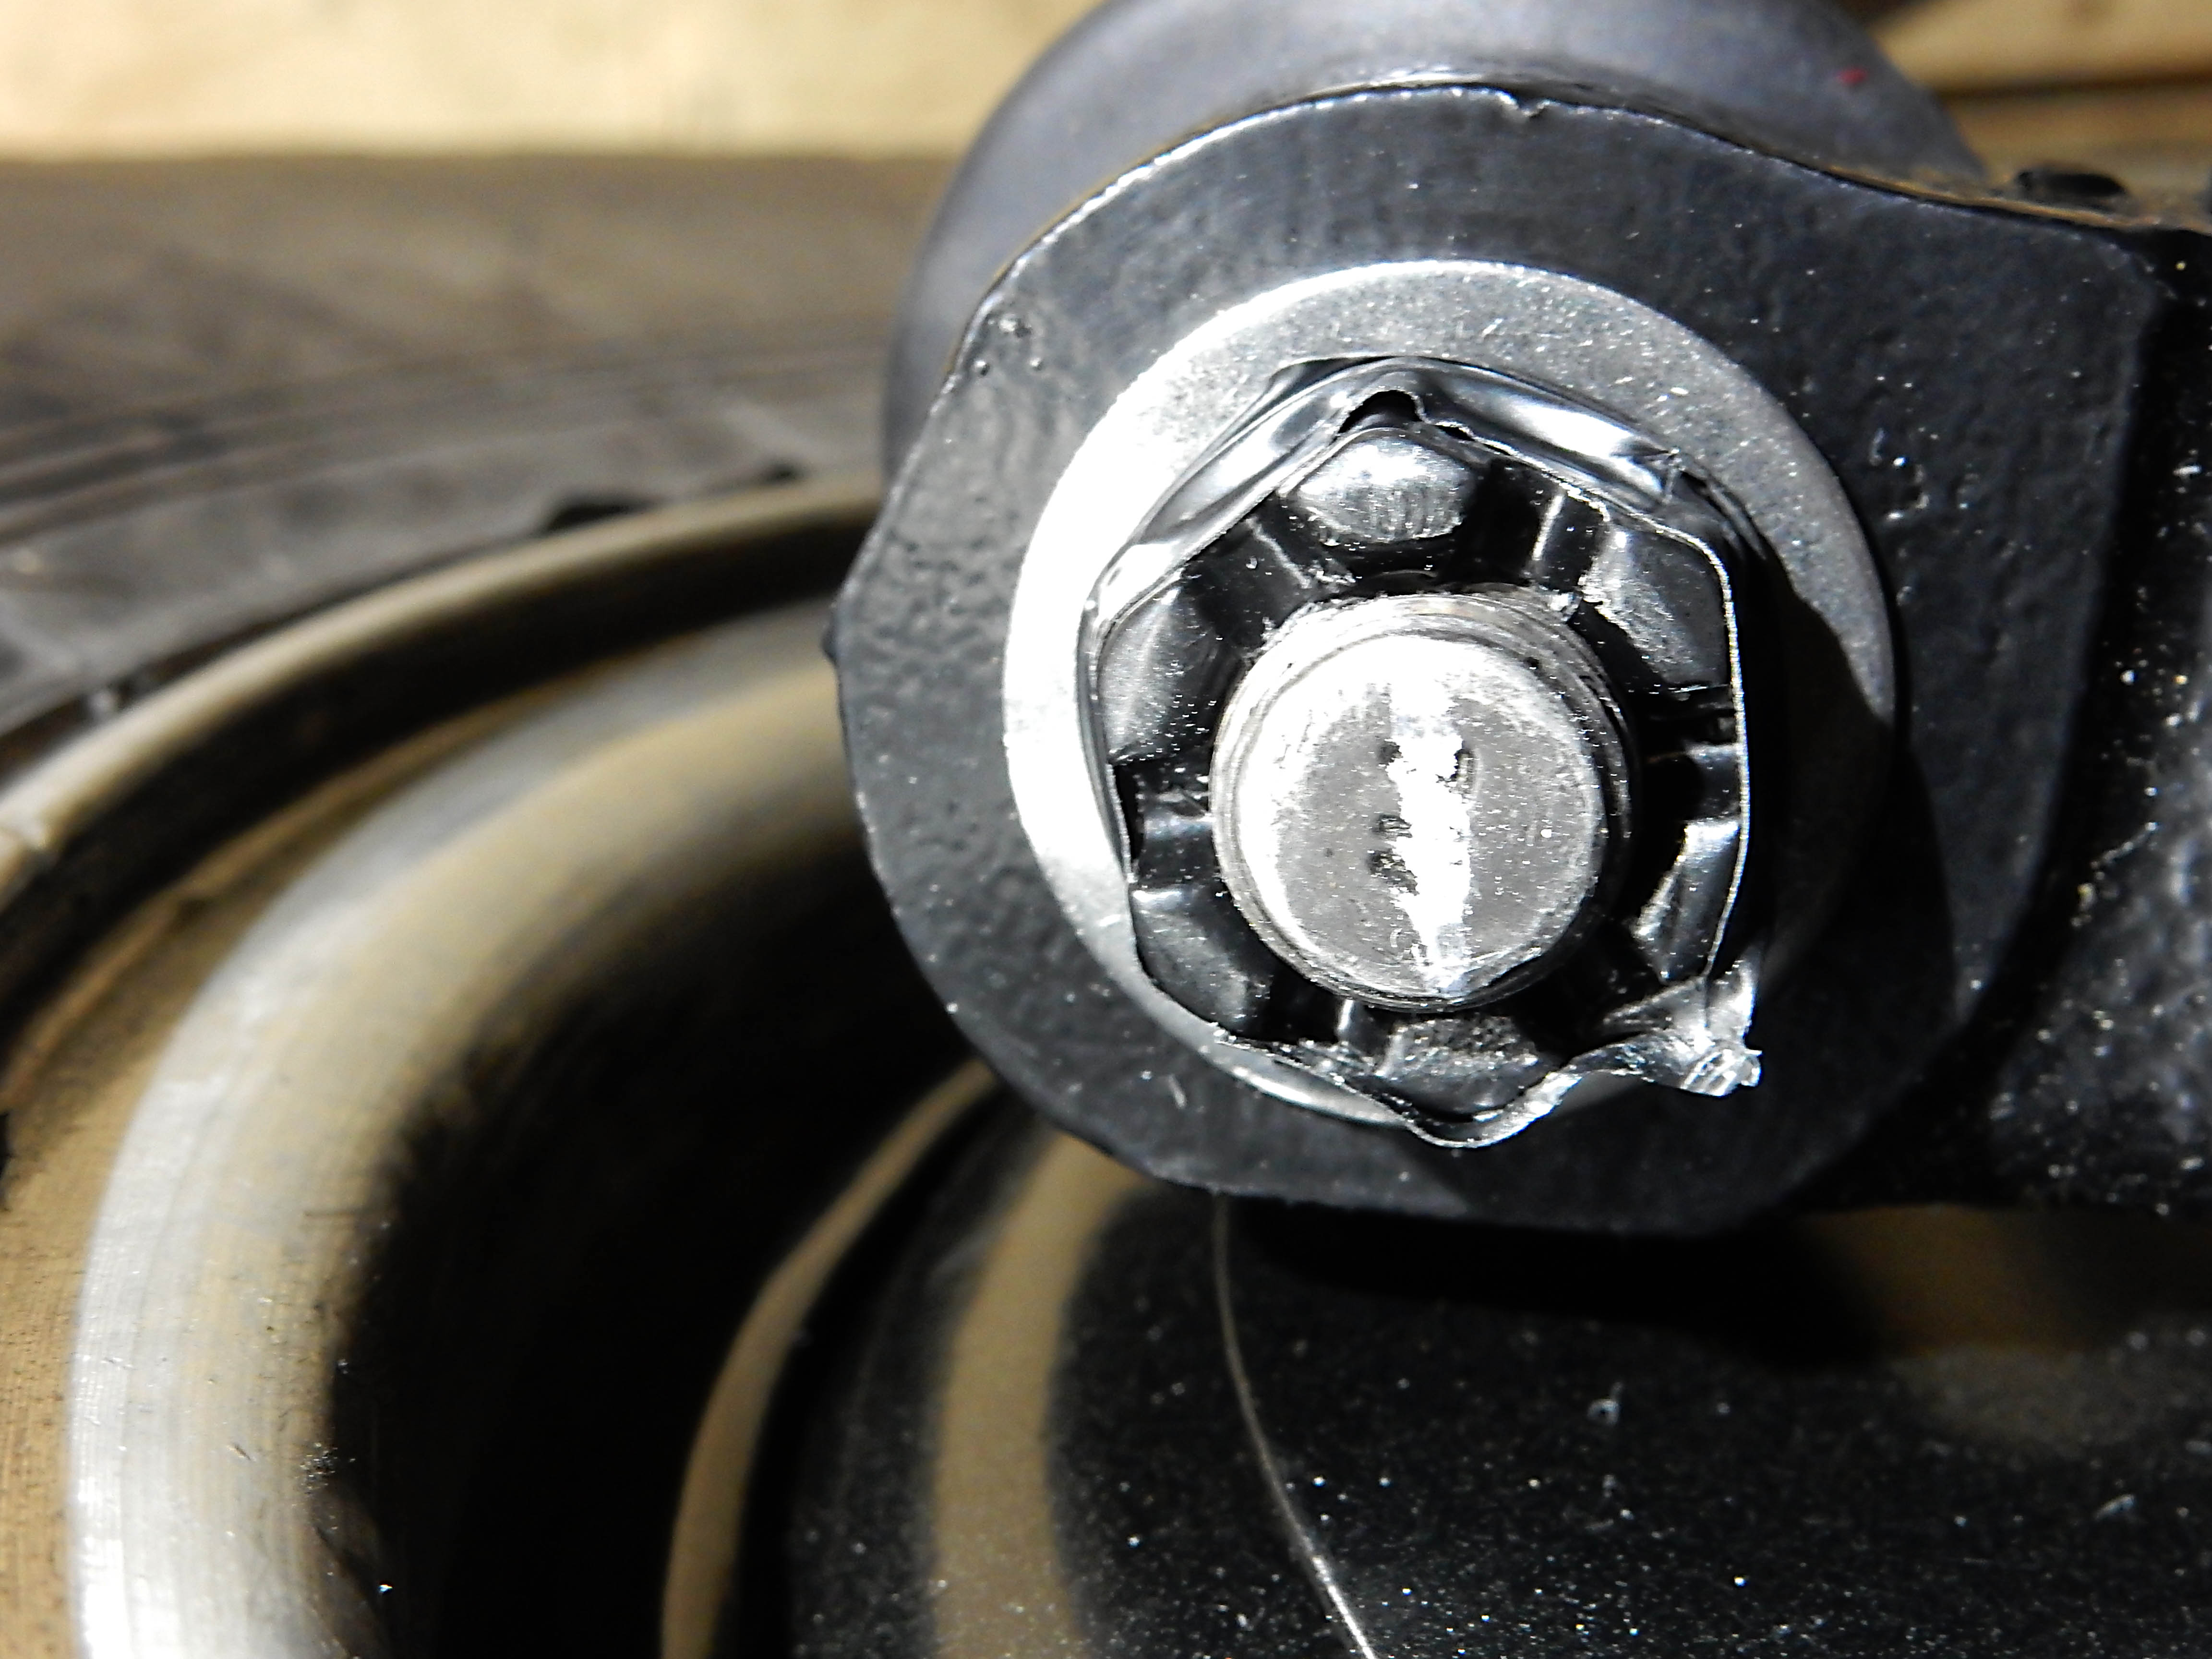
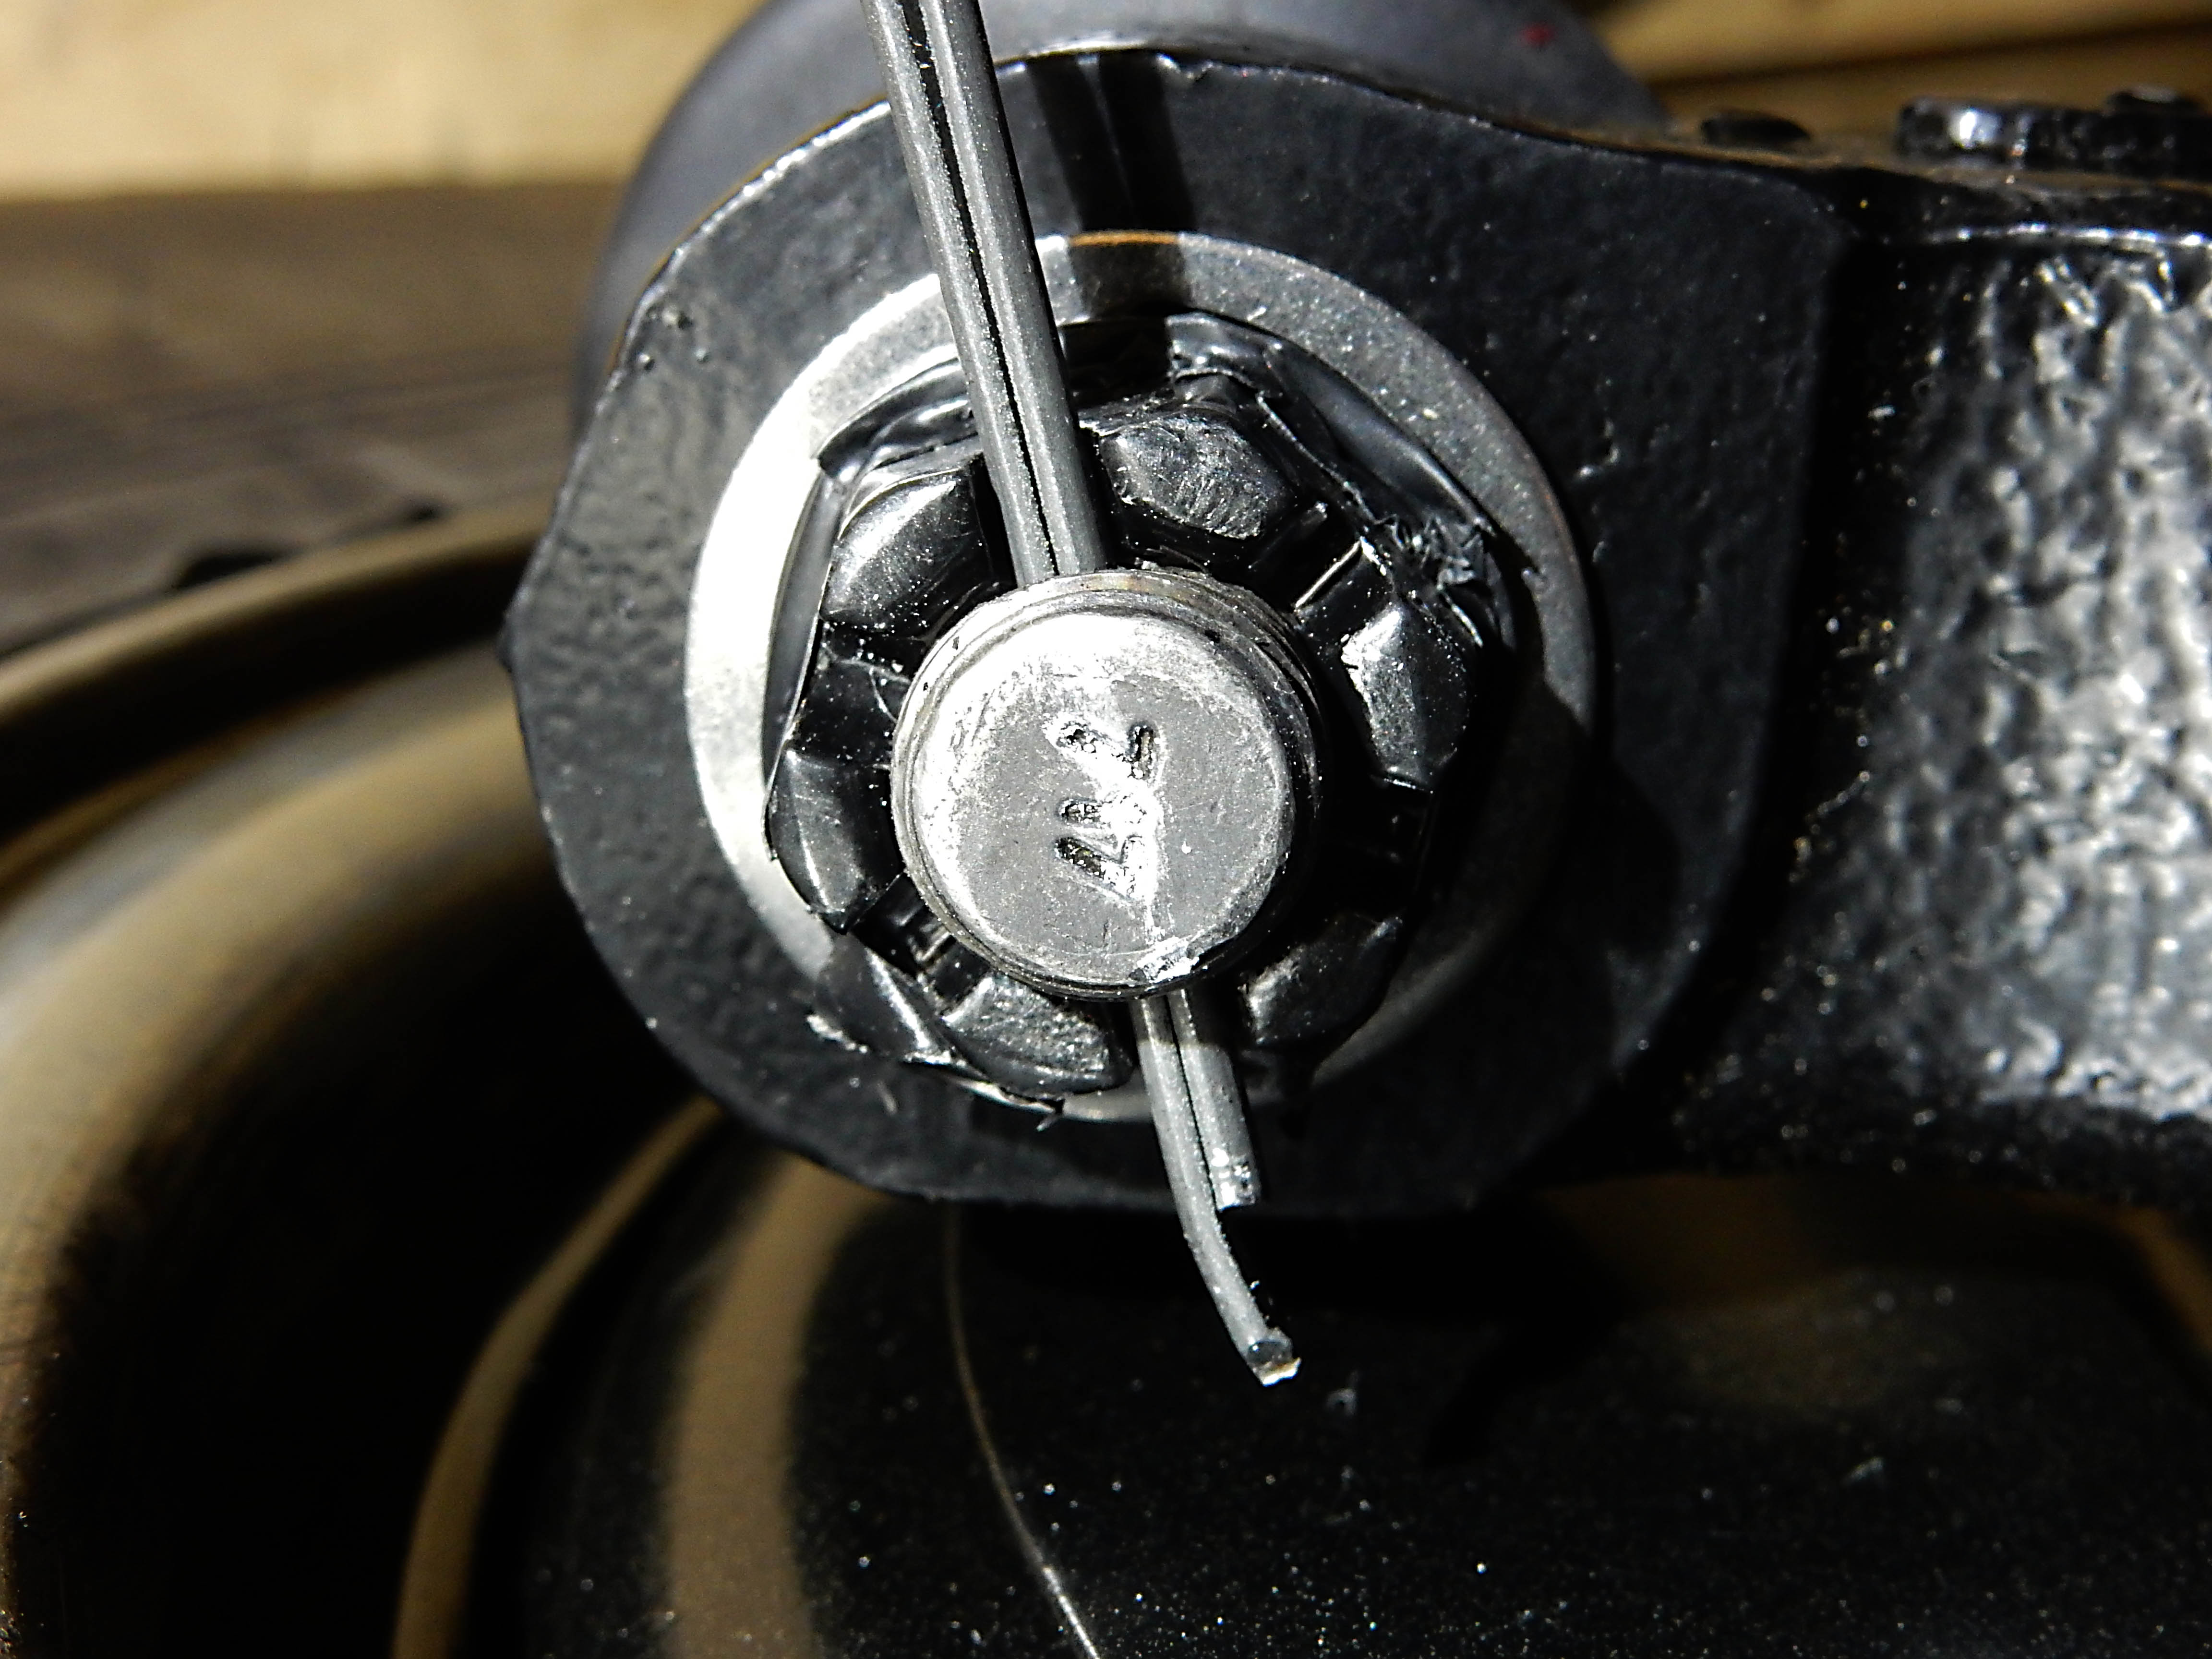
But today was another two steps forward & one step backward day. The first step forward was getting the tie rod ends torqued down. However, that wasn't as easy as it sounds. The problem was in getting the nuts indexed properly so that the cotter key would go through the hole in the stud. That doesn't sound like a big deal until you remember that every nut and bolt has to have tape wrapped around it to protect the powder. And the tape obscures the view of the hole through the stud, so initially I was taking the tape off, checking the alignment, and re-taping. But then I discovered a process that worked, and if anyone is silly enough to be following in my footsteps I guess I should document it:
The shot on the left is at 52 lb-ft, and the shot on the right is at 60 lb-ft. This process sure saved a lot of taping and untaping - which I did on the first few nuts until I developed the process.
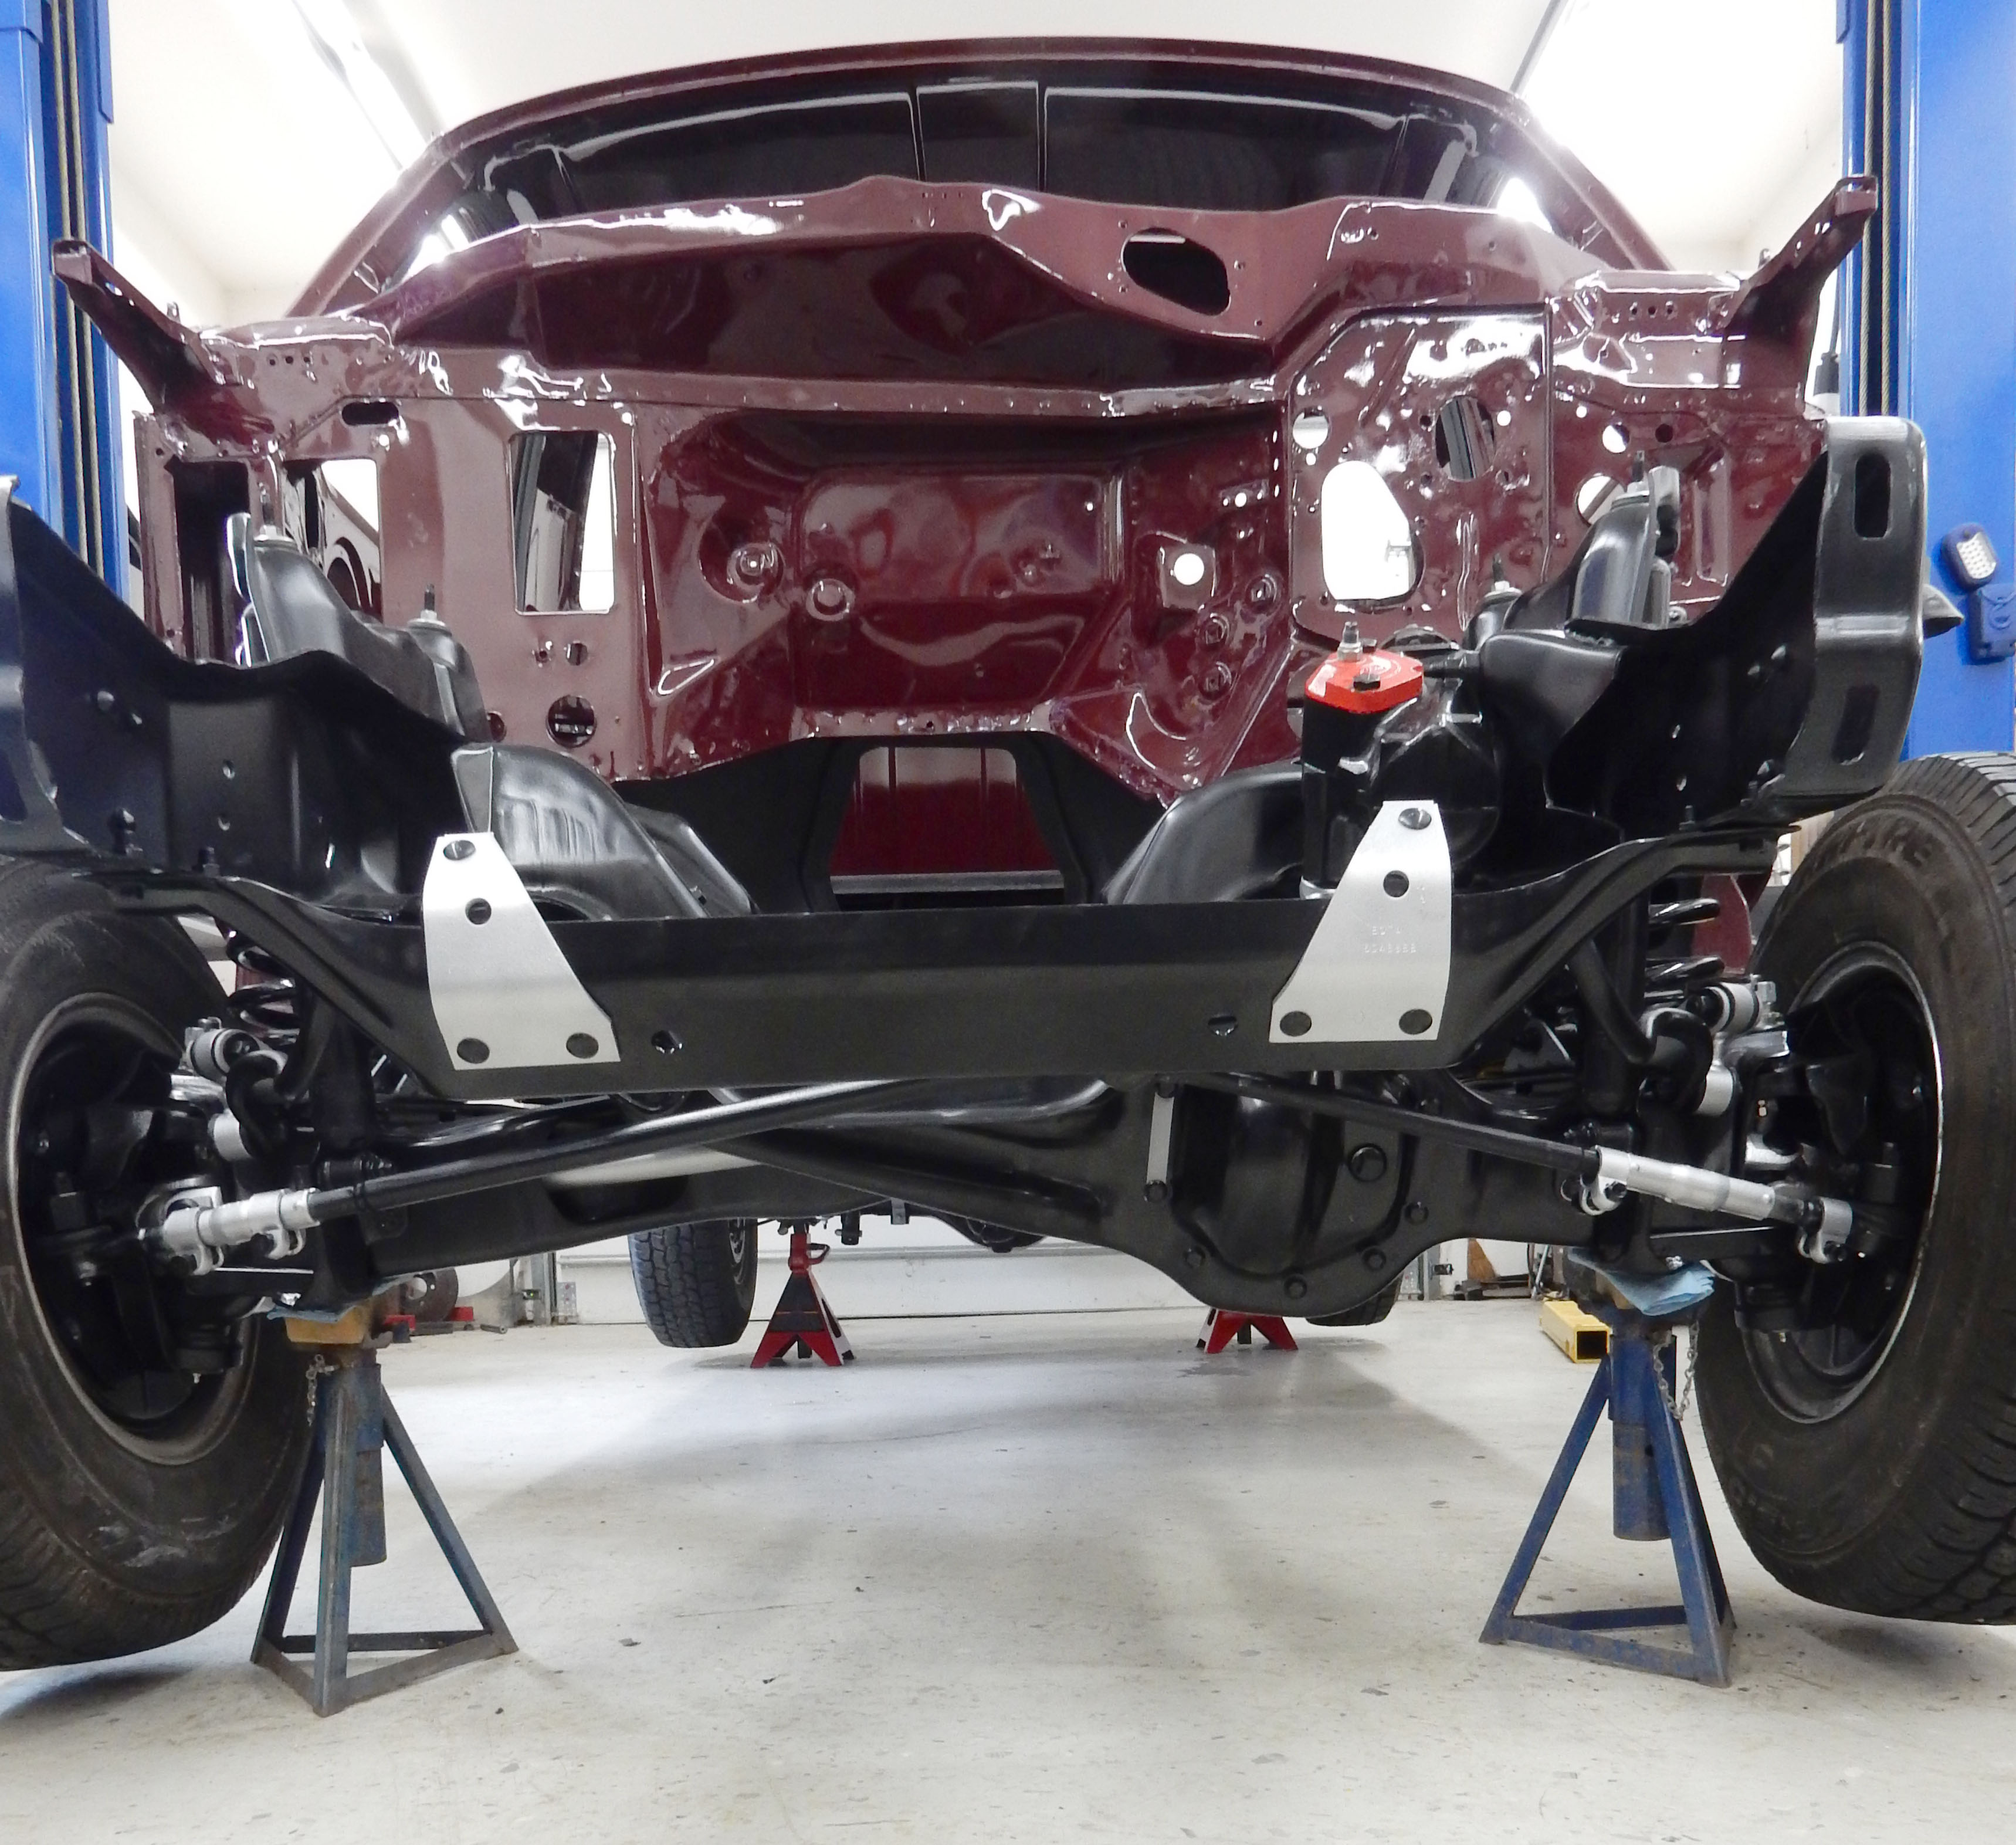
With that done I moved to getting the truck properly supported to accept the driveline components w/o moving, thereby ensuring that the cab will come back down from whence it came. And that meant placing the front on jack stands under the big bolt that secures the radius arm to the TTB, and jack stands under the rear axle. It should be noted that the original plan was to put the jack stands under the very front of the frame so when we load the frame with ~1000 lbs of engine/tranny/t-case the suspension won't give and cause the frame to move. Unfortunately that plan won't work as the jack stands are then too close together to allow the shop crane's legs to go past them and under the truck. So, back to the under-the-TTB plan for the jack stands. Got that done, which is the second step forward, and here's what it looks like:
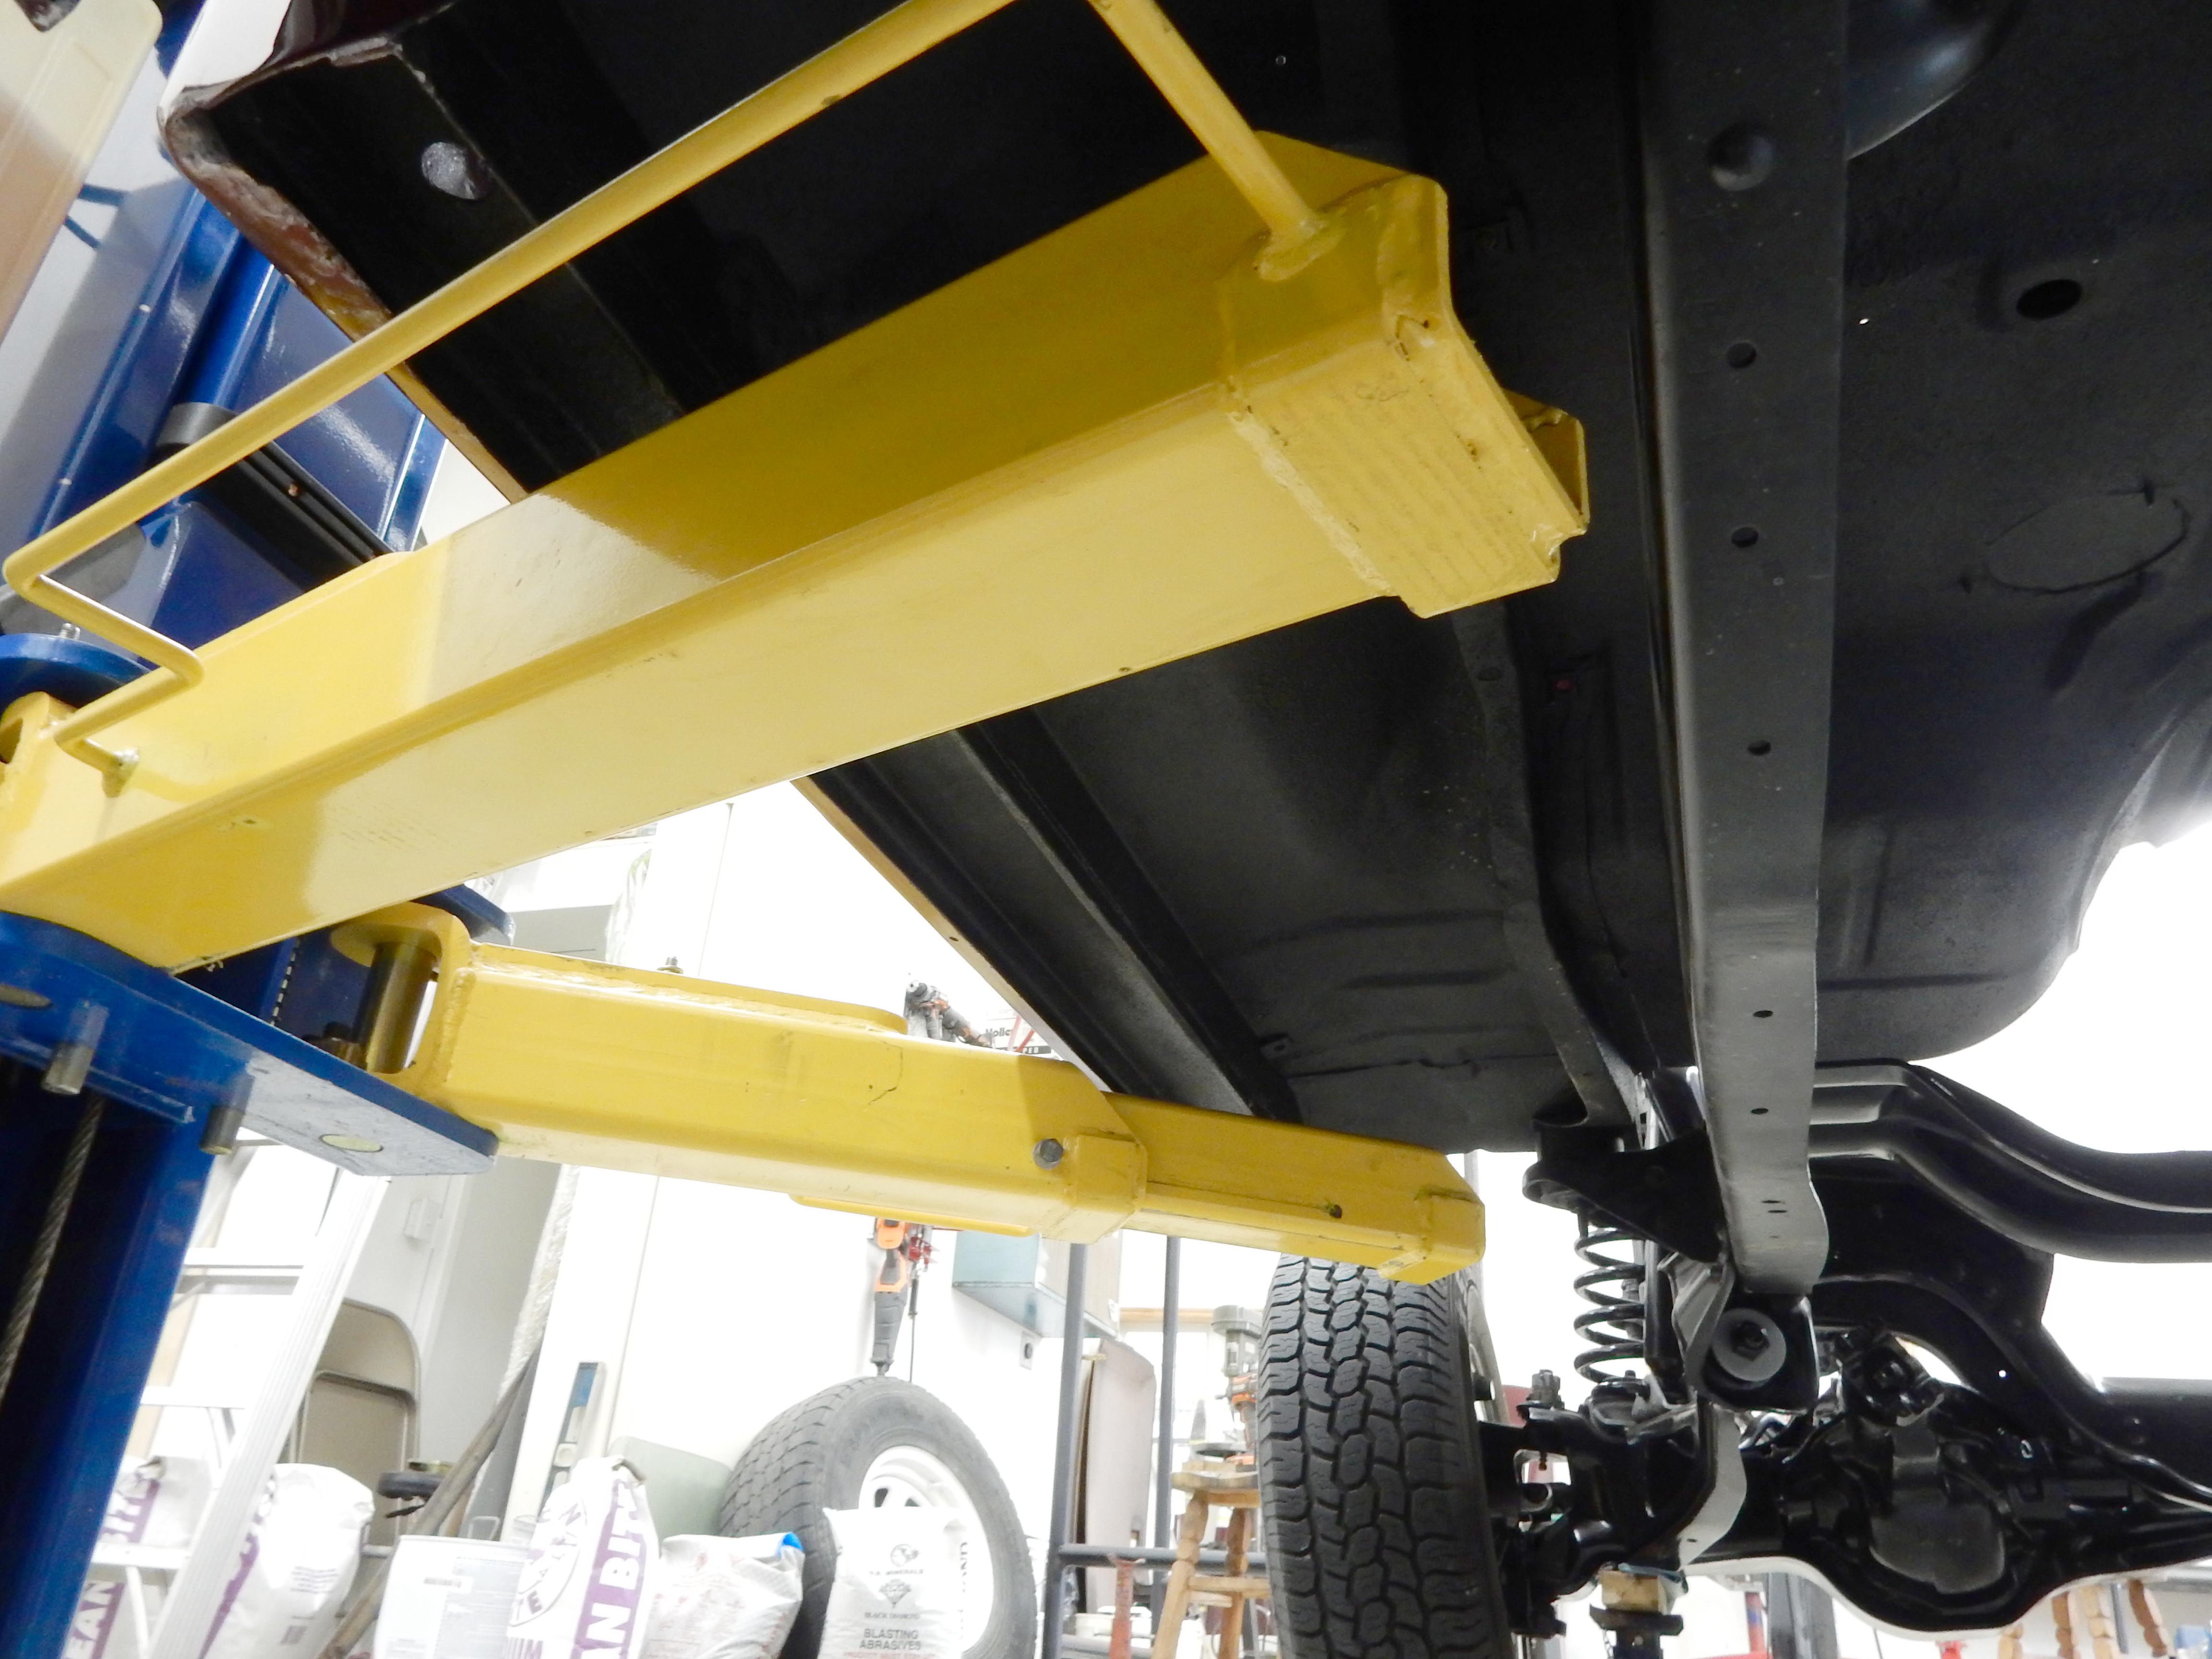
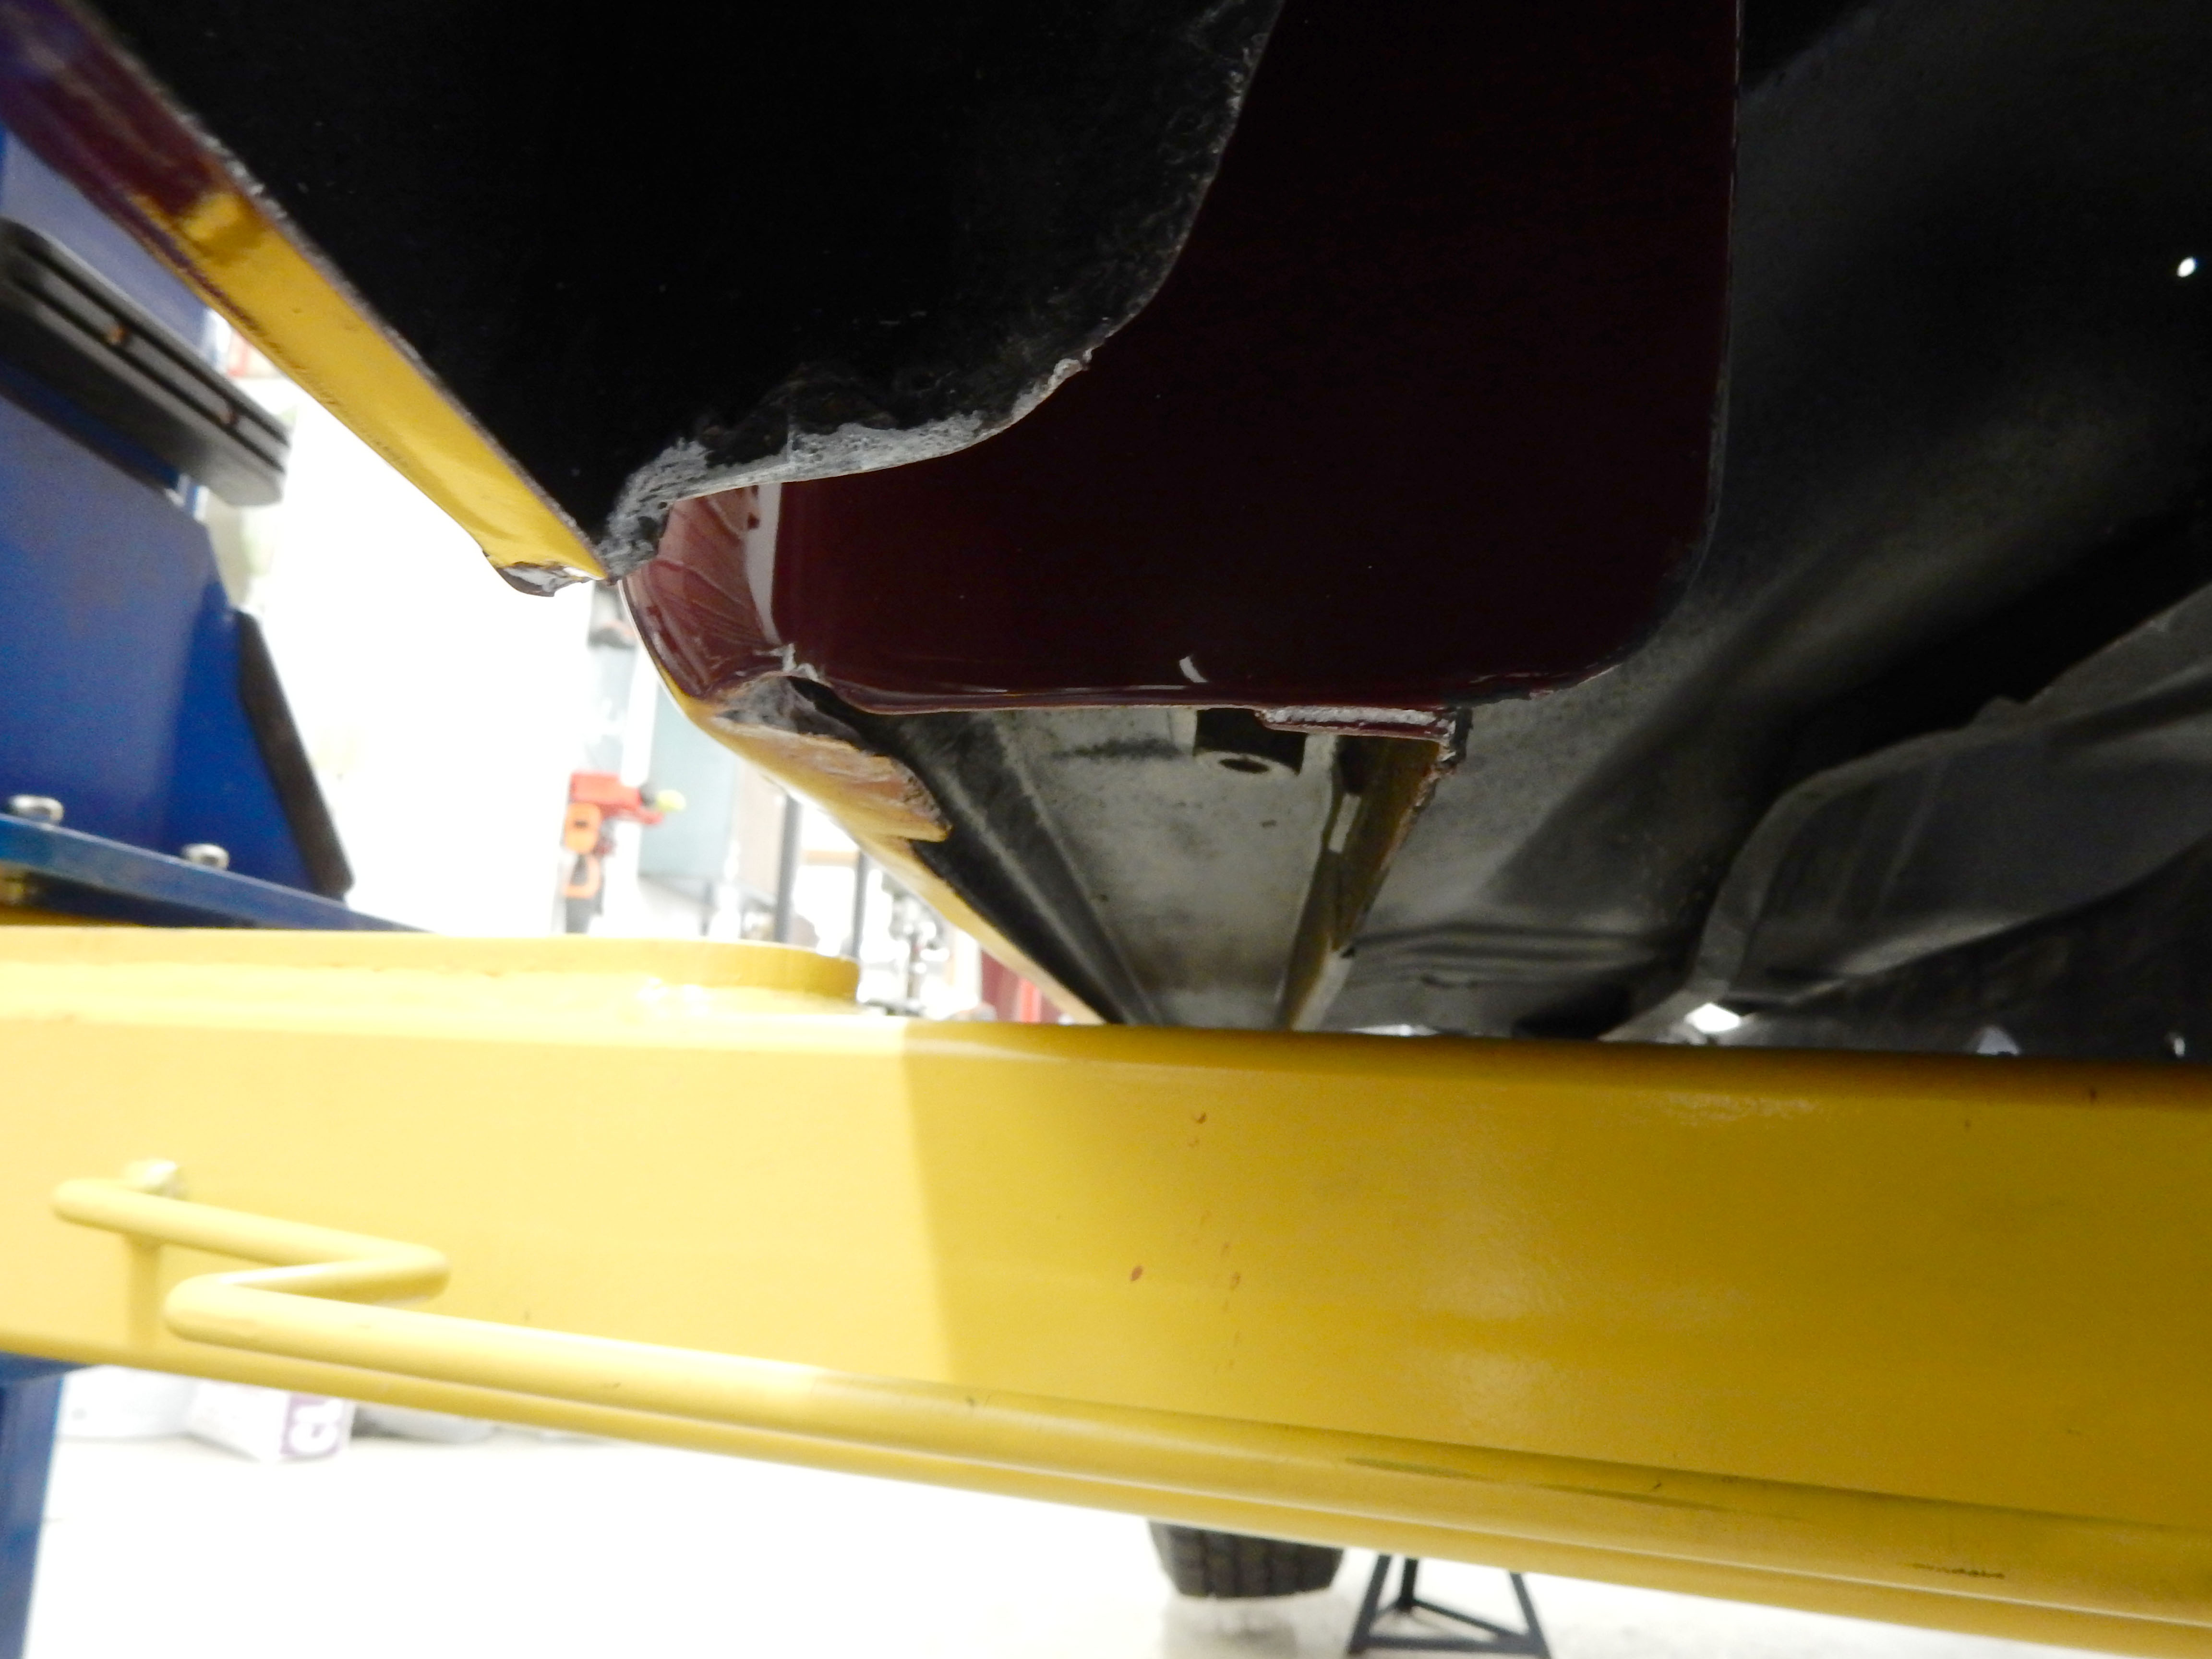
Then I turned to the plan to lift the cab off the frame with the lift - and ran into a problem - the step backward. I don't know what I was thinking, but the arms on the lift are waaaaaay to long to just reach to the rocker panel. Here's a shot from underneath with the arms shortened by removing the extensions. Notice that the rear arm, the closest one, is dangerously close to the frame. But, I have discovered that the truck is 3" closer to the left leg of the lift than to the right leg. So, I need to lift it up, remove the jack stands, drop it down, and roll it back and forth until I get it moved 1 1/2" right. That should allow the rear arm to easily clear the frame. I think I'll put tape on the floor to tell me where I want the tires to end up.
And, here's a shot of the "channel" that is between the rocker and the brace on the floor. It measures ~3" wide and 2" deep. So I'm going to rip 2x4's down to ~2 3/4" wide, stack two of them, and slip them in there with carpet on top of them.
Last, delivery of the flywheel/flexplate today was apparently Rock Auto's attempt at an April Fool's joke. That's ok as I didn't need it today, but perhaps it'll come tomorrow with the kit of stainless cotter keys.
Gary, AKA "Gary fellow": Profile
Dad's: '81 F150 Ranger XLT 4x4: Down for restomod: Full-roller "stroked 351M" w/Trick Flow heads & intake, EEC-V SEFI/E4OD/3.50 gears w/Kevlar clutches
|
|
Administrator
|
This was a tiresome day. The "tired" came from rolling the truck back and forth several times in order to get it properly positioned between the lift legs. I finally got it there, but I'll confess that I failed on that many times.
I'd measure and know I needed to move the truck 2 1/2" left, and then work, work, work to get it over there, only to find that exactly 2 1/2" was way too far. Then I moved it the other way - and went too far. And I think I went too far back the other way.  But finally, probably by blind luck, I got it where there's ~2" of clearance between the rear lift arms and the frame, as shown below. (And, you can see my belt & braces approach to supporting the truck in front. There are jack stands under the big bolt on the TTB as well as a 2x4 under the tire. It isn't going anywhere. But more on that later.) 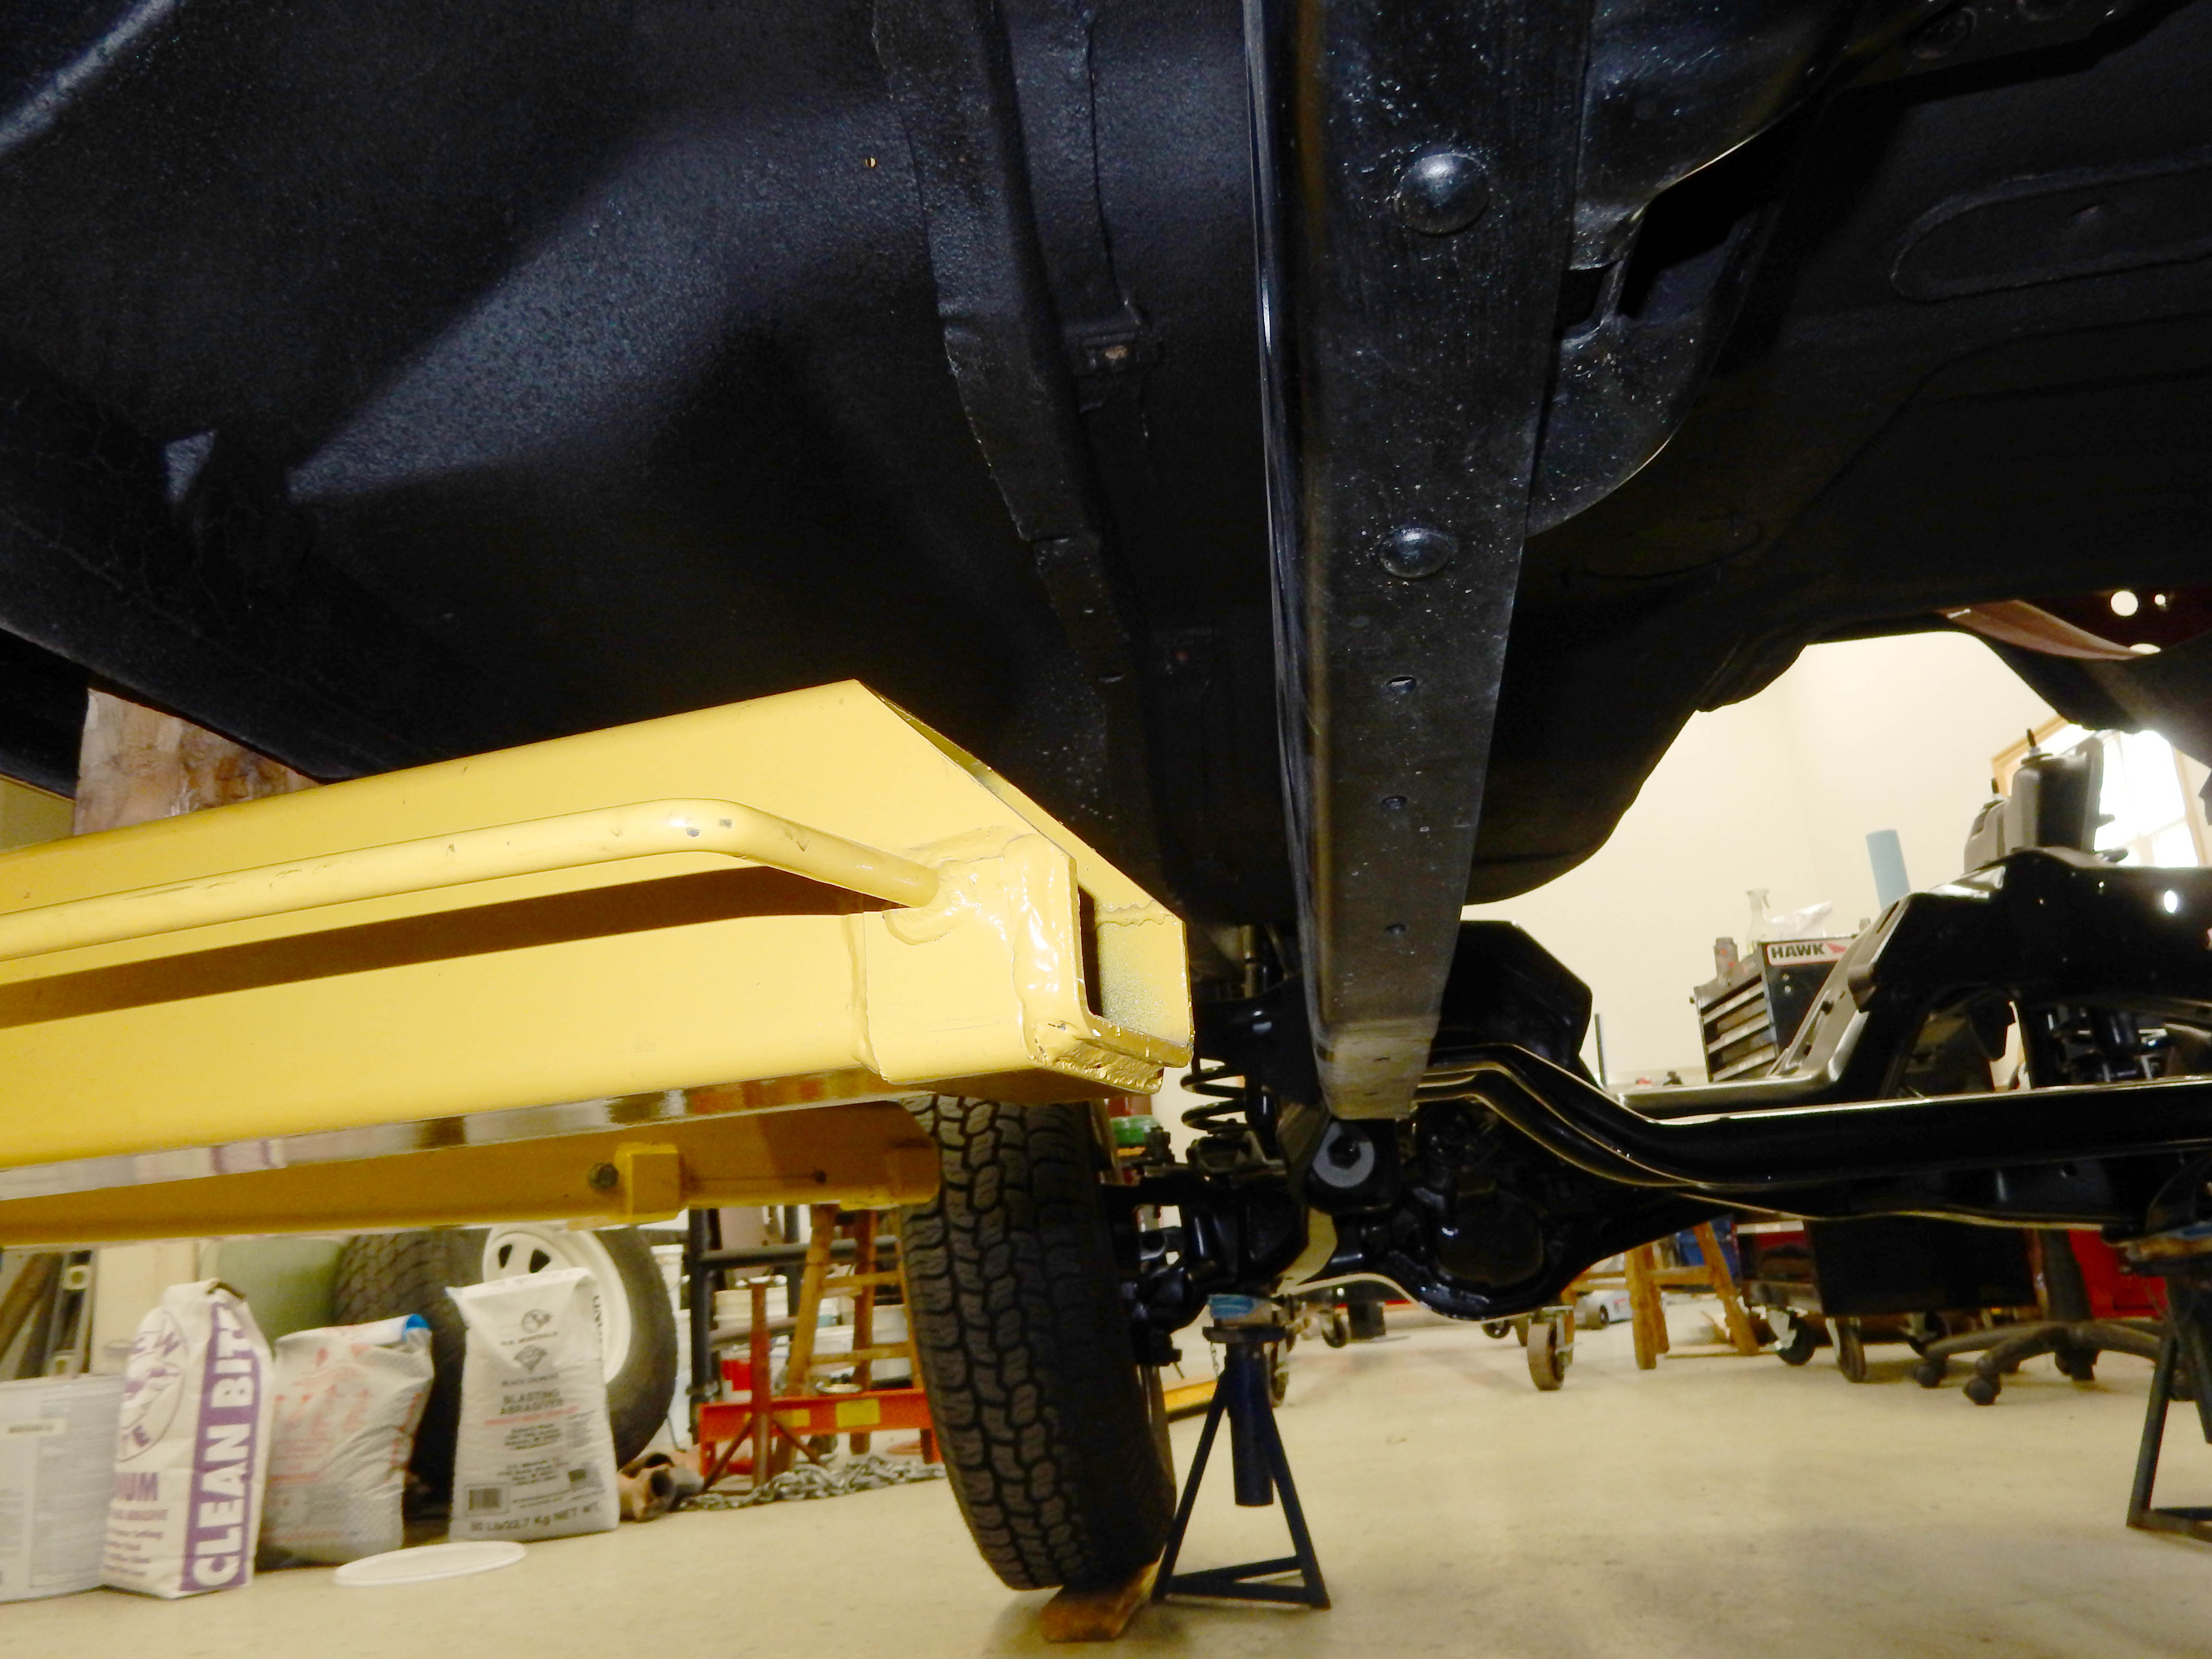 Once the truck was in position I set about getting the jack stands under it. In the front I measured the heads of the bolts that hold the radius arm to the TTB and found that they are about 1 3/8" in diameter. I wanted to bore a hole that size in a 2x4 and put that over the head of the bolt so that the truck wouldn't be sitting on the head of that bolt and potentially slide off. Instead, the weight will be on the radius arm instead. But, not having a drill bit that diameter I decided to bore a hole in a 2x4 that size. I put the 2x4 in the vise, slipped the boring head into the spindle, and tightened the draw bar to pull the head into the taper. But, there was this sickening feel where the draw bar didn't tighten up. So I pulled the draw bar out and discovered the threads were stripped.  How could that be as I've used that boring head before. But, with a little bit of inspection I found that the draw bar is supposed to be threaded 7/16-20 but the boring head is threaded 7/16-14. Bummer! After a bit of time on the phone with Grizzly I had another draw bar on order, but that left me with a boring head I couldn't use. So I welded the threads up, turned the thing down to .430", and ran a die down in. And along the way my Craftsman die cracked. But, it held together well enough to get the thing threaded and I got the job done. Now I have to paint the business end of that boring head red so I won't use it with the new draw bar when it comes in. 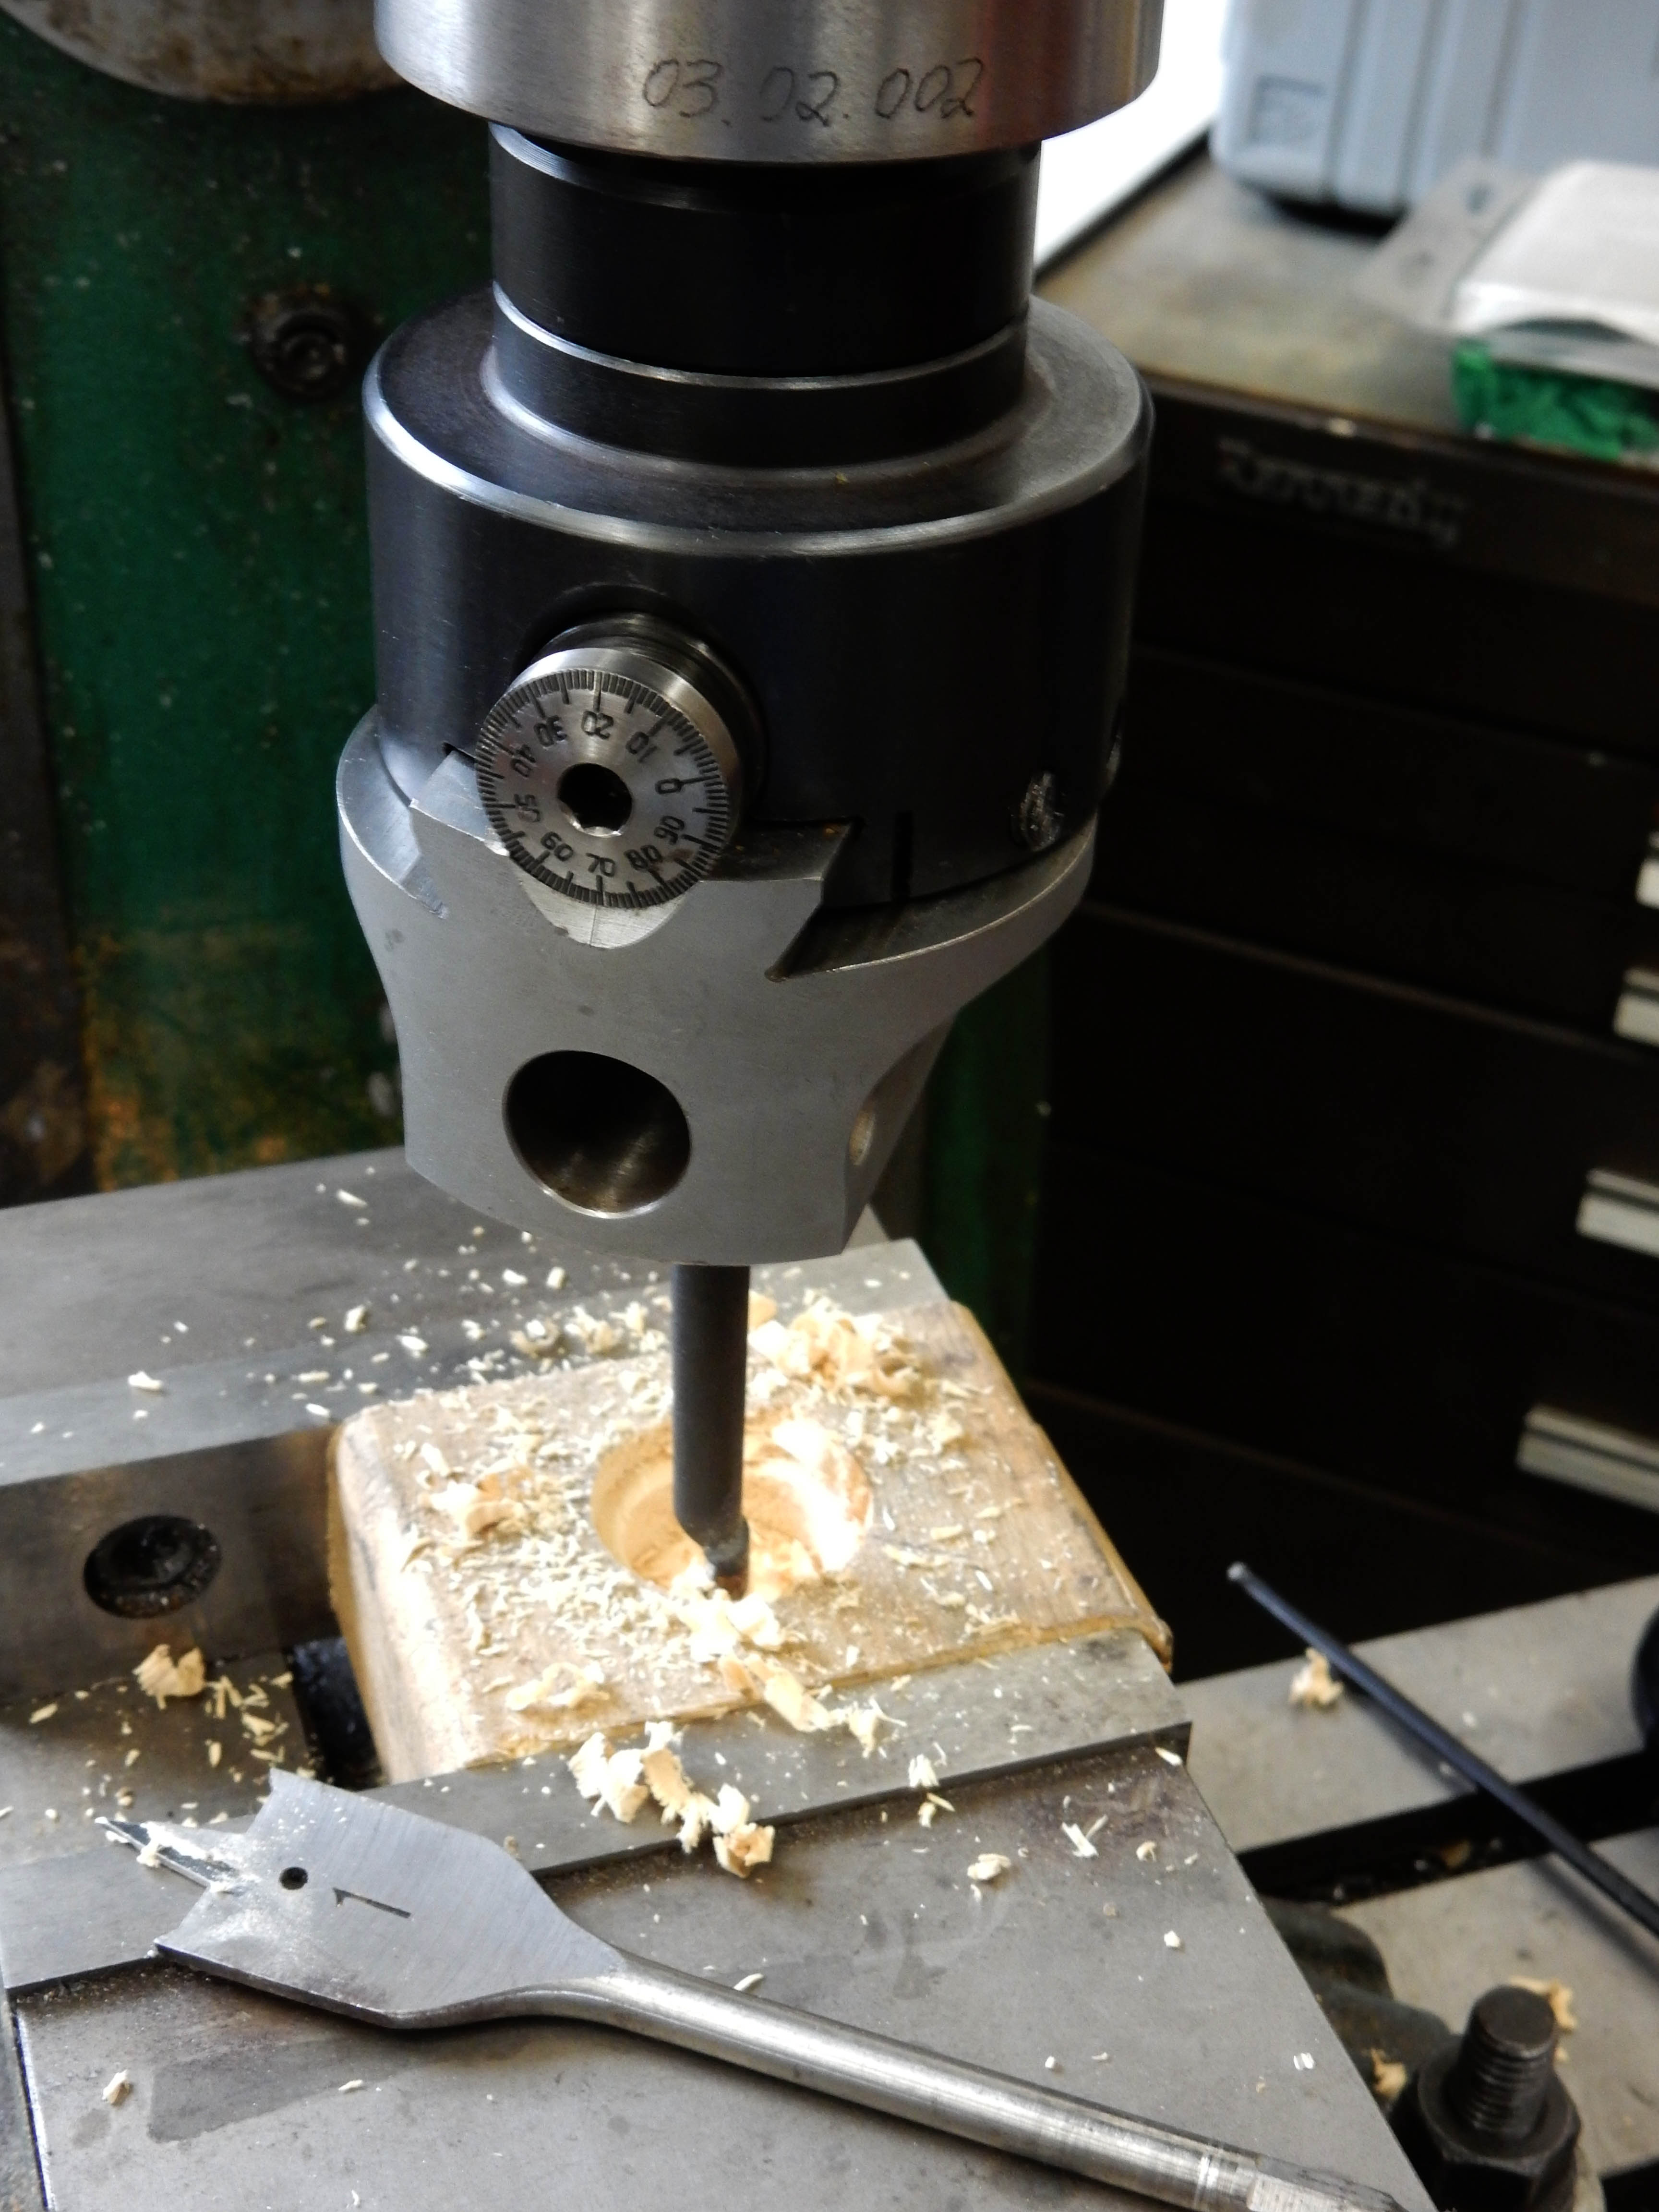 Ok, now that the truck is sitting on jack stands fore and aft, it was time to test the theory of lifting the cab with trimmed 2x4's in the "channel". Here's a pic that shows what I'm talking about, although that's just a little piece of 2x4 where two trimmed ones will be - along with some carpeting to protect the truck: 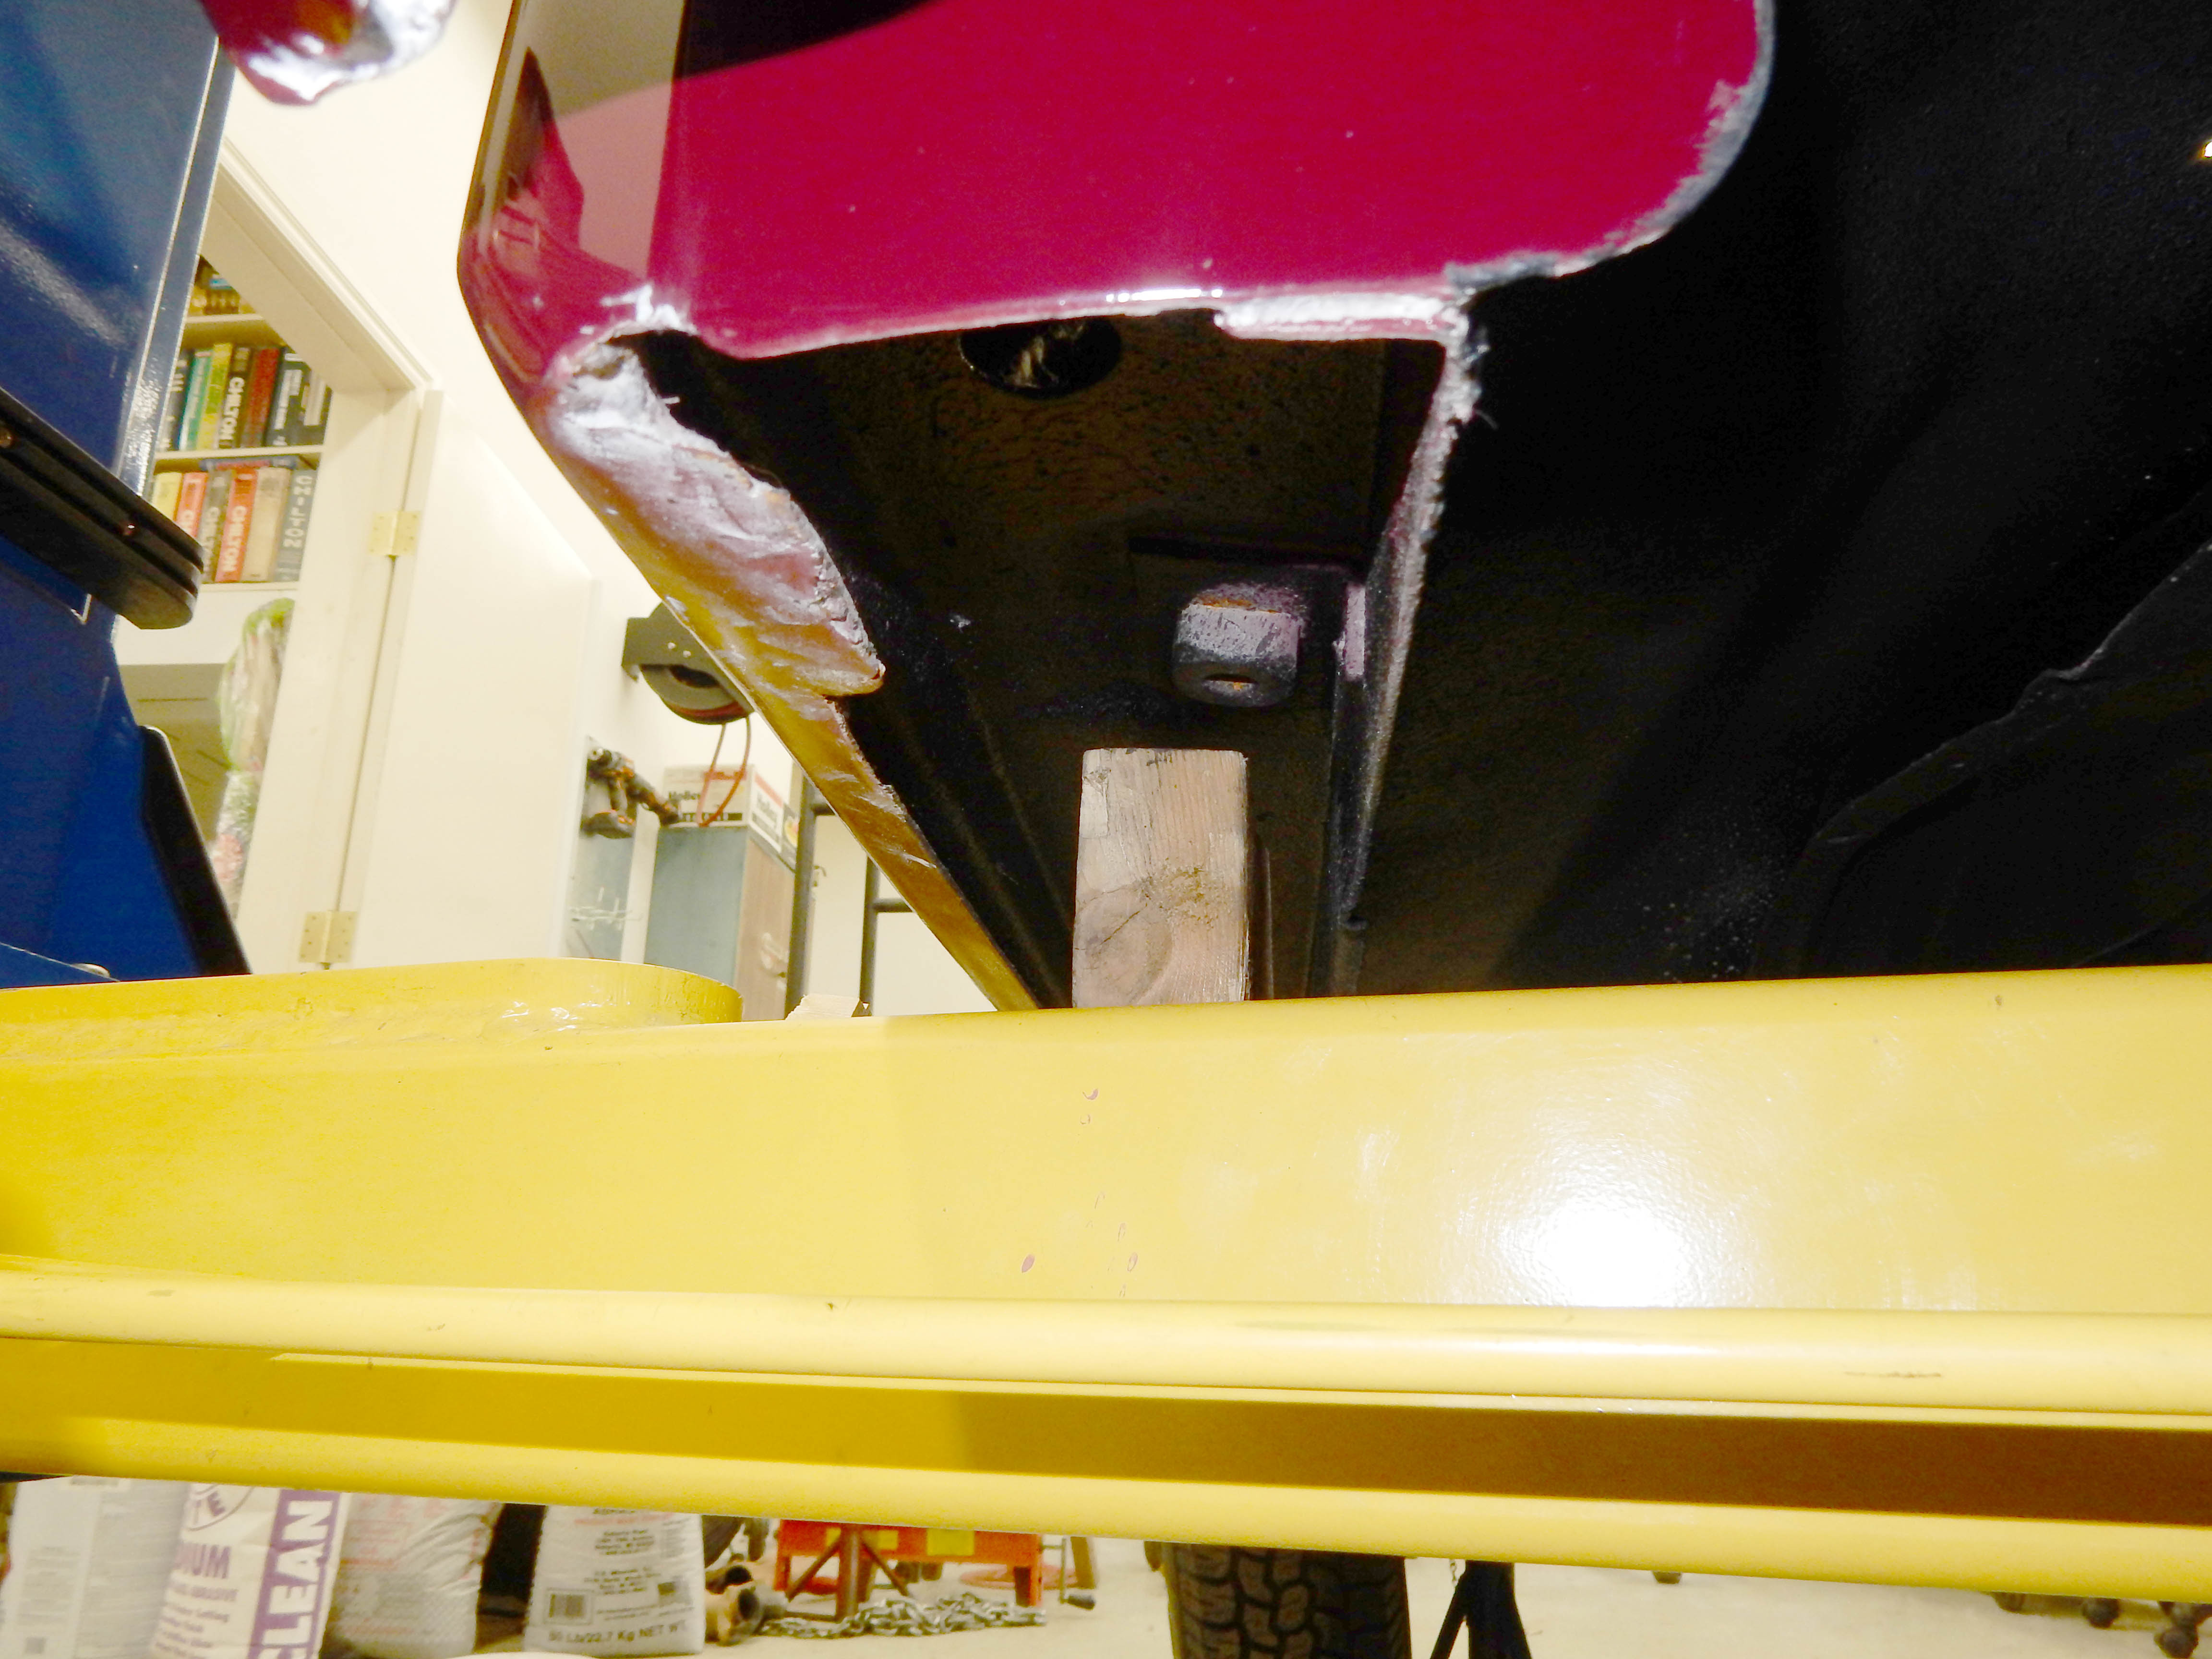 And, here's another view of the plan. But, there will be wood that spans the distance between those two arms so the force is spread over a very large area. 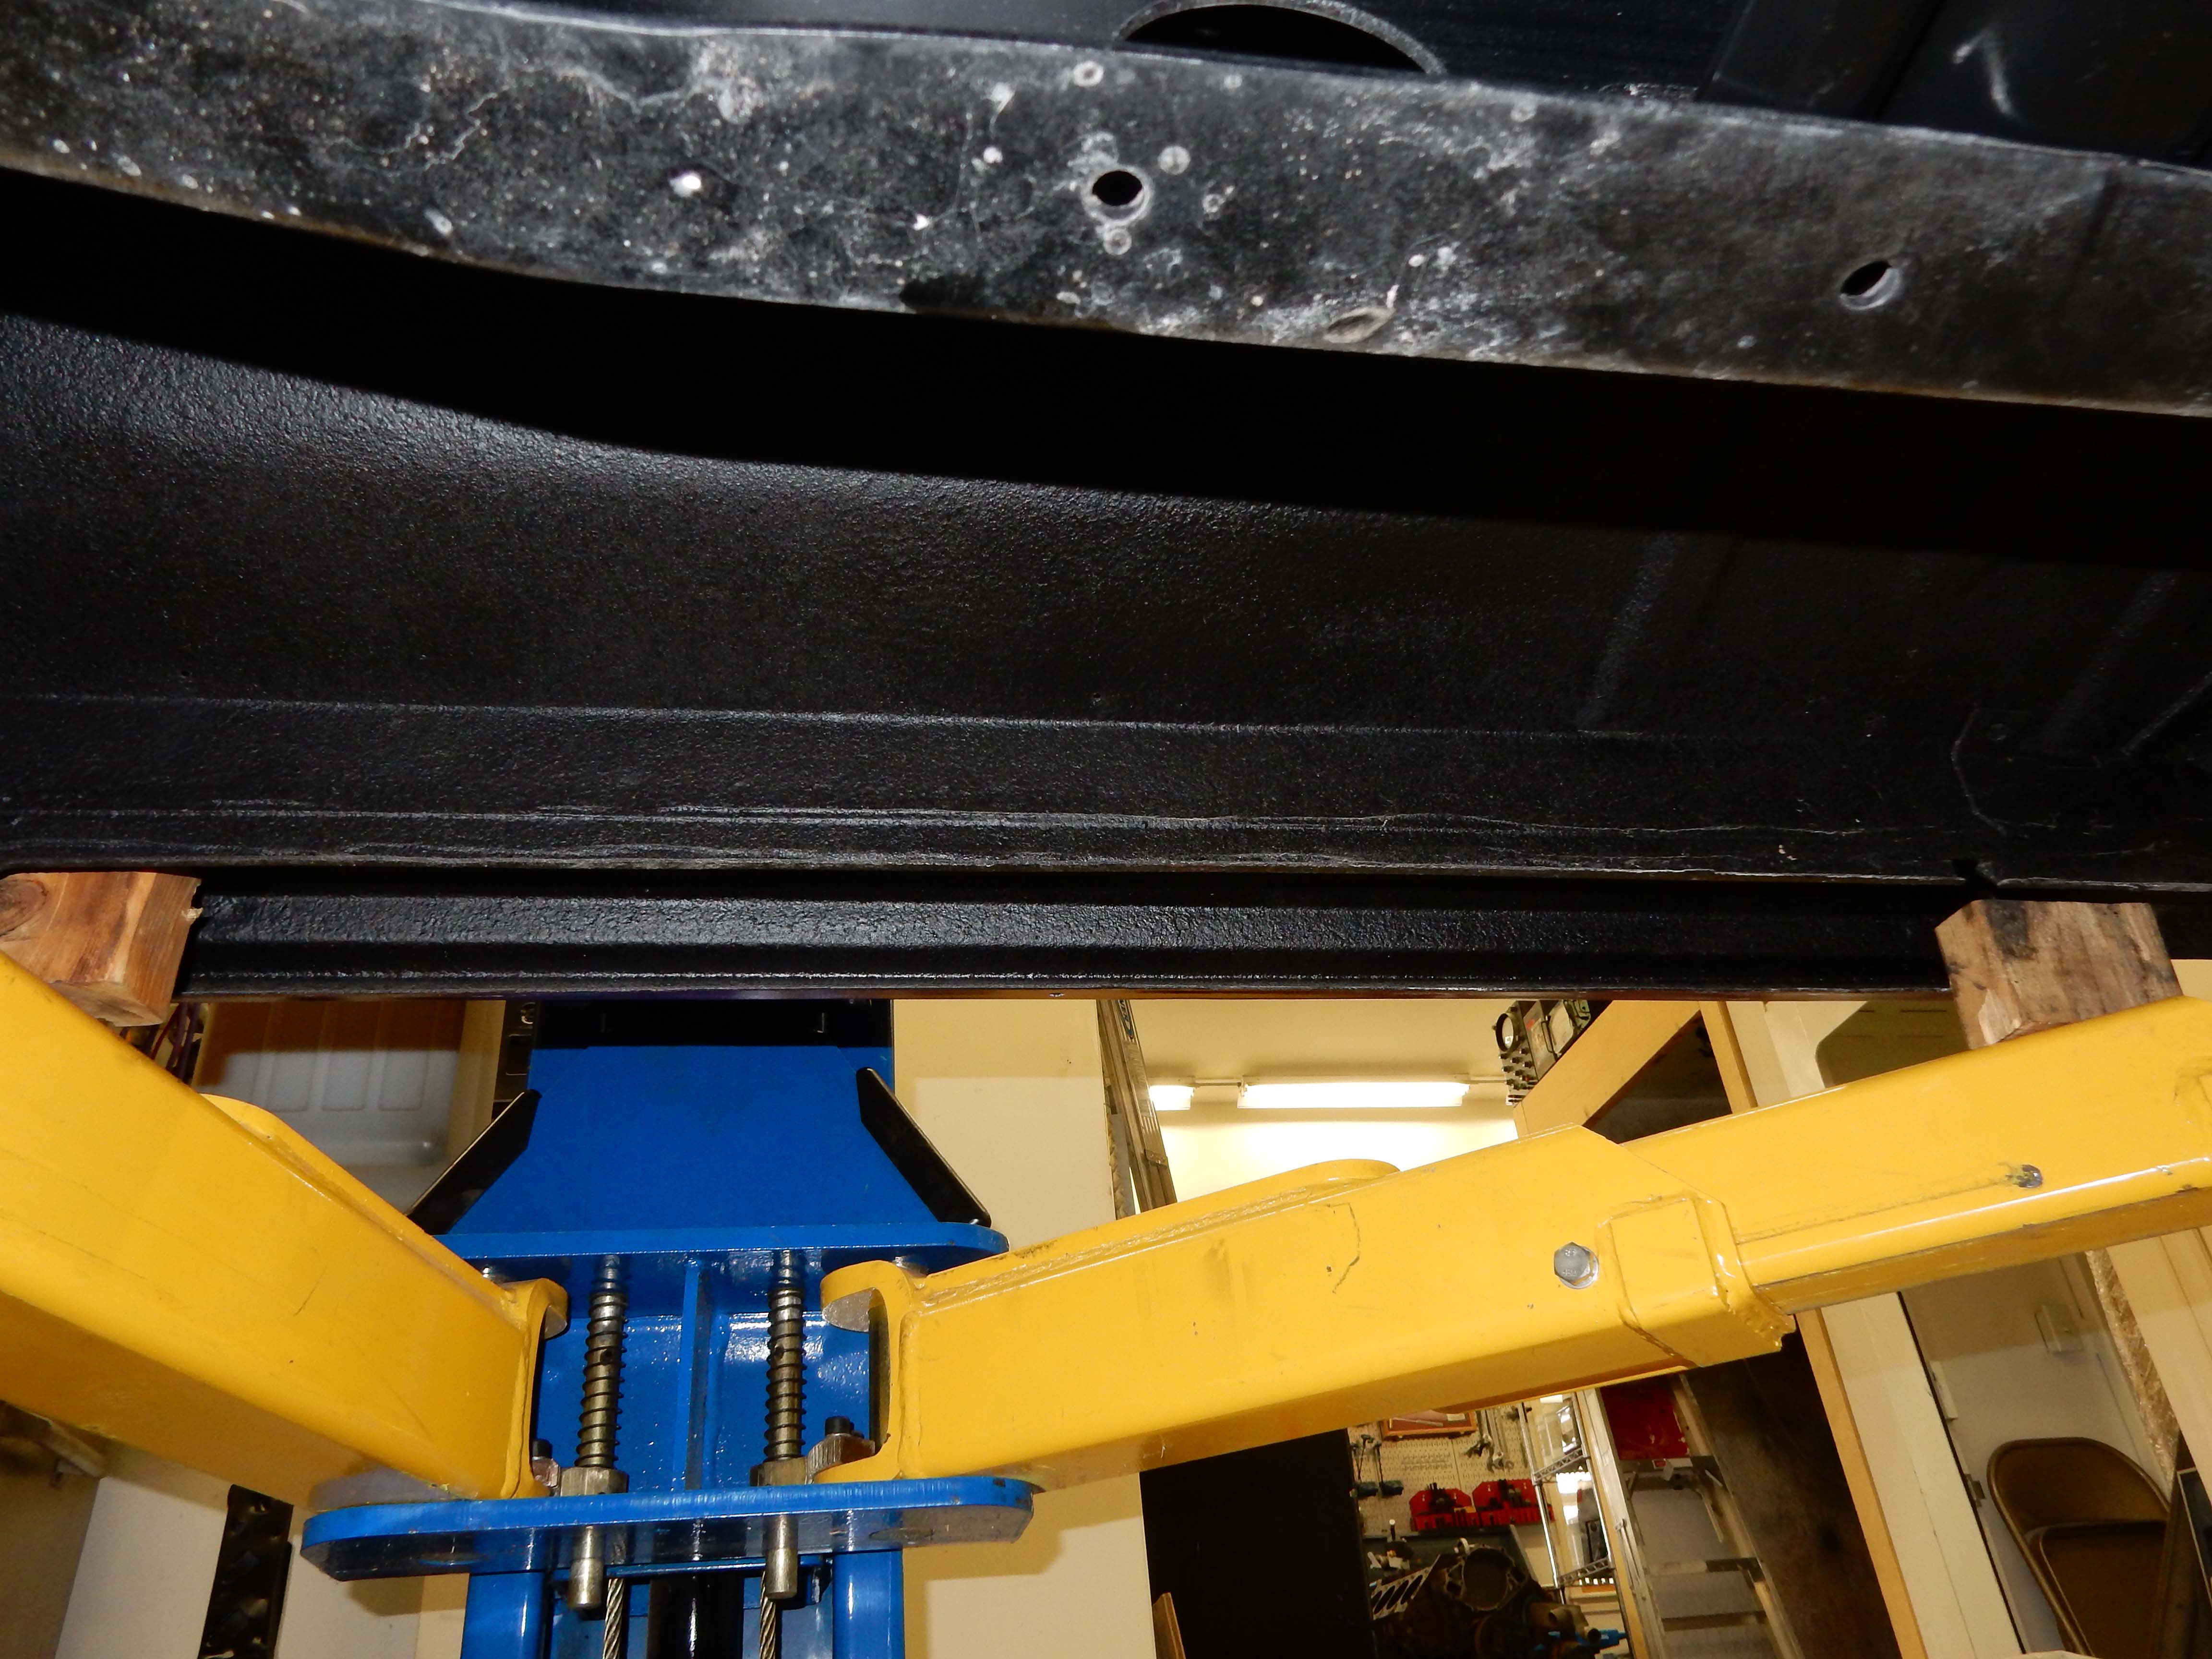 Any suggestions? Concerns?
Gary, AKA "Gary fellow": Profile
Dad's: '81 F150 Ranger XLT 4x4: Down for restomod: Full-roller "stroked 351M" w/Trick Flow heads & intake, EEC-V SEFI/E4OD/3.50 gears w/Kevlar clutches
|
| Edit this page |


