Big Blue's Transformation

classic Classic list List threaded Threaded
7421 messages Options
1 ... 93949596979899 ... 372
Reply | Threaded
Open this post in threaded view
|

Re: Big Blue's Transformation

Gary Lewis
Administrator
Yes, save for when I hit the button to the battery isolator and parallel the batteries for starting.  Then current will cross the radiator support via the #4 yellow wire to the PDB and thence to the starter.  But it needs to find its way back, and right now there's no good path.  However, if I tie the aux battery's negative to the frame the current can come back via the short #2 wire from the block to the frame on the passenger's side.

If I tied the aux battery's negative to the block then I'd have two routes to the block.  But I don't see a good place to go to the block, and going to the frame looks easy.  And that #2 ground I installed the other day is a good one.  Guess I'll rely on it.
Gary, AKA "Gary fellow": Profile

Dad's: '81 F150 Ranger XLT 4x4: Down for restomod: Full-roller "stroked 351M" w/Trick Flow heads & intake, EEC-V SEFI/E4OD/3.50 gears w/Kevlar clutches
Blue: 2015 F150 Platinum 4x4 SuperCrew wearing Blue Jeans & sporting a 3.5L EB & Max Tow
Big Blue: 1985 F250HD 4x4: 460/ZF5/3.55's, D60 w/Ox locker & 10.25 Sterling/Trutrac, Blue Top & Borgeson, & EEC-V MAF/SEFI

Reply | Threaded
Open this post in threaded view
|

Re: Big Blue's Transformation

kramttocs
Administrator
In reply to this post by Gary Lewis
Since the block is grounded to the frame on the passenger side, I think grounding to the frame on the driver side is valid and equivalent or better to any other option. I ran a 1/0 cable for ground between the two purely for the Boost option but I have also thought about putting a cable to one of the steering box bolts outside the frame. There may be a better location though. Interested to see what you decide as I may follow suit.
Scott
'Camano' 1986 F250 Supercab XLT Lariat 460/C6
'Chanute' 1980 F350 C&C 400/NP 435 - Gin Pole

But there ain't nothin' wrong with the radio
Reply | Threaded
Open this post in threaded view
|

Re: Big Blue's Transformation

Gary Lewis
Administrator
I think a steering box bolt is a good idea.  They are small enough that I should have the right connector.

Another option is just to drill and tap the frame or crossmember like the passenger's side ground is done.  I took it a step farther and used a bit longer bolt with a serrated nut underneath, and plenty of aluminum-based anti-seize to ensure there's no corrosion.


Thinking back to the spacers for the DS-II modules, I think I may have some aluminum that I could use.  That stainless is just so hard.
Gary, AKA "Gary fellow": Profile

Dad's: '81 F150 Ranger XLT 4x4: Down for restomod: Full-roller "stroked 351M" w/Trick Flow heads & intake, EEC-V SEFI/E4OD/3.50 gears w/Kevlar clutches
Blue: 2015 F150 Platinum 4x4 SuperCrew wearing Blue Jeans & sporting a 3.5L EB & Max Tow
Big Blue: 1985 F250HD 4x4: 460/ZF5/3.55's, D60 w/Ox locker & 10.25 Sterling/Trutrac, Blue Top & Borgeson, & EEC-V MAF/SEFI

Reply | Threaded
Open this post in threaded view
|

Re: Big Blue's Transformation

kramttocs
Administrator
I did the same - put a normal bolt and then a nut on the passenger side. Using a serrated nut is a good call  Will have to swap mine out.
If one doesn't want to make any real modifications at all on the drivers side they could possibly replace that fuel line retainer with a bolt and another style retainer or just drill out the plastic retainer to use a bolt. Then ground using that bolt.
Or is grounding near a fuel line a bad idea?
Scott
'Camano' 1986 F250 Supercab XLT Lariat 460/C6
'Chanute' 1980 F350 C&C 400/NP 435 - Gin Pole

But there ain't nothin' wrong with the radio
Reply | Threaded
Open this post in threaded view
|

Re: Big Blue's Transformation

Gary Lewis
Administrator
Not sure where my fuel line is going to go.  I may run the FDM's and, if so, the fuel line goes up over the back of the transmission and then to the backside of the intake.  Then I'll put the return-style regulator there and have my own hot-fuel handling system, but with regulated pressure to the carb.

Then, when I go EFI the fuel lines are right there and I just swap out to the lines to the rail and regulator.  Tada!

But, if I go back with the original setup the lines would come right down the frame rail and then have to go up to the carb.  And I might want that hold-down.  But, I'm not averse to drilling another hole in the crossmember.  Hmmm....  

However, I don't think you need to drill the plastic retainer out.  I think it is one of the pin-style where you drive the pin through and it comes off.  I changed the one on the passenger's side as it was way too small to hold the #2 ground.  I have a bin of the plastic retainers I've gathered and had one that held the ground nicely.
Gary, AKA "Gary fellow": Profile

Dad's: '81 F150 Ranger XLT 4x4: Down for restomod: Full-roller "stroked 351M" w/Trick Flow heads & intake, EEC-V SEFI/E4OD/3.50 gears w/Kevlar clutches
Blue: 2015 F150 Platinum 4x4 SuperCrew wearing Blue Jeans & sporting a 3.5L EB & Max Tow
Big Blue: 1985 F250HD 4x4: 460/ZF5/3.55's, D60 w/Ox locker & 10.25 Sterling/Trutrac, Blue Top & Borgeson, & EEC-V MAF/SEFI

Reply | Threaded
Open this post in threaded view
|

Re: Big Blue's Transformation

ArdWrknTrk
Administrator
I (personally) wouldn't mess with the steering box.

I try to avoid piggybacking anything, and see drilling another hole to hold the ground lug as a completely valid solution.
I also think keeping it out in the open, where it's easy to see at a glance is a big plus.
.... but I'm a bit dim witted and obviously lazy about maintenance!  
 Jim,
Lil'Red is a '87 F250 HD, 4.10's, 1356 4x4, Zf-5, 3G, PMGR, Saginaw PS, desmogged with a Holley 80508 and Performer intake.
Too much other stuff to mention.
Reply | Threaded
Open this post in threaded view
|

Re: Big Blue's Transformation

kramttocs
Administrator
Not doubling up on the steering box bolt is probably smart Jim. I'll wait and see what Gary evaluates and goes with.
Scott
'Camano' 1986 F250 Supercab XLT Lariat 460/C6
'Chanute' 1980 F350 C&C 400/NP 435 - Gin Pole

But there ain't nothin' wrong with the radio
Reply | Threaded
Open this post in threaded view
|

Re: Big Blue's Transformation

Gary Lewis
Administrator
Well, Gary's evaluation is at the bottom of this post and is really a questions.

First, Scotty just called and said my dizzy, carb adaptor, plugs, wires, etc will ship out Monday.  

Second, the morning was spent repairing the neighbor's chemical sprayer for the yard.  It had a flimsy sheetmetal bracket with holes in the front, into which the hitch bolted and it had rusted and then pulled out.  I happened to have a piece of angle laying on the bench from the coolant reservoir bracket work, and that was perfect as it was many times stronger and gave him more adjustment range, which he said he needed.  With a bit of press work I got it back in shape and then welded on the angle.  A few holes, and it was better than new.

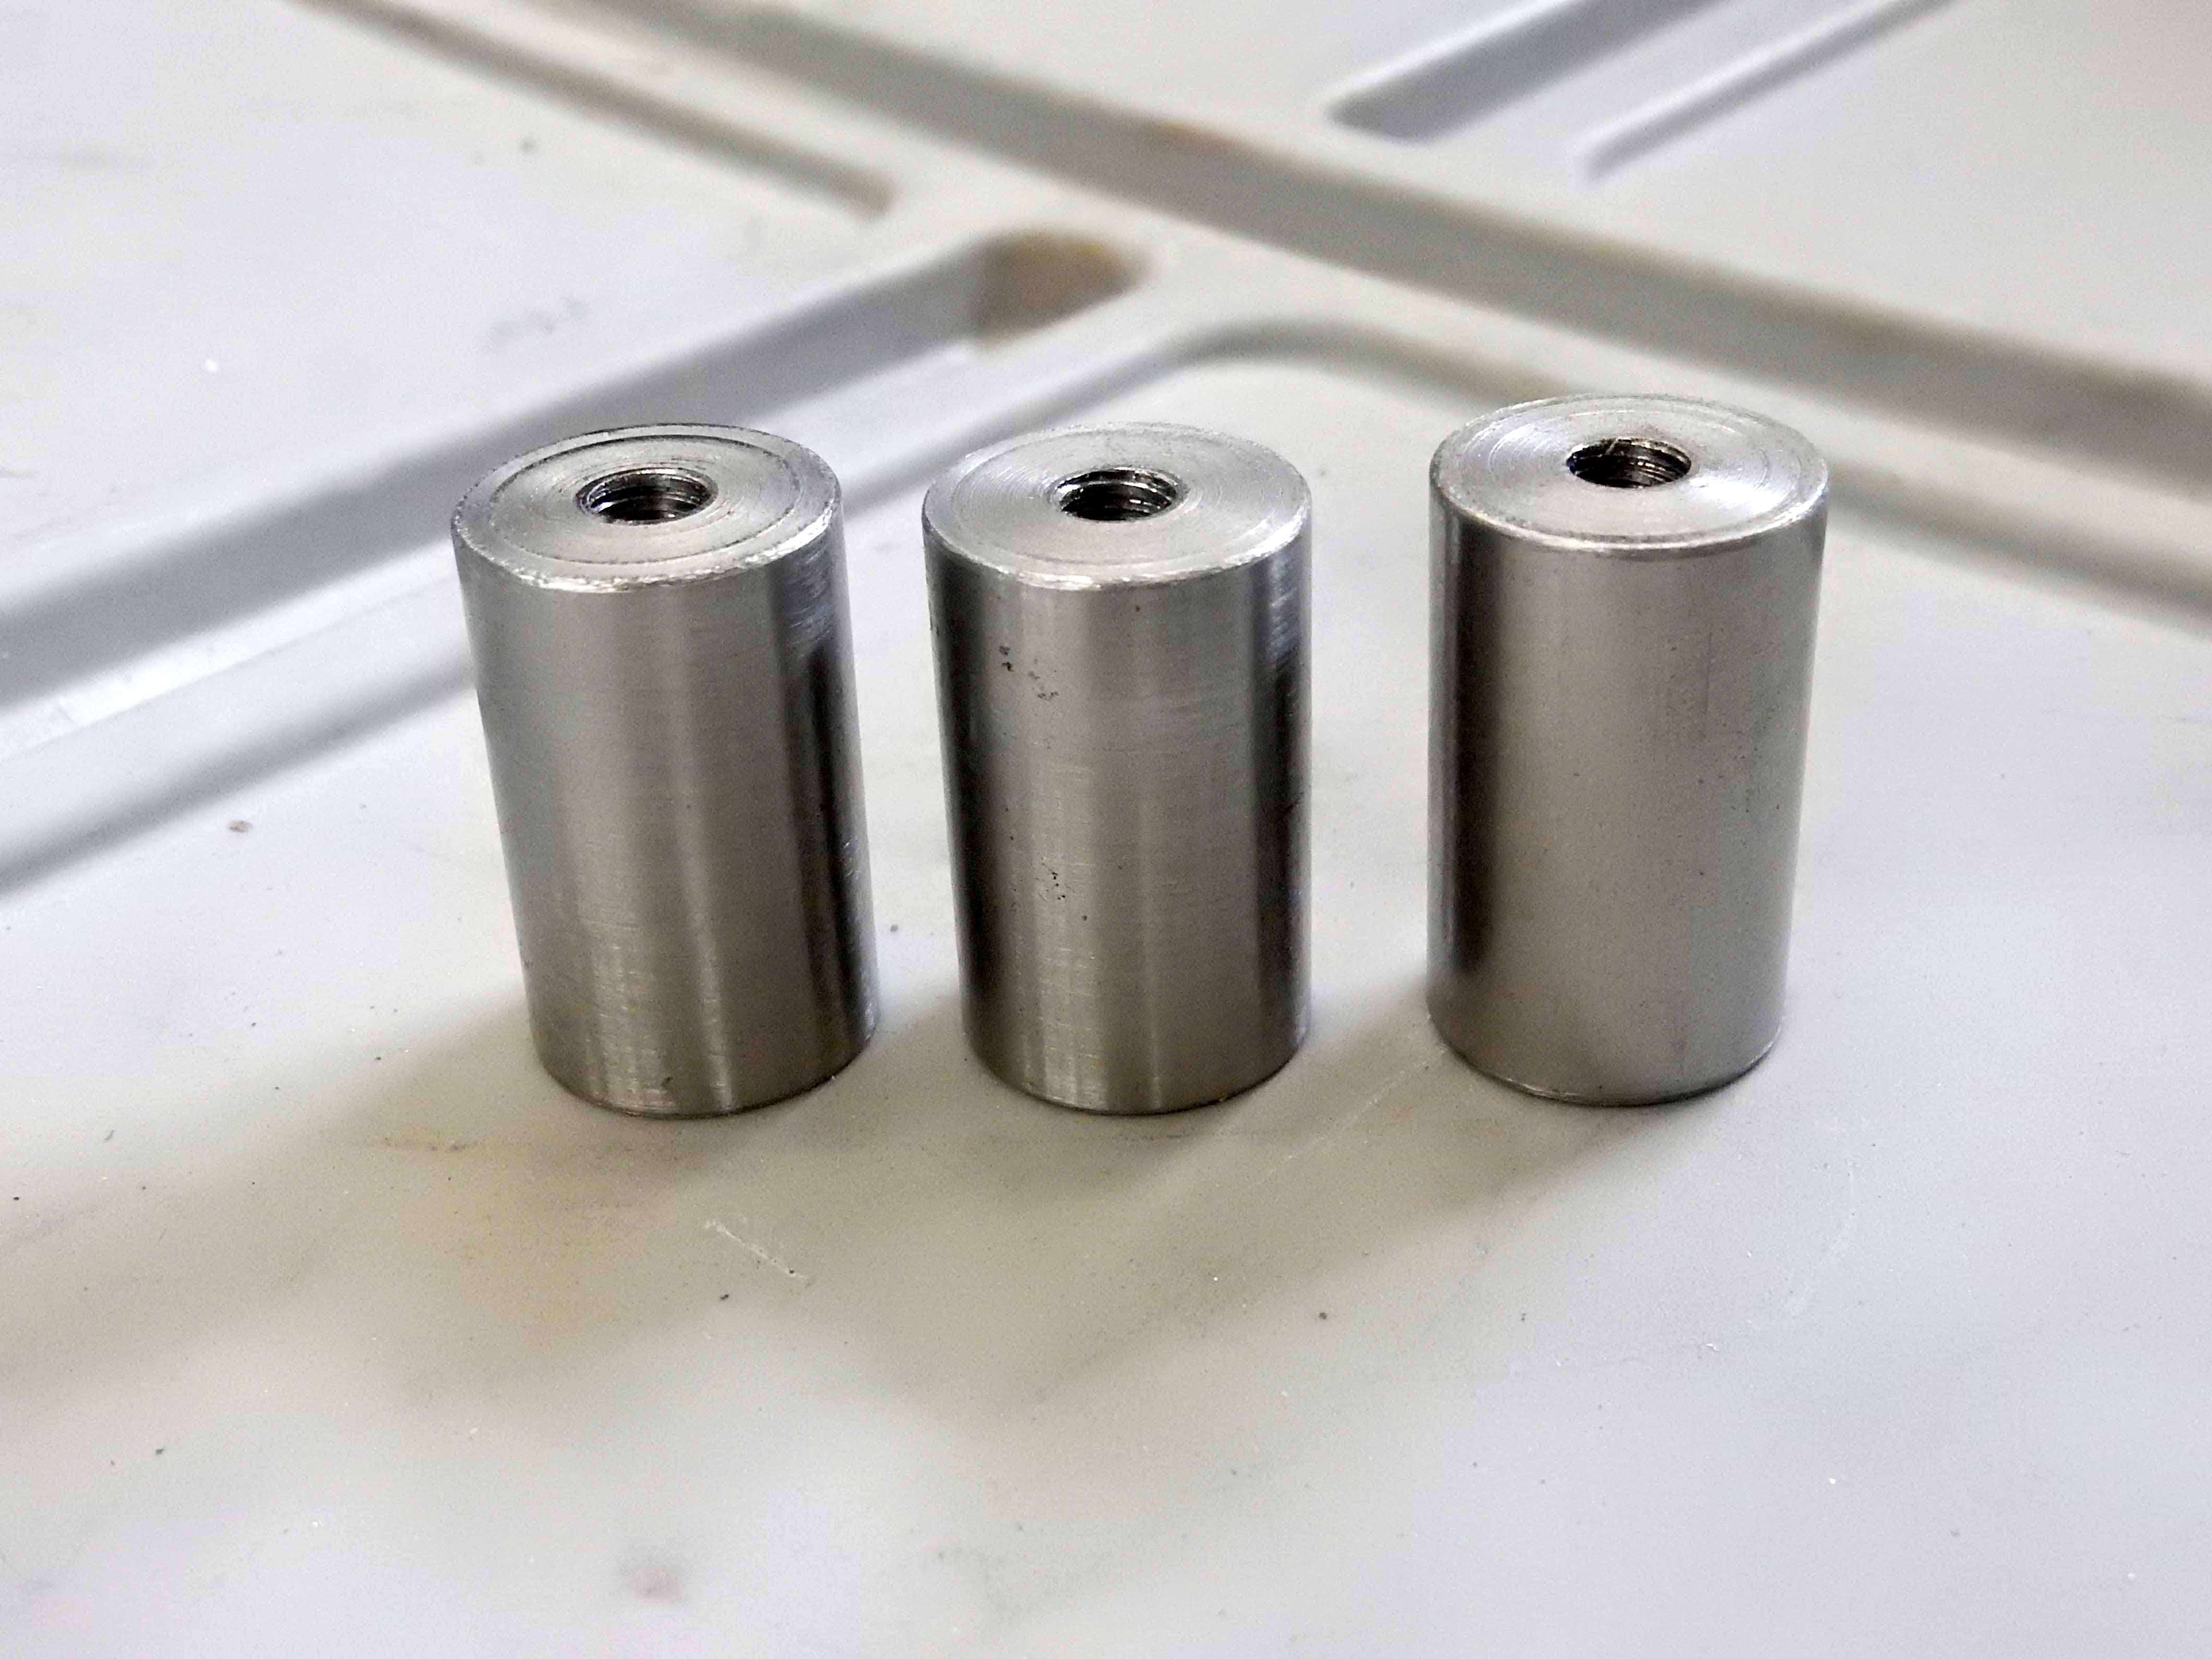
Then turned to the ignition module spacer.  The idea of making 3/4" diameter pieces 1 1/4" long using a hole saw on a 1 1/4" thick block of aluminum didn't pan out.  So I went back to the stainless.  And with a lot of patience I finally got the next two drilled and tapped 1/4-20 on both ends.  


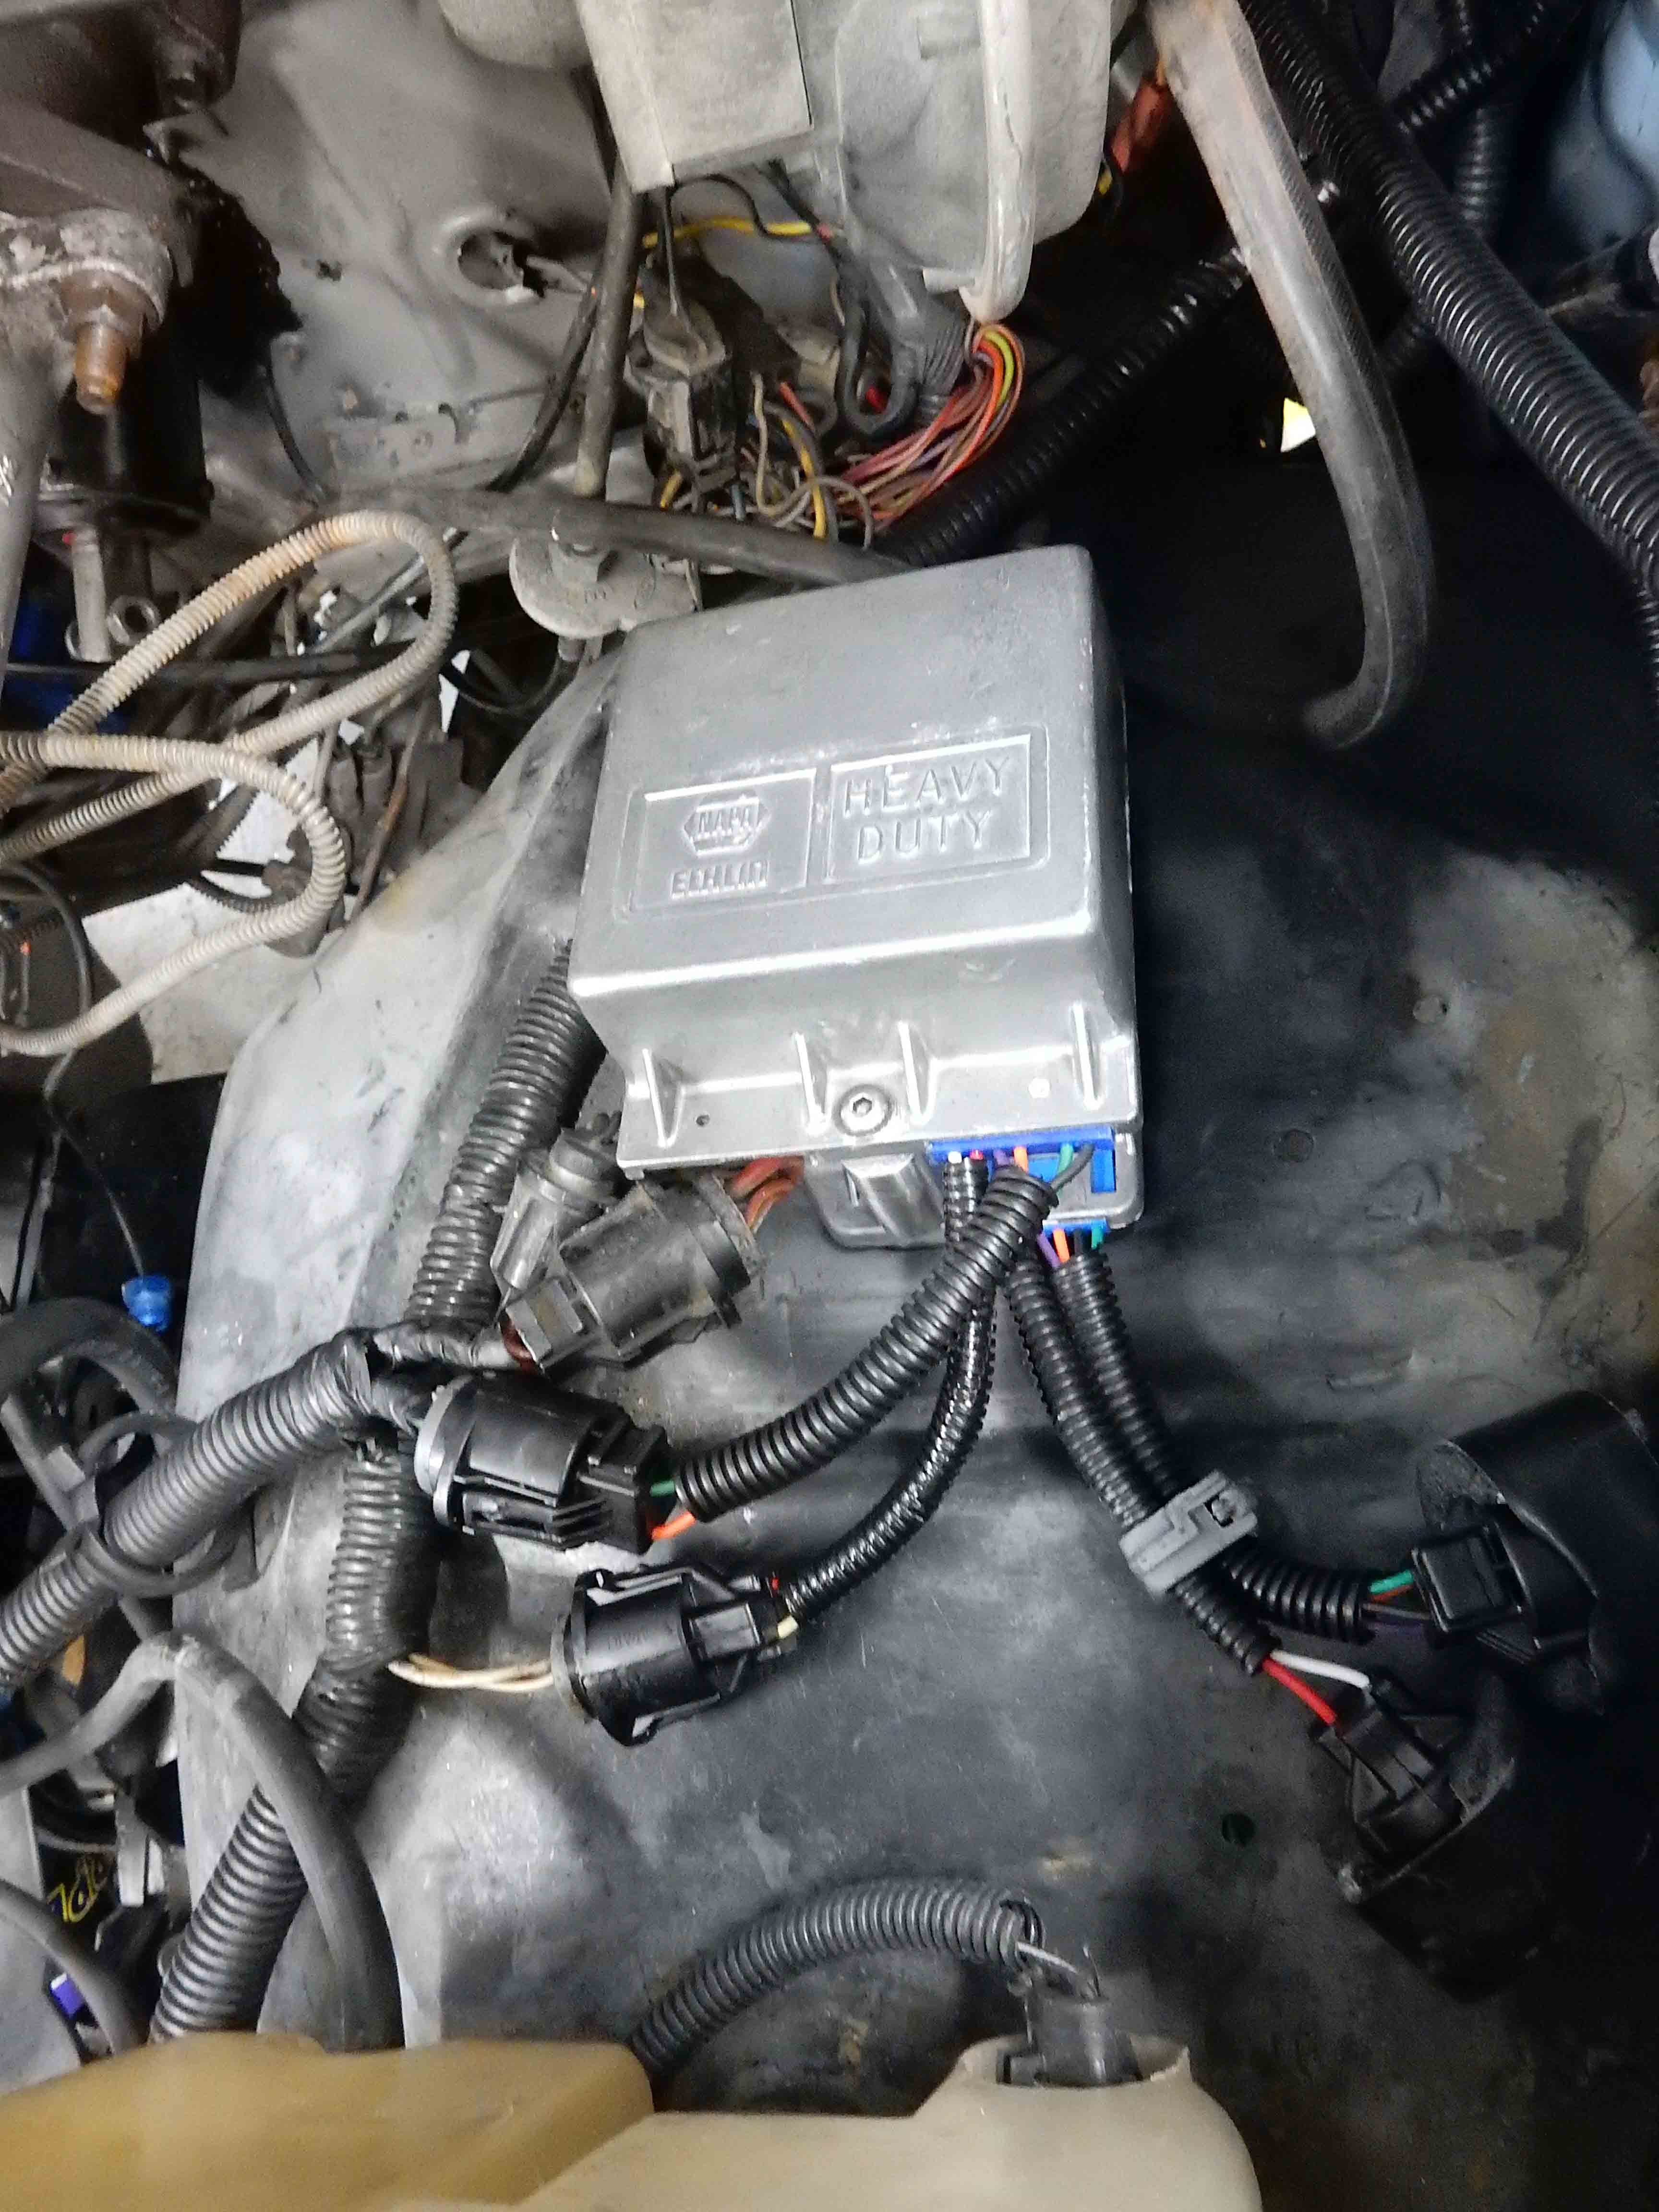
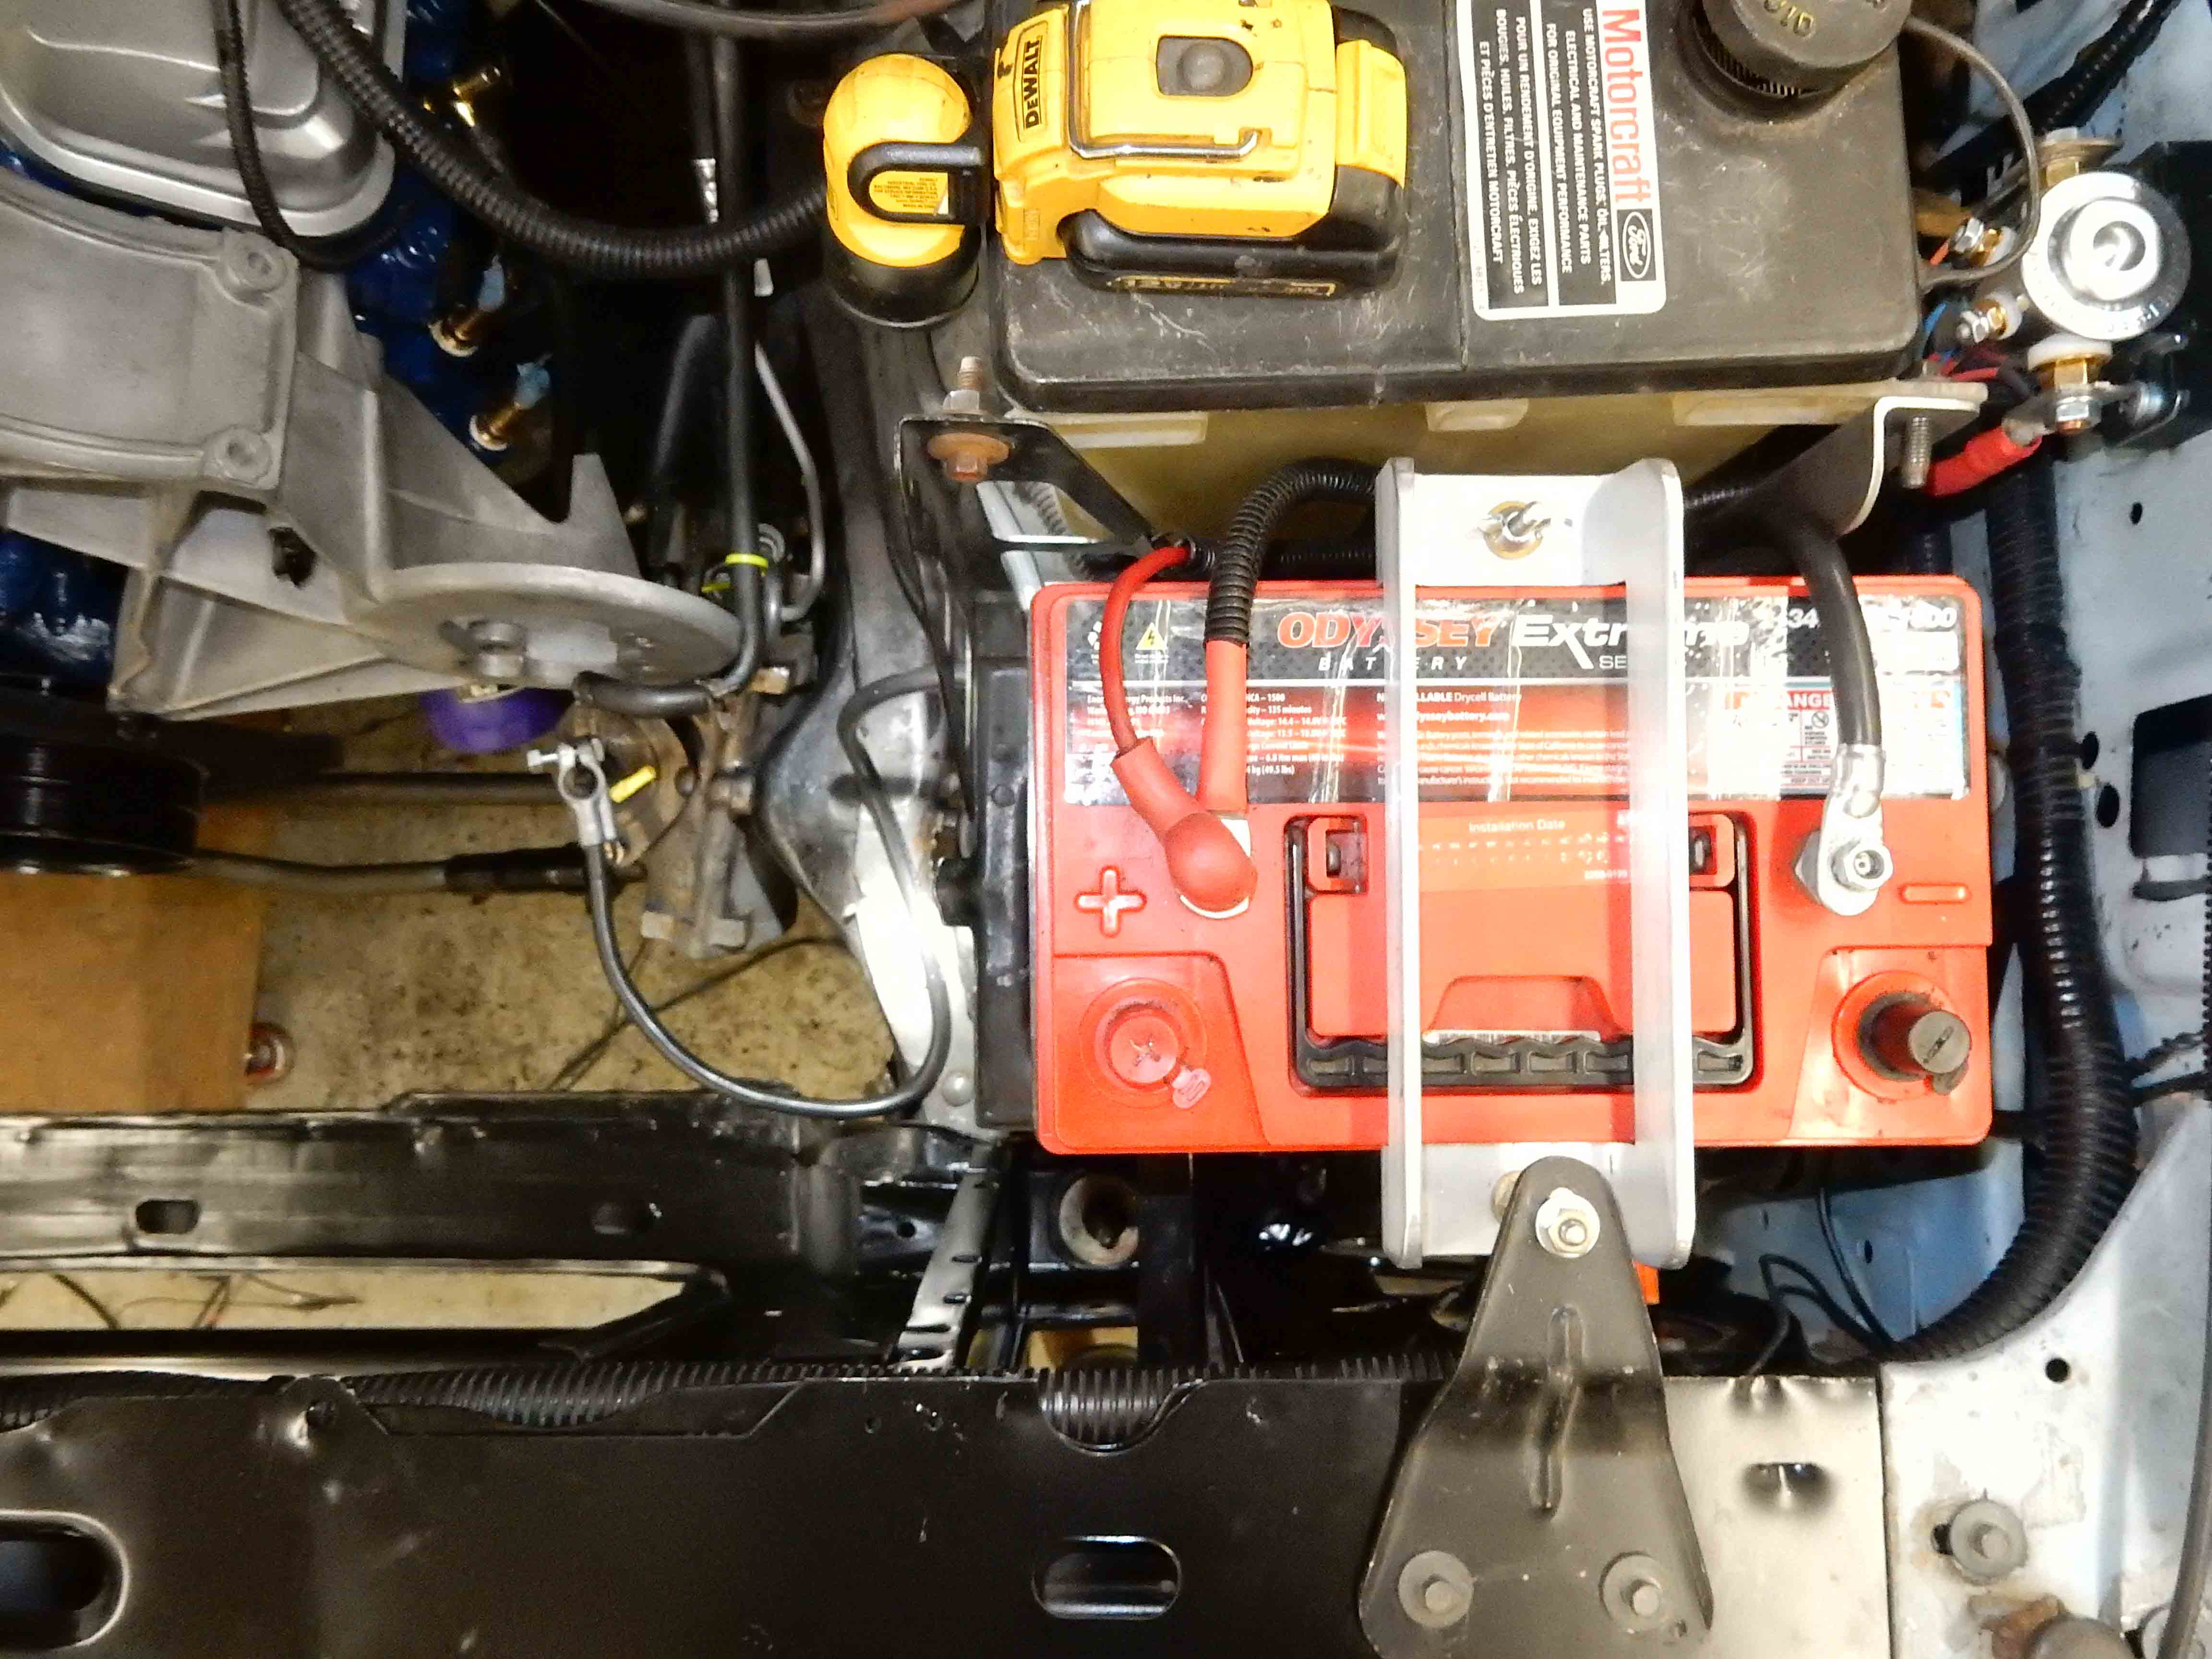
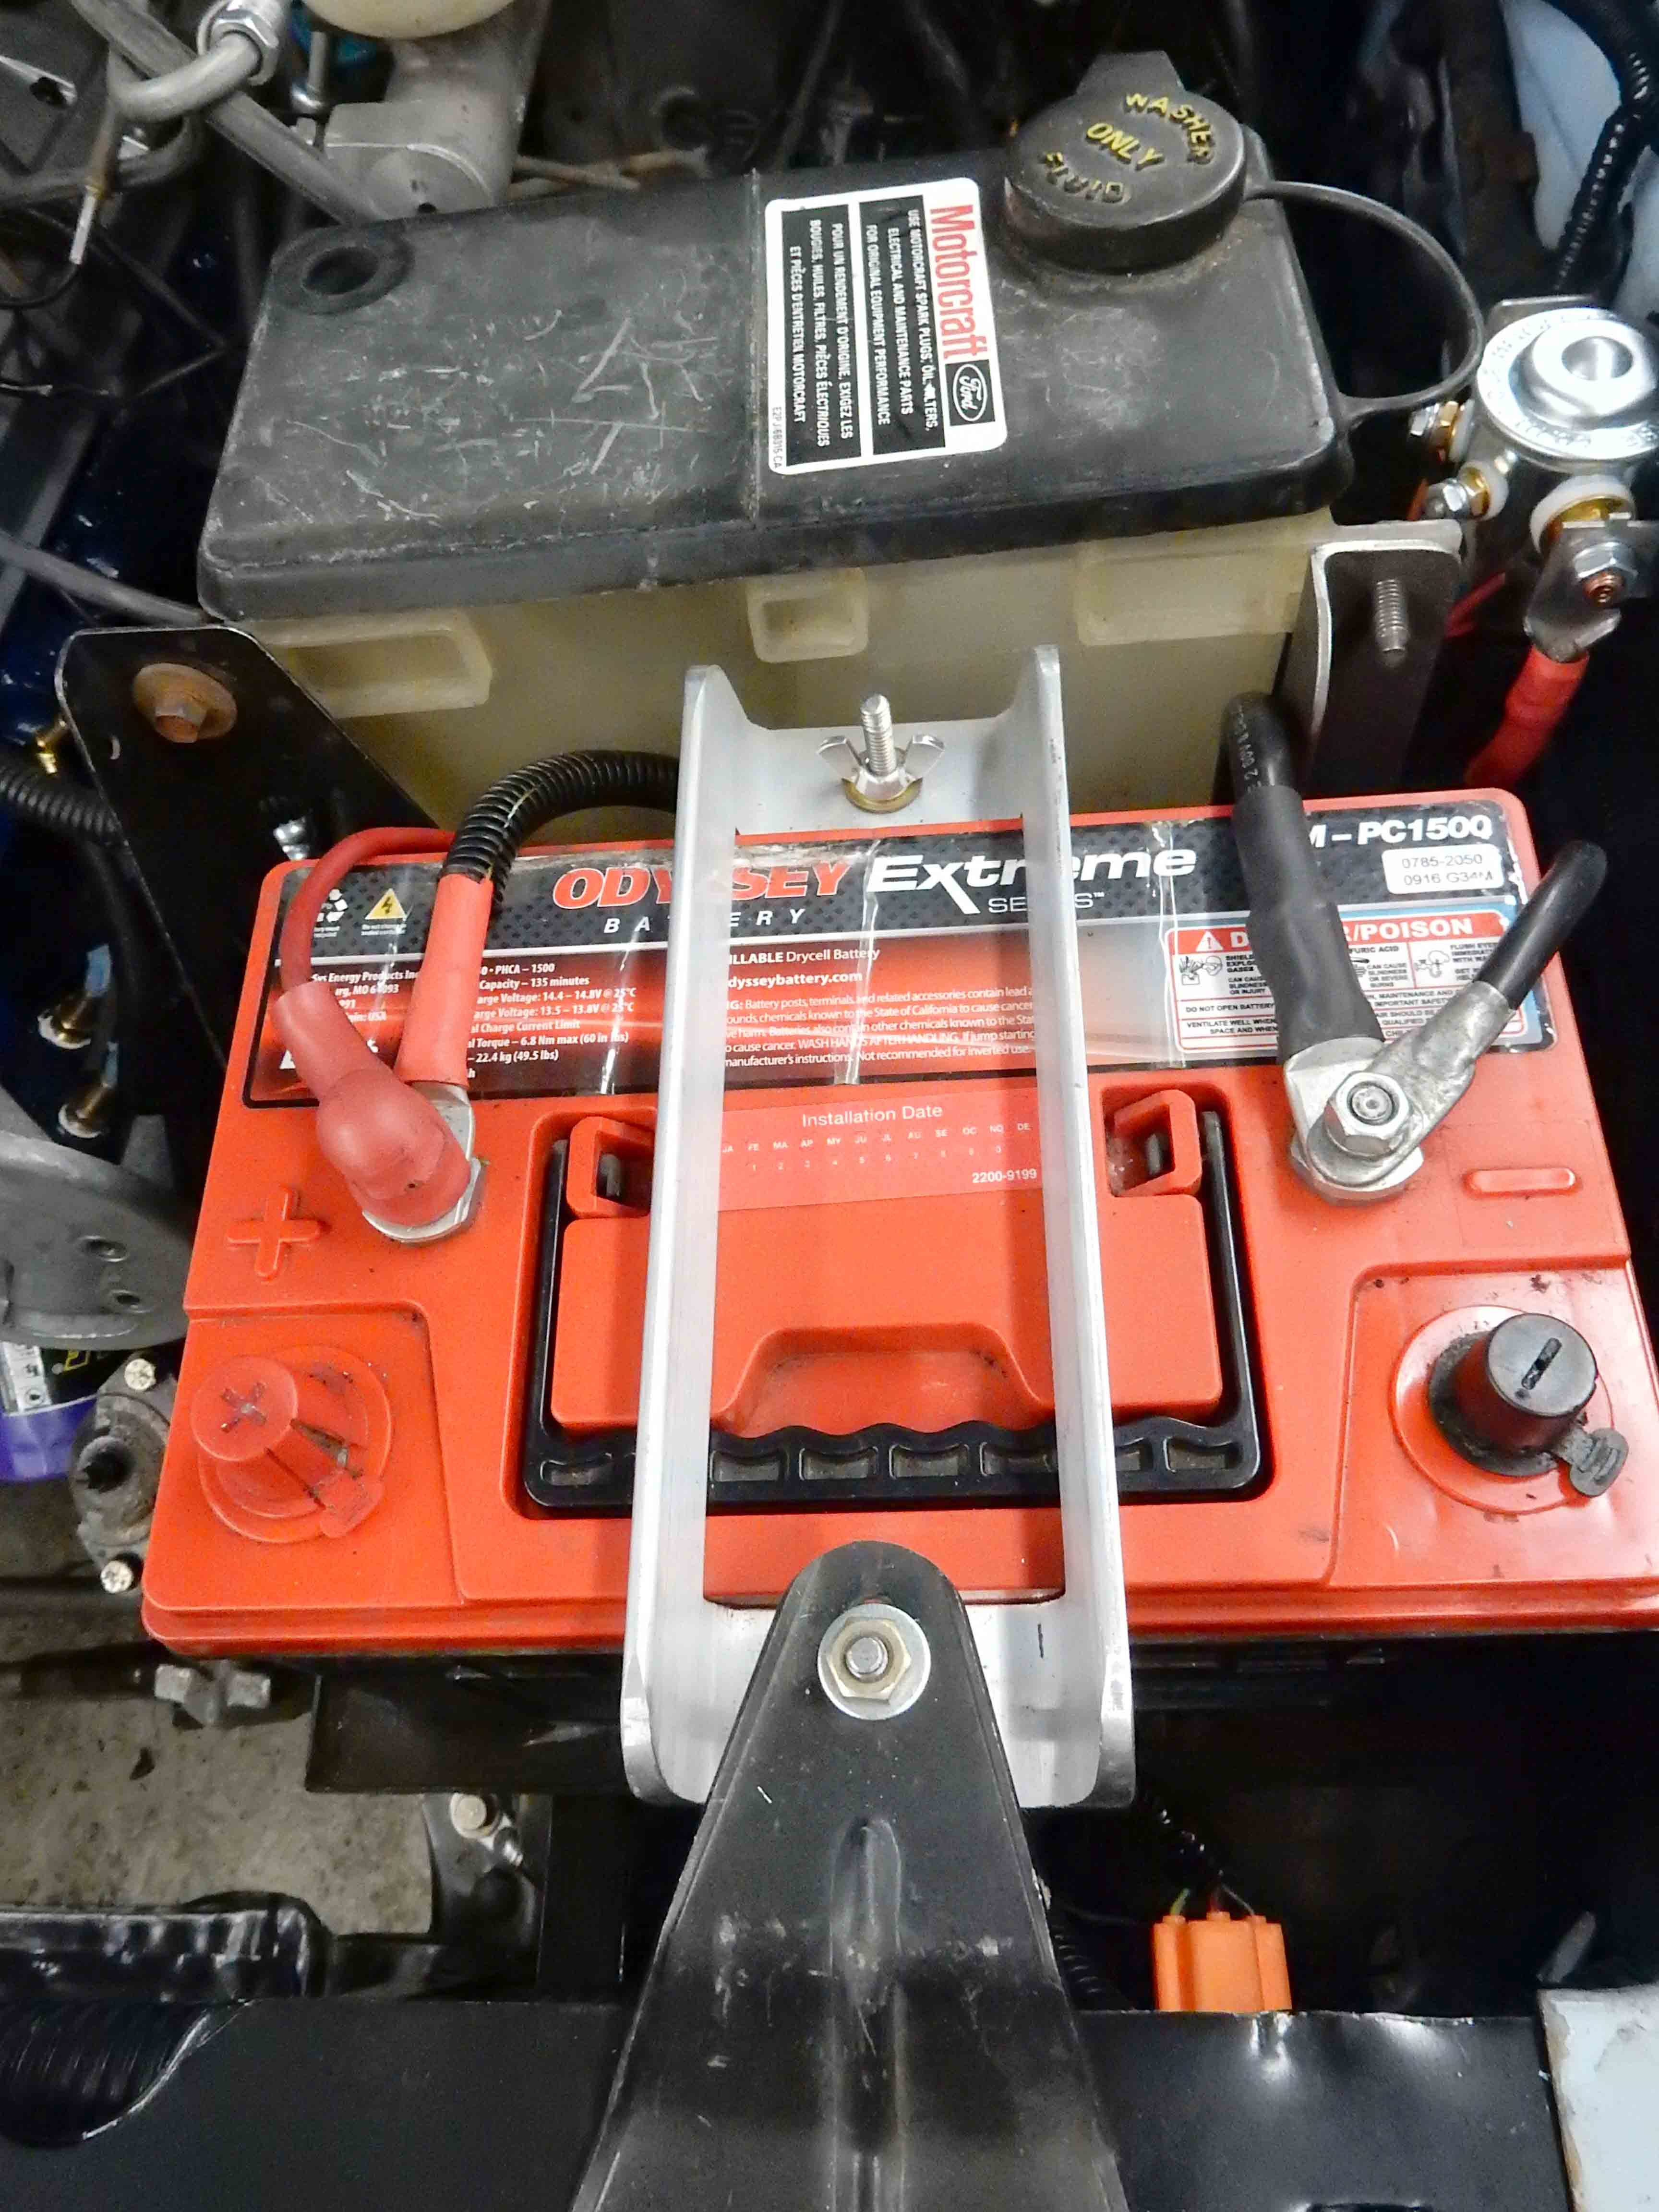
Then I decided to install a new module on the bottom since the old one has a flaky retard circuit.  Here's everything installed with plenty of aluminum-based anti-seize on everything, inc the interfaces between the aluminum modules and the stainless spacers:


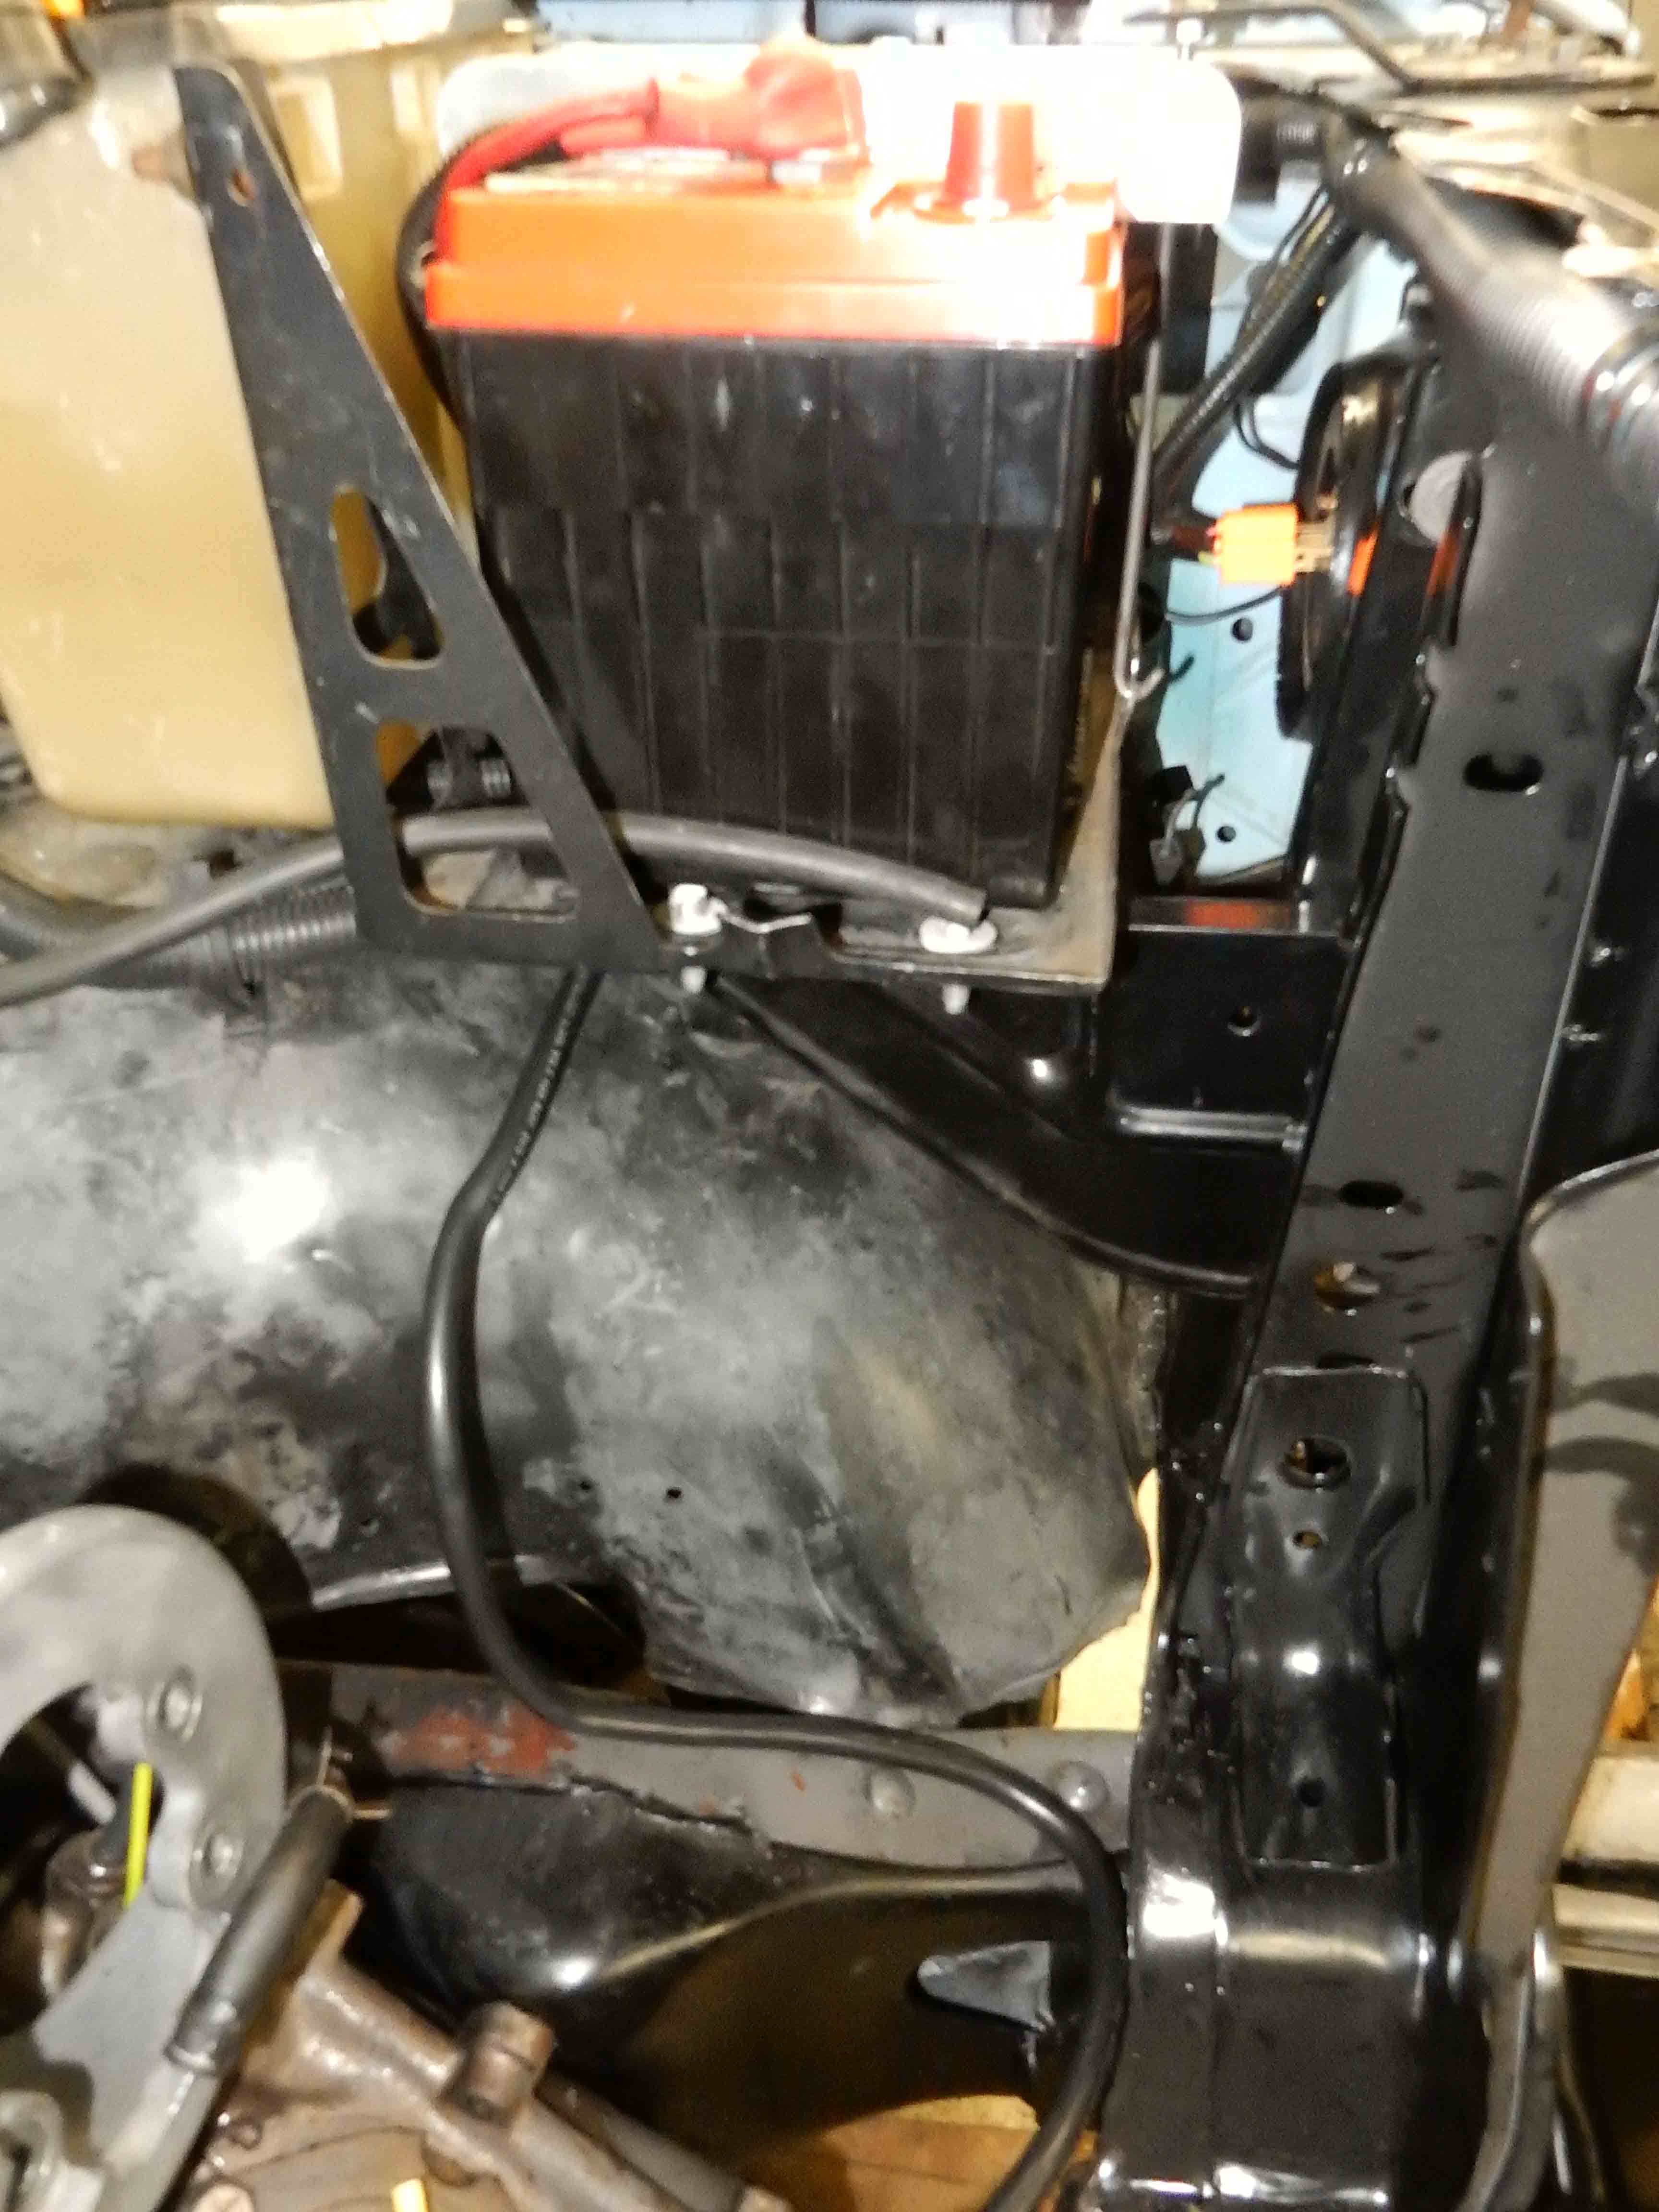
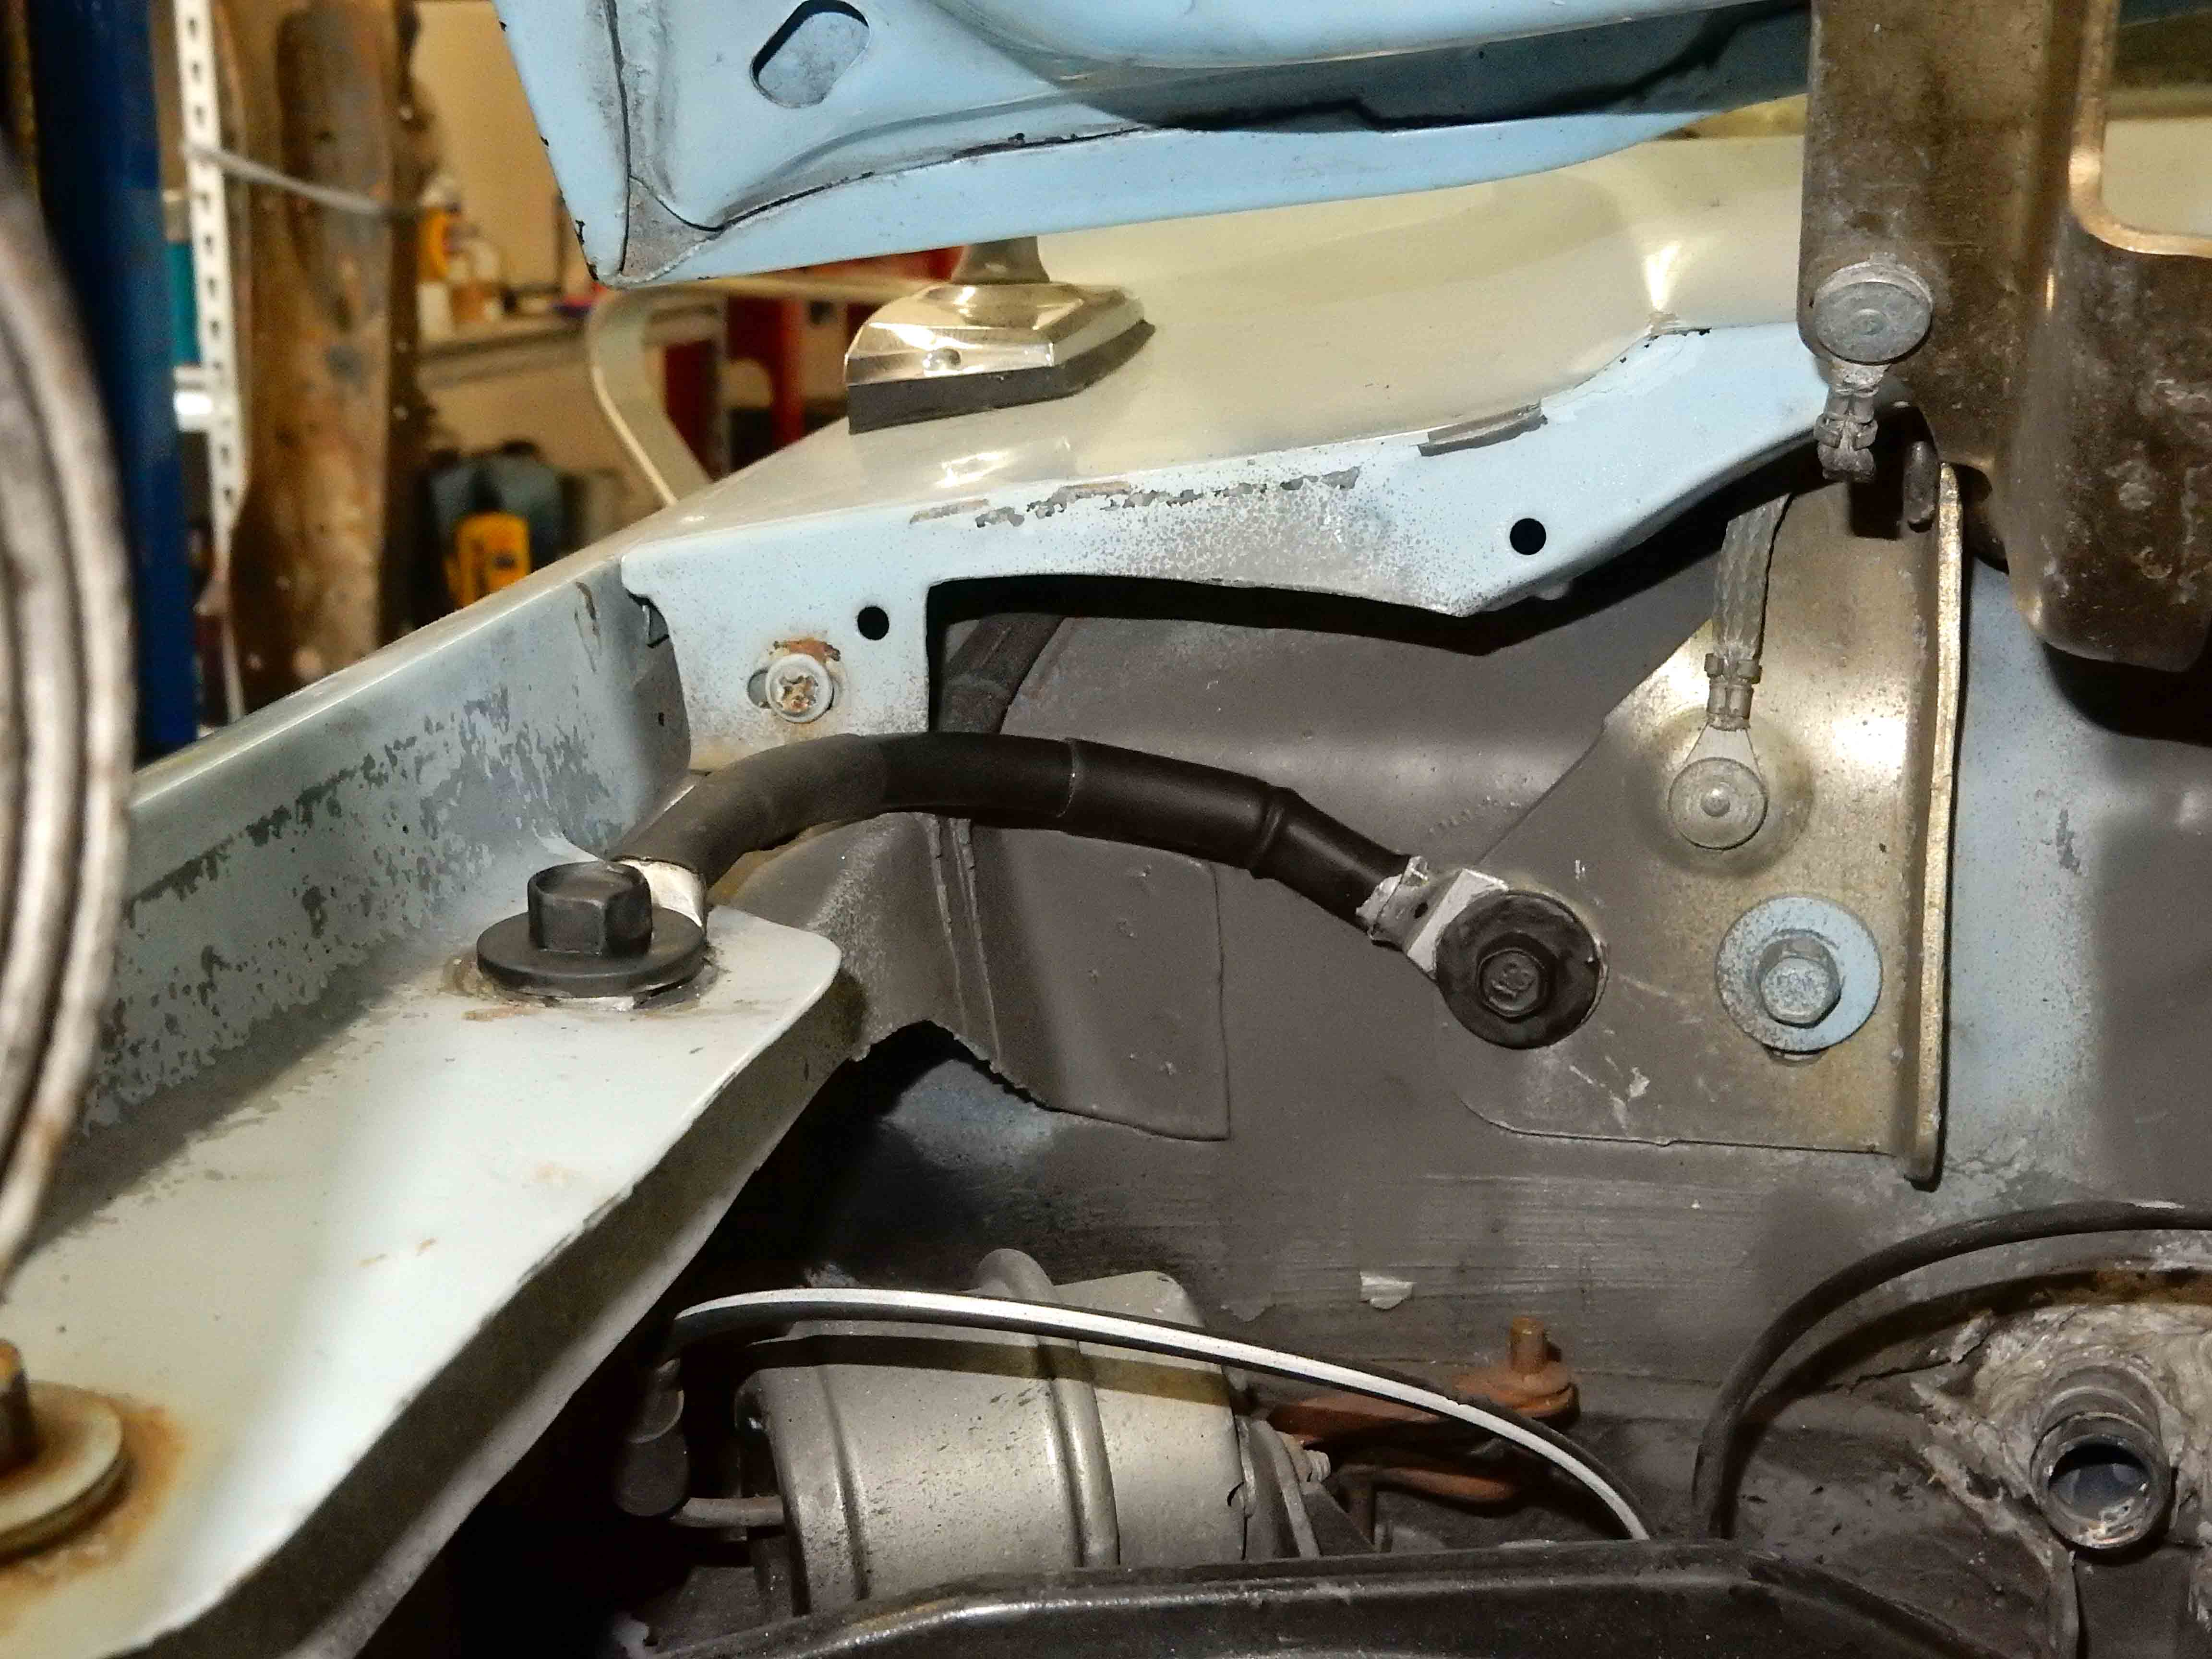
And now for the question.  In these pics the to-be #2 ground is snaked up through and onto the auxiliary battery's ground.  The other end is laying roughly where I'm thinking of drilling and tapping the frame.

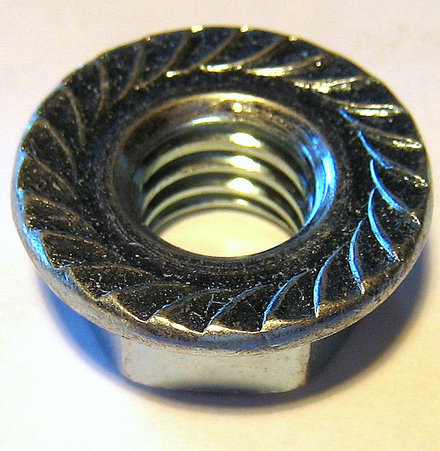
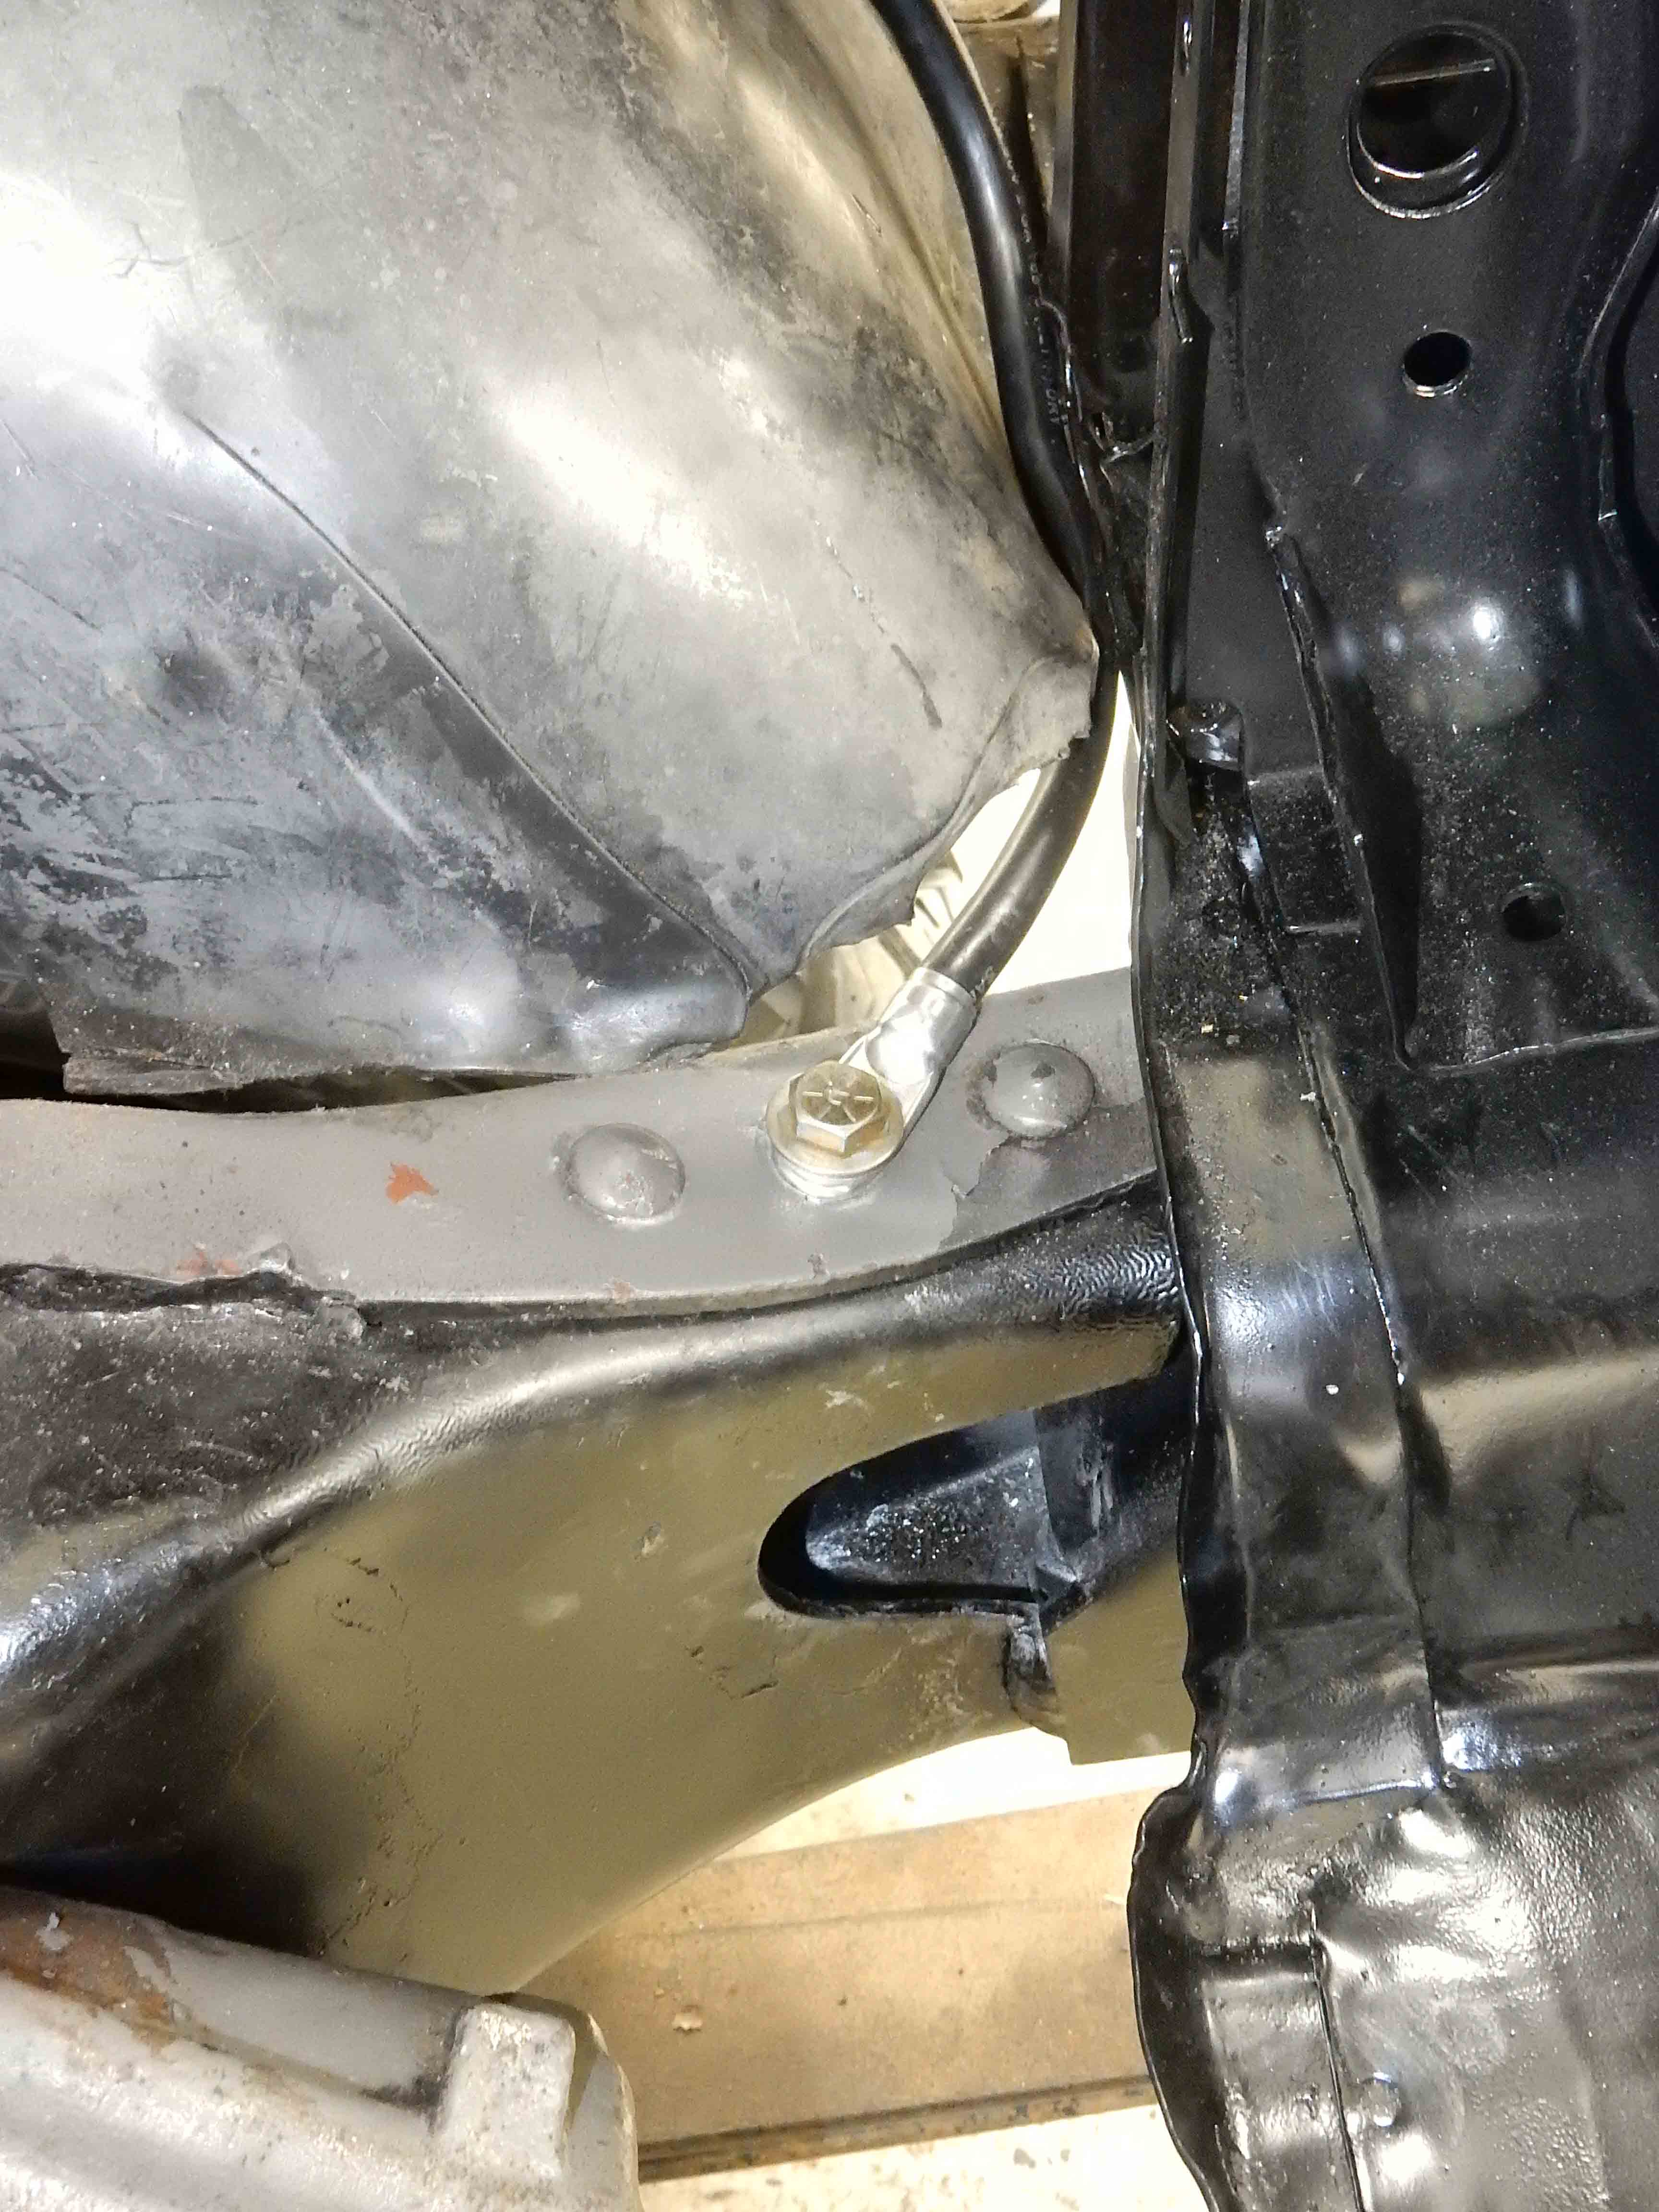
In the pic on the left you can see the spot roughly 1/2 way between the two rivets.  The hole would go through both the top of the frame as well as the frame liner, which is welded to the frame.  And there's an opening below that spot where I can get the serrated nut in to provide more surface area to the connection.

Sitting here looking at the pic on the left, I could angle the wire down the fender apron to the front, along with the other wires running there which you can see, and come to the same spot via a more protected and less conspicuous route.

Anyway, thoughts about that location for the ground?


Gary, AKA "Gary fellow": Profile

Dad's: '81 F150 Ranger XLT 4x4: Down for restomod: Full-roller "stroked 351M" w/Trick Flow heads & intake, EEC-V SEFI/E4OD/3.50 gears w/Kevlar clutches
Blue: 2015 F150 Platinum 4x4 SuperCrew wearing Blue Jeans & sporting a 3.5L EB & Max Tow
Big Blue: 1985 F250HD 4x4: 460/ZF5/3.55's, D60 w/Ox locker & 10.25 Sterling/Trutrac, Blue Top & Borgeson, & EEC-V MAF/SEFI

Reply | Threaded
Open this post in threaded view
|

Re: Big Blue's Transformation

85lebaront2
Administrator
Gary, re: ground for second battery, my question is why? Main load if it is engaged for cranking the engine will be to the engine. The later trucks do not rely on a bolted to the frame ground, a simple ground from the negative to the inner fender is what they use, and the headlight grounds are right above the headlights on the radiator support. Charging the aux. battery same thing, ground path is to the engine not the frame. On Darth, when I updated the wiring to 1996 style, I did keep the heavy right side negative cable to frame and block, but only the frame to block now. With the nice 1995 set Jim sent me the battery negative cable goes to the lower starter bolt/stud. Battery negative cable has a GM style ground pigtail to the inner side of the right front fender. I do still have the intake manifold to wiper mount ground.
Bill AKA "LOBO" Profile

"Getting old is inevitable, growing up is optional" Darth Vader 1986 F350 460 converted to MAF/SEFI, E4OD 12X3 1/2 rear brakes, traction loc 3:55 gear, 160 amp 3G alternator Wife's 2011 Flex Limited Daily Driver 2009 Flex Limited with factory tow package Project car 1986 Chrysler LeBaron convertible 2.2L Turbo II, modified A413

Reply | Threaded
Open this post in threaded view
|

Re: Big Blue's Transformation

Gary Lewis
Administrator
Bill - I have these cables:
  1. Positive:
    1. Main to PDB: new #2
    2. PDB to starter: new #2
    3. PDB to battery isolator: 1995 #4 with dual fuse links
    4. Battery isolator to aux battery: new #4
  2. Negative:
    1. Main to engine: new #2
    2. Engine to frame on passenger's side: new #2
    3. Main to passenger's fender: new #4
    4. Aux to driver's fender: new #4
    5. Passenger's fender to radiator support: new #10
    6. Driver's fender to radiator support: new #10

So with all those new cables I don't want to change the strategy. But, I have the ability to parallel batteries and if I do that and then hit Start the aux battery's return will be:

Block to the main battery via the #2
Main battery to the passenger's fender via the #4
Passenger's fender to the radiator support via the #10
Radiator support to the driver's fender via the #10
Driver's fender to the aux battery via the #4

In other words, I'll melt the #10's bonding the radiator support to the fenders. But, all I need to do is to put a ground from the aux battery to the frame and the route will be:

Block to frame on passenger's side
Across the engine crossmember to the frame on the driver's side
Frame to aux battery via the to-be #2 ground

No fried #10's and the auxiliary battery can contribute pretty well to the starting.

And all I'll have left to complete my grounding strategy are #10 grounds from the two fenders to the cab and then install the braided ground from the engine to the firewall.

Gary, AKA "Gary fellow": Profile

Dad's: '81 F150 Ranger XLT 4x4: Down for restomod: Full-roller "stroked 351M" w/Trick Flow heads & intake, EEC-V SEFI/E4OD/3.50 gears w/Kevlar clutches
Blue: 2015 F150 Platinum 4x4 SuperCrew wearing Blue Jeans & sporting a 3.5L EB & Max Tow
Big Blue: 1985 F250HD 4x4: 460/ZF5/3.55's, D60 w/Ox locker & 10.25 Sterling/Trutrac, Blue Top & Borgeson, & EEC-V MAF/SEFI

Reply | Threaded
Open this post in threaded view
|

Re: Big Blue's Transformation

ArdWrknTrk
Administrator
In reply to this post by Gary Lewis
Wait, you have a TP40 that doesn't retard properly?

So, right about where that brilliant glare is in the right hand pic?
Hopefully that isn't a foretelling of the arc when that bolt comes loose!

I like the idea of running the cable forward under the battery tray and back along the rail.
Not that I've ever had an issue, but it doesn't seem prudent to have anything out in the open, in line with the belts or fan blades.
 Jim,
Lil'Red is a '87 F250 HD, 4.10's, 1356 4x4, Zf-5, 3G, PMGR, Saginaw PS, desmogged with a Holley 80508 and Performer intake.
Too much other stuff to mention.
Reply | Threaded
Open this post in threaded view
|

Re: Big Blue's Transformation

Gary Lewis
Administrator
Yes.  In his post of Apr 10, 2020; 10:39am, Scott provided a link to my post back on FTE where I tested those two modules.  You said "I think you should just use a timing light, then apply power to the 'retard' wire and see if the marks move back towards tdc."

I did and discovered that the module that was on BB when I got him didn't always retard the spark.  Which is why I moved him to backup duty.  But while I was working on this yesterday I to that module out and installed a new one in its place.  And then wrote "Doesn't always retard" on it with a red Sharpie and put him back on the shelf.

As for the ground, I see what you are saying.  I'll route the wire forward and install the ground.  Thanks.

Gary, AKA "Gary fellow": Profile

Dad's: '81 F150 Ranger XLT 4x4: Down for restomod: Full-roller "stroked 351M" w/Trick Flow heads & intake, EEC-V SEFI/E4OD/3.50 gears w/Kevlar clutches
Blue: 2015 F150 Platinum 4x4 SuperCrew wearing Blue Jeans & sporting a 3.5L EB & Max Tow
Big Blue: 1985 F250HD 4x4: 460/ZF5/3.55's, D60 w/Ox locker & 10.25 Sterling/Trutrac, Blue Top & Borgeson, & EEC-V MAF/SEFI

Reply | Threaded
Open this post in threaded view
|

Re: Big Blue's Transformation

ArdWrknTrk
Administrator
I remember saying that.
But I thought you'd notice the timing mark more than the idle speed under no load.

The TVS does the same, in reverse, when the engine starts to overheat.
It sends direct manifold vacuum to the DSII distributor, rather than routing it through the Vacuum Restrictor.
This pulls in a little more advance, and ups the idle speed.
If stuck in traffic, the fan turns faster and the pump circulates more coolant.

I hadn't realized you installed a new module on top, so I was wondering why you'd bothered to put it back.  
 Jim,
Lil'Red is a '87 F250 HD, 4.10's, 1356 4x4, Zf-5, 3G, PMGR, Saginaw PS, desmogged with a Holley 80508 and Performer intake.
Too much other stuff to mention.
Reply | Threaded
Open this post in threaded view
|

Re: Big Blue's Transformation

Gary Lewis
Administrator
The timing is the key, although the RPM is a factor.

I'd thought about this, but decided to do some math.  All the box can do is delay a fixed period of time from when the dizzy says to spark.  And in my test the timing got retarded 4 degrees.  So:

RPM = 600
Rev/sec = 10
Degrees/Sec = 3600
4 degrees = 0.001 second

Looks to me like the box delays the spark about 1 millisecond.
Gary, AKA "Gary fellow": Profile

Dad's: '81 F150 Ranger XLT 4x4: Down for restomod: Full-roller "stroked 351M" w/Trick Flow heads & intake, EEC-V SEFI/E4OD/3.50 gears w/Kevlar clutches
Blue: 2015 F150 Platinum 4x4 SuperCrew wearing Blue Jeans & sporting a 3.5L EB & Max Tow
Big Blue: 1985 F250HD 4x4: 460/ZF5/3.55's, D60 w/Ox locker & 10.25 Sterling/Trutrac, Blue Top & Borgeson, & EEC-V MAF/SEFI

Reply | Threaded
Open this post in threaded view
|

Re: Big Blue's Transformation

ArdWrknTrk
Administrator
About four degrees is what I have noted.

Glad to see your math works out.
 Jim,
Lil'Red is a '87 F250 HD, 4.10's, 1356 4x4, Zf-5, 3G, PMGR, Saginaw PS, desmogged with a Holley 80508 and Performer intake.
Too much other stuff to mention.
Reply | Threaded
Open this post in threaded view
|

Re: Big Blue's Transformation

Gary Lewis
Administrator
Didn't get much done on the truck today, but I did get to Zoom with my grandkids.  

Anyway, I did drill and tap the frame and frame liner.  Man, that is a pain to do 'cause you can't get to it very easily.  And, because it is so thick.  There must be 3/8" of metal in there.

And, I crimped a new connector on the #2 cable and installed it.  I'm quite confident that the aux battery is now well and truly grounded to the frame - especially given the serrated nut on the bottom of that bolt.  And, with the anti-seize it won't be rusting any time soon.

And yes, I used a G8 3/8-16 bolt.  My reasoning was that if I'm going to drill a hole in the top flange of the frame I want it to contribute to the strength.  So it is torqued down tightly and the serrated nut is tight as well, thereby clamping the liner a bit tighter to the frame.

Gary, AKA "Gary fellow": Profile

Dad's: '81 F150 Ranger XLT 4x4: Down for restomod: Full-roller "stroked 351M" w/Trick Flow heads & intake, EEC-V SEFI/E4OD/3.50 gears w/Kevlar clutches
Blue: 2015 F150 Platinum 4x4 SuperCrew wearing Blue Jeans & sporting a 3.5L EB & Max Tow
Big Blue: 1985 F250HD 4x4: 460/ZF5/3.55's, D60 w/Ox locker & 10.25 Sterling/Trutrac, Blue Top & Borgeson, & EEC-V MAF/SEFI

Reply | Threaded
Open this post in threaded view
|

Re: Big Blue's Transformation

Gary Lewis
Administrator
Another "didn't get much done on the truck" day, but I did get the fender-to-cab grounds on.

As you can see, I used the fender mounting bolts and the hood hinge mounting bolts to do that.  But, it wasn't quite that simple.  The bolts were rusty, so I media blasted them so I'd have clean metal.  Then I "painted" everything but the head and top of the washer with aluminum-based anti-seize.

On the fenders I marked where the terminal would hit and took that area down to bare, shiny metal with the Dremel, and then painted that with anti-seize.

But the hood hinge was clean so I didn't bother it.  However, it wasn't actually the target.  Instead, the welded-on nuts inside of the cab were the target.  And to ensure they were clean I ran a tap through them.

And once everything was together I cleaned the tops of the washers and the bolt heads and painted them.

So, with all that and #4 wires on both sides I think the fenders are well and truly bonded to the cab.


And, while I was at it I replaced the following monstrosity that was holding the fender to the cab on the driver's side.  Apparently  
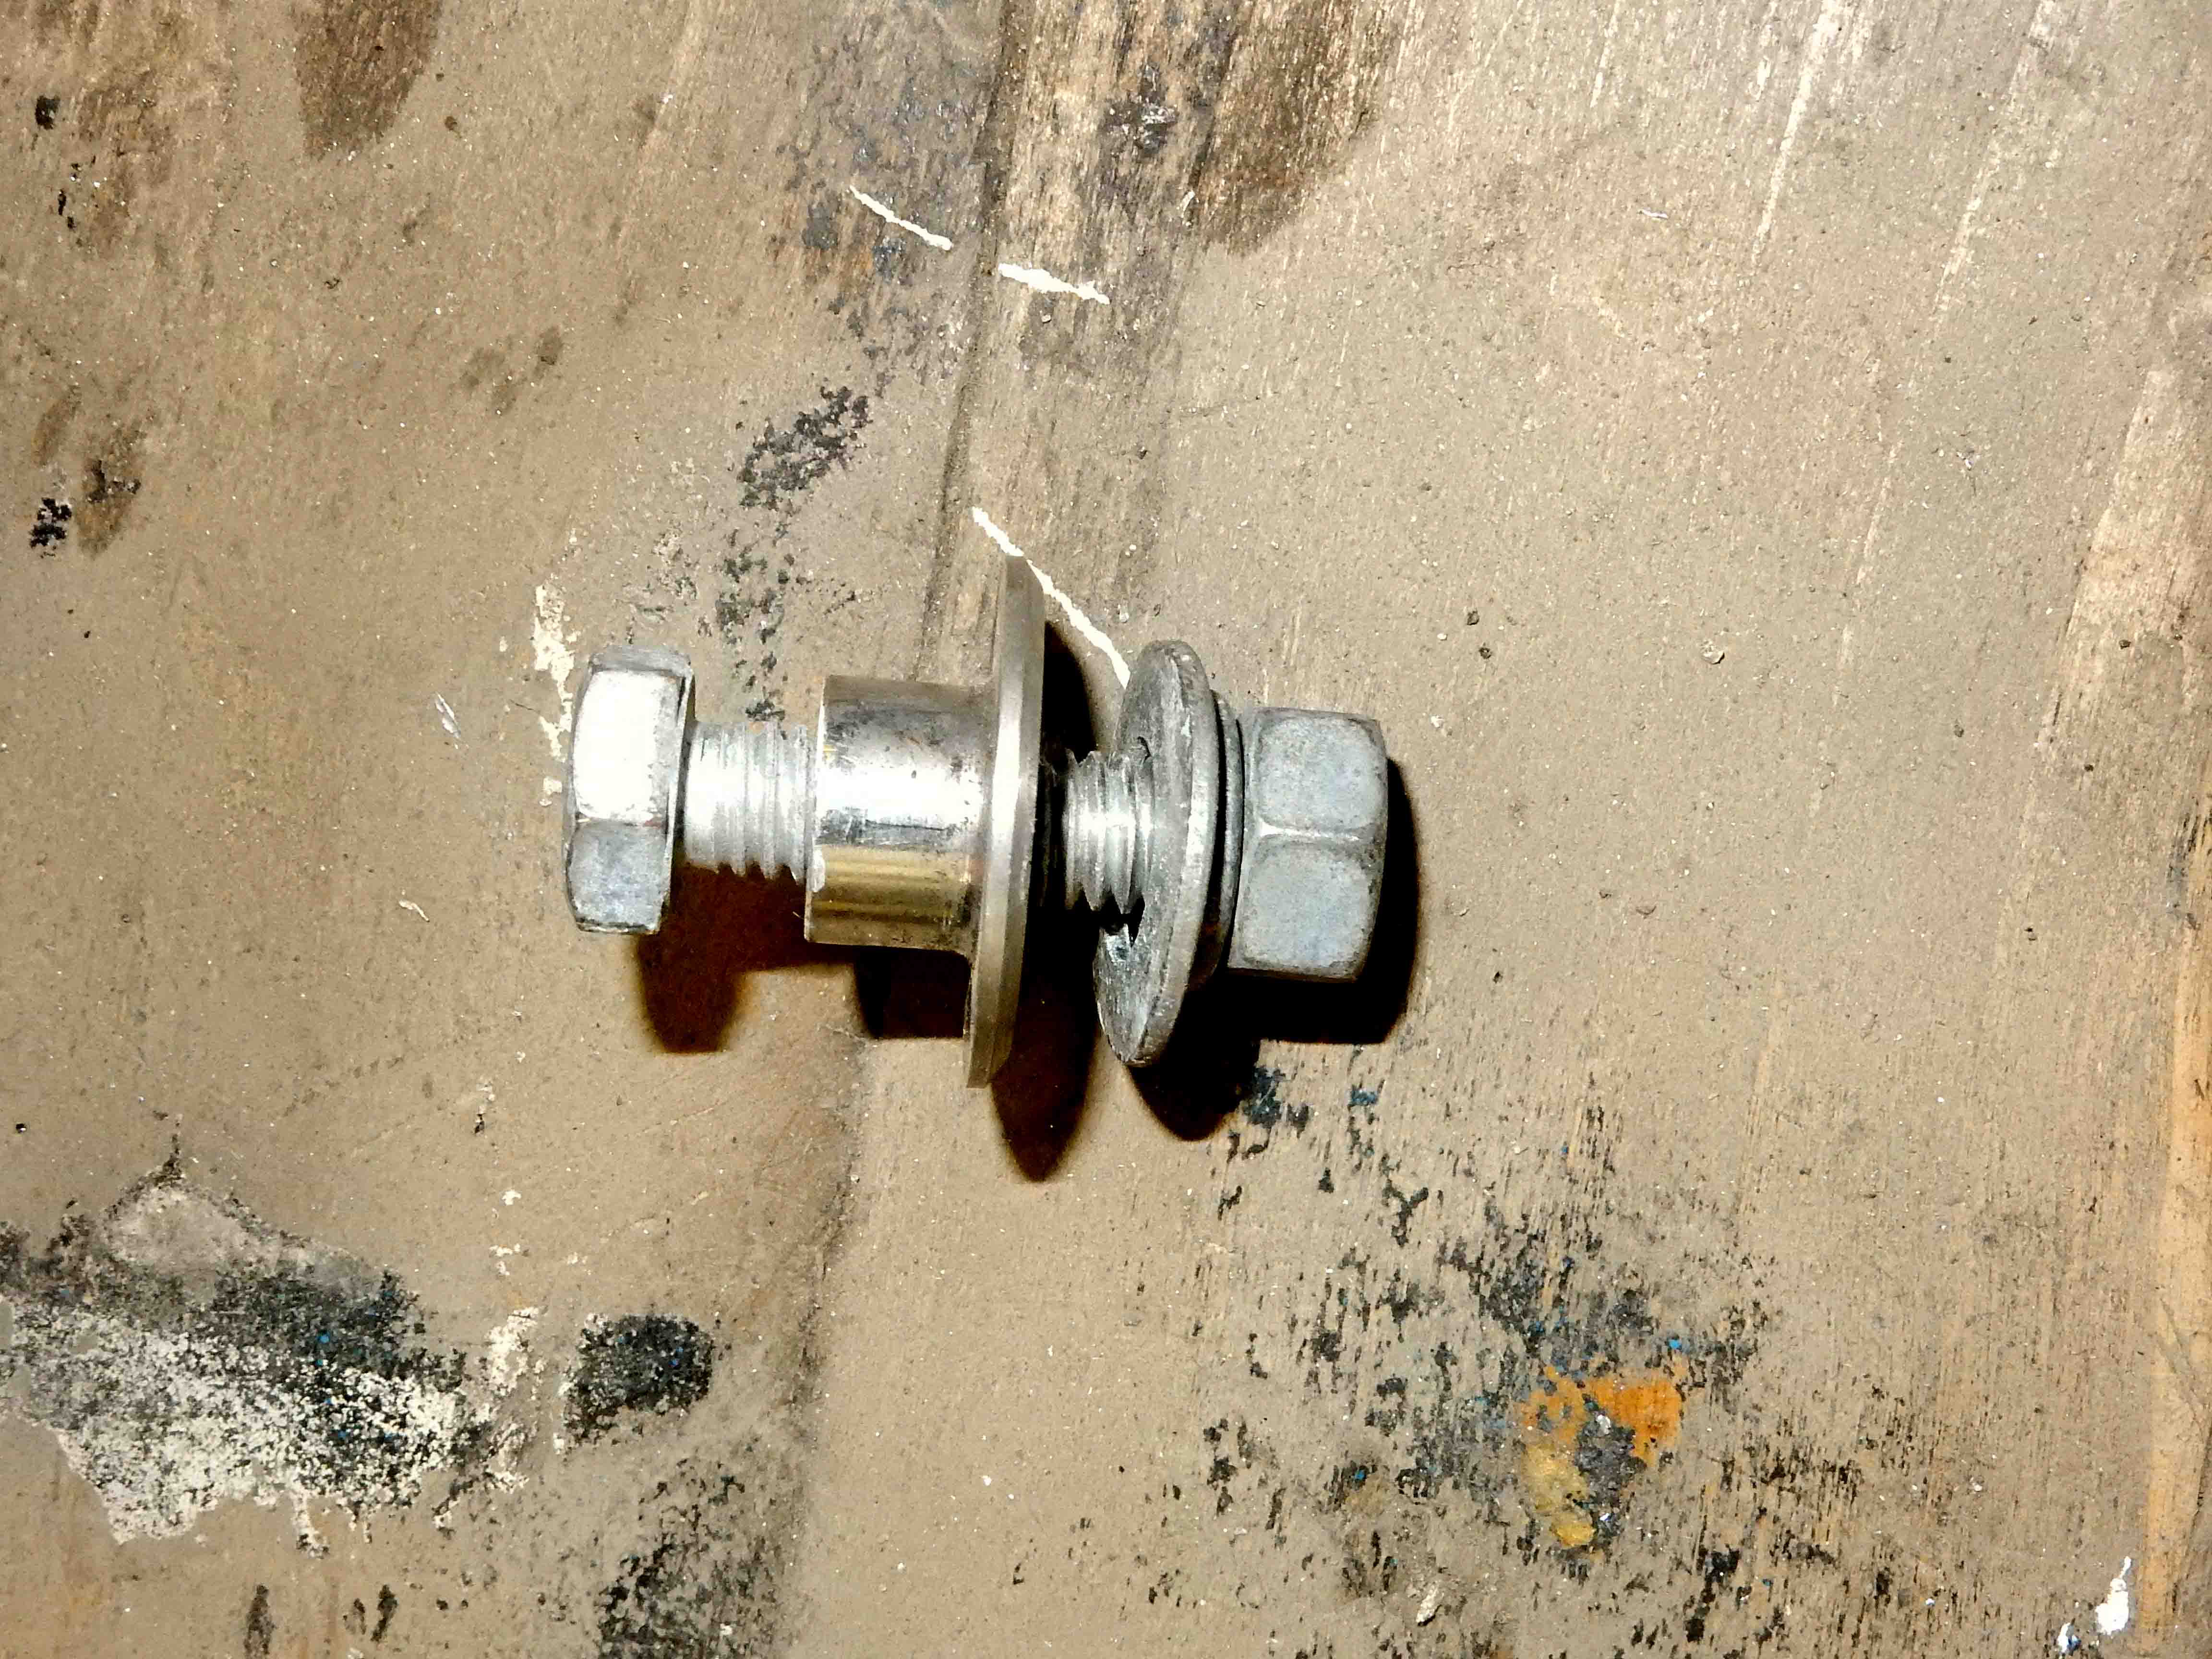
couldn't find the sheetmetal nut on the arm extending out from the cab, so used that arrangement.  I noticed the edge of the nut showing when I pulled the nut/bolt/washer combo off, so pulled the other bolt, pried up on the fender, and slid the sheetmetal nut into position.  Then I found the right bolt/washer combo used that.  

Gary, AKA "Gary fellow": Profile

Dad's: '81 F150 Ranger XLT 4x4: Down for restomod: Full-roller "stroked 351M" w/Trick Flow heads & intake, EEC-V SEFI/E4OD/3.50 gears w/Kevlar clutches
Blue: 2015 F150 Platinum 4x4 SuperCrew wearing Blue Jeans & sporting a 3.5L EB & Max Tow
Big Blue: 1985 F250HD 4x4: 460/ZF5/3.55's, D60 w/Ox locker & 10.25 Sterling/Trutrac, Blue Top & Borgeson, & EEC-V MAF/SEFI

Reply | Threaded
Open this post in threaded view
|

Re: Big Blue's Transformation

ArdWrknTrk
Administrator
Another didn't get anything done on the truck today....
But at least the wind and rain have blown by.
The tree frogs are very amorous with all this fresh water for them.
Their peeping is amazingly loud.

Sometimes I think that  couldn't find his  🐟  with both hands..
 Jim,
Lil'Red is a '87 F250 HD, 4.10's, 1356 4x4, Zf-5, 3G, PMGR, Saginaw PS, desmogged with a Holley 80508 and Performer intake.
Too much other stuff to mention.
Reply | Threaded
Open this post in threaded view
|

Re: Big Blue's Transformation

Gary Lewis
Administrator
I've noticed the birds being loud here these days.  I think it may have something to do with so little background noise.

As for , the thing today was just so bizarre!  The nut was there.  I could see it.  All it took was 5 minutes to loosen the other bolt, pry a bit, and slide it over.  But no, he had to leave it to the front and clamp down with another bolt, which bent the tab on the fender over that nut.  It's ok as it went back fairly well when I clamped down with the bolt and washer, but it was just the sheer stupidity of it.  

I probably ought to make a list, which would include: wiring around the inertia switch and oil pressure switch awa the resistance wire to the fuel pump; hacking up the crossmember; hacking up the radiator support; putting the fluid on top of the liner in the clutch master; the bolt today on the fender; having only 3 of 6 bolts in the driver's side perch; etc.  I could probably go on and on.  Maybe I don't want to remember.  

I'm thinking I'm really going to enjoy driving this truck when I get it together, and there's a faint glow at the end of the tunnel.
Gary, AKA "Gary fellow": Profile

Dad's: '81 F150 Ranger XLT 4x4: Down for restomod: Full-roller "stroked 351M" w/Trick Flow heads & intake, EEC-V SEFI/E4OD/3.50 gears w/Kevlar clutches
Blue: 2015 F150 Platinum 4x4 SuperCrew wearing Blue Jeans & sporting a 3.5L EB & Max Tow
Big Blue: 1985 F250HD 4x4: 460/ZF5/3.55's, D60 w/Ox locker & 10.25 Sterling/Trutrac, Blue Top & Borgeson, & EEC-V MAF/SEFI

Reply | Threaded
Open this post in threaded view
|

Re: Big Blue's Transformation

ArdWrknTrk
Administrator
As long as it's not Henry Flagler driving the train.
 Jim,
Lil'Red is a '87 F250 HD, 4.10's, 1356 4x4, Zf-5, 3G, PMGR, Saginaw PS, desmogged with a Holley 80508 and Performer intake.
Too much other stuff to mention.
1 ... 93949596979899 ... 372