|
Administrator
|
I feel like I read something once about that light. I am trying to find the post but it was something along the lines of someone getting a new turn signal that had an extra wire and someone else saying the wire was for a van that had the gear indicator lit up on the column itself (one of those see through things). It may be completely unrelated but your post just triggered that memory.
Scott
'Camano' 1986 F250 Supercab XLT Lariat 460/C6 'Chanute' 1980 F350 C&C 400/NP 435 - Gin Pole But there ain't nothin' wrong with the radio |
|
Administrator
|
I haven't found anything about the light, but I did get quite a few details worked out today.
First, I checked out the C305(A) situation. Sure enough, there was a white/purple in the connector going to the truck, and it had power on it for the speed control. So in the connector going to the speed control I pulled the red retainer, removed the blue/red wire in Pin 11's slot and put the white/purple wire there. And then I covered the blue/red wire with heat shrink, although it doesn't appear to connect to anything. Then I checked and the buzzer no longer buzzes when the door is opened, and the speed control gets power when the key is turned to Run. So I'm calling that problem SOLVED! 
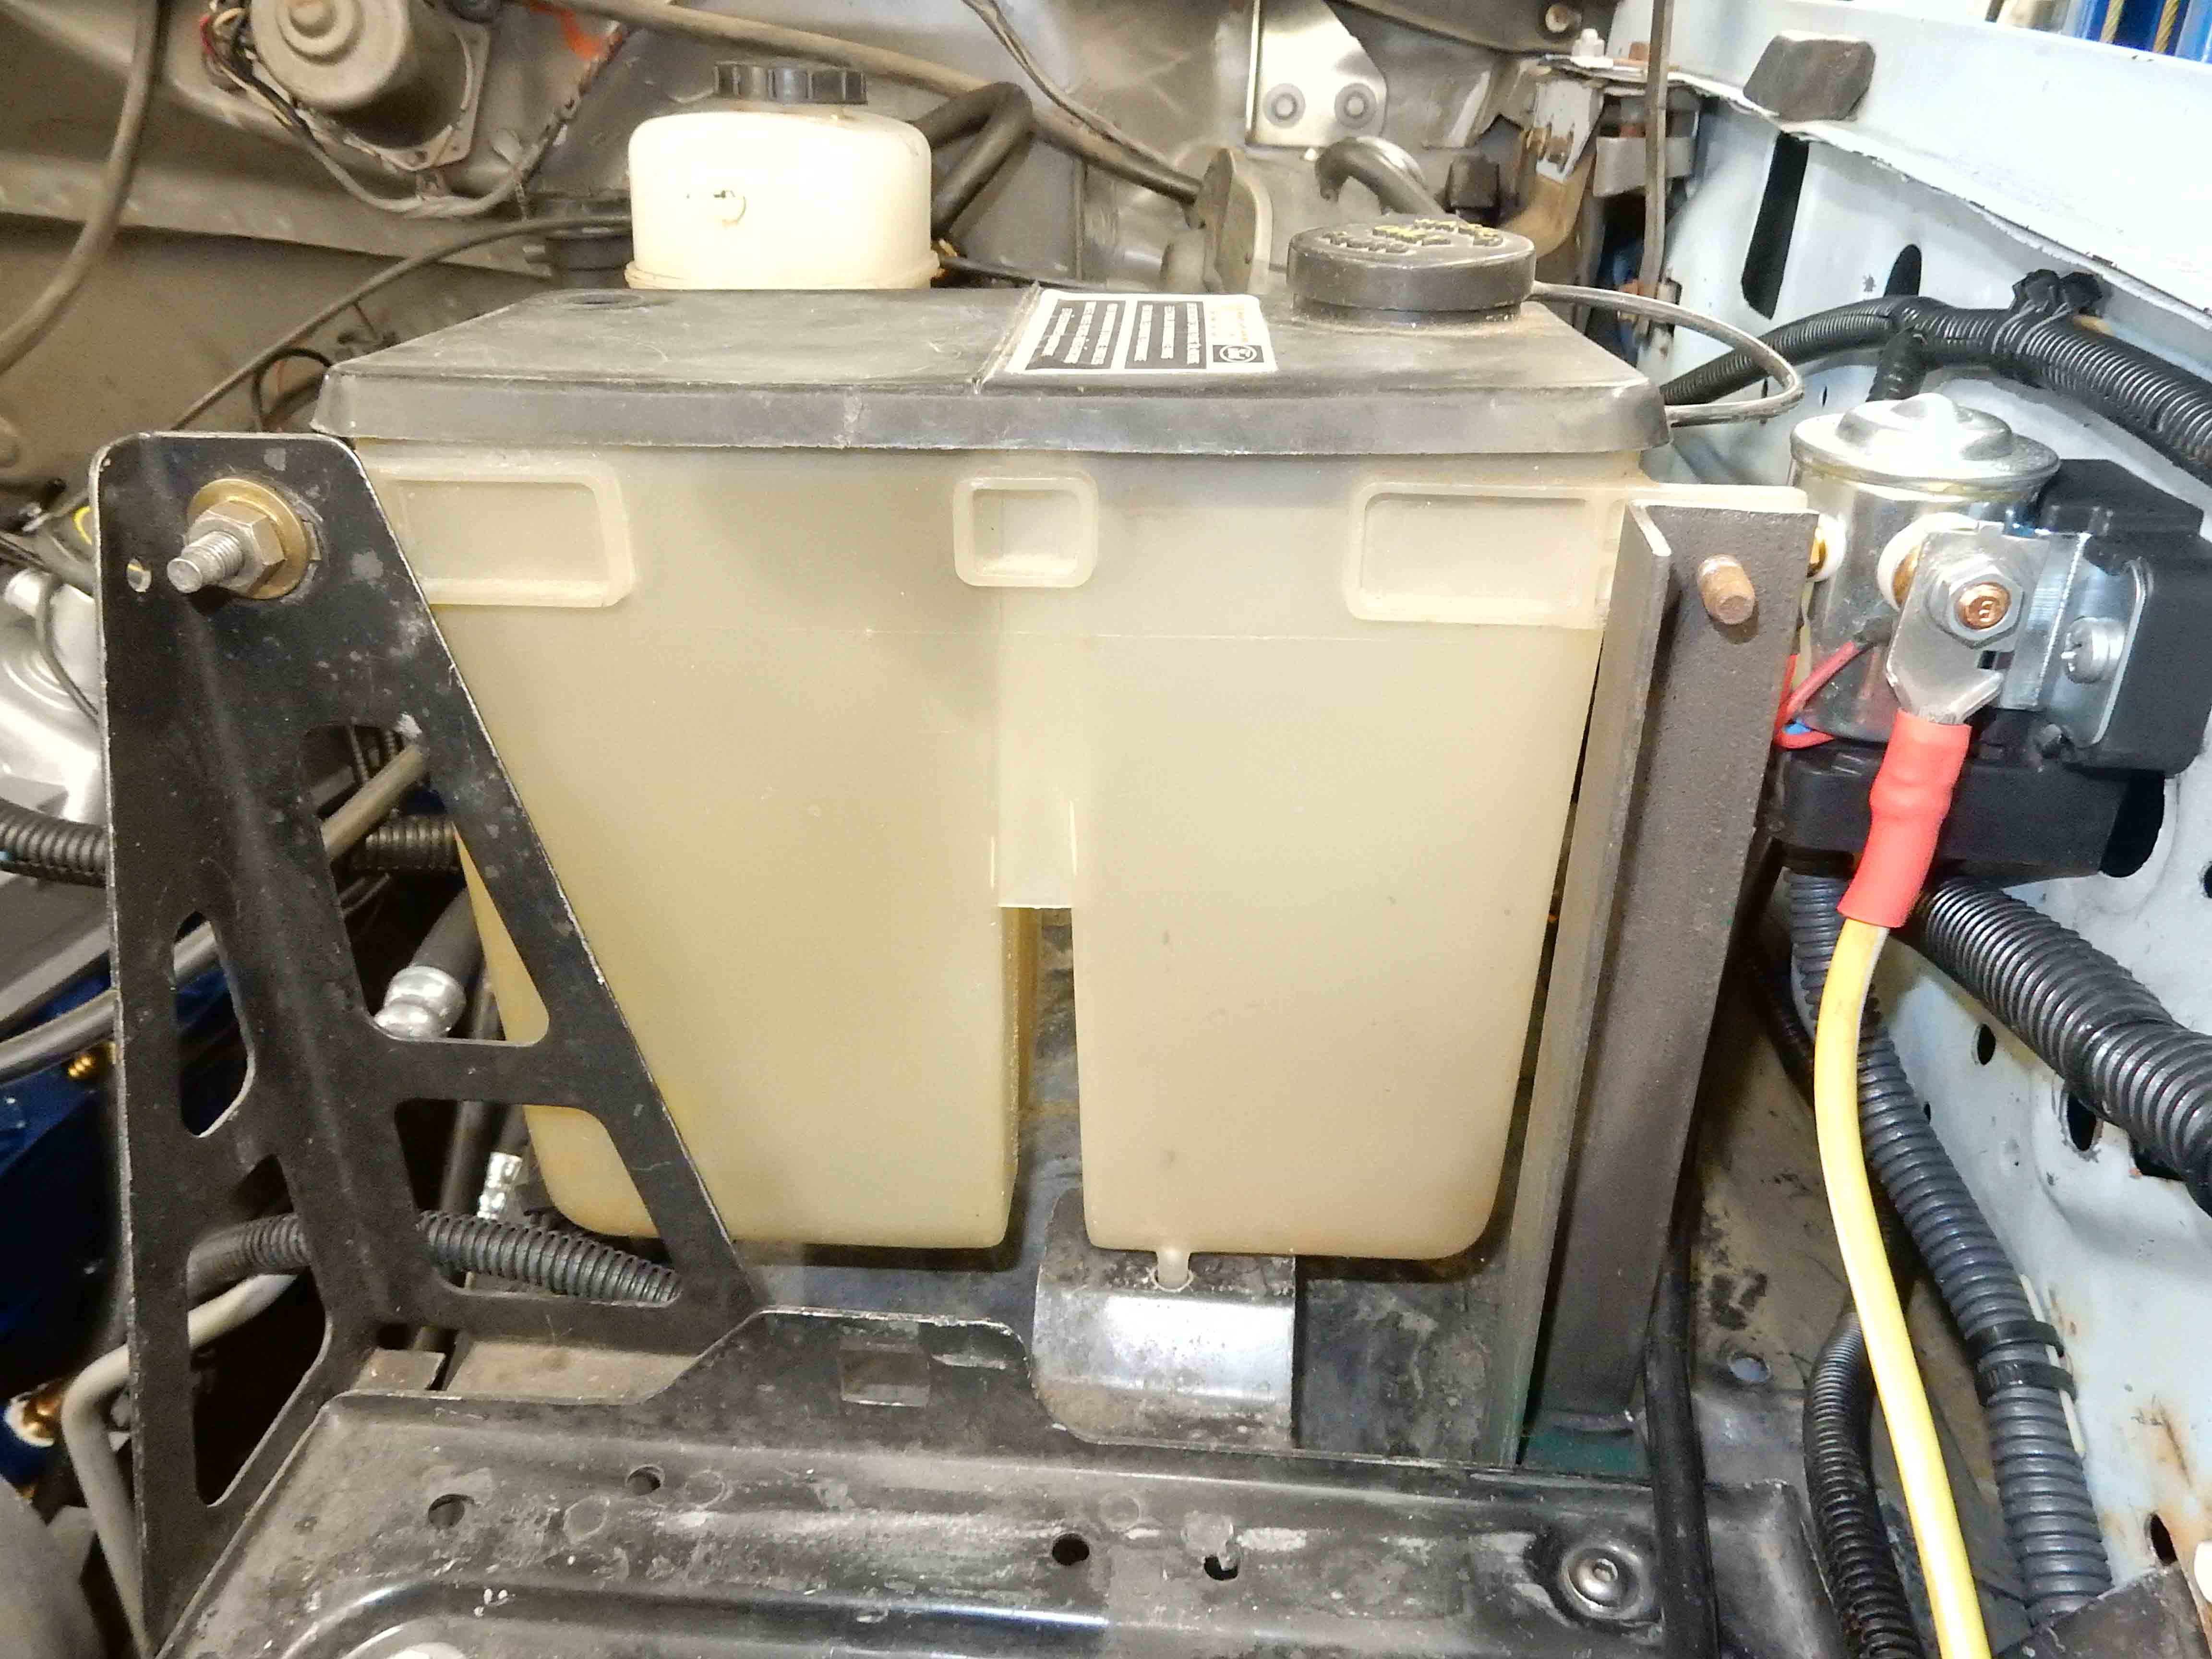
Next was the original aux battery relay. You'll remember that the plan was to pull the trigger wire to it as well as the trigger wire to the key-on relay off the aux battery relay and put a screw through them. That would prevent the aux battery relay from coming on, but allow the key-on relay to still function. Well, in the pic below the trigger wire is the one with the molded connector, and I thought it would be a pain to secure the wire below it to it and get that insulated with heat shrink. So instead I pulled the grounds off the empty stud, tied them together with a screw and nut, put heat-shrink on them, and tied the combo with a red zip tie to the adjacent wire. Problem solved: the aux battery relay doesn't come in but all of the other wires are still getting power, and the key-on relay does come on and shows the aux battery voltage on the aftermarket voltmeter. (Well, it didn't appear to be working when I first got done until I realized I'd not connected the aux battery up so the voltmeter was showing exactly what was on that circuit - nada. )
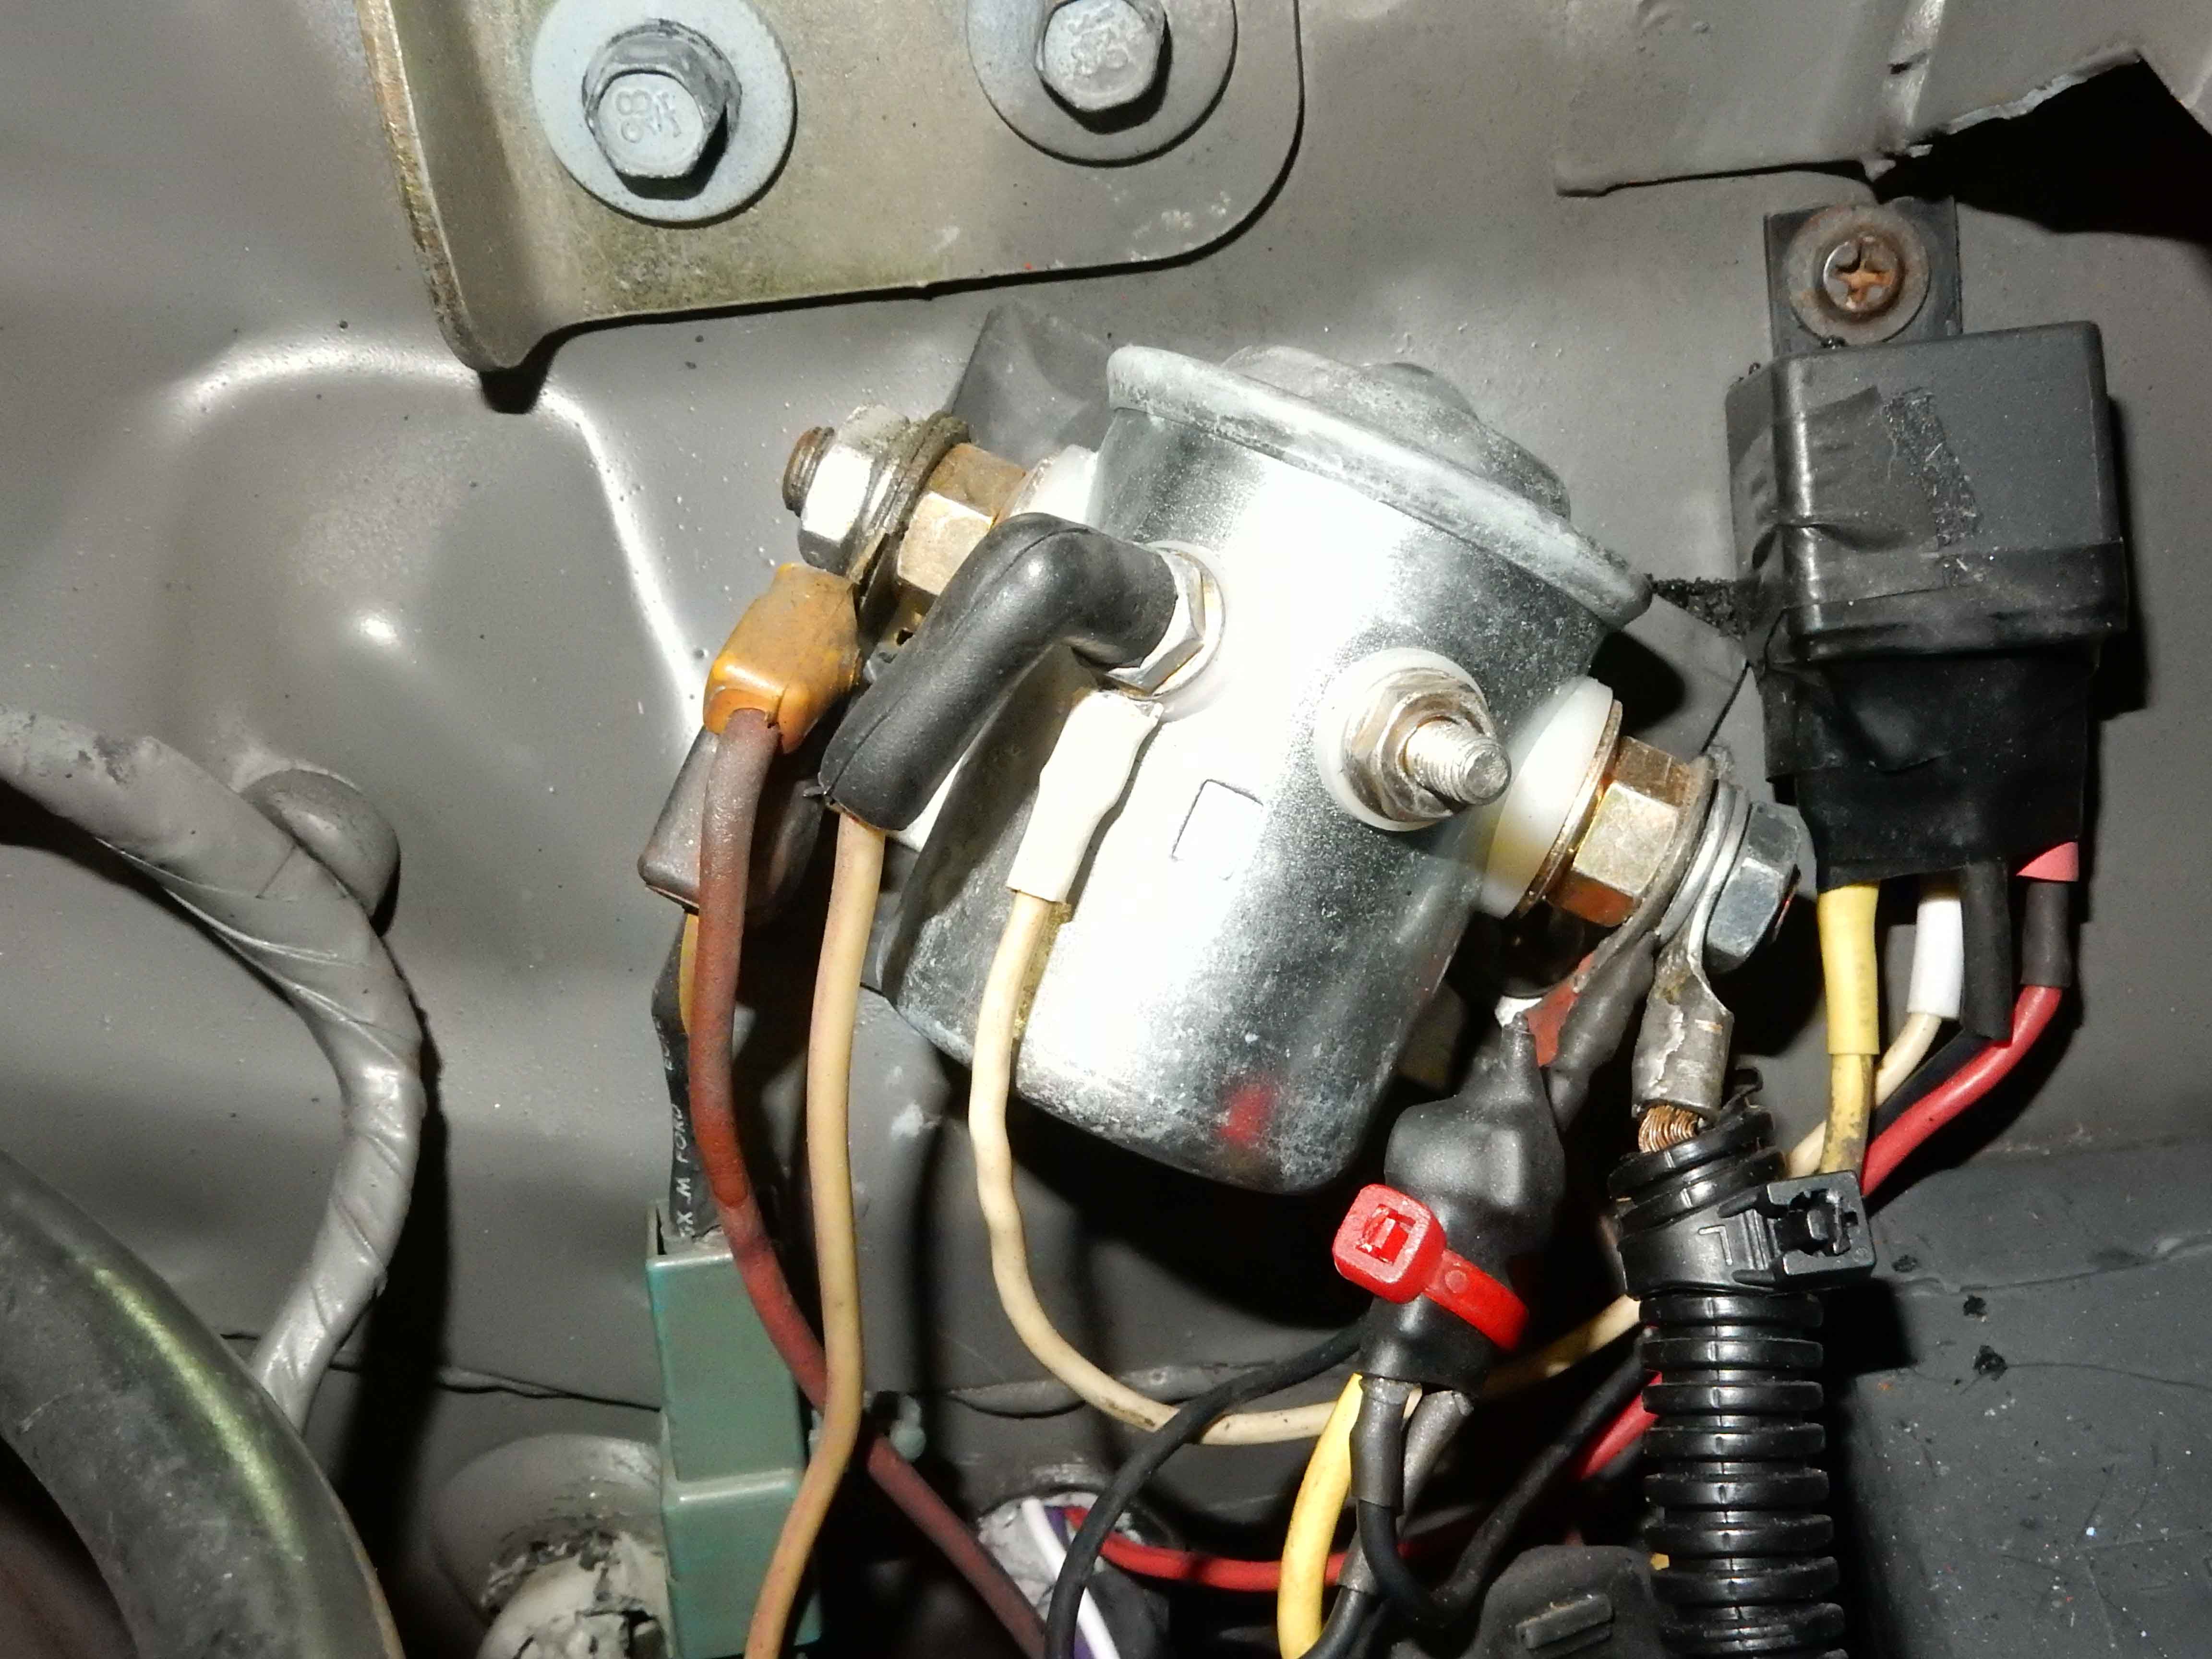
![]() Then I pulled the hot lead to the starter and turned the key to Start. Sure enough, the relay in the starter itself came in with a loud clunk. Then I pulled the trigger lead off the starter, tied my test light to it, turned the key to Start, and used a bungee to hold it there. The light came on, brightly, although it is kinda hard to see in the pic so I gave you a bit of help. ![]() Then I worked under the truck for about two hours neatening up the wiring and speedo cable, all the while watching the light. And nothing I did caused it to blink, and I moved and stretched all the wiring and associated connectors, so I'm confident that the Start circuit is solid. ![]() 
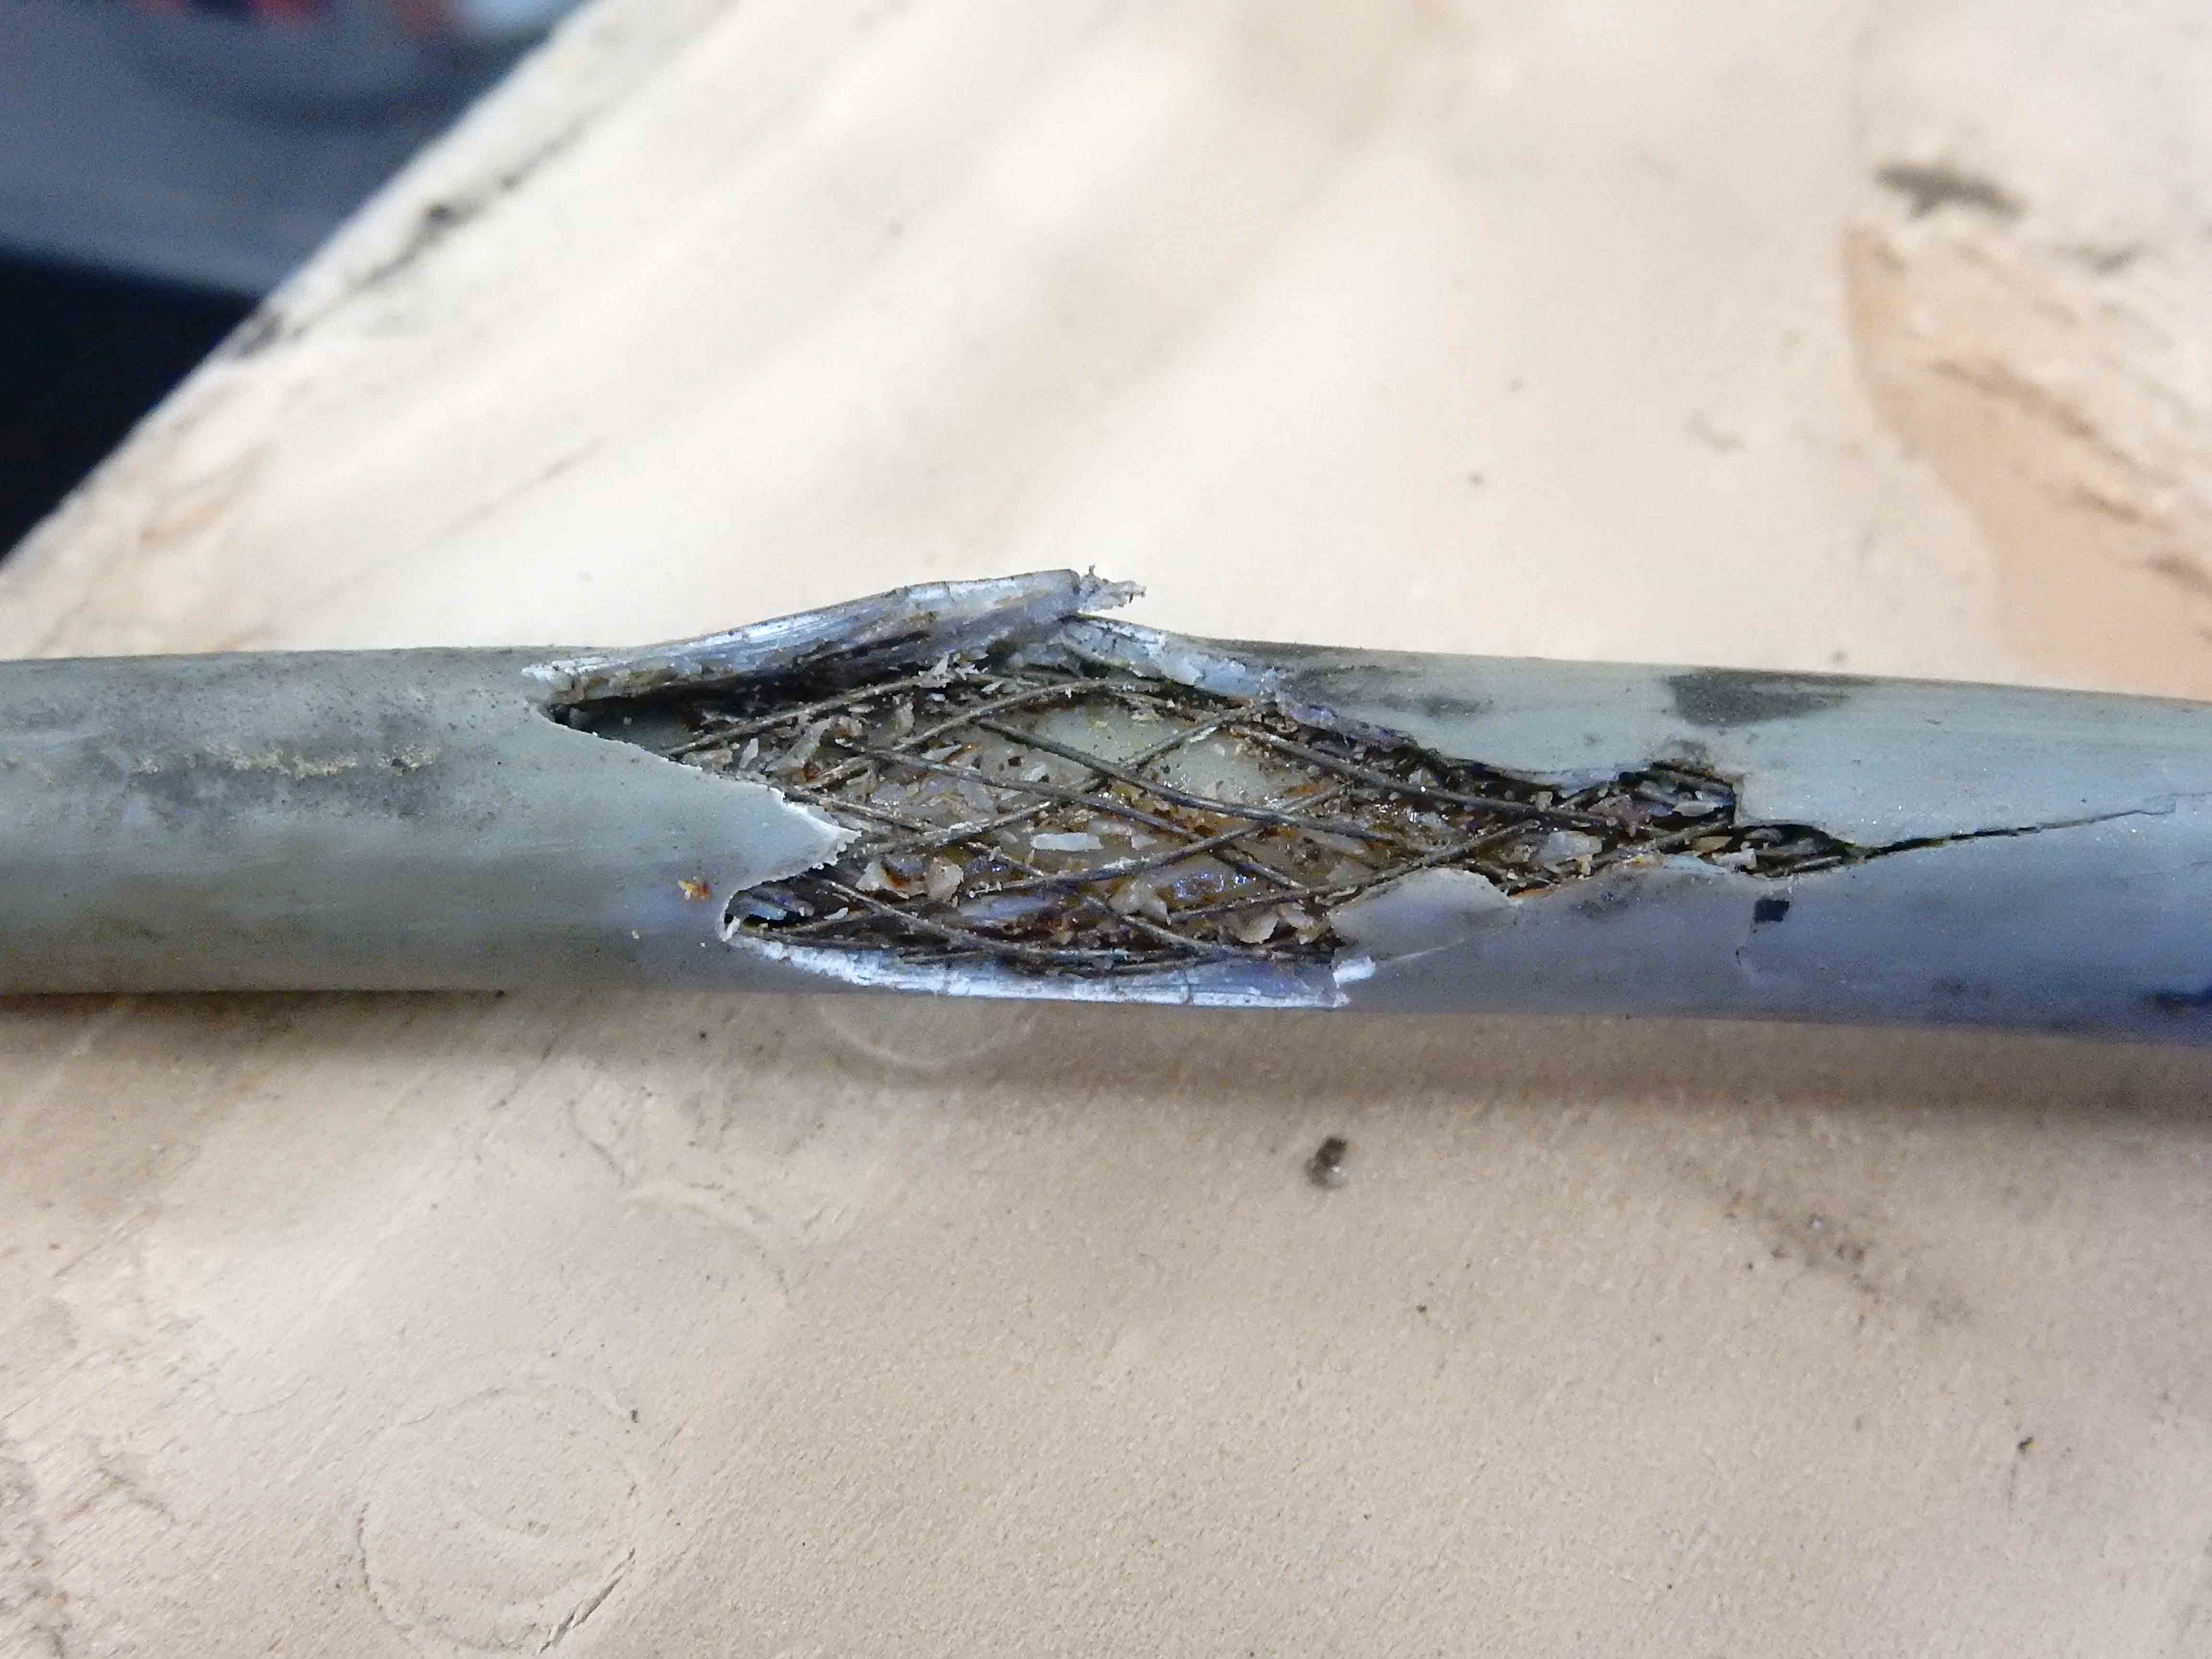
So, what did I do while working under there? First I cleaned off the grease that was all over the speedo cable, only to find it damaged. So I replaced the cable with one from the attic. And I lubed the cable before I put it on. ![]() 
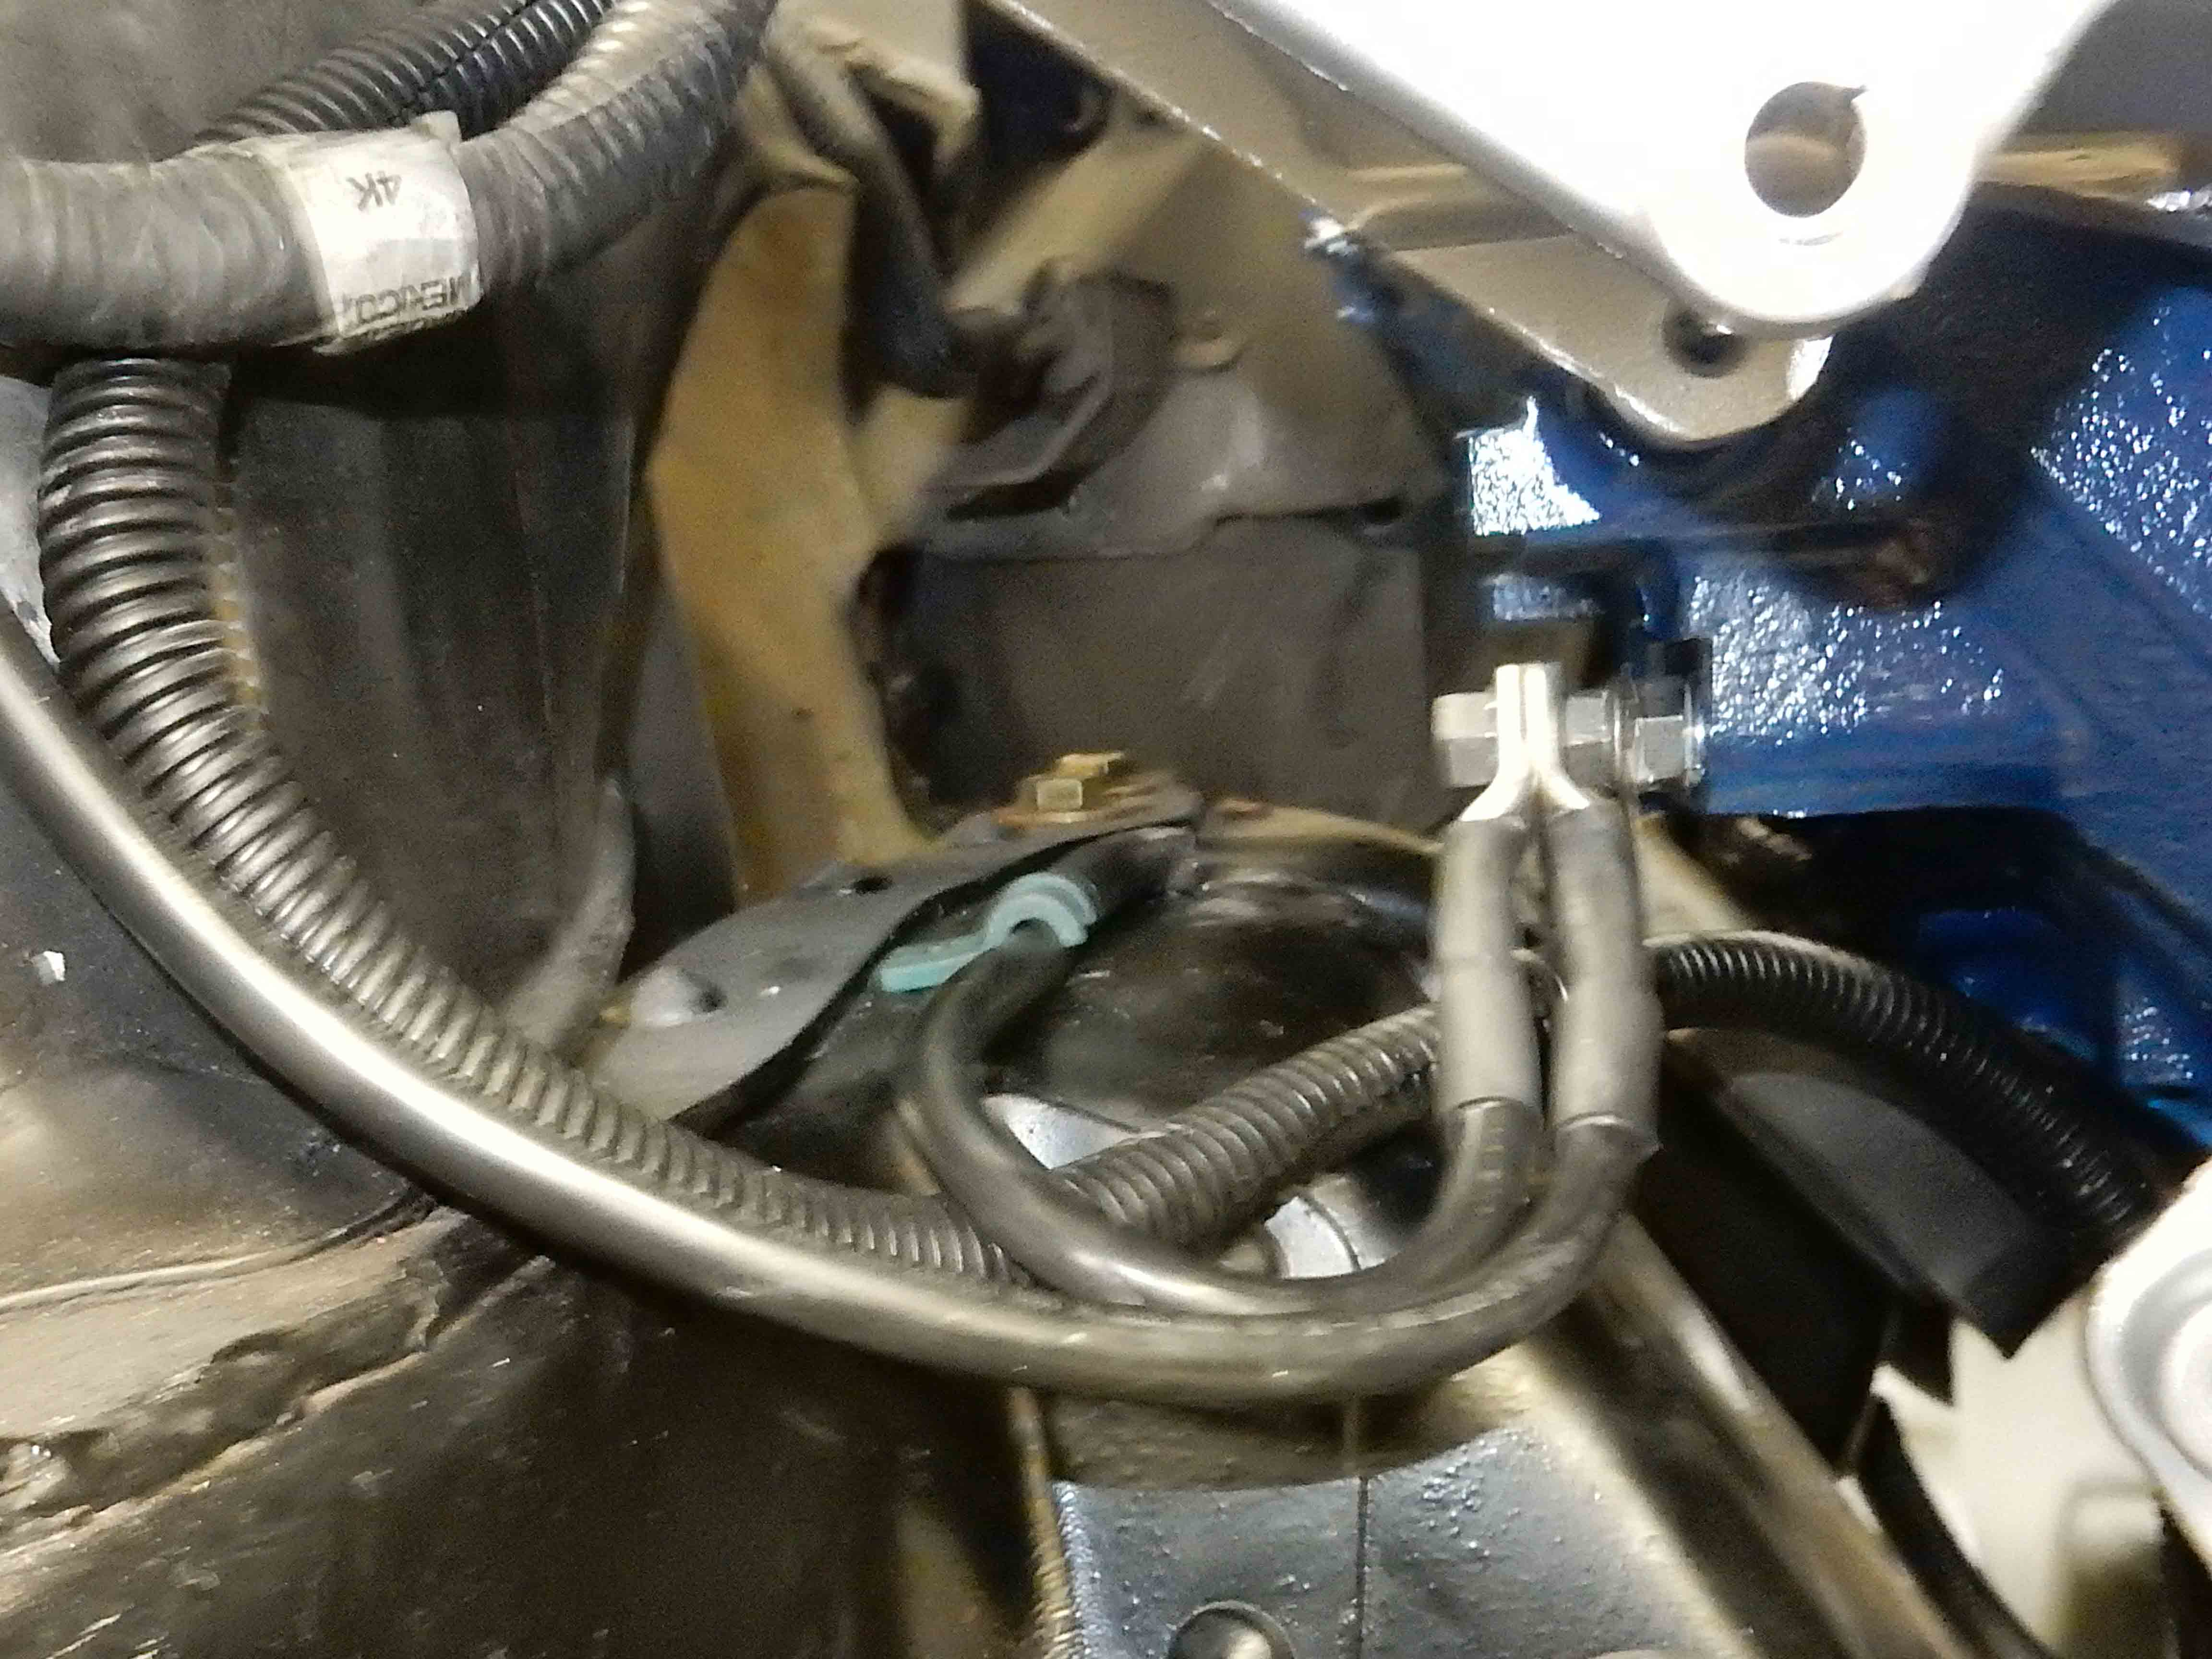
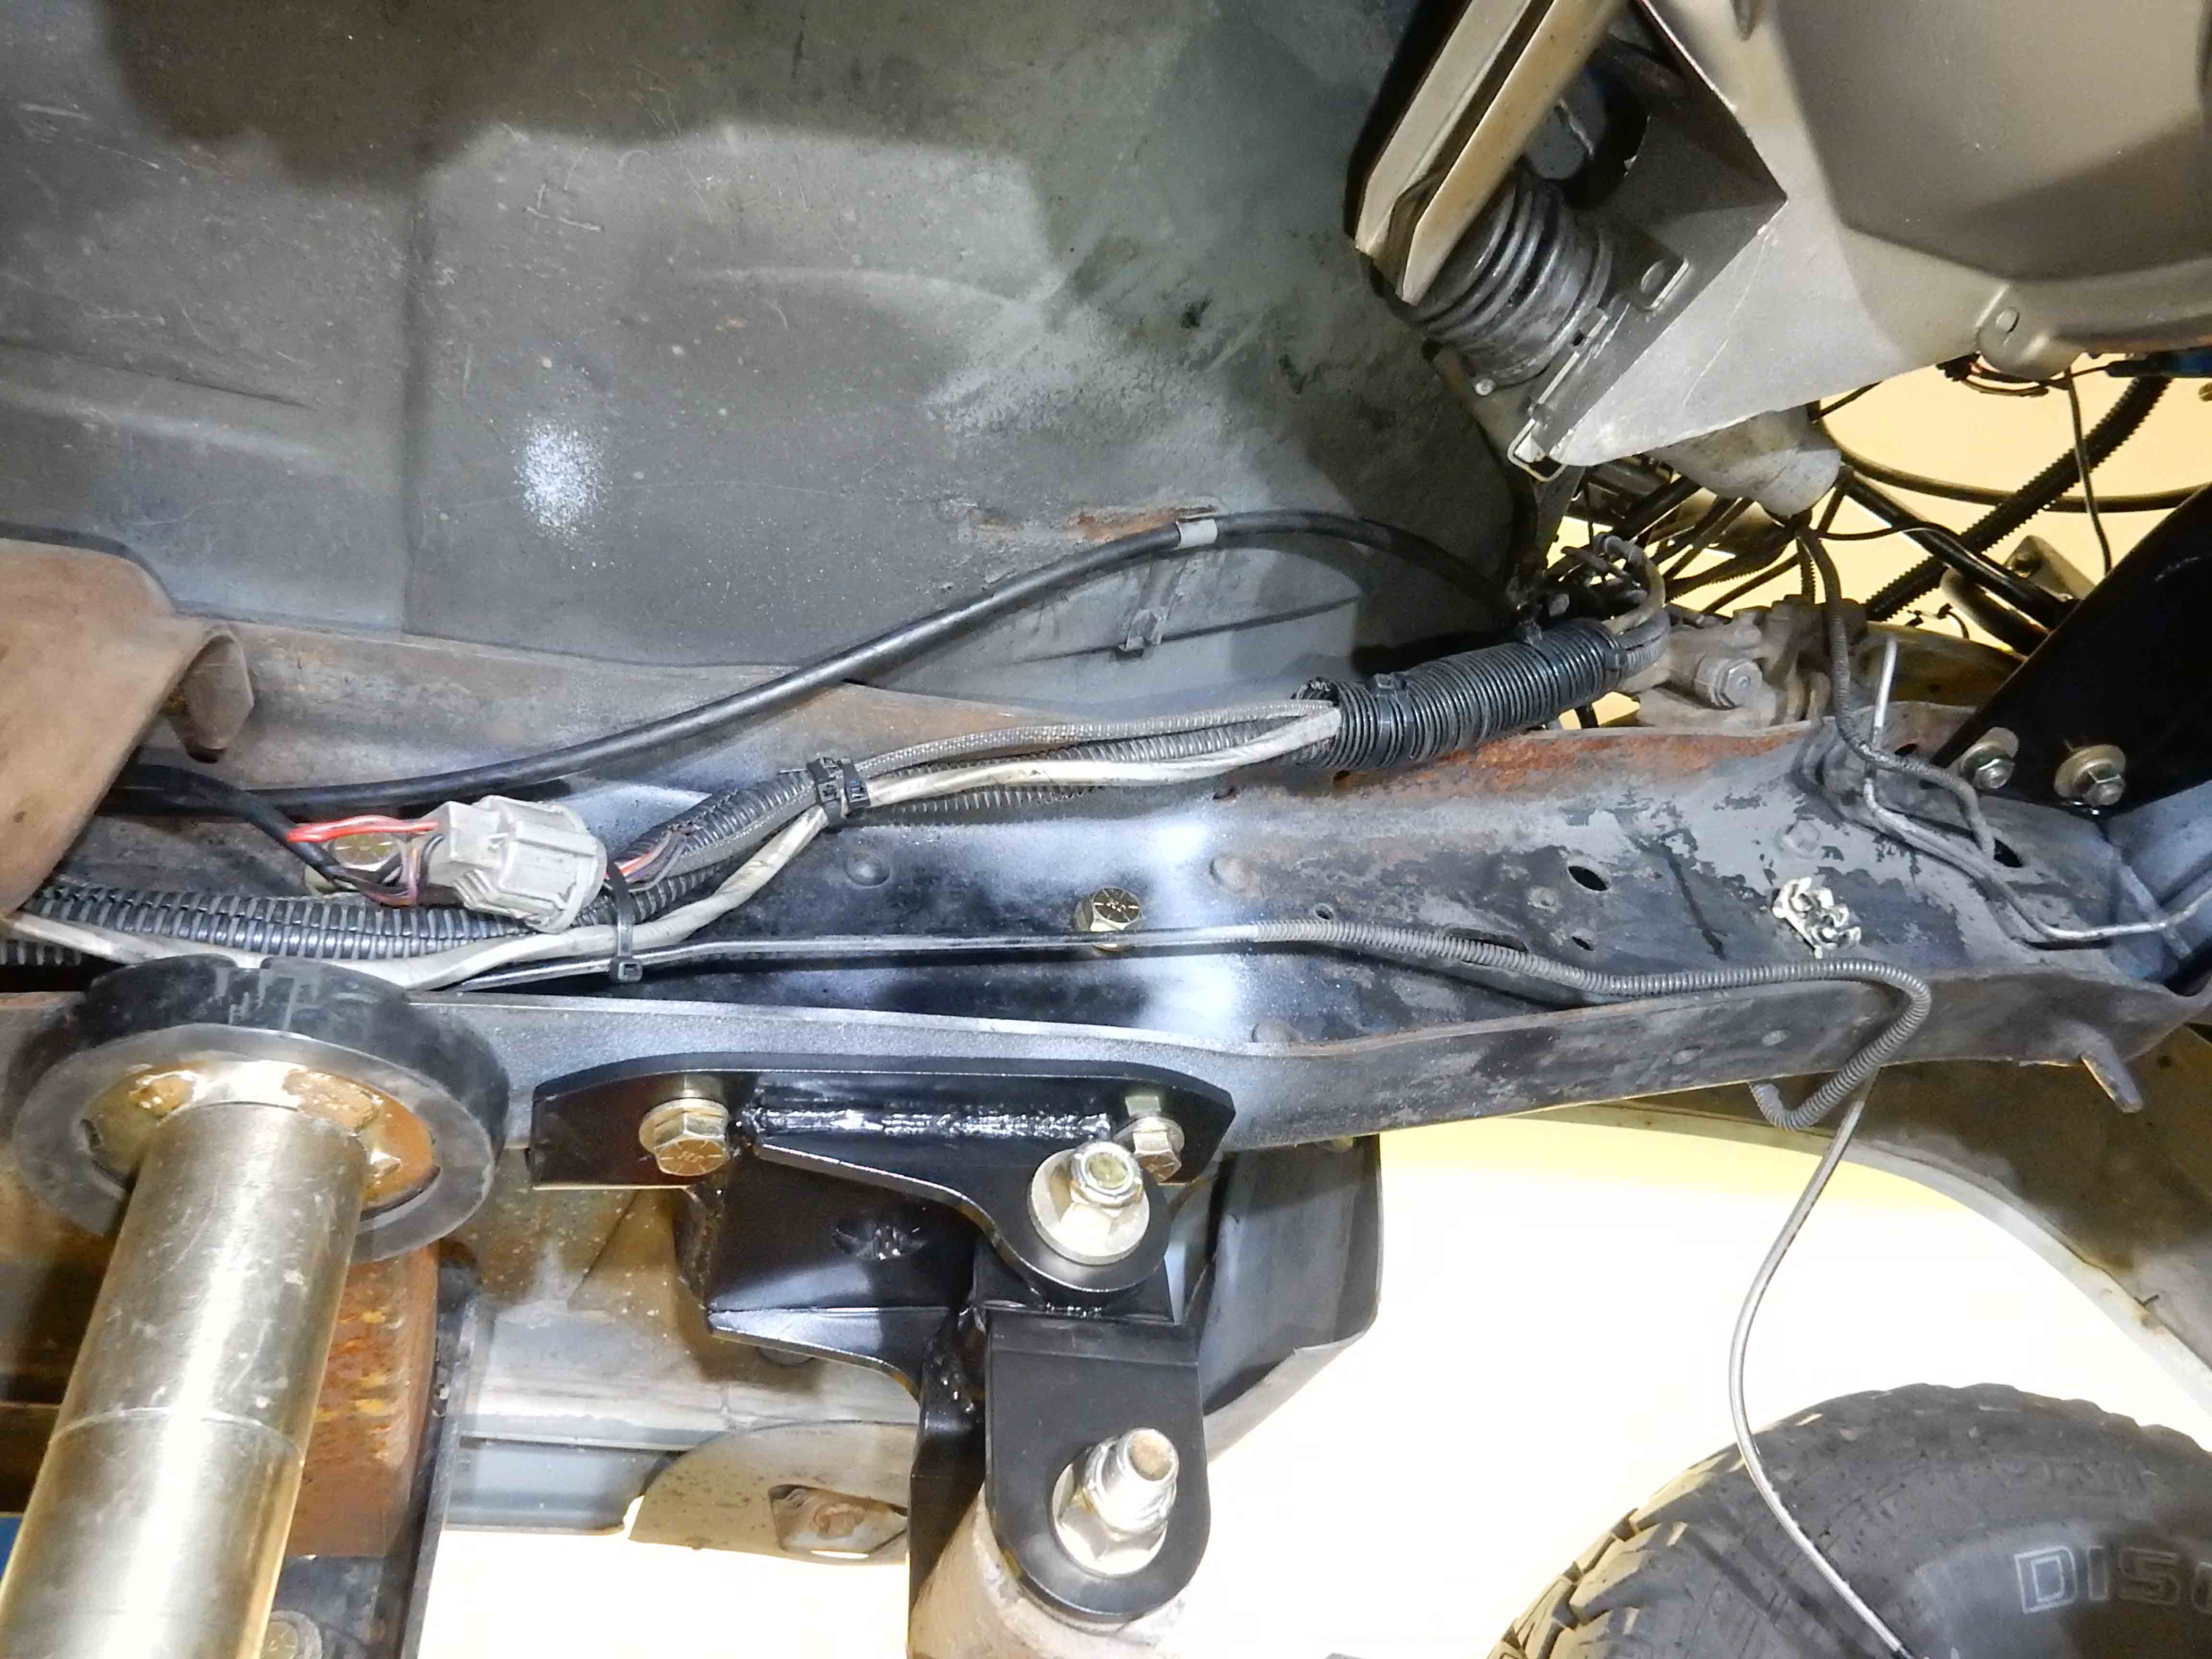
Then I tied the wiring on the frame rail down, covered some of it with convolute, and generally neatened it up and ensured it won't move. Here's a shot of it ahead of the transmission crossmember. Note that the clutch slave cylinder is now installed. (I'm not sure you are supposed to open the bleeder valve to compress the piston, but that's what I did and it worked.) ![]() 
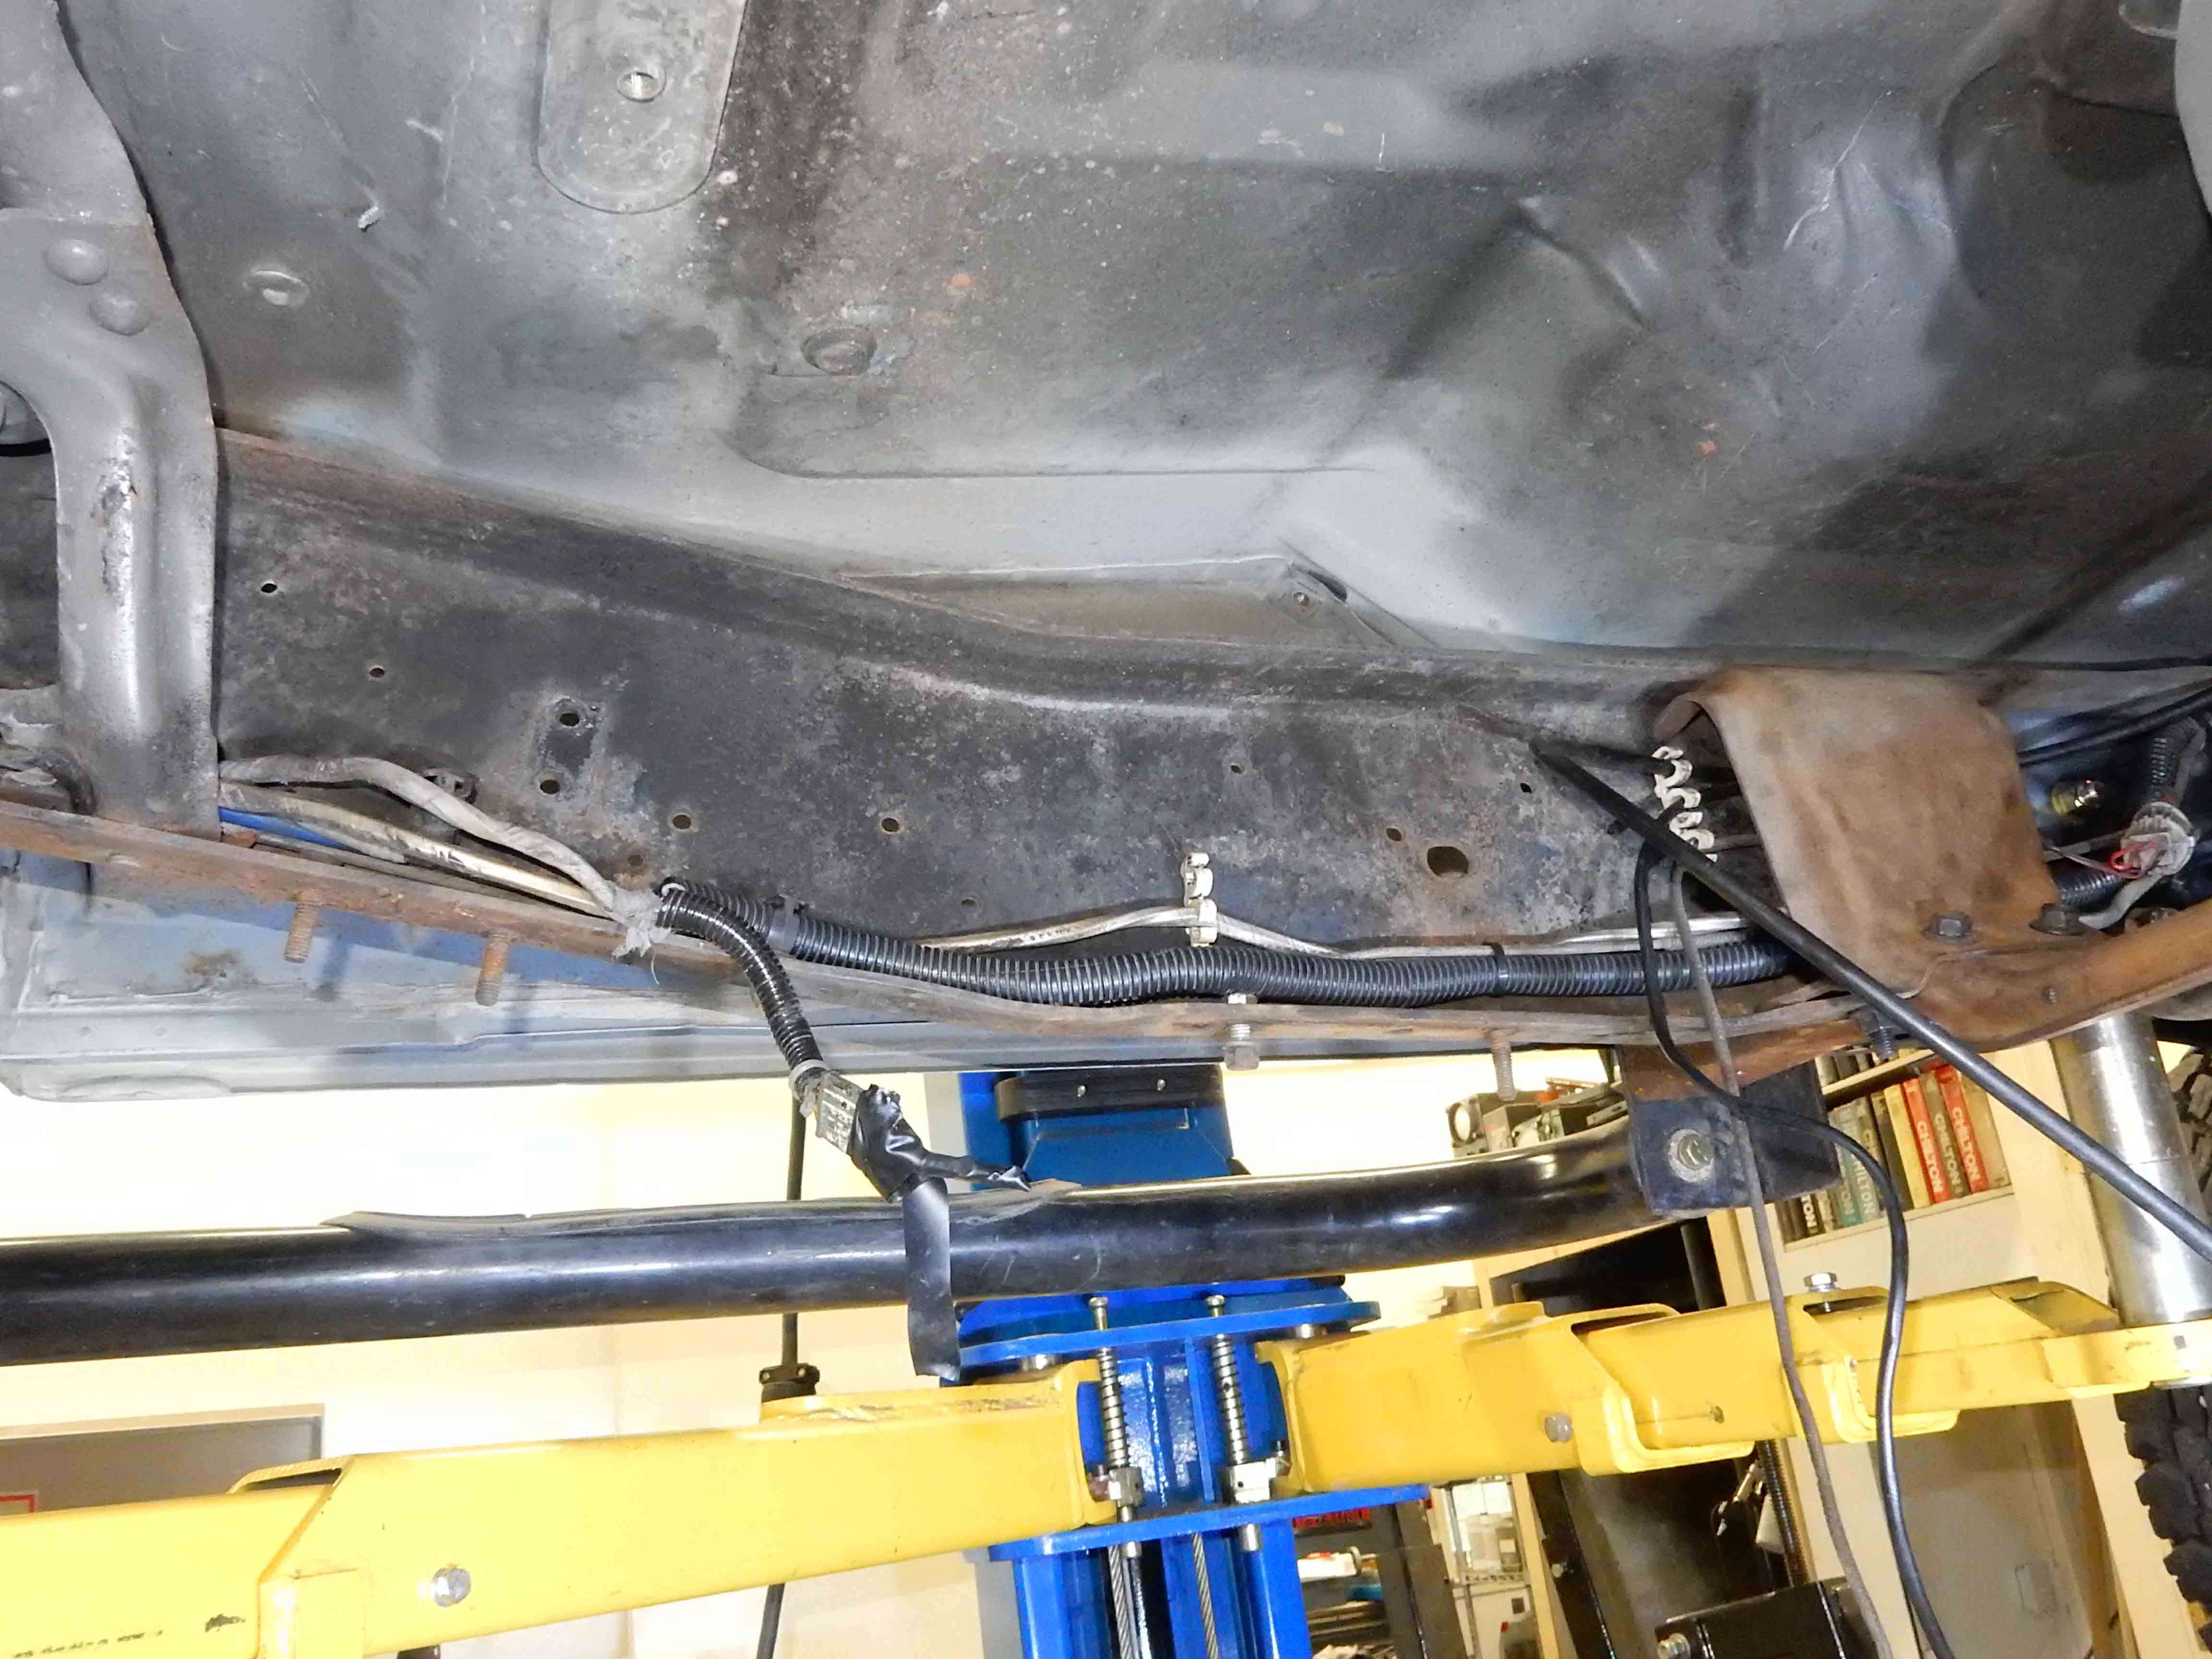
And here's a shot of the wiring aft of the crossmember. ![]() 
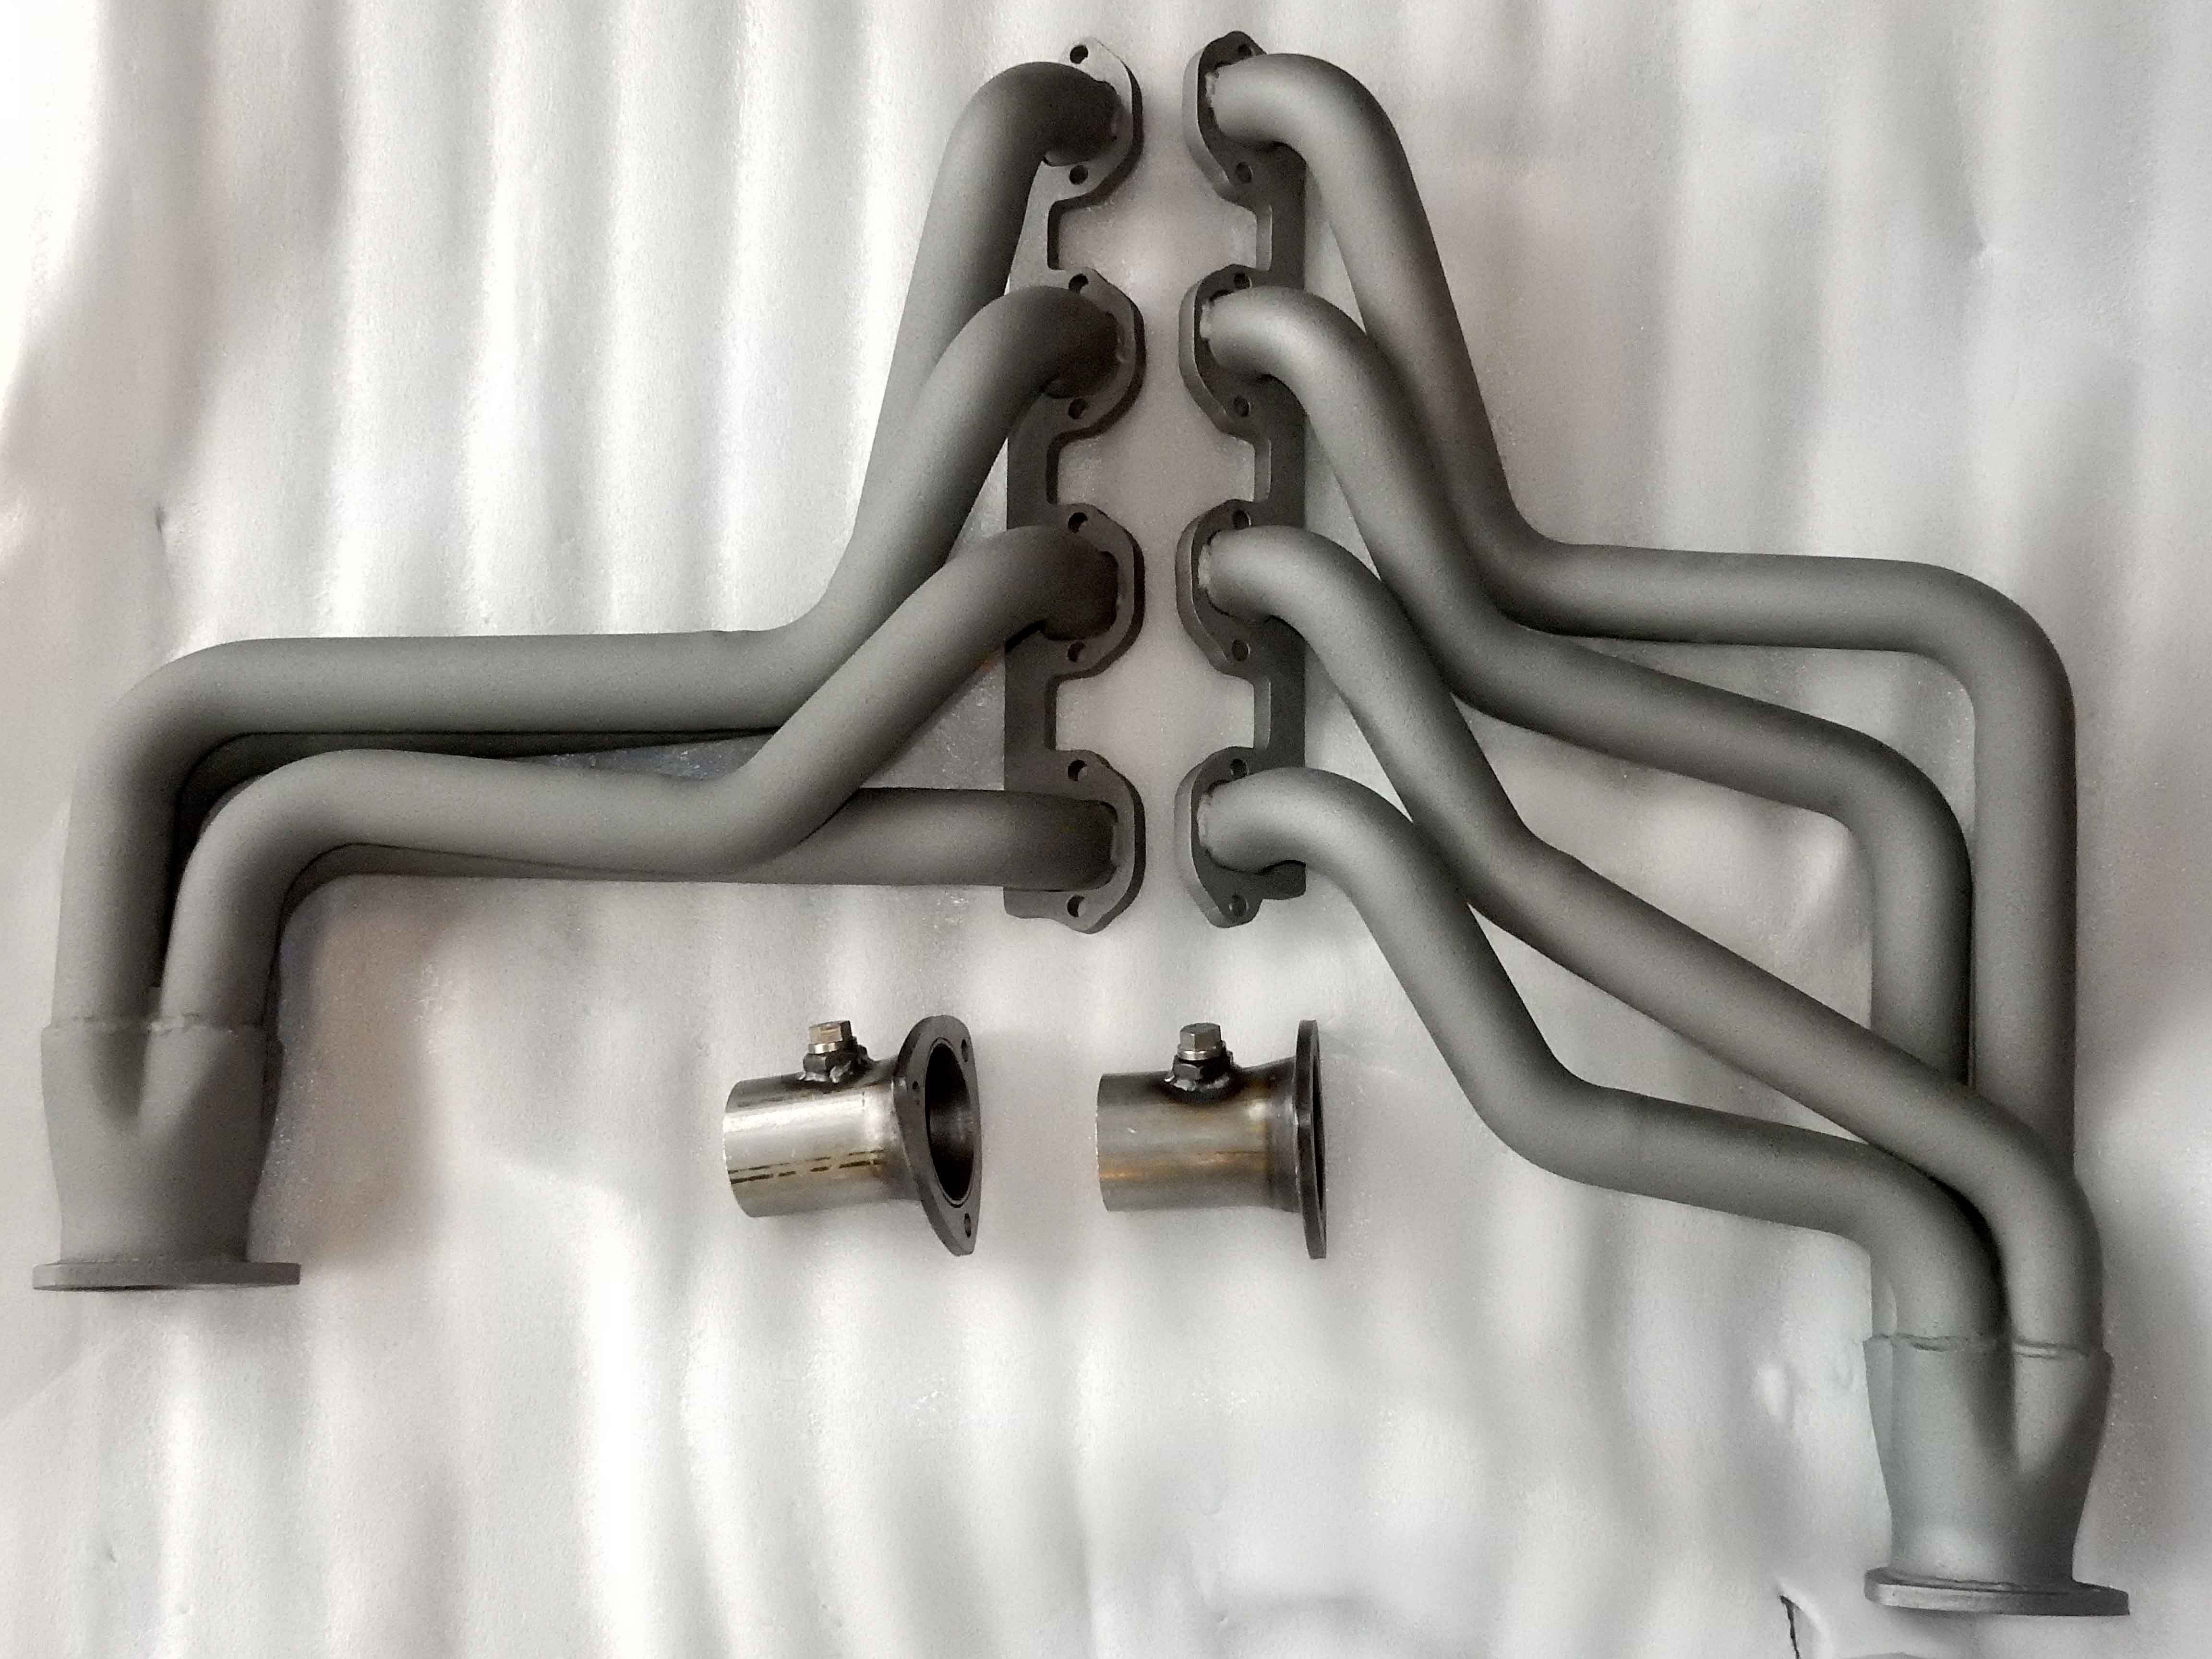
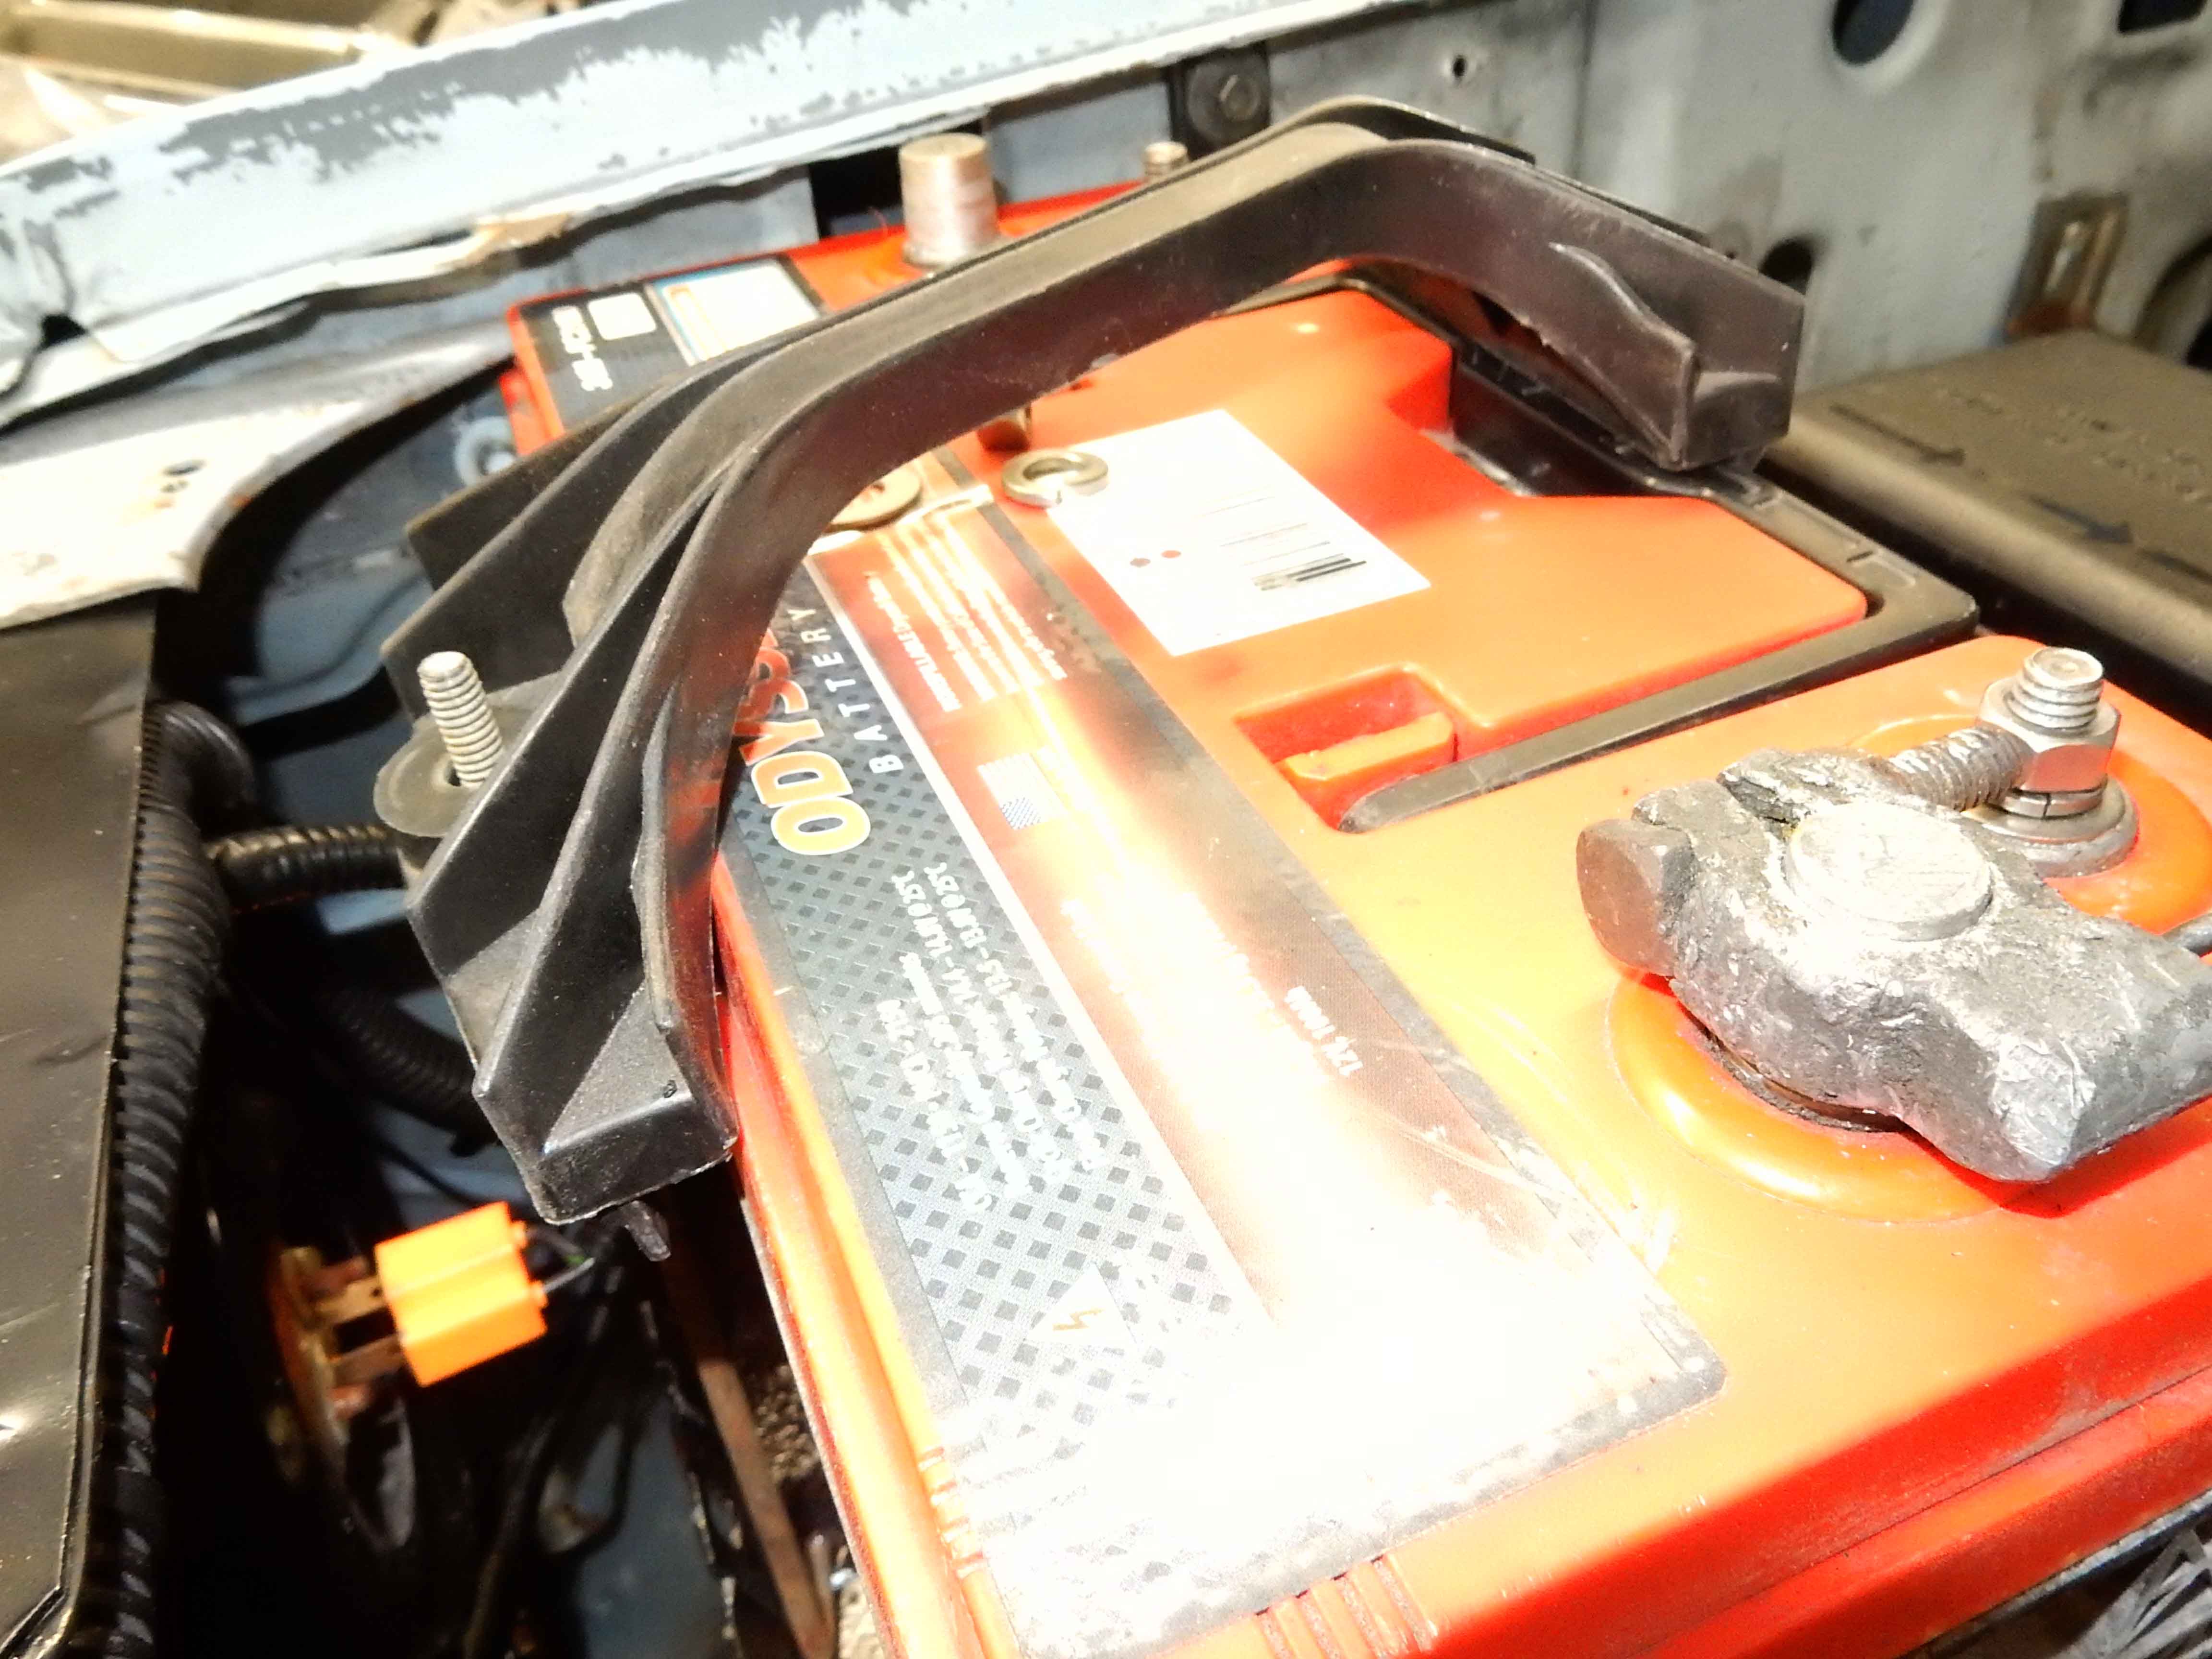
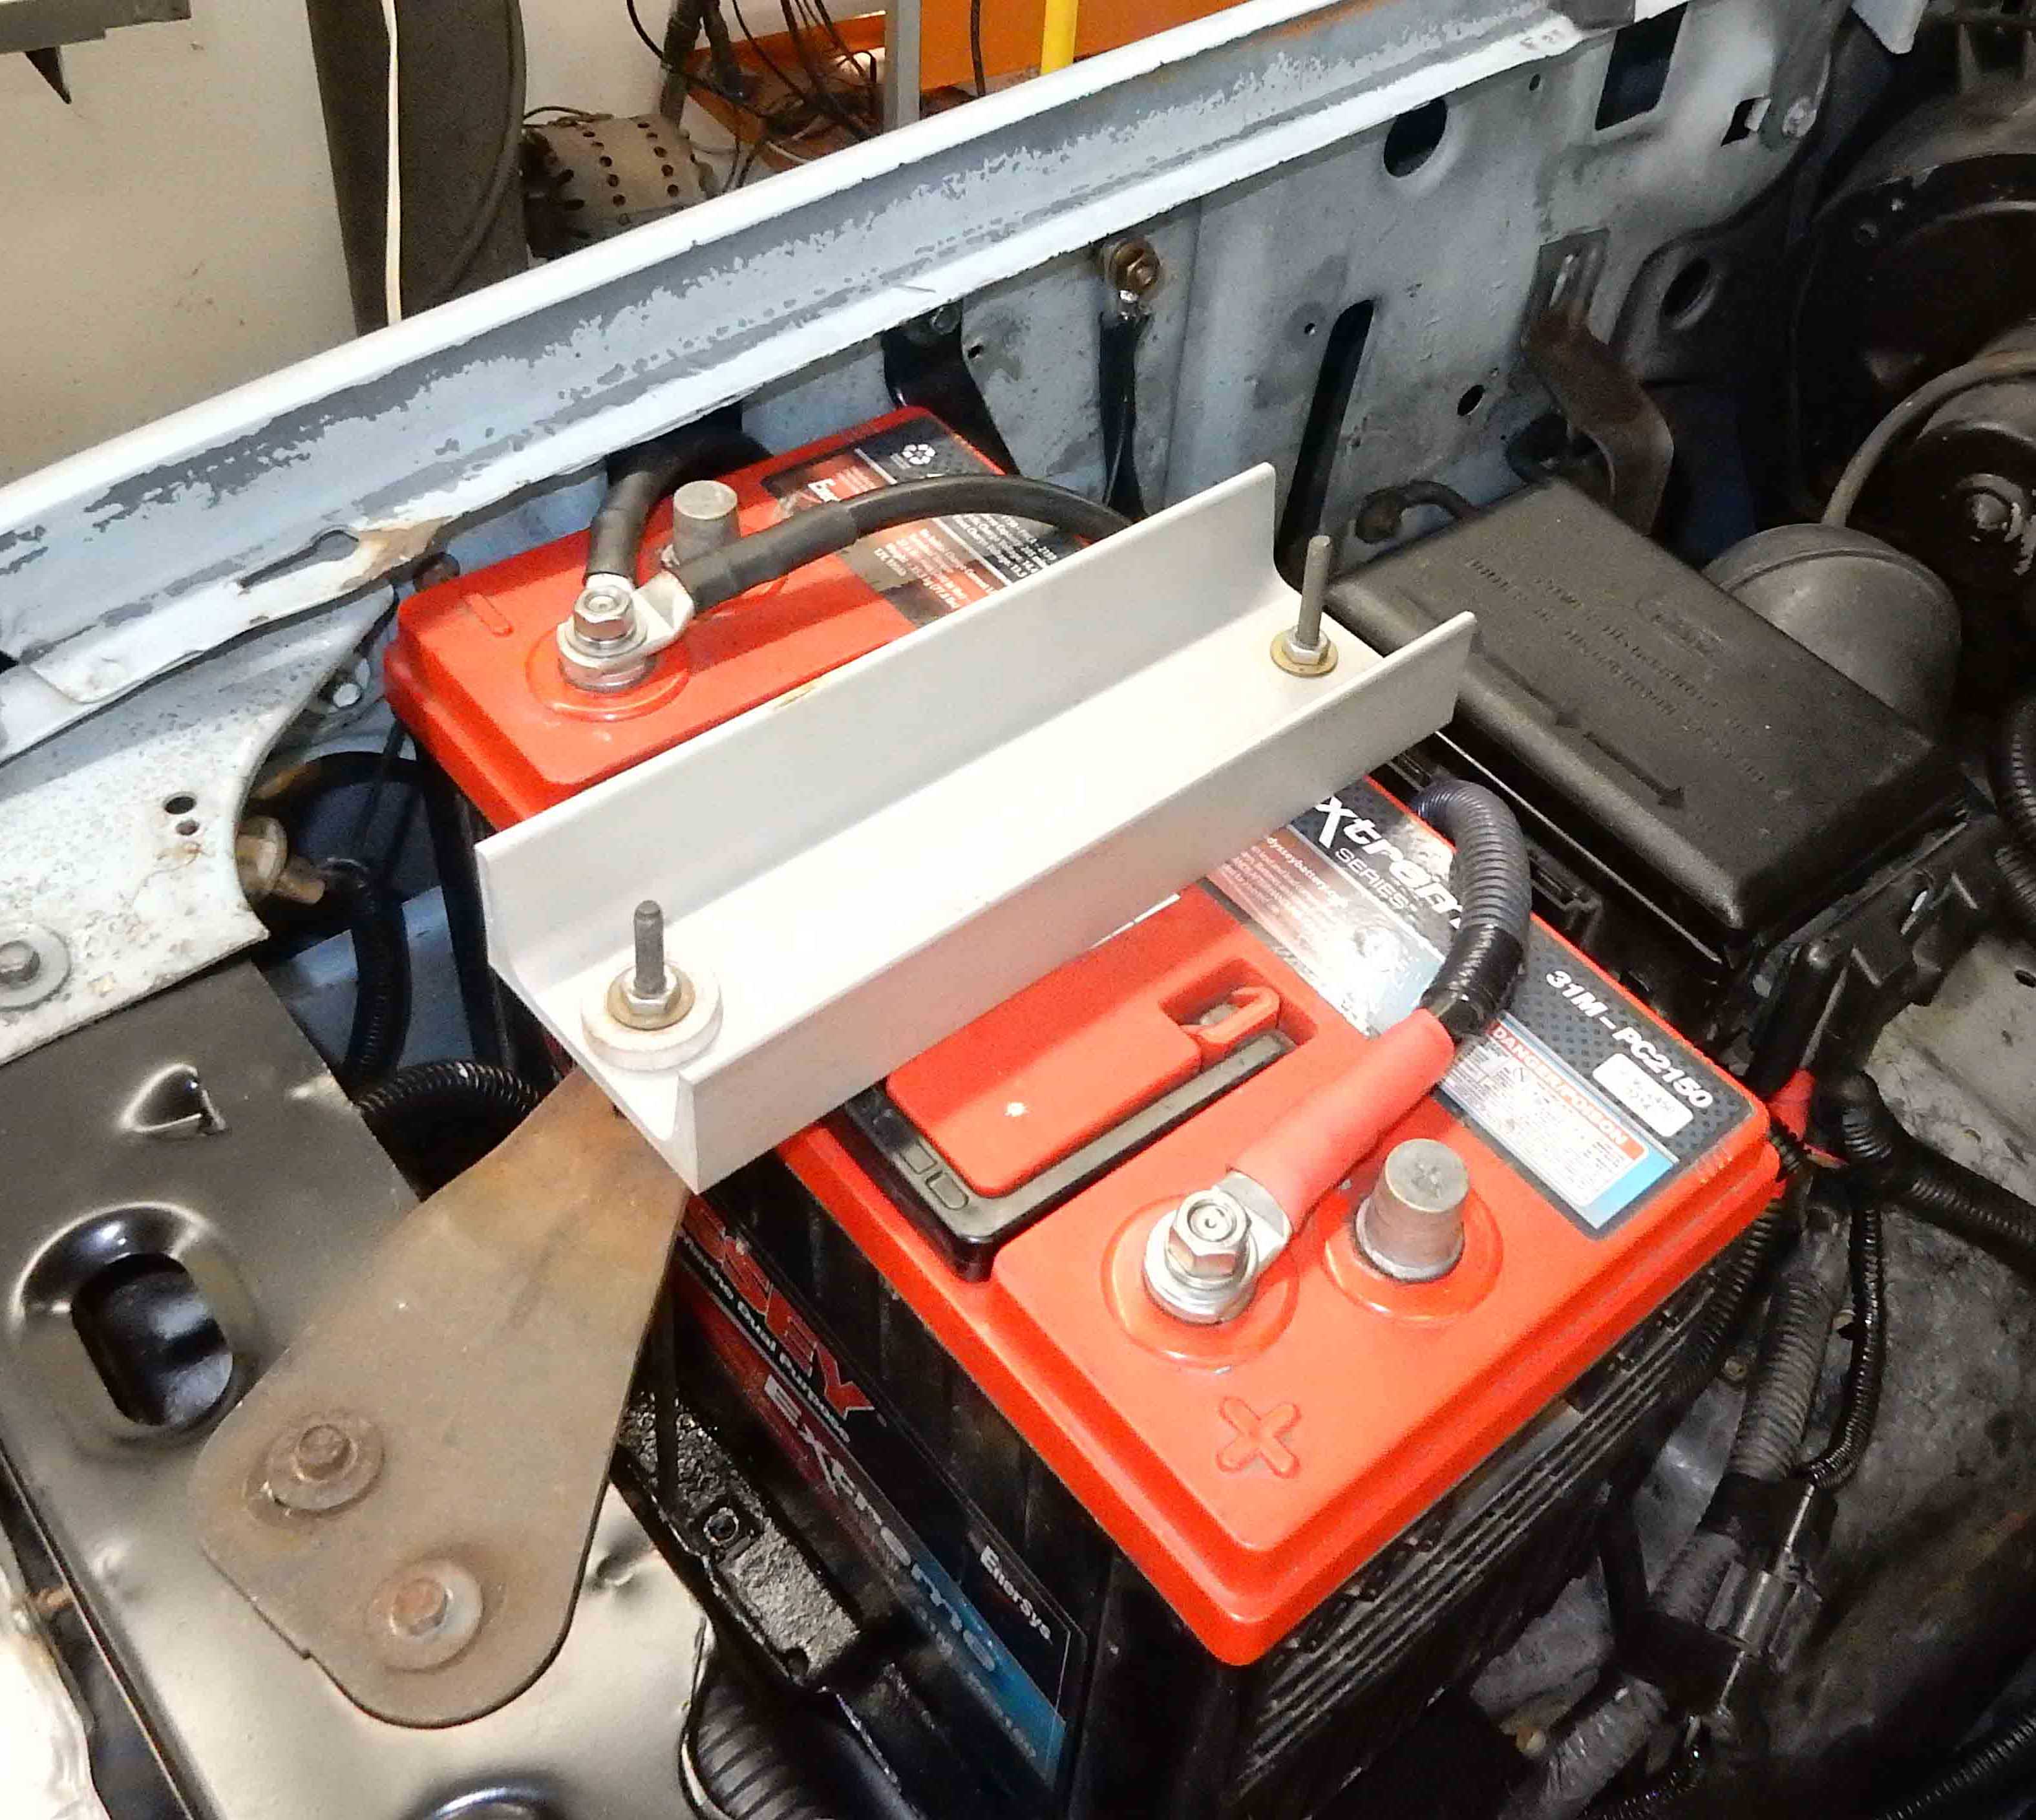
With that, all I need to do to call the electrical system done is to tie the batteries down. Hopefully that will easily happen tomorrow after church and I'll be ready for the headers. Oh, wait! I still have a fuse in the clutch start switch connector. So I will pull the hot lead off the starter again, pull the fuse, connect the wire to the switch, and see if the start circuit actually works.
Gary, AKA "Gary fellow": Profile
Dad's: '81 F150 Ranger XLT 4x4: Down for restomod: Full-roller "stroked 351M" w/Trick Flow heads & intake, EEC-V SEFI/E4OD/3.50 gears w/Kevlar clutches
|
|
Progress is good.
Is it still your plan to take a break from the truck(s) for a while?
Rob
Eddy Myrtle '84 F150 300-6, Offenhauser C series intake, Edelbrock 1404(500cfm manual choke), EFI exhaust manifold, HEI dizzy, custom Painless harness, NP 435, NP 208, D44, 8.8"/3.08, 1.5" leveling coils, 265/75/16 tires. Toyopet (Daily driver) '86 Toyota Pickup |
|
Administrator
|
Yes, I still plan to take a break, but the date for that has shifted roughly a month. Our daughter, SiL, and grandtwins were to arrive today. But they recently informed us that they are not going to do that, instead staying where they are in the Houston area for another month to, hopefully, get past the peak of the virus.
So I'll continue working on Big Blue and as we get closer to their arrival, maybe in late April, I'll figure out a new check-point. Maybe I'll get the headers, t-case, and driveshafts installed. Then the carb adapter and fuel system. And then I could start it!
Gary, AKA "Gary fellow": Profile
Dad's: '81 F150 Ranger XLT 4x4: Down for restomod: Full-roller "stroked 351M" w/Trick Flow heads & intake, EEC-V SEFI/E4OD/3.50 gears w/Kevlar clutches
|
|
Administrator
|
Well, I didn't get the batteries secured today, for two reasons. First, the main battery doesn't have the ledge on the bottom against which the later style wedges secure the battery. So, I'll have to use the old-school style. And the plastic arm/bracket/holder I have is the wrong size. So I'm considering making something to secure both batteries.
And what I'm thinking about is using aluminum channel. The j-hooks are offset, so the hold-down has to angle across. But I have plenty of 3" aluminum channel and could cut it at the right angle, drill holes in it for the j-hooks, powder coat them, and be done. Thoughts? Second, because I realized that I needed to make the brace/bracket for the outside end of the coolant reservoir before I put the aux battery in as the bracket will bolt to a hole under the battery. So I made the bracket. It is made from 1 1/2" angle and is in the shape of an L with the foot of the L going under the battery tray and being held by the washer-headed screw right at the bottom of the pic. The bracket itself is tapped 1/4-20 and there's a nut tack-welded to the underside of the foot of the L as well. And the top of the bracket is tapped 8 x 1.25 mm to accept on of the common bolts used on the front of the truck. The bracket works, as you can see below, but I need to round some corners, shorten that bolt, and media-blast and powder coat both. ![]()
Gary, AKA "Gary fellow": Profile
Dad's: '81 F150 Ranger XLT 4x4: Down for restomod: Full-roller "stroked 351M" w/Trick Flow heads & intake, EEC-V SEFI/E4OD/3.50 gears w/Kevlar clutches
|
|
Administrator
|
I wouldn't use aluminum.
It will eventually fail if subjected to load cycling. Holding a 60#(?) battery in place while bouncing down a trail is just asking for trouble. And then there's the corrosive nature of most batteries. Just my thoughts,
Jim,
Lil'Red is a '87 F250 HD, 4.10's, 1356 4x4, Zf-5, 3G, PMGR, Saginaw PS, desmogged with a Holley 80508 and Performer intake. Too much other stuff to mention. |
|
Administrator
|
I think it is a 75# battery. I checked when it was about all I could do to lift it up in there.
![]() But you've not seen this aluminum channel. It is very strong and surely stronger than the j-hooks. I'll post a pic in a bit. As for the corrosive gasses, I was planning to powder coat it - heavily. I'd prefer the plastic hold downs in the right size. I'm just not finding them. Perhaps I'm calling them the wrong thing?
Gary, AKA "Gary fellow": Profile
Dad's: '81 F150 Ranger XLT 4x4: Down for restomod: Full-roller "stroked 351M" w/Trick Flow heads & intake, EEC-V SEFI/E4OD/3.50 gears w/Kevlar clutches
|
|
Administrator
|
Ok, it must be Christmas in April. These L&L's came from Jet-Hot today:
![]() Here's a shot from the piston's point of view showing the inside coating: ![]() And here's the muffler's view:
Gary, AKA "Gary fellow": Profile
Dad's: '81 F150 Ranger XLT 4x4: Down for restomod: Full-roller "stroked 351M" w/Trick Flow heads & intake, EEC-V SEFI/E4OD/3.50 gears w/Kevlar clutches
|
Dane
1986 F250HD SC XLT Lariat 4x4 460 C6-Sold 1992 Bronco XLT 4x4 351W E4OD 1998 GMC Sierra SLE K1500 350 4L60E Arizona |
|
In reply to this post by Gary Lewis
Well it's about time. It's sad you had to send an unhappy email to get them, but at least you did.
|
|
Administrator
|
In reply to this post by Gary Lewis
But, in spite of the upper of having the headers in-house I'm a bit .... perplexed. It started with taking a pic of this plastic battery hold down that doesn't fit, as shown below. My batteries have a step at the top for which this hold down doesn't allow.
![]() So I then put the piece of 3" aluminum channel in place to show what I'm thinking about for a hold down. And, while doing that I realized that the new battery tray's ears for the J-bolts are not offset like the old ones are. So instead of angling the way the plastic hold down does I need one to go straight back, like this: ![]() However, that led to checking if the channel laid that way would clear the hood. As it turns out, it will. But, in doing so I realized that the positive battery post might not, and if it does it will be CLOSE! So, now the battery needs to be swapped end for end, which means the original negative cable is too short. And the new positive cable is probably too long. ![]() ![]() I think I'm going to do some scanning and let this sink in.
Gary, AKA "Gary fellow": Profile
Dad's: '81 F150 Ranger XLT 4x4: Down for restomod: Full-roller "stroked 351M" w/Trick Flow heads & intake, EEC-V SEFI/E4OD/3.50 gears w/Kevlar clutches
|
|
My first thought when I saw that post was that the hood was gonna hit it. That's way too close for comfort.
|
|
Administrator
|
In reply to this post by Gary Lewis
Maybe you should just use the group 65-2 that these battery trays were intended to hold, and have the lip on the bottom to hold them in place?
No hood clearance issues either. I know the concept of "good enough for everyone else on the planet" doesn't sit well with you. Sometimes the path of least resistance is there for a reason.
Jim,
Lil'Red is a '87 F250 HD, 4.10's, 1356 4x4, Zf-5, 3G, PMGR, Saginaw PS, desmogged with a Holley 80508 and Performer intake. Too much other stuff to mention. |
|
Administrator
|
In reply to this post by Gary Lewis
Gary, you are running into the same issues I did on Darth when I went to a group 65 battery. The only difference was I still had the original 1986 battery tray so my top clamp still fit but the brace on the front didn't. What group battery are you trying to cram in there? The group 65 is a flange mount battery which makes all of my Fords take the same battery.
Due to being a flange mount they are easy to reverse for clearance, at least Ford's battery trays are metal, not like the K-car ones.
Bill AKA "LOBO" Profile
"Getting old is inevitable, growing up is optional" Darth Vader 1986 F350 460 converted to MAF/SEFI, E4OD 12X3 1/2 rear brakes, traction loc 3:55 gear, 160 amp 3G alternator Wife's 2011 Flex Limited Daily Driver 2009 Flex Limited with factory tow package Project car 1986 Chrysler LeBaron convertible 2.2L Turbo II, modified A413 |
|
Administrator
|
Shaun - I didn't notice how close it was. Next time, tell me!
![]() The battery I'm trying to "cram" in there is an Odyssey Extreme 31M PC-2150. It is the battery that came with the truck, and appears to have a lot of life in it. And with the economy taking a dive I'm trying to keep my costs down. Yes, if I were to buy a new battery I'd probably go with a Group 65 flange-mount. But right now I don't want to spend the money if I don't need to do so. Given that, I'll spend some time creating a hold down to allow me to use this battery since I have the material. But, reversing the battery looks to be a requirement, so that's gotta happen, and new cables made.
Gary, AKA "Gary fellow": Profile
Dad's: '81 F150 Ranger XLT 4x4: Down for restomod: Full-roller "stroked 351M" w/Trick Flow heads & intake, EEC-V SEFI/E4OD/3.50 gears w/Kevlar clutches
|
This is the first time I noticed. I found out with my Ranger, if any part of the battery sticks up past the mounting flange of the fender, you're probably gonna have a bad time. And it looks like the same applies here. You were obviously fine with 80-86 tray since the battery sat lower. But not on the 87-96 tray. |
|
Administrator
|
Let's see original battery for Darth, 1986 F350 460 is a
group 64, 11.7" long, 6.4" wide and 8.9" high, RH-POS, group 65, 12.1" long, 7.5" wide and 7.6" high (I thought I remembered a reason the front brace wouldn't fit) LH-POS, which is 1987-97 and my Taurus and Mary's Flex group 31, 13" long, 6.8" wide and 9.4" high LH-POS Given that, you should only be 1/2" taller, but 1.3" or a little over 1 1/4" longer and .4" wider. I would bet the 1.3" longer is part of the problem. Are you still using the 1985 battery tray on the right side or a later one? You may also need to make sure the battery is fully seated in the tray, not up on the edges. The reversal of the positive post is why the battery is also a problem the group 64 when installed has the positive post on the right side rear so it is far enough away to not touch. When I first put a group 65 in Darth, I had the positive right side front, but since it is 1.3" shorter than the group 64 there was no contact with the hood. When I got the cable set from Jim, I had already turned the battery around and everything hooked up like it was supposed to.
Bill AKA "LOBO" Profile
"Getting old is inevitable, growing up is optional" Darth Vader 1986 F350 460 converted to MAF/SEFI, E4OD 12X3 1/2 rear brakes, traction loc 3:55 gear, 160 amp 3G alternator Wife's 2011 Flex Limited Daily Driver 2009 Flex Limited with factory tow package Project car 1986 Chrysler LeBaron convertible 2.2L Turbo II, modified A413 |
|
Administrator
|
I'm using the later battery tray on the right/passenger's side. And the battery is fully "seated" in the tray.
Speaking of the battery, it is 13" long, 6 3/4" wide, and 8" high to top of case and 9" to top of posts. But, as said, it is fully seated in the tray, so it isn't too long. It is mainly that the later tray sits slightly above the fender liner and not below, so the battery sits maybe 1/2" higher. But by swapping it end-for-end , which places the negative post near the fender & hood, I think it'll be fine. However, I'll pull the battery again and see if there is any way to drop the tray a bit. Anything would help. But the way the hood is shaped the positive post will be far from it after turning the battery. In fact, it appears that my battery hold down idea will also clear. Looks like I'll start making new cables tomorrow.
Gary, AKA "Gary fellow": Profile
Dad's: '81 F150 Ranger XLT 4x4: Down for restomod: Full-roller "stroked 351M" w/Trick Flow heads & intake, EEC-V SEFI/E4OD/3.50 gears w/Kevlar clutches
|
|
Administrator
|
In reply to this post by Gary Lewis
Purdy! ![]() |
|
Administrator
|
Thanks, David.
![]() Ok, I have a question for y'all so I'll start with it and progress to the other. Here's the mocked-up battery hold down, along with a lot of other work which we shall get to in due course. What do you think of the look? (I'm sure it'll be strong enough and it clears the hood as well, albeit just.) I'm thinking of three options, but in all cases the ends will be neatly radiused and it'll be PC'd black: 1: Just as shown but cleaned up2: With the ribs milled down roughly half way and PC'd black3: With the flat of the channel milled out such that only the ribs cross the battery. This would let it sit down over the lip of the battery where the "step" is on the edge.I think they are presented in increasingly attractive order, and the latter would look purpose-built whereas the thing now just looks like a chunk of channel that someone put under there. But I'd like your opinions. ![]() As for the other things, the first one can be seen in the pic above - I swapped the battery around. And the second thing is also visible - a ground stud. It is straight behind the PDB on the fender just under the lip, and has the new 4 ga ground that comes off the battery going to it awa the previously existing grounds from the harness and from the PDB. It is a stainless 1/4-20 stud with nuts with toothed lock washers either side. The last thing can also be seen in the above pic, sorta. But it is the new 2 ga ground cable that goes to the engine. And then from the engine there's another 2 ga ground going to the frame, but you can't see that in the pic. So here's a pic of both of them before installation and then in captivity: ![]()
Gary, AKA "Gary fellow": Profile
Dad's: '81 F150 Ranger XLT 4x4: Down for restomod: Full-roller "stroked 351M" w/Trick Flow heads & intake, EEC-V SEFI/E4OD/3.50 gears w/Kevlar clutches
|
| Edit this page |
