The Camano Experience
|
Administrator
|
No, it's still locked out until 15-20mph.
Since I don't have any real world experience with it, here is the description from the manual for Manual mode which is where the lower threshold comes into play: "The only time you will find the need for the MANUAL setting on the dash control panel is when you want to gear split from a complete stop. This is a very useful feature when tackling a steep on-ramp to a freeway where you will want to come up to speed quickly, or virtually anytime you are pulling out on a grade from a stop. To use this feature, set the dash control panel to MANUAL, turn the Under/Overdrive floor switch on to illuminate the red light, and pull the gear shift selector to low. As you take off, your vehicle will go from first, to first over, automatically at about 20mph. Once your engine's rpm is approximately 3500, move your shift lever into second gear. After you hear the transmission shift into second gear, turn off the Under/Overdrive by depressing the floor switch, and this is second direct. Once the engine again revs to 3500 rpm, press the floor switch for second over. For third direct, move the gear shift lever to drive, wait until you hear the transmission change gears, then turn off the Under/Overdrive (this would be third direct)." Note: I put 'automatically' in bold.
Scott
'Camano' 1986 F250 Supercab XLT Lariat 460/C6 'Chanute' 1980 F350 C&C 400/NP 435 - Gin Pole But there ain't nothin' wrong with the radio |
|
So it still will not shift into OD unless at a certain speed.
It also is strange you shift the transmission to the next higher gear when still in OD from the gear before then turn off OD? How does that not shift in to the next higher gear OD? I would think the same time the transmission shifts to the next higher gear you turn the OD off. Kind of like driving a 2sp rear axle truck that needed to split all the gears to get the truck to move. Yep fun to drive 5sp trans / 2sp rear = 10 speeds. It was fun shifting 2 gears in reverse  Dave ----
Dave G.
81 F100 flare side 300 six / AA OD / NP435 / 2.75 gear http://cars.grantskingdom1.com/index.php/1980-Ford-F100?page=1 81 F100 style side 300 six/SROD parts truck -RIP http://cars.grantskingdom1.com/index.php/1981-Ford-F100 |
|
Administrator
|
I agree with you Dave - the shifting sequence there seems odd. Since it will primarily just be a 4th gear for me I don't plan on using the Manual mode much but maybe it will make more sense when it's more than just theory to me. I bet it would be fun driving a truck like that. We have an old (60's Chevy maybe?) dump truck on the farm that I think has a two speed rear end but it's been decades since I have been in it. I just remember the tempting orange knob on the shifter that I was warned to never touch when I got stuck sitting in the middle.
 Had some good help (bonus: small hands) the past couple nights so I got the dash switch panel installed 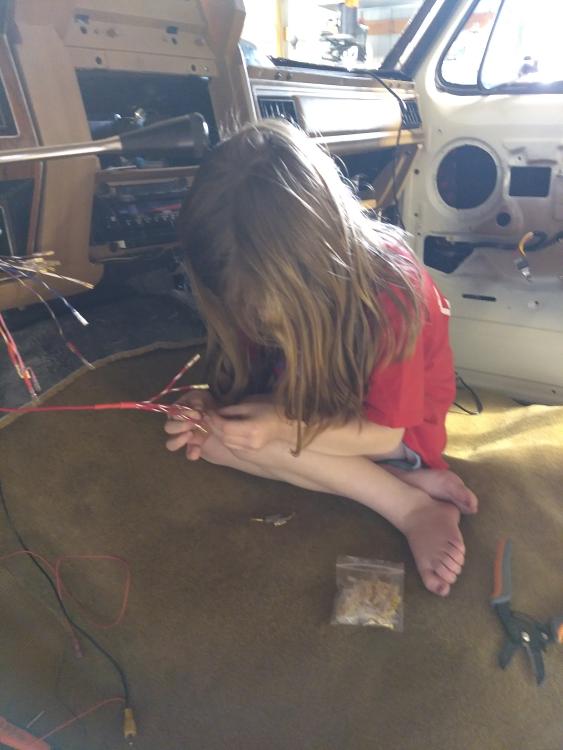 I took a couple videos to send to my dad so he could see what I was talking to him about on the phone the other day. They aren't well scripted or great quality but for anyone interested: Some notes: 1. The isolator actually disconnects at 12.7 instead of the 12.6 I said in the video 2. The GVOD switch doesn't light up because their wiring doesn't have either constant 12v or constant ground. Best I can tell/guess is that when the computer senses the different mph thresholds (~15/45) that it then puts voltage or ground to the switch wiring and depending upon which circuit is connected it either engages the OD solenoid or not. In order to have the switch light up when pressed in I will need to add a relay to the circuit that doesn't connect to +12v but rather just connects the GVOD wiring in NO or NC. Maybe someday I'll do that. 3. I suspect it won't be long before I put some tinting over the buttons as they are plenty bright 4. I wasn't originally going to make the low beam a latching button but there was a thread recently where the OP wanted to run with both high and low elements lit and after thinking about it, at the risk of forgetting and leaving it on, it seems like a good idea if the need ever arose. 5. I also rewired the backup camera from what I had it. I had it coming on automatically when going into reverse but decided to have it only driven by the button. Thought about doing both and putting a diode in to prevent the button from causing the backup lights to come on but since I don't care to use a backup camera for actually backing up and only want it when hooking up to a trailer, the button is the better option for me.
Scott
'Camano' 1986 F250 Supercab XLT Lariat 460/C6 'Chanute' 1980 F350 C&C 400/NP 435 - Gin Pole But there ain't nothin' wrong with the radio |
|
Administrator
|
What a blessing to have such a sweet little helper. And, you are teaching her skills!

|
|
Administrator
|
In reply to this post by kramttocs
That's great!
Kids home from school means more bonding time and teaching them real world skills. You're doing it right, Scott!
Jim,
Lil'Red is a '87 F250 HD, 4.10's, 1356 4x4, Zf-5, 3G, PMGR, Saginaw PS, desmogged with a Holley 80508 and Performer intake. Too much other stuff to mention. |
|
Administrator
|
In reply to this post by 1986F150Six
She was bound and determined that her, my son, and I were going to camp out in the truck last night since the carpet is in. Told her maybe after I get the locating seat belt bolts out. Would be uncomfortable enough without rolling over on one of those

Scott
'Camano' 1986 F250 Supercab XLT Lariat 460/C6 'Chanute' 1980 F350 C&C 400/NP 435 - Gin Pole But there ain't nothin' wrong with the radio |
|
Administrator
|
In reply to this post by kramttocs
Scott - Those videos really do a good job of showing how well thought out your switches are. Well done! At some point you might consider creating a page showing the plans, schematics, etc all in one go.
As for your helper, she is such a beautiful blessing. Please tell her hello from me and I hope to get to see her in September.
Gary, AKA "Gary fellow": Profile
Dad's: '81 F150 Ranger XLT 4x4: Down for restomod: Full-roller "stroked 351M" w/Trick Flow heads & intake, EEC-V SEFI/E4OD/3.50 gears w/Kevlar clutches
|
|
I have to ask what was the reason behind the switches for the Hi / Low beam lights?
I know I seen a post of you taking about mounting them I think it was but why have them? Did I miss that? On the trailer brake control is that what came with your controller and you just mounted it there? Is there a way to apply the trailer brakes when driving other than pushing the button? If not then it looks like it is on or off and nothing in between. Dave ----
Dave G.
81 F100 flare side 300 six / AA OD / NP435 / 2.75 gear http://cars.grantskingdom1.com/index.php/1980-Ford-F100?page=1 81 F100 style side 300 six/SROD parts truck -RIP http://cars.grantskingdom1.com/index.php/1981-Ford-F100 |
|
Administrator
|
Good questions and for at least one I have a good answer.
On the brake controller - yes, that is the out of the box dial and an adaptation of the out of the box led indicator system. It's a Reese Compact IQ controller and for this application, I am way more excited about it than I should be. It has a really small control unit that is mounted to the side of the brake pedal support. Then it has a fairly long (but could be longer for my location) lead on it with the dial and led indicator. I posted about this in a separate thread but with the help of the guys here, I split out the dual led into separate ones for Connected and Braking so it would better fit in the dash panel. So in short, it's a normal proportional brake controller. Speaking of - I was making sure I didn't have any parasitic draw last night and found out that this thing constantly draws .02 amps. Just fyi  . .
As for the headlights. A few reasons, none of which would make me tell someone else they should do it. 1. With the relay mod, I had the driver's side headlight wires available and ready to use 2. Had the spots in the dash switch that I wanted to fill and these seemed like good candidates 3. In an emergency situation, maybe having both elements lit would be handy (which is why the low is a latching switch) 4. Easier to push a button to flash an oncoming driver as a warning for deer/animals in the road 5. Easier to send Morse code messages with a push button The first two are the real reasons... 
Scott
'Camano' 1986 F250 Supercab XLT Lariat 460/C6 'Chanute' 1980 F350 C&C 400/NP 435 - Gin Pole But there ain't nothin' wrong with the radio |
|
I had to look up the brake controller as I have not seen that type before.
I am old school and like the "box" with a lever mounted to the bottom of the dash as that is all I have towed with. Ok got it on the lights ....... Morse code messages LOL Dave ----
Dave G.
81 F100 flare side 300 six / AA OD / NP435 / 2.75 gear http://cars.grantskingdom1.com/index.php/1980-Ford-F100?page=1 81 F100 style side 300 six/SROD parts truck -RIP http://cars.grantskingdom1.com/index.php/1981-Ford-F100 |
|
Administrator
|
This was the first time I'd ever seen a controller like that also. I've always had either the electronic or hydraulic under dash controllers. Just wanted something unseen this time.
Started on fitting the carpet this evening. The soldering gun works even better than expected. With the mass backing it works great. 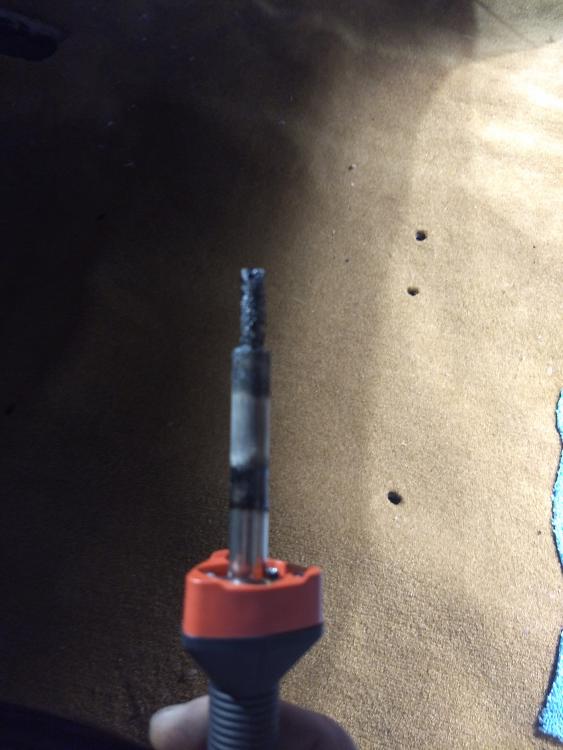 I didn't want to use my good gun so picked up a simple straight type. The large shaft is perfect for the 10mm bolts. 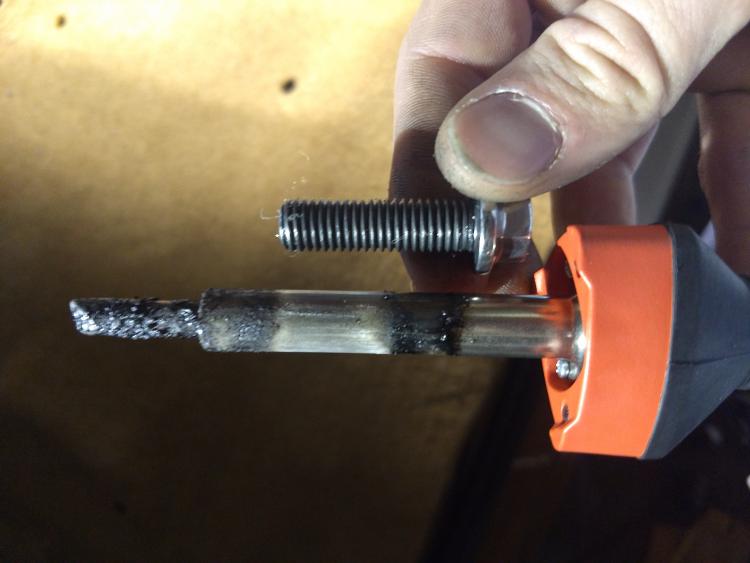 As simple as marking the hole and then just pushing it all the way through. Once cooled you can remove the excess rubber material from the back that will pop right off.
Scott
'Camano' 1986 F250 Supercab XLT Lariat 460/C6 'Chanute' 1980 F350 C&C 400/NP 435 - Gin Pole But there ain't nothin' wrong with the radio |
|
Administrator
|
Just when I thought I was done powder coating, I found the retaining ring for the 4x4 boot and a couple of the seat belt bolts. So while those were baking I installed the wall plug for the battery charger and block heater.
I mentioned a few posts earlier but the plan was to install the port on the driver's side wheel well behind the turn signal. Found out though that the block heater cord isn't long enough to reach the driver's side but the battery charger cord is long enough to reach the passenger side. So passenger side it is. Only downside is the lack of visibility of the cord but as Dave mentioned, there are alternatives. Nothing to the install. 2" hole saw and I used some m6 bolts/nuts. The cap looks like it will do a good job sealing it but figure due to the location I may have to clean it out every now and then. The cruddy looking stuff is really old rhino liner. I scraped it away to get a good seal against the fender liner.  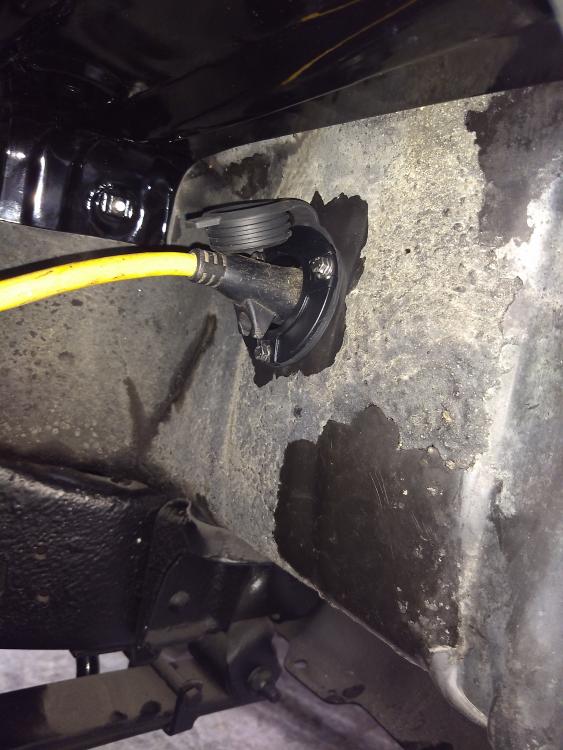 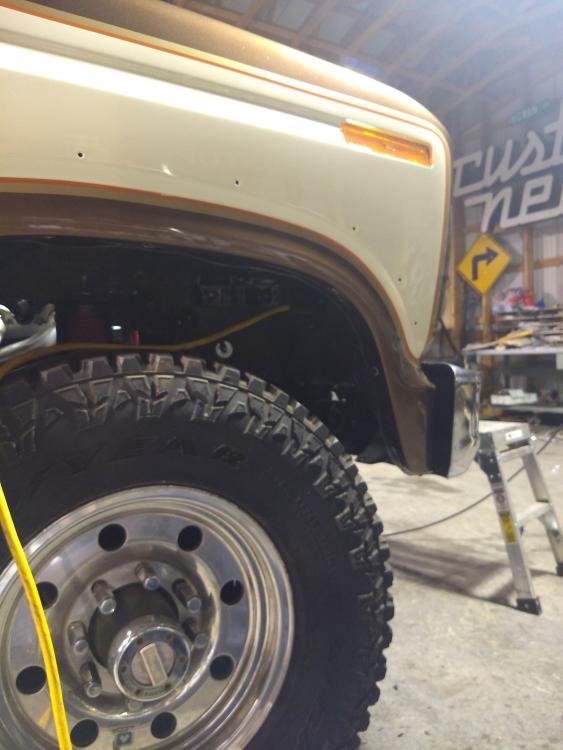
Scott
'Camano' 1986 F250 Supercab XLT Lariat 460/C6 'Chanute' 1980 F350 C&C 400/NP 435 - Gin Pole But there ain't nothin' wrong with the radio |
|
Administrator
|
Good to see that the soldering gun trick works so well on that carpet. But, like you, I don't want to use my good one. Maybe I have an old Weller soldering pen/wood engraver kicking around?
And the connector installation looks good, but I hope you use some kind of positive way to ensure it doesn't get ripped out. I've gone to placing my keys in strategic places to prevent such things, but maybe you don't want to do that with keys?
Gary, AKA "Gary fellow": Profile
Dad's: '81 F150 Ranger XLT 4x4: Down for restomod: Full-roller "stroked 351M" w/Trick Flow heads & intake, EEC-V SEFI/E4OD/3.50 gears w/Kevlar clutches
|
|
Administrator
|
That was the 'want' for putting it on the drivers side but sadly just didn't work out. The over the mirror or something on the steering wheel indicators Dave mentioned or putting the keys over on that side will likely be the solution. Now if I wanted to really prevent it I could put in a 110v relay that would lock out the ignition circuit.
 Finished the carpet and installed the front captain seats. The soldering pen is hands down the way to go. Not only dead simple but looks professional. Wouldn't be a concern in a reg cab but in the supercab, one just has to be careful with it in hand when crawling about the back.
Scott
'Camano' 1986 F250 Supercab XLT Lariat 460/C6 'Chanute' 1980 F350 C&C 400/NP 435 - Gin Pole But there ain't nothin' wrong with the radio |
|
Administrator
|
This post was updated on .
In reply to this post by Gary Lewis
"REMOVE BEFORE FLIGHT" banner on a Pip pin is cheap and easy.
We used to use these to safe our rockets, and I had one on the disc lock of my motorcycle.  https://www.aircraftspruce.com/catalog/pspages/removestreamer.php?gclid=Cj0KCQjwjoH0BRD6ARIsAEWO9DsNv8Zsg5FIpQAdfKvMaAISUEZOHWTifjTZkOH0LiV--n_gjOl6wZwaAsxGEALw_wcB Maybe use one of those split key rings in its grommet to also hold an old-fashioned 2-3 prong outlet adapter. Plug the flag into the end of then extension cord when not in use. The male prongs can be removed, and the split ring threaded into the grounding tab. 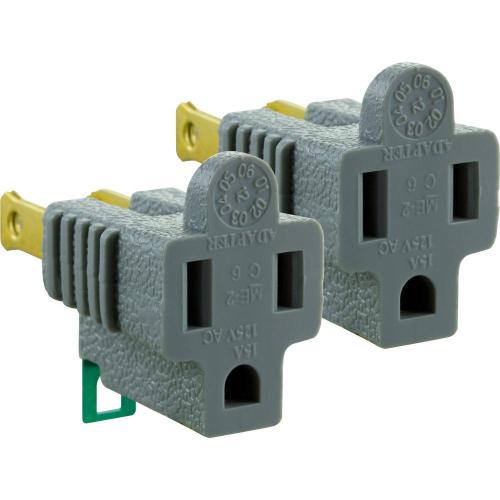 It's not lockout/tag out, but it is cheap, simple and effective.
Jim,
Lil'Red is a '87 F250 HD, 4.10's, 1356 4x4, Zf-5, 3G, PMGR, Saginaw PS, desmogged with a Holley 80508 and Performer intake. Too much other stuff to mention. |
|
Administrator
|
Good ideas! When I was working on the truck I realized there is already something of an indicator - since the boost button lights up with the status of the smart isolator, it being lit will be a fairly accurate sign the truck is plugged in. Won't help anyone else that doesn't know but...
Did a lot on the truck with the nice weather this weekend. I need to gather some more photos as I want to give a good review of the Hi Rider aftermarket kit for the rear seat for other supercab owners that might be interested. Today though I was pretty happy to see my new (does nos apply to non-factory things?) running boards arrive in perfect shape. The truck came with front wheel to rear wheel running boards that I removed the rear portion from fairly quickly as I didn't care much for how it made the truck look lower. I was debating whether or not to put the front half's back on after the rebuild but with two little kids they are a bit of a necessity. They do need some repair work and a lot of buffing that I've been putting off. When a new set (and a 1984 DeeZee catalog) showed up online I went for it. 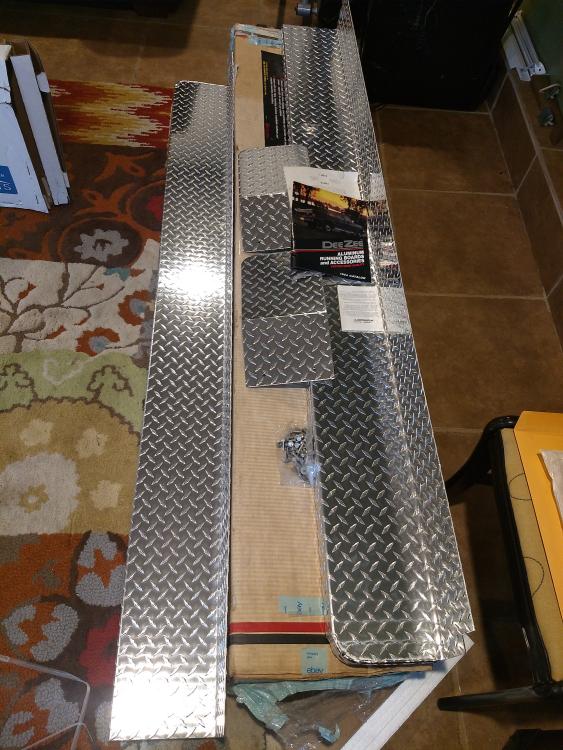 Finished up the radio mounting this evening. I'd picked up a piece from the jy awhile back that gripped the back of a single din head unit and clipped to the dash support. It was in a bullnose but pretty sure it's just an aftermarket adapter. After finding the right depth I riveted it to the double din cage and coated it. I left the back upright on the bracket to give me something to attach the speaker wiring to so it will stay away from the hvac moving parts. 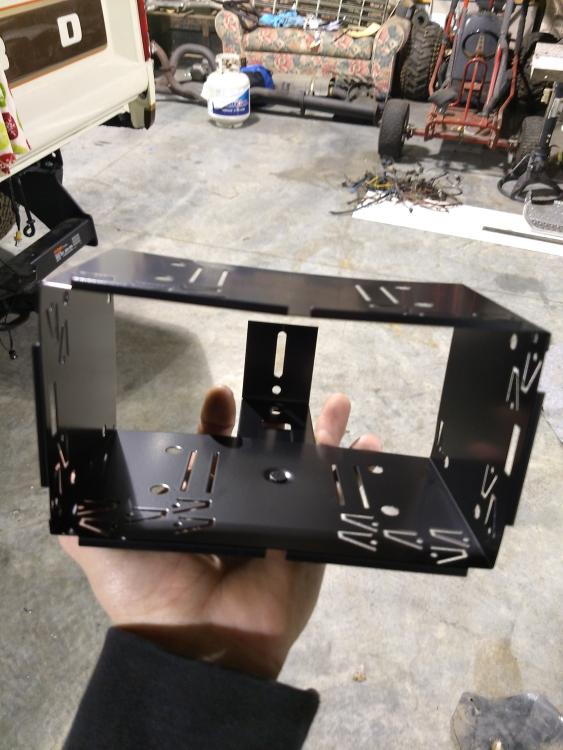 Sorry, bad focus on this one 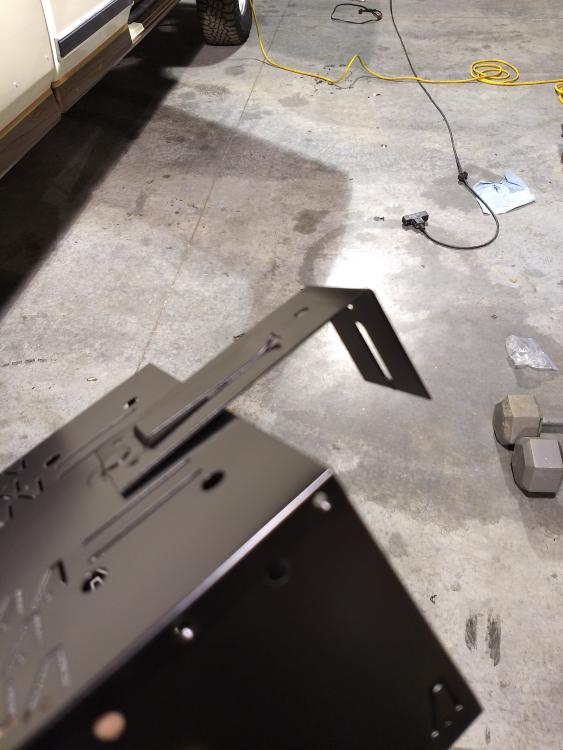
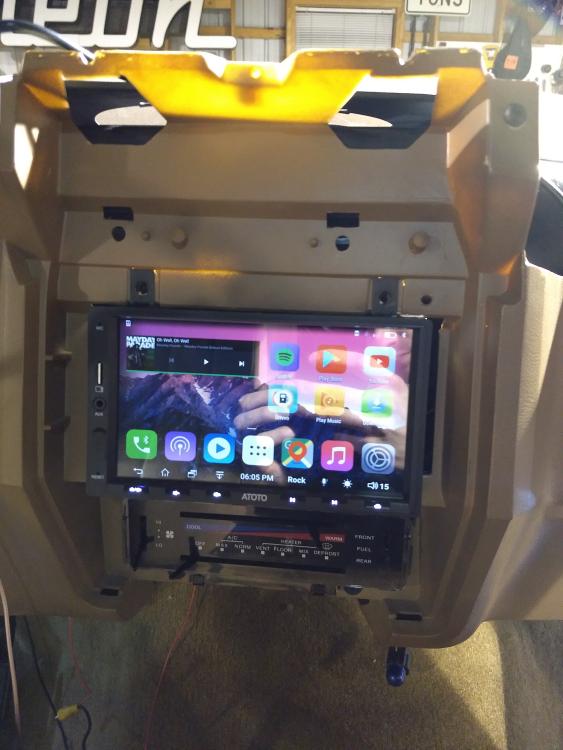 This setup holds the unit in really well and is solid in all directions so no weight will be on the bezel itself. Now to measure 50 times and cut once on the bezel.
Scott
'Camano' 1986 F250 Supercab XLT Lariat 460/C6 'Chanute' 1980 F350 C&C 400/NP 435 - Gin Pole But there ain't nothin' wrong with the radio |
|
Administrator
|
Those running boards are shiney! That will save you a LOT of effort. And NOS probably applies as they may not be making them now.
And the head unit's installation looks perfect. I'm really impressed and may need to follow your leade at some point on that. Good luck on cutting the bezel!
Gary, AKA "Gary fellow": Profile
Dad's: '81 F150 Ranger XLT 4x4: Down for restomod: Full-roller "stroked 351M" w/Trick Flow heads & intake, EEC-V SEFI/E4OD/3.50 gears w/Kevlar clutches
|
|
Administrator
|
Very nice detailing, Scott!

|
|
Administrator
|
Thanks. Had a little cosmetic issue arise but simple problem, simple solution.
The rear seatbelt in the supercab has a lot of room between it and the trim piece. Normally not noticeable since the metal and trim are close in color. Well, xmat and the trim, not so much. 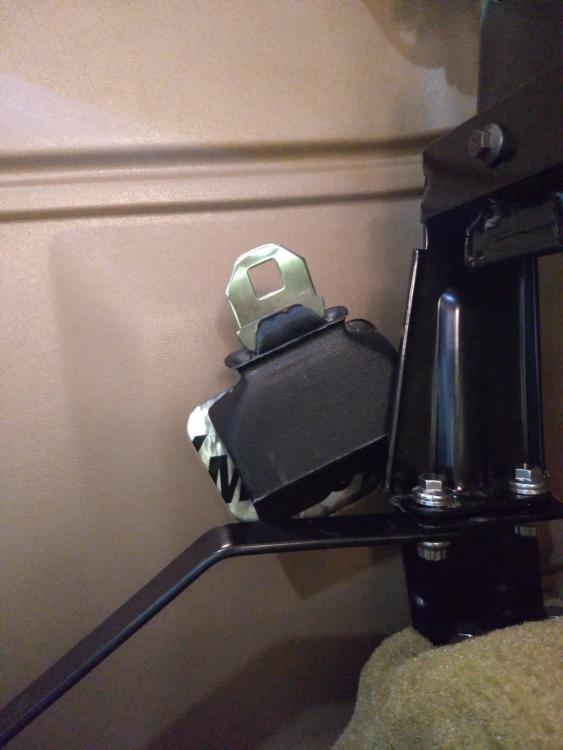 When I was at the jy last I pulled the rear trim piece from an identical truck and cut some pieces at the bottom that weren't faded. Made some oversized pieces and problem solved. I know, not really worth a post for but just in case it helps someone. 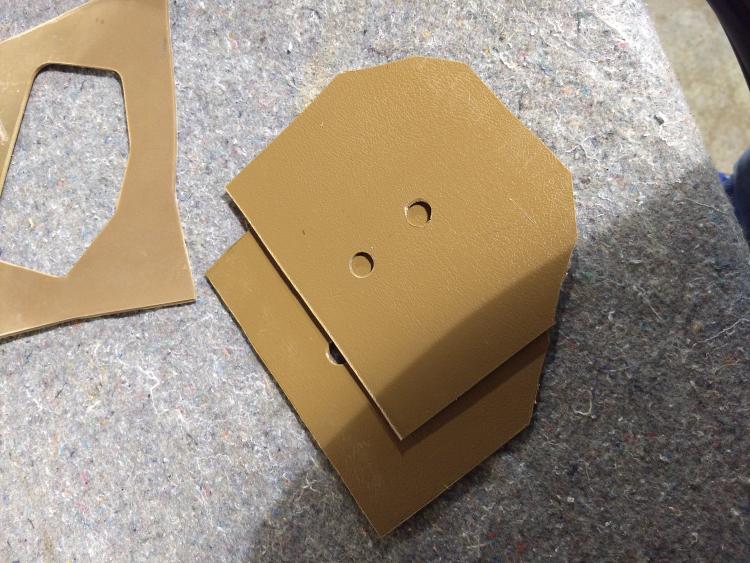 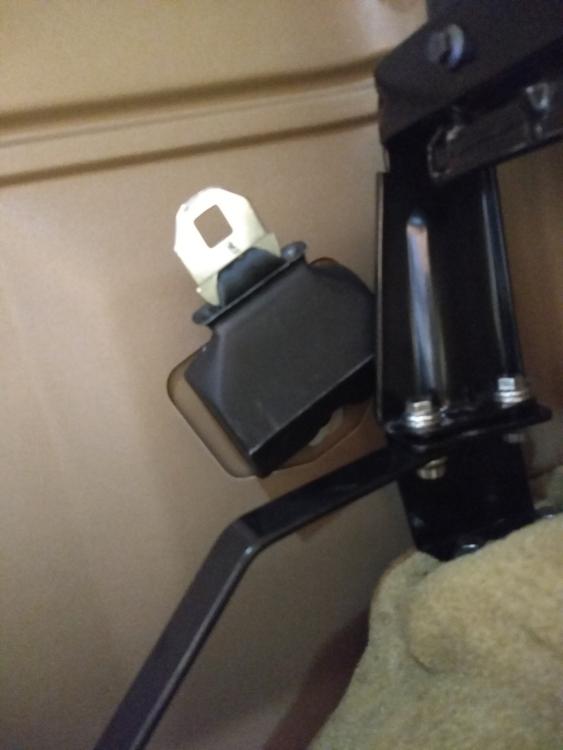
Scott
'Camano' 1986 F250 Supercab XLT Lariat 460/C6 'Chanute' 1980 F350 C&C 400/NP 435 - Gin Pole But there ain't nothin' wrong with the radio |
|
Slick!
Dane
1986 F250HD SC XLT Lariat 4x4 460 C6-Sold 1992 Bronco XLT 4x4 351W E4OD 1998 GMC Sierra SLE K1500 350 4L60E Arizona |
| Edit this page |

