The Camano Experience
|
Administrator
|
Grounding is an oft-overlooked problem. Many people don't realize that if current comes in it has to go out. (You sure wouldn't want it pooled around your feet.
 ) )
But there are grounds and then there are GROUNDS. In later years Ford got serious about grounds and ran several to the cab, fenders, etc. But not so on our trucks.
Gary, AKA "Gary fellow": Profile
Dad's: '81 F150 Ranger XLT 4x4: Down for restomod: Full-roller "stroked 351M" w/Trick Flow heads & intake, EEC-V SEFI/E4OD/3.50 gears w/Kevlar clutches
|
|
Administrator
|
Interesting approach.
I'm sure I could scavenge one from an electric panel. In fact, they make retrofit ones for sub panels to meet current code for keeping neutrals separate all the way to the main.
Jim,
Lil'Red is a '87 F250 HD, 4.10's, 1356 4x4, Zf-5, 3G, PMGR, Saginaw PS, desmogged with a Holley 80508 and Performer intake. Too much other stuff to mention. |
|
Administrator
|
Good point - one could pull a neutral block from a panel, cut to length, and accomplish the same thing with even more screw points.
Scott
'Camano' 1986 F250 Supercab XLT Lariat 460/C6 'Chanute' 1980 F350 C&C 400/NP 435 - Gin Pole But there ain't nothin' wrong with the radio |
|
In reply to this post by kramttocs
very nice. We have a lot of salt and humidity in the air here. If I am running something like this I will need to take that down to bare metal then seal the joint between the ground bar and frame to keep it from rusting up relatively quickly. On my Malibu i have had so many ghost electrical issues caused simply by corrosion in grounds. Like loosing AC on a 100F day because the computer lost temp sensor readings.
1985 F-350 XL | 460 | C6 | "Rufus Maximus"
1986 F-150|Standard Cab|4x2|300Six|C6Transmission w/3.08 rear|Name:TBD 2021 Ranger XLT Super Crew | Cactus Grey | black out package | max tow |
|
Administrator
|
This post was updated on .
Been terrible at updating this thread.
Have been making a lot of progress though. Actually ran the engine for the first time last weekend. That was exciting. Allowed me to get the fluids all taken care of also. It wasn't without a couple hiccups though. I first unhooked the starter and held the key on to let the fuel pumps fill the carb. Hooked the starter back up and it fired right up. Ran for a little bit and then died. With the Quickfuel bowl sights plus the clear inline fuel filter I could see that it wasn't getting any fuel. Did this a couple times before I realized I never grounded the fuel pump relay over by the brake booster.  Second one was after it had been warmed up. I was checking some things on it when [insert Old Faithful noise here] the bottom-most plug under the radiator cap flew off sending coolant everywhere. Guess I'd left clamping that thing off of my pre-startup checklist.  What is that bottom port even for? On all my 400/460 trucks it has been capped. Update - did some googling and sounds like it's for the 300. What is that bottom port even for? On all my 400/460 trucks it has been capped. Update - did some googling and sounds like it's for the 300.
Now I need to tune the carb and swap out the recurved distributor from Scotty. Then back to wiring. Hooked up the Cole Hersee smart battery isolator and ran the 1/0 power and ground wire from the passenger side fuse block. Before I can finish that wiring I need to make/install the aluminum plate that will hold the drivers side fuse block and the duraspark module. Originally I was also going to mount my battery charger on it but after getting the charger in hand, the size and weight of it meant it had to go elsewhere. The onboard battery charger I am using is a NOCO Gen2 Mini. Not kidding about the weight of this thing. 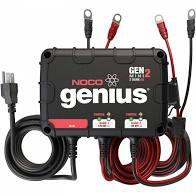 It is going to get mounted on the core support between the core support and the aux battery. I am making a mounting plate out of 1/8 aluminum sheet that will bolt onto the core support and then the battery charger will mount upside down to it - this is because there isn't anything on the core support that lines up with the charger mounting holes. Originally I was going to just hook the two charger leads up to either side of the battery isolator since it would be right under it but with this new location, the two leads can reach each battery directly. In addition to the battery charger, I also have the block heater that will need plugged in. Last winter I just ran it through the grill like a diesel but I picked up one of these (also NOCO) to see if it will work.  While I know to go around the front and unplug it, if my wife or anyone else ever needed to take the truck somewhere it wouldn't be something they would think of nor would it be visible from the drivers side. The plan is to mount this thing in the plastic inner fender towards the front - somewhere in the turn signal area. This way it would be hidden when not used but also tough to miss when the cord is hanging there. I also finished up installing the floor heat/sound mats which reminds me - since the exhaust shop routed the drivers side exhaust up and over the transfer case, the area under the drivers seat definitely got warm when the engine was running even with these mats installed. It wasn't routed this way previously so I have nothing to compare it to but I am assuming (hoping) the mats made it better than it would have been on the interior side than if they weren't there. Will have to see if the mass backed carpet makes it less noticeable. Speaking of, I took that out of the box yesterday to get some of the wrinkles out and hope to get it in tomorrow although the weather may not cooperate. 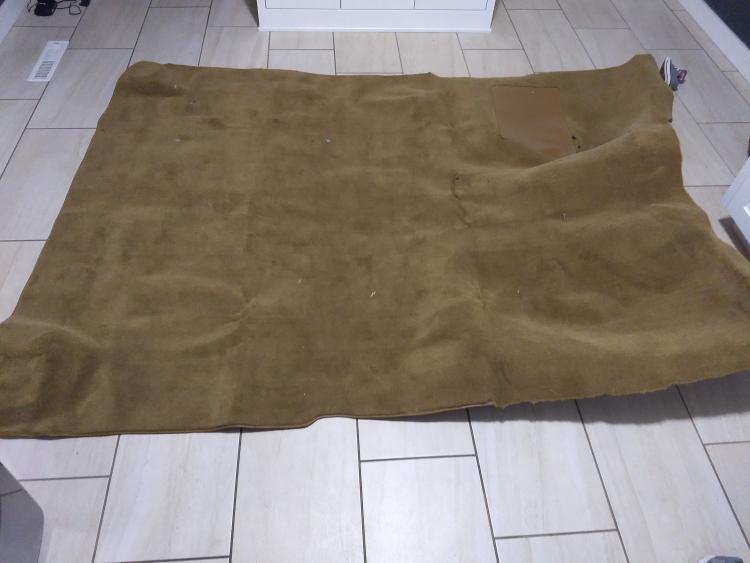 I was reading up on the various ways to cut the holes for the seat/seatbelt bolts. Seems like cutting x's, heating a socket to burn a hole, or using a soldering gun to burn a hole were the common ways. TheScatch - you used the soldering gun right? Happy with how that turned out? I don't recall - did you just poke it through or did you use a flat tip to cut a circle? And was your carpet mass backed?
Scott
'Camano' 1986 F250 Supercab XLT Lariat 460/C6 'Chanute' 1980 F350 C&C 400/NP 435 - Gin Pole But there ain't nothin' wrong with the radio |
|
Administrator
|
You HAVE been making progress. Well done!
 Now I know why I have a Starter fuse and a Fuel Pump fuse. I can pull the Starter fuse and still run the fuel pump to prime things.  As for the hiccups, I'm expecting to have more than that. So you did well. But I think the extra fitting on the radiator may have to do with the fact that some of the EFI'd engines had coolant-heated air inlet systems. Small hoses ran to the throttle body to heat the incoming air. On the on-board charger, did you remember that it may well trigger the smart isolator, thereby paralleling the two batteries?
Gary, AKA "Gary fellow": Profile
Dad's: '81 F150 Ranger XLT 4x4: Down for restomod: Full-roller "stroked 351M" w/Trick Flow heads & intake, EEC-V SEFI/E4OD/3.50 gears w/Kevlar clutches
|
|
On the block heater cord on work truck where it was plugged in at the radiator the cord was run over the drivers side mirror so you would see it when getting in to start.
My work truck now has it under the drivers door, again you see it getting. On my diesel I was the only one to drive it so not a big deal but I also parked it so I would have to walk pass where it was plugged in. Maybe for you if the above does not work something that hangs from the sun visor blocking the view saying the block heater plugged in? Dave ----
Dave G.
81 F100 flare side 300 six / AA OD / NP435 / 2.75 gear http://cars.grantskingdom1.com/index.php/1980-Ford-F100?page=1 81 F100 style side 300 six/SROD parts truck -RIP http://cars.grantskingdom1.com/index.php/1981-Ford-F100 |
|
Administrator
|
In reply to this post by Gary Lewis
That will definitely come in handy  Over the past few months I've left a handful of messages with Littlefuse tech support to ask them about the smart isolator and if they had any warnings about charging like this but haven't ever received a return phone call. I called NOCO last week and explained how the smart isolator worked. In short, the gentleman I spoke to said that all the charger cared about was what was between the positive and negative lead. So hook up the two leads to each battery and it won't care if the isolator has them joined or not. He said the charger were smart enough to identify the batters individually. Then gen2mini can handle batteries up to 120Ah per bank so that will have to be considered. A quick search is showing the standard group 65 battery topping off at 75Ah and the largest yellowtop at 72. They do have some info on their site: https://no.co/support/series-and-parallel-charging Dave - that's a good idea on the visor or the drivers mirror. Simple and effective.
Scott
'Camano' 1986 F250 Supercab XLT Lariat 460/C6 'Chanute' 1980 F350 C&C 400/NP 435 - Gin Pole But there ain't nothin' wrong with the radio |
|
What was nice going over the mirror beside you would see it, but if it snowed you could grab the cord there and follow it to the truck plug pulling it out of the snow and sticking it out of the way for a plow to come by or shoveling.
Dave ----
Dave G.
81 F100 flare side 300 six / AA OD / NP435 / 2.75 gear http://cars.grantskingdom1.com/index.php/1980-Ford-F100?page=1 81 F100 style side 300 six/SROD parts truck -RIP http://cars.grantskingdom1.com/index.php/1981-Ford-F100 |
|
Administrator
|
Been working on the dash controls for awhile since the weather hasn't been great but did get a few minutes to install the battery charger.
The 1/8 aluminum plate is mounted to existing holes on the core support braces and I tapped some holes to mount the charger to the plate. It's pretty close to the battery tray at the bottom but angles away at the top. 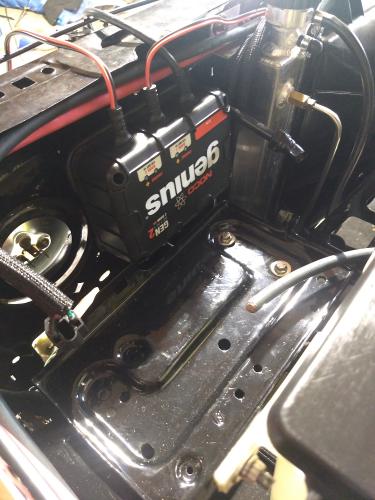 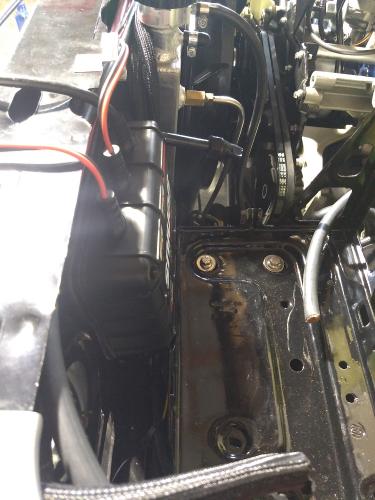 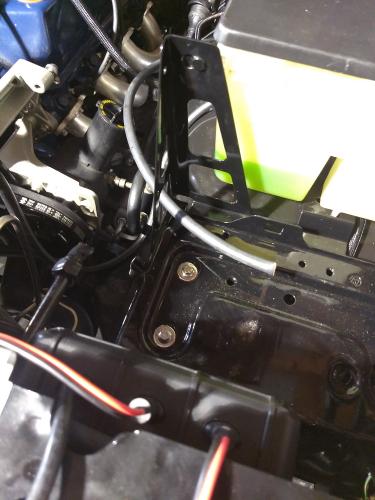
Scott
'Camano' 1986 F250 Supercab XLT Lariat 460/C6 'Chanute' 1980 F350 C&C 400/NP 435 - Gin Pole But there ain't nothin' wrong with the radio |
|
Administrator
|
Nicely done, Scott!

|
|
Administrator
|
In reply to this post by kramttocs
Yes, nicely done! So it is tucked in ahead of the battery in that unused space. Cool!
Gary, AKA "Gary fellow": Profile
Dad's: '81 F150 Ranger XLT 4x4: Down for restomod: Full-roller "stroked 351M" w/Trick Flow heads & intake, EEC-V SEFI/E4OD/3.50 gears w/Kevlar clutches
|
|
Administrator
|
I knew the measurements beforehand but it was still a lot bigger in person than I expected. The original onboard charger that came with the truck was mounted in the same spot but on the drivers side. It was a much smaller unit and only did one bank.
Had the day off so spent part of it working on the truck. First was trying to get an understanding of the GVOD wiring. Didn't pay a ton of attention when it was removed from the original truck as it is color coded but since I am integrating it into the custom dash panel I need to understand the wiring a bit better. Think I have everything figured out but having some issues with the 4x4 lockout (blue wire with a male spade). Figured it had to be scotchlok-ed into the 4x4 indicator down by the tcase which means it would be ground switched. Chatted with support but they weren't sure since the unit is an older one. Fortunately Jonathan (F834) had a better diagram which confirmed the scotchlok. So now I know the blue wire is looking for ground. Great. The problem is what when I checked that wire it didn't have any voltage. Not sure what is going on there. Tabled that for the moment but welcome any suggestions on tests I can perform. I don't care for scotchloks so made a jumper to go in the 4wd wire that is on the engine side of the firewall. 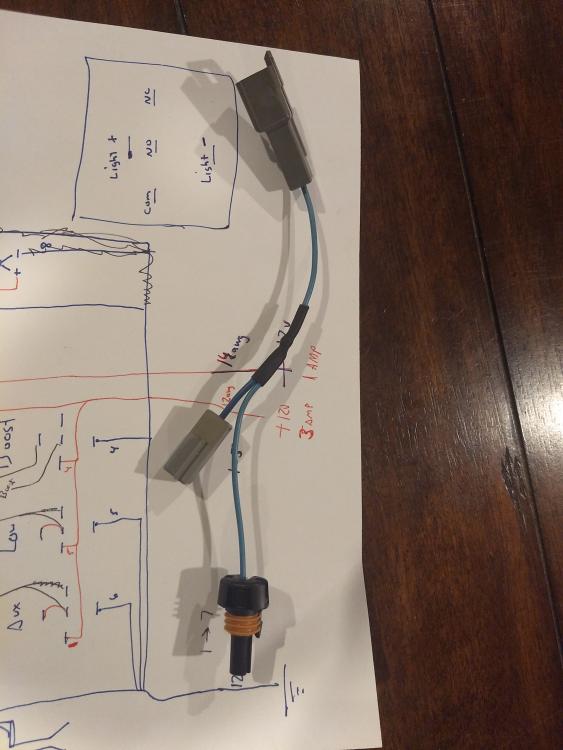 Moved on to the interior. Cleared all the tools out and did some cleaning/vacuuming. 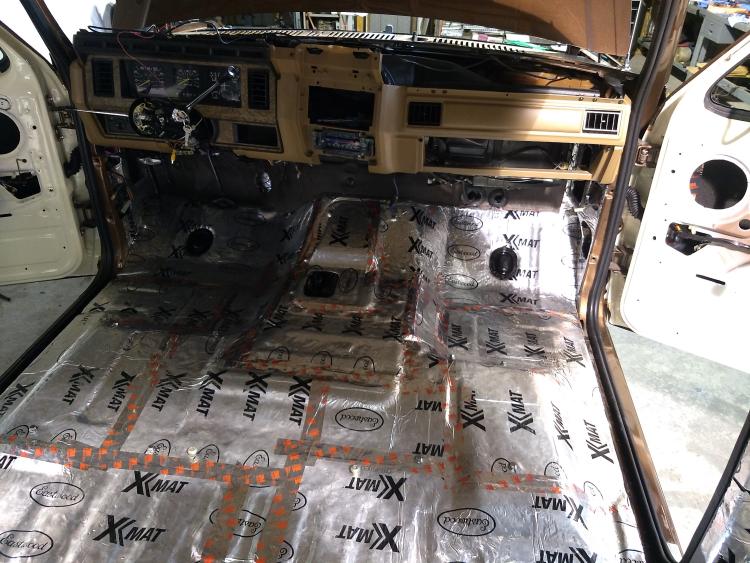 Installed all the seat/seatbelt bolts and then installed the carpet. I talked about the carpet back when I bought it but this is the mass backed essex. Right now I would say the fit is ok. The material quality is great but it isn't quite fitting like I expected. I haven't installed a carpet since the 65 Mustang in high school though and I've slept since then. Hopefully once I start working it around it will fit better. It was also in the 30's in the shop so no doubt that made the mass backing a bit less pliable. 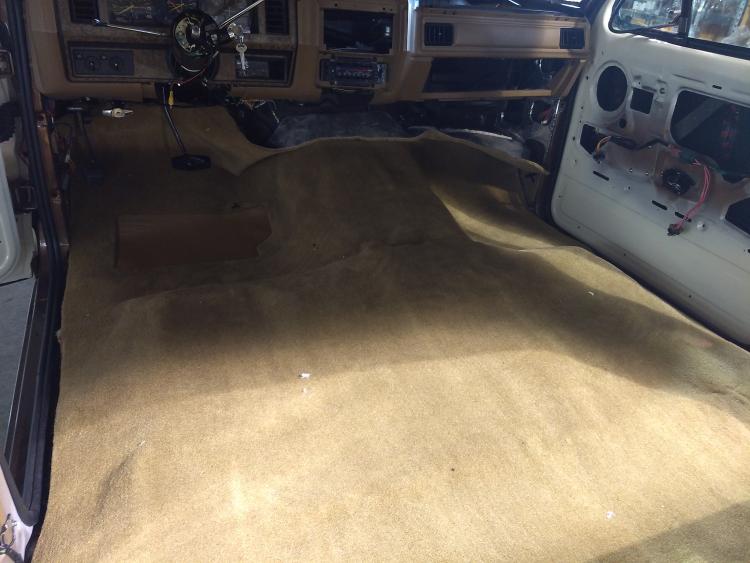 Did some more work on the drivers side platform. Originally this platform was going to be for a fuse box, the duraspark, and the battery charger. Since the battery charger was way too big for this I gained a spot for something else. 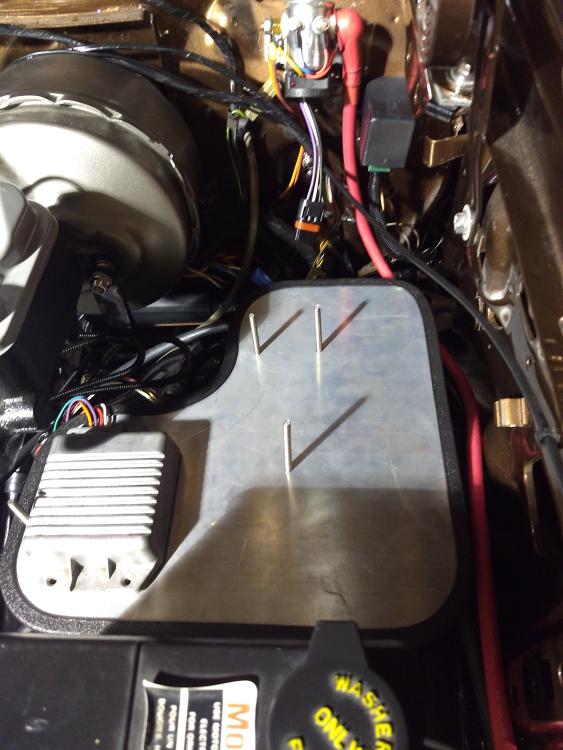 The threaded rods will be cut off. Due to the overflow tank hose and the washer fluid pump wiring, this platform has to be raised higher than the passenger side one so the rods were used with nuts underneath to find the right height. At this point I am thinking a second ssVEC might fill the empty spot. I don't have a need for it now but want to plan for it. I was going to place it in the spot near the firewall but with the cruise control there isn't enough height for it, let alone room to raise the lid. Now the plan is to place the duraspark in that spot, the fuse box will go where the duraspark is in the photo (near the motor), and the ssVEC will go in the corner near the washer fluid. I was planning to stack the durasparks for a backup but since the cruise control prevents that I am thinking I will throw the spare directly underneath the in-use one and bolt them together. It won't get much air there but would last long enough until the top one is replaced.
Scott
'Camano' 1986 F250 Supercab XLT Lariat 460/C6 'Chanute' 1980 F350 C&C 400/NP 435 - Gin Pole But there ain't nothin' wrong with the radio |
|
Administrator
|
So, what do you think kills DSII boxes?
Hours of runtime? Age? Underhood heat? My 'known good' spare is just kicking around under the seat with my jumper cables and stuff. I've found they tend to die somewhere between 80-120kmi. Maybe newer ones are better? The TP-40 I have now hasn't hiccuped yet.
Jim,
Lil'Red is a '87 F250 HD, 4.10's, 1356 4x4, Zf-5, 3G, PMGR, Saginaw PS, desmogged with a Holley 80508 and Performer intake. Too much other stuff to mention. |
|
Administrator
|
In reply to this post by kramttocs
The carpet looks GREAT! And I'm sure the heat will soften the backing and let it lay in even better.
On the GVOD, is it possible that there's no voltage there until the unit goes into a certain mode, and it isn't at the moment? As for the DS-II box, if you bolt them together the bottom one will sink some of its heat into the top one through the bolts. Or you could put the top one upside down and against the bottom one, with some compound between them. And maybe an aluminum plate to cover the bottom of the top one?
Gary, AKA "Gary fellow": Profile
Dad's: '81 F150 Ranger XLT 4x4: Down for restomod: Full-roller "stroked 351M" w/Trick Flow heads & intake, EEC-V SEFI/E4OD/3.50 gears w/Kevlar clutches
|
Yes the carpet looks good. Reminds me I need to bring the carpet I got from a buddy as it is hanging outside. On the GVOD do you have the 4x4 light on the dash? If so how about a relay to be tripped when the light comes on to ground? Dave ----
Dave G.
81 F100 flare side 300 six / AA OD / NP435 / 2.75 gear http://cars.grantskingdom1.com/index.php/1980-Ford-F100?page=1 81 F100 style side 300 six/SROD parts truck -RIP http://cars.grantskingdom1.com/index.php/1981-Ford-F100 |
|
Administrator
|
This relay would accomplish, what?
I can understand if it shows the transfer case is engaged (4X4) but otherwise what's the point?
Jim,
Lil'Red is a '87 F250 HD, 4.10's, 1356 4x4, Zf-5, 3G, PMGR, Saginaw PS, desmogged with a Holley 80508 and Performer intake. Too much other stuff to mention. |
|
Administrator
|
In reply to this post by Gary Lewis
Jim, good question. I've always assumed heat was their only kryptonite.
I've only ever had one go out on me. It wasn't an all or nothing thing in that case. The truck would just die randomly. Fortunately it would also start right back up and since the truck (the 80 1 ton) is a manual it wasn't a huge problem. My plan is: Active DSII (right side up) ==================1/4 aluminum plate Backup DSII (upside down) I will drill out the threads on the active unit and sandwich it all together using bolts coming from the top and using the Backup DSII's threads. The Backup DSII will only be used for short times until I get the Active one replaced. Or life happens and I forget to replace the top one until they both go bad... Ether way the aluminum plate ought to help dissipate some heat even though the bottom one won't get much airflow. ...... On the GVOD. Turns out I wasn't working with all the right information. I didn't have a manual with my unit so I purchased one awhile back. It is for the current control box whereas mine is the 'analog' model with a build date of '95  Your thoughts Gary aren't all that far off for some functions of the unit. I was trying to test the controls/lights but nothing was working. Turns out they don't work unless the solenoid is hooked up (had to call tech support on that one). That stumped me for quite awhile. I was afraid I was going to have to go the route Dave just mentioned. Where I would have a NC connection that would be for the power to the whole unit and upon being grounded (via the 4x4 switched ground indicator) it would kill power to the whole unit. Fortunately that turned out to not be the case. The manual I have states that "The lockout is designed to lockout Gear Vendors until the ignition has been cycled. If the truck has been shifted into four wheel drive, the vehicle must be shut off and restarted in 2 wheel drive, in order for Gear Vendors to be operation again. To test whether this feature is working correctly. Turn vehicle ignition on, shift transfercase into four wheel drive. Once the 4x4 indicator illuminates on the dash board, shift transfercase back into 2 wheel drive. Now depress Gear Vendors foot switch while looking at Red Autodrive light. Nothing should change. If the red light turns on and off with the foot switch, something is not correct. If everything is wired correctly, the ignition must be shut off and turned back on in order for Gear Vendors to work." Some notes on that- The Red Autodrive light is on IF the unit is going to go into OD automatically. This means either Launch (1st over) if in Manual mode or 4th gear in Automatic mode (these modes don't refer to the transmission type). Whether in Manual or Automatic the foot switch can be used to toggle the Red Autodrive light. When the unit is in OD the Green OverDrive light comes on (and the Red light goes off) - it's either one lit, the other lit, or neither. My moment of panic was that even when grounding the 4x4 lead and then disconnecting it, I was still able to toggle the red light with the foot switch. My next test, thankfully as it explained the whole 4x4 issue, was to see if the solenoid actually engaged. Hooked a drill to the end of the speedometer, put the unit in Manual mode with the Red Autodrive lit since this is Launch and means the unit should engage OD at a lower mph, and started the drill. Sure enough the red light went out, green light came on and I could hear the solenoid click. Put it in 4x4, did the same test and, phew, the red light always stayed on - no OD engagement. Put it back into 2wd, did the same test and the OD kicked in. Huh? The manual says it should require an ignition cycle Well after a number of tests in all the various configs and the different mph engagement thresholds with, I have to assume that the analog unit doesn't require that power cycle and is simply interrupted by the presence of ground. I actually prefer this as having to kill the truck seems a bit of a pain but I do see the safety in it. That may not mean anything or matter to most but I hadn't come across that information before so maybe it will help someone. Doing those tests and routing the wires is about all I got done today. I did get the tailgate installed last night. Never realized how many alignment points there are with it. Everything looks good except it's too close to the passenger side. Will take some photos and post a question about that in the main forum later. On another note - I first learned about Big Blackie when it was put up for sale the first time. Found the FTE thread at that time but admittedly never read beyond a few posts here and there because all of the photos were missing. So all I'd ever seen were the eBay listing photos (which were impressive). Well this afternoon I was googling something and that thread was returned, clicked on it, and was surprised to see all the photos showing up. That led to reading the vast majority of the thread  Wow! Incredible work. Knowing how much work was involved between each photo update is crazy. There is a ton of good information and tips in there that everyone should read. Part of me wishes I had before I started but the other part is afraid I would have been scared away Wow! Incredible work. Knowing how much work was involved between each photo update is crazy. There is a ton of good information and tips in there that everyone should read. Part of me wishes I had before I started but the other part is afraid I would have been scared away  .Now I entirely understand the references when you guys mention that truck and what it sold for. .Now I entirely understand the references when you guys mention that truck and what it sold for.
Scott
'Camano' 1986 F250 Supercab XLT Lariat 460/C6 'Chanute' 1980 F350 C&C 400/NP 435 - Gin Pole But there ain't nothin' wrong with the radio |
|
In reply to this post by ArdWrknTrk
He needs to ground the GVOD wire when in 4x4 and I don't know of any other way to ground that wire so if he was to use the live power 4x4 wire to trigger a relay to ground the GVOD wire would that not work? It would add a little more wiring but unless he finds a wire that grounds when in 4x4 what is he to do? How would you ground the GVOD wire when in 4x4? Dave ----
Dave G.
81 F100 flare side 300 six / AA OD / NP435 / 2.75 gear http://cars.grantskingdom1.com/index.php/1980-Ford-F100?page=1 81 F100 style side 300 six/SROD parts truck -RIP http://cars.grantskingdom1.com/index.php/1981-Ford-F100 |
|
Well the last post looks like it was for nothing
 Scott, good to hear you got the 4x4 lock out figured out and tested and works. So are you saying you can run the GVOD in OD under a set speed with your unit. The latest unit I think will not go into OD under a certain speed and most of the time left 1stOD out. Cant wait to hear how it works when out on the road. Dave ----
Dave G.
81 F100 flare side 300 six / AA OD / NP435 / 2.75 gear http://cars.grantskingdom1.com/index.php/1980-Ford-F100?page=1 81 F100 style side 300 six/SROD parts truck -RIP http://cars.grantskingdom1.com/index.php/1981-Ford-F100 |
| Edit this page |


