T2K-CAR
|
Administrator
|
This post was updated on .
Sounds at least reasonable. I need to extract the key from the crank to see what it looks like. I have a woodruff key assortment I bought at Fastenal years ago. I also need to figure out how far out the sprocket needs to sit on the crank snout to be in the same plane as the cam sprockets.
It may end up as a stub shaft that goes over the crank snout with the sprocket being a press fit and the key for it being separate form the existing key. Wherever the key ends up will be what I have as not having all the identical pieces of the 2.4L timing system may (and probably will) vary the actual location of the cam gears +/- a half tooth. Crank pulleys, 2.2/2.5L are held onto the sprocket with 5 M8X1.25 bolts. The 2.4L is an actual balancer and presses on the crank with a large center bolt, probably a key to align it.
Bill AKA "LOBO" Profile
"Getting old is inevitable, growing up is optional" Darth Vader 1986 F350 460 converted to MAF/SEFI, E4OD 12X3 1/2 rear brakes, traction loc 3:55 gear, 160 amp 3G alternator Wife's 2011 Flex Limited Daily Driver 2009 Flex Limited with factory tow package Project car 1986 Chrysler LeBaron convertible 2.2L Turbo II, modified A413 |
|
Administrator
|
Bill - I've lost track of where we are on this. I was thinking you were taking measurements with a straightedge to see how far forward the accessories go. And with that we could discuss creating a stub shaft as you suggested. But now that I look back on all the traffic I'm not sure that is the case.
I think the idea of a stub shaft is a good one - assuming there's enough room for it. But I don't have a way to broach it for the keyway. I could probably mill it, but that would make the keyway rounded at the top. Anyway, is the ball in my court or yours? 
Gary, AKA "Gary fellow": Profile
Dad's: '81 F150 Ranger XLT 4x4: Down for restomod: Full-roller "stroked 351M" w/Trick Flow heads & intake, EEC-V SEFI/E4OD/3.50 gears w/Kevlar clutches
|
|
Administrator
|
Right now it is still in my court. I went to Pick-n-Pull in VB today and got most of what I needed, I couldn't get the balancer off, Northern Tool puller snapped one of the Chinesium bolts for the jaws. Once I get a chance to mock some things up and get some decent pictures/measurements I will send them to you.
One question, have you ever tried any machining on powered metal parts? The gears on the 2.4L are powdered metal and if I want to use the entire 2.4L set, I will need to make an extra cam gear fit the 2.5L intermediate (distributor and oil pump drive) shaft. It is either that or try to make the 40 tooth 2.5L gear line up with the wider gears for the 2.4L DOHC setup. Since I am not using the block location for the distributor (it will be on the head driven backwards by the intake cam) if the oil pump turns 5% faster it shouldn't be a problem. It will mean having to use a 24mm wide instead of a 28mm wide belt, and still do some modifications to get everything lined up.
Bill AKA "LOBO" Profile
"Getting old is inevitable, growing up is optional" Darth Vader 1986 F350 460 converted to MAF/SEFI, E4OD 12X3 1/2 rear brakes, traction loc 3:55 gear, 160 amp 3G alternator Wife's 2011 Flex Limited Daily Driver 2009 Flex Limited with factory tow package Project car 1986 Chrysler LeBaron convertible 2.2L Turbo II, modified A413 |
|
Administrator
|
Ok, glad the ball is in your court. I was afraid it was in my court and I was supposed to be doing something.
And I've not machined anything made of powdered metal. A bit of reading says there are many different compositions of powdered metal, and that changes the ease with which they are machined. Plus they have microscopic voids which means there are lots of little "interruptions" in the cut, and that creates chatter and rough finishes. But it can be machined.
Gary, AKA "Gary fellow": Profile
Dad's: '81 F150 Ranger XLT 4x4: Down for restomod: Full-roller "stroked 351M" w/Trick Flow heads & intake, EEC-V SEFI/E4OD/3.50 gears w/Kevlar clutches
|
|
Administrator
|
I am trying right now to figure out which way to go on the timing belt, right side motor mount and accessory mounts (AC, PS and Alternator). The 2.4L engine uses a timing belt driven water pump that is mounted in the block in a protruding section with the water inlet entering the impeller through a pipe that is centered on it. The 2.5L engine has the water entrance to the block in the same area, but the actual pump is mounted low down with a curved casting containing the discharge, it also rotates backwards in relation to the crank.
The result is the accessory locations are quite different. 2.5L PS pump is on the back side next to the manifolds, but not attached to the head in any way. AC compressor is on the front on a large aluminum casting that also carries the alternator. Alternator ends up slightly above and forward of the water pump. On the 2.4L that I got the parts from, a PT Cruiser, the alternator sits behind the engine low down with a dedicated belt, AC compressor low (oil pan level) in front with the PS pump above it near but above the water pump and both are driven by the same auto tensioned belt (both are polygroove). After doing some fitting of the timing belt tensioner and the big hunk of cast iron that holds the power steering pump and supports the right end of the engine, it looks like using the front upper bolt location in the 2.5L block it puts the timing belt tensioner in the correct area and with the rear upper bolt location rotated against the bottom of the head the angle matches the stamped 2.5L mount. The center of the actual mount is exactly 7" from the face of the block on the 2.2L in the car and the through bolt holding the two halves of the mount together is 3.5" from the face of the block. The center of the holes for the upper torque reaction strut on the PT Cruiser are 3.5" from the face of block. The 2.5L timing belt goes around the right side mount bracket necessitating complete disassembly of the AC compressor and alternator mount to change it. This big chunk of aluminum is going to be the biggest challenge outside of the crank adapter due to the way it is attached. There are 5 M10 X 1.5 bolts with somewhat oversize spring washers that go 3 into the block and 2 into the head flanking #1 plug. There is a probably 3.5" long stud and a similar bolt in the end of the block that go through that casting and a "dogbone" shaped spacer between the motor mount and the casting so once everything is tightened the AC compressor is very solid.
Bill AKA "LOBO" Profile
"Getting old is inevitable, growing up is optional" Darth Vader 1986 F350 460 converted to MAF/SEFI, E4OD 12X3 1/2 rear brakes, traction loc 3:55 gear, 160 amp 3G alternator Wife's 2011 Flex Limited Daily Driver 2009 Flex Limited with factory tow package Project car 1986 Chrysler LeBaron convertible 2.2L Turbo II, modified A413 |
|
Administrator
|
It is hard to imagine all that w/o pics, and might be hard to figure out with pics. But it sure seems challenging! Man, that seems like a whole lot of work.

Gary, AKA "Gary fellow": Profile
Dad's: '81 F150 Ranger XLT 4x4: Down for restomod: Full-roller "stroked 351M" w/Trick Flow heads & intake, EEC-V SEFI/E4OD/3.50 gears w/Kevlar clutches
|
|
Administrator
|
Yes, it is, but so was BB. I don't right now have any good pictures as I was just doing some test fitting on the block with the good head just sitting on it and going back and forth with the various pieces.
I need to dig around and find the extra AC compressor bracket and the "dogbone" spacer so I can get a better line up on the parts. I think I have a good plan on the crank gear mounting, it may involve a "cheat", loctiting the gear to the adapter after making the adapter almost an interference fit in it.
Bill AKA "LOBO" Profile
"Getting old is inevitable, growing up is optional" Darth Vader 1986 F350 460 converted to MAF/SEFI, E4OD 12X3 1/2 rear brakes, traction loc 3:55 gear, 160 amp 3G alternator Wife's 2011 Flex Limited Daily Driver 2009 Flex Limited with factory tow package Project car 1986 Chrysler LeBaron convertible 2.2L Turbo II, modified A413 |
|
Administrator
|
Yes, BB was a major project, as was Darth, so we are familiar with "projects".
Speaking of Darth, I don't think that 4300 carb sold, and I have stuff to get back to you, so???
Gary, AKA "Gary fellow": Profile
Dad's: '81 F150 Ranger XLT 4x4: Down for restomod: Full-roller "stroked 351M" w/Trick Flow heads & intake, EEC-V SEFI/E4OD/3.50 gears w/Kevlar clutches
|
|
Administrator
|
Price?? Now I need a nice 1/2" thick piece of aluminum plate that can be drilled and tapped for the 4300D and drilled for the EFI upper plenum bolt pattern.
From what you have posted, it looks like it was a great event as always!
Bill AKA "LOBO" Profile
"Getting old is inevitable, growing up is optional" Darth Vader 1986 F350 460 converted to MAF/SEFI, E4OD 12X3 1/2 rear brakes, traction loc 3:55 gear, 160 amp 3G alternator Wife's 2011 Flex Limited Daily Driver 2009 Flex Limited with factory tow package Project car 1986 Chrysler LeBaron convertible 2.2L Turbo II, modified A413 |
|
Administrator
|
Price? I dunno. Not much 'cause shipping will be a bunch - it is heavy.
Can you bolt a spreadbore adapter to my carb/plenum adapter? Do you need a dizzy to start it up with? If so, a DS-II module?
Gary, AKA "Gary fellow": Profile
Dad's: '81 F150 Ranger XLT 4x4: Down for restomod: Full-roller "stroked 351M" w/Trick Flow heads & intake, EEC-V SEFI/E4OD/3.50 gears w/Kevlar clutches
|
|
Administrator
|
Probably, but the 4300D throttle pattern doesn't match a spreadbore, it is all by itself. Yes I can use the DS-II stuff, I'll have to figure out how to wire it since the 1996 harness has no provision for a ballast resistor or DS-II box. Fortunately I have lots of relays and sockets to make a temporary DS-II power system and can probably use a Chrysler resistor as they were external ceramic block ones for years.
Bill AKA "LOBO" Profile
"Getting old is inevitable, growing up is optional" Darth Vader 1986 F350 460 converted to MAF/SEFI, E4OD 12X3 1/2 rear brakes, traction loc 3:55 gear, 160 amp 3G alternator Wife's 2011 Flex Limited Daily Driver 2009 Flex Limited with factory tow package Project car 1986 Chrysler LeBaron convertible 2.2L Turbo II, modified A413 |
|
Administrator
|
Back to the originally scheduled discussion. Here are a couple of pictures of what I am working on with this. The original mount system for this end (right side of car) is a 5mm thick stamped piece that sits against the "front" face of the block. It has one fairly long stud top front, and a short stud top rear. On the front side there is a "dogbone" cast aluminum spacer that fills the space out to the end of the large aluminum casting that the AC compressor mounts to and the alternator pivots on.
On the back side the power steering pump bracket goes over the mount and an M10X1.5 nut with a washer secures the upper, lower is secured with an M10X1.5 bolt with washer. On the front, upper stud after passing through the engine support stamping, dogbone and casting has another stamped brace for the mount bracket that was only used on the turbocharged 2.2L and all 2.5L due to the higher torque then a M10X1.5 nut with washer, bottom has a long M10X1.5 bolt that on some applications went into the water jacket, later models it is a blind hole. This is the back side, mount is on left, power steering pump bracket is black bracket on bottom side right end. 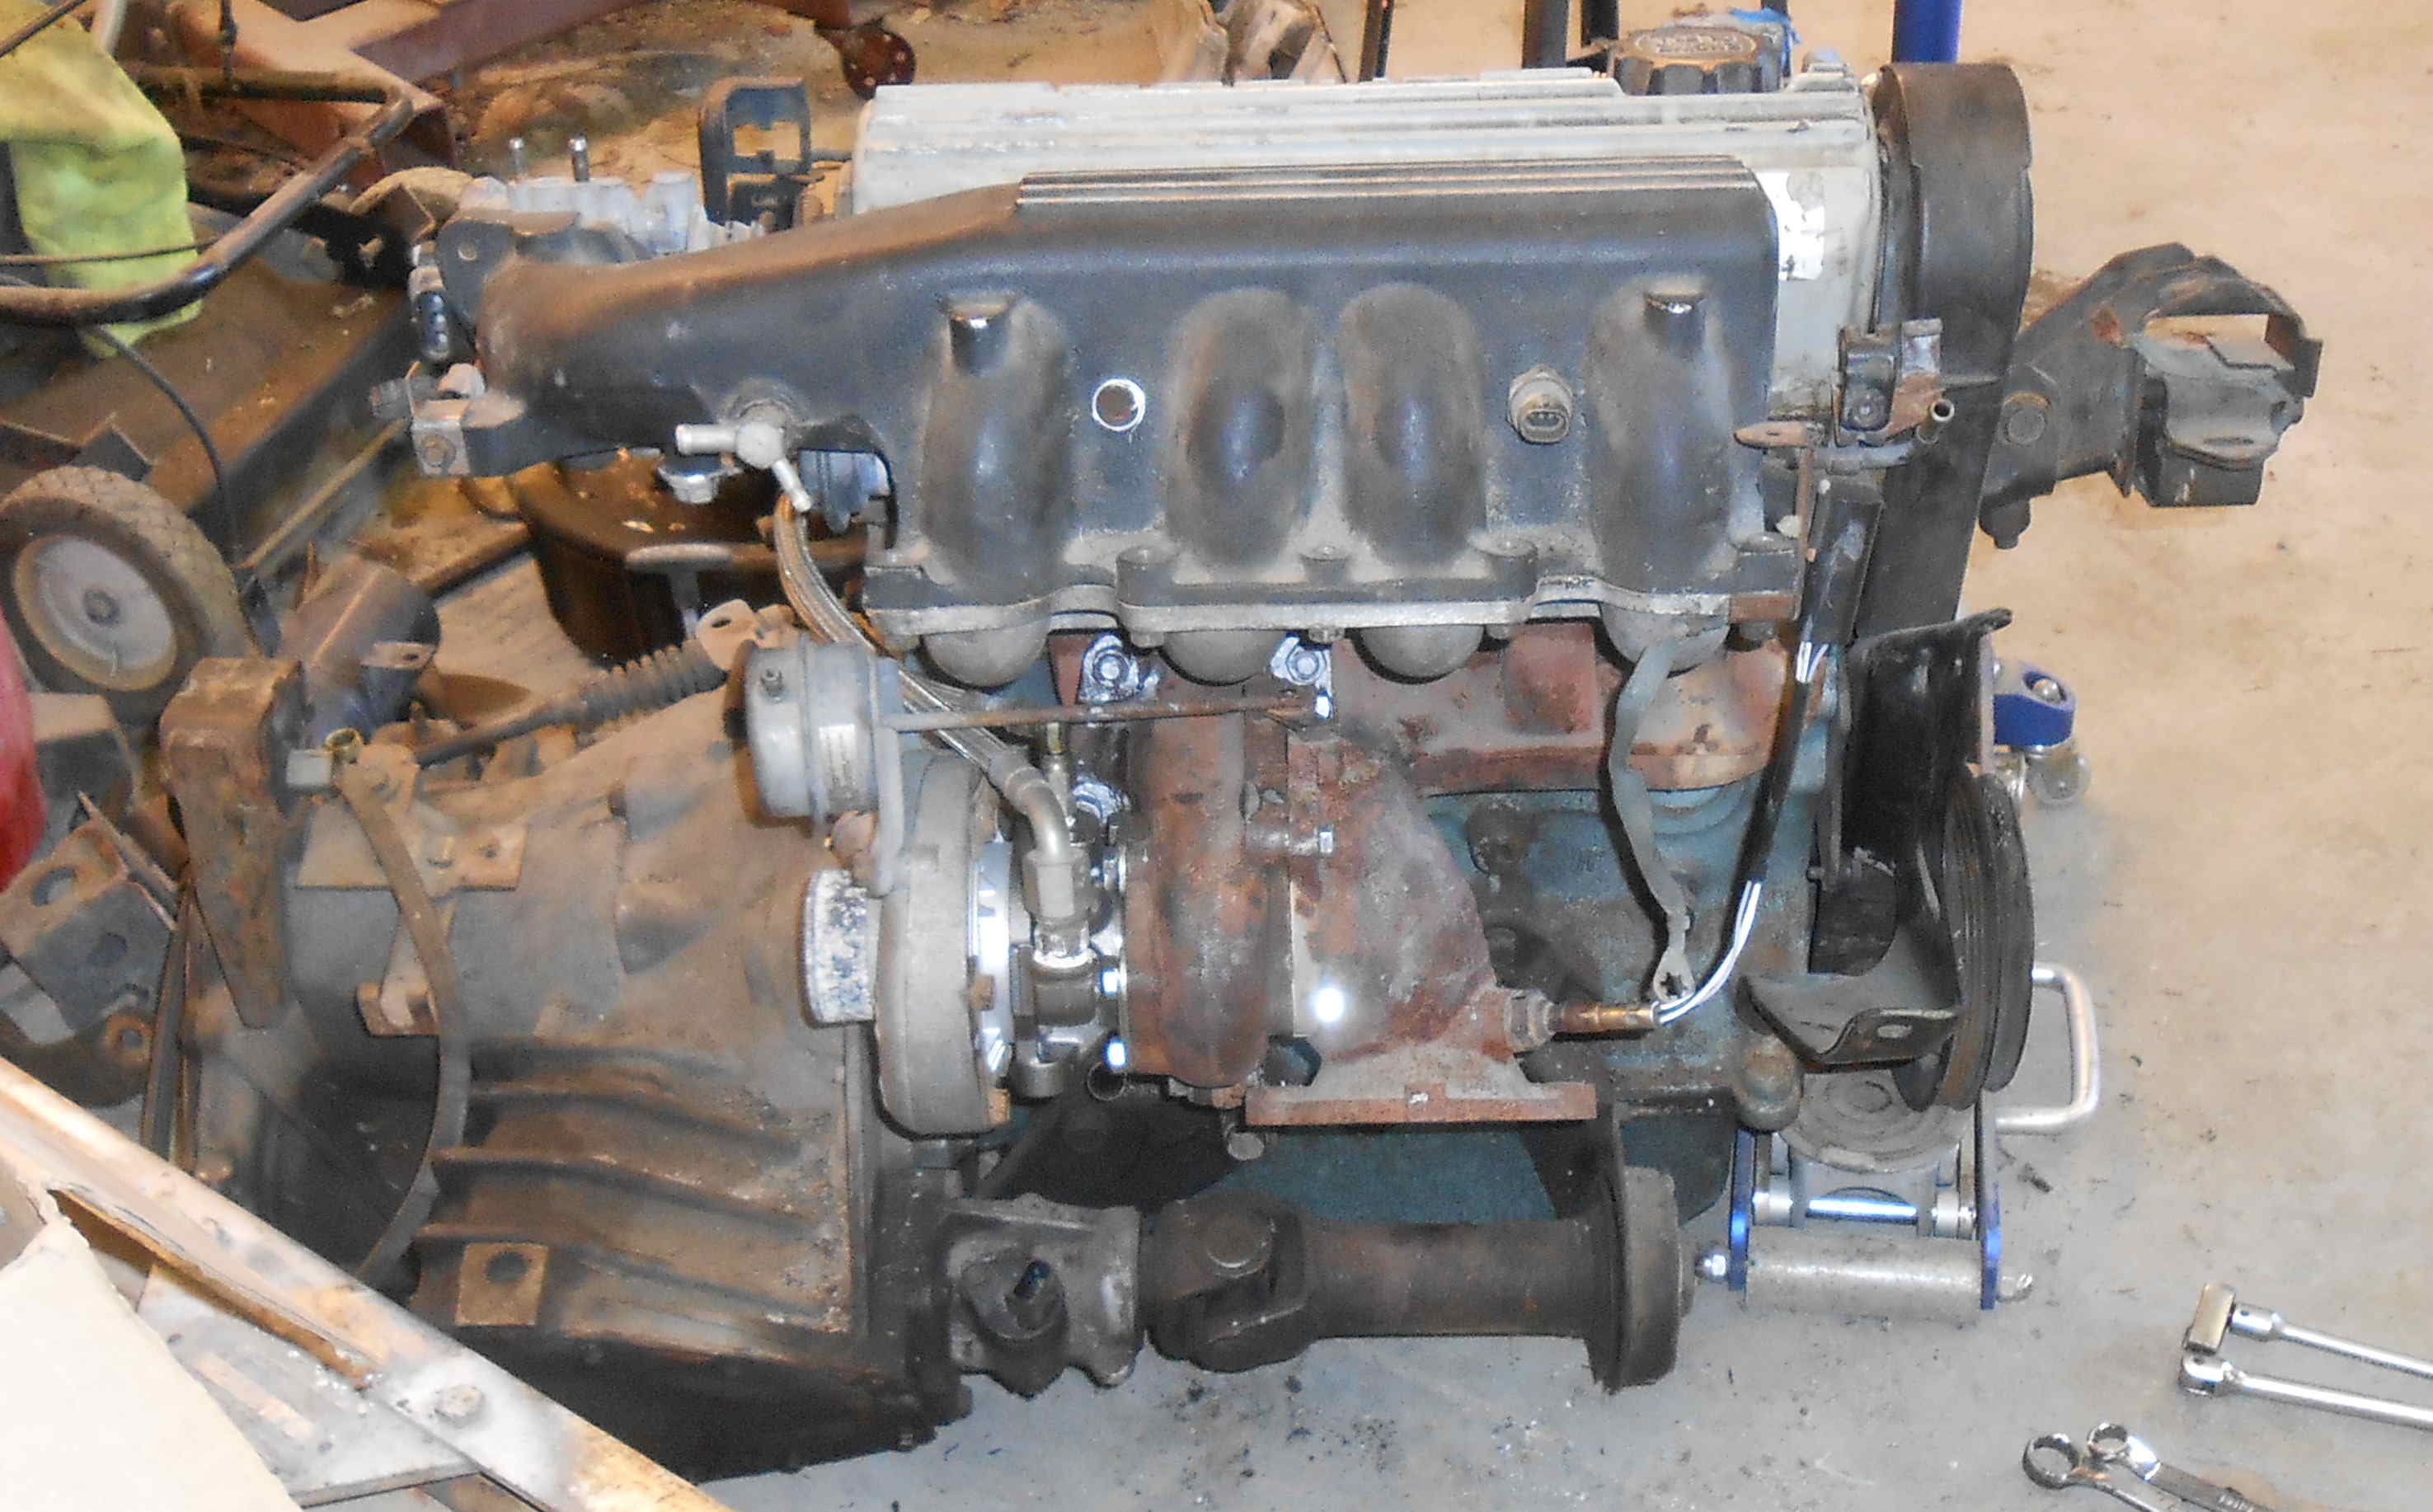 The timing belt on these runs between the dogbone and compressor/alternator mount necessitating a fair amount of disassembly to replace it. The vehicle I removed the parts from was a PT Cruiser with a 2.4L DOHC NA engine. These have a very interesting mounting system on the right side. There is a large cast iron bracket attached to the end of the cast iron cylinder block with 3 long M10X1.5 bolts, at the bottom of this is an M10X1.5 tapped hole, when the engine is installed a bolt is installed through the actual mount that sits in a frame rail recess. The top of this casting has a smaller cast bracket that the upper torque mount is attached to. In behind this casting is the automatic timing belt tensioner on a cast aluminum bracket. The front upper bolt for the engine support passes through it and the lower front bolt passes through the water pump body, rear bolt goes into the block with an alignment sleeve. By using the lower rear hole and upper front holes, the timing belt tensioner bracket went on with a little additional clearancing of the holes. This gave me a solid reference location for the engine support. In order to be sure the angle in relation to the engine was correct, I installed the 1989 mount to the block, zeroed my nice angle gauge by setting it on the garage floor (verified 0° slant) then placed it on the top of the mount and rotated the engine block to be on 0° at the mount. I then assembled the PT Cruiser support bracket to it's location using only the front upper bolt, prior to doing this I had cleaned the block face and sprayed some bright "chrome" paint where the front lower bolt would sit. With the support bracket aligned at 0° I now had the correct angle for the bracket. I took one of the long bolts, put it through the lower front hole and hit it a few good raps with a brass hammer, giving me a center location/ Center punched it, drilled and tapped to M10X1.5. 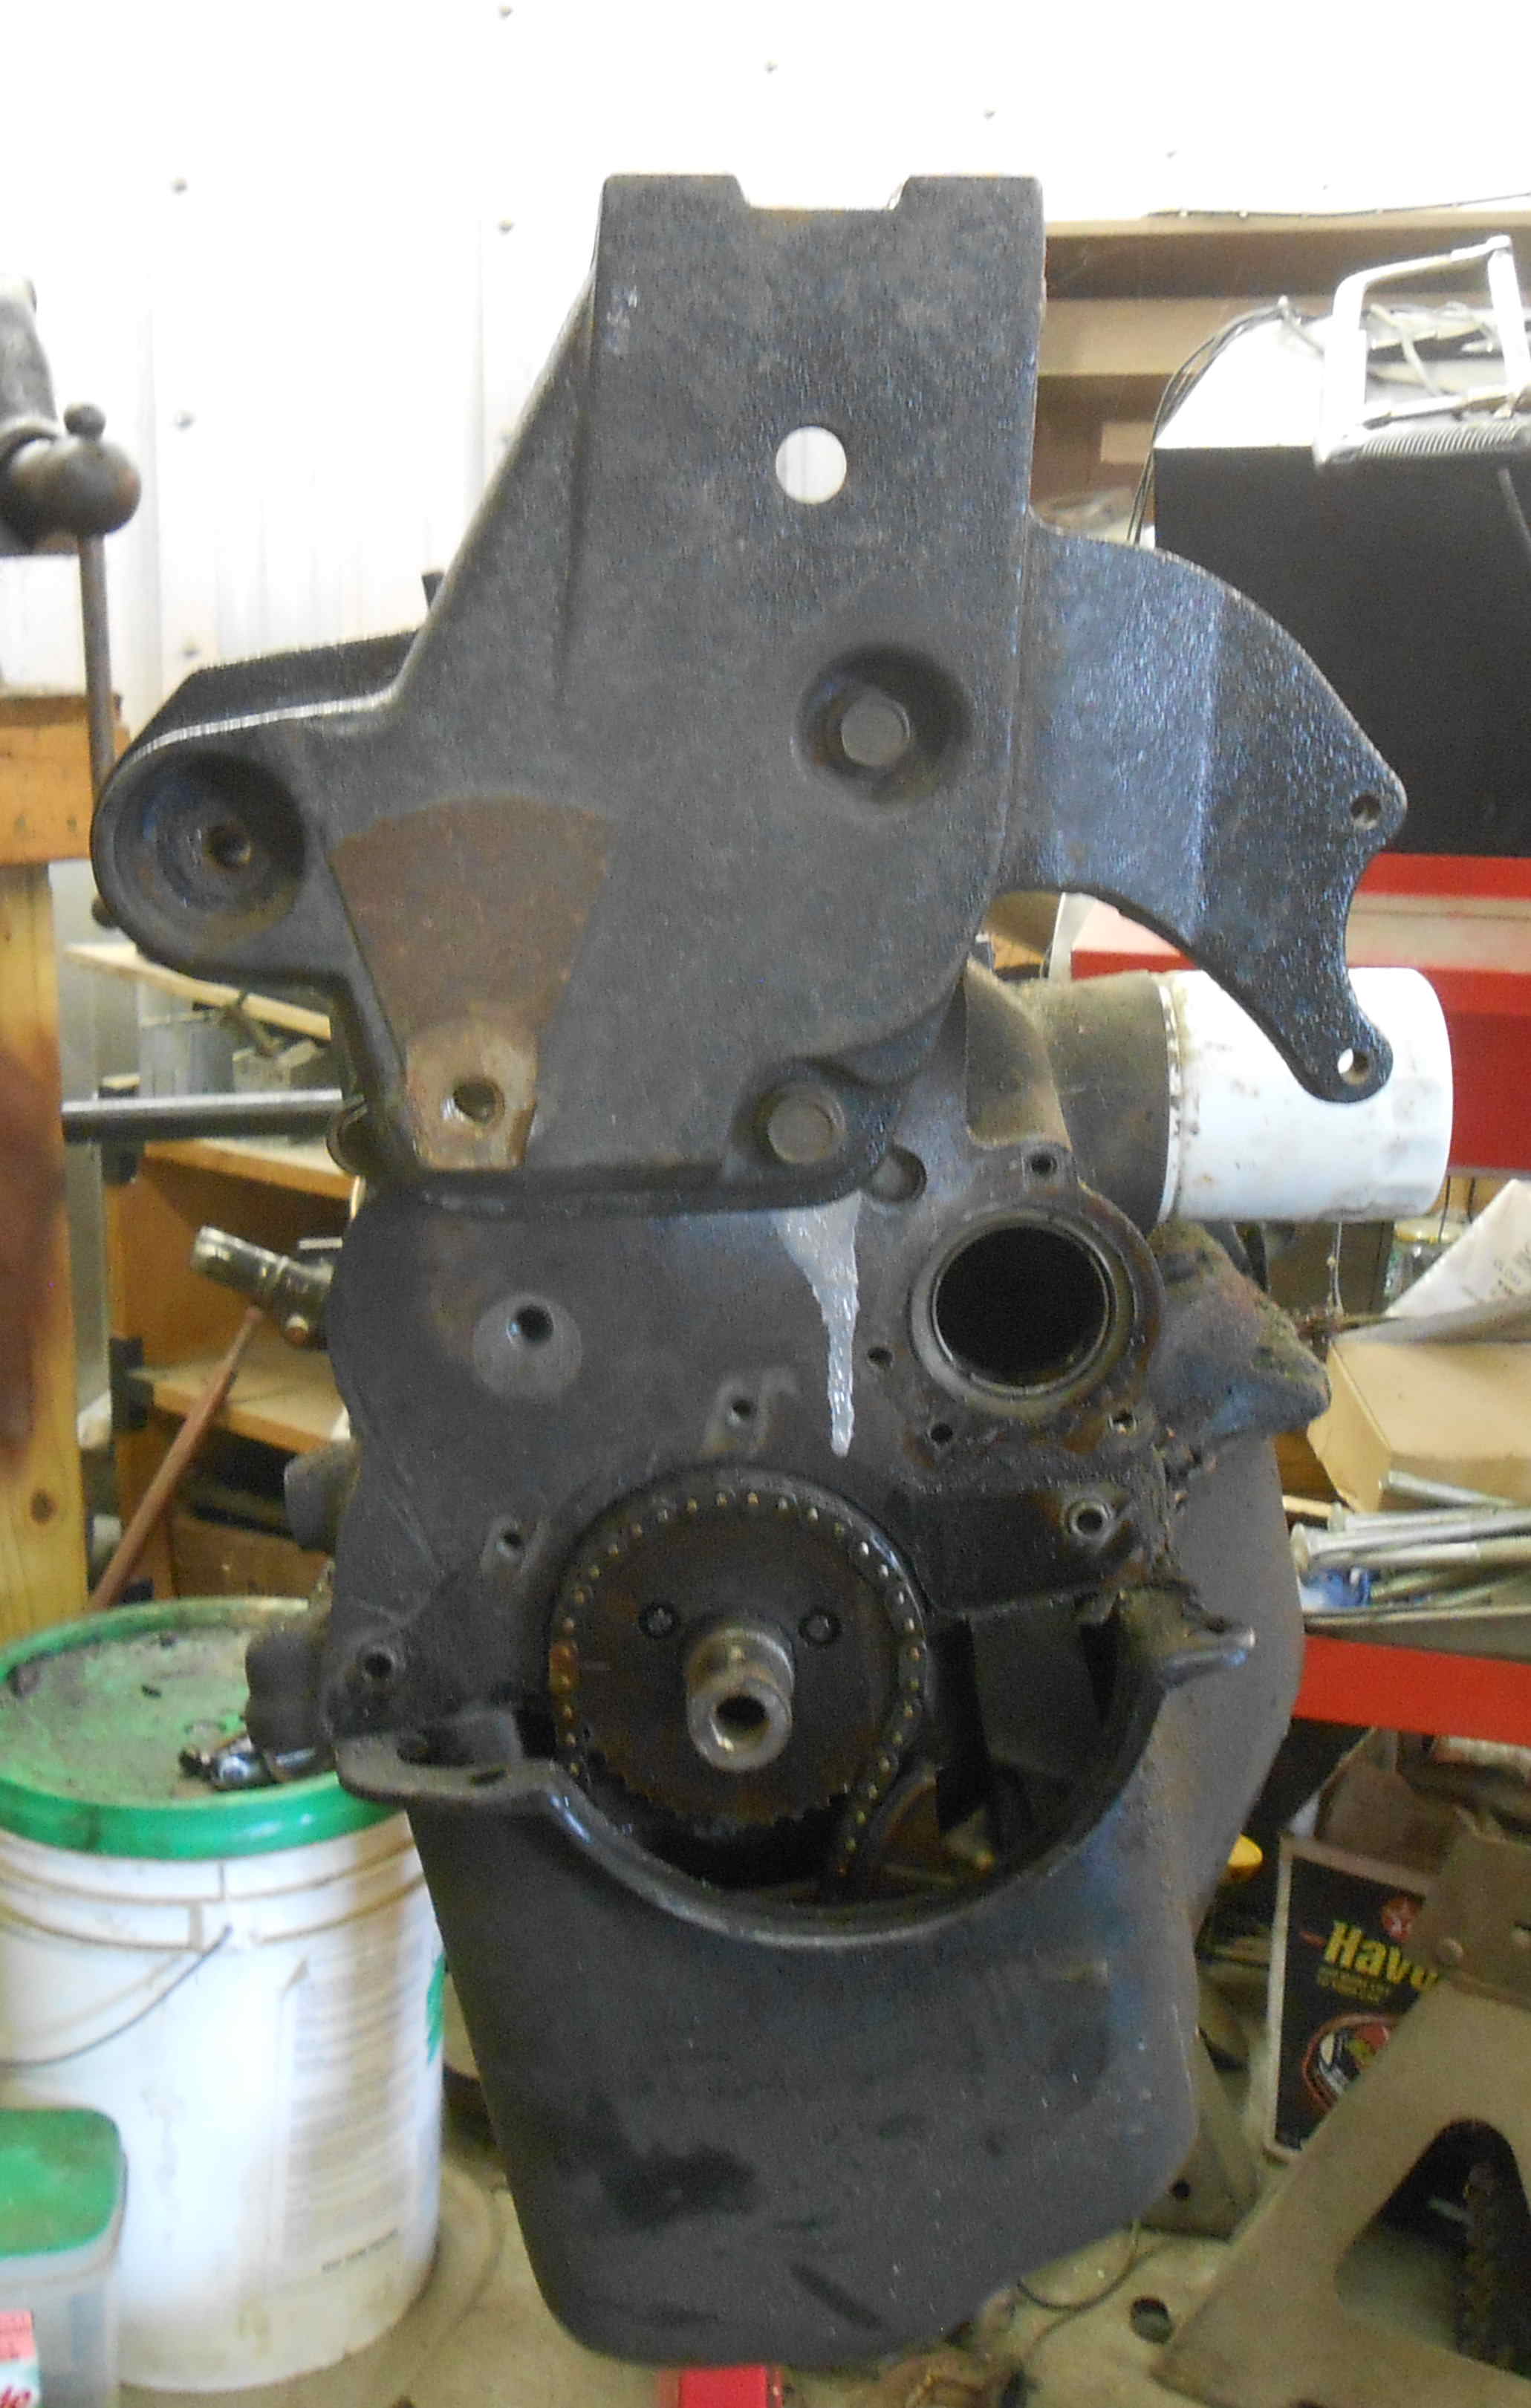 From the top: 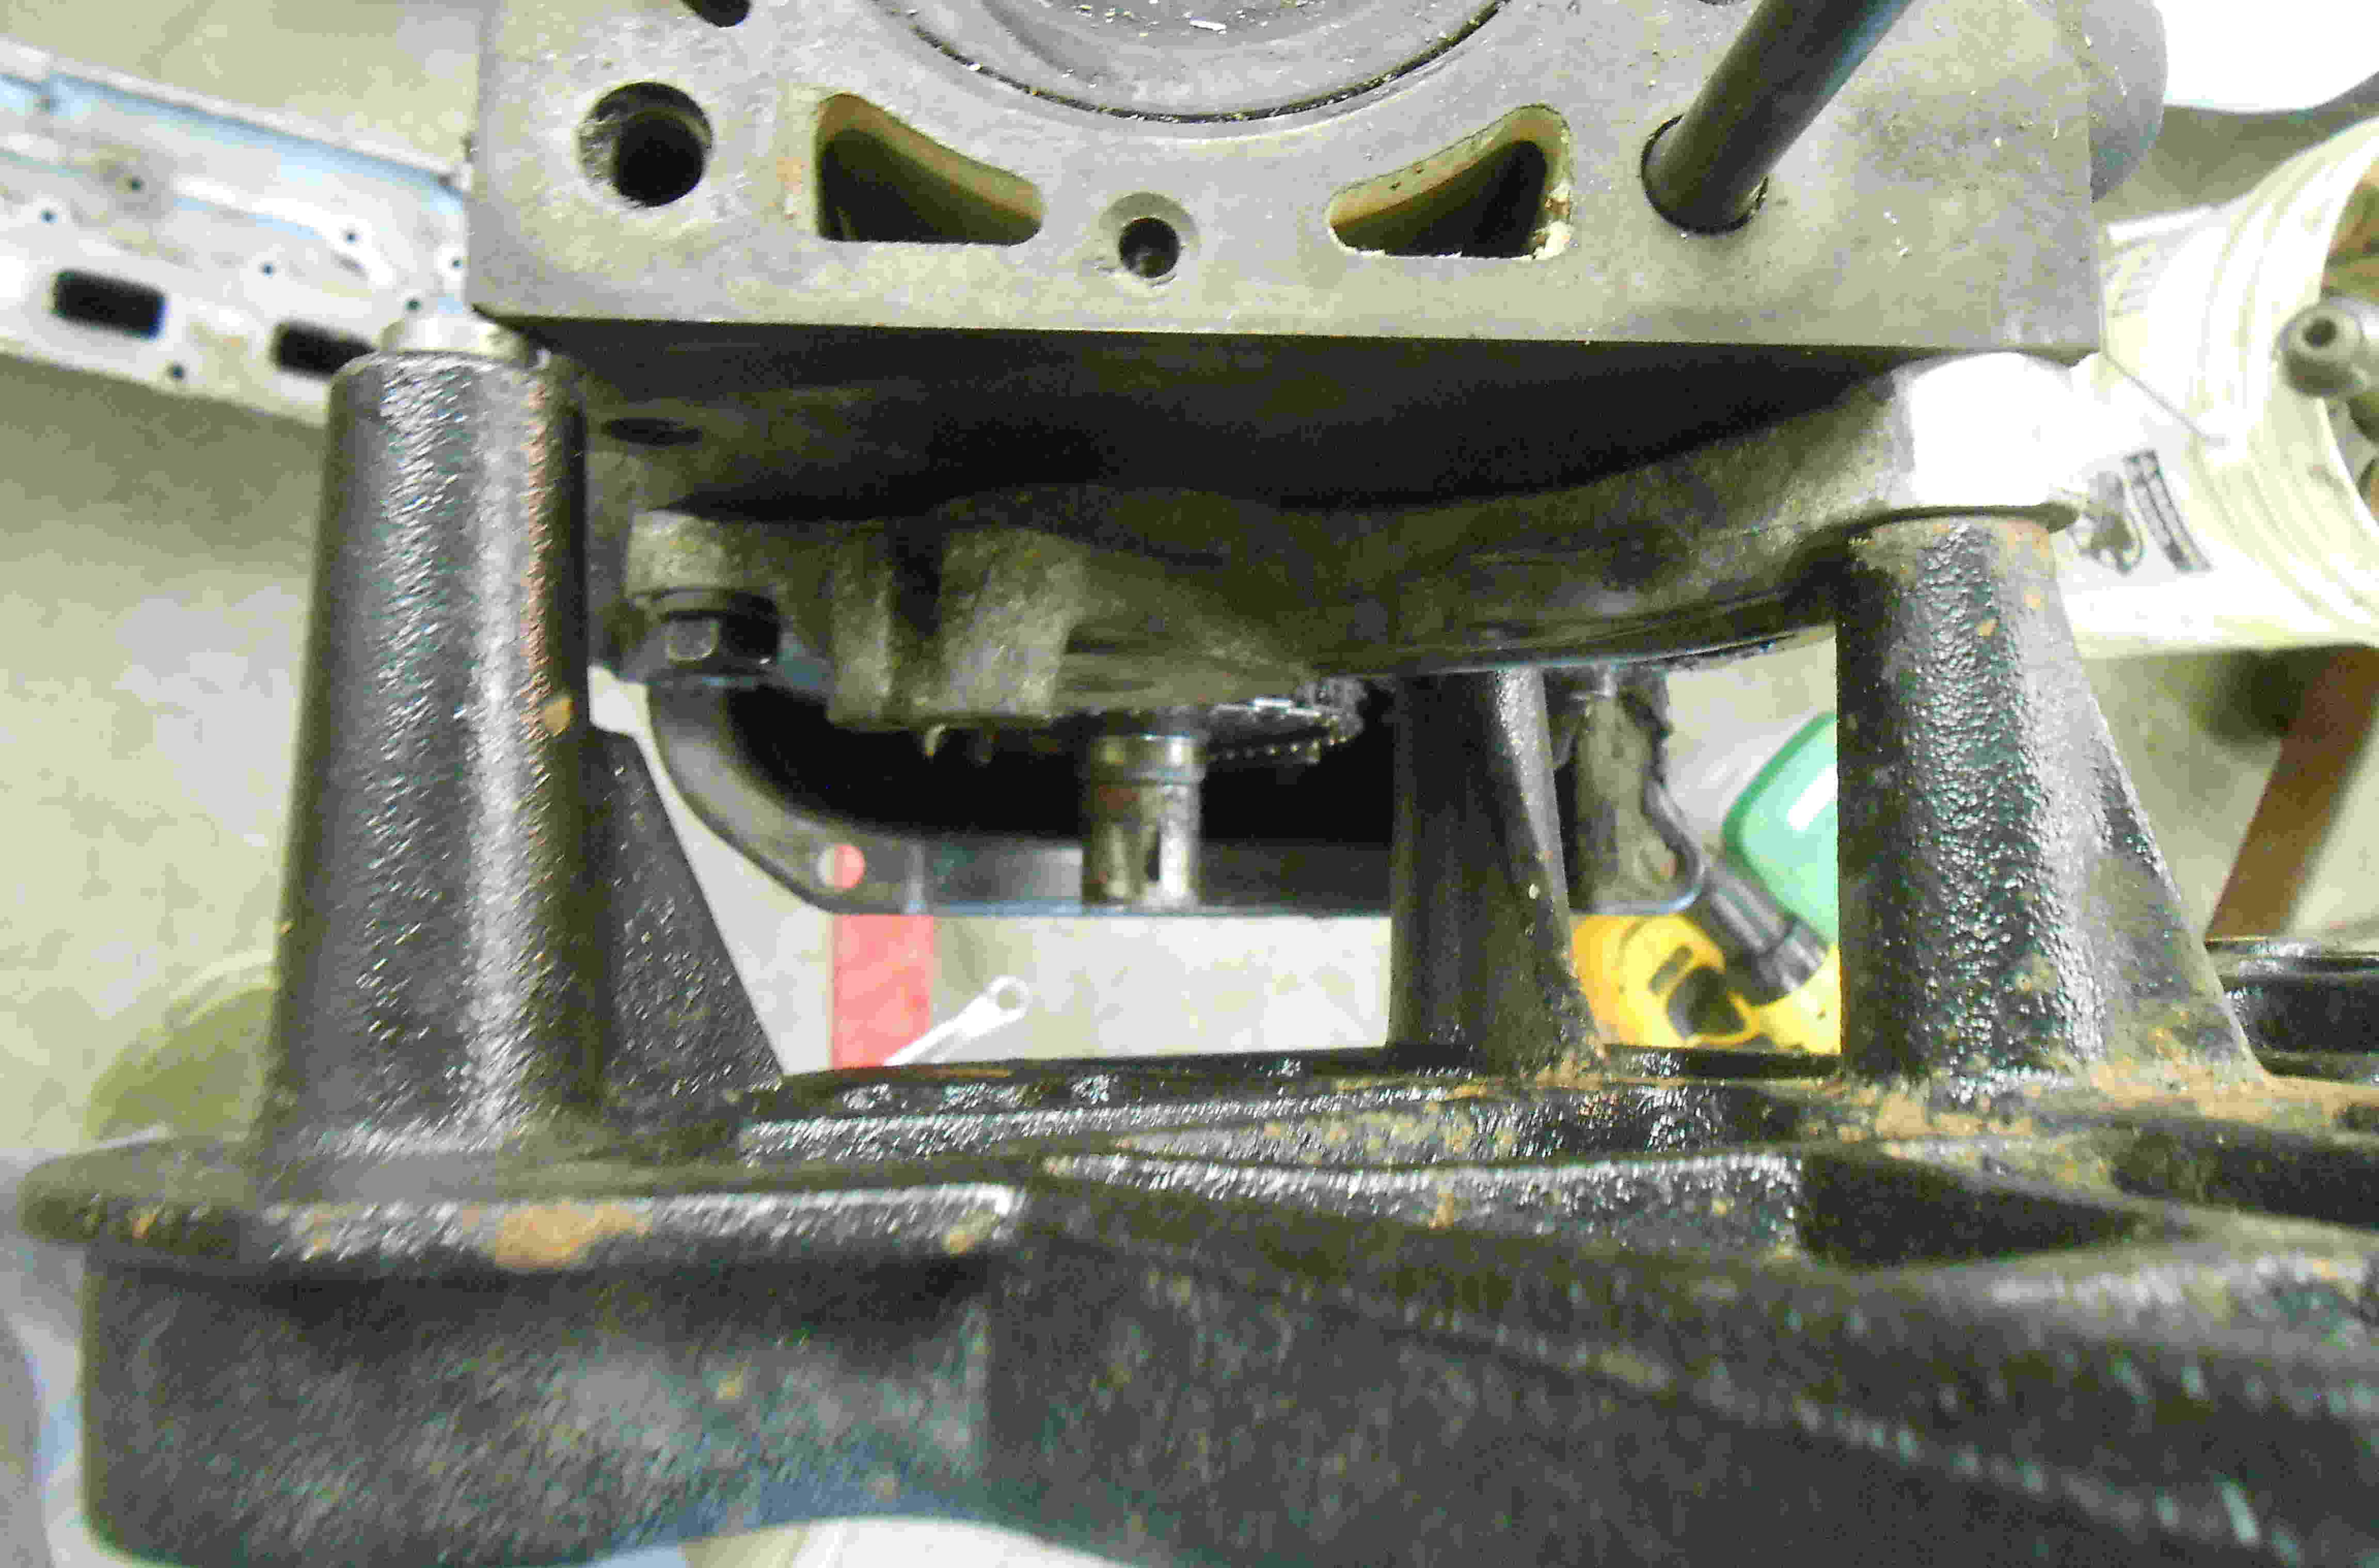
Bill AKA "LOBO" Profile
"Getting old is inevitable, growing up is optional" Darth Vader 1986 F350 460 converted to MAF/SEFI, E4OD 12X3 1/2 rear brakes, traction loc 3:55 gear, 160 amp 3G alternator Wife's 2011 Flex Limited Daily Driver 2009 Flex Limited with factory tow package Project car 1986 Chrysler LeBaron convertible 2.2L Turbo II, modified A413 |
|
Administrator
|
I think I understand most of what you said.
 But what I'm pretty sure I understand is that you located the bolt hole and then drilled and tapped it for the bracket's bolt. And the process was ingenious! 
Gary, AKA "Gary fellow": Profile
Dad's: '81 F150 Ranger XLT 4x4: Down for restomod: Full-roller "stroked 351M" w/Trick Flow heads & intake, EEC-V SEFI/E4OD/3.50 gears w/Kevlar clutches
|
|
Administrator
|
I was trying to describe the process and make the pictures work. Thanks! One thing I didn't mention, the block face to the mount centerline at the frame is 7" with the location of the through bolt if the first picture being 3 1/2" out from the block face. The center of the cast iron 2.4L bracket sits at 3 1/2" from the block face and the top is close enough to be workable into the original cushion.
Bill AKA "LOBO" Profile
"Getting old is inevitable, growing up is optional" Darth Vader 1986 F350 460 converted to MAF/SEFI, E4OD 12X3 1/2 rear brakes, traction loc 3:55 gear, 160 amp 3G alternator Wife's 2011 Flex Limited Daily Driver 2009 Flex Limited with factory tow package Project car 1986 Chrysler LeBaron convertible 2.2L Turbo II, modified A413 |
|
Administrator
|
This post was updated on .
Here are some further pictures to help explain the process:
First, here is the existing mount system (bracket has been modified as an early attempt at fitting). This wasn't going to work unless I only used an alternator, water pump and maybe a power steering pump. It also completely blocked the timing belt routing used on the 2.4L. 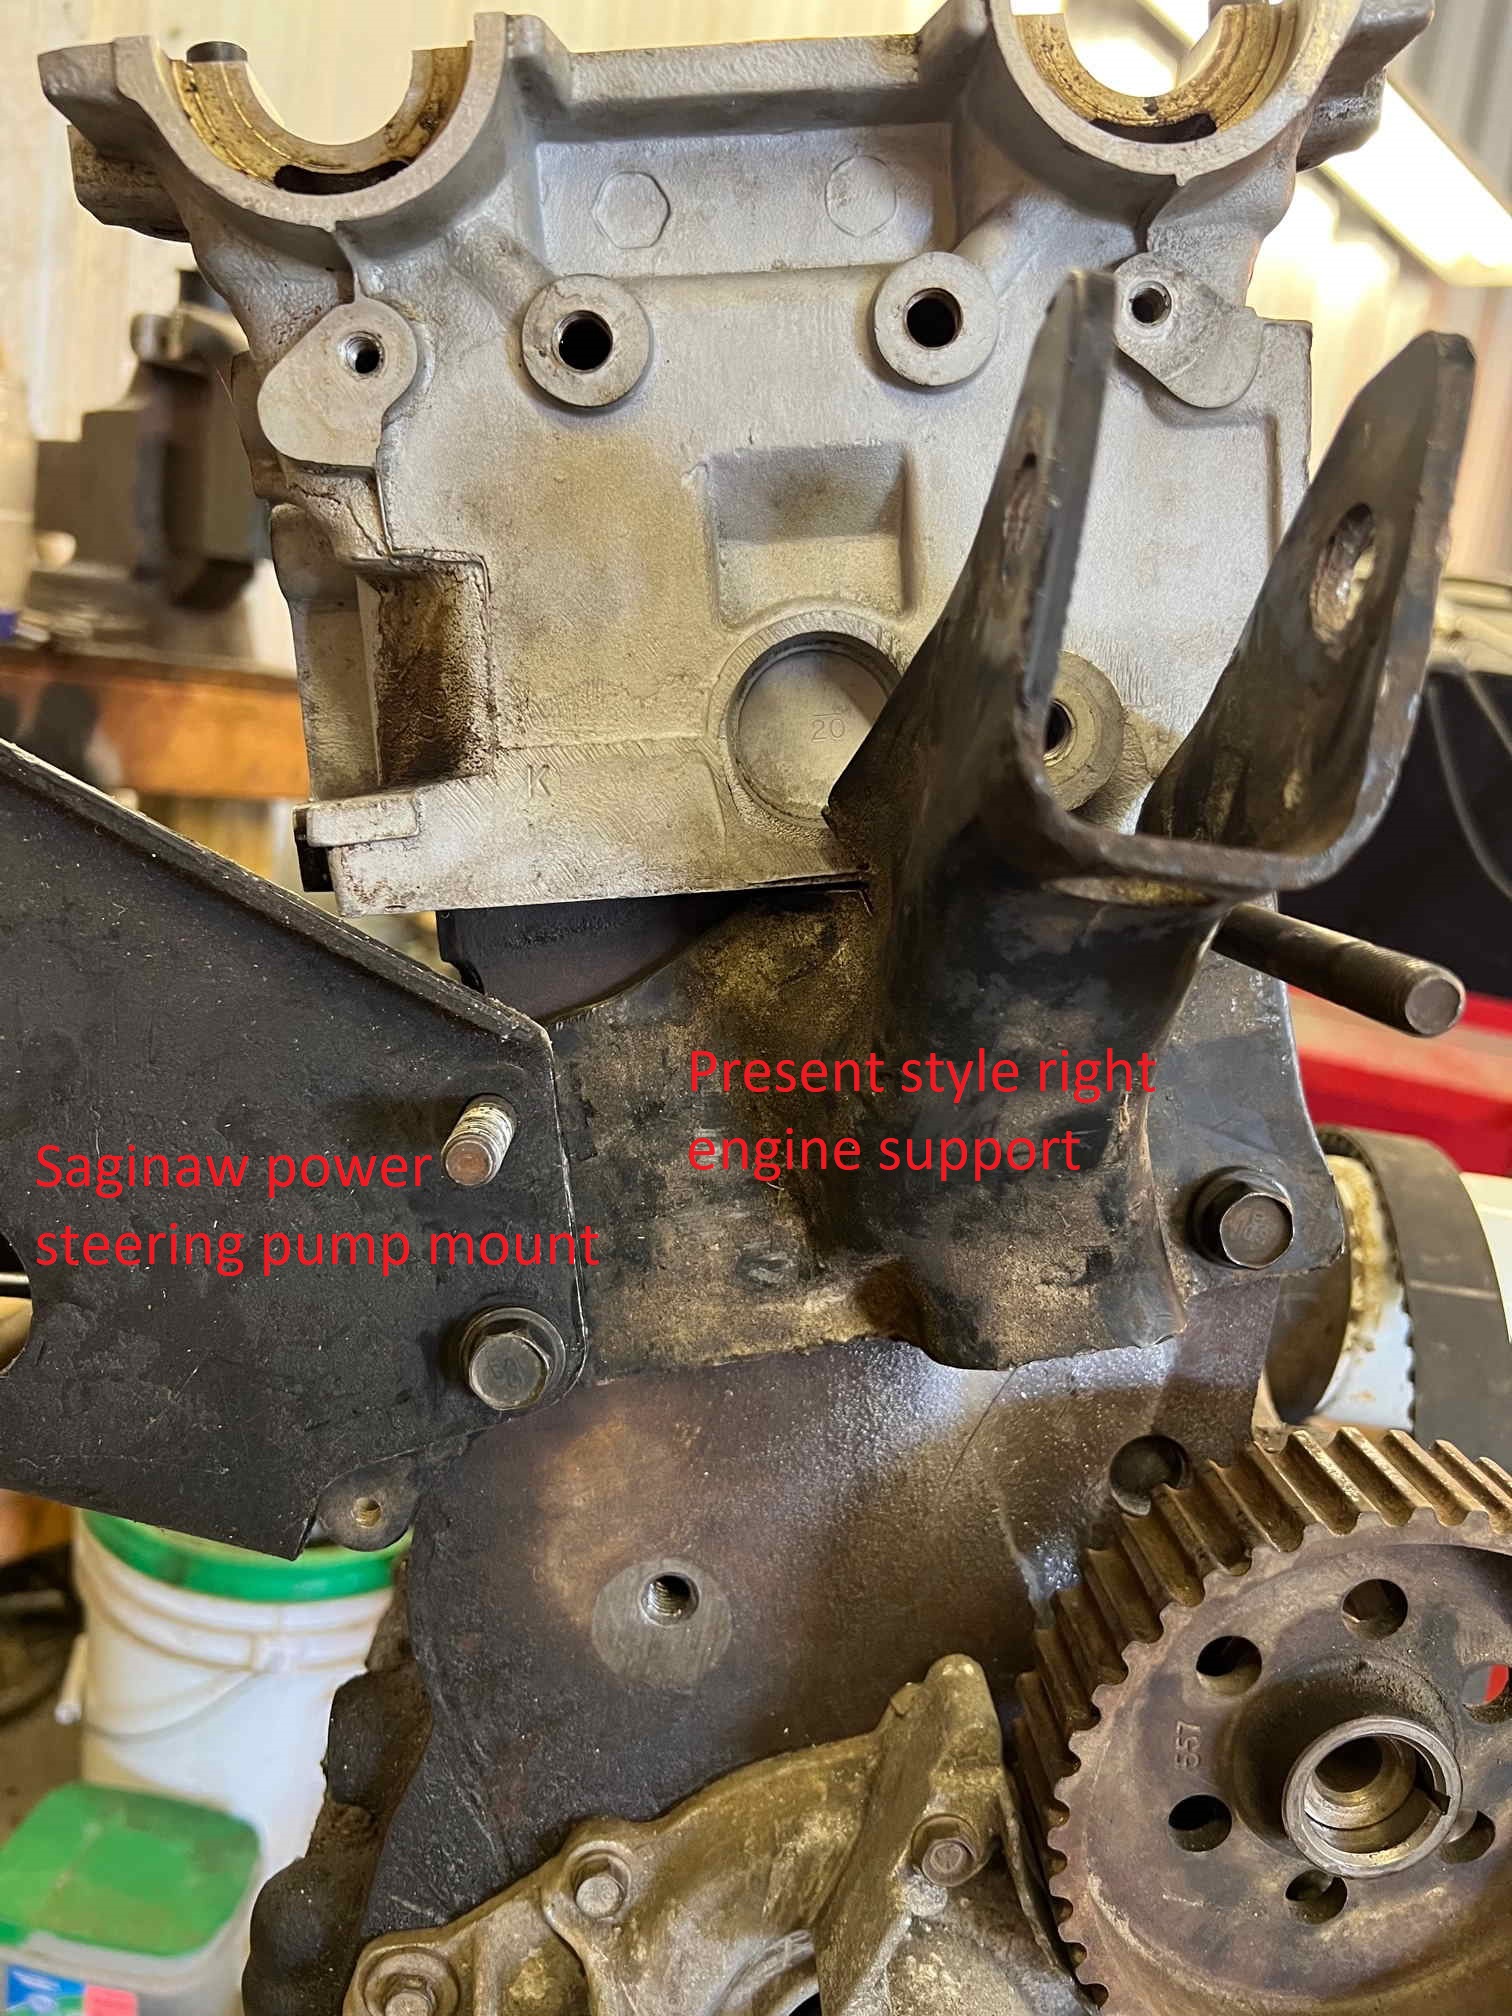 Here is the "front" of the block with most of the factory 2.4L timing system mounted. The belt that is partially routed is the one that came with the original DOHC head and the rest of the routing is drawn in black. In the late 80s - early 90s, Chrysler had two DOHC versions of the 2.2L, one was a Lotus designed head, the other I believe was a Shelby design. One of them, I believe it was the Shelby design was sold as a Turbo III. it had very little wrap on the two cam gears, a 30 tooth intermediate shaft gear that only drove the oil pump. Due to extremely high tension on the belt and the higher intermediate shaft speed there were loads of problems. The belt routing shown is much better, although I still have to run the oil pump with the intermediate shaft (it will only be 5% faster): 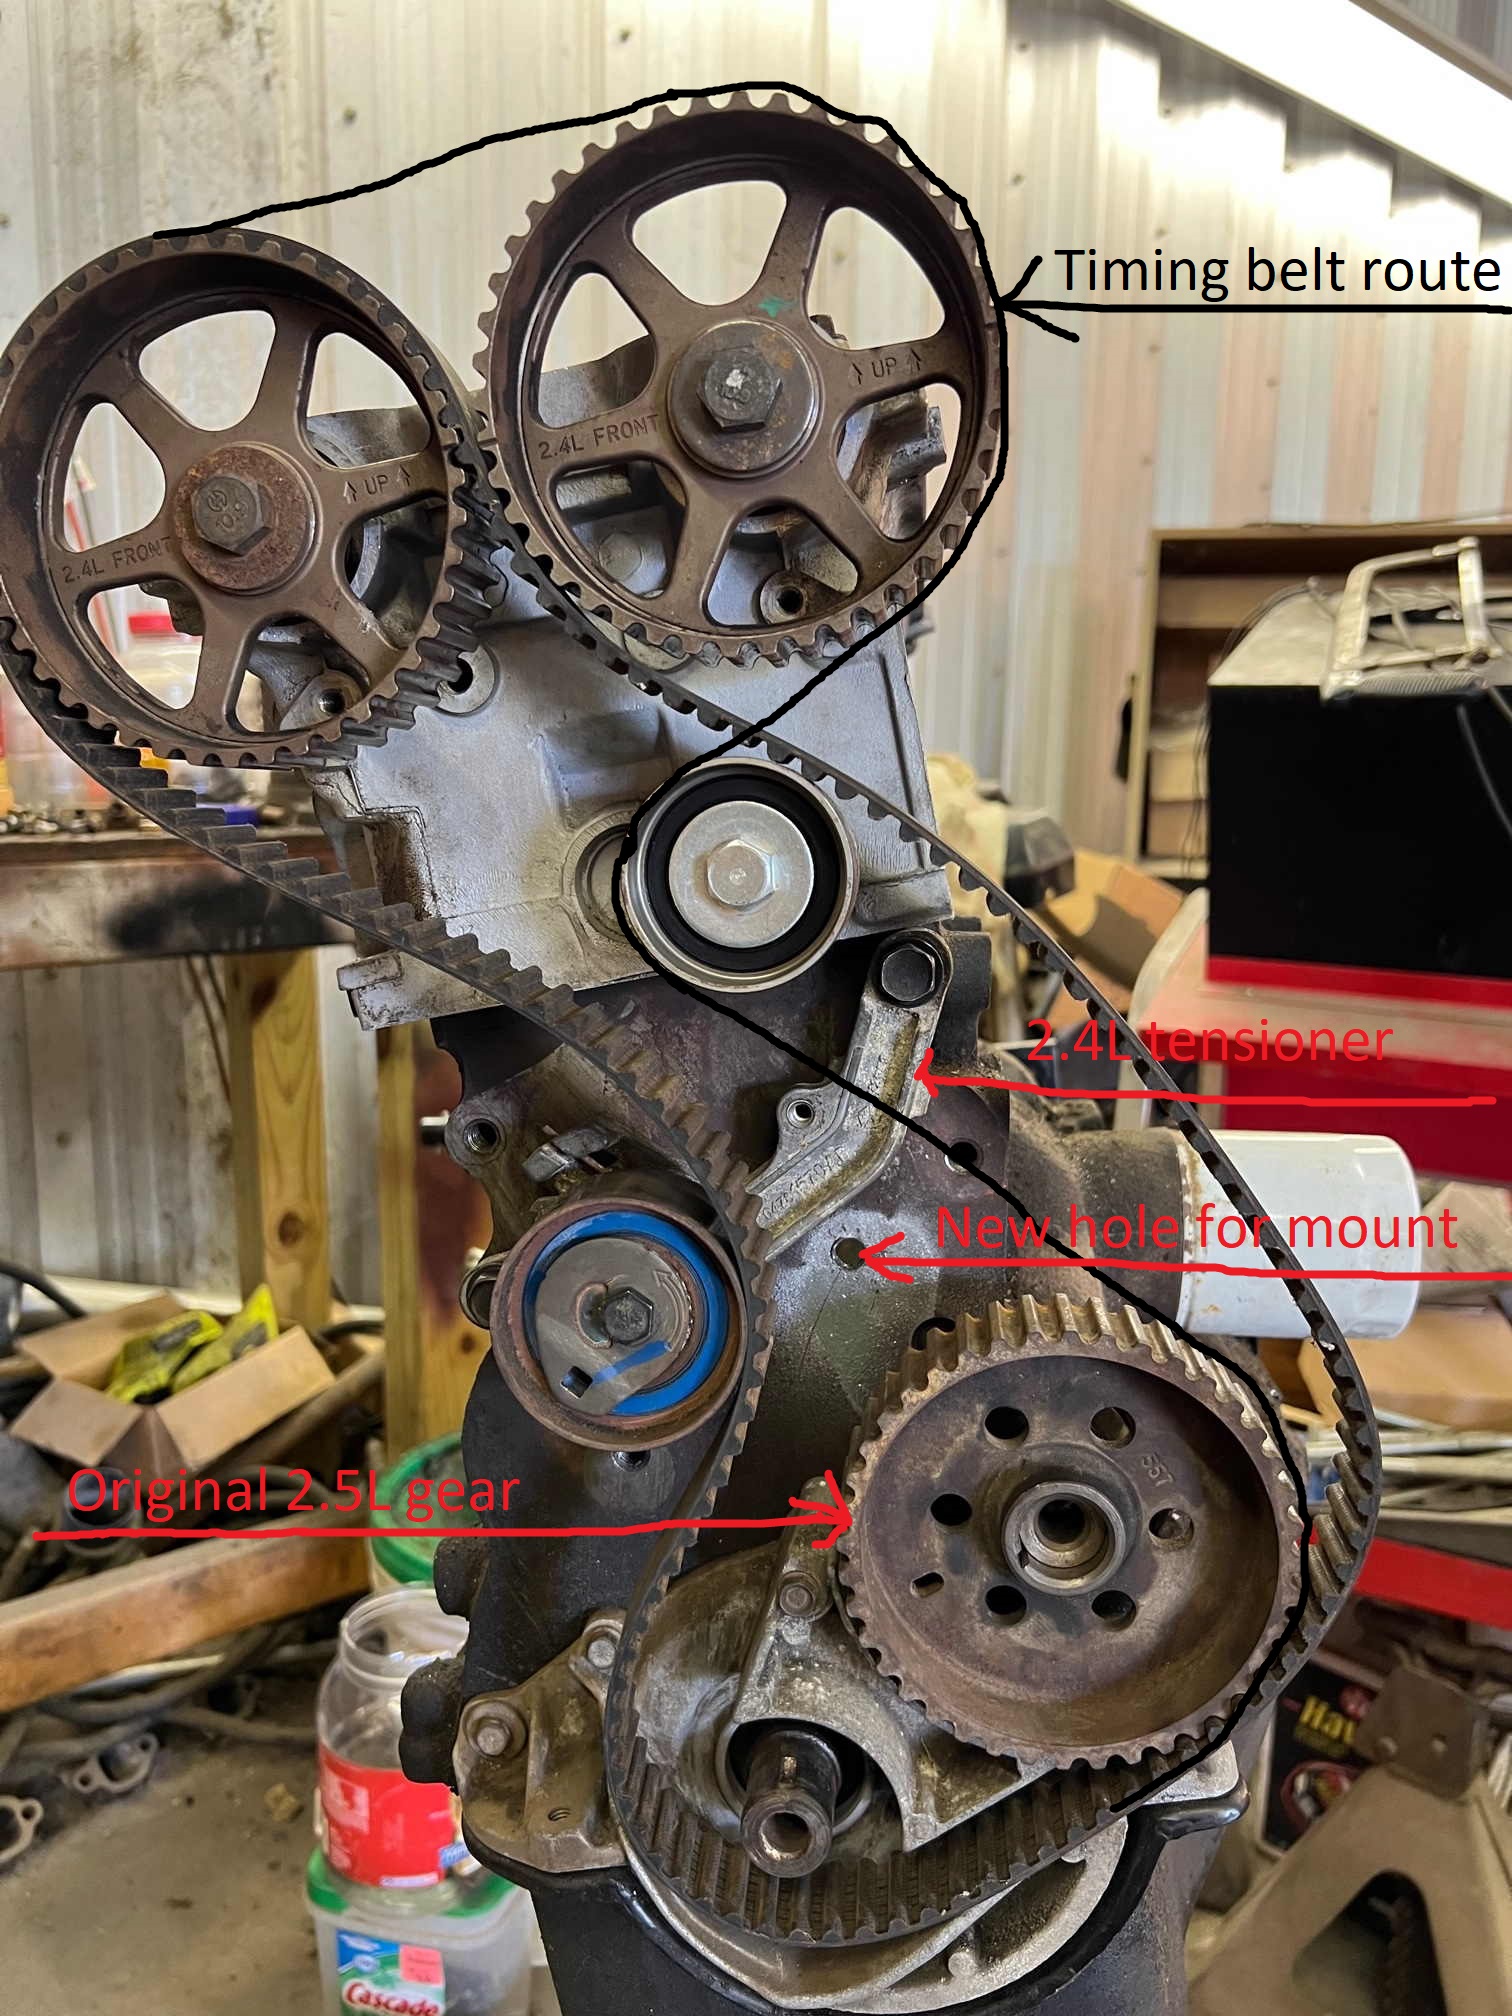
Bill AKA "LOBO" Profile
"Getting old is inevitable, growing up is optional" Darth Vader 1986 F350 460 converted to MAF/SEFI, E4OD 12X3 1/2 rear brakes, traction loc 3:55 gear, 160 amp 3G alternator Wife's 2011 Flex Limited Daily Driver 2009 Flex Limited with factory tow package Project car 1986 Chrysler LeBaron convertible 2.2L Turbo II, modified A413 |
|
Administrator
|
Gary, it looks like you may be off the hook. Here is what I did the last two days. I took a leftover piece of a cast iron wheel hub I modified so I could use bolt on wheels on my 1991 Ford YT16H tractor. It was just a tiny bit larger OD than the 2.4L crank gear and the hole was a snug fit on the 2.5L crank snout.
I started by chucking it in the lathe by the inboard end so I could true up the hacksaw cut face. 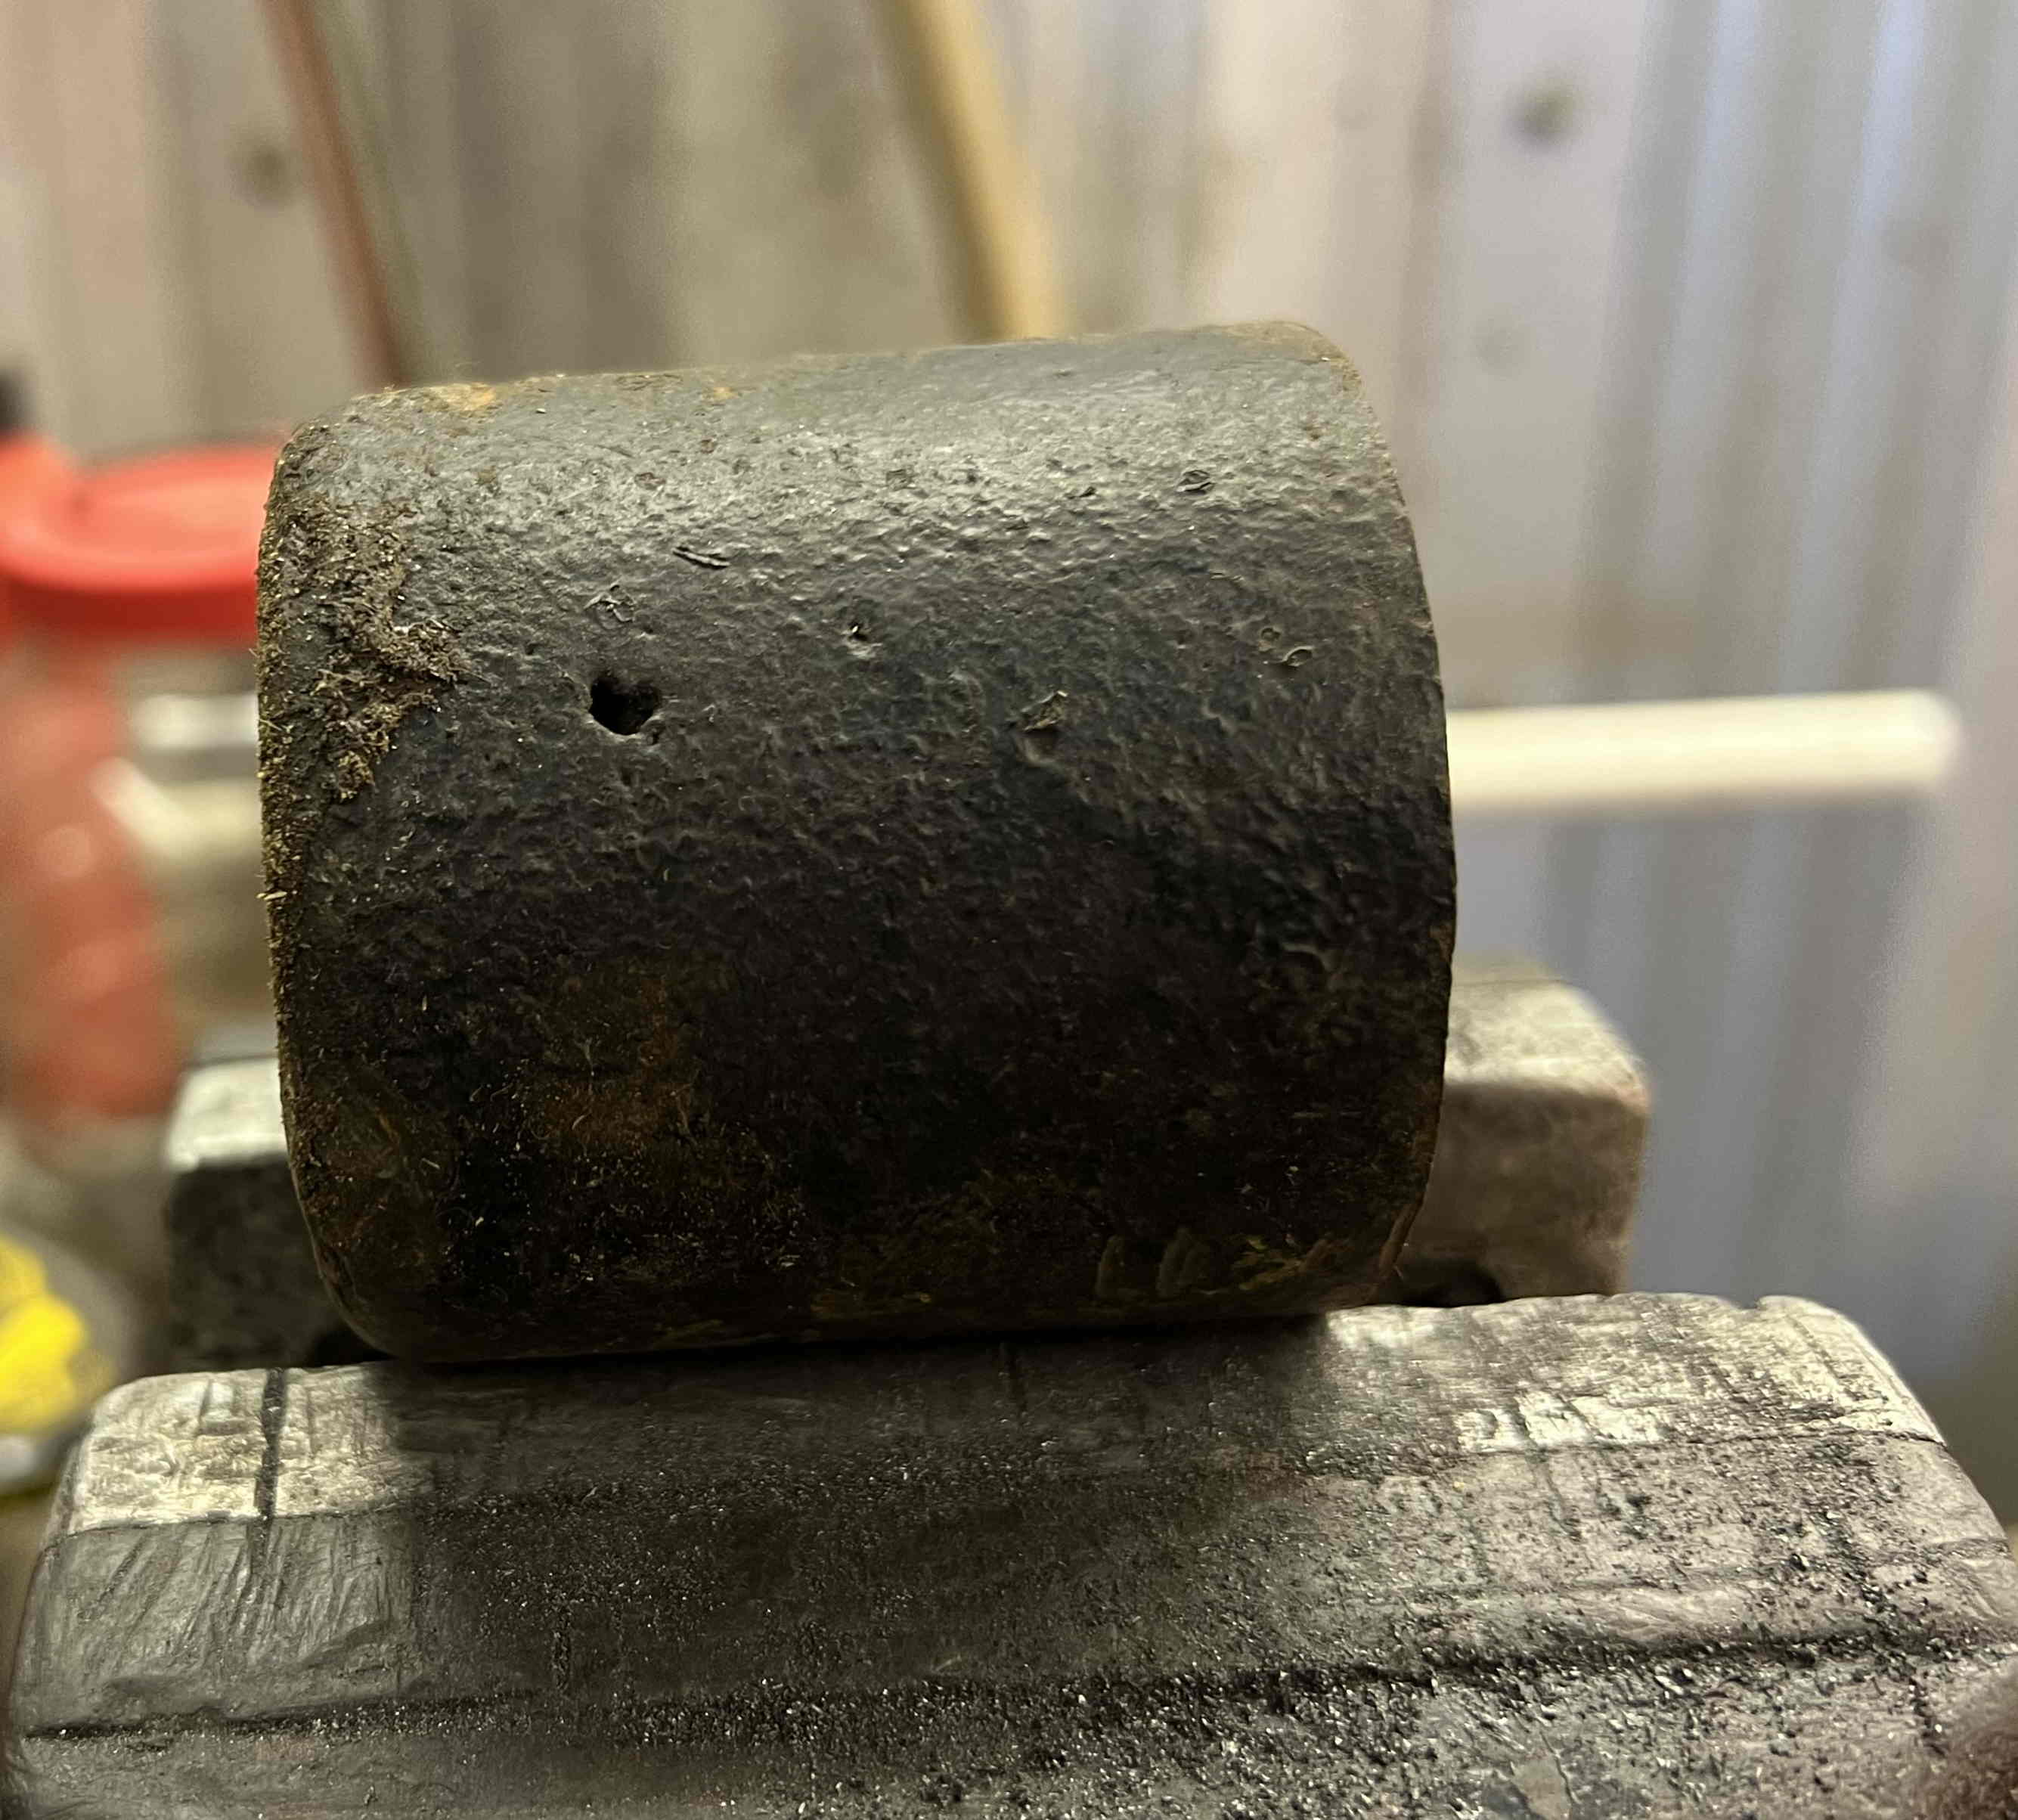 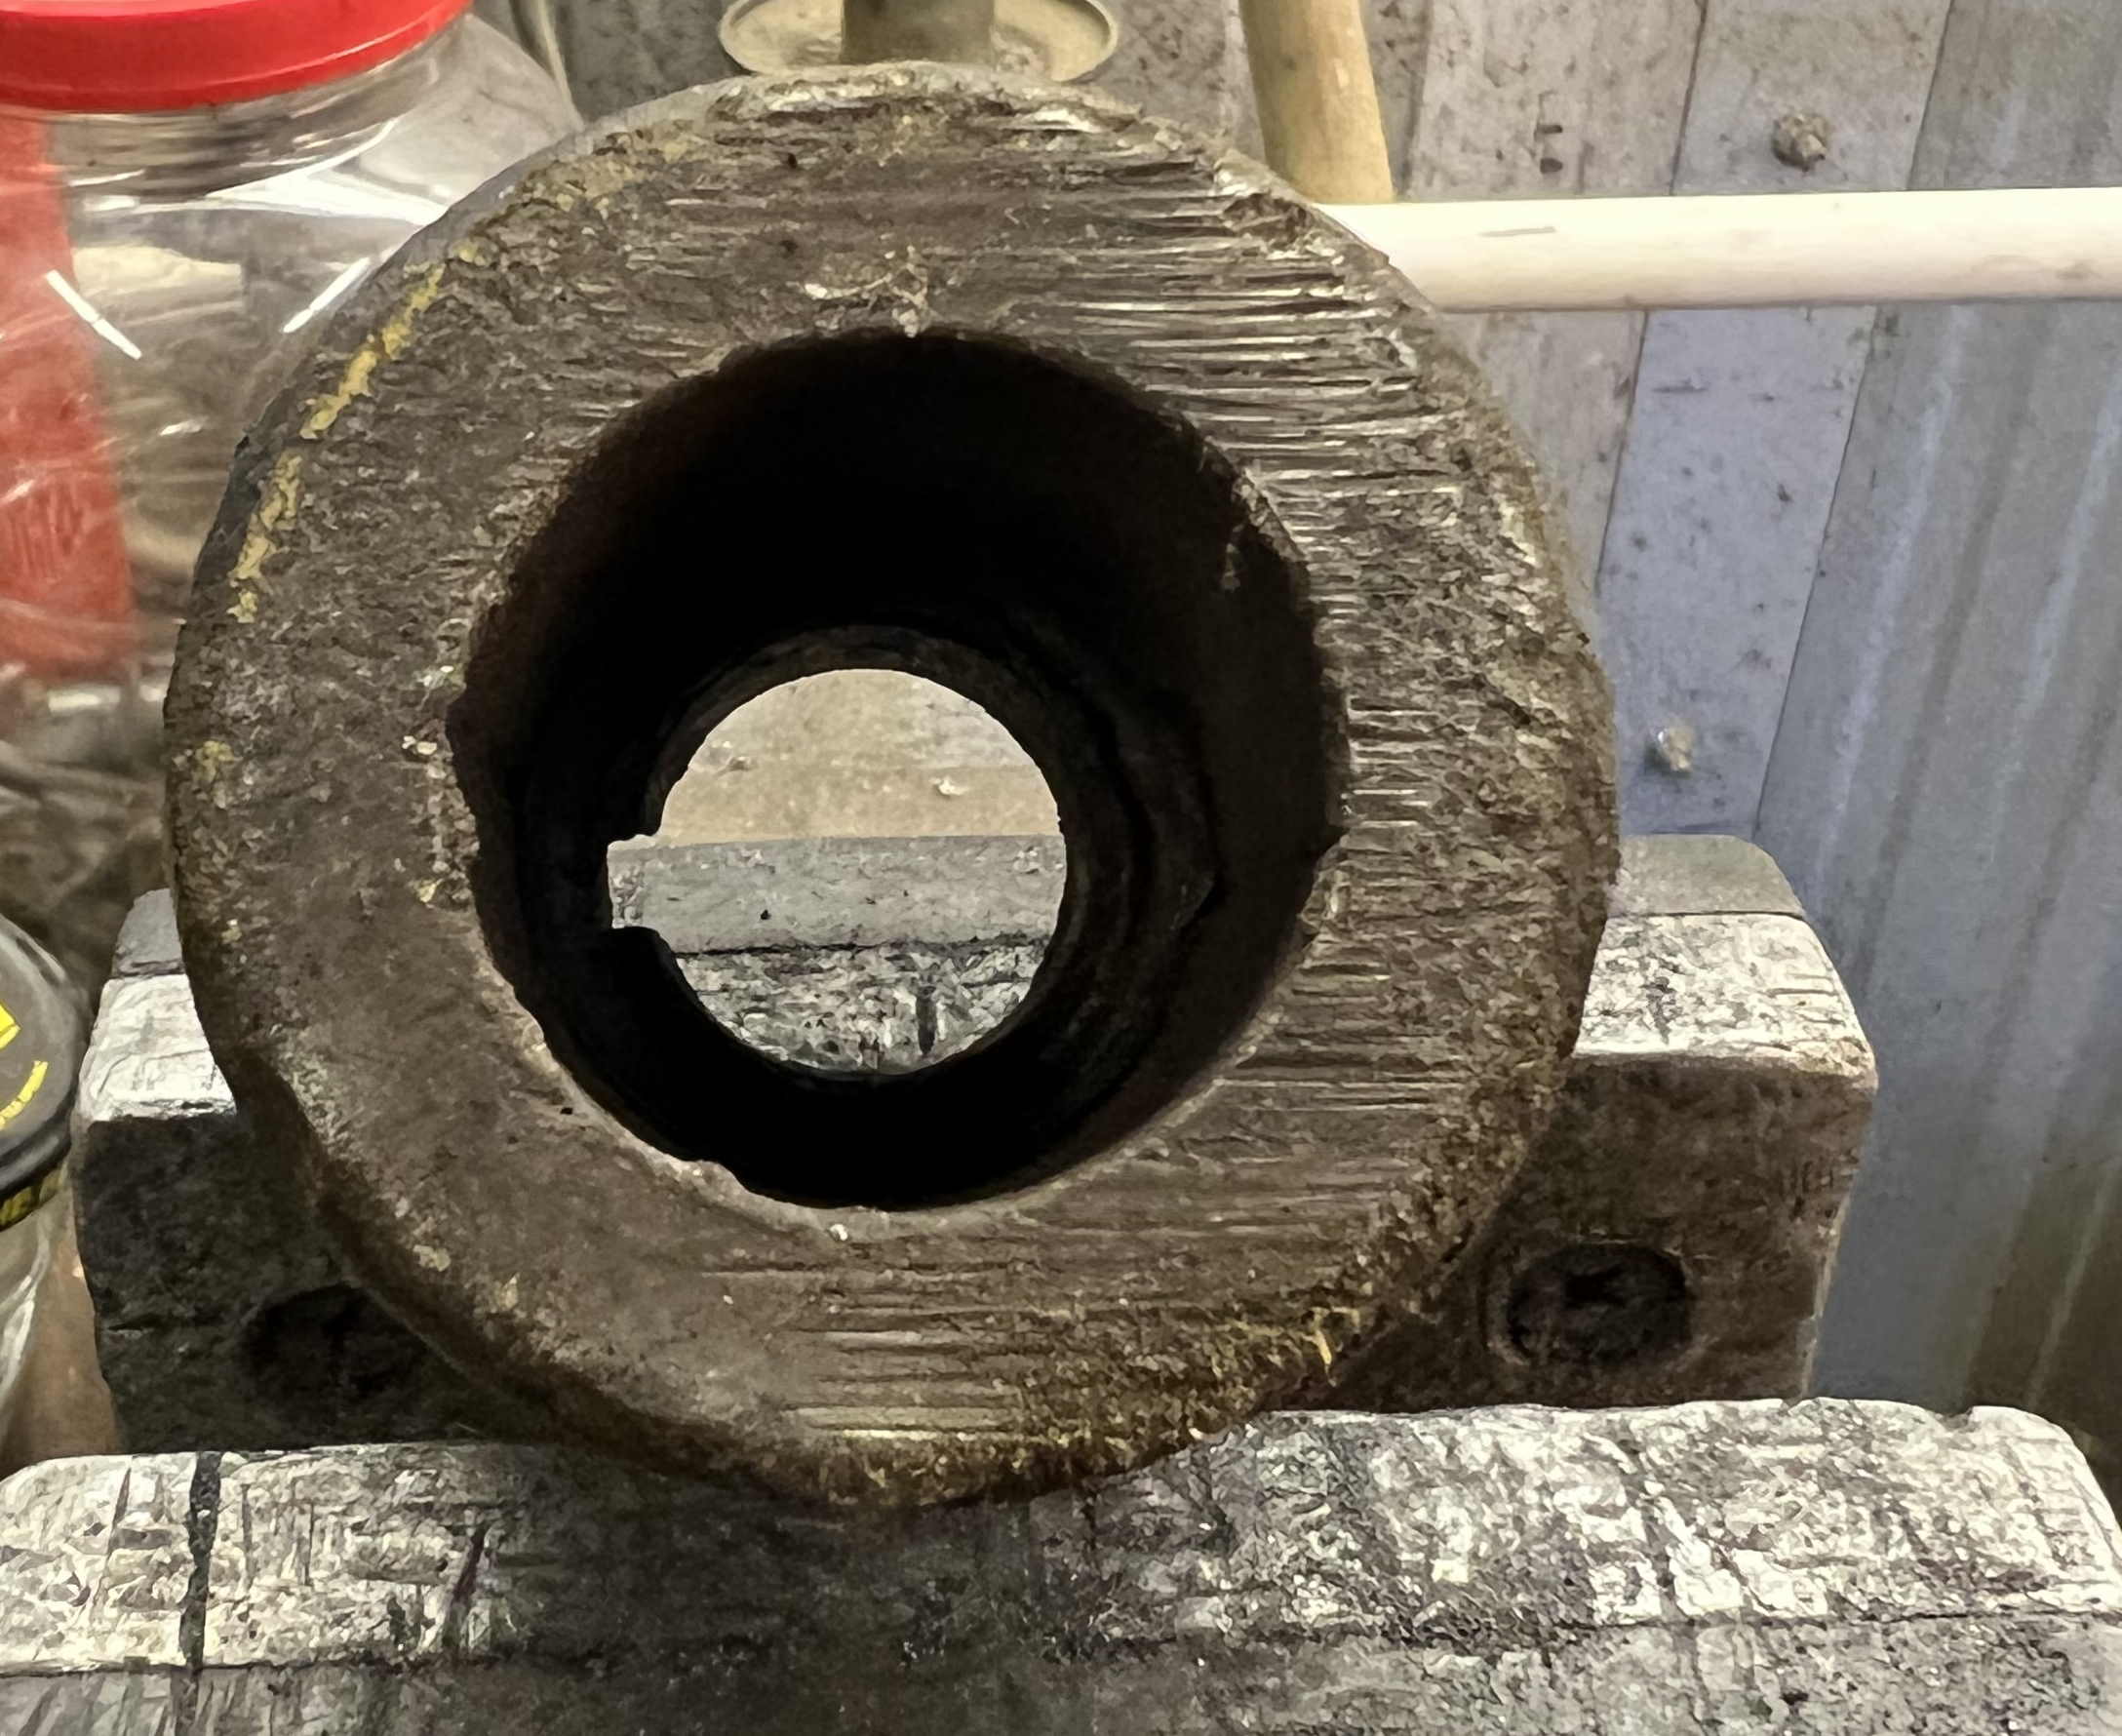  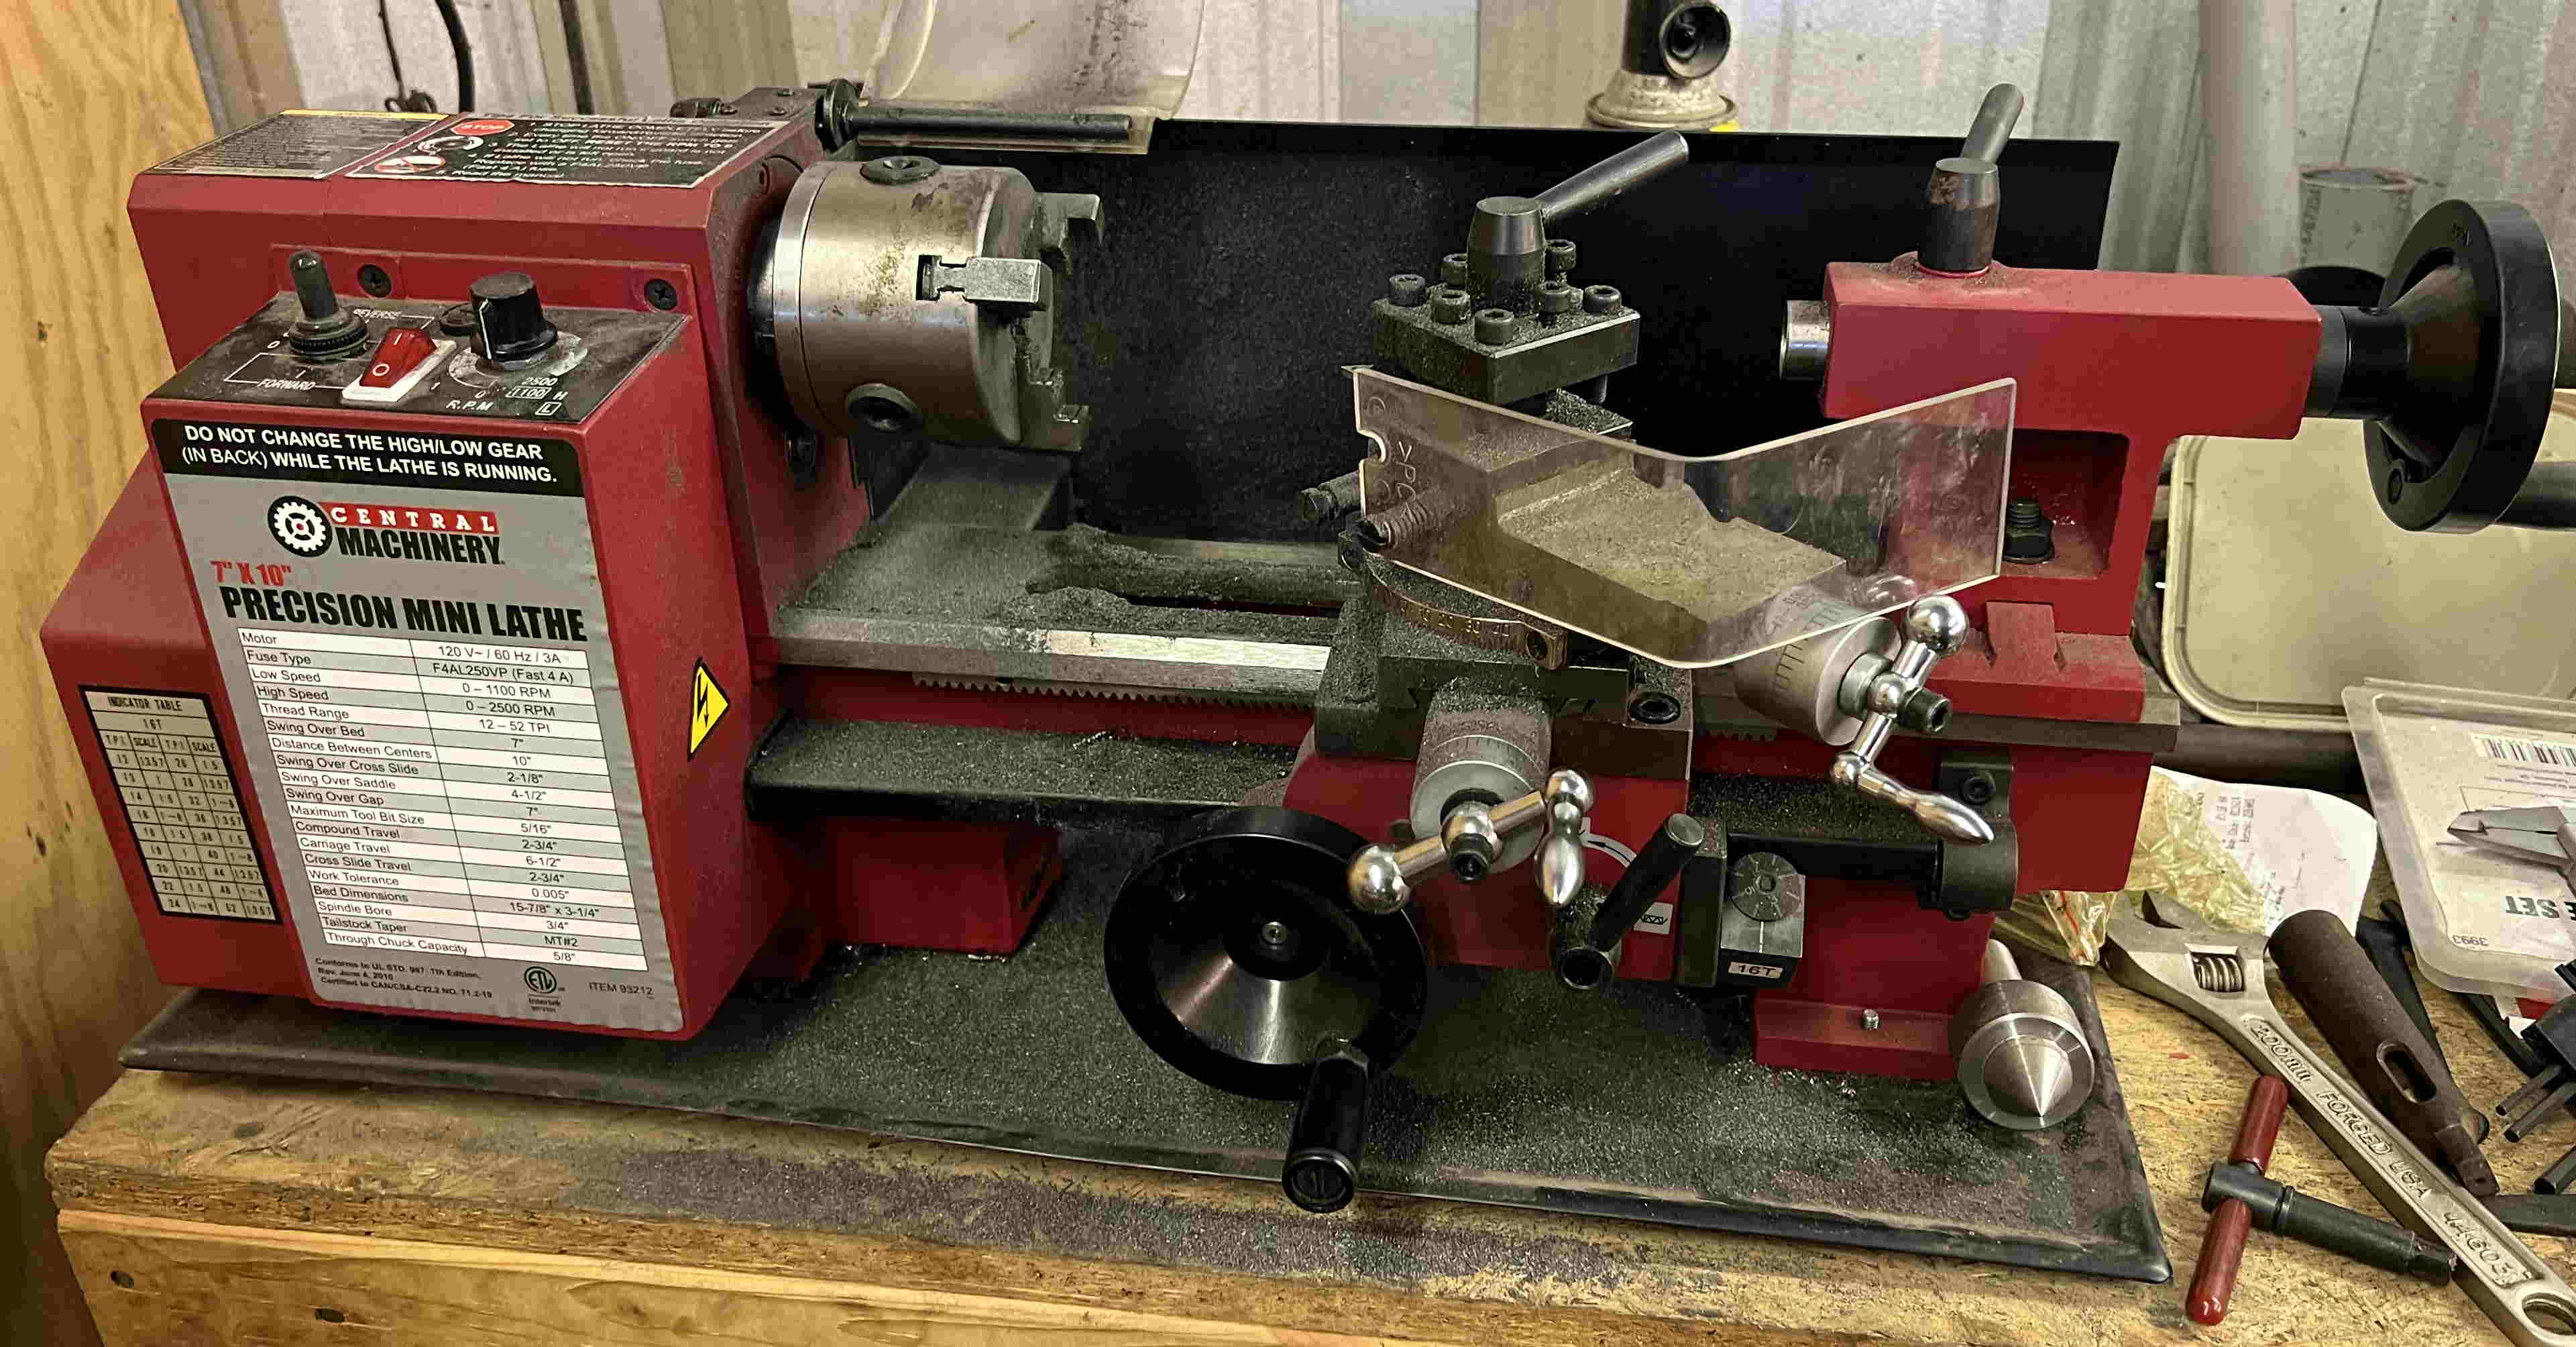 Once that was square, I turned it around, took a quick depth measurement and cut it there using the lathe and hacksaw to get a nice square cut (I learned that trick at the NNS lab). Once cut I proceeded to face that side off until it was smooth all the way across but still thick enough to put the crank gear far enough out. I than cut the gear facing portion down and chamfered it to fit in the back side of the 2.4L crank gear. The 2.4L crank gear has three holes tapped M6X1.0 part way so a special puller can remove it. I lined up the key ways and center punched the piece I had made. Drilled holes for 3 M6X1.0 bolts to check position and tapped the through holes in the gear all the way. Stuck some bolts in it to do a position check for depth, permanent bolts will be socket head and countersunk for clearance on the seal housing.  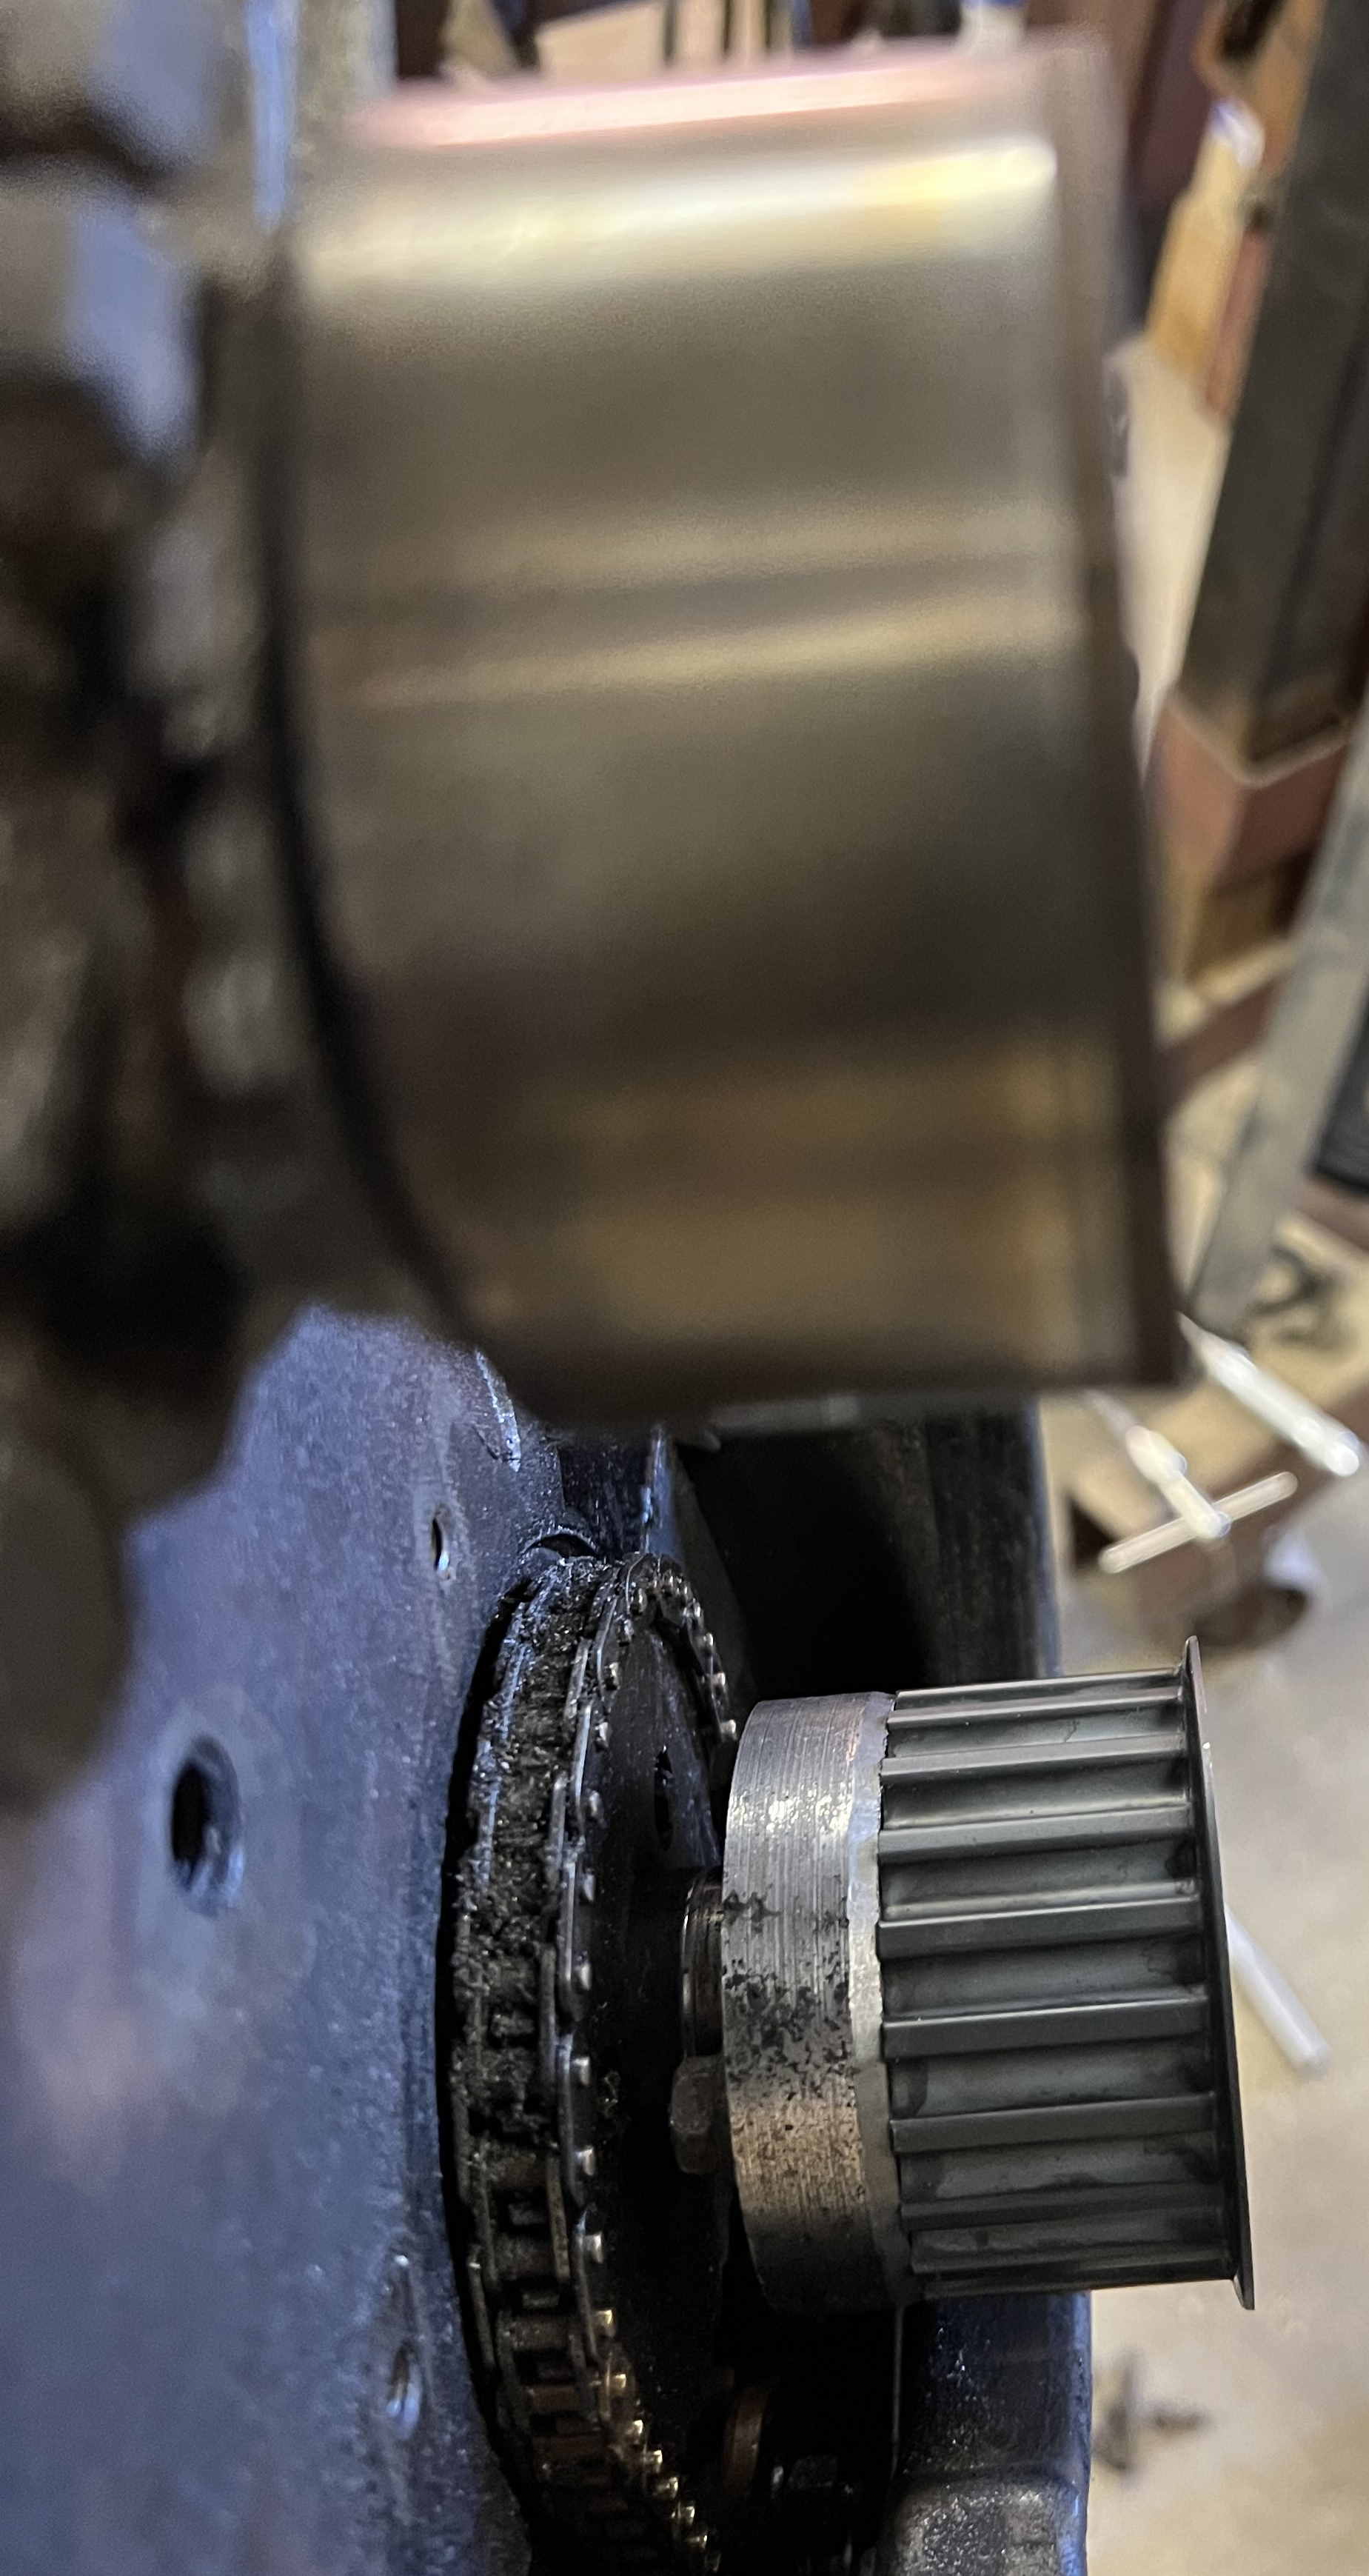 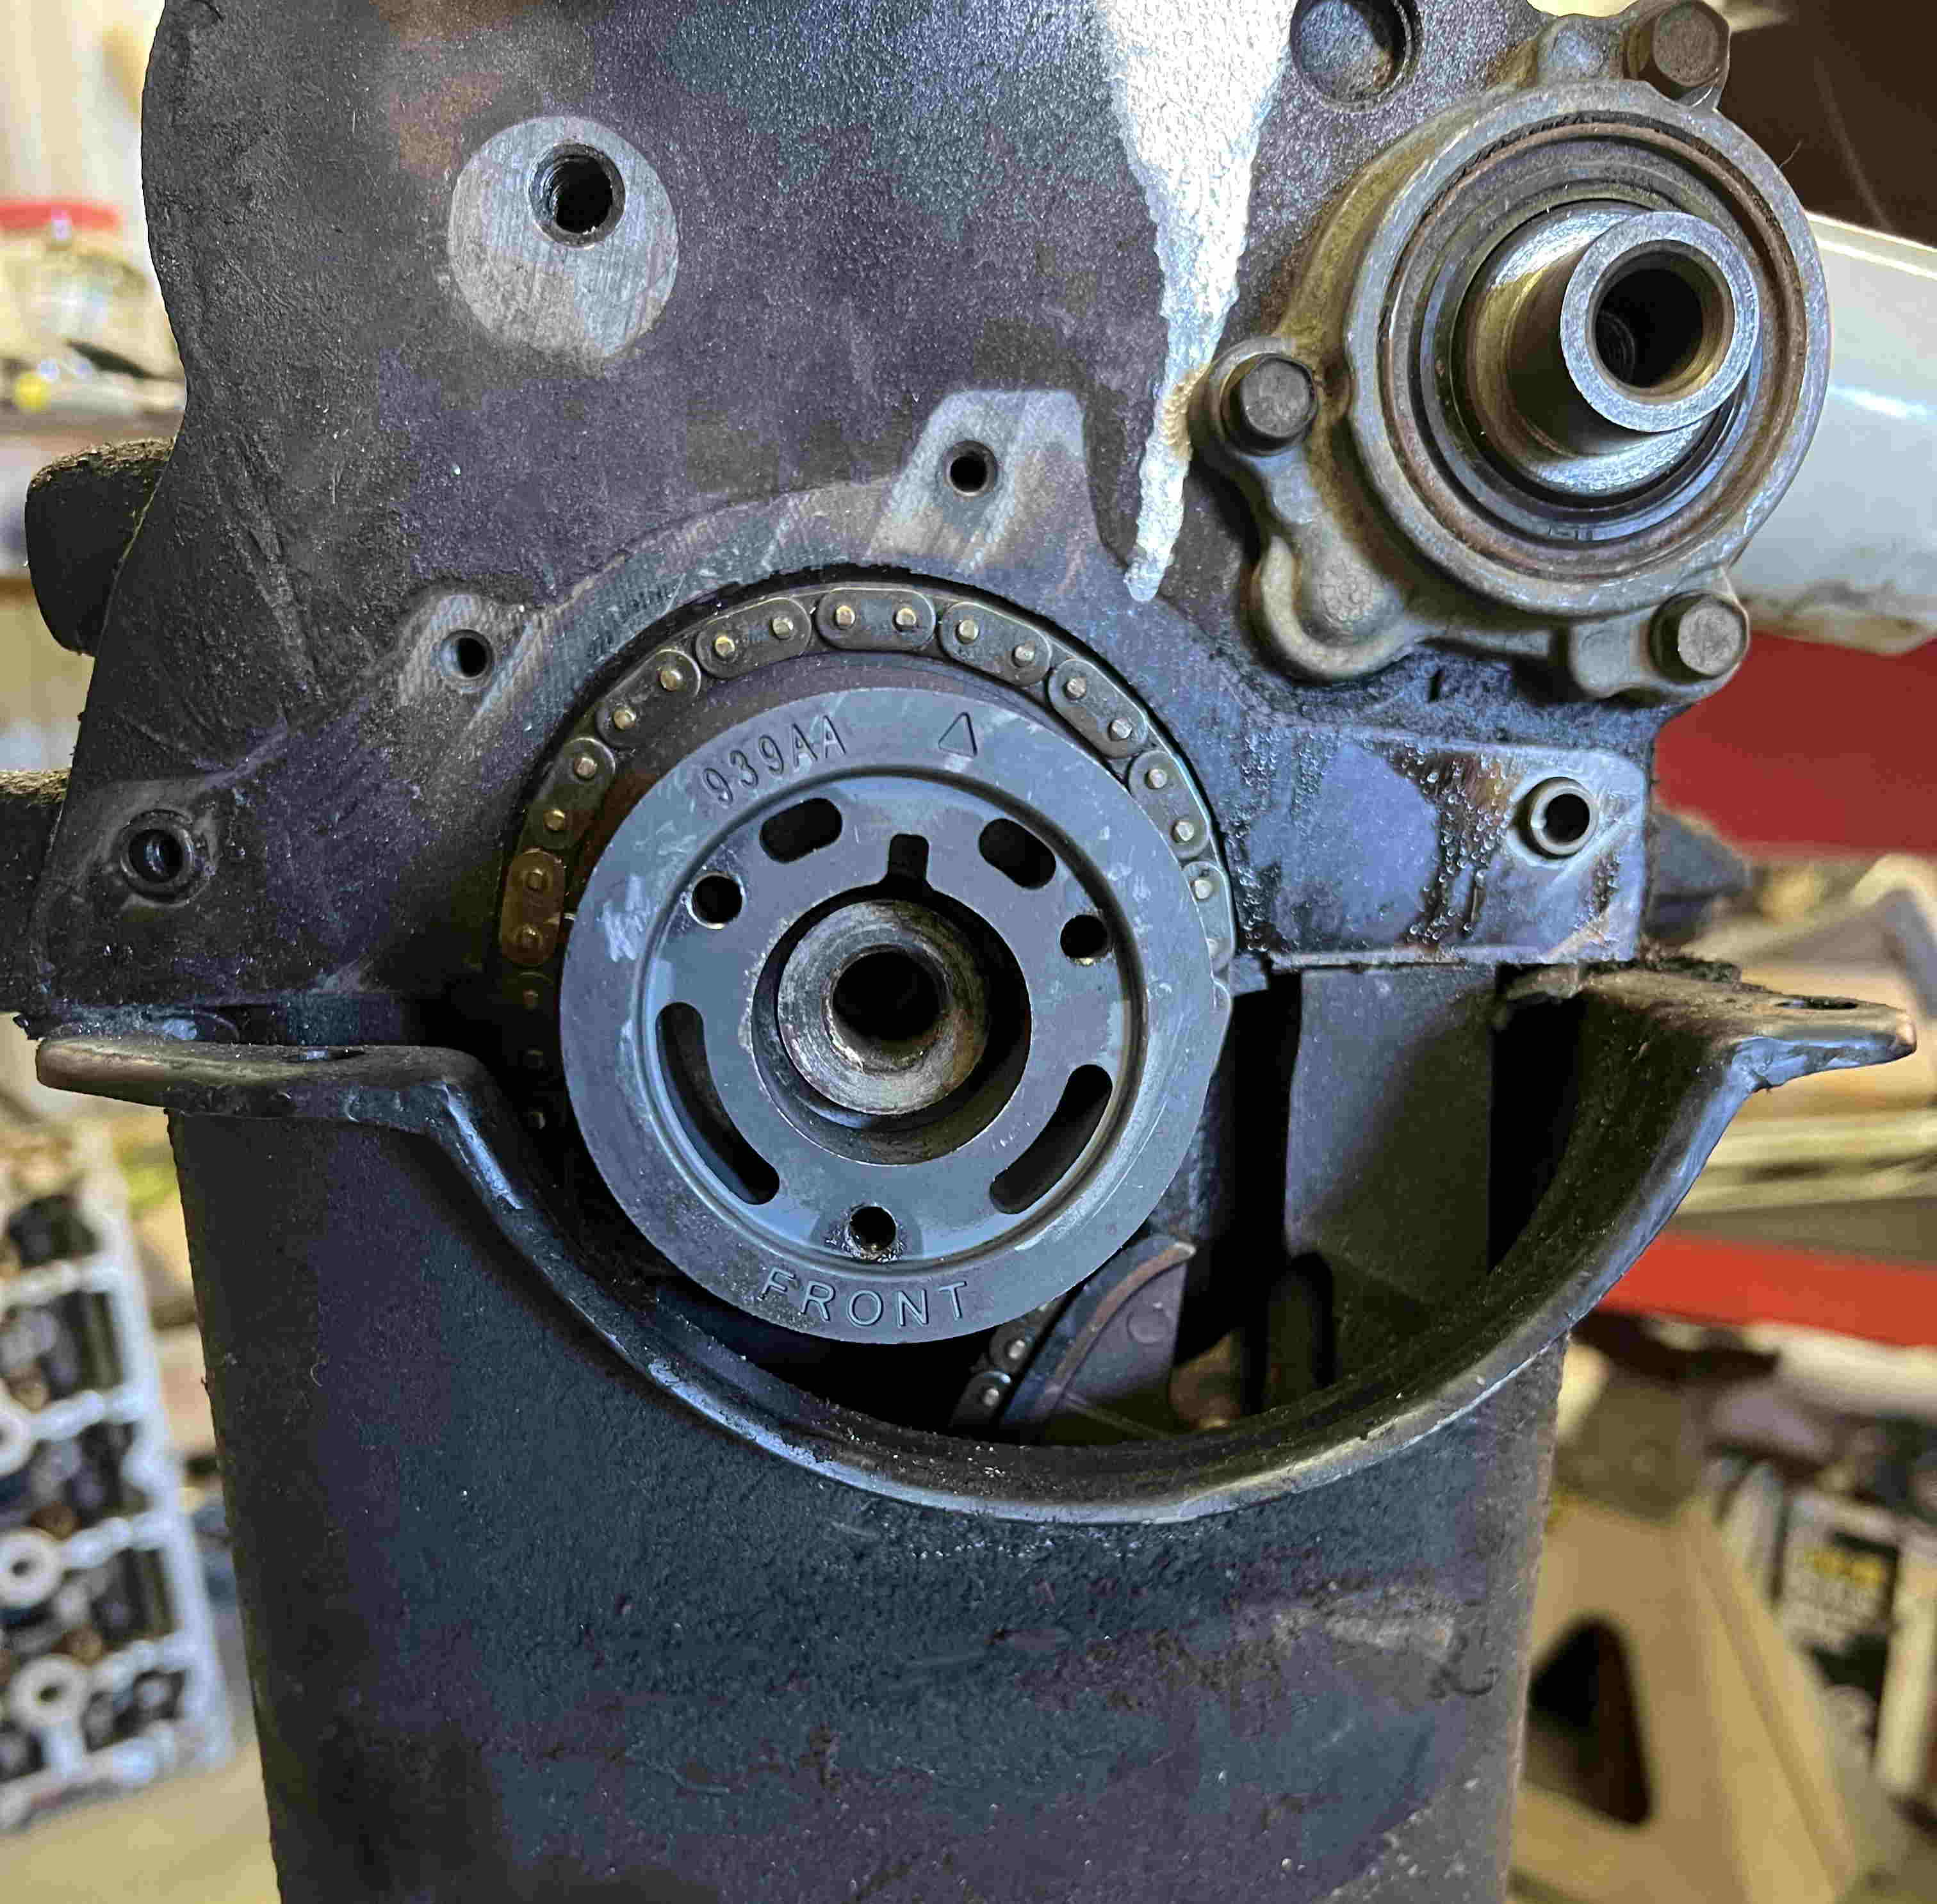 It appears to be near perfect as far as alignment with the tensioner. I will see what I need for the front of it to attach the 2.5L crank pulley on to. I bought an extra crank gear in case I mess this one up.
Bill AKA "LOBO" Profile
"Getting old is inevitable, growing up is optional" Darth Vader 1986 F350 460 converted to MAF/SEFI, E4OD 12X3 1/2 rear brakes, traction loc 3:55 gear, 160 amp 3G alternator Wife's 2011 Flex Limited Daily Driver 2009 Flex Limited with factory tow package Project car 1986 Chrysler LeBaron convertible 2.2L Turbo II, modified A413 |
|
Administrator
|
That looks great Bill! Well done!

Gary, AKA "Gary fellow": Profile
Dad's: '81 F150 Ranger XLT 4x4: Down for restomod: Full-roller "stroked 351M" w/Trick Flow heads & intake, EEC-V SEFI/E4OD/3.50 gears w/Kevlar clutches
|
|
Administrator
|
Thanks! I still have to figure two things out, how to get a key that will positively locate it and how to get the 5 bolt crank pulley attached. I am going to see how hard it will be to enlarge the hole in the 2.4L gear, then if I can arrive at a decent size hole and have enough space in front of that gear, cut down the OD of the 2.5L gear so it's key way can be used. Then figure out how to fit 3 M6X1.0 bolts in between the 5 M8X1.25 holes for the crank pulley.
That may have to wait until I can do a good fit up of the head onto the block and sacrificing the Stratus head gasket I can't use anyway to get a final length on the timing belt. Once I have that I can secure the crank at TDC, line up the cam gears and clamp them so they can't move and get the crank gear so the belt is tight. The 5 pulley bolts are fairly short, maybe 10mm thread length and pretty strong as per the markings so at worst case, I may end up using cut off M6 bolts as pins and making the gear to pulley hub a mild interference fit and use red Loctite on assembly of gear to adapter and rear hub to gear bolts so it becomes essentially a single piece.
Bill AKA "LOBO" Profile
"Getting old is inevitable, growing up is optional" Darth Vader 1986 F350 460 converted to MAF/SEFI, E4OD 12X3 1/2 rear brakes, traction loc 3:55 gear, 160 amp 3G alternator Wife's 2011 Flex Limited Daily Driver 2009 Flex Limited with factory tow package Project car 1986 Chrysler LeBaron convertible 2.2L Turbo II, modified A413 |
|
Administrator
|
Wow, great work Bill!
 Timing is going to be critical. Are you willing to rely on Loctite??? Have you considered just putting a pin in the annulus between the two gears?
Jim,
Lil'Red is a '87 F250 HD, 4.10's, 1356 4x4, Zf-5, 3G, PMGR, Saginaw PS, desmogged with a Holley 80508 and Performer intake. Too much other stuff to mention. |
|
Administrator
|
This post was updated on .
I'm still in the process, I have thought about pins. Right now I am working on cutting down the 2.5L crank gear. That powdered metal tears up the cutting tools.
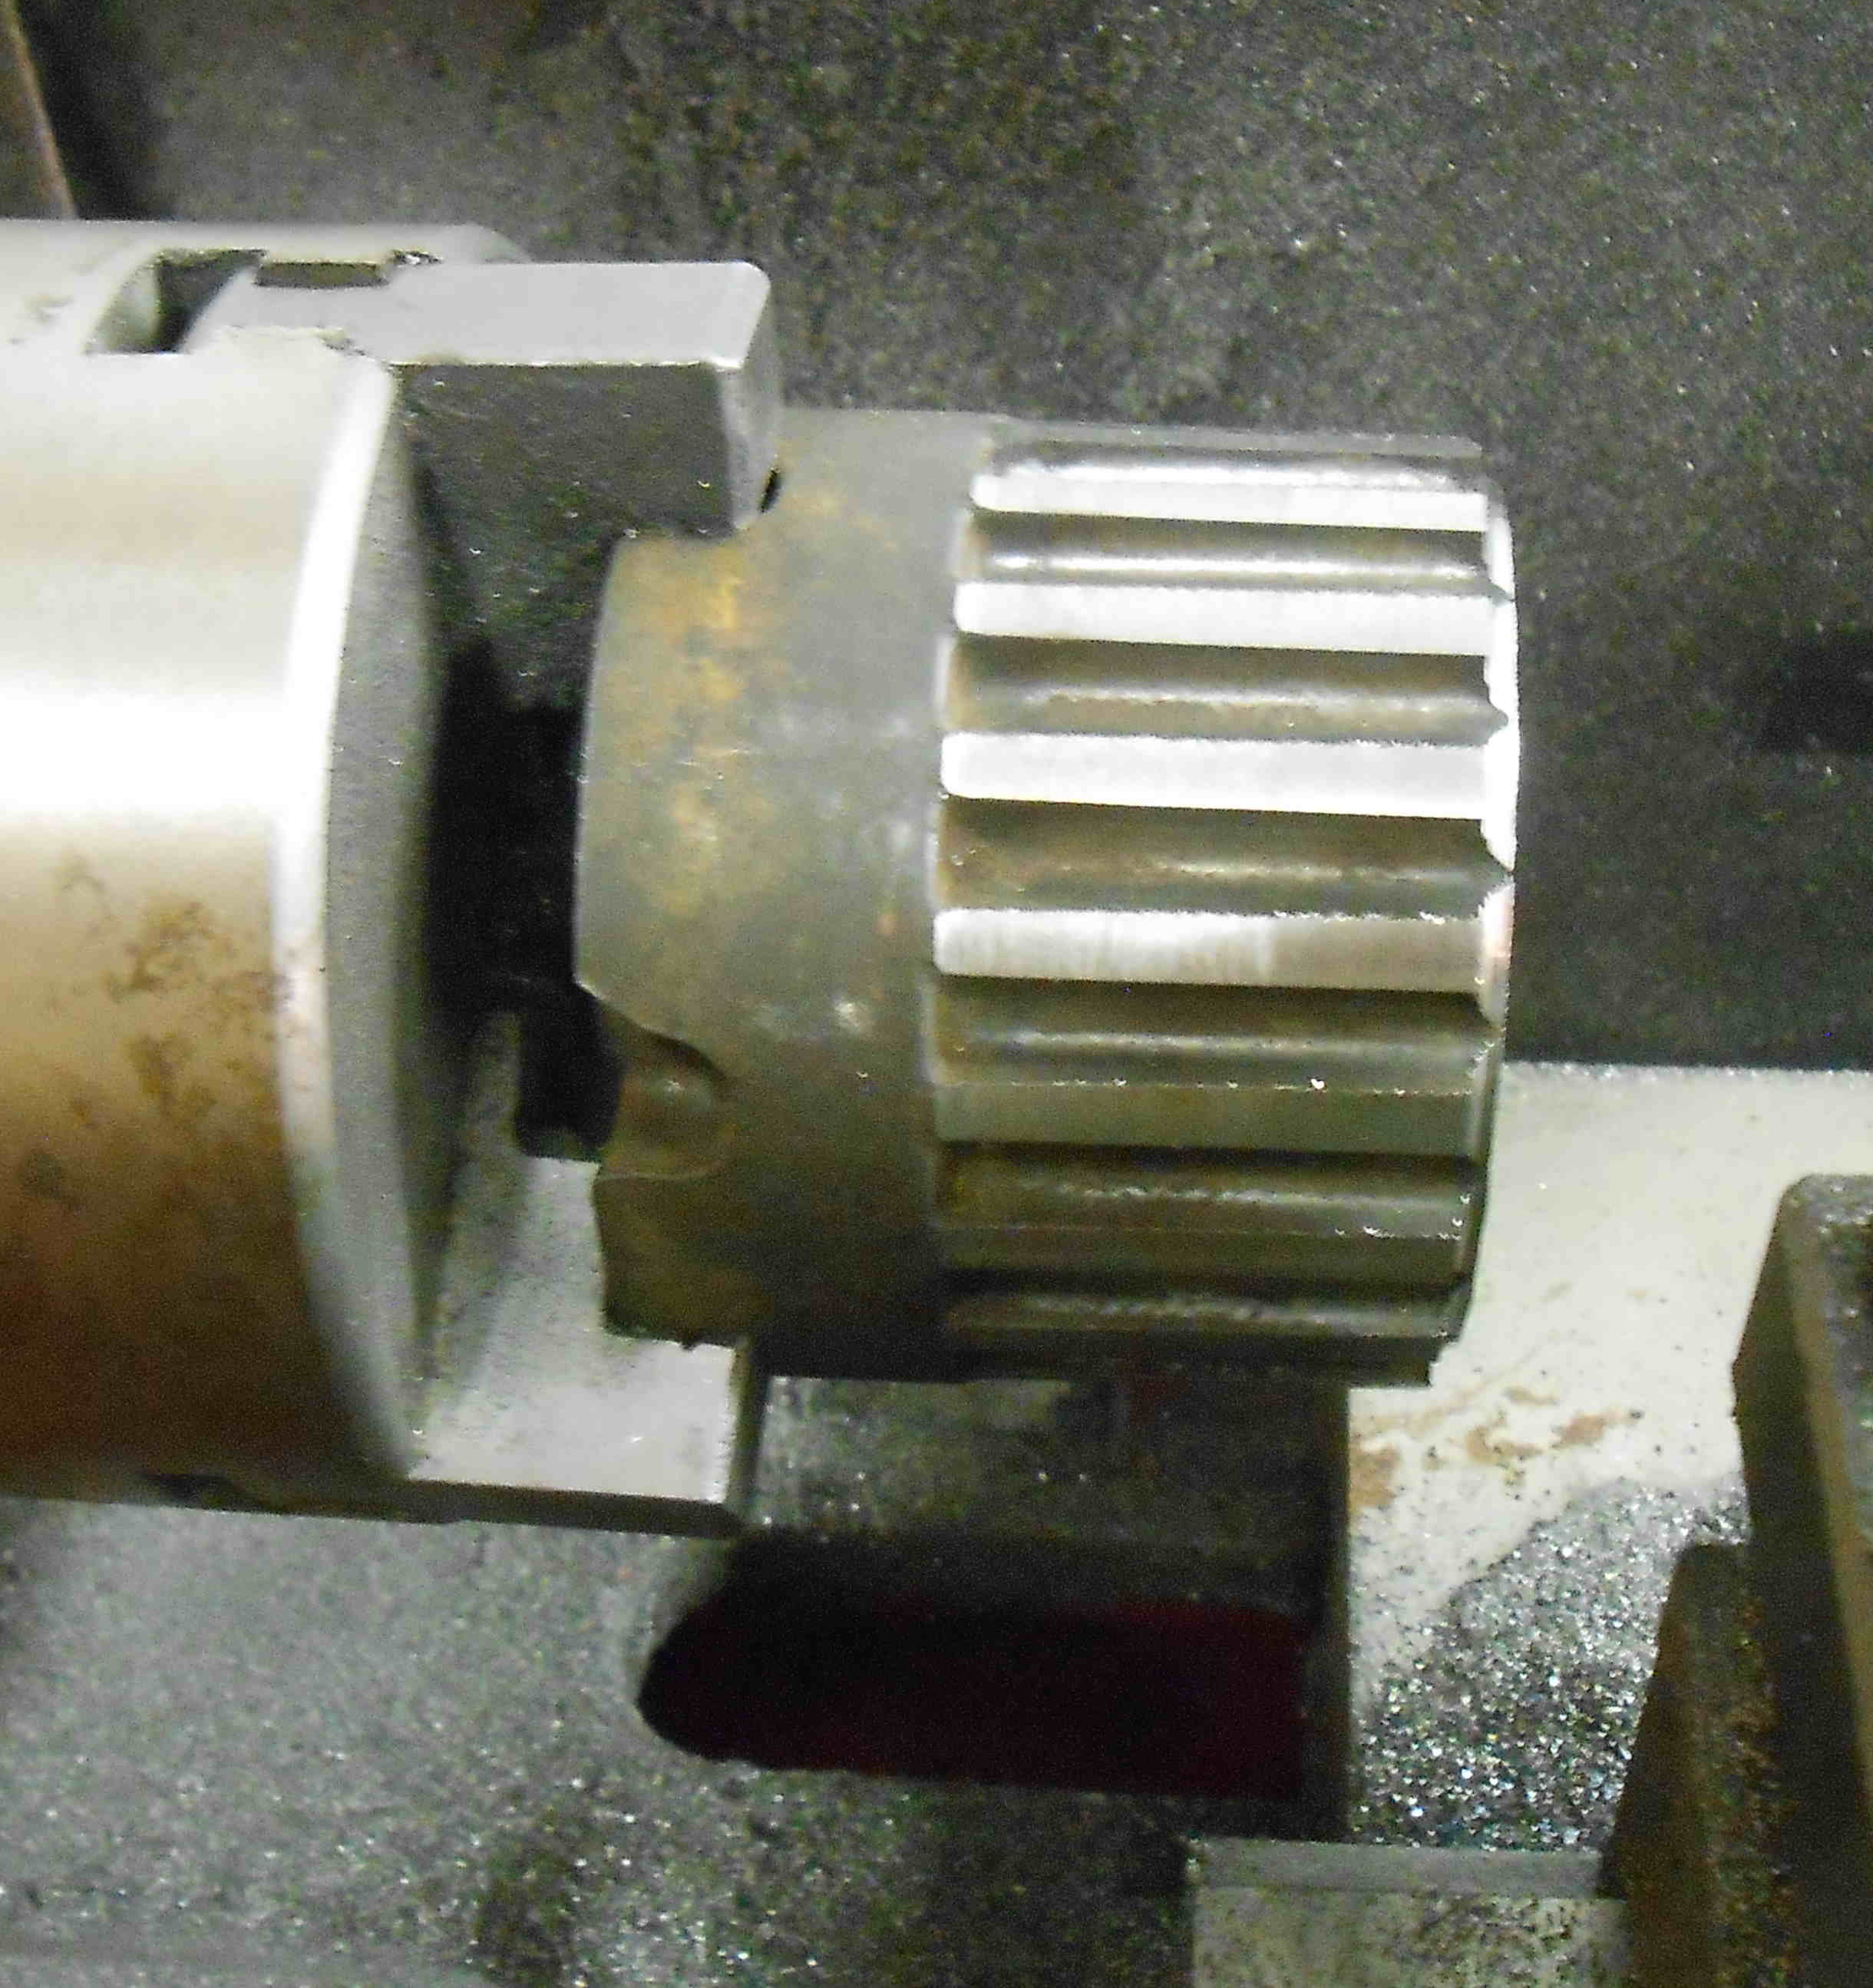 What I am trying to get is an extended hub where the teeth are now, the idea being an interference fit between the hub and gear. so once the correct timing location for the crank gear is determined, they outer one can be heated to hopefully allow the center to be quickly inserted and clamped while it cools. Then possibly one or more roll pins coated with red Loctite so they can't come out at high rpm.
Bill AKA "LOBO" Profile
"Getting old is inevitable, growing up is optional" Darth Vader 1986 F350 460 converted to MAF/SEFI, E4OD 12X3 1/2 rear brakes, traction loc 3:55 gear, 160 amp 3G alternator Wife's 2011 Flex Limited Daily Driver 2009 Flex Limited with factory tow package Project car 1986 Chrysler LeBaron convertible 2.2L Turbo II, modified A413 |
| Edit this page |

