"Rocky" - 1981 F250 Restoration
|
I have a Borgeson 980 in my Bronco. It definitely feels more "connected" you feel a lot. I can see why a rag joint was used, it does suppress some of that feeling and I think some people would prefer that.
Personally I like the more connected feel and I think it will work well with a blue top steering box (to be ordered mid march).
1985.5 F-150 XL Explorer standard cab 5.0 EFI AOD 4x4
Daily Driver. We call her Eunice the Ute. 1982 Bronco XLT Lariat 351W AOD 4x4 Code name Esperanza, or Espy to her friends. Please see my Project thread for the blow by blow. 1984 F-350 XL Centurion crew cab 460 T19 4x4 "Eylza Dual-little" |
|
In reply to this post by taskswap
You bring up a good point, no matter what the truck is - F100 on up. If you buy an old truck, go ahead and pull those drums. I had to go buy a bigger hammer to get one of mine off. But the parts in there were junk. I had brakes before. But I didn't have faith in them and they were rusty, junky, awful. The cable for the automatic adjusters were rusted through - no cables left. The shoes had lining left, but had broken, glazed, chipped, everything bad. Front pads were worn almost to the backing plates.
If you care about stopping safely, go ahead and replace your shoes and all the hardware with NEW hardware in there. This isn't to you in particular but everyone - replace everything you can possibly afford to in the brake system if it looks or feels the least bit suspect. Good luck getting it all repaired - I know you'll have it looking great soon.
Randy
Mt. Airy, NC 81 F-150 STYLESIDE regular cab 2wd. 302 Auto Zone crate. 5 spd M5od-R2 |
Yeah I 100% agree here. Adding to the list today I just disconnected one of my brake cylinders to start replacing it (driver side) and a few drops of what sure looked like muddy water dribbled out. No idea what's up, the fluid in the reservoir looks normal but I know this stuff is hygroscopic. I think I'm going to flush the entire system when I bleed it. It's worth a few extra bottles of fluid to make sure I don't have ANY water in the lines. Pulled the parking brake cable today, the new one hasn't arrived but I wanted a look at the old one. Sure enough the braided/armored section is pulled away from the end fixture at the brake. Worthless. List of things wrong with my driver's side wheel: - Everything List of things wrong with my passenger's side wheel: - Bad parking brake cable - Bad bearings (literally an eighth inch of play, totally worn down and burned) - Brake cylinder stiff and heavily rusted. No fluid leaking in the dust boots but I'm sure that wold have been next... - Wheel studs a hot mess - Shoe liners literally cracked in half and corners fallen off - Adjuster rusted frozen and useless How this truck stopped at all is a huge mystery to me. The weird thing is, while it was a huge pain getting out some of the frozen bearings (I had to dremel slots in them and cold-chisel them out, even a torch wasn't doing it) all of the work involved was actually not that hard - or expensive. Spring kit, bearing kit, two parking brake cables, a pack of wheel studs, some gear oil, and two cylinders. I think I'm only out $180 for both wheels. Imagine driving a deathtrap for $180 and 4 hours labor...
--
1981 F-250 Custom. 6.6L V8, 4 barrel Holley carb, ARA aftermarket A/C. |
Re: "Rocky" - 1981 F250 Restoration
|
Administrator
|
You are doing it right - fix it while you are there. And brakes are a big thing - just not all that expensive.

Gary, AKA "Gary fellow": Profile
Dad's: '81 F150 Ranger XLT 4x4: Down for restomod: Full-roller "stroked 351M" w/Trick Flow heads & intake, EEC-V SEFI/E4OD/3.50 gears w/Kevlar clutches
|
|
Here are some photos for the bored or curious.
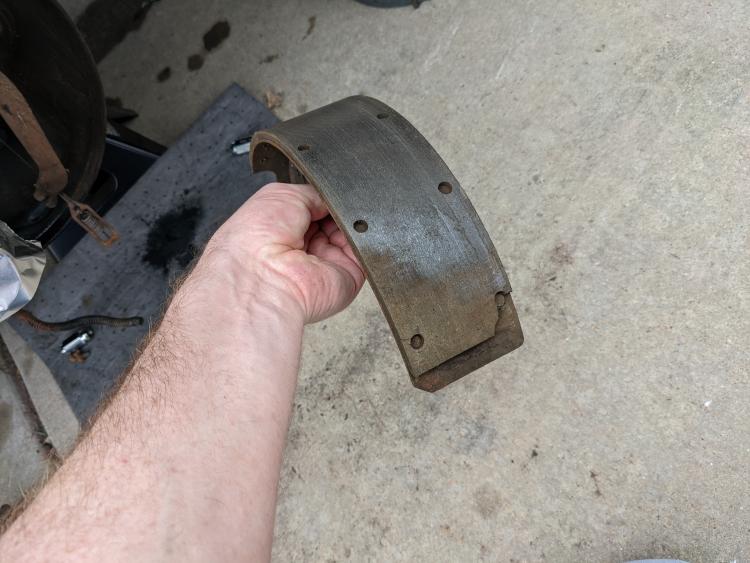 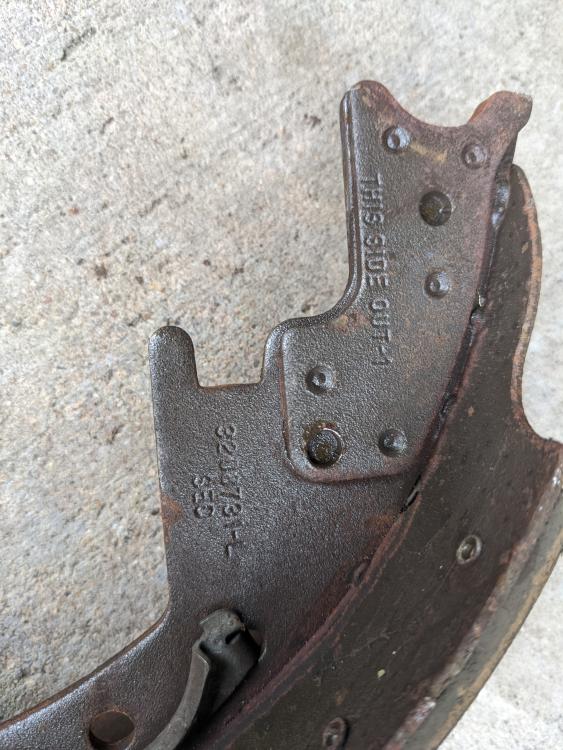 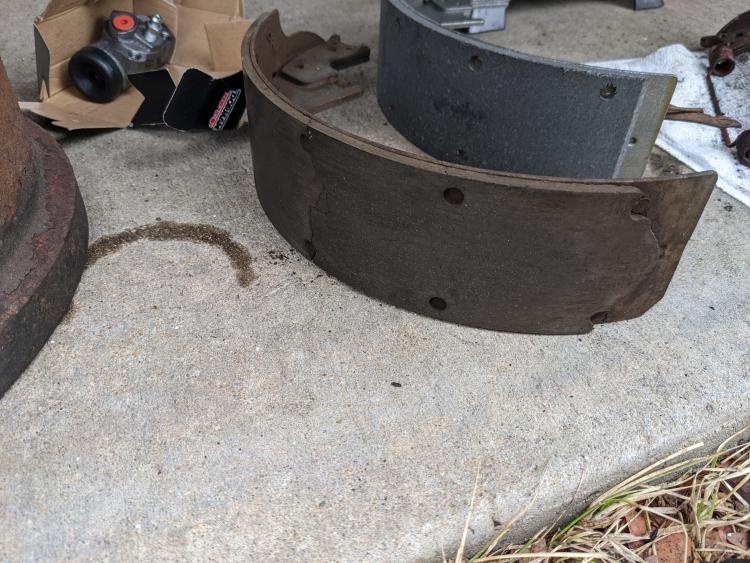 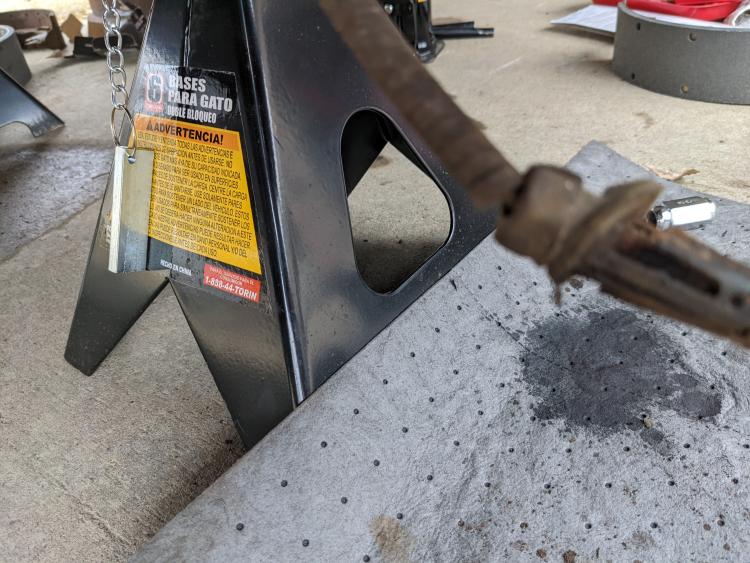 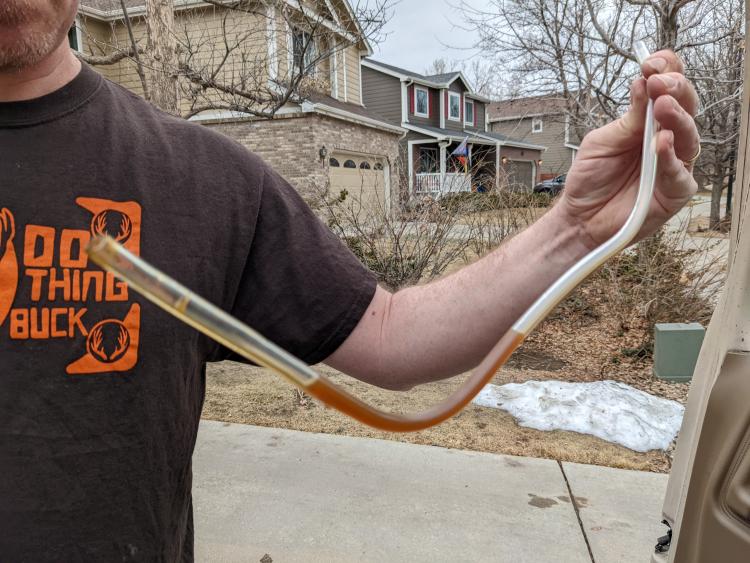 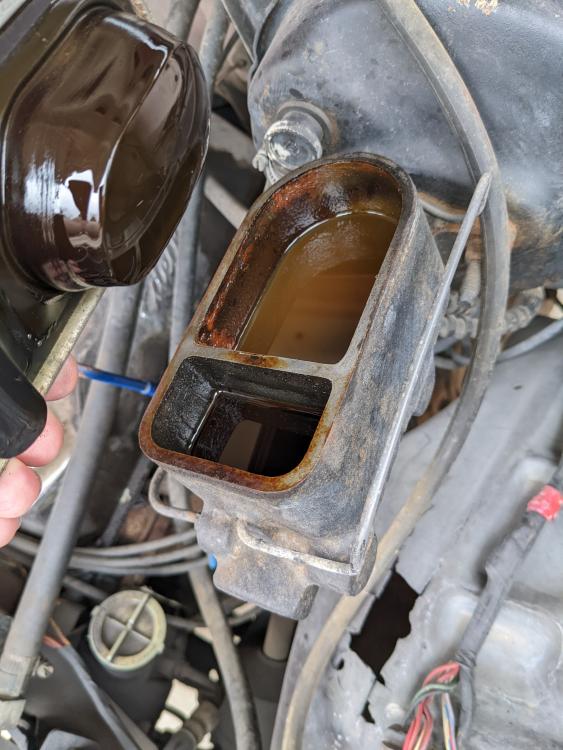 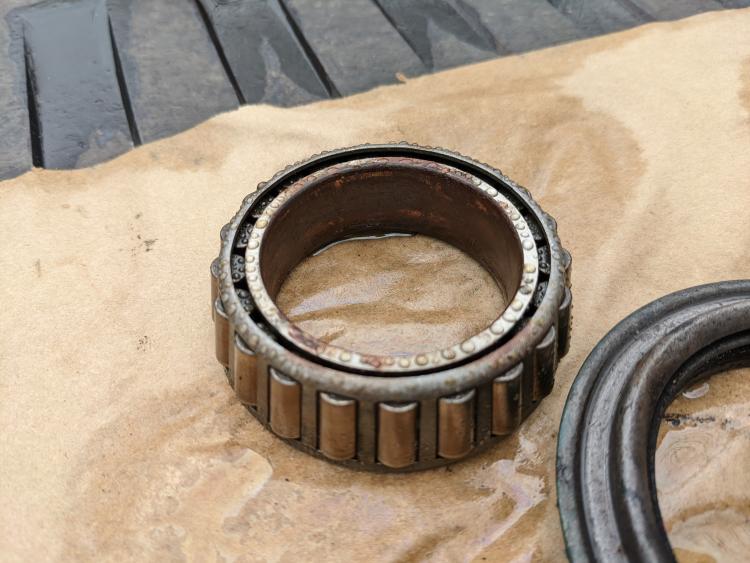 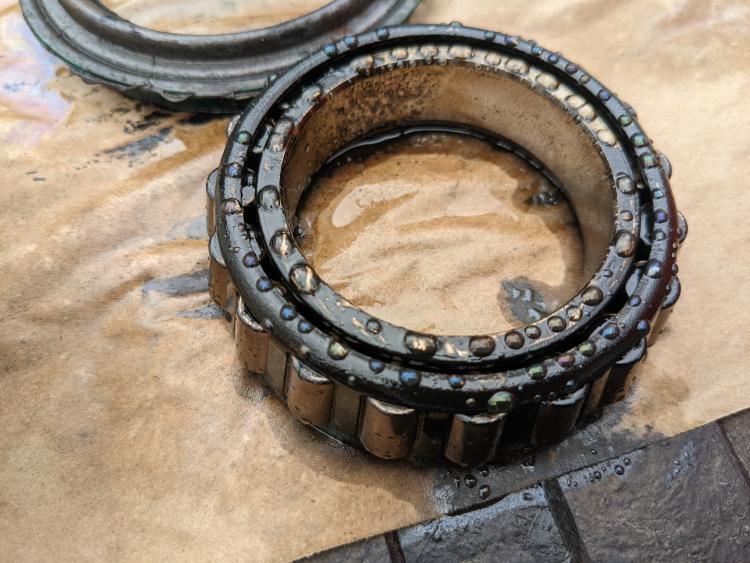 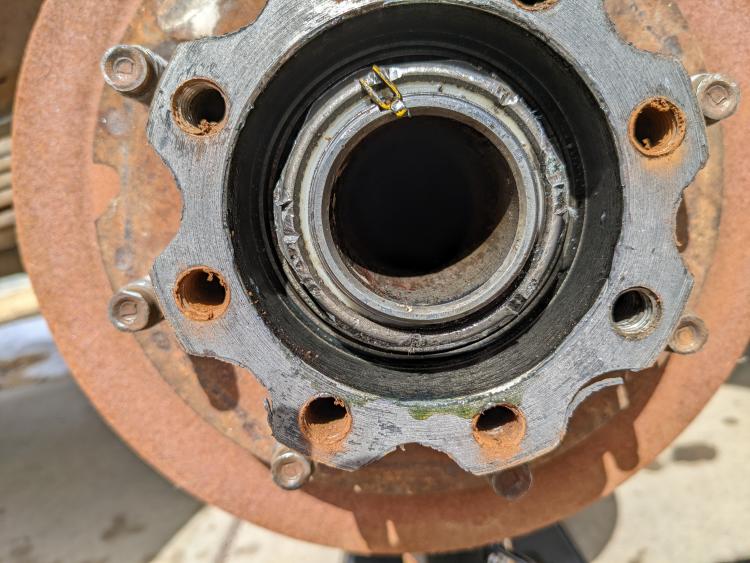 Sometimes digging into an old vehicle that you don't know the history on is like being an archaeologist. If you pay close attention you can sometimes make an educated guess about what the previous owners were up to. The brake shoes are not original so they were replaced. That part number isn't Ford, there's a Bendix stamp on each shoe so I assume it's a Bendix #. As you can see there was actually a lot of liner material left but they were still a trash item, the liners were heavily glazed and one of them was cracked in the center with the bottom all torn off, while another was wearing unevenly (warped shoe). I suspect this damage was related to high heat caused by bearing failure. The driver's side bearings were dry, no oil at all. I'm going to pull the diff cover next to see if there might be some blockage to explain that, but either way the bearings were totally cooked. With my investigator hat on I suspect this was actually recent damage both because if it had gone on for long it would have caught fire, it was that bad, and also because although they were scorched, they actually still rolled very well, with only a tiny bit of visible wear to the inner races and rollers. I think this was a "caught in the nick of time" type thing. There is minor wear to the spindle but the spindle shaft is still very smooth and cleaned up pretty well with emery paper. Since the spindles were "passable" rather than replacing them and delaying the project another week (these are hard to find and expensive) I'm going to throw on the parts I have (arriving Monday) and kick the ball down the road. At some point I'd like to put on a disc brake conversion kit, so rather than sink more money into these I'll just make a note of it and budget to do that in the next year. (As a backup plan if i find a good axle at a junkyard or Craigslist listing, I may grab it and do a transplant.) The parking brake cable is original, I would bet on it. It's rusted into oblivion and broken off the end mount, but it has that "Ford" quality you know what I mean? You can just tell when you're holding something from Dorman or Bendix vs something that came off the line with the truck. So I suspect that's just always been broken. This is supported by absolutely no wear marks on the bolt head or threads on the adjuster. I figure the previous owner(s) just accepted it and maybe lived on a level street and never cared. The brake fluid was just lousy with rust and water. It's a testament to the massive brakes on these trucks that I was able to stop at all (I had great stopping power). The reservoir was full of gross brown watery sludge and the lines were too. But i need to get this truck on the road so although I'll probably get a replacement/rebuilt booster/reservoir soon, it did look like it was in acceptable shape and the top cover seal looks really good, considering. Again, investigator hat on, I suspect this was a new issue. Most likely since brake fluid is hygroscopic, that top cover is actually not as good as it looks and it's letting moisture in. I'll replace it, but for now I just siphoned out the reservoir and absorbed every drop/bit of sludge I could with shop towels, then vacuumed two bottles of fresh fluid through the system (while pumping the brakes) until it ran clean at the left rear. (I have that cylinder off right now to prepare to replace it.) I'll do the same at the left rear until that runs clean, then once I have the rear brakes/wheels sorted out and remounted, I'll bleed the front discs until they run clear as well. Some other telling signs. If you look closely at the driver's side axle nut (shown) you can see it was clearly removed with a lot of gouging and scoring, probably by vice grips by somebody without the right socket. My guess is the most recent owner "tried" to tackle some of these problems, got partway into the system, realized it was beyond him, and repeated the same mistakes re-assembling it all. Hope you're all having good weekends...
--
1981 F-250 Custom. 6.6L V8, 4 barrel Holley carb, ARA aftermarket A/C. |
Re: "Rocky" - 1981 F250 Restoration
|
Administrator
|
Are you sure that truck hasn't been in Florida? I really looks like
 had his way with it. had his way with it.
But you'll get it sorted. And the brakes will work great for a long time - including the parking brake. As for my weekend, I have six Saturdays and one Sunday. The hard part is knowing which Saturday is the one before Sunday, and I think that's today. 
Gary, AKA "Gary fellow": Profile
Dad's: '81 F150 Ranger XLT 4x4: Down for restomod: Full-roller "stroked 351M" w/Trick Flow heads & intake, EEC-V SEFI/E4OD/3.50 gears w/Kevlar clutches
|
|
That's a good quote, I'm going to steal it. :D
Started re-assembly today. Nothing major, most of my parts arrive Monday. But since I have my replacement wheel cylinders I figured I'd throw them on. Nothing really remarkable, it's a bit of a fumble getting the bolts and hydraulic line all lined up properly (I followed a Youtube video's advice and connected my hydraulic line first, hand tight, and that helped). But it's frankly a pretty simple job. I vacuum'd the passenger side first to get out what old fluid I could. I haven't seen any brake parts kits that include the little steel pins that go into the drum brake cylinders, so I assume they're meant to be reused. I cleaned mine up with some brake cleaner and 600 grit and they seem fine... Gary, is it worth closing/deleting threads or just let sleeping dogs lie? I opened a thread for Bullwinkle, the camper rebuild that was going to be Rocky's "friend". But in a twist I found a listing for a truck camper that was affordable and a perfect fit for my needs. I've decided to get that instead of rebuilding the other one, so I won't be posting there any further. The bonus is this will give me time to really focus on "do it right" stuff for Rocky. Next two projects are the front winch and rear gas tank, but I may add a rebuild of the front brakes and steering components now that I'll have time to do it...
--
1981 F-250 Custom. 6.6L V8, 4 barrel Holley carb, ARA aftermarket A/C. |
Re: "Rocky" - 1981 F250 Restoration
|
Administrator
|
It is a tough job, but I'm happy to take it on. And I declare that today is the Saturday before Sunday!
 Seriously though, I'm glad you found a camper so you won't have to rebuild Bullwinkle. But you could put a post in that thread to tell everyone what you are doing. That will kind of close off that thread, although there's no need to delete it. And I think the extra time achieved by buying the camper will be well spent on things like the brakes and the winch. 
Gary, AKA "Gary fellow": Profile
Dad's: '81 F150 Ranger XLT 4x4: Down for restomod: Full-roller "stroked 351M" w/Trick Flow heads & intake, EEC-V SEFI/E4OD/3.50 gears w/Kevlar clutches
|
|
In reply to this post by taskswap
You almost have to call this camper Bullwinkle!
Might need that thread to report on your “new” one.
Dane
1986 F250HD SC XLT Lariat 4x4 460 C6-Sold 1992 Bronco XLT 4x4 351W E4OD 1998 GMC Sierra SLE K1500 350 4L60E Arizona |
|
I would post what happened on the rebuild of Bullwinkle 1.0 and the start of Bullwinkle 2.0
 You could keep 2.0 in that post / thread as it is still Bullwinkle. Dave ----
Dave G.
81 F100 flare side 300 six / AA OD / NP435 / 2.75 gear http://cars.grantskingdom1.com/index.php/1980-Ford-F100?page=1 81 F100 style side 300 six/SROD parts truck -RIP http://cars.grantskingdom1.com/index.php/1981-Ford-F100 |
|
Alright I will. :) Figure a week before there's an update on Bullwinkle. Need to sort out the financing and it takes a bit of time. I do plan a few mods for it to make it more "Rocky friendly" so I'll post those there.
Meanwhile I'm a day away from reassembling my brakes, if all goes well. I'm really just waiting for the parking brake cables to get here. I think its "possible" to install them after the shoes but given the tight routing I think it's easier to go in order... Given all the shipping delays, I decided to go "whole hog" and ordered a bunch of stuff like a replacement master cylinder, replacement front wheel hoses and the rear center hose, bolts, washers, all that kind of stuff. But I can't seem to find a replacement booster. The MPC on this is E0TZ-2005-B which is "81/83 F250 2/W/D, 4/W/D and and dual piston, w/booster - 8500 GVW and over". My GVW is 8650 so I think thats the right one. All I can find matching this on Amazon/Summit/Jegs/etc is a remanufactured Cardone that seems to get terrible reviews, stuff like "didn't even last a year". eBay has a bunch of generic options (no reviews) but all seem to be <8500 GVW. What makes more sense here? My booster is not actually failing right now, but the truck's 40+ years old... It's probably more luck than anything, right? Should I risk it awhile longer and hope for a NOS part to come up (and still have a good/sealed diaphragm)? Or try one of these other parts and maybe keep my booster as a spare part? Both seem kind of equally bad...
--
1981 F-250 Custom. 6.6L V8, 4 barrel Holley carb, ARA aftermarket A/C. |
Re: "Rocky" - 1981 F250 Restoration
|
Administrator
|
I'd use the booster you have until it fails, and watch for a better one in the interim.
As for the master cylinder, did you go with the later version? I really like the ones with the plastic reservoir.
Gary, AKA "Gary fellow": Profile
Dad's: '81 F150 Ranger XLT 4x4: Down for restomod: Full-roller "stroked 351M" w/Trick Flow heads & intake, EEC-V SEFI/E4OD/3.50 gears w/Kevlar clutches
|
|
No, I wasn't sure whether those were better or worse so I went with the exact replacement from AC Delco, this one https://www.amazon.com/gp/product/B000C9JDPW. Is the plastic lid one that much better?
Speaking of cheap replacement parts is this interesting at all? https://www.ebay.com/itm/275055139689 It looks identical to mine and a reasonable price. I have no reason to believe mine is leaking but it sure is rusted, would it be a good idea to replace it just as a preventive item? (Sorry for the terrible pic but you get the idea...) 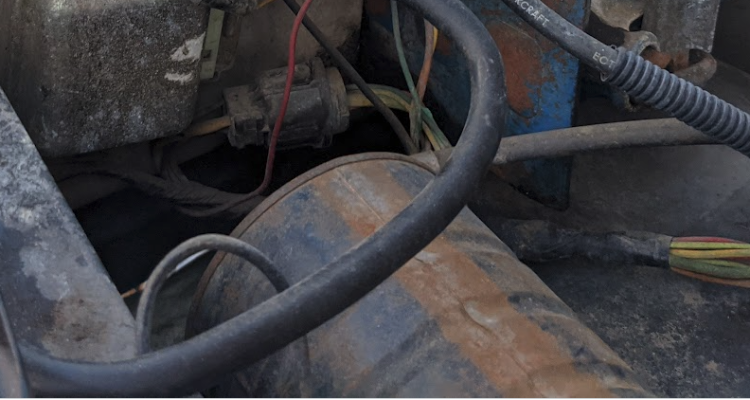
--
1981 F-250 Custom. 6.6L V8, 4 barrel Holley carb, ARA aftermarket A/C. |
Re: "Rocky" - 1981 F250 Restoration
|
Administrator
|
There are several advantages to the newer master cylinders, like the ability to see how much fluid you have w/o pulling the cap, a cap that doesn't leak, and the ability to put a pressure bleeder on and bleed the brakes that way. But the older ones work fine, so there's no problem with staying with it.
On the vacuum reservoir, if it doesn't leak then it isn't a problem. But if it is rusty it might leak. So if you don't want to clean it up and paint it to stop the rust then replacing it is a good idea.
Gary, AKA "Gary fellow": Profile
Dad's: '81 F150 Ranger XLT 4x4: Down for restomod: Full-roller "stroked 351M" w/Trick Flow heads & intake, EEC-V SEFI/E4OD/3.50 gears w/Kevlar clutches
|
|
In reply to this post by taskswap
Like Gary said, use booster as is, but find the proper replacement. I replaced mine easily without disturbing anything else in the engine compartment. Unbolt the master, slide it off the bolts. Do the inside part, which is a little tough to access, but changes out without too much effort or disturbance.
My booster came from NAPA and is a Cardone, but hasn't given me any problems yet. Almost a year now. F150 though Pay attention to the order the bushings on brake light switch when you do it. Put that back exactly like you removed and check your brake lights afterwards. I'm not impressed with the Autozone replacement switches. I went through two of those and have a "better" replacement from ebay now. The last one worked but only randomly at the end after a couple months.
Randy
Mt. Airy, NC 81 F-150 STYLESIDE regular cab 2wd. 302 Auto Zone crate. 5 spd M5od-R2 |
|
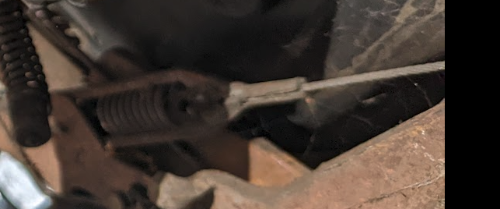
Thanks for the advice, guys. Got another one for you, brakes again. My parking brake cables just arrived. Among all the parts I've bought from various kits are replacements for the short spring-ended steel cable that goes from the top of the adjuster arm down to the spring loaded adjuster stop, sorry I don't know the name of it, this thing:
 To replace it, it looks like I have to take this thing off, which appears to be a bolt through the back plate: 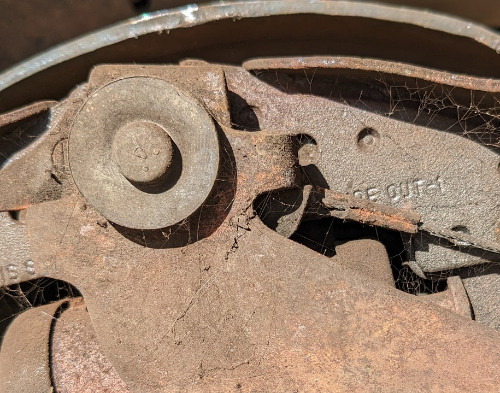 Fine so far. But I have this mental conflict over lubrication. I know better than to toss around WD-40 or any wet lubricant inside a brake but I've never dry-assembled moving parts in my life. Would some dry graphite/moly lube between the components on this bolt be OK? Or is it a bad idea?
--
1981 F-250 Custom. 6.6L V8, 4 barrel Holley carb, ARA aftermarket A/C. |
|
Is that second photo inside the backing plate? The upper pivot? I used a dab of high temp brake grease on all the moving metal to metal contact points in mine. I painted the backing plate. and all the metal parts that didn't come in the new hardware kit. Basic cleaning and quickie spray bombing to hopefully slow the attack of rust and brake dust. I used the first cans that came to hand - silver and burgundy. I know yours is a lkot different, but I see no issue using carefully applied grease to lube the metal parts. I didn't use giant globs, just a little to help metal move against metal.
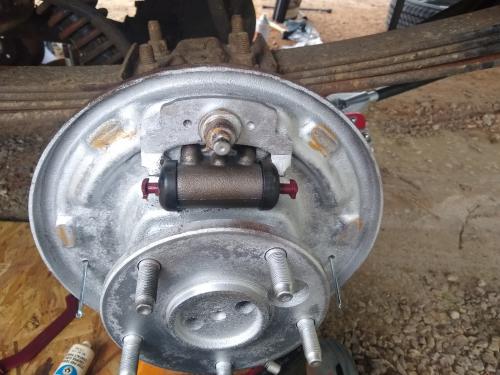 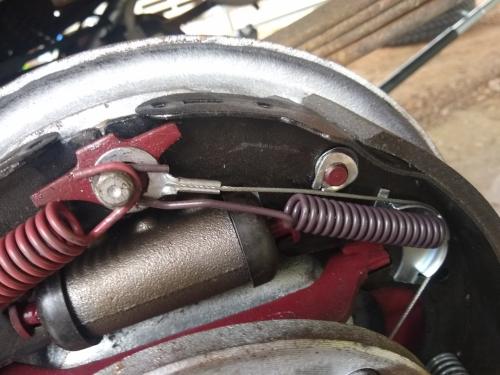 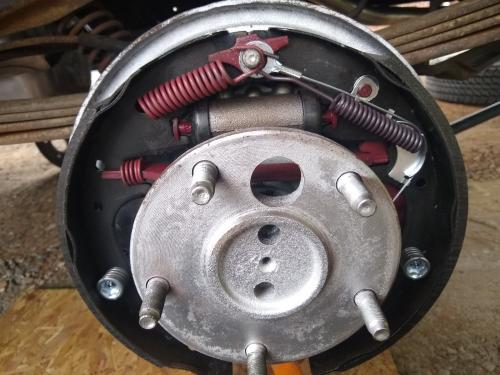
Randy
Mt. Airy, NC 81 F-150 STYLESIDE regular cab 2wd. 302 Auto Zone crate. 5 spd M5od-R2 |
Re: "Rocky" - 1981 F250 Restoration
|
Administrator
|
I, too, have used grease. But I don't think that graphite would be a bad idea. It wouldn't collect dirt, but wouldn't lube as well as grease.
Gary, AKA "Gary fellow": Profile
Dad's: '81 F150 Ranger XLT 4x4: Down for restomod: Full-roller "stroked 351M" w/Trick Flow heads & intake, EEC-V SEFI/E4OD/3.50 gears w/Kevlar clutches
|
|
I used grease, thanks for the suggestions guys.
So today was either progress or a setback and to be honest I'm not sure which. Removing the parking brake levers took way longer than I hoped. It's just an 11m nut on the back but it somehow took me an hour of fumbling with different sockets, extensions, and wrenches before I found a combination that would fit back there. Pro tip for any future readers, if you're replacing your brake cylinders too, leave them out while you do this step because it gives you a bit of a better angle. A mirror is also super useful. I wish I had a magnetic one that I didn't have to hold... Next I tackled the parking brake cables. Dorman swears these are the right replacements for my truck but boy was it a struggle to fit them. They don't seem to enter the drum housing at the same angle and they seem to be a few inches longer as well - not enough to stop them from working, but enough to be frustrating to line up properly. After that it was shoe time. This went fine - I don't have to tell any of you that installing shoes is fussy work with "springs and things" so it takes awhile, but I got it done and I'm fairly sure I did it right. But once again, some trouble. The spring loaded brackets that engage the pawls on the adjusters just seem like they don't work all that well. It's easy to wiggle them into positions where they don't engage the pawls at all. I have some anxiety about them. After that I finished installing my new wheel studs, which was probably the easiest task of the list. I just hammered the new ones through the back (I got them aligned with the old knurls easily) until they were almost in, then put five washers on each stud (so my closed end wheel nuts wouldn't bottom out) and impacted on a sacrificial wheel nut to draw the stud tight. Took 10 minutes for both drums. Then I installed the inner bearings and seals in my wheels. I've always struggled to do this "right" (I don't own or even have room for a proper press) so I bought a seal installer kit. But it was hot garbage, way too soft to do the job right. So I just hammered the seals in the way I always do. I know you're not supposed to but if you go slowly and lightly around the edge with lots of gentle taps (a half millimeter at a time) it does the job without wrecking the seal. You can also put a plate across the seal while you do this but then you can't see your progress and IMO it's more important to drive it as straight as possible than to avoid dinging the face of the seal. So finally I installed the drums on the axle spindles, put in the outer bearings and the nuts (I bought new nuts as well). Once again, I had issues. So you know how normally you tighten the nut until the wheel won't turn, then back it off a quarter-turn and stake the nut? Well on one wheel I broke my breaker bar! I have a shorter one but it was a struggle to get the right torque with it. In the end it was progress with some letdowns. I was really hoping to get to a point where setting the parking brake would seize the drums. I know it's not reasonable to expect this until I have the shoes and parking brake cable both adjusted, and I haven't even done the master cylinder and bled the system yet. But I guess I was still hoping. The parking brake pedal is MUCH firmer now but even if I stomp on it, it doesn't "set" the shoes. I'll do the rest tomorrow, hopefully. Replacing the parking brake cables was a must because one of my old ones was damaged... But if you have the option I would recommend an alternative to Dorman if you can find one. I like most of their parts but these cables just don't seem to be quite right. Just FYI.
--
1981 F-250 Custom. 6.6L V8, 4 barrel Holley carb, ARA aftermarket A/C. |
Re: "Rocky" - 1981 F250 Restoration
|
Administrator
|
I think when you get everything together and apply the brakes hydraulically the parking brake will work well. It takes a lot of force and some wearing-in to get the shoes touching all the way around.
The parking brake on Big Blue is binary - it is either on or off. There's nothing in between. When I first got the winch I was supposed to wind the cable up the first time under tension. So I set Blue at one end of the driveway and Big Blue at the other end. Ran the cable out to Blue's trailer hitch, set Blue's park brake, and went back to Big Blue to set the park brake "a little bit". There was no "little bit". Just a bit and the wheels lock and Blue came sliding to me. In other words, the park brake on these trucks can work very well. And I'll bet that yours does after you get the shoes to take a set and wear in.
Gary, AKA "Gary fellow": Profile
Dad's: '81 F150 Ranger XLT 4x4: Down for restomod: Full-roller "stroked 351M" w/Trick Flow heads & intake, EEC-V SEFI/E4OD/3.50 gears w/Kevlar clutches
|
| Edit this page |

