EFI For Big Blue
|
Administrator
|
You say it is 42% of 12V, but 12V is well below the 12.6V of a six cell LA battery at rest, and even farther below the 14.35V my regulator puts out with the engine running.
But I really like your analog solution using discreet components. Newark is another handy source.
Jim,
Lil'Red is a '87 F250 HD, 4.10's, 1356 4x4, Zf-5, 3G, PMGR, Saginaw PS, desmogged with a Holley 80508 and Performer intake. Too much other stuff to mention. |
|
Administrator
|
Ok folks, the Arduino approach works. I've documented everything in my Bricknose Sender To Bullnose Gauge Interface project. To test it I downloaded an Arduino simulator and tried the concept - and it worked well.
However, along the way I did find a bust in my spreadsheet, which caused me to recalculate the "m" and "b" values in the equation to y=.27x+.02. And, I found a minor omission in the sketch/program - both of which I've changed in the previous posts to ensure posterity doesn't try to replicate this with dodgy data. You can see from the screenshots of the simulator that the results are extremely close to what we need, and can easily be dialed in via the m and b parameters. In fact, they could be dialed in for every combo of senders and gauges, so it would be easy to use Bullnose senders and Bricknose gauges. Now to figure out other things to have the Arduino do in its spare time - and it will have a lot of it. 
Gary, AKA "Gary fellow": Profile
Dad's: '81 F150 Ranger XLT 4x4: Down for restomod: Full-roller "stroked 351M" w/Trick Flow heads & intake, EEC-V SEFI/E4OD/3.50 gears w/Kevlar clutches
|
|
Just a thought here on driving the bullnose gauges.
Are you going to use the OEM IVR, (flasher type), or operate the gauge from a regulated 5V source? It may make a difference in that you could need a level shift or some sort of driver for the Arduino? |
|
Administrator
|
I don't usually leave a flasher in. As shown in the drawing, I'll replace it with one of the regulated supplies like shown here: Electrical/ICVR. That way all the gauges will have a stable supply.
But, the Arduino will run off of the vehicle battery voltage and create its own power - as well as the 5v reference I'll feed to the tank senders. As for a level shift, I can do that with the "b" value in the equation. But if that equation doesn't do it for another application I could go quadratic if needed to give a curve. Lots and lots of flexibility.
Gary, AKA "Gary fellow": Profile
Dad's: '81 F150 Ranger XLT 4x4: Down for restomod: Full-roller "stroked 351M" w/Trick Flow heads & intake, EEC-V SEFI/E4OD/3.50 gears w/Kevlar clutches
|
|
Administrator
|
Doing some thinking about the path forward on the engine and wanted to bounce a few ideas/thoughts off you guys. But, before I ask, let me state how I'll use the truck - casually. Driving in town and on the highway, overlanding but nothing serious, and very little towing since I have the 2015 truck that is a tow monster.
But I've been reading a number of opinions, most notably those of Scott, The Mad Porters, and he recommends: Heads: Porting the intake side of the F3TE's, which apparently are slightly better than the earlier E7 EFI heads. However, according to Scott the exhaust ports are decent but the intake ports need some work. Is it worth it for my use?Lower Plenum: It is recommended that the head flange be ported to match the heads.Cam: I have the Edelbrock Performer, which Scott called "pooh" and "little more than stock". He recommends a VooDoo cam with more lift and dwell. Should I change?Exhaust: Scott also recommends headers and large pipes. But I don't see the need.Also, I was looking at the EGR port on the upper plenum today, and realized that the boss where the EGR valve bolts on is both ugly and at an angle. So I'm thinking of milling the boss off where the red line is, below. And then tap the hole 3/8 NPT and plug it as the one on the rear is plugged. Thoughts? 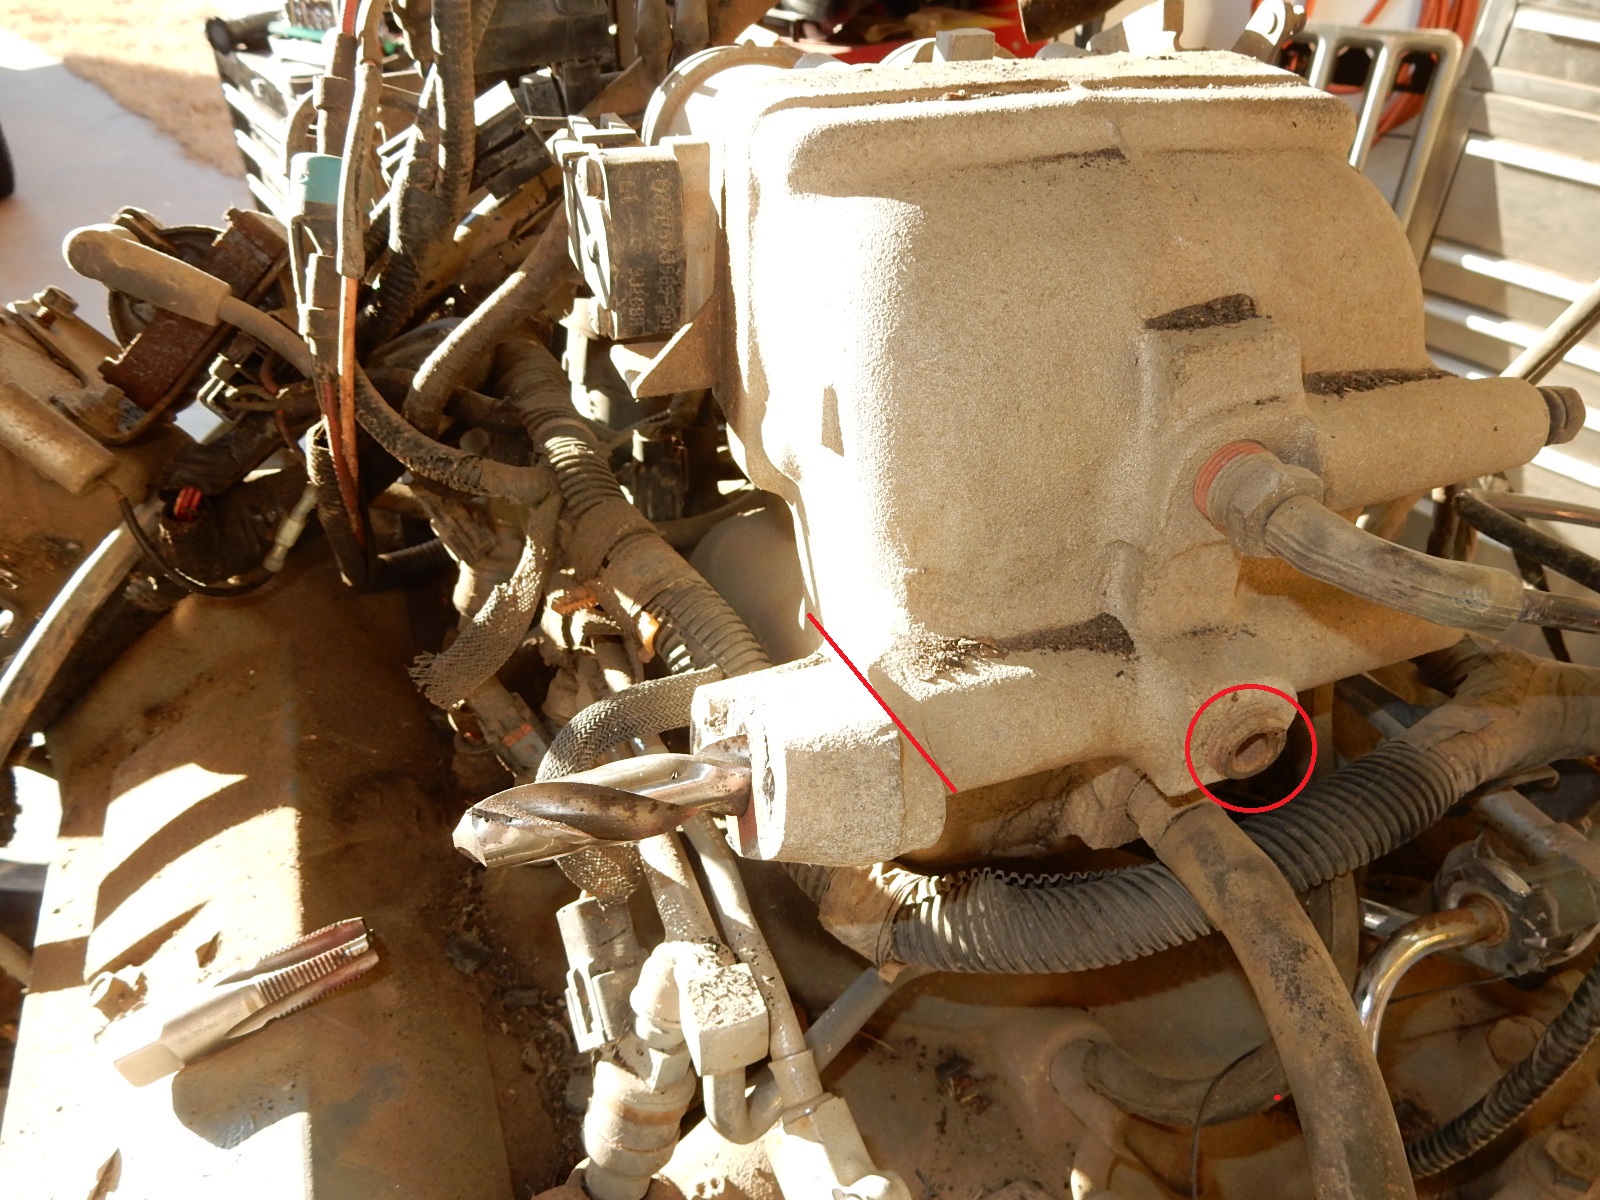
Gary, AKA "Gary fellow": Profile
Dad's: '81 F150 Ranger XLT 4x4: Down for restomod: Full-roller "stroked 351M" w/Trick Flow heads & intake, EEC-V SEFI/E4OD/3.50 gears w/Kevlar clutches
|
|
Administrator
|
Scott is very forthright with his knowledge and not trying to hardsell his work.
Try to contact him and get answers. I would guess he knows at least as much about 385's as Tim knows about 335's. Aggree with him on the cam. I do not know about the internals of the 7.5l uppers, but I do know you have another.... So, why not work on the 'spare'?
Jim,
Lil'Red is a '87 F250 HD, 4.10's, 1356 4x4, Zf-5, 3G, PMGR, Saginaw PS, desmogged with a Holley 80508 and Performer intake. Too much other stuff to mention. |
|
Administrator
|
Yes, the plan is to work on the "spare", but it is stored away and this one is up on the stand, so is much easier to see. But, you agree with the approach?
As for the cam, it obviously needs to be part of a "package". So the question to Scott really has to start with what that package should be. I'll email him.
Gary, AKA "Gary fellow": Profile
Dad's: '81 F150 Ranger XLT 4x4: Down for restomod: Full-roller "stroked 351M" w/Trick Flow heads & intake, EEC-V SEFI/E4OD/3.50 gears w/Kevlar clutches
|
|
Administrator
|
Gary, if the threads in that plenum are good, I will trade you one with a broken off bolt in the EGR pad. Then I will have a spare good one. My thought, remove the plug on the back and make a new one that will go in far enough to be flush with the inner passage. Or you can use it as an extra vacuum port (not that you will really need it).
Bill AKA "LOBO" Profile
"Getting old is inevitable, growing up is optional" Darth Vader 1986 F350 460 converted to MAF/SEFI, E4OD 12X3 1/2 rear brakes, traction loc 3:55 gear, 160 amp 3G alternator Wife's 2011 Flex Limited Daily Driver 2009 Flex Limited with factory tow package Project car 1986 Chrysler LeBaron convertible 2.2L Turbo II, modified A413 |
|
In reply to this post by Gary Lewis
Probably a really dumb question, but why is a drill bit sticking out of that EGR port?
|
|
Administrator
|
In reply to this post by 85lebaront2
Bill - I'll check tomorrow, but I'm pretty sure I have two good plenums. So let's swap and I'll mill the stripped one down.
And, you are suggesting that I use the rear plug to seal off the side passage - right? I understand, but I think that will beg the question of why there's a hole on the side of the plenum. So why not just plug it? Ray - That 5/8" bit is there to show both the diameter as well as the angle of that passage. See how the face of the EGR mount is not perpendicular to the bit? For some reason the EGR valve sits partially facing forward rather that completely to the side. I was initially planning to make a block-off plate to seal that passage, but came to the conclusion that the whole boss is ugly and needs to go.
Gary, AKA "Gary fellow": Profile
Dad's: '81 F150 Ranger XLT 4x4: Down for restomod: Full-roller "stroked 351M" w/Trick Flow heads & intake, EEC-V SEFI/E4OD/3.50 gears w/Kevlar clutches
|
|
Administrator
|
The EGR passage goes to the plug, then inside the plenum in the center of the back wall.
Bill AKA "LOBO" Profile
"Getting old is inevitable, growing up is optional" Darth Vader 1986 F350 460 converted to MAF/SEFI, E4OD 12X3 1/2 rear brakes, traction loc 3:55 gear, 160 amp 3G alternator Wife's 2011 Flex Limited Daily Driver 2009 Flex Limited with factory tow package Project car 1986 Chrysler LeBaron convertible 2.2L Turbo II, modified A413 |
|
Administrator
|
So a recessed plug would get both of them. Got it. But, it would leave holes on the outside. I think I'll "borrow" the plug from the back of the good one to put in the side passage on yours after it is sufficiently rid of the excess material and tapped. Other than not having the casting texture I'll bet I can make it look like it was meant to be that way.
Gary, AKA "Gary fellow": Profile
Dad's: '81 F150 Ranger XLT 4x4: Down for restomod: Full-roller "stroked 351M" w/Trick Flow heads & intake, EEC-V SEFI/E4OD/3.50 gears w/Kevlar clutches
|
|
Administrator
|
I sent the following note to Scott, The Mad Porter, asking what I should do for mod's to the engine:
Scott - I am in the process of planning an EEC-V MAF/SEFI install on an '85 engine that's been built w/Edelbrock components, including Performer cam, intake, and carb. It is in an '85 F250.
And I got back this response: Gary,
What are your thoughts?
Gary, AKA "Gary fellow": Profile
Dad's: '81 F150 Ranger XLT 4x4: Down for restomod: Full-roller "stroked 351M" w/Trick Flow heads & intake, EEC-V SEFI/E4OD/3.50 gears w/Kevlar clutches
|
|
Administrator
|
If I was going from scratch to build one, I would probably go ahead and order it. The cam choice is obviously acceptable for a speed density system, and he says it is acceptable for CA use so I would think that package would be great.
Scott is the 385 series guru, just like Tim Meyer is the 335 guru. They both compete in Engine Masters and love messing with the brand C bunch. My friend in Newport News, along with his son had their hind parts handed to them a few years ago when both of their BBCs grenaded on the test stand. The change in test procedure from the competitor running the test at his best rpm ranges to a series of pulls that simulate real world usage favored engines with more flexibility and the 460 is extremely tolerant as far as spark knock and detonation due to the head design.
Bill AKA "LOBO" Profile
"Getting old is inevitable, growing up is optional" Darth Vader 1986 F350 460 converted to MAF/SEFI, E4OD 12X3 1/2 rear brakes, traction loc 3:55 gear, 160 amp 3G alternator Wife's 2011 Flex Limited Daily Driver 2009 Flex Limited with factory tow package Project car 1986 Chrysler LeBaron convertible 2.2L Turbo II, modified A413 |
|
Administrator
|
In reply to this post by Gary Lewis
Seems really good for an SD compatible engine on 85 octane fuel.
I don't do Facebook, so don't know what all he shares on there, but you might learn more if you're friended/following him.
Jim,
Lil'Red is a '87 F250 HD, 4.10's, 1356 4x4, Zf-5, 3G, PMGR, Saginaw PS, desmogged with a Holley 80508 and Performer intake. Too much other stuff to mention. |
|
Administrator
|
In reply to this post by 85lebaront2
Yes, he is the guru of 460's, and I may well learn something by following him on Facebook. Will consider that.
Not sure about having him do the head work just due to the cost of shipping such heavy objects that far. We have a local guy, Eric Weingartner, who has also competed in the engine masters series, and he does heads. I've reached out to him and recently missed a call that may have been him, so will get back with him to see what the cost would be to have him do the heads. (He's the one Brandon/Bruno2 had do his heads recently, and he's also the one that did my flow testing several years ago on the Windsor D8OE heads.) I'll compare Eric's price vs Scott's, including shipping, and see what I want to do. But if it isn't too much more to go with Scott I'll do that since he's helped me.
Gary, AKA "Gary fellow": Profile
Dad's: '81 F150 Ranger XLT 4x4: Down for restomod: Full-roller "stroked 351M" w/Trick Flow heads & intake, EEC-V SEFI/E4OD/3.50 gears w/Kevlar clutches
|
|
Administrator
|
Back on the idea of interfacing later model sending units with Bullnose gauges, or vice versa, it turns out there is a commercial product to do just that. I picked up the June 2018 issue of Classic Trucks and on pages 46 - 54 there's an article entitled A Dash Of Class where they discuss New Electronics For Old Gauges - by Classic Instruments.
On Page 54 there is a discussion of Classic Instruments' SN34 Fuel Link, The Fuel Link interface is the problem-solver between fuel senders and gauges to correct ohm mismatch and erratic movement due to fuel slosh.
I don't know that it would do the job, but it looks like it would. But, at about $136 it costs more then an Arduino, which could do a lot more than interface the fuel system. And it is a lot more than Ray's transistor approach. But, if you need it....
Gary, AKA "Gary fellow": Profile
Dad's: '81 F150 Ranger XLT 4x4: Down for restomod: Full-roller "stroked 351M" w/Trick Flow heads & intake, EEC-V SEFI/E4OD/3.50 gears w/Kevlar clutches
|
|
Looks like a clever idea!
Price is not too bad. Appears to be pretty flexible. I don't like those screw terminals though. Used a Dakota Digital product with similar connections some years back. Had quite a bit of trouble keeping the connections tight. Strange as I used the same type of connectors in a few industrial applications over the years without problems. Anyways, on to my prototype. The local electronics store in Regina did not have any prototype board on my last visit, which sadly was months ago. Stopped in today and they had what I was looking for, so onwards with the project. I also need to locate an FDM for an actual level sensor, just to prove it will work as intended. Problem is those are all on the underside of my parts trucks and I'm going to have to pull a tank. Another cold and windy day out here, but I saw the first pair of Canada geese of the season, so that's a good sign. |
|
Administrator
|
In reply to this post by Gary Lewis
Ray - I'm replying to my post to test that you get notified now that you've subscribed.
Anyway, I think your transistor plan is a good one, and with a top and bottom pot you should be able to dial in Full and Empty, or 1/4 and 3/4, or whatever. And, it has to be a lot less expensive than either the Custom Instruments device or the Arduino. Having said that, I'll probably still go with the Arduino. I've been wanting to use one of those for something for quite a while, and this is a good chance. Plus, it would let me monitor and alarm lots of other things. I'd like to do away with the aftermarket gauges for Dad's truck, and maybe even Big Blue, and the Arduino would allow that. And if I can find the right display to go in the clock windows I can use a button to step through all of the display options, like volts, oil pressure, water temp, and even outside temp if I want. Plus, I can set high and low level alarms for water temp and oil pressure and have the Arduino sound an alarm as well as bring on the Check Engine light.
Gary, AKA "Gary fellow": Profile
Dad's: '81 F150 Ranger XLT 4x4: Down for restomod: Full-roller "stroked 351M" w/Trick Flow heads & intake, EEC-V SEFI/E4OD/3.50 gears w/Kevlar clutches
|
|
Administrator
|
Did a bit toward Big Blue's EFI today - performed a lumpectomy. Had an upper plenum that had the EGR bolts twisted off, and since I'm not going to run EGR I removed the EGR valve's mount. Here's how....
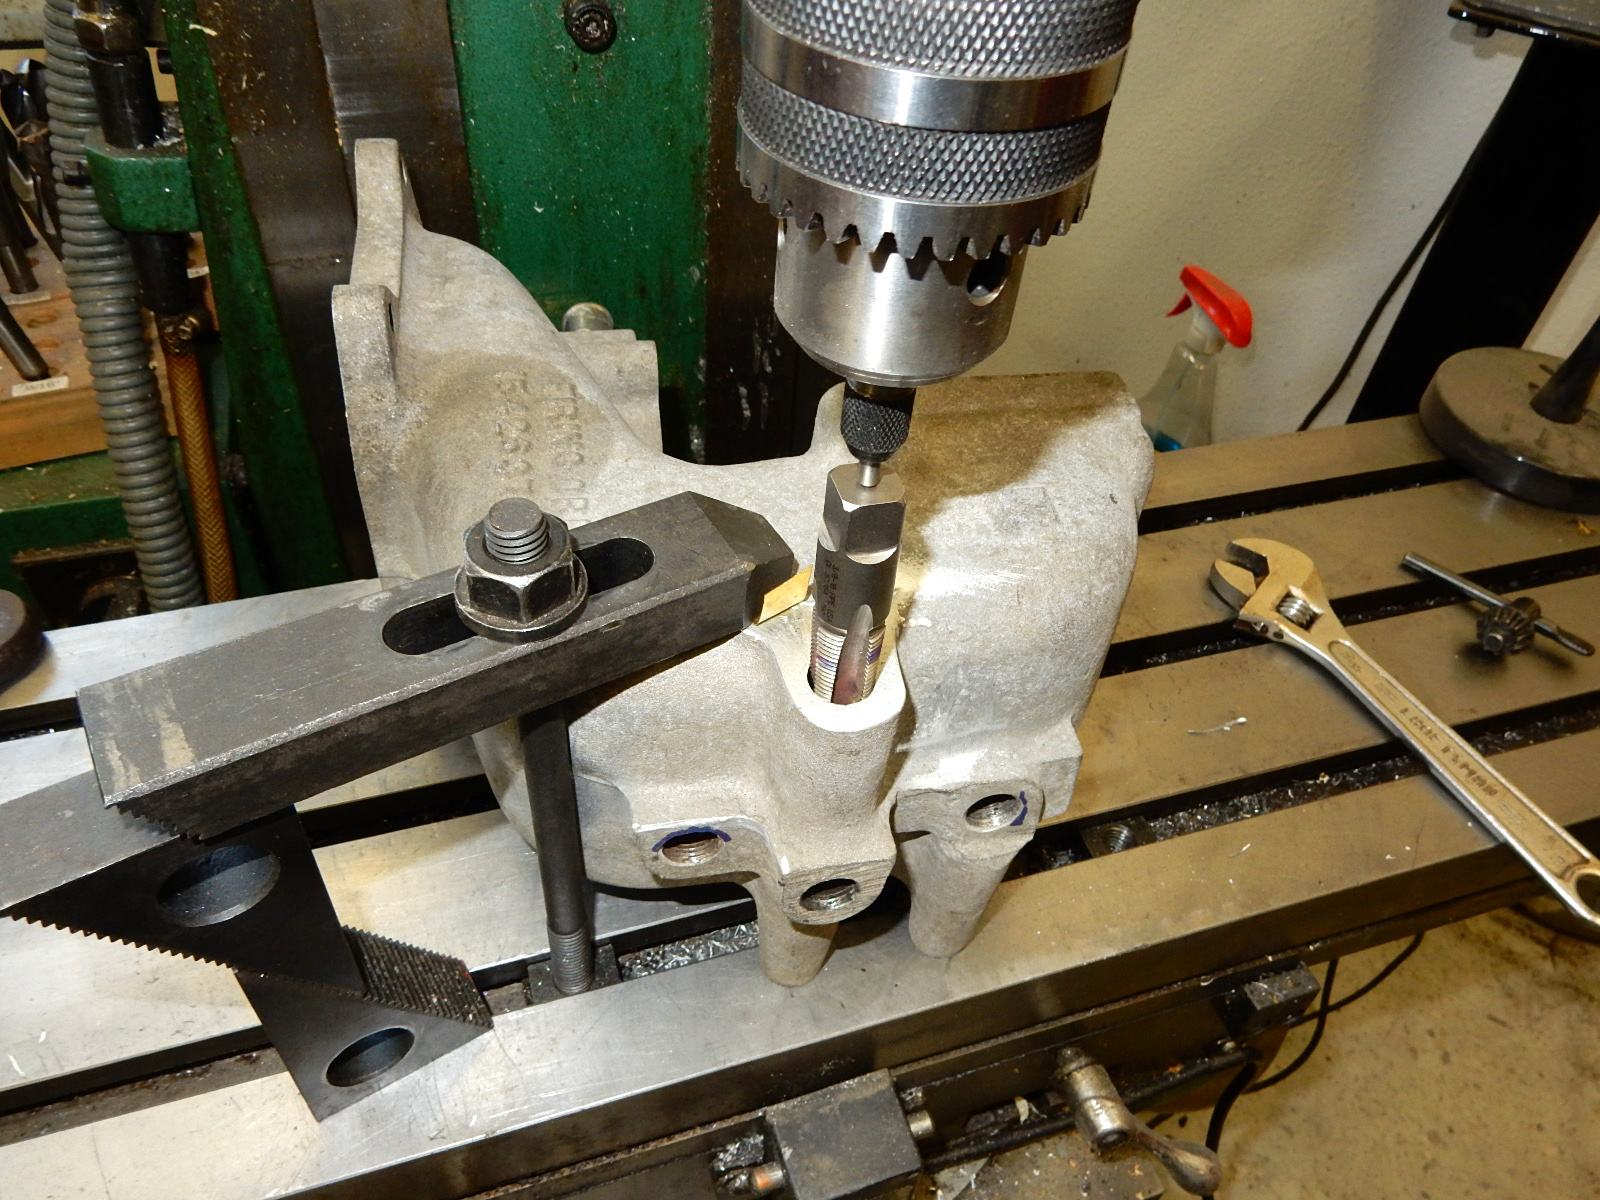
First, I used a hack saw and removed the lump as close as I could get to the plenum itself: 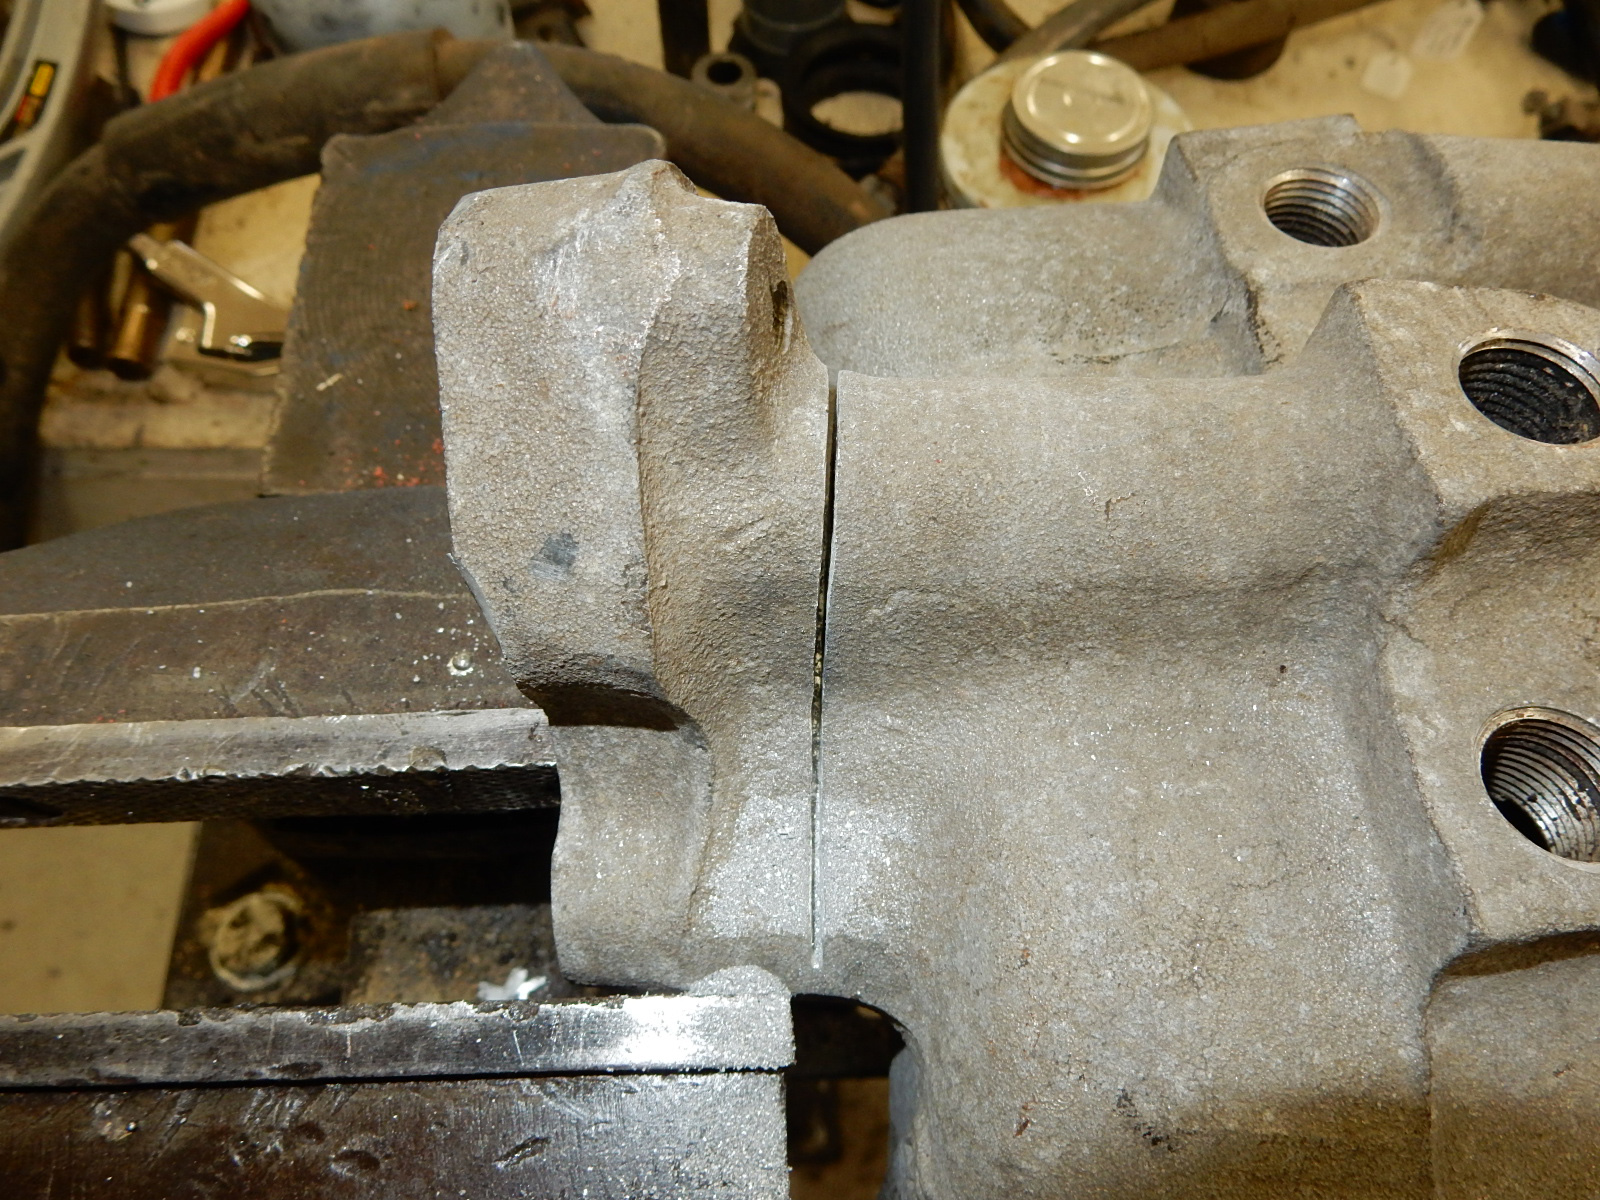 Then I mounted the plenum on the mill's table: 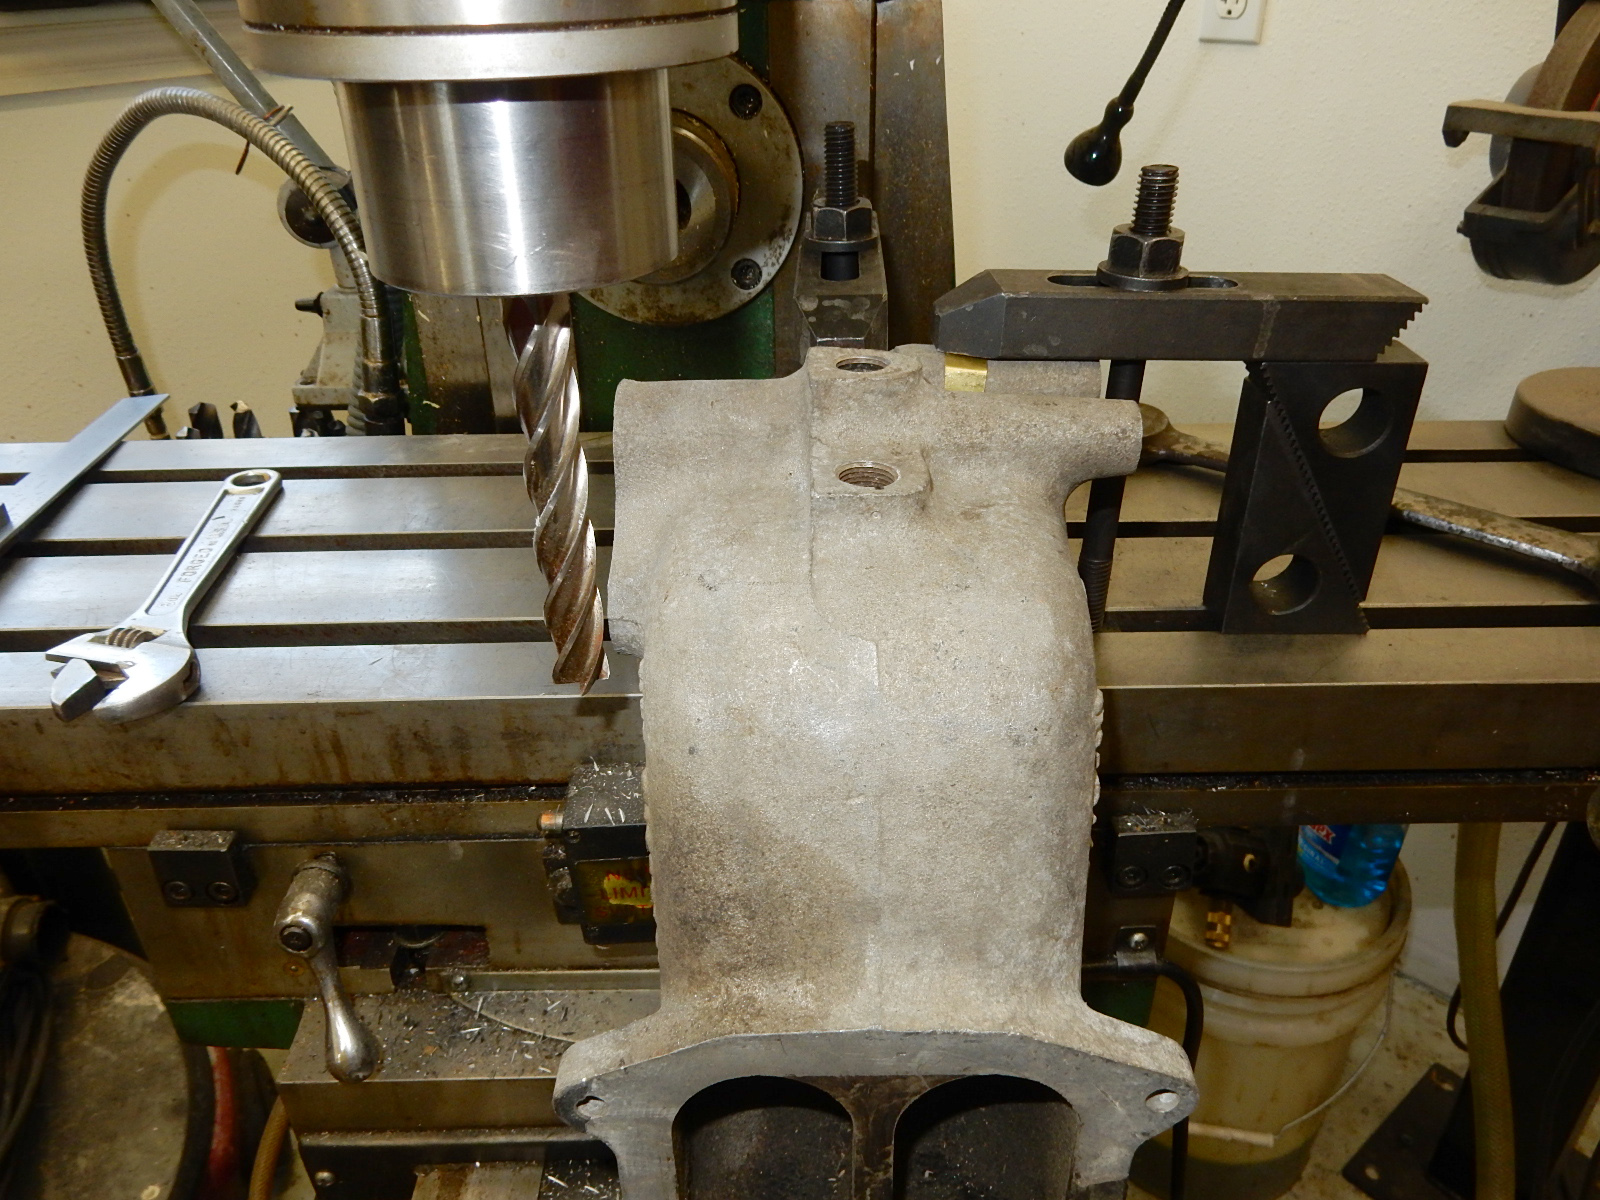 And after many passes I had it down to this: 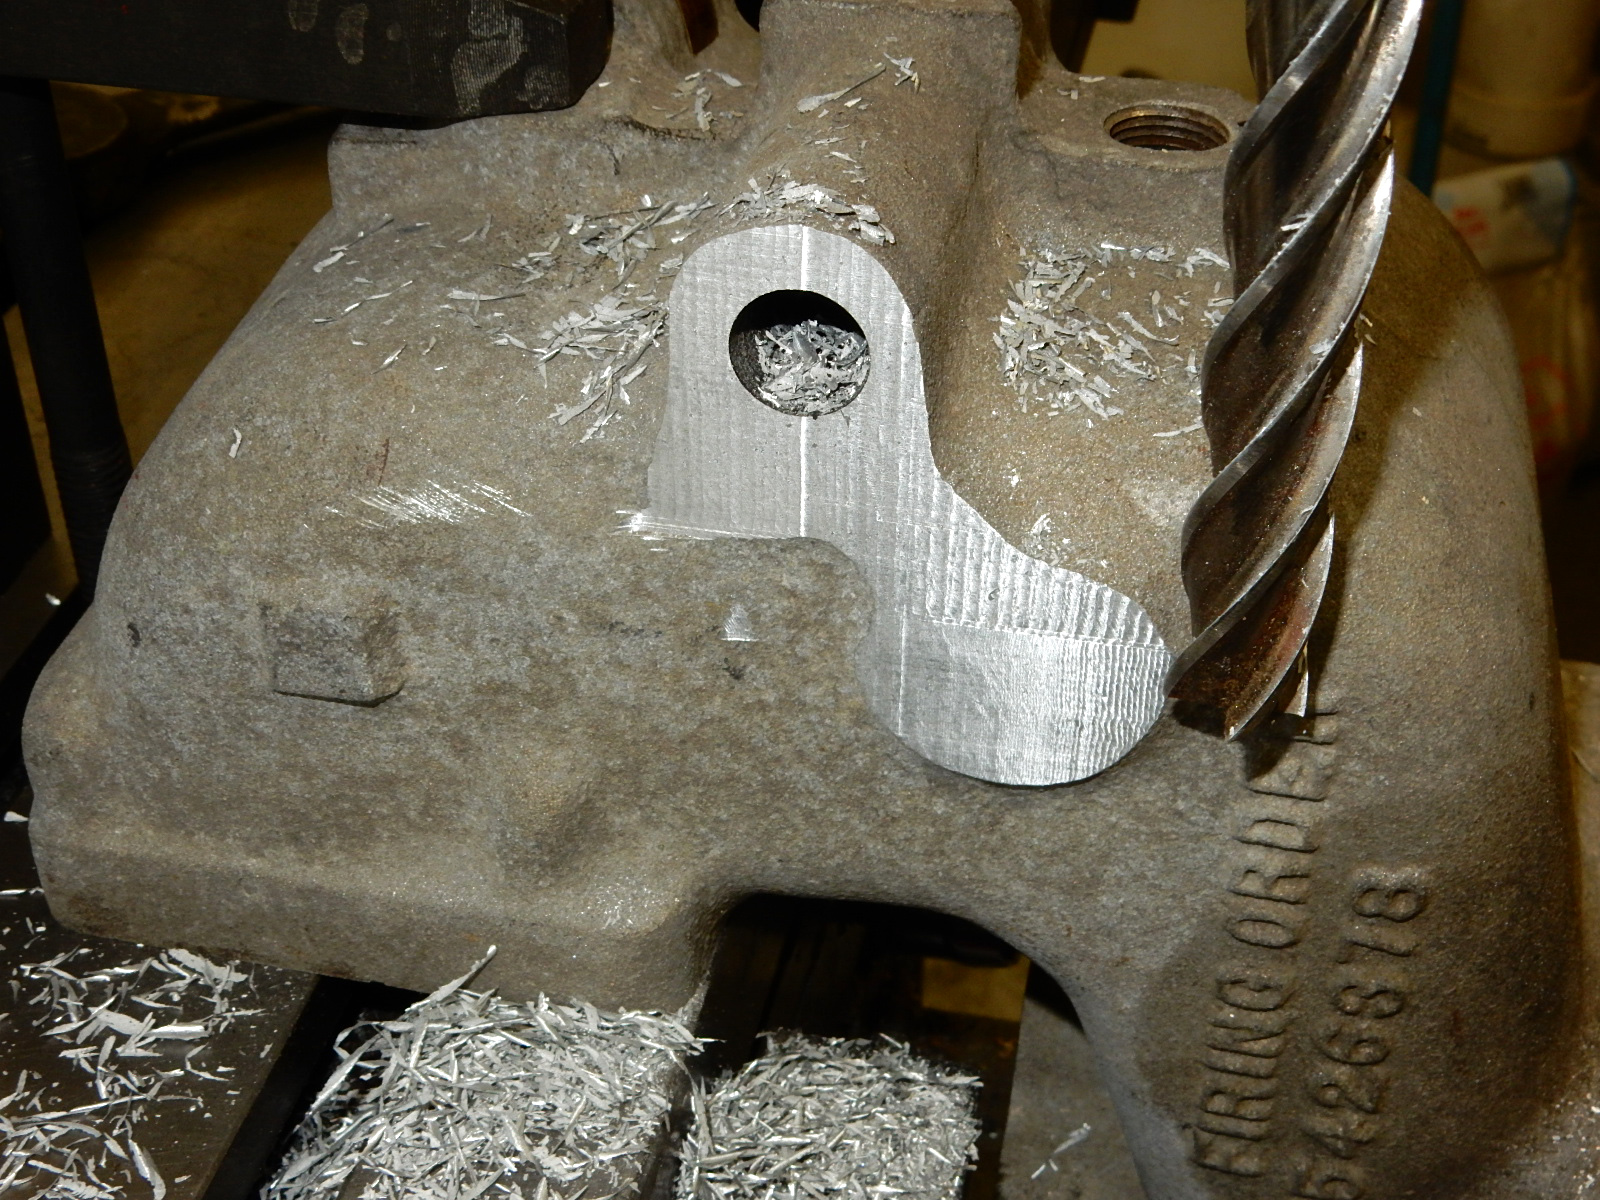 The next step was to tap the passage 3/8" NPT. That normally takes a 37/64" (.578") tap drill. Unfortunately the passage is 5/8" (.613"), so full threads aren't possible. And, in my experience with oversized passages and soft material it is critical that the tap be held precisely aligned with the hole or the threads are easily messed up. (Don't ask, please.  ) So, I mounted the plenum on the mill's table again, lined the spindle up with the hole using a drill bit, and then chased the tap with a centering tool: ) So, I mounted the plenum on the mill's table again, lined the spindle up with the hole using a drill bit, and then chased the tap with a centering tool:
 And, here are the resulting threads. Deep enough to seal for vacuum, especially using PTFE compound, but I wouldn't do this under much pressure. 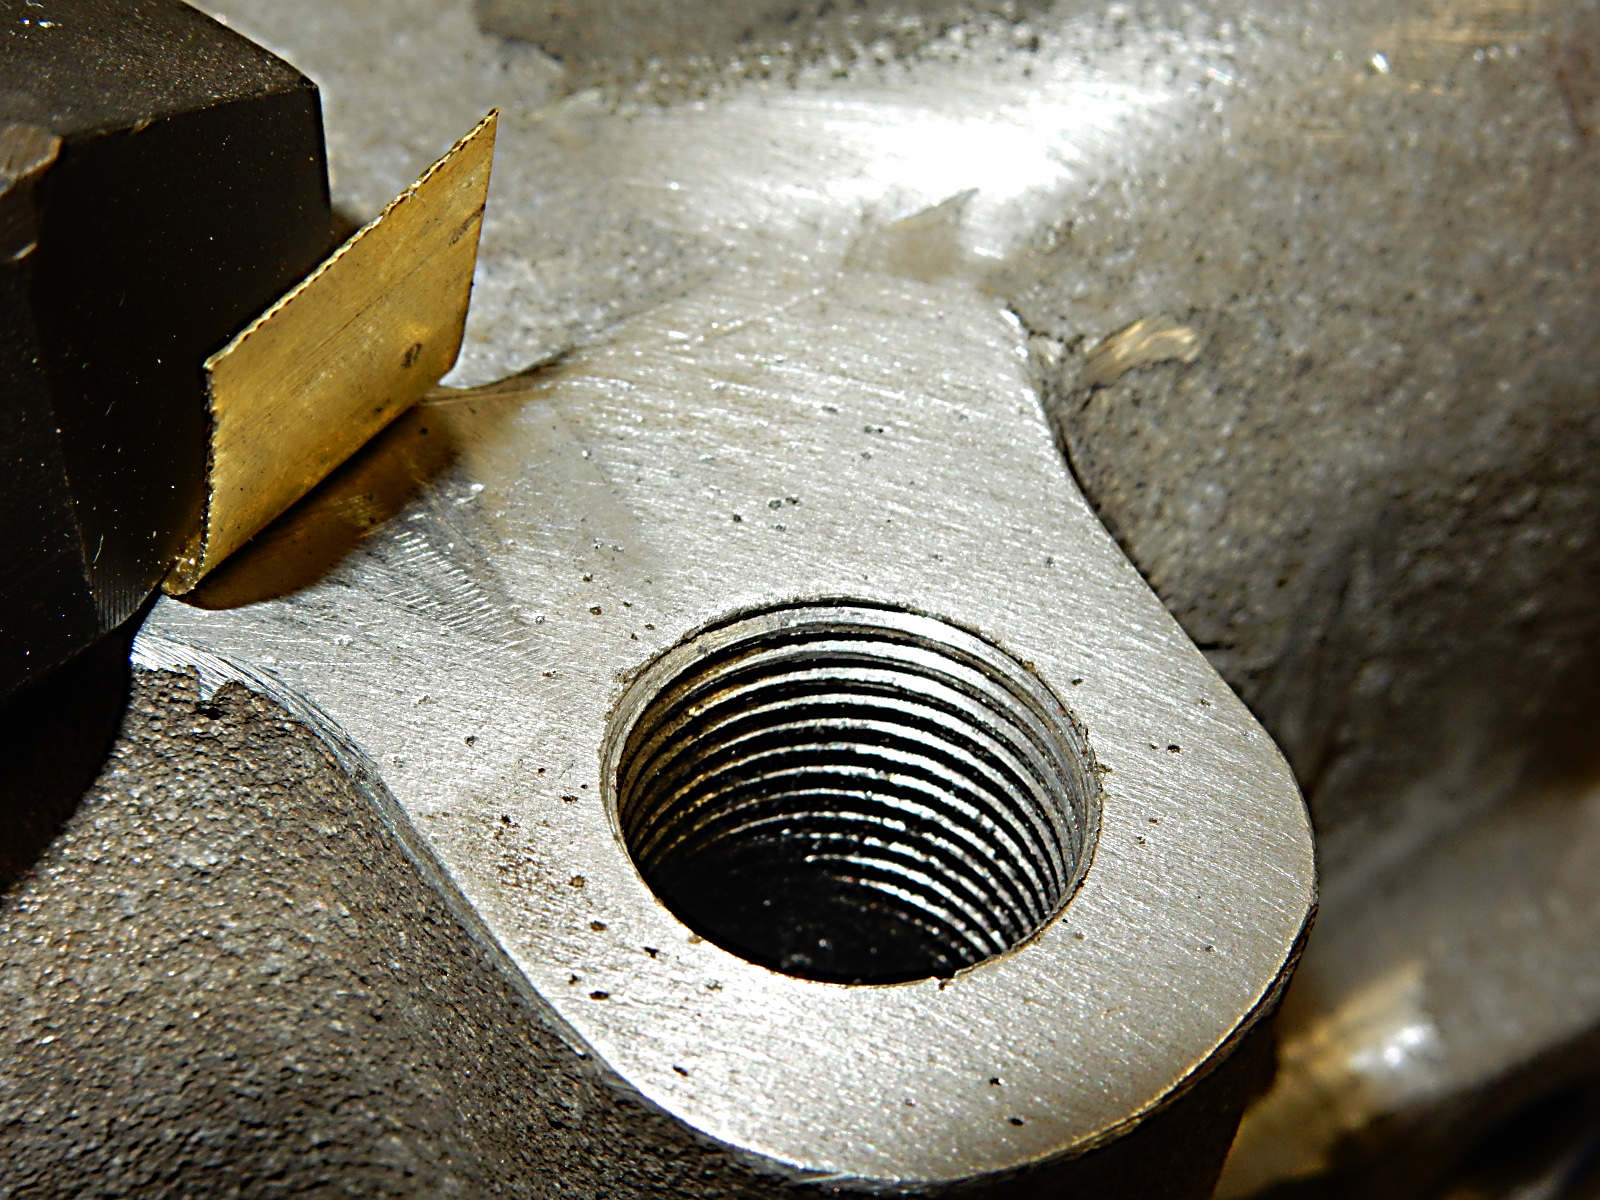 Here's the plug run in pretty snugly. I think it'll be just about flush when it is put in after the plenum is finished. 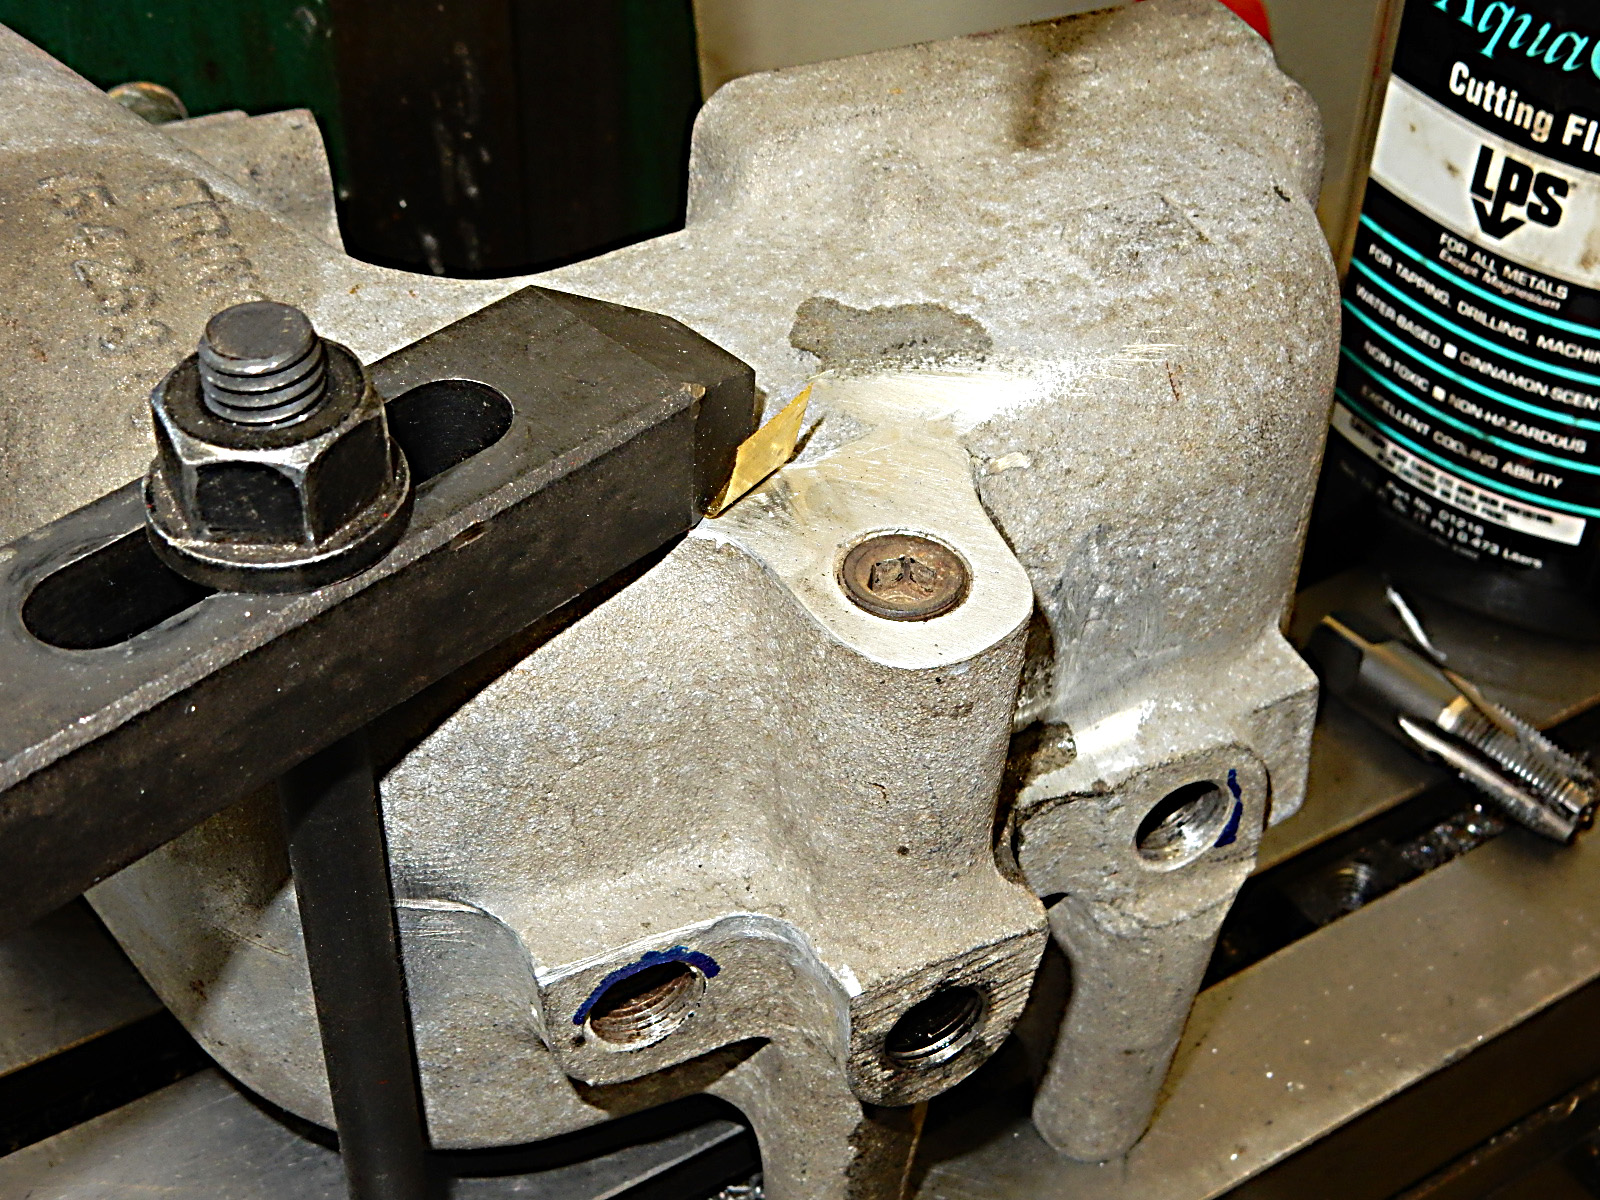 And then I did a bit of media blasting to get the plenum clean both inside and out. Here's a shot after both this plenum and Bill's were blasted: 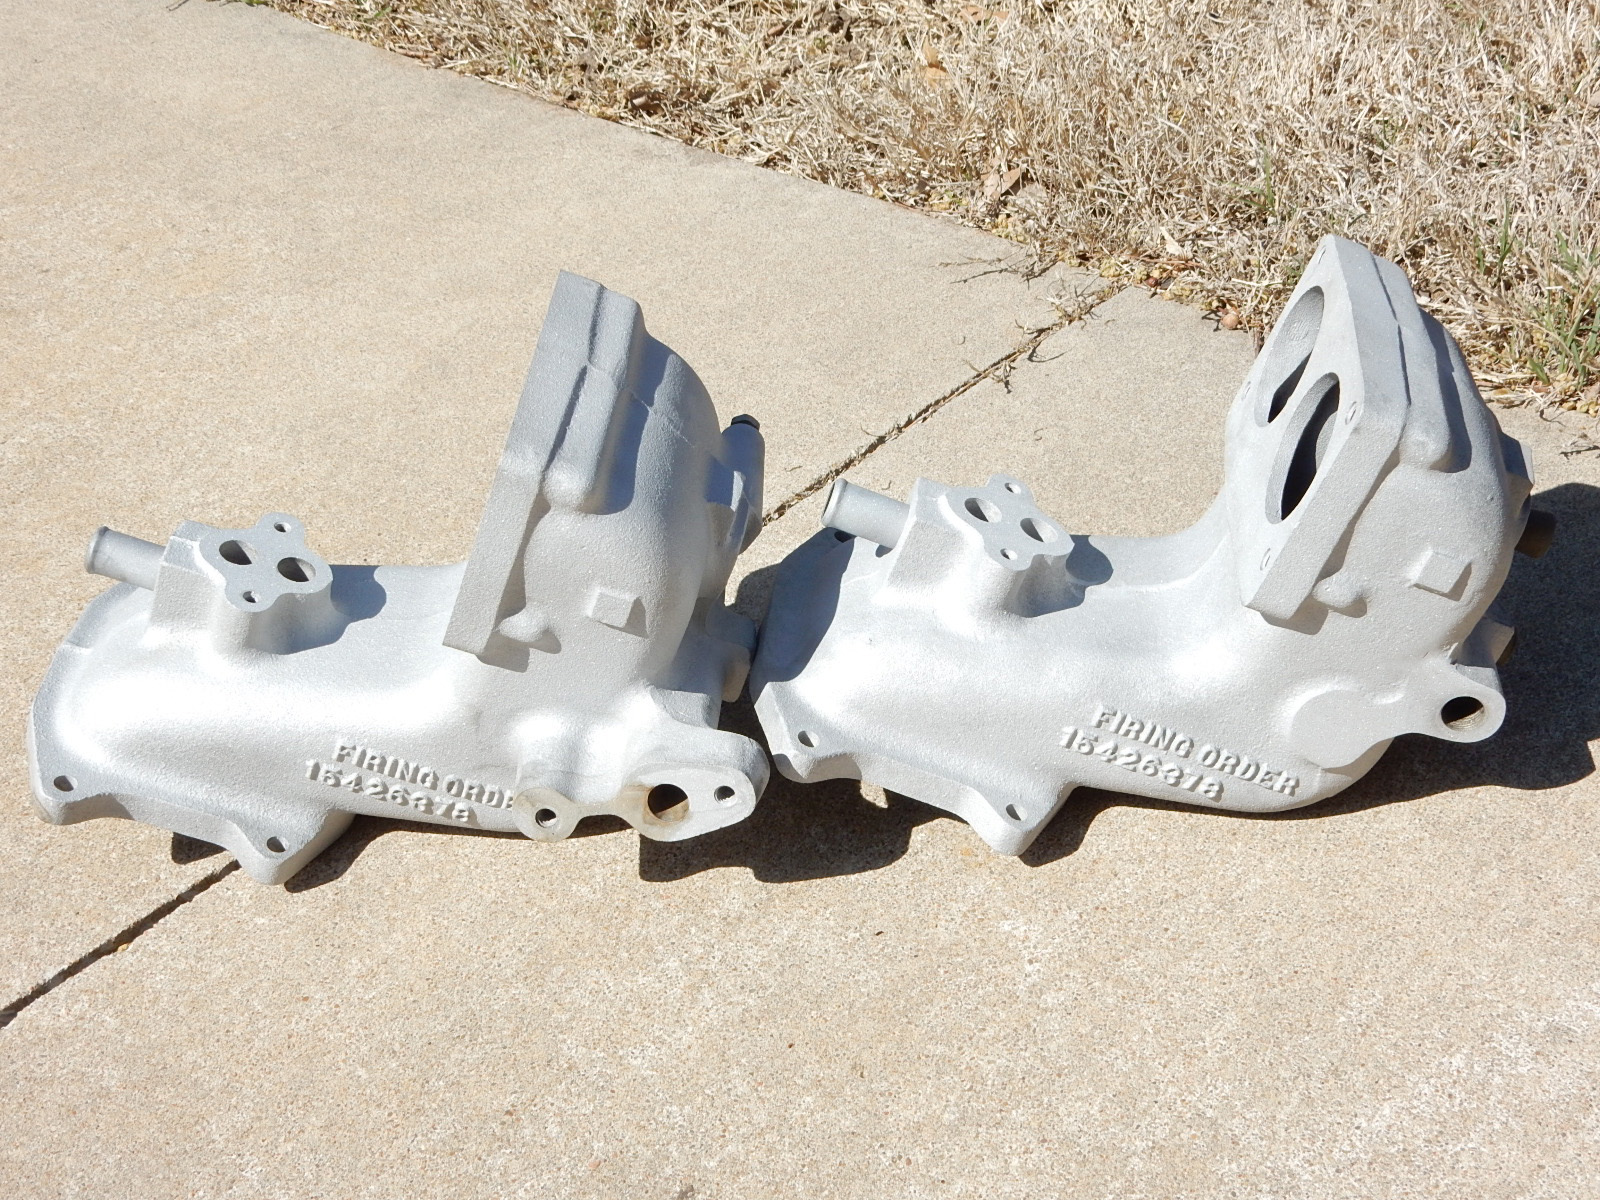 But I wanted the inside to be clean as well since I'm not running that black, sooty, exhaust gas through it, so I cleaned and blasted the inside as well. Here's a shot of the upper end: 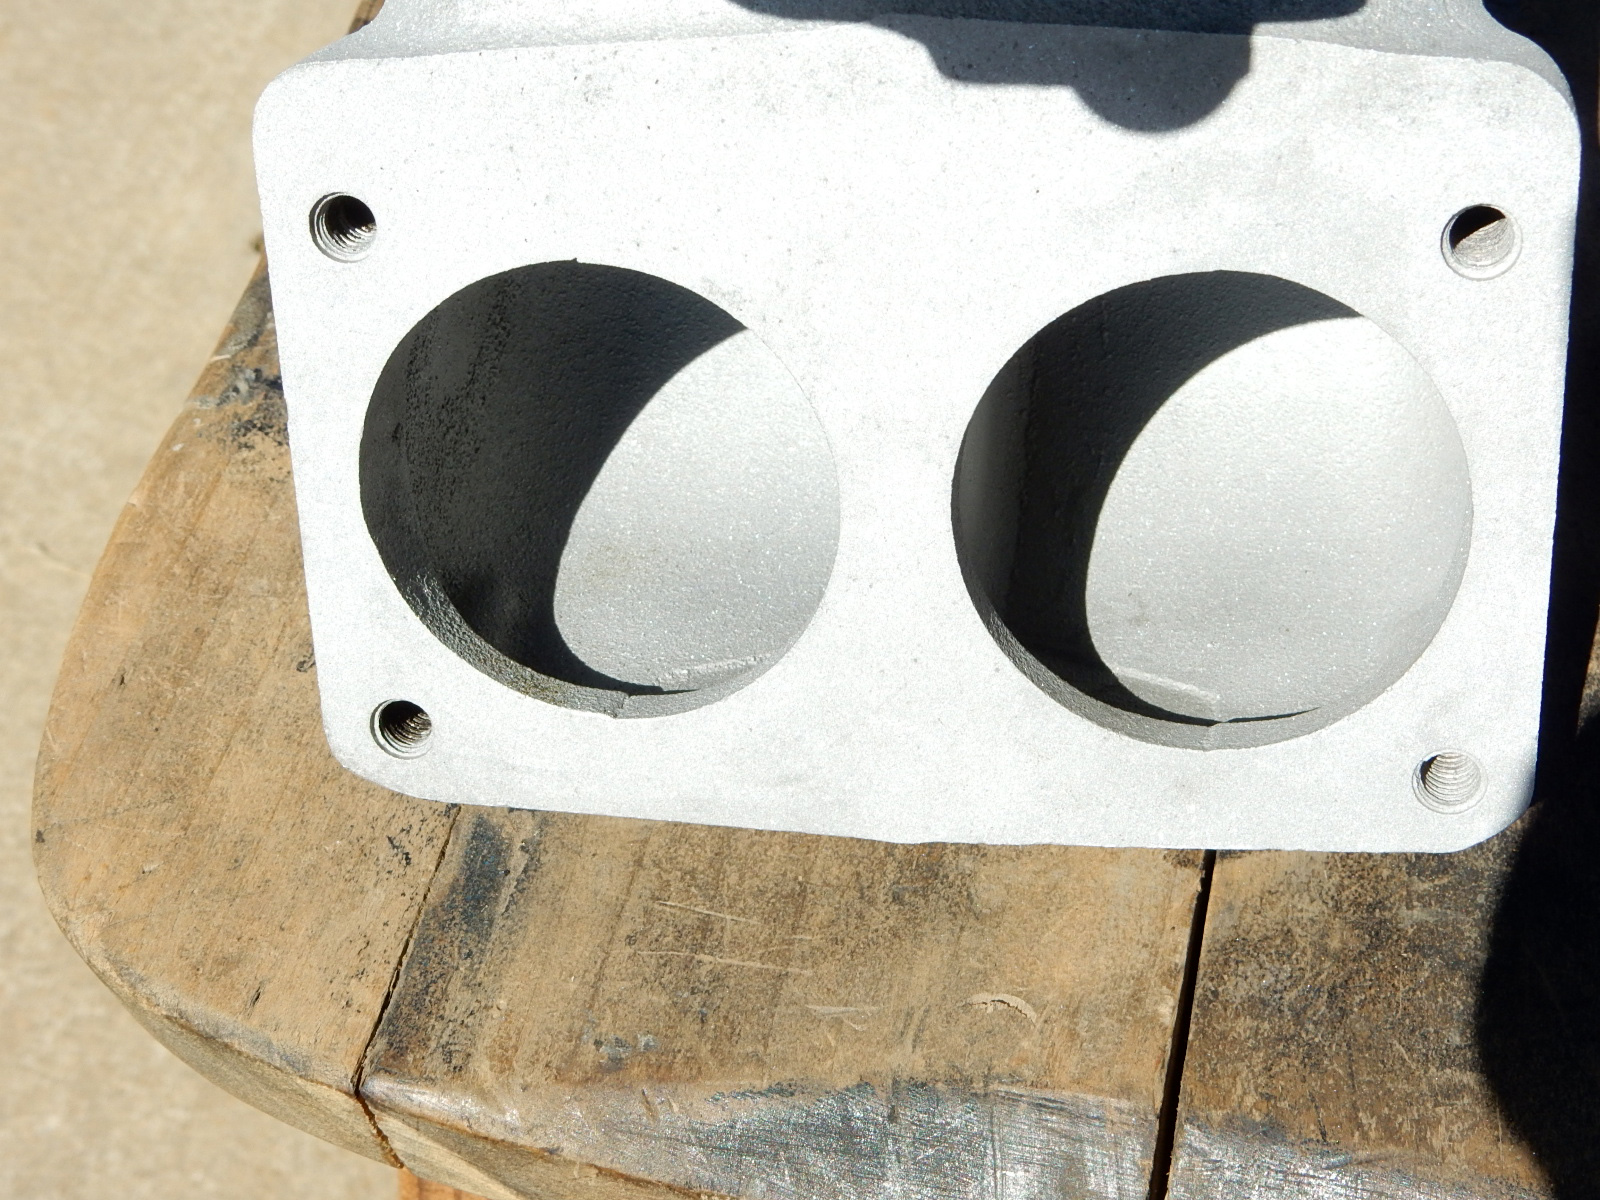 And here's a shot from the bottom end: 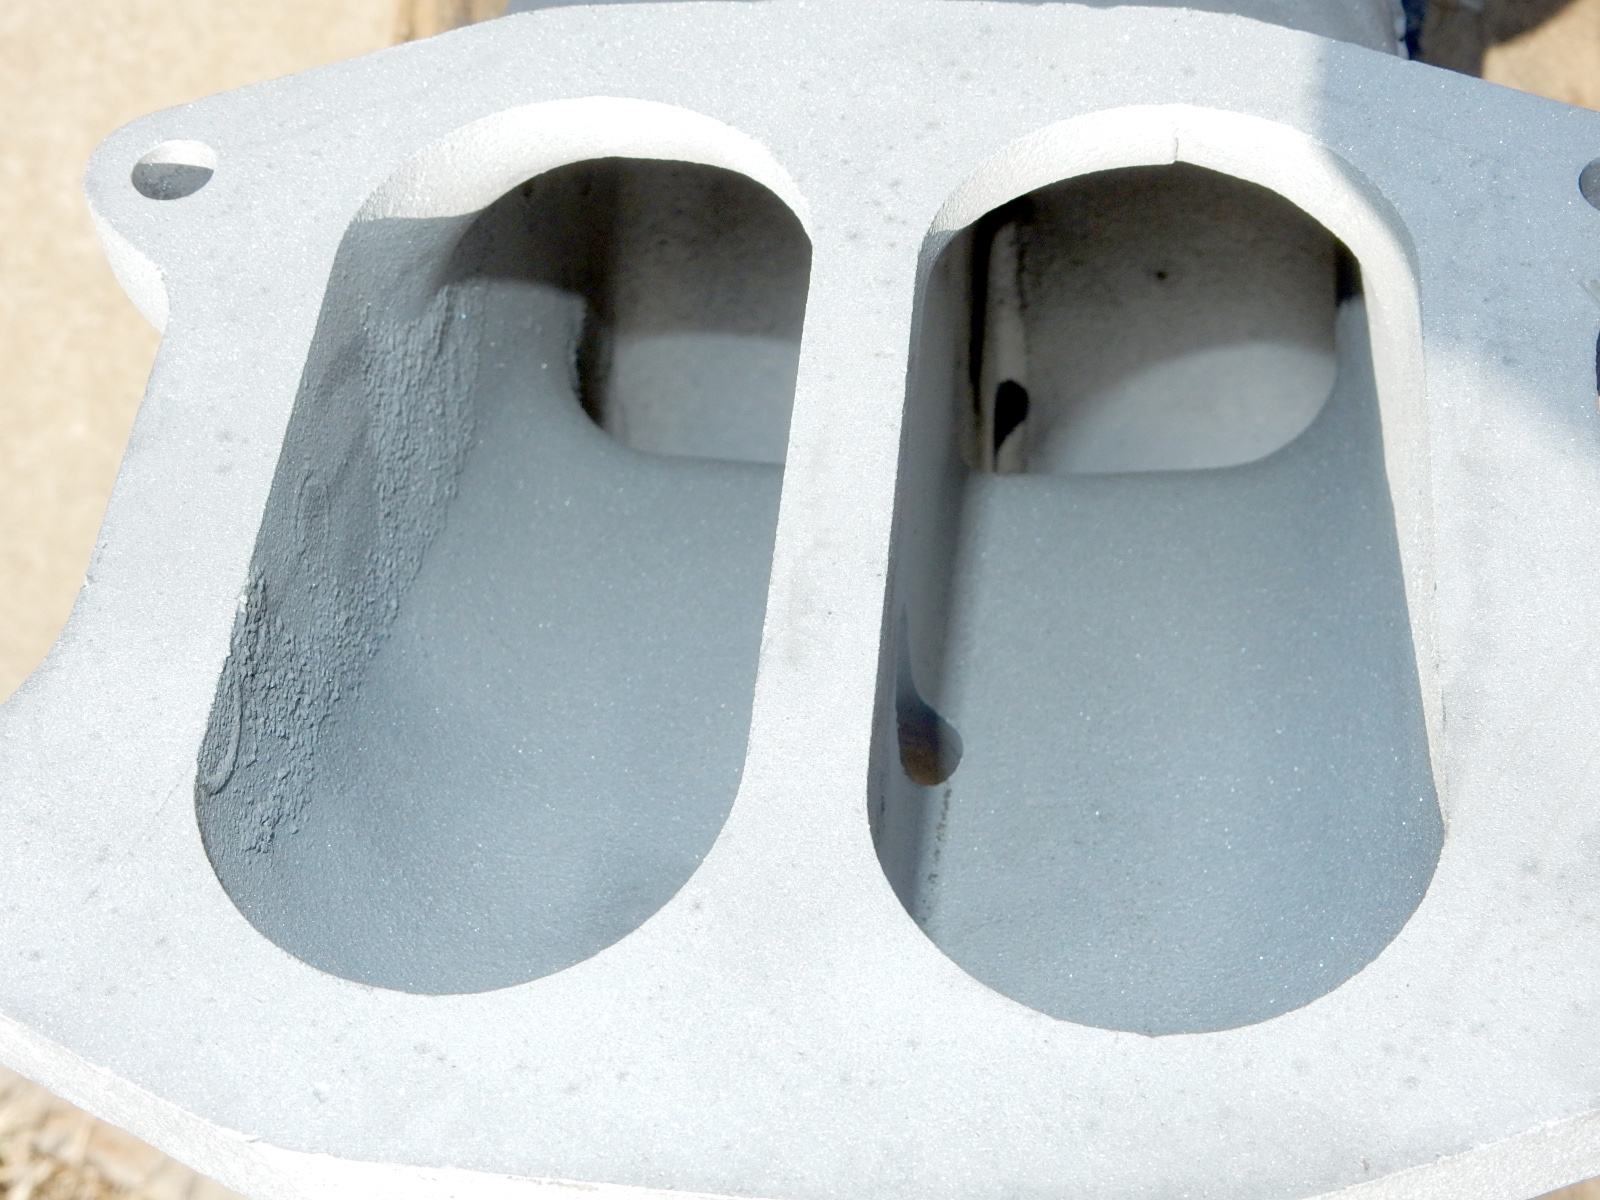 Now I need to clean and blast the lower plenum so I can powder coat all three of them. Powder coating aluminum is time-consuming as it has lots and lots of pores, and there's always lots of gunk in them. If you don't get the gunk out before placing the part in the oven at 420 degrees the gunk vaporizes and blows the powder off, ruining the finish. (Again, please don't ask.) So, you have to clean the part as best you can before blasting to ensure the media stays clean, and then wash the part in brake cleaner to get everything off that you can and pop it in the oven. Two hours at 420 degrees does the gunk in and then once you pull the part out you have to wash it in brake cleaner again and then ensure all the brake cleaner has vaporized by heating the part with the heat gun. Only then you can apply the powder. In this case I think I'll use Eastwood's Silver Lining instead of clear-coating them. The problem is that it is really hard to get cast aluminum an even color, so I'd rather use a powder that will hide the color differences. Another option is to use Eastwood's Blasted Aluminum. However, it has a texture to it and will catch grease, so I'm leaning to Silver Lining - like I used on Dad's front driveshafts: 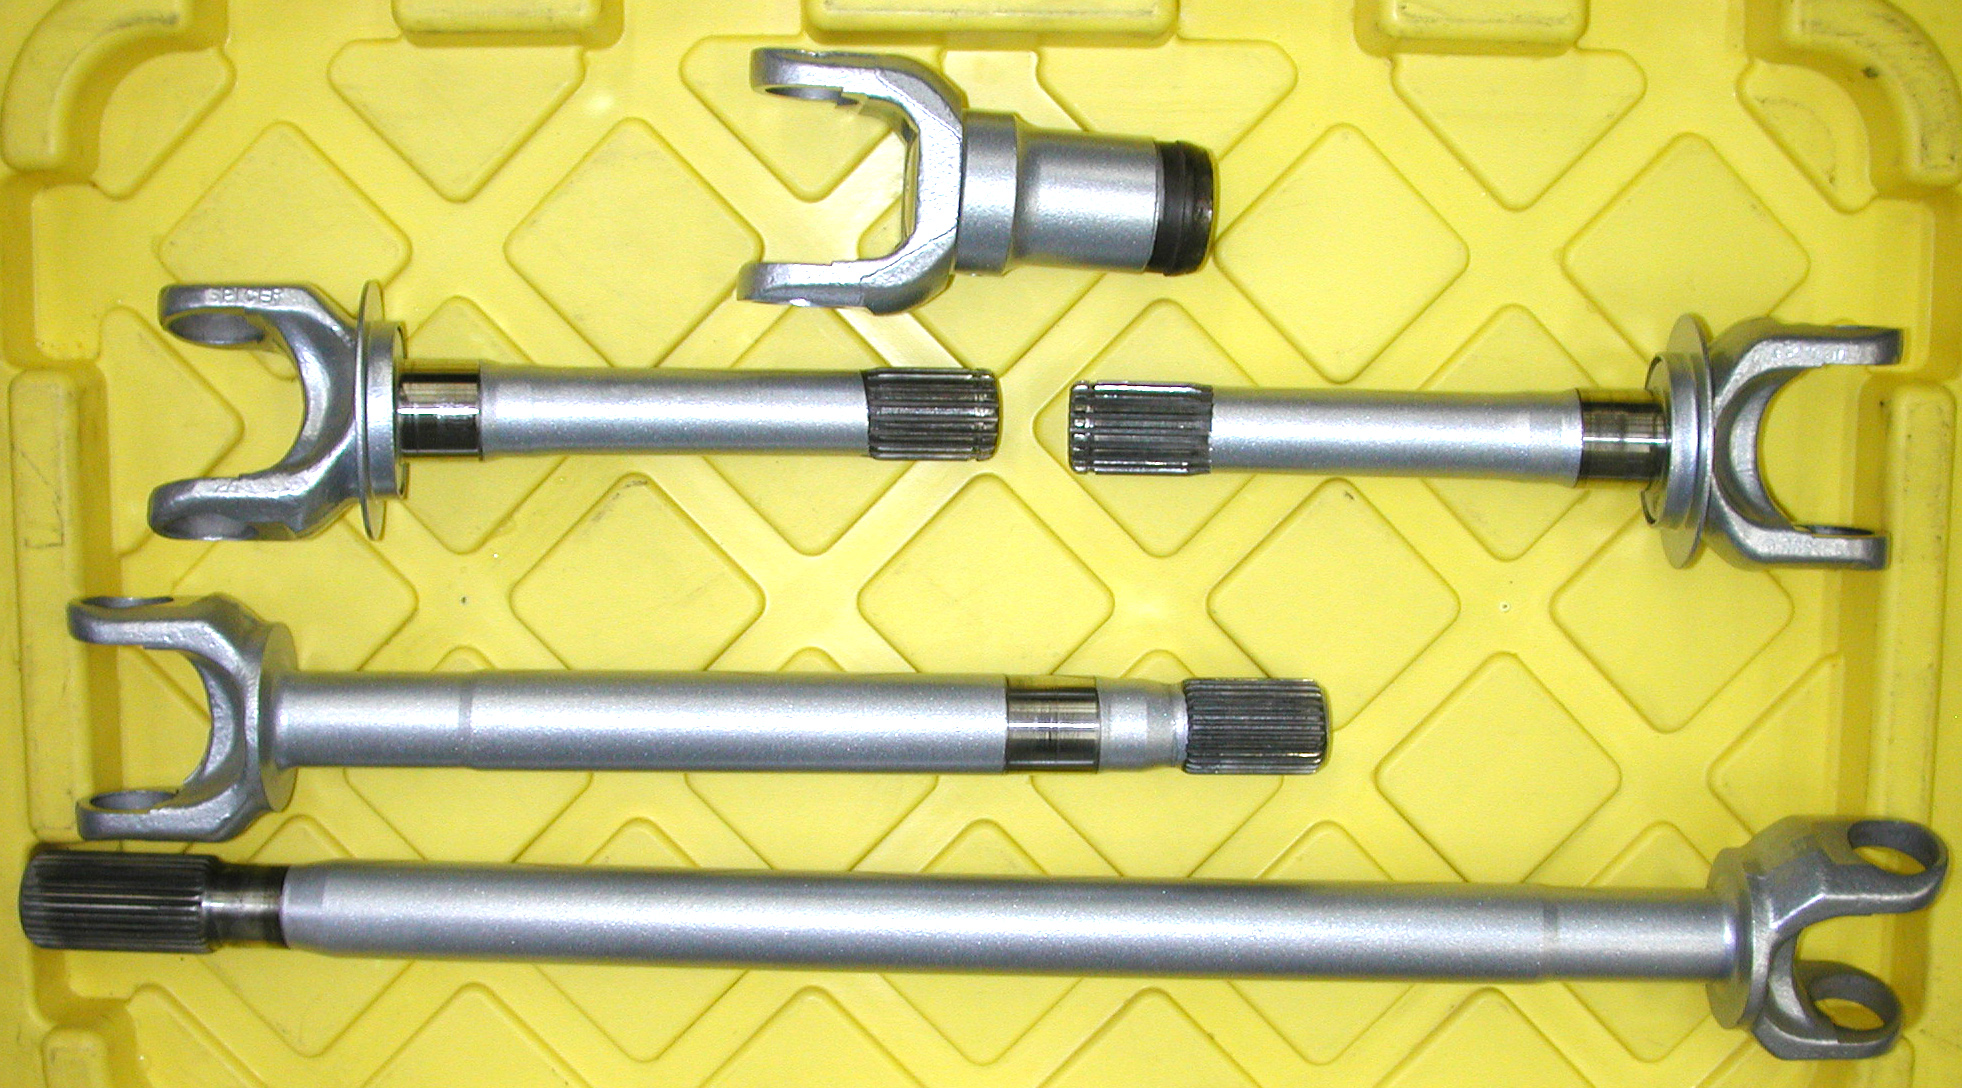
Gary, AKA "Gary fellow": Profile
Dad's: '81 F150 Ranger XLT 4x4: Down for restomod: Full-roller "stroked 351M" w/Trick Flow heads & intake, EEC-V SEFI/E4OD/3.50 gears w/Kevlar clutches
|
| Edit this page |

