I can always pull the bolts and move it a bit and tighten them down again. I think the seam sealer will have the backing strips anchored well enough for that.
I guess the best way would be to loosen it, put the screws in for the steering column, and then tighten back down. Yes?
Correct, but I feel like I recall somebody saying that they had to manipulate the brace to get it to fit the firewall, so I wonder if it's possible to manipulate(bend) the upper section so that the whole brace moves up? That seems to be your biggest issue, it's too low. Looking at it a second time, it could go towards the transmission tunnel a little more too, but it's hard to tell from pictures.
That's what I'm thinking. Looks like there's a gap the closer you get to the firewall, so I don't think it's as high as it can go. It just needs a little more tweaking and it will probably be good to go.
I was in a rush to get it in this afternoon so the seam sealer could set up over night. Had hoped it would be closer to "right" than it is, but obviously it needs a bit of "help". We'll see how it goes tomorrow.
Was just working on the check list. It needed a LOT of re-organization, upgrading, etc. But, I'm starting to see light at the end of the tunnel. Just might get this thing started before summer.
I took the bolts out and shifted the plate so I could put the screws for the steering column in. Then I put the bolts back, re-gooed the backing plates, and tightened the bolts down. Then I installed the clutch master.
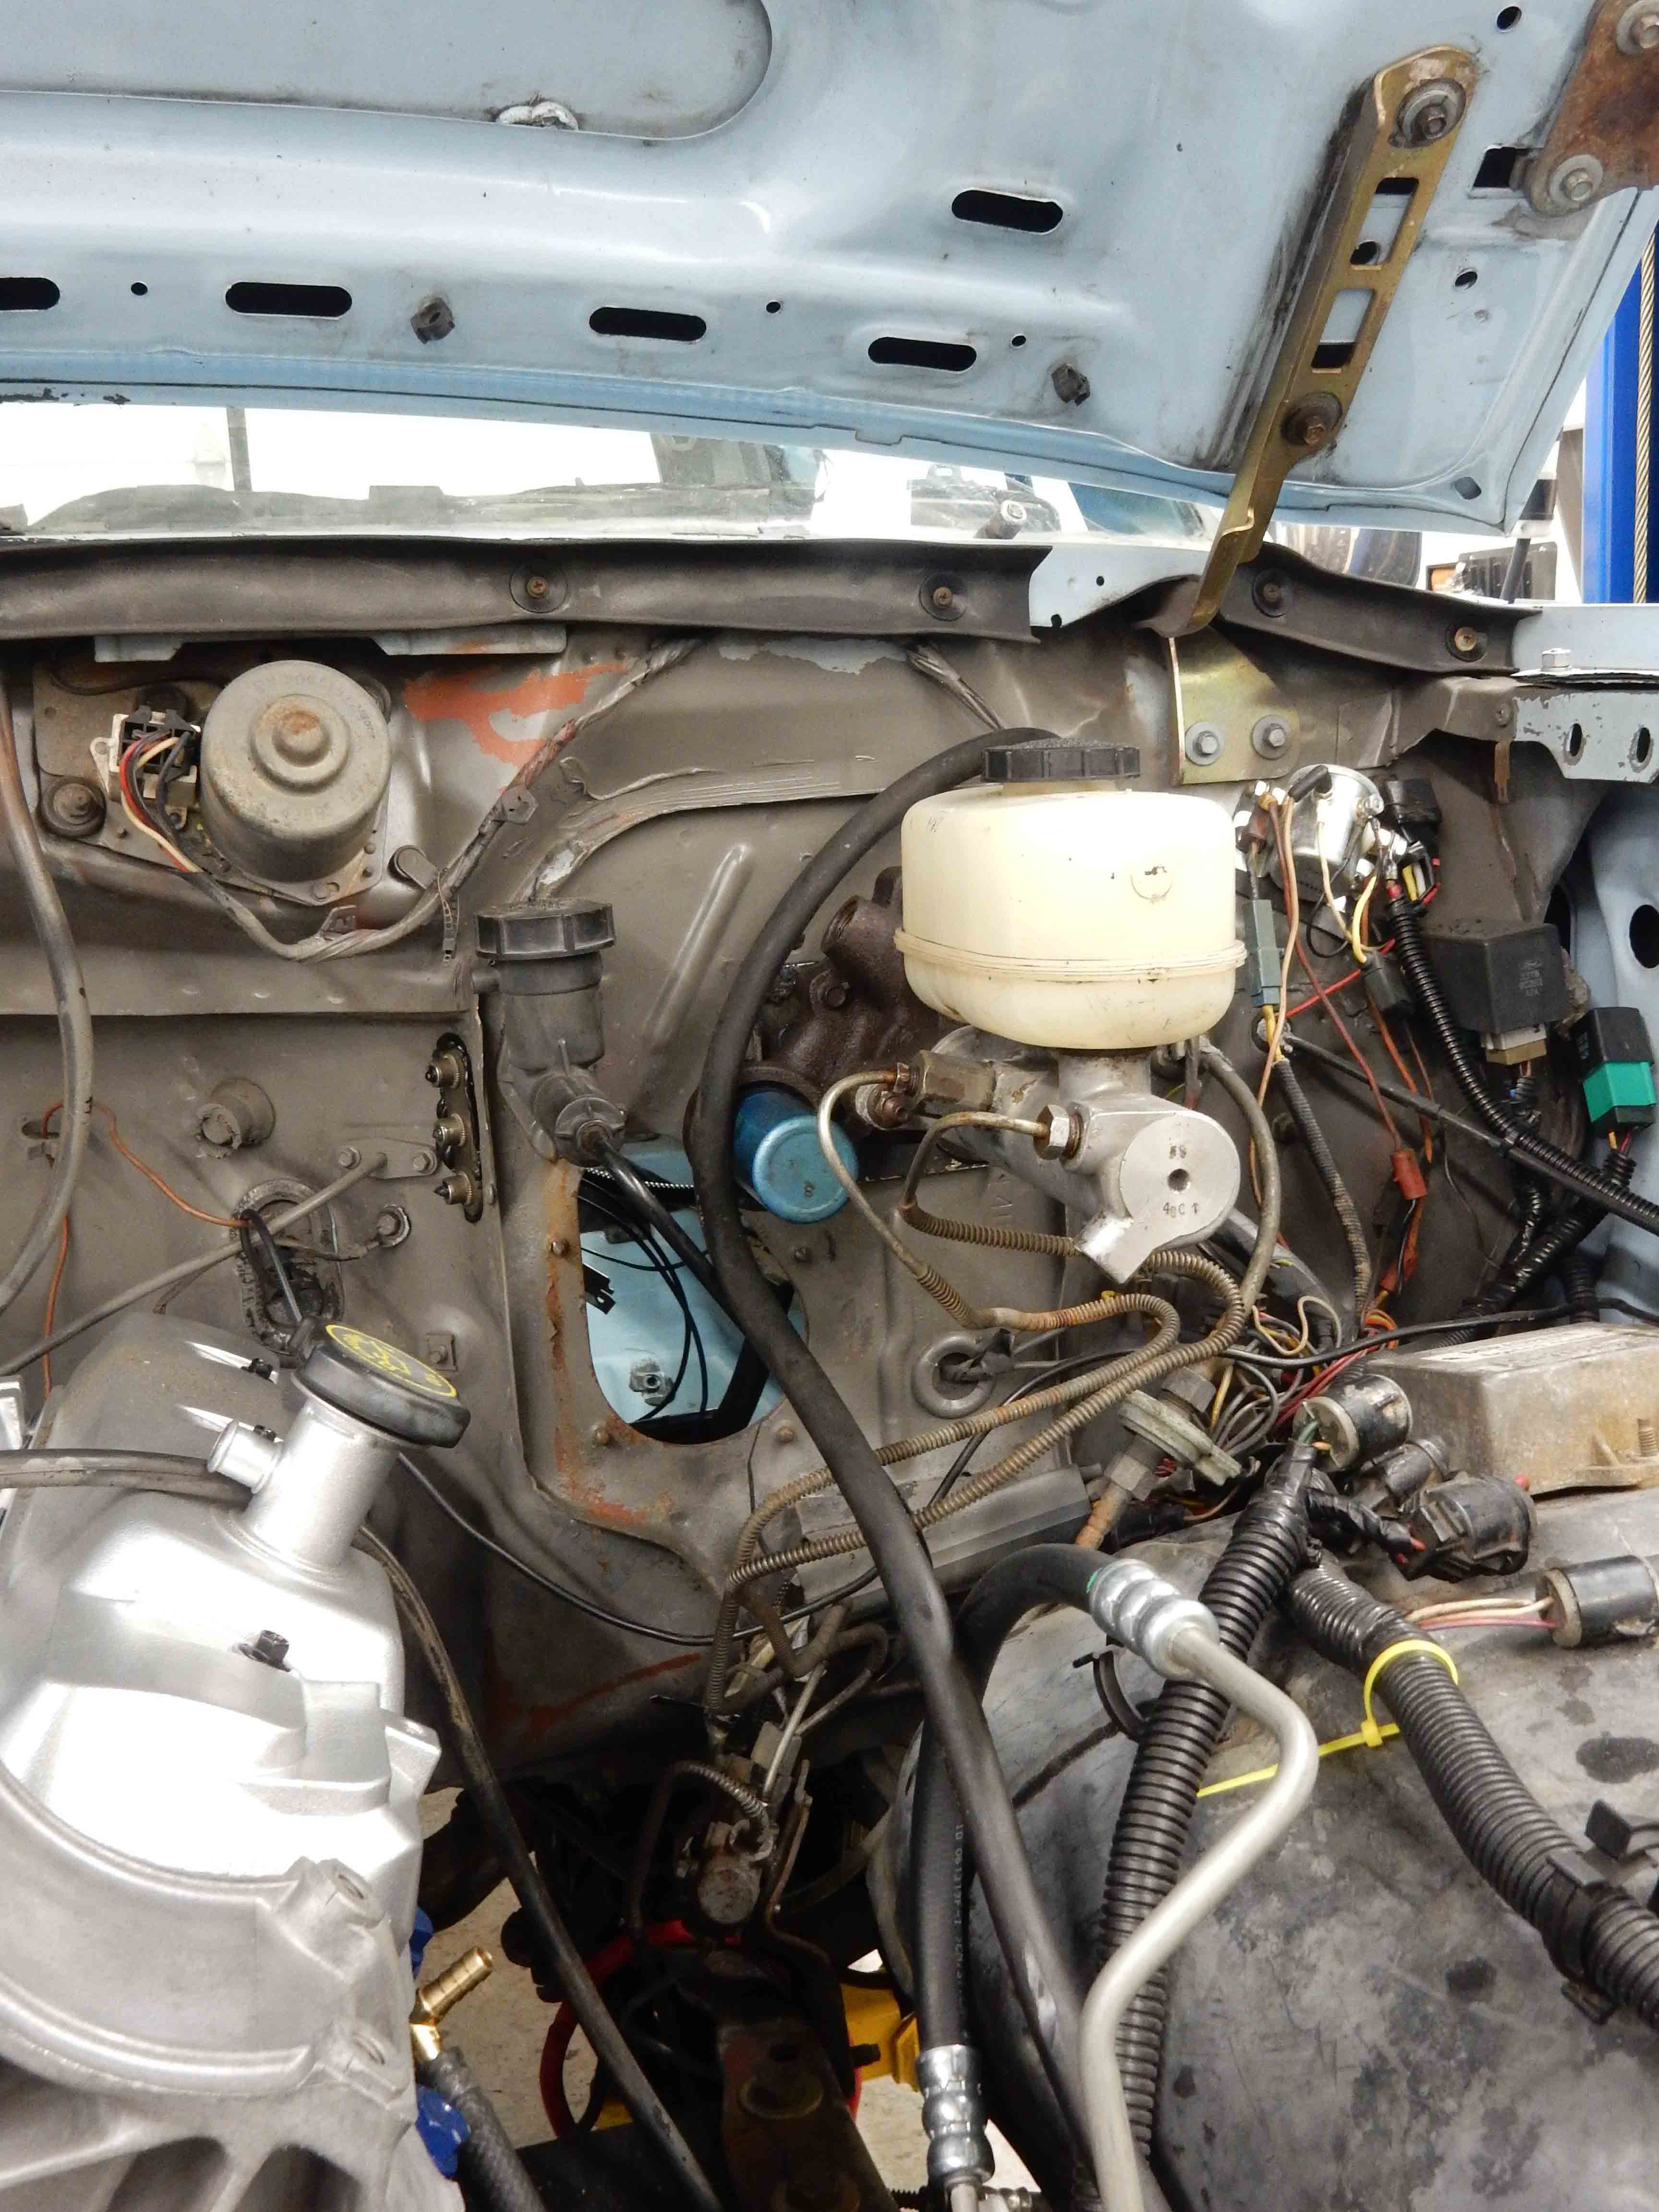
Next up was the pedal assembly. Boy, was that a PAIN! Getting it in with those wires in the way wasn't easy, but it is in:
And the hydroboost unit and the brake master are installed, as are the lines to the master. As said before, I used the lines from Huck, the '90 F250, from the master to the proportioning valve as their fittings and bends were just exactly right.
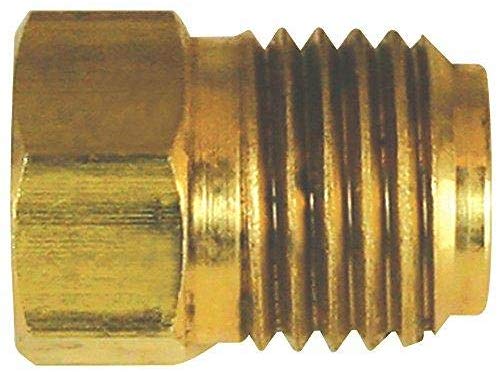
All that's keeping me from filling the master and bleeding the brakes is a plug to replace the fire starter switch. I checked and it is 3/8-24 female flare, so I ordered a bag of 10 plugs from Amazon for $5.99.
Then I re-installed the pin-cushion cowl as well as the cowl seal - using seam sealer this time. Seamed like a good plan. And I re-adjusted the hood as I'd had to take it loose in order to get the cowl off.
"Getting old is inevitable, growing up is optional"
Darth Vader 1986 F350 460 converted to MAF/SEFI, E4OD 12X3 1/2 rear brakes, traction loc 3:55 gear, 160 amp 3G alternator
Wife's 2011 Flex Limited
Daily Driver 2009 Flex Limited with factory tow package
Project car 1986 Chrysler LeBaron convertible 2.2L Turbo II, modified A413
Good to know, Bill. But I'm gonna try this one 'cause I have it. Want to make sure it isn't too big or somesuch, and then if I have problems I'll replace it - and use one w/o the fitting. But, for $6.24 delivered I'll have nine extra plugs.
Shaun - I was pleased with the way it came out. Pretty sure there will be no flex in the firewall now.
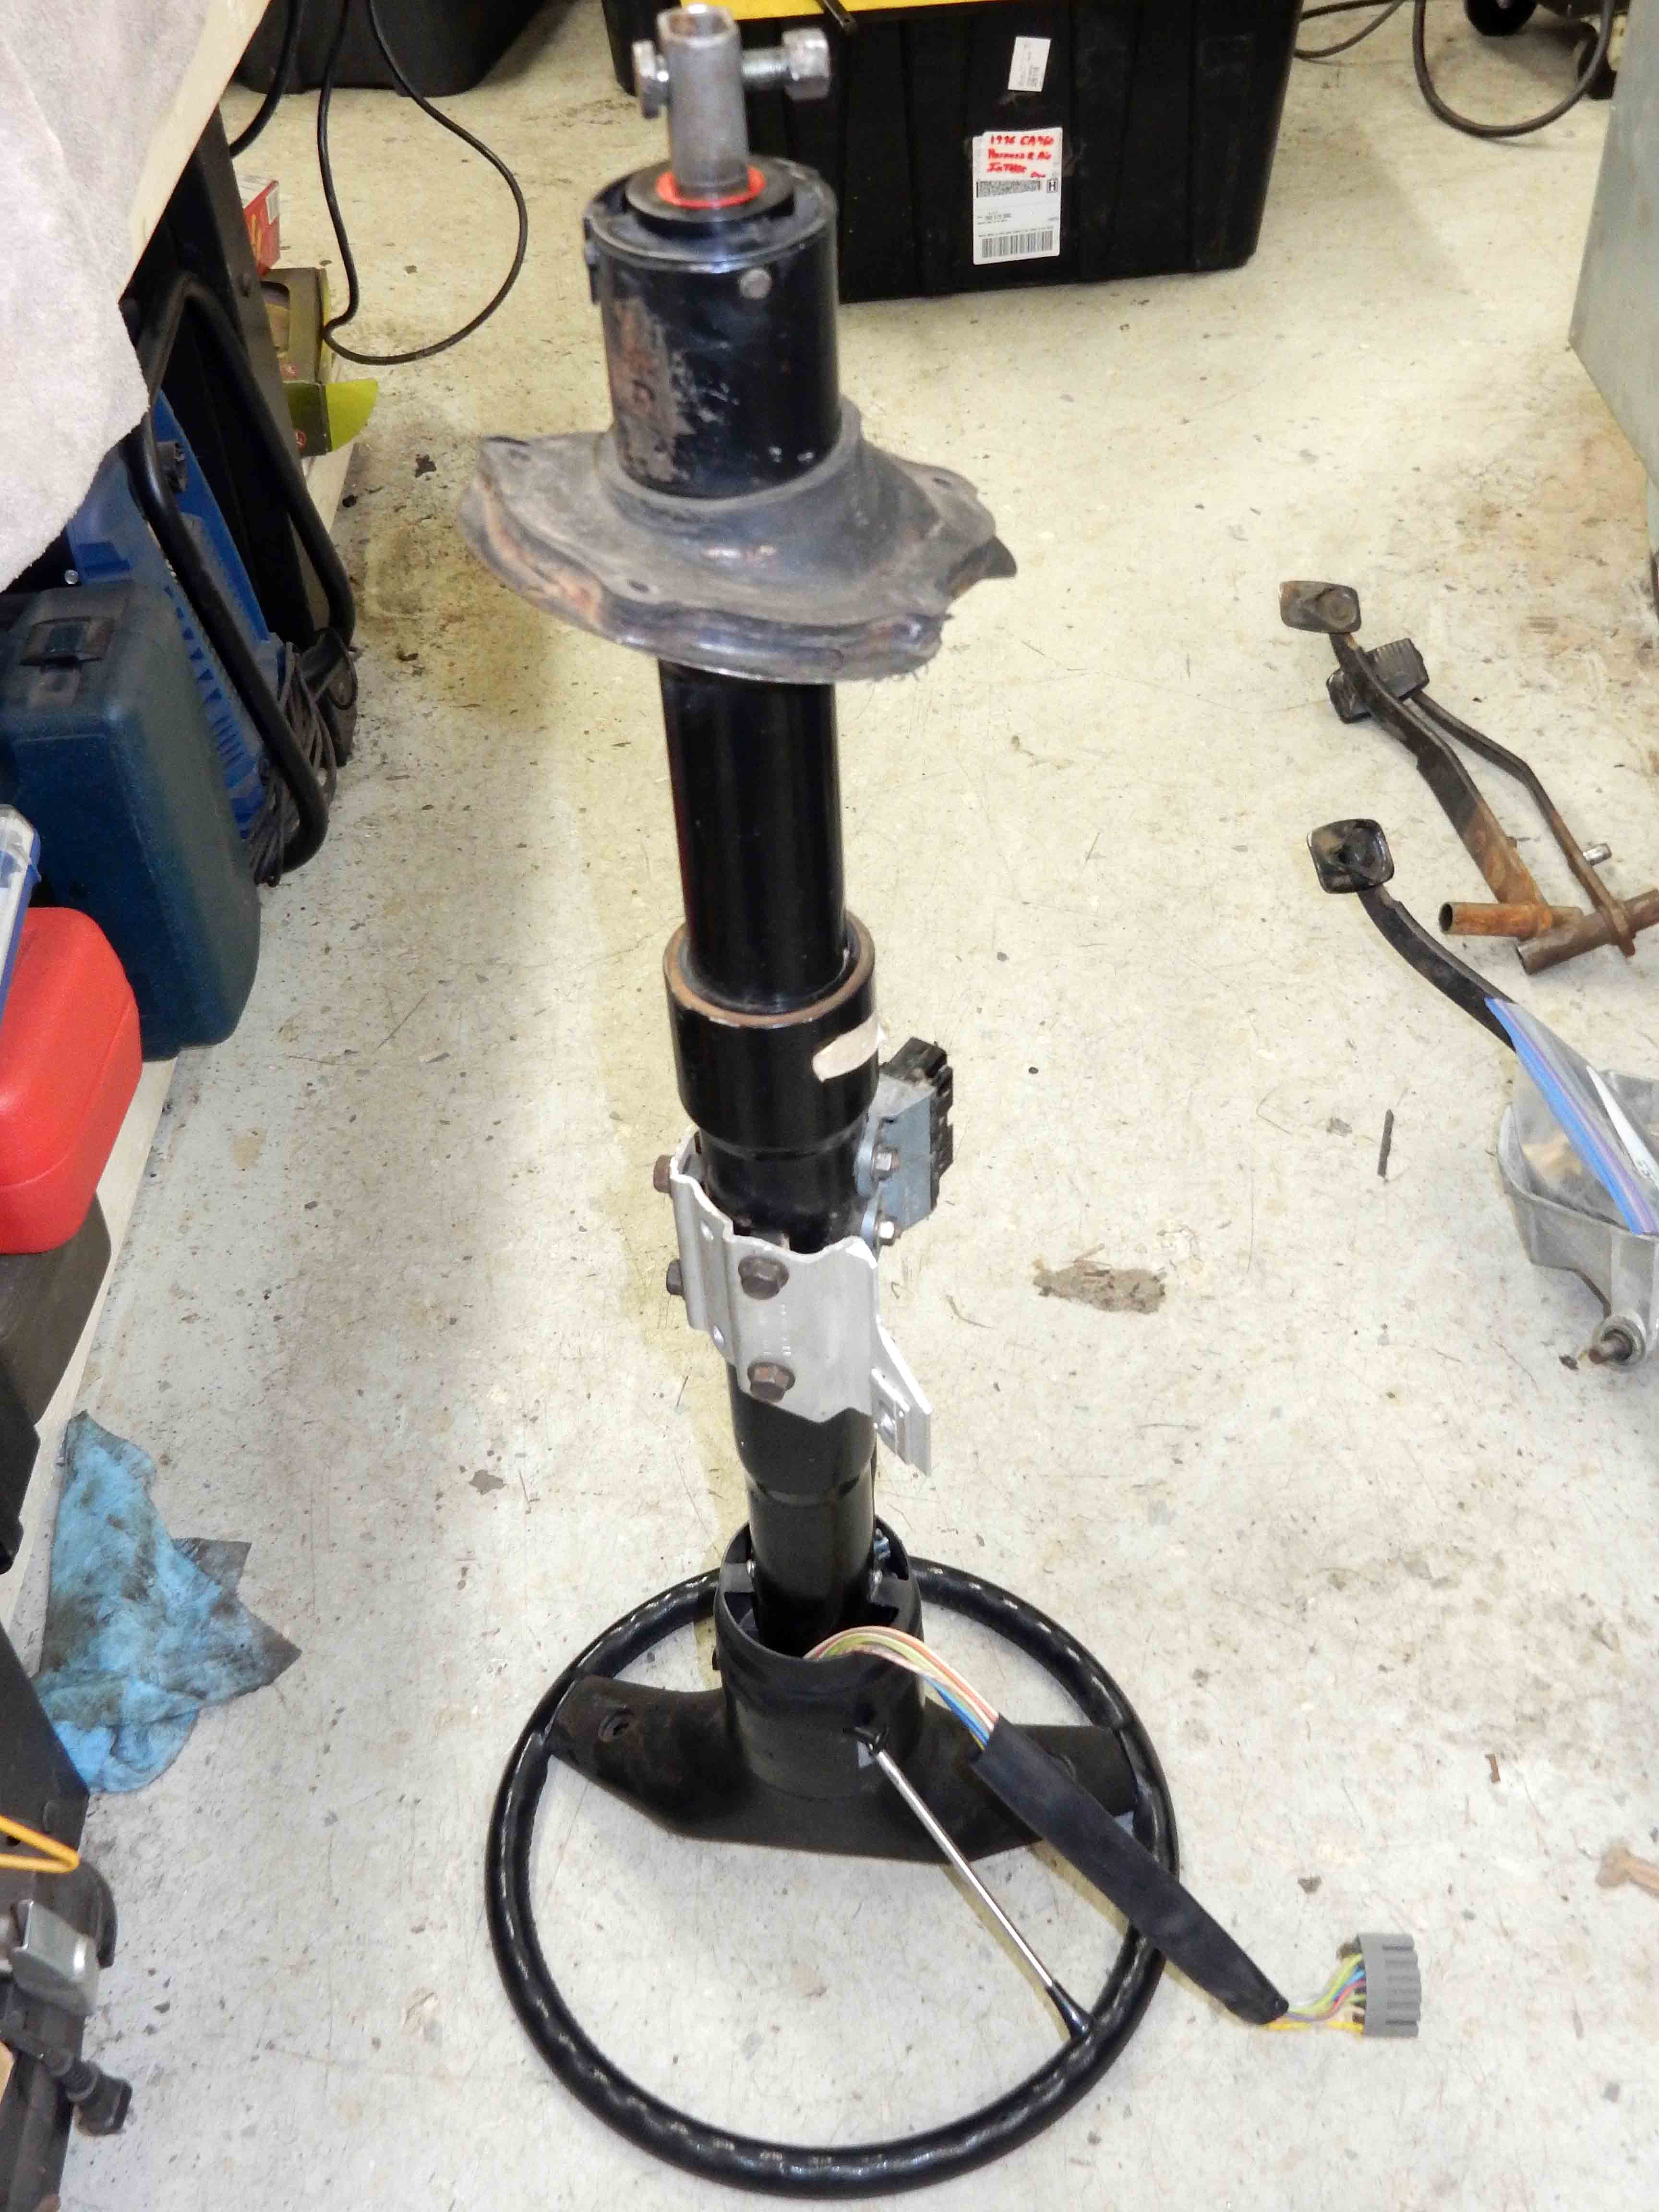
Well, today was "Steering Column Day". And I now have a "rebuilt" steering column that looks like this, and it has re-lubed upper and lower bearings, the right key, a cleaned ignition switch, and lubed ignition switch linkage. (It also has one glaring error that I'll explain in a bit. Scott?)
As previously said, I decided to use a non-tilt column 'cause everyone getting in is gonna need a handhold, and the steering wheel is too inviting. Plus, we may want to use it to anchor ourselves while on the trail. So I don't want the pot metal part on a tilt wheel to be a potential problem. Given that, I pulled out the steering column that had been in Dad's truck when it had the ZF5.
The first thing I did was to pull the lower bearing retainer, and discovered that the bearing was reluctant to turn, like the grease was thick. So I pulled the lower bearing retainer from what had been Big Blue's original steering column and discovered that it wasn't stiff - it screeched!
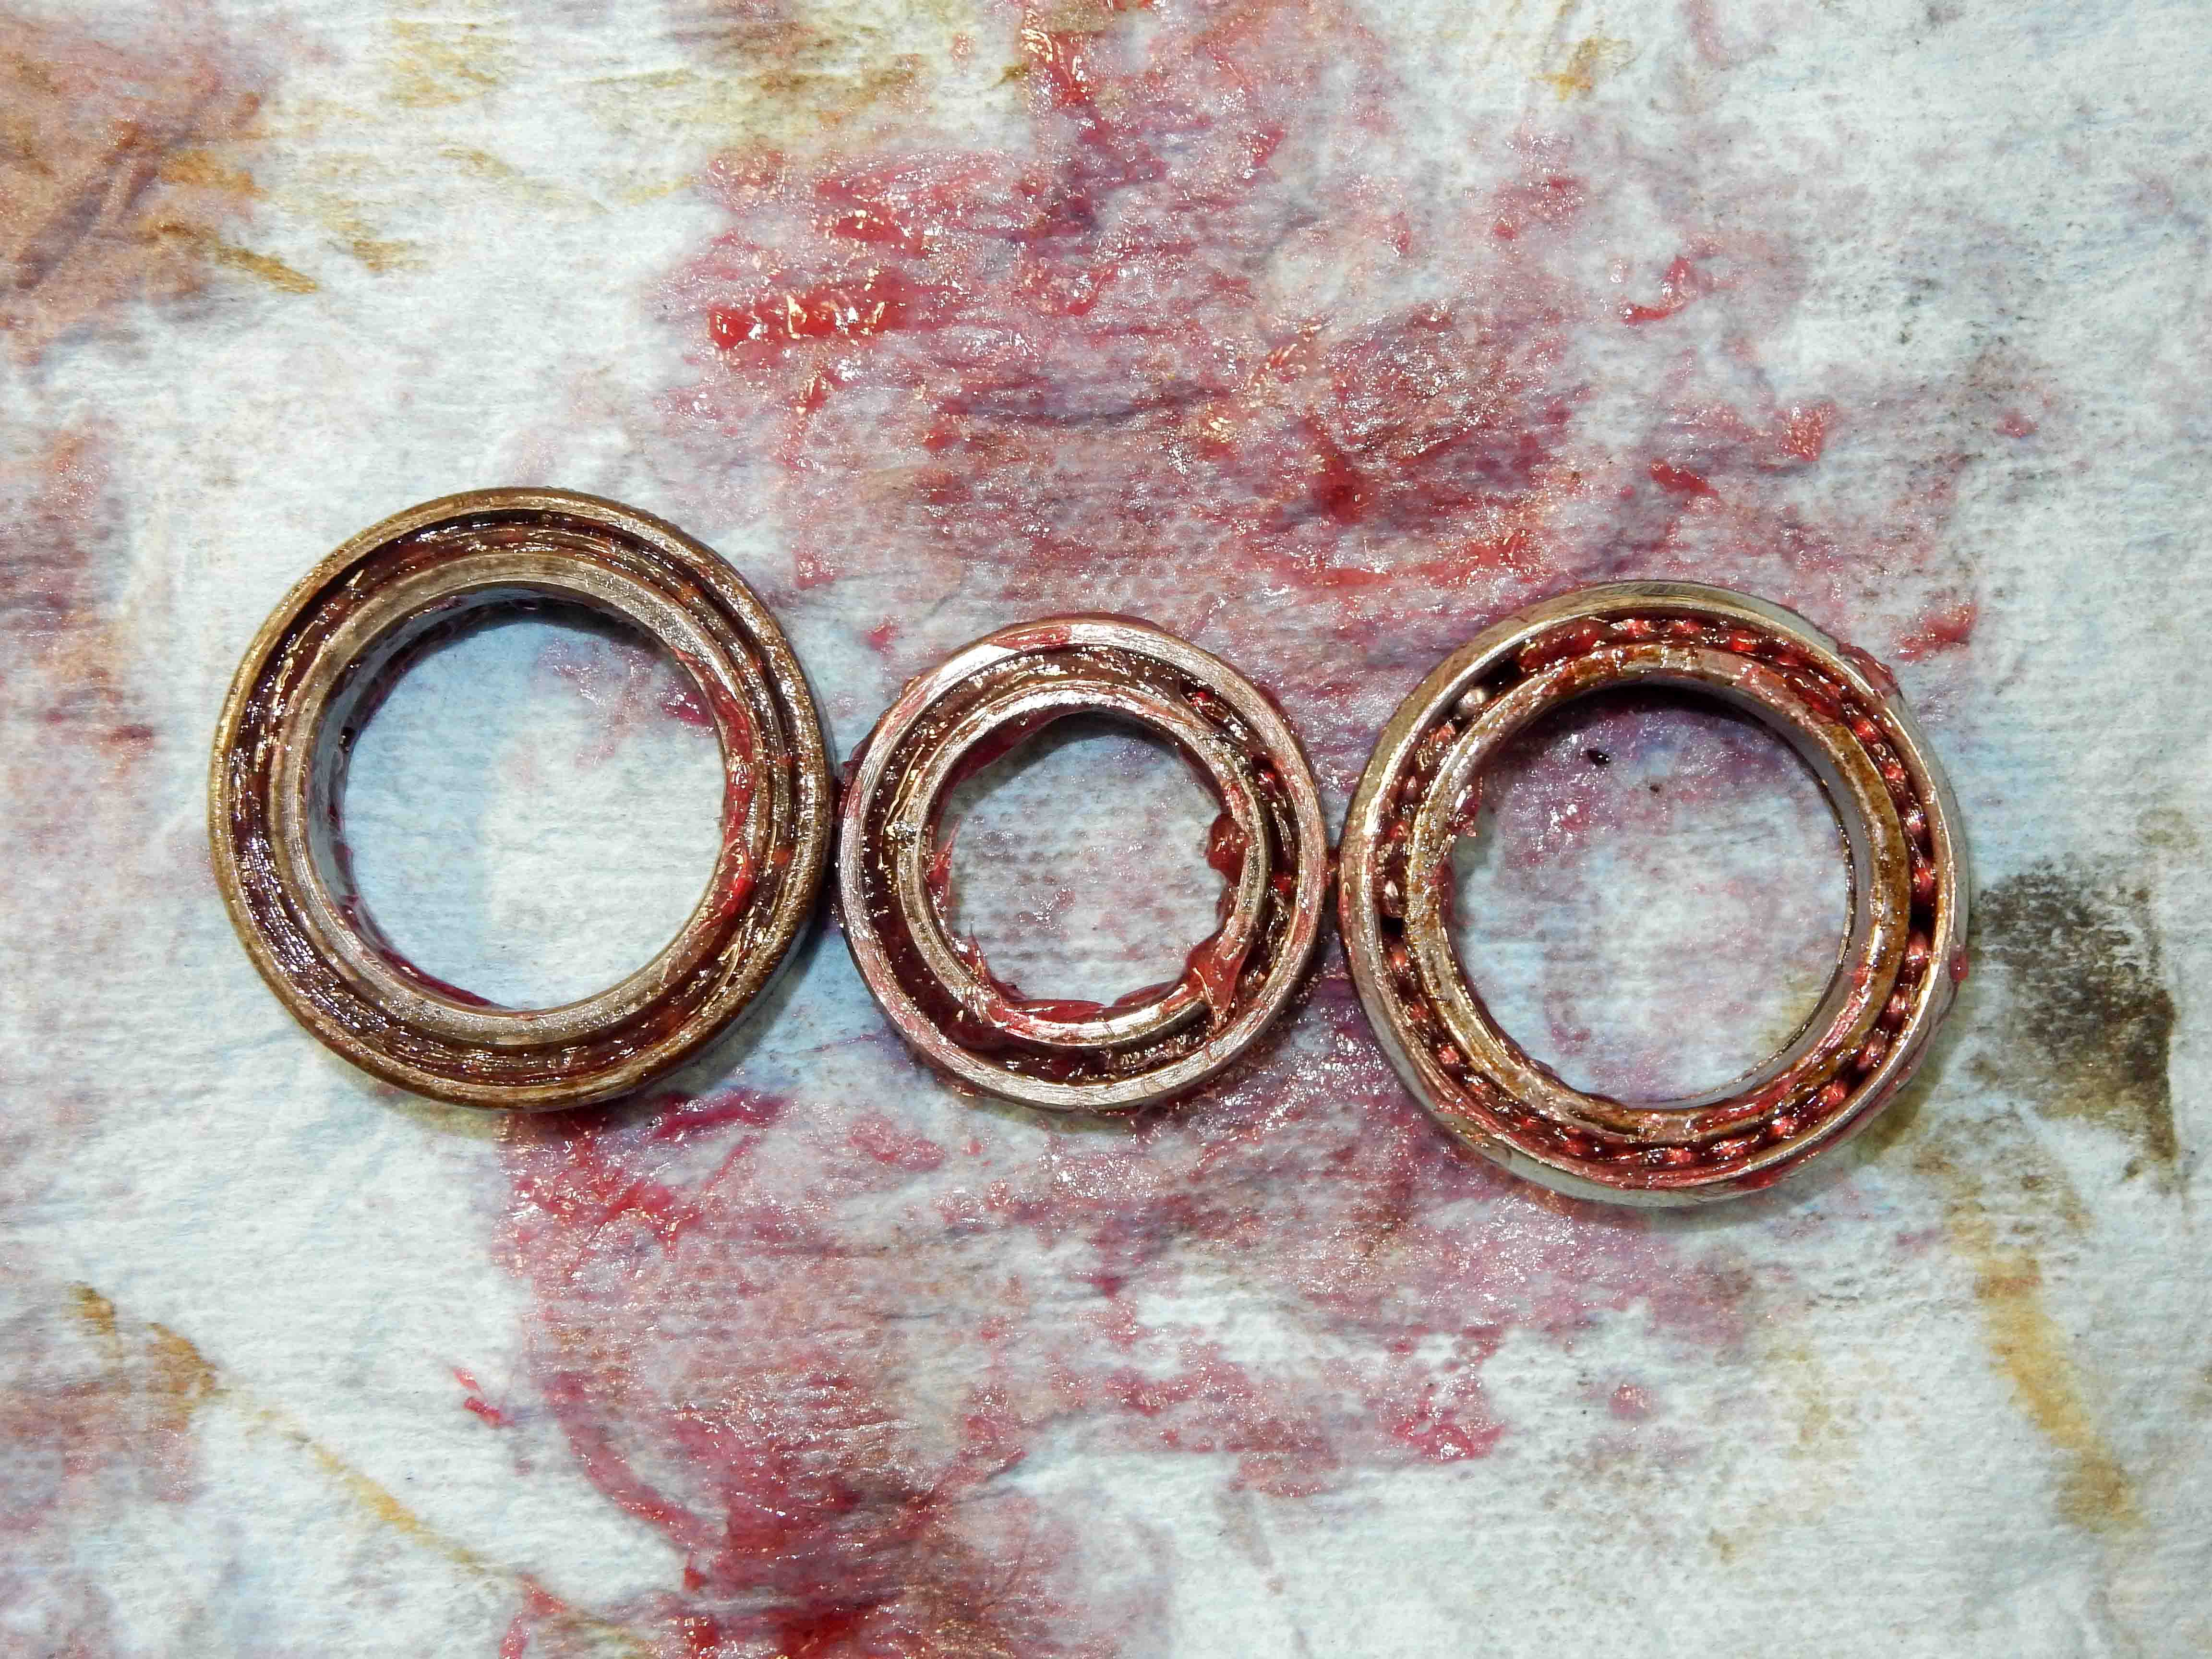
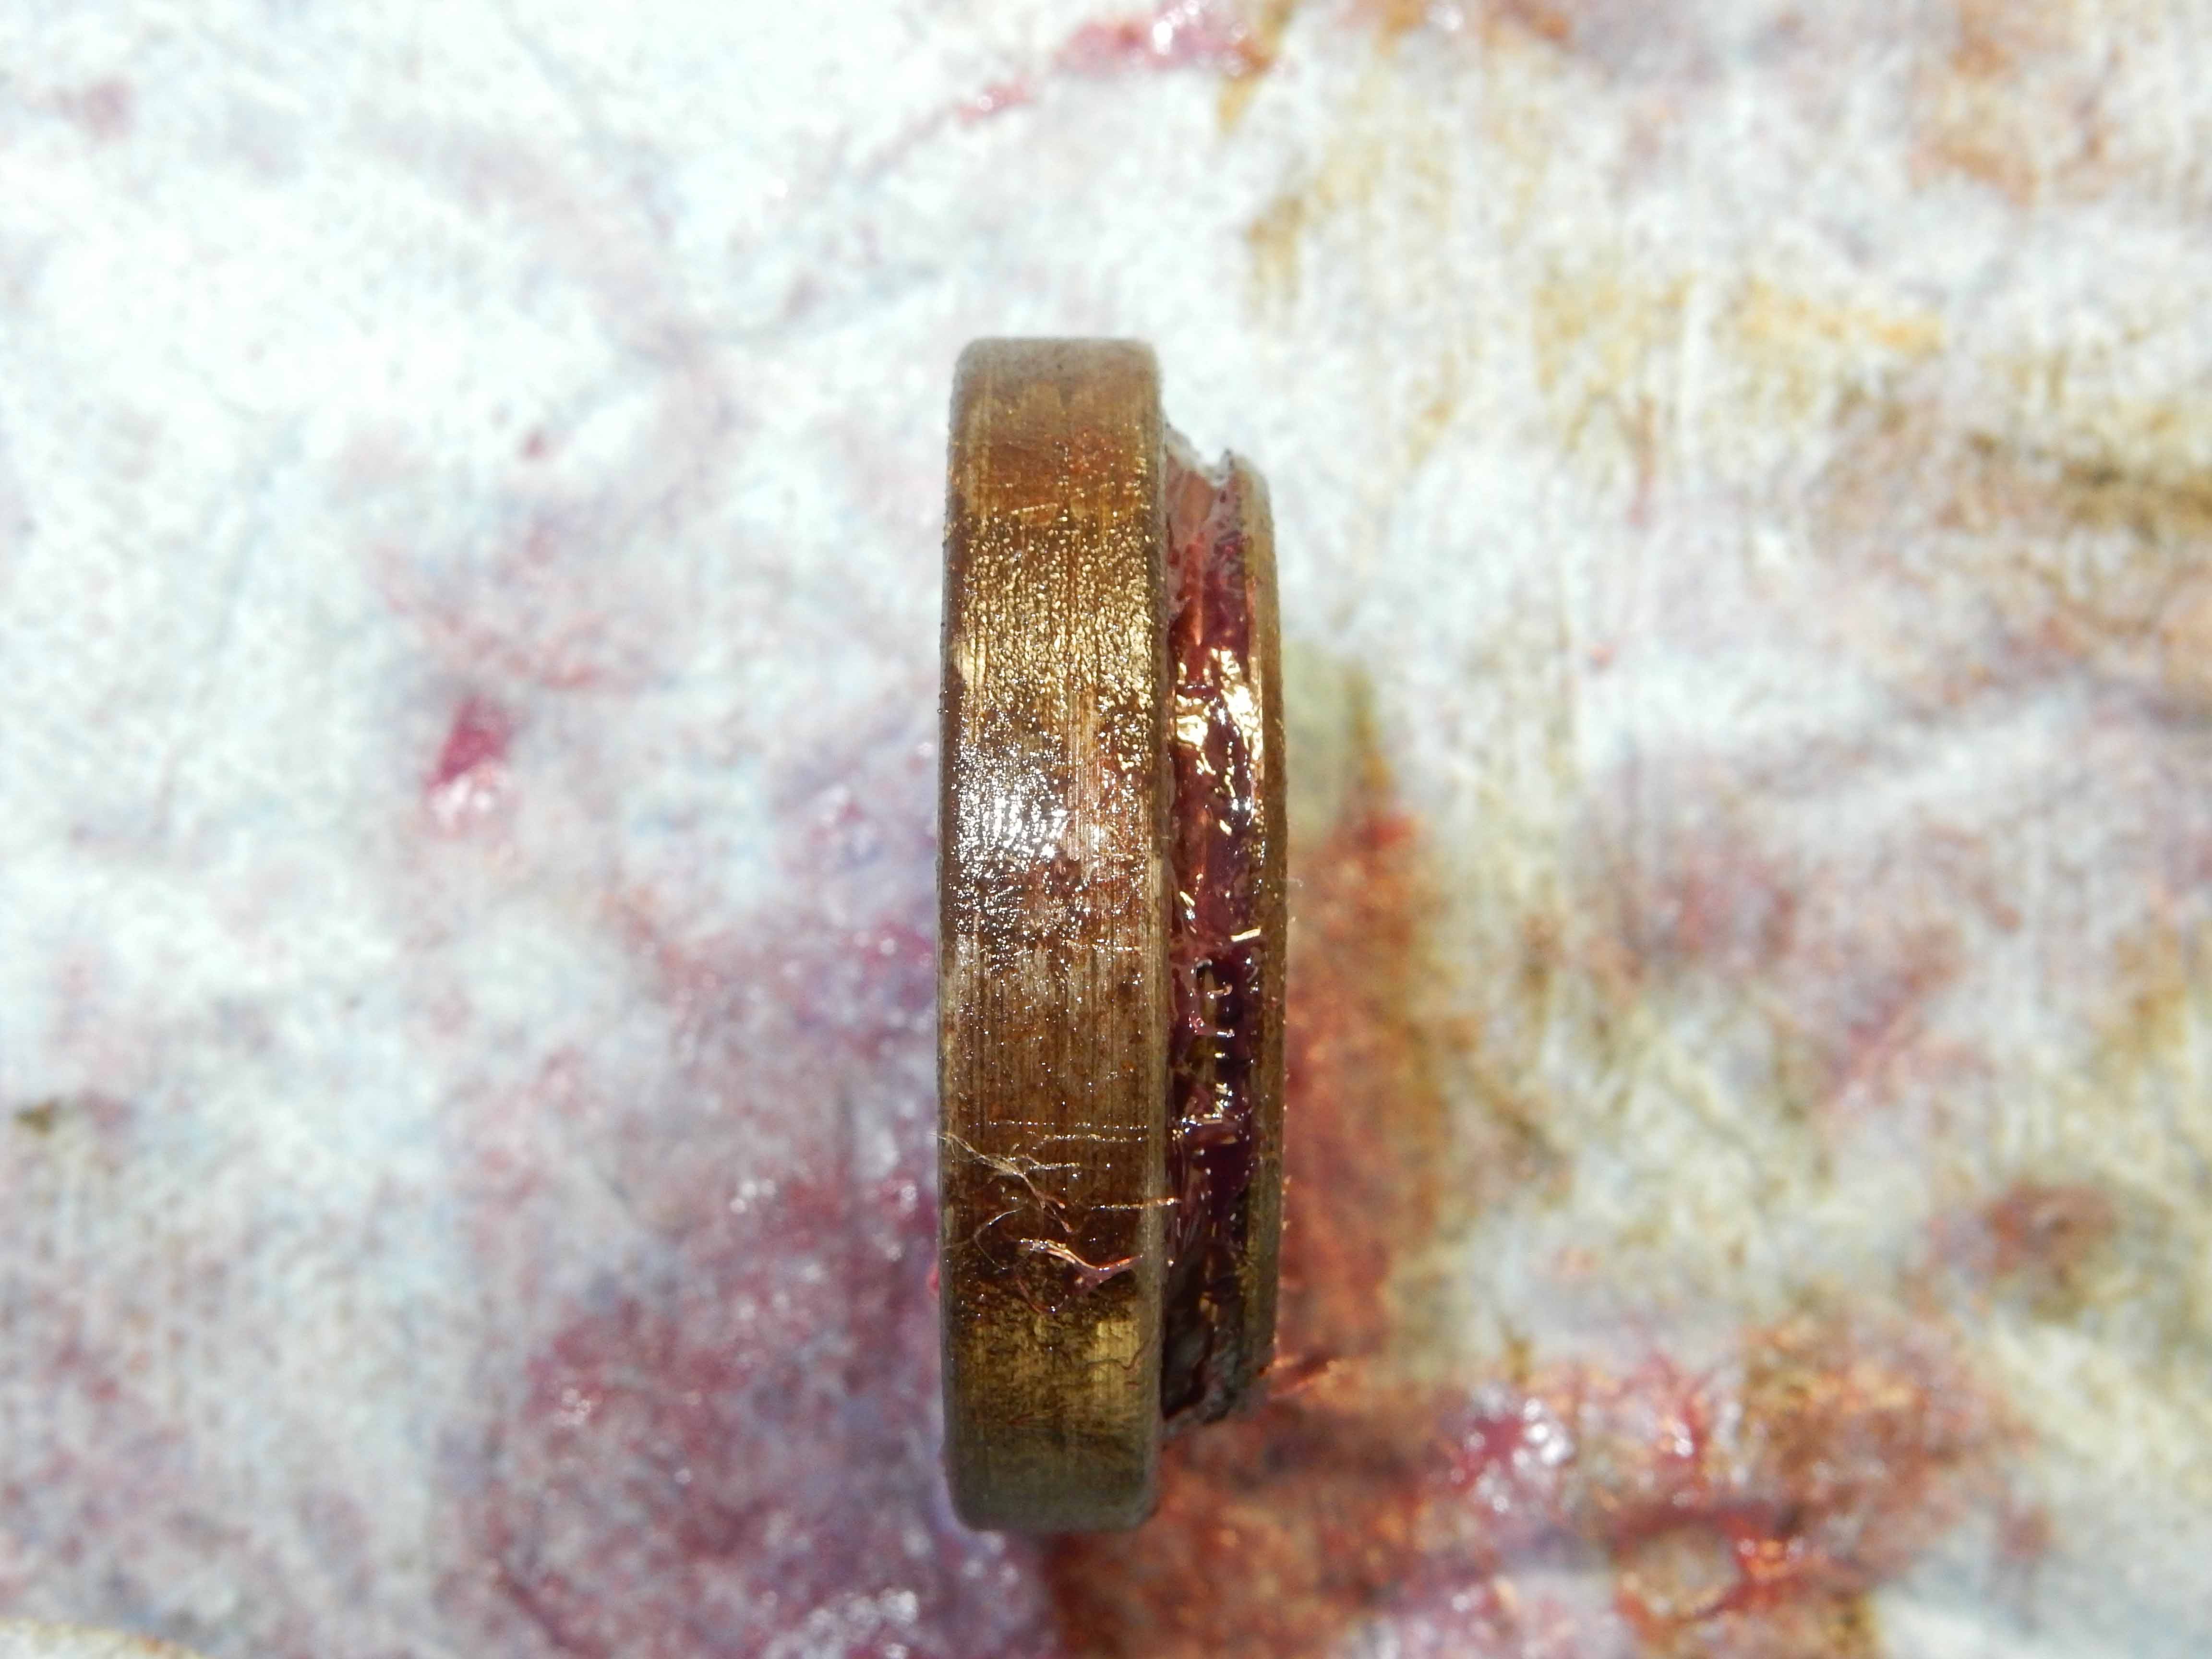
Given that, I pulled the top bearing to see how bad it was, and was pleasantly surprised to find that it wasn't bad at all. But I cleaned it, and the other two as well, and lubed them. Here they are
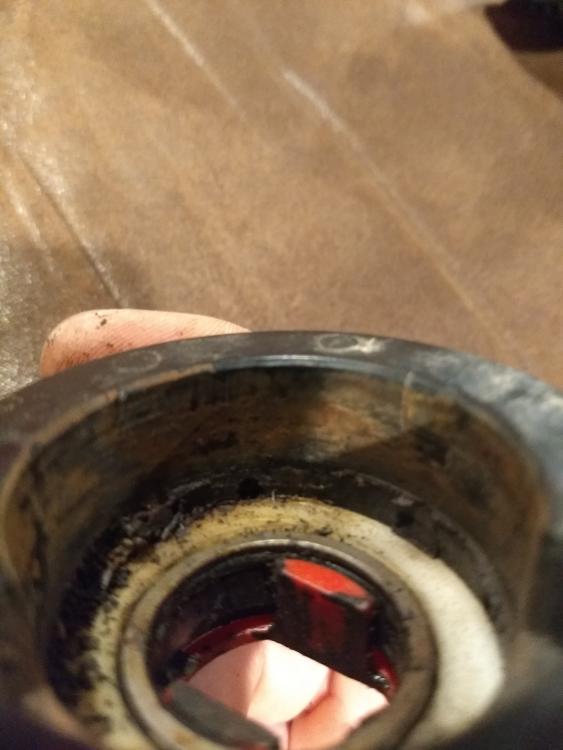
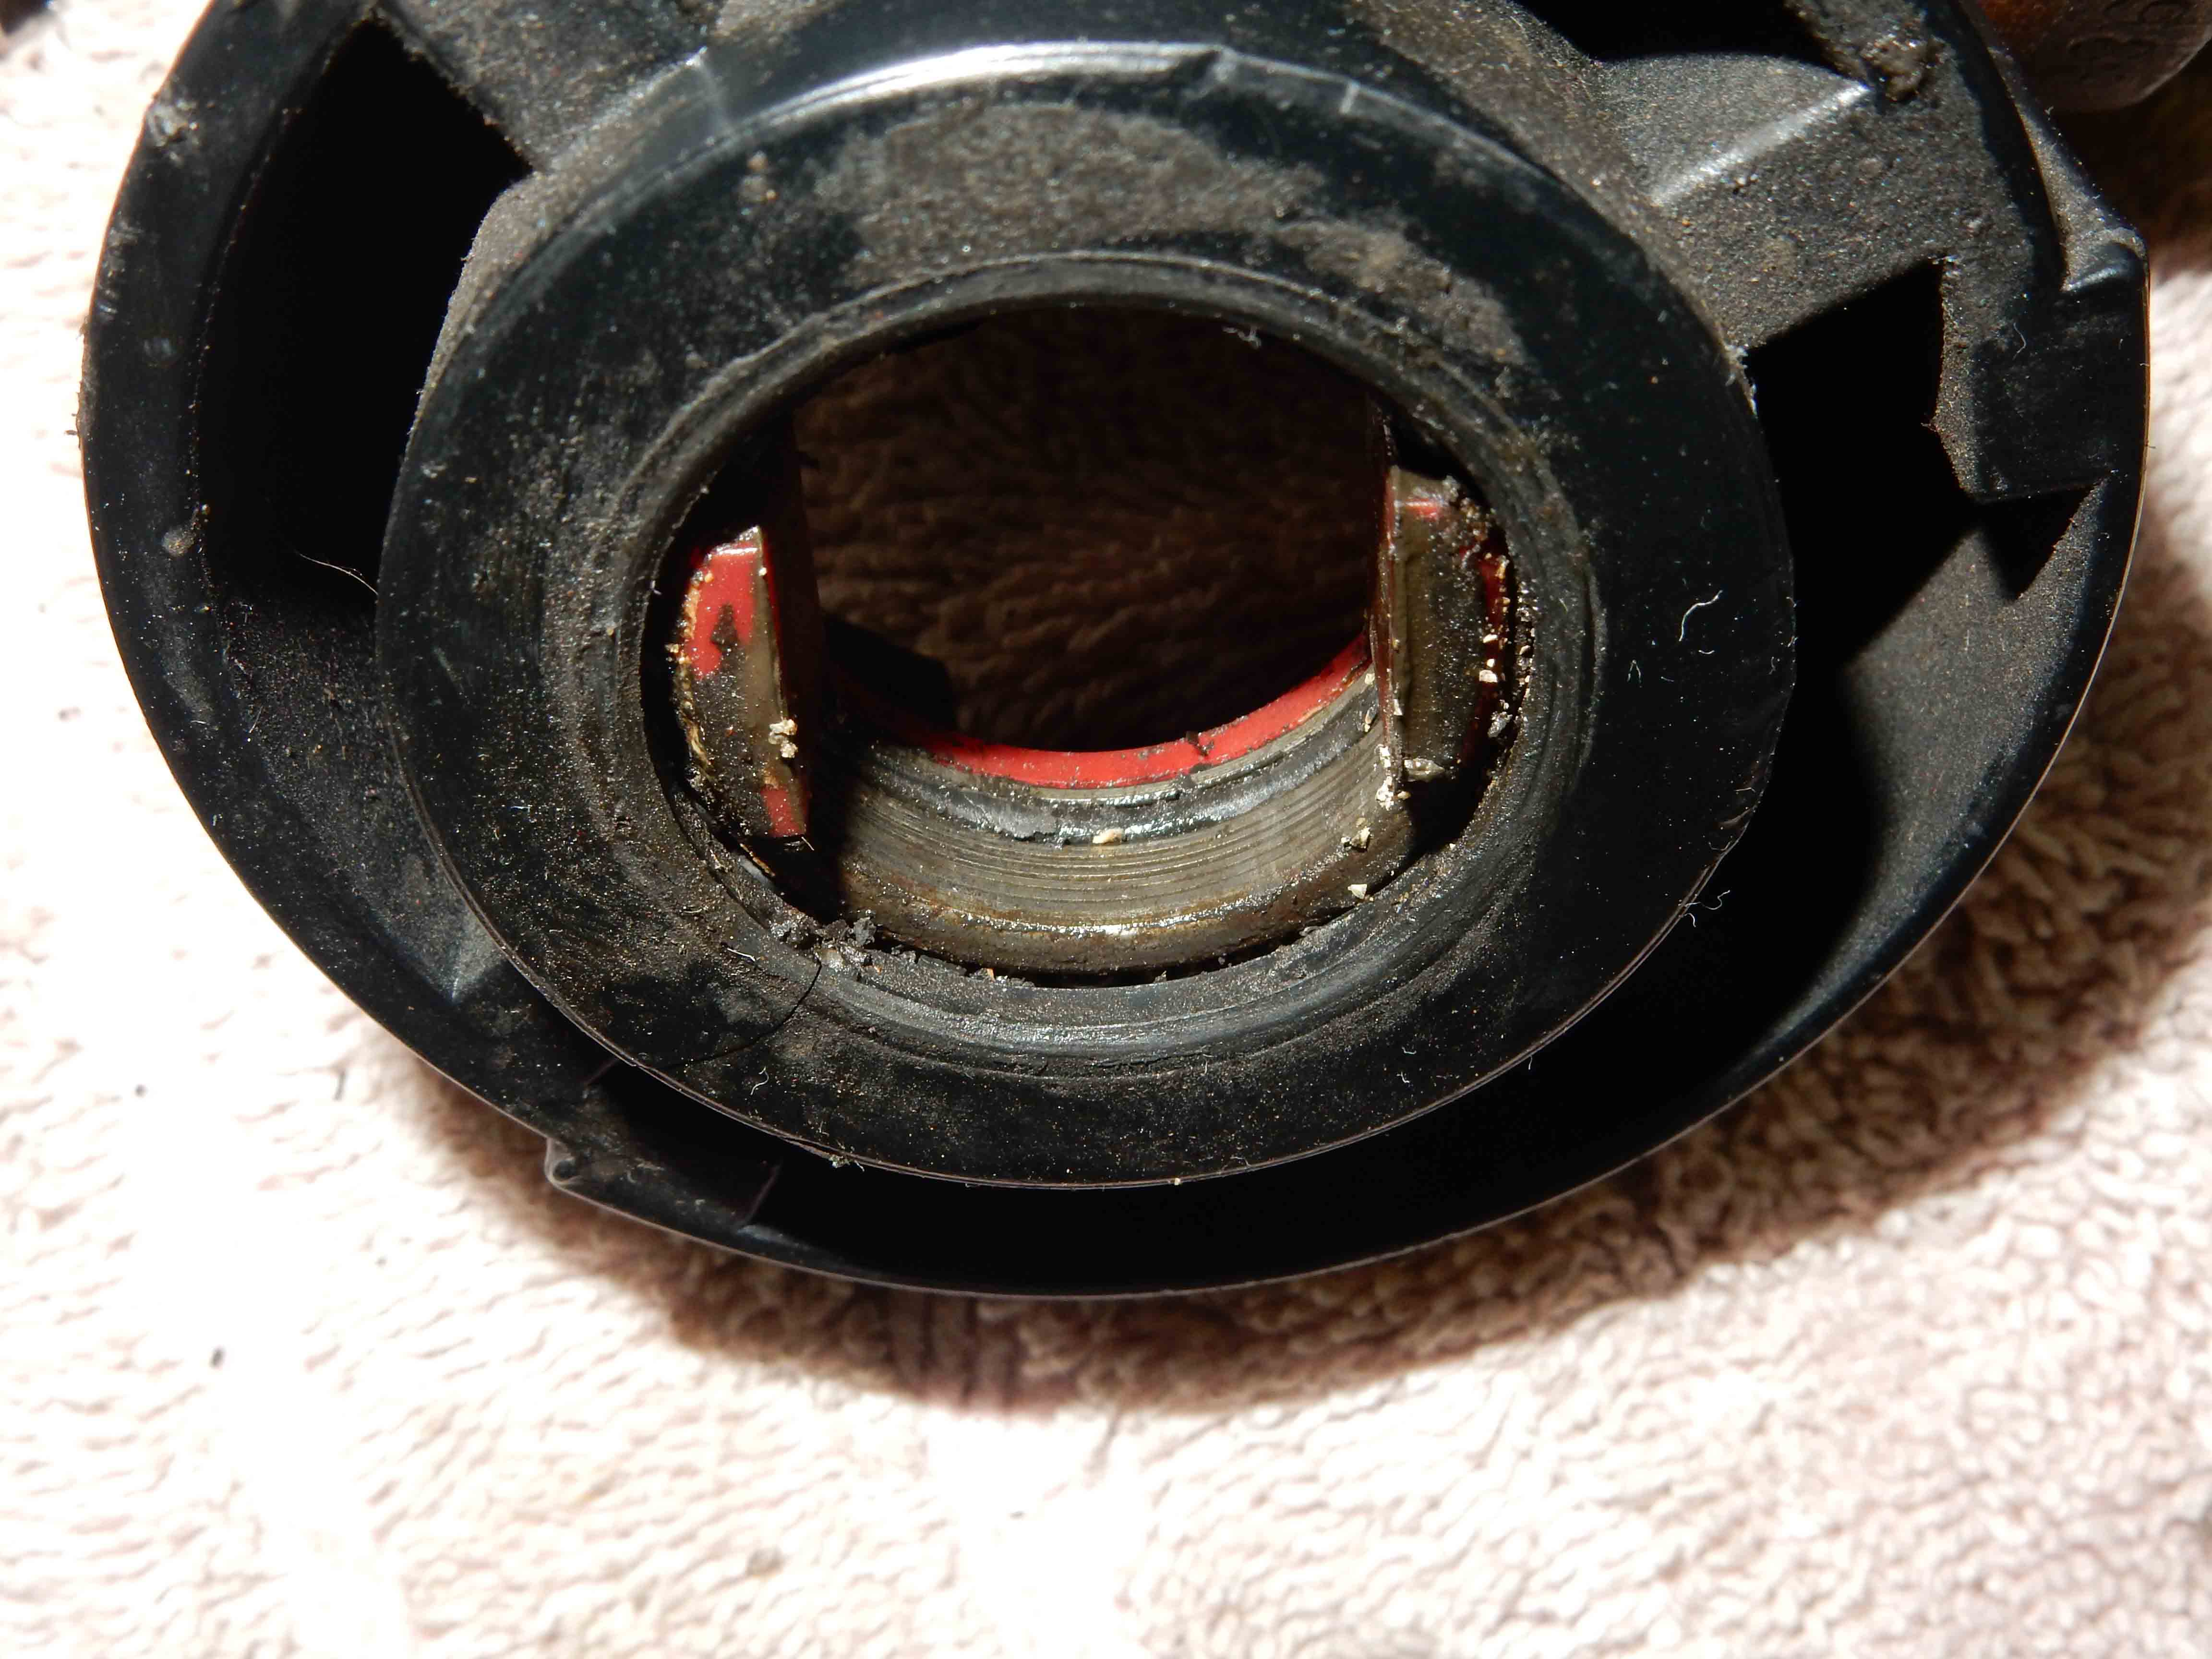
But, when I started installing things I discovered that nothing I could find told me which way the bearing goes in, with the lip up or down. Seen below, the lip apparently goes up 'cause it won't go together with it down. The Nylon retaining washer won't go under the snaps with it that way.
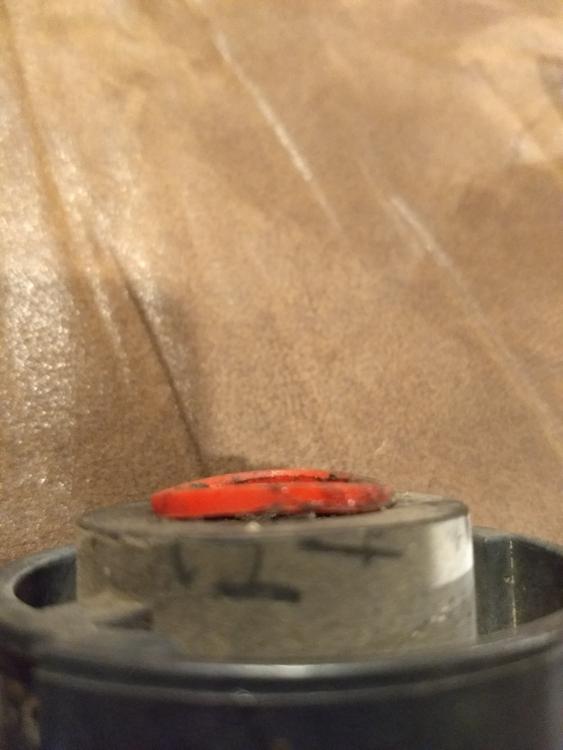
But then I wondered which way the red retainer goes in, and apparently I guessed wrong. In the first pic you can see the red retainer shining, but in this pic it is in the other way, and that's a pic taken before I took it apart.
But that's an easy fix, if indeed it needs to be fixed. The way it is it protects the bearings from dirt. I'll check it out tomorrow.
Then I turned to the ignition lock/tumbler. This was keyed to Dad's keys, so I swapped the tumblers between the two columns. And I lubed them.
Last, I checked the alignment of the ignition switch and found it wasn't quite right, so I pulled it, cleaned it, and then aligned it. And as it all went together I lubed the ignition switch linkage.
Another box in the list checked!
Looking good!
This is the correct way.
The red retainer should come in from the top and when all assembled you should only see the ends of two tabs that are on the flat of the shaft.
Scott
'Camano' 1986 F250 Supercab XLT Lariat 460/C6
'Chanute' 1980 F350 C&C 400/NP 435 - Gin Pole
Just caught up on this thread - tcase looks great! As does the reinforcement plate.
Well done.
Back to the red ring on the column. Since the bearing is held in by the white ring and the red ring is to make the round hole flat on two sides, I don't know if it really matters which side it comes in on. As long as the tabs could snap over something so the ring doesn't fall out, I can't think of why it wouldn't be functionally equivalent.
Scott
'Camano' 1986 F250 Supercab XLT Lariat 460/C6
'Chanute' 1980 F350 C&C 400/NP 435 - Gin Pole
Back to the red ring on the column. Since the bearing is held in by the white ring and the red ring is to make the round hole flat on two sides, I don't know if it really matters which side it comes in on. As long as the tabs could snap over something so the ring doesn't fall out, I can't think of why it wouldn't be functionally equivalent.
That's my thinking as well, Scott. But I needed someone else to confirm it. I'm going to check more closely tomorrow, but I like it the way it is since the ring covers the exposed bearings. It does catch on the other end of the bearing, but I'll show you that tomorrow with pics.
And those pics may be closeups. I'll fire up the OLD camera that has an awesome macro and get some good shots. The questions I can think of are if the ring drags on the bearing retainer and if it catches well on the bearing. Any more you can think of?
If you're snapping pictures, can you snap one of the section where the auto shift lever would come through the bottom of the column? I'm curious to see what it looks like since I want to delete the shift tube from my auto column and just find a way to secure the shift collar by the ignition tumblr. Removing the shift tube would leave a giant opening for dust and moisture to get to the lower bearing so I'll need to cover that up.
I can take a pic of another column, if that's what you mean. Oh, maybe take a pic of an automatic column's lower bearing retainer and then the same pic of a lower bearing retainer for a manual tranny's column. Is that what you mean?
Shaun - Check out the steering doc page > instructions and see if my photos will show what you are looking for. You could leave everything there but just cut off the perpendicular arm at the bottom.
Gary - this is intriguing. While I was in the shop grabbing my spare lower bearing from an auto, I checked out the one in my gpas 85 manual. It is the same as my auto where you can't see the red ring.
My photos aren't great but I tried flipping it around and the tabs aren't long enough to go to the top of the bearing. Instead they land about where the inside oring is.
By not having the tabs lock in the ring part is deformed and doesn't sit flat.
Scott
'Camano' 1986 F250 Supercab XLT Lariat 460/C6
'Chanute' 1980 F350 C&C 400/NP 435 - Gin Pole
Scott - I'll pull the three 1/4" headed screws tomorrow and check it out. But I could have sworn that the legs snapped in on mine. Better safe than sorry.


 And I re-adjusted the hood as I'd had to take it loose in order to get the cowl off.


 As previously said, I decided to use a non-tilt column 'cause everyone getting in is gonna need a handhold, and the steering wheel is too inviting. Plus, we may want to use it to anchor ourselves while on the trail. So I don't want the pot metal part on a tilt wheel to be a potential problem. Given that, I pulled out the steering column that had been in Dad's truck when it had the ZF5.
The first thing I did was to pull the lower bearing retainer, and discovered that the bearing was reluctant to turn, like the grease was thick. So I pulled the lower bearing retainer from what had been Big Blue's original steering column and discovered that it wasn't stiff - it screeched!
Given that, I pulled the top bearing to see how bad it was, and was pleasantly surprised to find that it wasn't bad at all. But I cleaned it, and the other two as well, and lubed them. Here they are
As previously said, I decided to use a non-tilt column 'cause everyone getting in is gonna need a handhold, and the steering wheel is too inviting. Plus, we may want to use it to anchor ourselves while on the trail. So I don't want the pot metal part on a tilt wheel to be a potential problem. Given that, I pulled out the steering column that had been in Dad's truck when it had the ZF5.
The first thing I did was to pull the lower bearing retainer, and discovered that the bearing was reluctant to turn, like the grease was thick. So I pulled the lower bearing retainer from what had been Big Blue's original steering column and discovered that it wasn't stiff - it screeched!
Given that, I pulled the top bearing to see how bad it was, and was pleasantly surprised to find that it wasn't bad at all. But I cleaned it, and the other two as well, and lubed them. Here they are
 But, when I started installing things I discovered that nothing I could find told me which way the bearing goes in, with the lip up or down. Seen below, the lip apparently goes up 'cause it won't go together with it down. The Nylon retaining washer won't go under the snaps with it that way.
 But then I wondered which way the red retainer goes in, and apparently I guessed wrong. In the first pic you can see the red retainer shining, but in this pic it is in the other way, and that's a pic taken before I took it apart.
 But that's an easy fix, if indeed it needs to be fixed. The way it is it protects the bearings from dirt. I'll check it out tomorrow.
Then I turned to the ignition lock/tumbler. This was keyed to Dad's keys, so I swapped the tumblers between the two columns. And I lubed them.
Last, I checked the alignment of the ignition switch and found it wasn't quite right, so I pulled it, cleaned it, and then aligned it. And as it all went together I lubed the ignition switch linkage.
Another box in the list checked!
But that's an easy fix, if indeed it needs to be fixed. The way it is it protects the bearings from dirt. I'll check it out tomorrow.
Then I turned to the ignition lock/tumbler. This was keyed to Dad's keys, so I swapped the tumblers between the two columns. And I lubed them.
Last, I checked the alignment of the ignition switch and found it wasn't quite right, so I pulled it, cleaned it, and then aligned it. And as it all went together I lubed the ignition switch linkage.
Another box in the list checked!