3-D printer Fog light bezel has been made and shipped!
Re: 3-D printer Fog light bezel has been made and shipped!
|
Administrator
|
Well, that was quick. May not answer all the questions, but recommends some directions and provides links for study.
Hello Gary,
So, I come away with these thoughts, but want the rest of y'all to chime in with your takeways: Material: Looks like I need to read up on the guidelines for the materials and then adjust the lettering to meet them.We need to move away from a powder-based material.However, just a bit of reading on their site says "Acrylic plastic is heatproof to 48ºC / 118.4ºF degrees. Higher temperatures may significantly change material properties." On the other hand it says this about High Definition Acrylate: "The material is heat resistant up to 120°C." That's 248ºF, so I think this one would work. In addition, although HP Nylon is a powder-based material their website says "The surface is smooth, finished and semi-glossy..." So I've gone back to him asking about that material.
Gary, AKA "Gary fellow": Profile
Dad's: '81 F150 Ranger XLT 4x4: Down for restomod: Full-roller "stroked 351M" w/Trick Flow heads & intake, EEC-V SEFI/E4OD/3.50 gears w/Kevlar clutches
|
|
Both printed samples are the correct size/thickness. The company I use did my sample on the "new" HP 3-printer, I'm on the road this week and will get you details when home.
1986 F-150 Flareside 4x4, 351, 4-v, ZF5 speed. AC, Cruise, Tilt, Slider, Digital clock, Radio, Lariat seat, Pwr doors/locks
|
Re: 3-D printer Fog light bezel has been made and shipped!
|
Administrator
|
I've done the reading on Shapeways' site and it looks like High Definition Acrylate is the way to go. Here are some snippets from that page:
"High Definition Acrylate is made of a photo-reactive resin. It is printed using Direct Light Projection (DLP) technology which provides excellent resolution and accuracy. It is capable of fine details and is therefore ideal for miniatures and models trains. Additionally, the DLP process produces a smooth surface, making it well suited for painting. The material is heat resistant up to 120°C and is printed at 50 micron layer thickness."They said I need to "pay extra attention to the "embossing" section on that page". That's because "Embossed details stick out from a surface." And their minimum height and width for an embossed detail is .1mm, which is .004". According to the drawing the thinnest section of any of the letters is .007", and the minimum distance between letters is also .007". In comparison, the Strong & Flexible material I used says it has a minimum height and width for embossed details of .008". So, the HDA should work fine, but I can see why the S&A material didn't.So, I'm planning another round using HDA. Does anyone have any suggested changes for this round?
Gary, AKA "Gary fellow": Profile
Dad's: '81 F150 Ranger XLT 4x4: Down for restomod: Full-roller "stroked 351M" w/Trick Flow heads & intake, EEC-V SEFI/E4OD/3.50 gears w/Kevlar clutches
|
|
Administrator
|
Wow! Excellent footwork Gary! I never thought about the heat resistance but obviously that is a major concern, especially for me 😉. I think the next print should be cleaner and easier to achieve the desired finish. I am excited to see the results.
As far as painting, when I refurbished the tach face (that I stupidly damaged with alcohol), I used the SEM Trim Black "Euro Jet Satin" 41023. It is not 100% identical to the stock gauge face paint but pretty darn close. It has just ever so slightly more sheen to it. I think it would be an excellent choice for the black parts of woodgrain or XLS bezels and for the fog light bezel. My particular can went on very thick. Be aware of this as I thought I had ruined my gauge face by filling in the grid texture (!) but once it dried it was okay. It could have just been my can, but it could potentially fill in parts of the lettering like the O or the triangle of the A etc., on the positive side it might also help smooth out the texture. Just begin with a very light application is all I am saying. For the chrome edge I would use the cosmetic q tip over dipping. It is extremely easy to control and gives a great result. It will probably need a gloss undercoat to get it truly chrome like, but I don't think it will be hard to achieve. The white lettering is going to be the most difficult and no easy way to get around it. I had fits trying to repaint the numbers on my tach face. First of all it is hard to get full opacity of white covering black. It needs a few coats no matter what. The edge of the letter/number likes to scrape paint off your implement and let it run down onto the face. Corners are particularly difficult (think about the acute angle at the base of a "2". I tried the HyPo fluorescent white and no go. It was way to pasty and translucent. I tried an extremely fine white paint pen but I could not control the plunger tip/flow pattern on the skinny number faces. I ended up with a larger felt tip paint pen and a dob dob dob technique, but it was fitful. Next time I try this I think I am going to order white Testor's model paint and use the dense fine tip cosmetic q tips to apply it. If you have any spare/junk gauge parts I would practice on those before tackling the fog light bezel. I know all of this is getting ahead of the current state of the project, but i thought I'd throw it out there anyway. 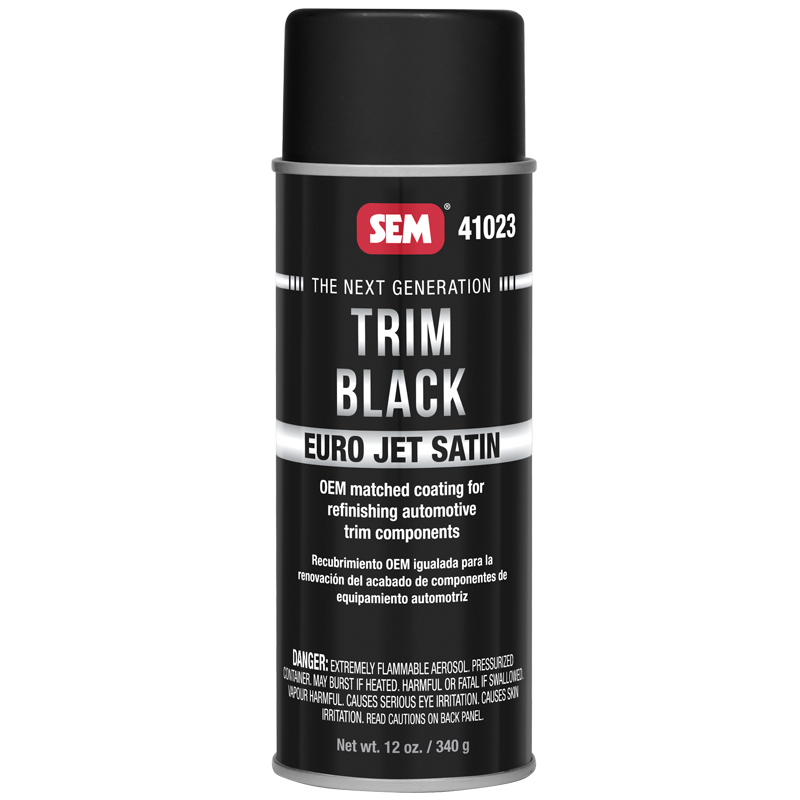 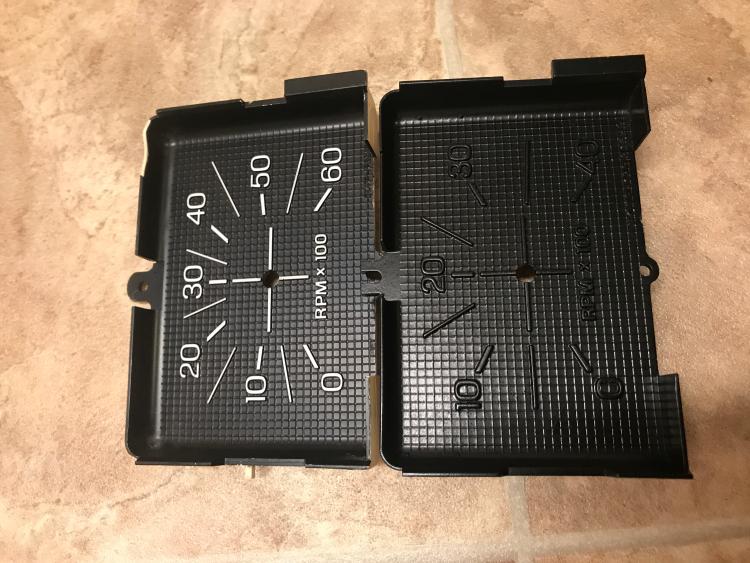 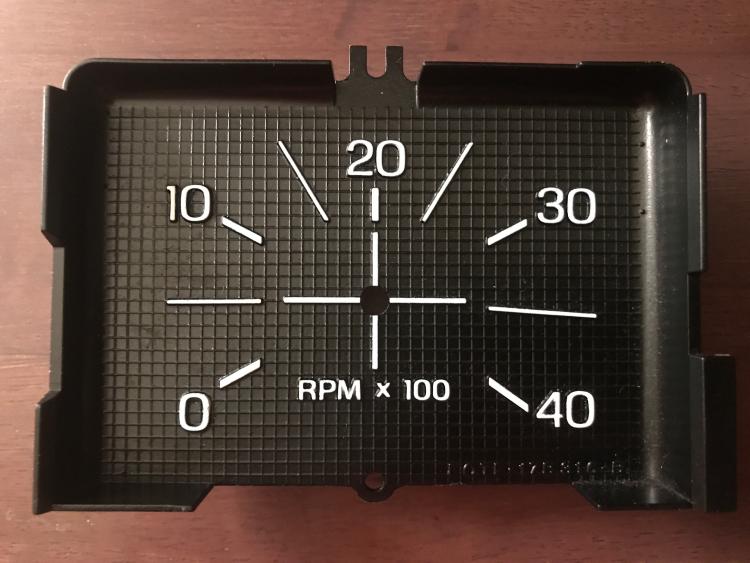
SHORT BED 4-DOOR DIESEL: 1986 F350 4x4 under construction-- 7.3 IDIT ZF5+GVOD
STRAIGHT SIX 4X4: 1981 F150 2wd to 4x4-- 300 I6 close ratio diesel T19, hydroboost brakes, Saginaw steering BIG F: 1995 F-Superduty under construction— converting to 6.9L IDI diesel ZF5+DNE2 |
Re: 3-D printer Fog light bezel has been made and shipped!
|
Administrator
|
In reply to this post by Gary Lewis
OK, so Ron's results are better with the jet printer than your experience with SLS.
Acrylic will produce a harder and glossier part with better adherence to the file. But again, it *will not* produce a part with the detail and resolution of a die injected molded part. (or even a gravity molded part in a mold pulled from the original) Anything built layer by layer is not going to be the same as something monolithic. What is one difference between a block wall and a poured concrete wall? You can add details to the inside of a form and have good resolution when the forms are stripped. Try that when laying up block. Not to get too far off track in this fog light bezel thread I'm going to make a post in the workshop/tools section. Do we even know what the original is made of? I'm assuming ABS. Really looking forward to seeing the results in acrylic
Jim,
Lil'Red is a '87 F250 HD, 4.10's, 1356 4x4, Zf-5, 3G, PMGR, Saginaw PS, desmogged with a Holley 80508 and Performer intake. Too much other stuff to mention. |
Re: 3-D printer Fog light bezel has been made and shipped!
|
Administrator
|
Jonathan - That is excellent info on painting. Thanks!
 Jim - I see your point about a block wall and a poured wall. But fortunately, about all that can be seen on the fog light bezel when it is installed is the top of the letters and the bead, and the face of the bezel itself. In other words, not the sides where the "stepping" is going to be obvious. And even then it is tucked up under the steering wheel such that the inspector's rear end is easily assaulted.  Anyway, I'm hoping to get the 2nd pass started today. 
Gary, AKA "Gary fellow": Profile
Dad's: '81 F150 Ranger XLT 4x4: Down for restomod: Full-roller "stroked 351M" w/Trick Flow heads & intake, EEC-V SEFI/E4OD/3.50 gears w/Kevlar clutches
|
Re: 3-D printer Fog light bezel has been made and shipped!
|
Administrator
|
I think the point I was trying to make is that fusing nylon dust is still joining discreet 'blocks' together.(no matter how small)
If you join an edge or corner the whole block is still fused to the main body, even though 1/2 or more might not be within the the desired boundry. So yeah, you have the rows of block.... Then you have to fact that the blocks are just being thrown at random towards the wall you want to build. There is no constraining form to keep them from jutting beyond where you want your wall.
Jim,
Lil'Red is a '87 F250 HD, 4.10's, 1356 4x4, Zf-5, 3G, PMGR, Saginaw PS, desmogged with a Holley 80508 and Performer intake. Too much other stuff to mention. |
Re: 3-D printer Fog light bezel has been made and shipped!
|
Administrator
|
Yes, I get your point about joining blocks. Thousands of them! So there will be registration issues.
On a slightly different subject, I just had a thought about another use for the bulk of the fog light bezel. In the pic below you can see the bezel off of Huck for the OD lockout switch. Why not make a "Bullnose style" bezel that says OVERDRIVE, takes the later switch, and slips into the same holes in the instrument bezel as the fog light bezel does? 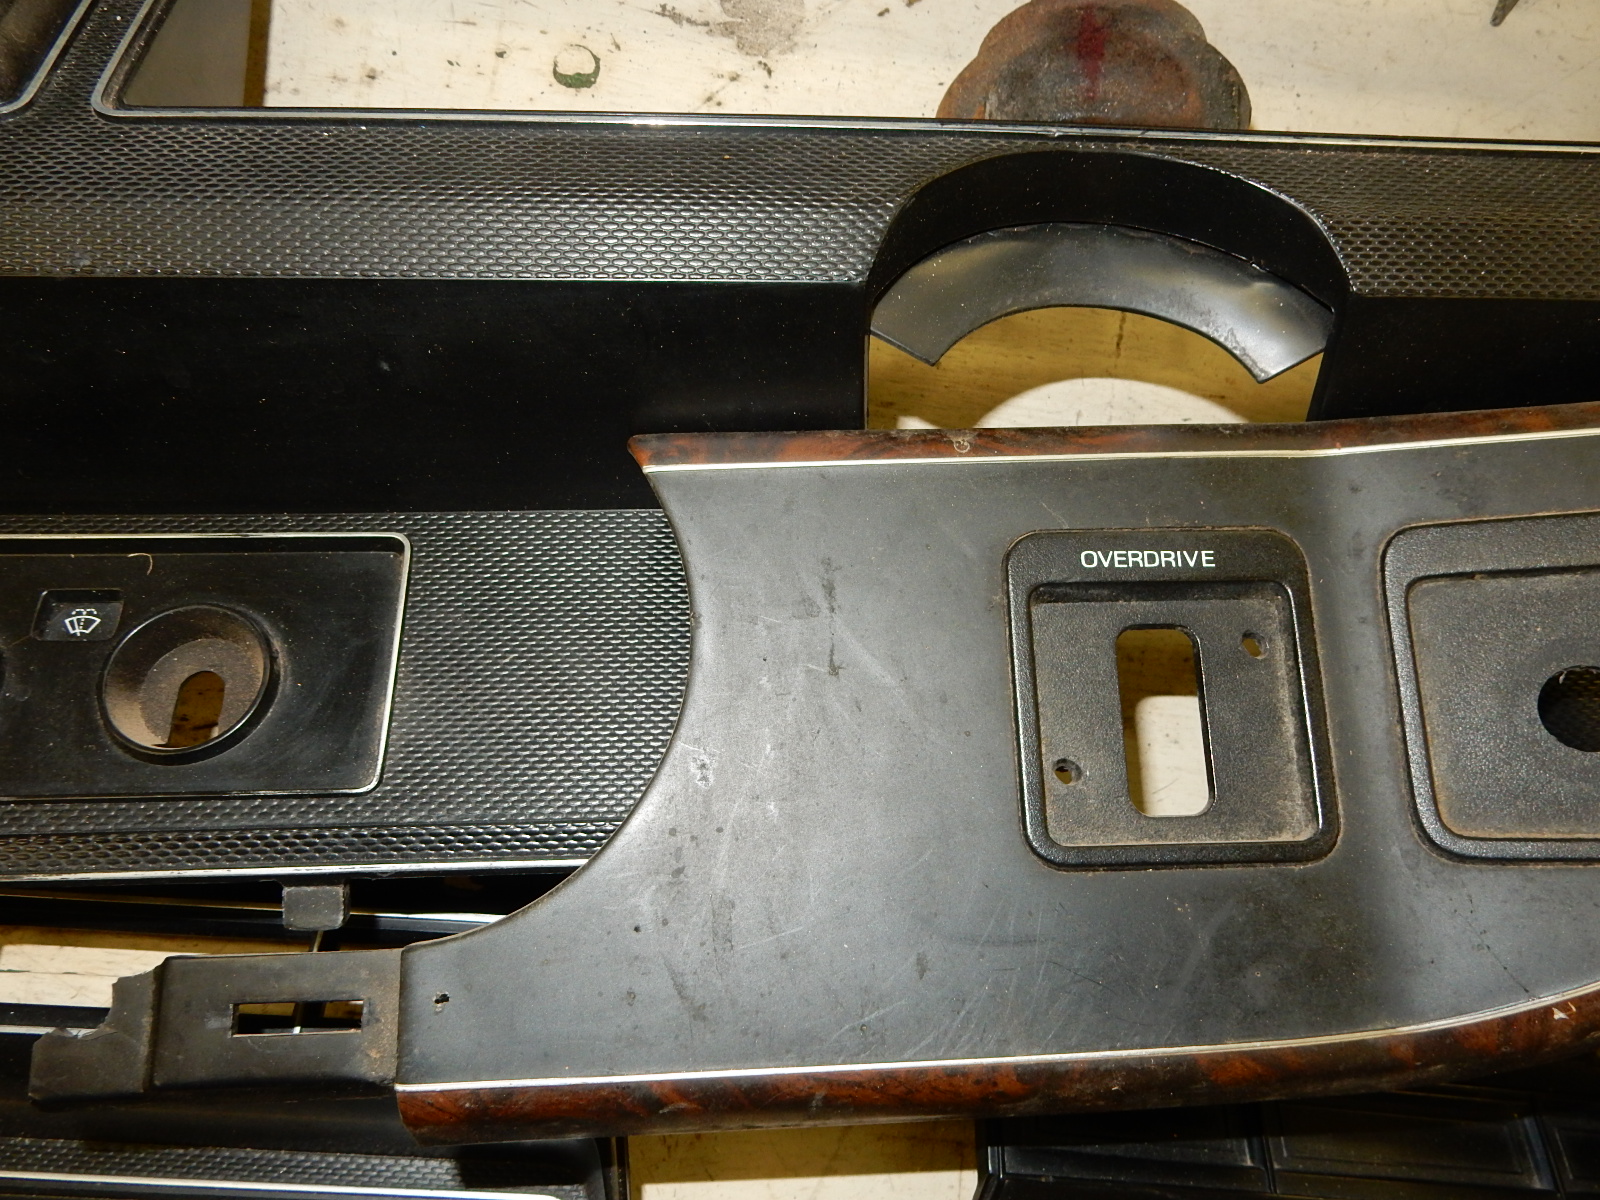
Gary, AKA "Gary fellow": Profile
Dad's: '81 F150 Ranger XLT 4x4: Down for restomod: Full-roller "stroked 351M" w/Trick Flow heads & intake, EEC-V SEFI/E4OD/3.50 gears w/Kevlar clutches
|
|
Administrator
|
That's a neat idea Gary! Justin on the diesel forum repurposed his tank selector to engage/disengage his DNE2 overdrive, and I was thinking of something similar for the GVOD on/off switch that adds clutter to the dash. An "overdrive" bezel would be great!
SHORT BED 4-DOOR DIESEL: 1986 F350 4x4 under construction-- 7.3 IDIT ZF5+GVOD
STRAIGHT SIX 4X4: 1981 F150 2wd to 4x4-- 300 I6 close ratio diesel T19, hydroboost brakes, Saginaw steering BIG F: 1995 F-Superduty under construction— converting to 6.9L IDI diesel ZF5+DNE2 |
Re: 3-D printer Fog light bezel has been made and shipped!
|
Administrator
|
Took a bit of time to look at the OD lockout switch and the bezel today. On the '90 the switch fastens to the back of the external bezel, which then attaches to the instrument bezel - much like the fog lamp bezel on the Bullnose trucks. And the switch itself gets pushed through a hole in the instrument bezel. So, I'll have to do something like that if I want to create a bezel for the switch on Dad's truck. However, I will also look at the trucks with a switch on the end of the shift lever.
Anyway, I ordered the fog lamp bezel printed in High Definition Acrylate, as shown below. Shipping is guestimated for January 30th.  Hi Gary,
Gary, AKA "Gary fellow": Profile
Dad's: '81 F150 Ranger XLT 4x4: Down for restomod: Full-roller "stroked 351M" w/Trick Flow heads & intake, EEC-V SEFI/E4OD/3.50 gears w/Kevlar clutches
|
|
Administrator
|
This post was updated on .
Gary, I misunderstood that you are looking at making a bezel to mount a specific switch. In my case all I would need is a fog lamp bezel where the words "fog lamps" would be replaced by "overdrive" and wire the device through a toggle switch rather than the one supplied by DNE or GV. I would like to use the 83/84 upshift indicator lens on the cluster bezel to indicate when the overdrive is engaged. These are the switches I would like to get away from:
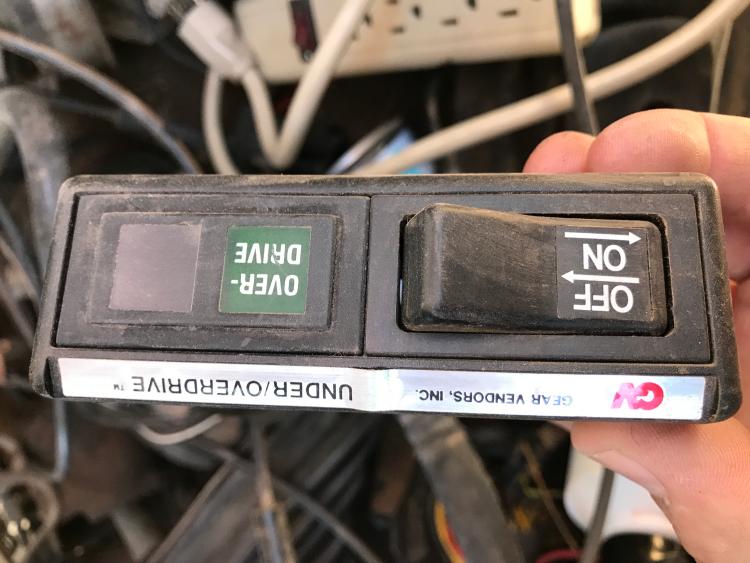 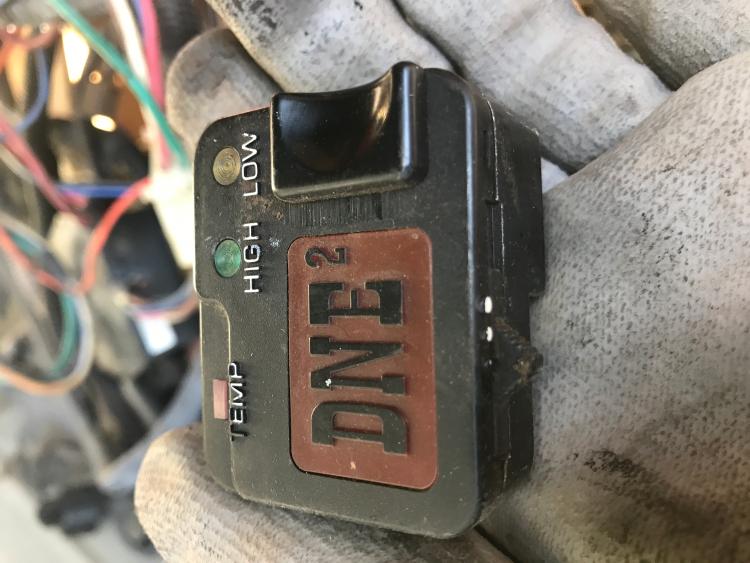 One step at a time though, I'm not totally sure that the '81 even needs more overdrive and for the diesel I may decide to re-gear instead. Overdrives accomplish an important goal but they are not necessarily the best solution 😐
SHORT BED 4-DOOR DIESEL: 1986 F350 4x4 under construction-- 7.3 IDIT ZF5+GVOD
STRAIGHT SIX 4X4: 1981 F150 2wd to 4x4-- 300 I6 close ratio diesel T19, hydroboost brakes, Saginaw steering BIG F: 1995 F-Superduty under construction— converting to 6.9L IDI diesel ZF5+DNE2 |
Re: 3-D printer Fog light bezel has been made and shipped!
|
Administrator
|
Good points about OD's and gearing. As for the lettering, easy peasy - but we still have to find the right switch, for either fog lamps or over drives.
Gary, AKA "Gary fellow": Profile
Dad's: '81 F150 Ranger XLT 4x4: Down for restomod: Full-roller "stroked 351M" w/Trick Flow heads & intake, EEC-V SEFI/E4OD/3.50 gears w/Kevlar clutches
|
Re: 3-D printer Fog light bezel has been made and shipped!
|
Administrator
|
In reply to this post by Ford F834
Thought of you guys [re: OD switch quest] when I saw this... I believe the switch might cancel after a certain time interval, though.
https://i.ebayimg.com/images/g/igUAAOSwgDRZcPDg/s-l1600.jpg https://www.ebay.com/itm/NOS-1985-1986-FORD-BRONCO-REAR-WINDOW-DEFROSTER-SWITCH-AND-BRACKET/372026518203?epid=1111255490&hash=item569e822abb:g:igUAAOSwgDRZcPDg&vxp=mtr |
Re: 3-D printer Fog light bezel has been made and shipped!
|
Administrator
|
Yes, I suspect it turns off after X minutes. And it is pricey, so I don't think I'd buy it hoping that it'll fit with our bezel. But, it is an option to put under the dash.
Gary, AKA "Gary fellow": Profile
Dad's: '81 F150 Ranger XLT 4x4: Down for restomod: Full-roller "stroked 351M" w/Trick Flow heads & intake, EEC-V SEFI/E4OD/3.50 gears w/Kevlar clutches
|
|
So I Just got back from a week of training in Atlanta (home office) at MacDermid Graphic Solutions, We have a tech-geek that "plays" with large format platters and ink-jet printers. What I didn't know is he has numerous 3-D printers at home and has been "side R&D-ing" them.
He came up to me and said "I heard you started in 3-D printing" and I told him of this situation and the font issue, He eagerly wanted the file to look at it. So I had the file on my laptop, so he now has it, He came back a few hours later and said there are definite problems of how they are applied to the bezel and can fix it. So after a few more hours he is still ironing out the font and how it is "mounted" to the face. he said he thinks he has a solution, he will split Gary's file in half (like an English muffin). Part 1, he will make 1/2 of base and studs, (studs up), then in a separate file, he will make the other half, face-up and then epoxy together. So lets see what happens with "version 2.1".....
1986 F-150 Flareside 4x4, 351, 4-v, ZF5 speed. AC, Cruise, Tilt, Slider, Digital clock, Radio, Lariat seat, Pwr doors/locks
|
Re: 3-D printer Fog light bezel has been made and shipped!
|
Administrator
|
Interesting. However, I have a file in which the letters are not attached to the base if that would help.
Gary, AKA "Gary fellow": Profile
Dad's: '81 F150 Ranger XLT 4x4: Down for restomod: Full-roller "stroked 351M" w/Trick Flow heads & intake, EEC-V SEFI/E4OD/3.50 gears w/Kevlar clutches
|
|
Administrator
|
This post was updated on .
In reply to this post by Gary Lewis
A guy on Facebook was messing with one of these defroster switches and it is on a timer circuit. They do come up in the junkyard but i don't think it would be adaptable for fog lights. I did notice that the '68 has an emergency flasher switch in the glove box that could potentially work, but it might not be much easier to find than the fog light switch unless someone makes an aftermarket replacement:
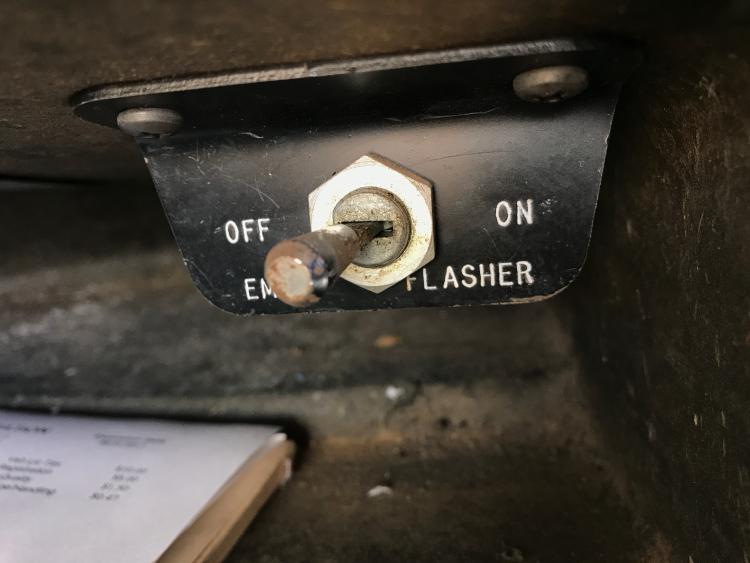 Gary the other factor with the overdrive switch bezel will be which instrument bezel I actually install in the truck. If it's a cloned stunt double then anything goes... but if the NOS one is used I'm not cutting it!!! 😬 Edit: the emergency flasher switch seems to be generally available on eBay with prices from $10 to $100 or new for about $45. The toggle is too short but could possibly be fitted with an extension... https://www.dearbornclassics.com/1968-ford-emergency-flasher-switch.html
SHORT BED 4-DOOR DIESEL: 1986 F350 4x4 under construction-- 7.3 IDIT ZF5+GVOD
STRAIGHT SIX 4X4: 1981 F150 2wd to 4x4-- 300 I6 close ratio diesel T19, hydroboost brakes, Saginaw steering BIG F: 1995 F-Superduty under construction— converting to 6.9L IDI diesel ZF5+DNE2 |
Re: 3-D printer Fog light bezel has been made and shipped!
|
Administrator
|
This post was updated on .
In reply to this post by reamer
If it is made in ABS, PLA, or acrylic he would be better off solvent welding them to create a monolithic part than trying to epoxy them together.
For that matter, epoxy doesn't usually stick well to Nylon either. Some (like G5 -with proper surface prep-) will hold, but again fusion is a better answer. (ETA) and with Nylon "fusion" would mean using heat.
Jim,
Lil'Red is a '87 F250 HD, 4.10's, 1356 4x4, Zf-5, 3G, PMGR, Saginaw PS, desmogged with a Holley 80508 and Performer intake. Too much other stuff to mention. |
Re: 3-D printer Fog light bezel has been made and shipped!
|
Administrator
|
Jonathan - I don't blame you for not cutting that beautiful bezel!
 But, there's gotta be a way to make stunt doubles. But, there's gotta be a way to make stunt doubles.  As for an add-on switch somewhere, I'm planning on placing some switches in the ash tray for Big Blue. Jim - I agree that gluing is a poor idea. I'm sending the file to Ron to see what his guy can do with it.
Gary, AKA "Gary fellow": Profile
Dad's: '81 F150 Ranger XLT 4x4: Down for restomod: Full-roller "stroked 351M" w/Trick Flow heads & intake, EEC-V SEFI/E4OD/3.50 gears w/Kevlar clutches
|
|
Still working on the new commercially available switch I got. It will handle up to 50 amps.. I have not mocked up the switch/bezel onto the spare gray dash superstructure I have...
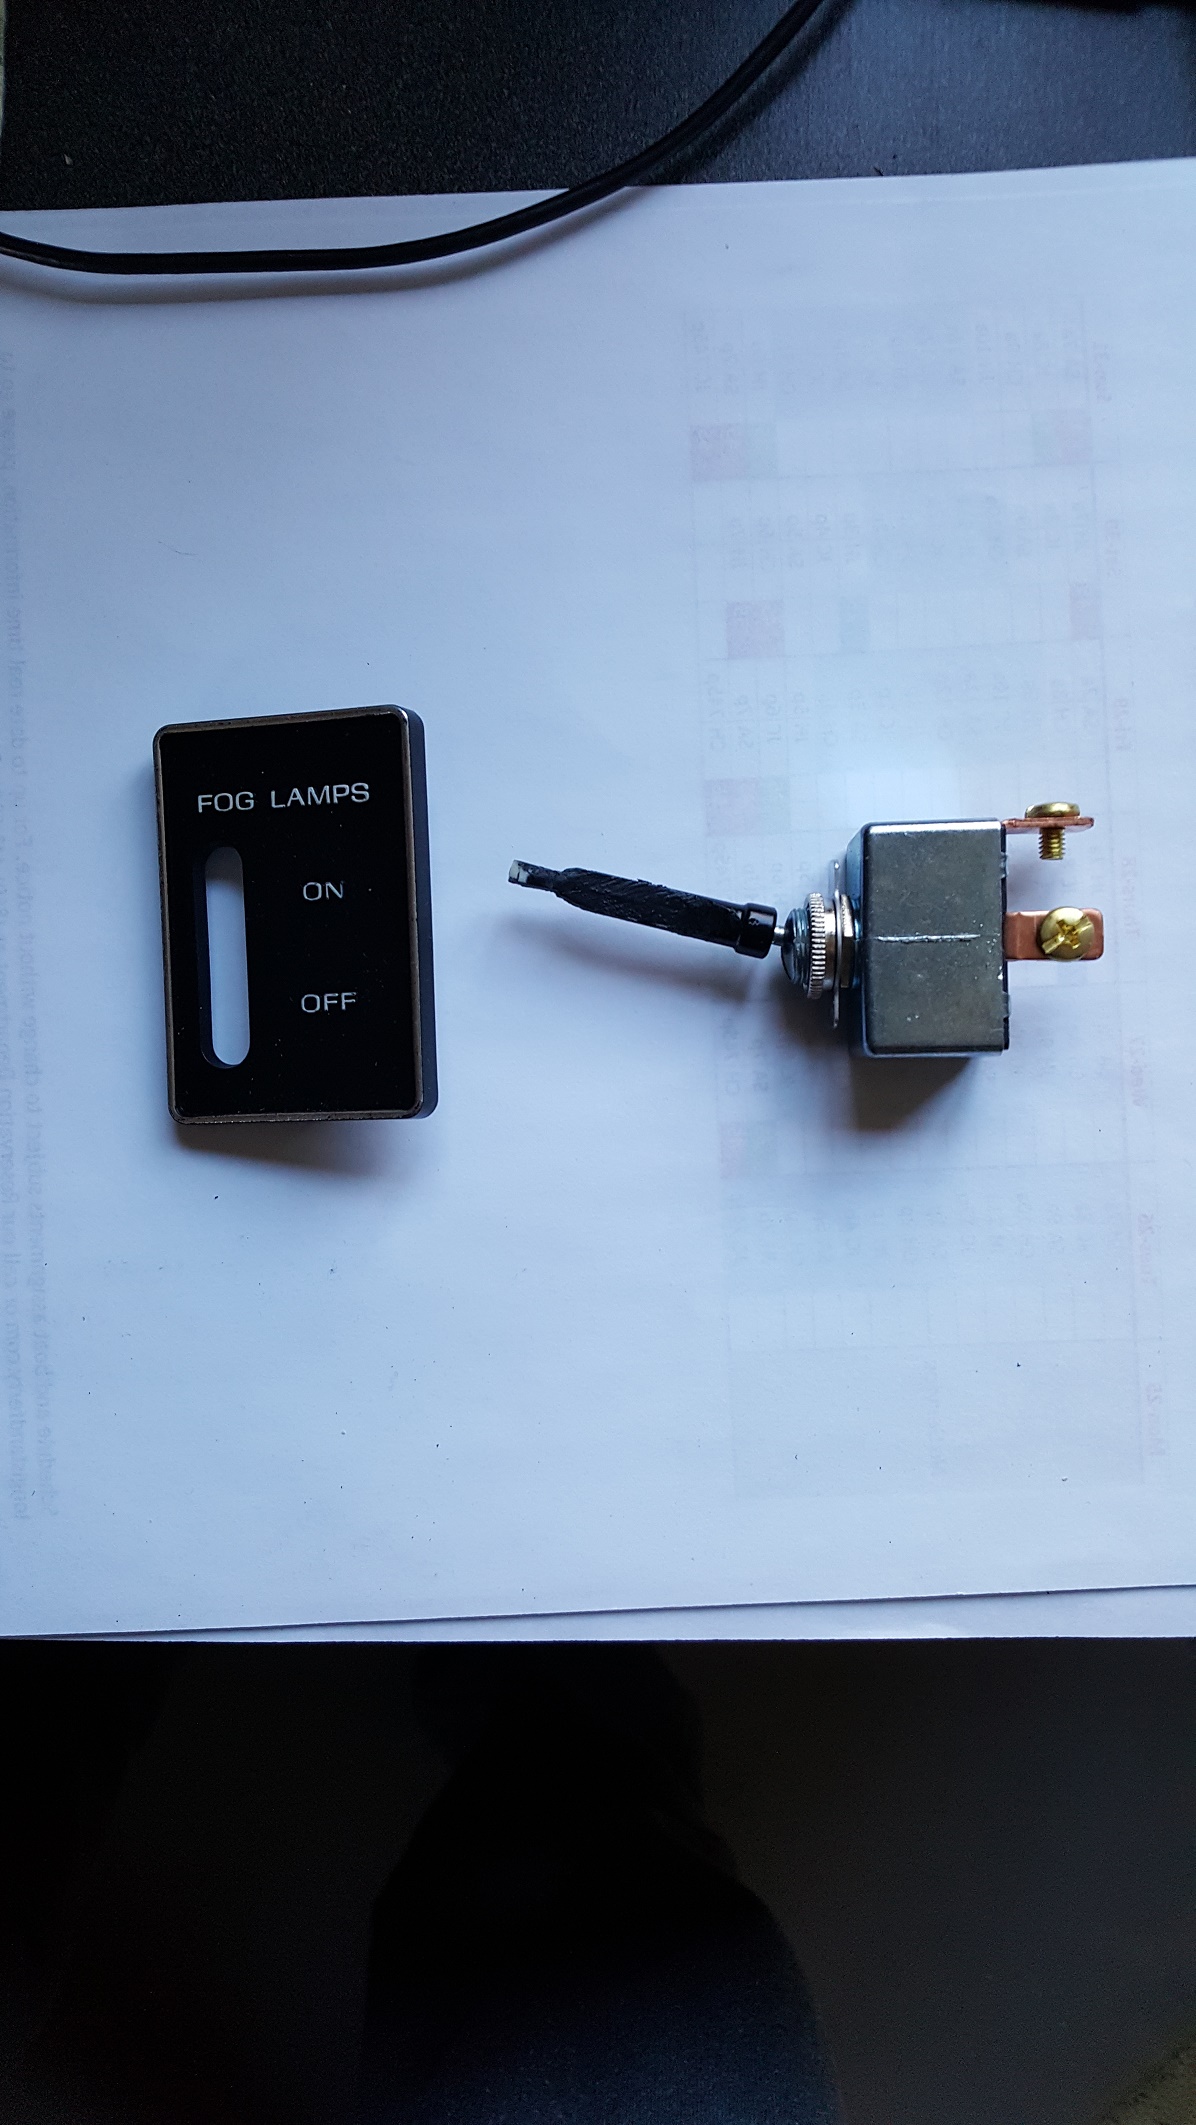
1986 F-150 Flareside 4x4, 351, 4-v, ZF5 speed. AC, Cruise, Tilt, Slider, Digital clock, Radio, Lariat seat, Pwr doors/locks
|
| Edit this page |

