The Truck of Doom: An Occasional Build Thread
|
Administrator
|
The one (cowl seam) in my 86 was bad enough to require cutting out and replacing sections of but as long as it isn't that bad, here is how I would go about it after that experience as well as taking care of the 80.
Remove cowl, wiper arms/motor and clean the channel. I found that a lot of wire wheels on a dremel tool with the flexible extension worked great. This is after removing any of the old sealant that you need to. The wire wheels are a little slow and you still end up with scrapes on your hands but doable. Removing the wiper arms and motor gives you more room and another hole to work through or shine a light in. Once you get it cleaned out and any flaking rust out wipe it down with degreaser. You can likely see where you have the leak at this point. I've never used the por 15 sealer but with the liquid I would stick some tape over the rusted out holes under the dash as best you can. Removal of the dash pad will help some areas. Then brush the por15 in the channel. The tape is to prevent it all from running down the firewall. This stuff is runny and will soak into the seam. Once it is dry tape over the windshield and cover as much as you care about. Then spray the channel liberally with aerosol flex seal. I am really impressed with this stuff. Anyways, that's how I'd go about it next time depending upon the severity. I really like the idea of a por 15 seam sealer (assuming it's a caulk like product) but getting that in the channel may be a trick. In the 86 a PO had tried unsuccessfully to silicone the seam at some point. Best guess is that they put a bunch in a gloved hand and smeared it around blindly. It was kind of like that bathroom scene in Daddy Daycare... I would also do the 'hole in cowl for wiper motor bolt access' mod while you have the cowl off.
Scott
'Camano' 1986 F250 Supercab XLT Lariat 460/C6 'Chanute' 1980 F350 C&C 400/NP 435 - Gin Pole But there ain't nothin' wrong with the radio |
|
That's a solid maybe. May could without removing the trim, not sure. I know the trim puts pressure on the cowl. I didn't attempt it because I didn't want to risk hurting the trim as I needed it for my truck.
Tessa - 1982 F-100 - 300 6 with a mystery build, C6, new(to her) forged front end and not-so-stock emissions wearing a 1985 F-150 Texas Chainsaw style.
|
|
In reply to this post by Gary Lewis
That's what I was afraid of...how does one remove the trim without damaging it? I saw in the documentation that there's 9 clips under that lower piece, but I couldn't find anything showing what those clips look like, or how to disengage them. Yep! I remembered that post, and found it yesterday...I'll be using it as a guide for the wiper work. I'm hopeful that mine won't be as bad as yours - the front of my truck was garaged for most of its previous life, so I suspect I just have dried out sealant to deal with. As to the 'hole in cowl' mod you're referring to, I haven't heard of that. I'm guessing there's a bolt that holds the wiper motor in place that can only be accessed with the cowl panel removed? |
|
Administrator
|
I used a small plastic pry bar to remove my trim.
Here is the wiper motor mod: https://www.ford-trucks.com/forums/1457308-grief-b-gone-for-a-wiper-motor-change.html I would read the thread and decide if it's worth if for you. I did it since the cowl was off and was getting repainted anyways. I don't know if I would go out of my way to do it though as I had to change the wiper motor on the 80 when I first got it and don't recall it being a big deal.
Scott
'Camano' 1986 F250 Supercab XLT Lariat 460/C6 'Chanute' 1980 F350 C&C 400/NP 435 - Gin Pole But there ain't nothin' wrong with the radio |
|
^yeah small plastic pry bar from a harbor freight set of trim and molding removal tools worked well for me. Hooked it from the glass side and lifted straight up where the clips are. Helps to ease up on the trim with your other hand. I started with the top corners and worked over and down, did the bottom last. I can get a picture of the clips when I go out to the shop. Bottom ones are plastic and slide into the trim. Top and sides are small metal clips and only one edge hooks into the trim. The metal clips slide straight over metal t studs. Bottom clips have a small hook and slide down into a slot on metal clips.
Tessa - 1982 F-100 - 300 6 with a mystery build, C6, new(to her) forged front end and not-so-stock emissions wearing a 1985 F-150 Texas Chainsaw style.
|
Re: The Truck of Doom: An Occasional Build Thread
|
Administrator
|
^^x2 But I used two of the plastic pry bars, one from the glass side to start and one from the cowl side to spread the load.
Gary, AKA "Gary fellow": Profile
Dad's: '81 F150 Ranger XLT 4x4: Down for restomod: Full-roller "stroked 351M" w/Trick Flow heads & intake, EEC-V SEFI/E4OD/3.50 gears w/Kevlar clutches
|
Re: The Truck of Doom: An Occasional Build Thread
|
Administrator
|
In reply to this post by kramttocs
I too, wonder if it's worth it.
My wiper motor died last year. I don't expect to be alive, let alone driving a gas guzzling truck thirty three years from now. I think if your wiper motor is regularly failing, you have a deeper issue that you're not addressing.
Jim,
Lil'Red is a '87 F250 HD, 4.10's, 1356 4x4, Zf-5, 3G, PMGR, Saginaw PS, desmogged with a Holley 80508 and Performer intake. Too much other stuff to mention. |
|
Am I correct in assuming that the entire windshield trim needs to be removed? Looking at how the pieces are lapped, it doesn't look like the lower segment alone can be removed without damage.
|
|
It would probably be easiest to remove all of it starting with the top corners. I'm going to try uploading pictures.
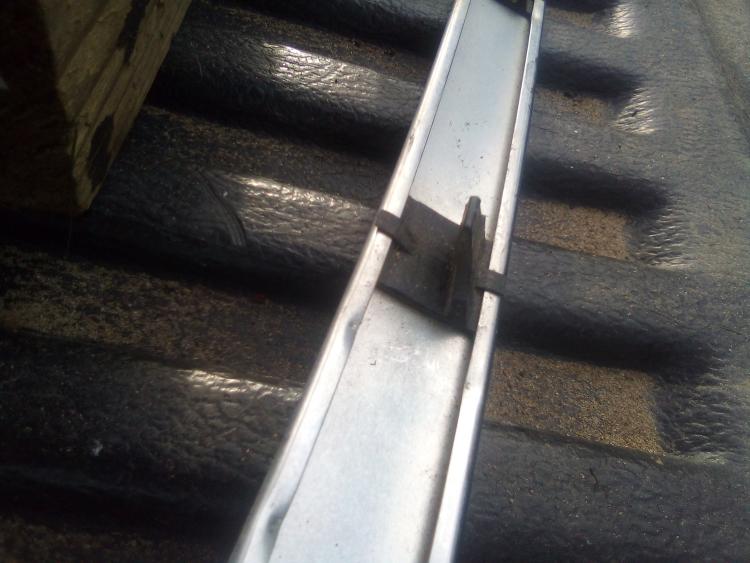 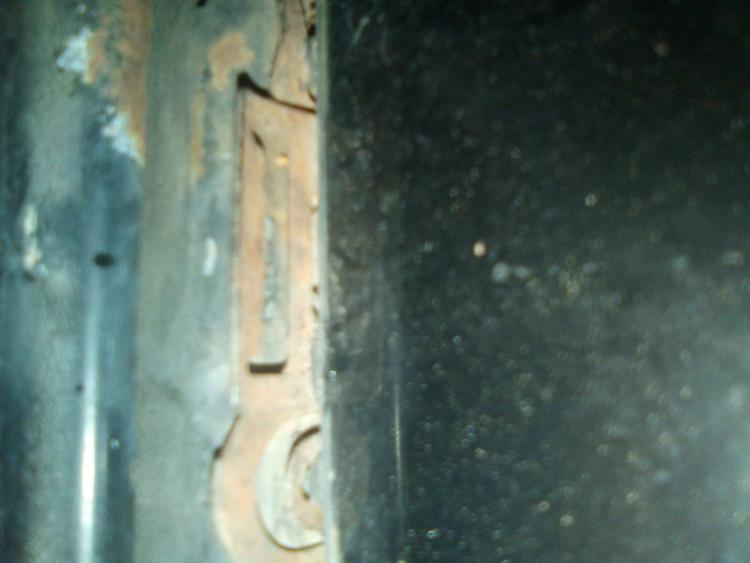 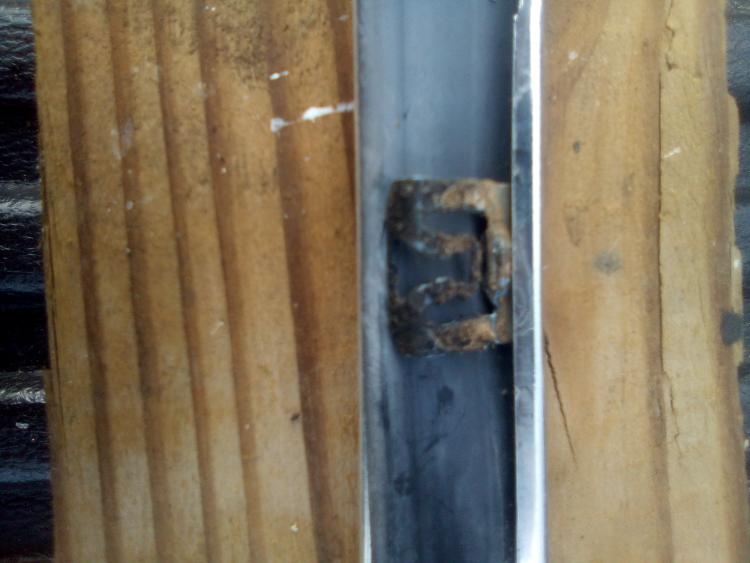 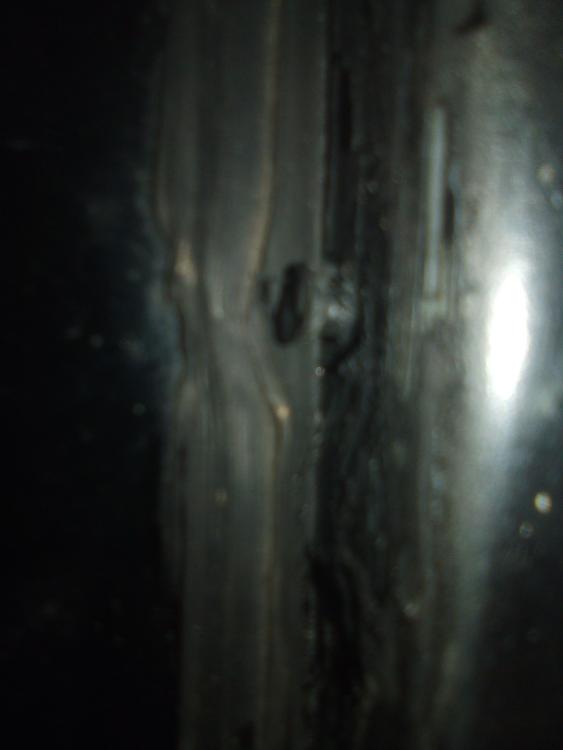 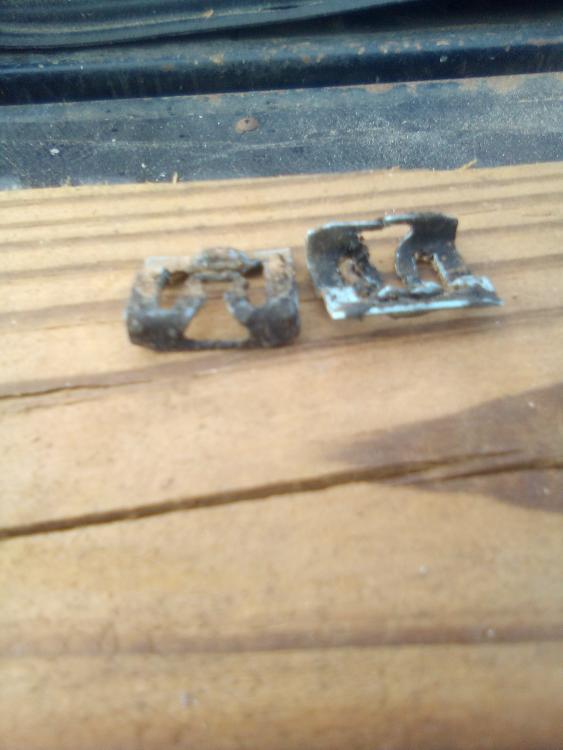 *edit* looks like it doesn't show photo descriptions. Top photo is bottom plastic clip. Right side is the bottom of the trim. That plastic has a little bit of a hook on it to lock into the meal clip shown in the second photo. Next is the side and top clips shown how the fit into the trim. Only hooks under one side. Next is the stud those clips slide over. Last photo is two profiles of the top and side trim clips.
Tessa - 1982 F-100 - 300 6 with a mystery build, C6, new(to her) forged front end and not-so-stock emissions wearing a 1985 F-150 Texas Chainsaw style.
|
|
Administrator
|
In reply to this post by Dorsai
I didn't remove the trim on either of my trucks when removing the cowl. It can be done with both trim and hood in place. It requires moving the hood up and down in a bit of a dance and I placed tape/paper over a lot of the points where contact was possible.
Scott
'Camano' 1986 F250 Supercab XLT Lariat 460/C6 'Chanute' 1980 F350 C&C 400/NP 435 - Gin Pole But there ain't nothin' wrong with the radio |
|
Thanks for the good info guys...especially for those photos! I may try to start pulling trim this evening.
|
|
Since (like just about everybody else in North America) I have nothing to do this weekend, I decided to futz with my truck. So the first thing I did was remove the cowl - I was hoping to be able to do this without messing with the hood, but I was never able to find a hood position that would let me work the cowl off. So I loosened the hood bolts, slid it about a half-inch forward, and was able to get the cowl off without further difficulty.
The first thing I noticed was this:  Please tell me this isn't the factory-recommended way to install an antenna? The coax makes a way too sharp bend in order to go down the hole and then back up into the base of the antenna, and in my case this resulted in a broken outer shield and exposed copper. I certainly understand why my radio reception is so poor. Anyway:  Plenty of trash and debris in there, including this lovely mud dauber nest that was perched on top of the wiper motor:  Now here's where things get interesting. This is looking down at the passenger side cowl drain through the antenna hole, just inboard of the fender: 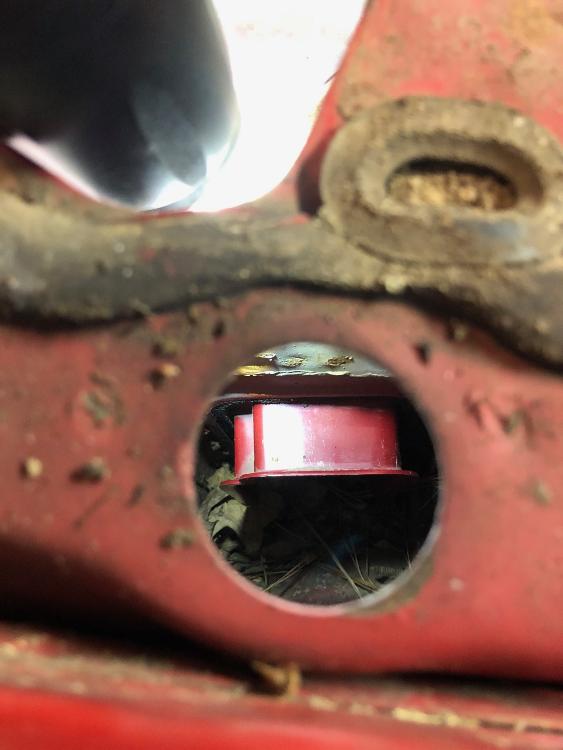 First, what is that red plastic thing extending into the space? It looks like it's coming in from the cabin interior, and is even sealed with a nice foam gasket, but what is it? At first I thought it was some kind of air duct, but feeling around underneath the lip it appears to be sealed off. Also, how does one actually get down to the drain to clean it out, and perhaps completely remove the rubber drain outlet? I can reach my hand down to roughly where that plastic thing is (and the same thing is on the driver side as well), but no farther. Plus, I'd like to get in there with some sealant and hopefully fix my cabin leak. Surely I don't have to pull the fenders as well? |
Re: The Truck of Doom: An Occasional Build Thread
|
Administrator
|
Glad you got the cowl off w/o damaging the hood. That's tough to do.
But that's NOT the way the antenna is supposed to be installed. Did you truck ever make it to Florida? As for the debris, that's pretty much normal. But I do not know what the red thing is. Do you have vents in the kick panels? If not, pull the kick panel and the plate behind it to see what's there. And, you may be able to clean things out that way as well.
Gary, AKA "Gary fellow": Profile
Dad's: '81 F150 Ranger XLT 4x4: Down for restomod: Full-roller "stroked 351M" w/Trick Flow heads & intake, EEC-V SEFI/E4OD/3.50 gears w/Kevlar clutches
|
|
The red thing is the backside of the factory fresh air vent. When you pull the kick panel and the vent, you should be able to reach in with your hand or a shop vac and get the rest of the debris out. You may be able to reseal the area from here as well.
|
|
In reply to this post by Gary Lewis
I was actually more worried about damaging the cowl; that metal is thin and floppy. My paint is shot in any case, another scrape on the hood wouldn't be a big deal, but I managed to avoid it anyway. I'm still hoping to repaint the truck this year, although with all the economic uncertainty I may need to put that off a bit longer...we shall see. No...but as I've documented elsewhere in this thread, Florida Man does have a brother Oklahoma Man who is also in the business of abusing trucks. Maybe even multiple brothers (Oklahoma Men?) - one who worked at Don Thornton Ford, and another one that worked at whatever hack audio shop my grandmother took the truck to to get the radio added. Surprisingly, those red things *are* the kick panels. I had them out last year for cleaning, but I didn't recall the protrusion that can be seen in the photo. Plus, in my mind's eye the kick panels were farther down; they are in fact near the floor, but the floor rises up at the front of the cab. Big 'duh' on my part here. I may pull them again to do more cleaning; I cleaned out behind them when I had them out last time, but I don't recall if I was able to reach all the way down. Could be a job for that skinny kid of mine, hmmm. Speaking of cleaning and the future avoidance thereof...have you (or anyone reading this) ever applied window screen to the underside of the cowl panel, as I've heard done? Seems like a good solution, I'm just wondering what the best way to apply it is. |
Re: The Truck of Doom: An Occasional Build Thread
|
Administrator
|
I haven't done the screen, but plan on it. My paint/body man said there's a black plastic screen that he has used.
Gary, AKA "Gary fellow": Profile
Dad's: '81 F150 Ranger XLT 4x4: Down for restomod: Full-roller "stroked 351M" w/Trick Flow heads & intake, EEC-V SEFI/E4OD/3.50 gears w/Kevlar clutches
|
|
So...it's been a month since I pulled the cowl on the truck, and I've been thinking that maybe it's time to get things done so I can stop driving around looking like a hillbilly.
First things first...anyone have an idea what this bracket is for?  It sits under the cowl, just aft of the passenger side hood hinge. It obviously serves no function on my truck, but I'm having a hard time imagining what purpose it would serve on *any* truck. On to the wipers. This is a shot of the wiper motor arm, with the linkages for the two wipers still attached. Those linkages rattle around on that shaft - is this normal? Or should there be some kind of a bushing on there?  Finally, what I'm most interested in...cleaning out my drains. The good news is that I don't think I have a true leak into the cabin; after some experimentation with a garden hose as well as a few visits during rainstorms, I've realized that the water in my cabin comes from the water level in the drain area rising to the level of the pass-through for the kick panel vents, and coming in that way. I had thought I'd cleaned out the area when I had the vents out last year, but it was only the surface trash I got; that was on top of several inches of solid dirt sitting in there. I've gotten most of that out now, but I still don't have a clear idea of the next step. My big problem is that I can't see the drain, which I understand to be kind of a plastic insert at the bottom of the cowl channel, behind the front wheel. I tried to get a look at it from below, but couldn't find it - do I need to remove the plastic wheel well lining to get to it? And, can it be removed from below, or do I have to fish it out from above? If anyone has a clear photo or diagram of how the drains are put together, that would be super helpful. |
Re: The Truck of Doom: An Occasional Build Thread
|
Administrator
|
Matthew,
A shield can attach there so debris doesn't have a straight shot to the drain on that side. Last year I posted a bunch of pictures of my wiper assembly and removing the rubber drains (along with the muck behind them) Lemme see about the dates in the WHYDTYTT
Jim,
Lil'Red is a '87 F250 HD, 4.10's, 1356 4x4, Zf-5, 3G, PMGR, Saginaw PS, desmogged with a Holley 80508 and Performer intake. Too much other stuff to mention. |
Re: The Truck of Doom: An Occasional Build Thread
|
Administrator
|
Start Here Matthew.
http://forum.garysgaragemahal.com/WHYDTYTT-What-Have-You-Done-To-Your-Truck-Today-tp148p34214.html If you've got any questions, fire away.
Jim,
Lil'Red is a '87 F250 HD, 4.10's, 1356 4x4, Zf-5, 3G, PMGR, Saginaw PS, desmogged with a Holley 80508 and Performer intake. Too much other stuff to mention. |
Re: The Truck of Doom: An Occasional Build Thread
|
Administrator
|
I also have a few pictures of the driver side drain with the fender cut away from last week when I was chasing my leak.
Jim,
Lil'Red is a '87 F250 HD, 4.10's, 1356 4x4, Zf-5, 3G, PMGR, Saginaw PS, desmogged with a Holley 80508 and Performer intake. Too much other stuff to mention. |
| Edit this page |

