Salan's 1980 Something
|
Managed to finish up the cab mount patches today. The passenger side wasn't too bad, so I just ground out a small channel where the pitting was and then filled it with weld. The POR15 will coat it and fill any remaining voids.
I also knocked out the hole on the passenger side. There were two smaller holes underneath that could be seen inside the cab. I welded those up on both sides, treated the surface rust, and then laid a patch in. I threw two plug welds in since the sheet metal is spot welded along this area. I still have one more cancerous area to knock out at the bottom, but once that's done I can move on to the POR15 and then work on the lower fender mounts (bricknose to bullnose mod) and then replace the body bushings. I don't think there's anything else I need to do with the cab flipped back, so I will likely drop the cab back down once the remaining tasks are completed. 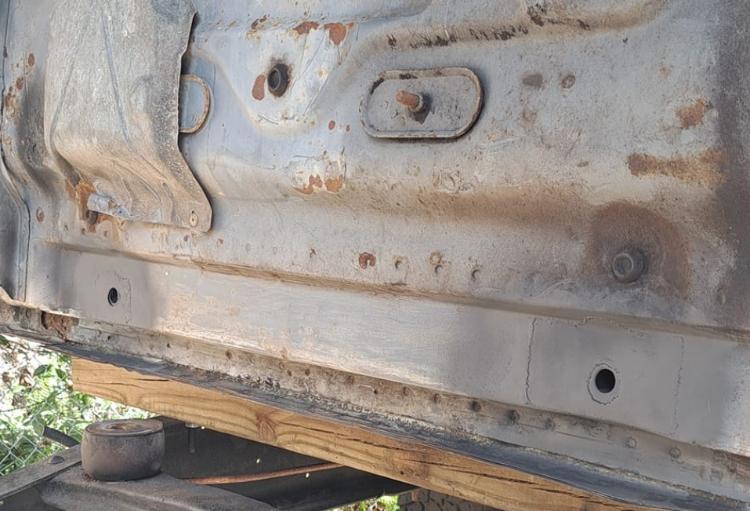 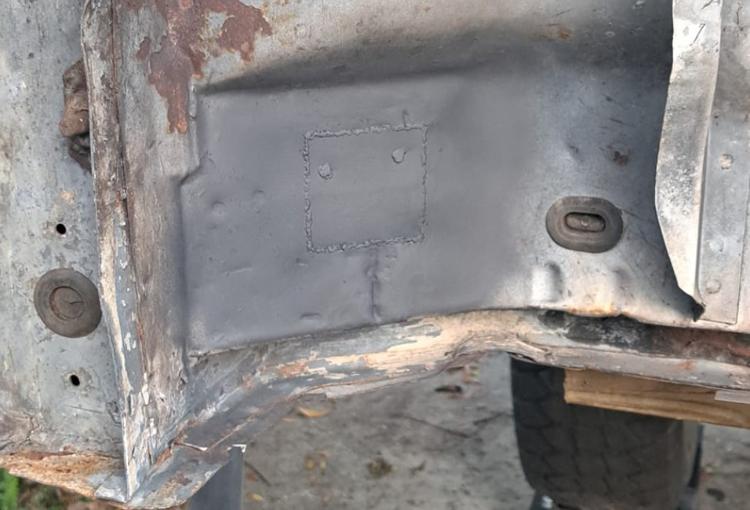
|
|
Administrator
|
Excellent progress, Shaun. You seem to know how to don’t, very well. Want to tackle my SiL’s floorboards?

Gary, AKA "Gary fellow": Profile
Dad's: '81 F150 Ranger XLT 4x4: Down for restomod: Full-roller "stroked 351M" w/Trick Flow heads & intake, EEC-V SEFI/E4OD/3.50 gears w/Kevlar clutches
|
|
Thanks Gary! I was able to see how these sections rusted out, which helped me make sure I took the steps to keep it from happening again.
I can't say I would tackle this on a truck other than my own since I'm definitely not an expert. I'm just fortunate enough to have grown up in and around auto body shops so I have some idea of what to do to fix issues such as this in a way that will last. It's definitely not show quality, but it sure will outlast me. |
|
Well after a few month hiatus, I finally welded in the last patch to the back firewall. I still need to seam seal and protect (paint) the entire floor, but once that's done I can move on to the lower fender mounts.
I plan on dropping the cab back down after that as I'm tired of seeing the truck in 100 pieces. 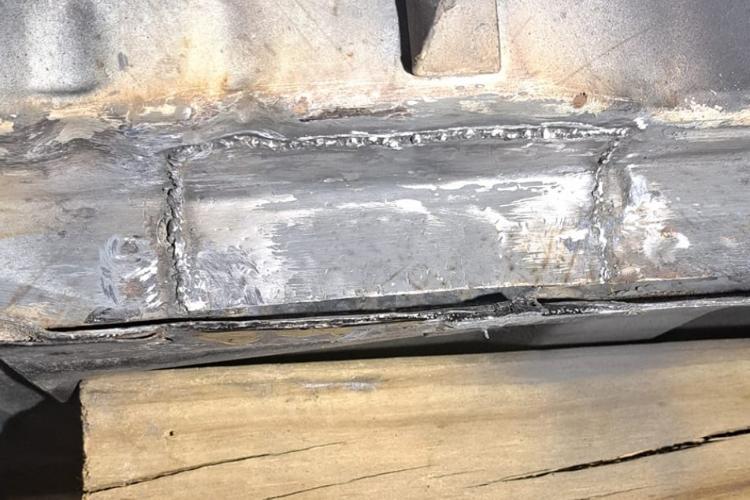
|
|
Administrator
|
Progress!!

Gary, AKA "Gary fellow": Profile
Dad's: '81 F150 Ranger XLT 4x4: Down for restomod: Full-roller "stroked 351M" w/Trick Flow heads & intake, EEC-V SEFI/E4OD/3.50 gears w/Kevlar clutches
|
|
Administrator
|
In reply to this post by salans7
Awesome to see you're ready to move on.
Your welding has improved a bit Shaun! A flap disc would hide 1,000 sins. 
Jim,
Lil'Red is a '87 F250 HD, 4.10's, 1356 4x4, Zf-5, 3G, PMGR, Saginaw PS, desmogged with a Holley 80508 and Performer intake. Too much other stuff to mention. |
Thanks Jim! If I really took my time, I could lay some pretty good beads. Alot of these welds are at uncomfortable angles and the part of me that knows this is just a farm truck isn't worried if they look strange. I just want them to have good penetration and not have any gaps. I would love to flap disc this but it's in a channel so I can't get a regular flap disc in there. I need one of these: 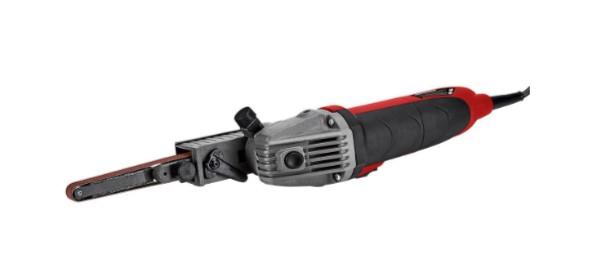
|
|
Administrator
|
They make them that wrap over the edge of the disc, so you have a tangent sanding surface. (evidently, curved or corner flap disc is the term)
It might not reach all the way into a 90° corner, but it will leave like a 3/16 fillet.
Jim,
Lil'Red is a '87 F250 HD, 4.10's, 1356 4x4, Zf-5, 3G, PMGR, Saginaw PS, desmogged with a Holley 80508 and Performer intake. Too much other stuff to mention. |
|
Today I found one more spot of rust that I needed to patch with the cab flipped back. I missed it because the area was thin due to pitting. I went to prep the back of the cab for paint, and the three small holes said peek-a-boo when I ran the flap disc over them. Set me a back a little, but I'm glad I found it prior to painting the bottom.
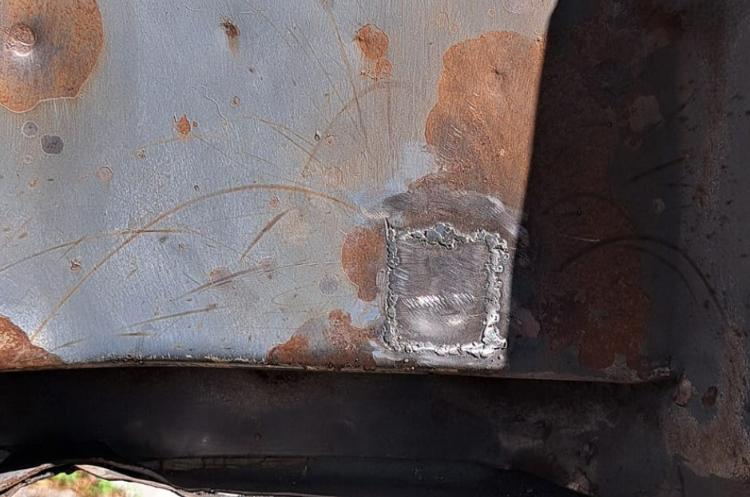 Once that was finished up, I spent the rest of the day priming and painting all of the areas I repaired to protect them from further corrosion. I'm gonna leave the rest of the cab floor for a later date since it will be easier to get to than the back part of the cab that ends up hidden by the rear cab mount crossmember. 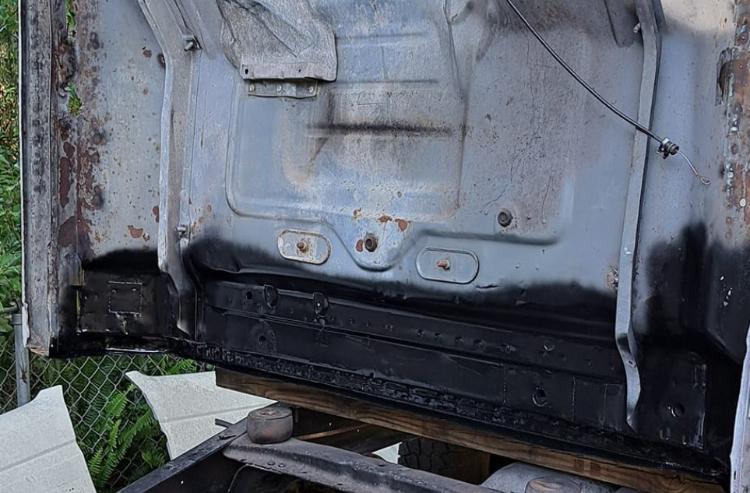 I'm going to try and get the cab back down onto the body mounts tomorrow, and then I'll likely start working on the rust in the kick panel areas. I've got a spot in the cowl I'd like to tackle as well but have to plan that out as I may need to get creative to tackle that one. Once that stuff is done, then I can work on the rockers. Once those are complete, I do see some bubbling paint on the interior cab roof, so I'll address that as well and probably end up finding more corrosion once I dig out the seam sealer in the rain gutters or whatever they're called. Little by little I'm getting there. 
|
|
Administrator
|
Progress is Gooooood!

Jim,
Lil'Red is a '87 F250 HD, 4.10's, 1356 4x4, Zf-5, 3G, PMGR, Saginaw PS, desmogged with a Holley 80508 and Performer intake. Too much other stuff to mention. |
|
Administrator
|
Yes, progress is GOOD! And you are making progress, little by little.

Gary, AKA "Gary fellow": Profile
Dad's: '81 F150 Ranger XLT 4x4: Down for restomod: Full-roller "stroked 351M" w/Trick Flow heads & intake, EEC-V SEFI/E4OD/3.50 gears w/Kevlar clutches
|
|
Spent the afternoon bringing the cab down. Everything went smoothly and I'm thankful for that. I don't think I'll ever tip a cab back that way again because I was N-E-R-V-O-U-S. If there ever was a next time, I would lift the cab up, roll the frame out, lower the cab to the ground, and THEN flip it.
But it's done and I'm happy to have the cab back down where it belongs.  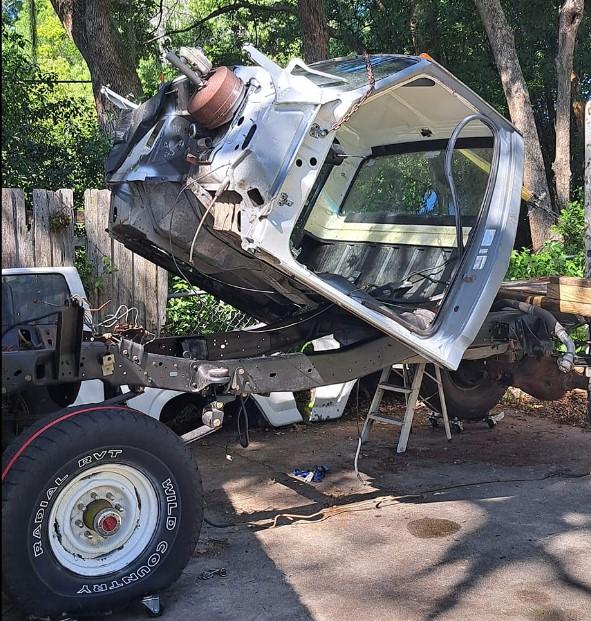 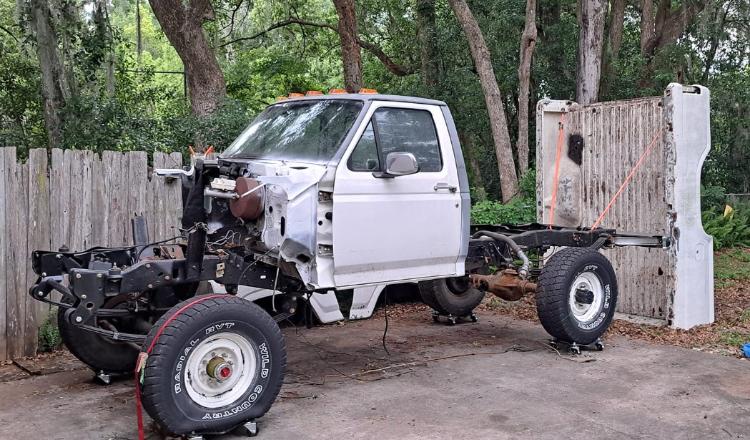
|
Cooool!  
Jeff / 1984 F350 Crew Cab 4x4/5.8L w351 4V/ T18/ D50 4.10 front/ 8' bed.
Restored 2019-2022. Nicknamed «Big Brother 1984», due to its soooo-looong shape & nod to George Orwell's 1984 famous novel. |
|
Started cutting out the rust from my passenger kick panel tonight.
First impressions, it's not that bad. It definitely will require some ingenuity since the kick panels have layered joints between the floor, kick panel, and the rockers at the bottom, but I should be able to work with that. The cab mount box is untouched, and it looks like the inside of the kick panel is untouched as well. The crud in the second photo is some sort of foam that I assume Ford shot up into that area. I've found it in all four corners of the cab now. Not really sure what the purpose was, but should I do something similar when I piece all of this back together? 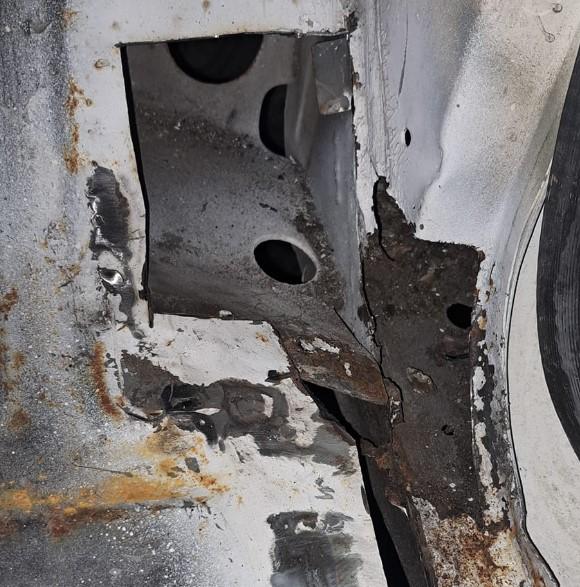 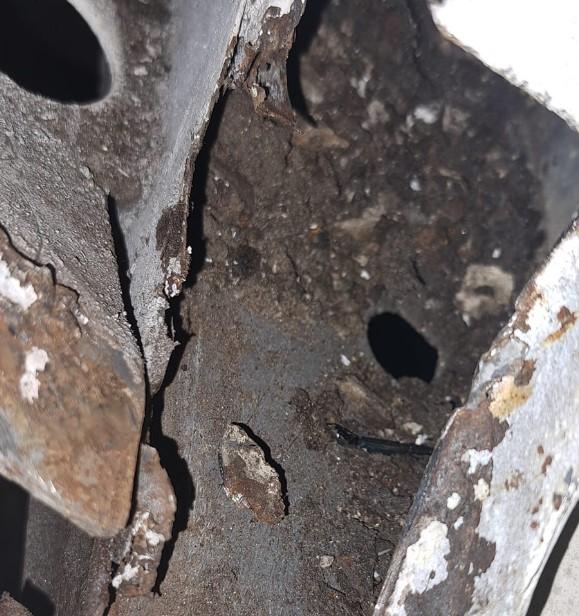
|
|
This post was updated on .
Spent half of today knocking out my lower fender mounts. This is a bricknose truck, so the lower fender mounts were different than those on a bullnose.
I had to modify the lower mounts to accept the vertical bolt, so I welded a plate to the bottom of the cut-down bricknose bracket and then drilled and reamed the hole for the bolt to pass through. Everything test fit well and I have plenty of adjustment. Bullnose mount: 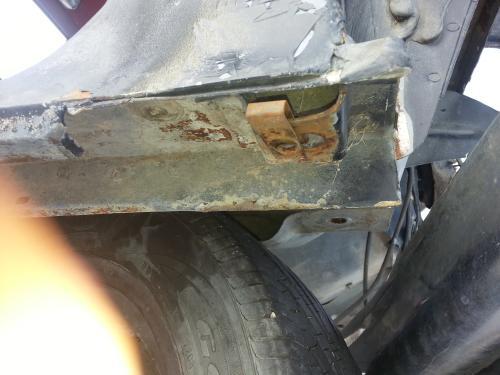 My modified bricknose mount: 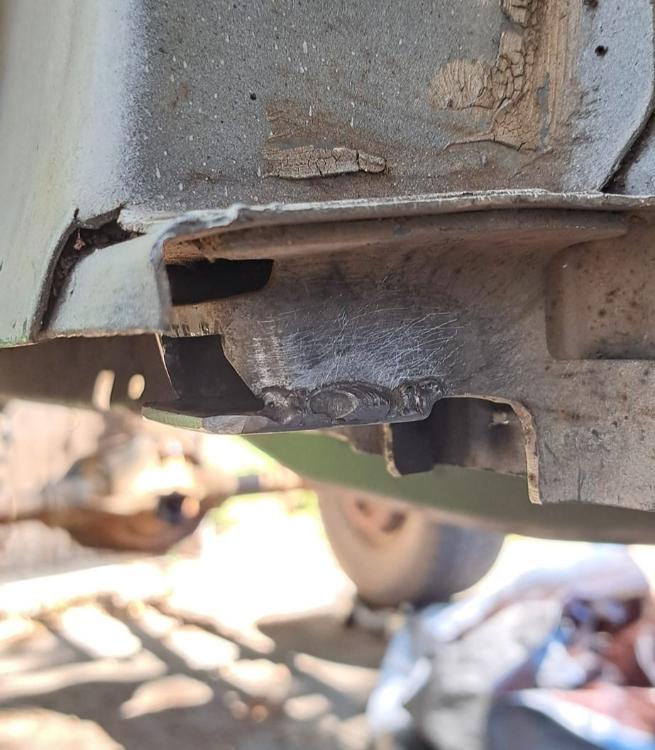 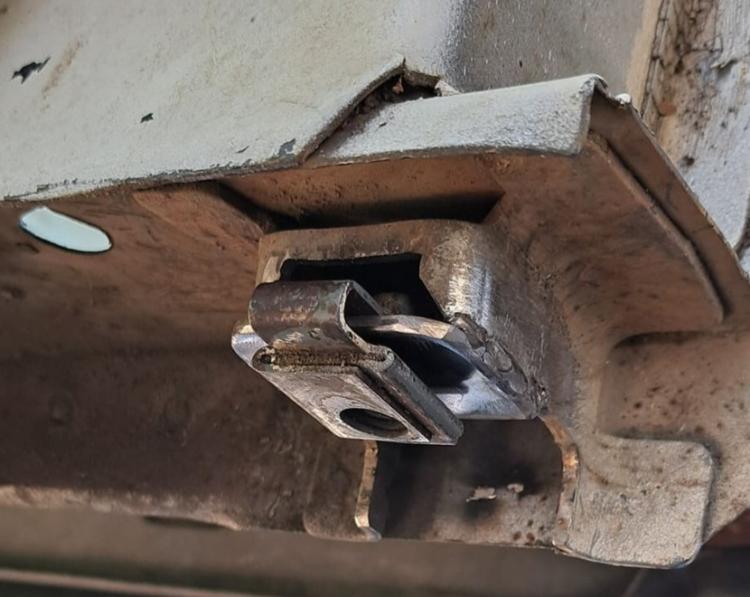 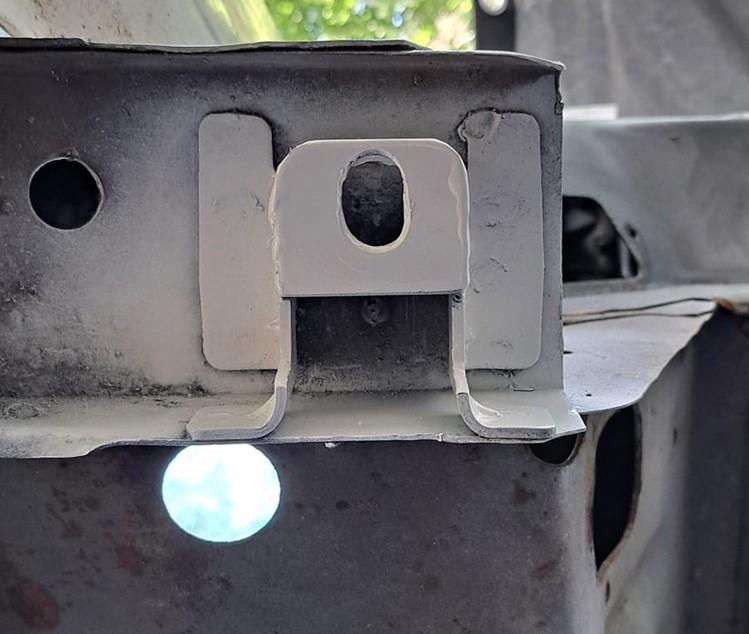
|
|
In reply to this post by salans7
any chance that you have another cab to source the panels from . i dont know of a source of patch panels for the inner area of the vertical/ inner rocker area. floor pan, and outer rockers yes.
|
I did at one point, but I think these areas were rusted out on that one too. I have old rusted-out doors that I have been using for patch panels and have just been hand-forming the sheet metal from those to fit and will likely do the same for the kick panel area. |
|
Administrator
|
In reply to this post by salans7
Good work, Shaun!

Gary, AKA "Gary fellow": Profile
Dad's: '81 F150 Ranger XLT 4x4: Down for restomod: Full-roller "stroked 351M" w/Trick Flow heads & intake, EEC-V SEFI/E4OD/3.50 gears w/Kevlar clutches
|
Thanks Gary! Feels good to check things off the list. |
|
This post was updated on .
This weekend's project was to start working on plugs for the doors where the old mirrors were. The doors on my truck are from a 95-97 with the extra support at the bottom (my cab is a bricknose cab which is why the doors fit). They originally came with the aero mirrors, and none of the holes line-up with any mirror offered on a bullnose or bricknose truck. There are also extra holes for bracing and for who knows what else.
I spent the weekend creating plugs and then one by one welding them in. The three smaller holes in the door are for the bullnose mirrors I will be installing (Type 9 2-position). You can see how they're lower than what was there for the aeronose mirrors. I specifically sought out doors from a 1992-1996 because it's easier to find doors without the lower rivnuts for type 9 mirrors. The 2-position Type 9 mirrors have three bolts at the top and bottom, and none of the bolts on the bottom line up with the normal Type 9 mirrors. I wanted to be able to make my own holes for the mirrors where I need them to be with my own rivnuts. I still need to fill in one more hole, but I was running out of daylight and still needed to make the plug. I'll knock out the driver's side this week as well, and then I'll have to do a little body work to even everything out. No thick gobs of bondo like my old doors though. 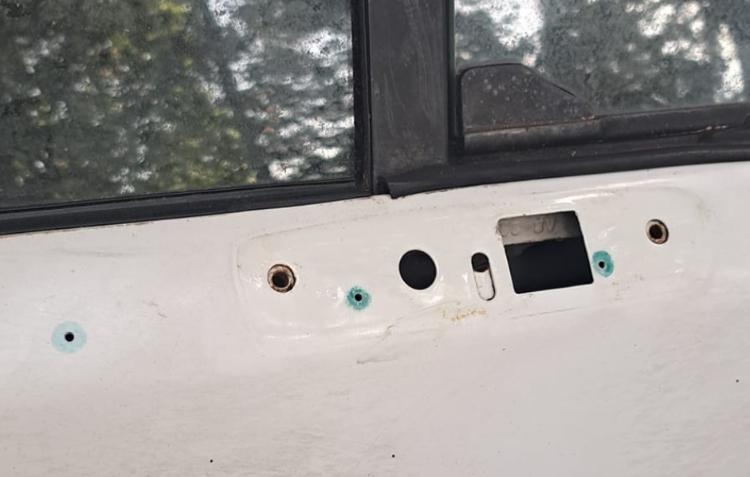 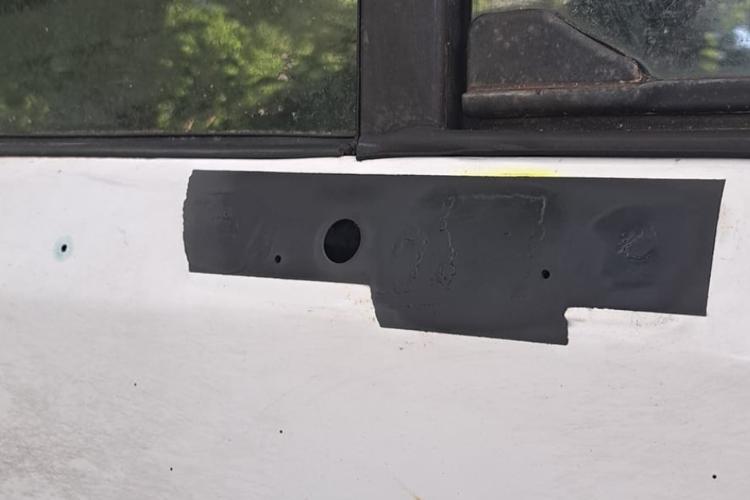 Mirrors I'm installing: 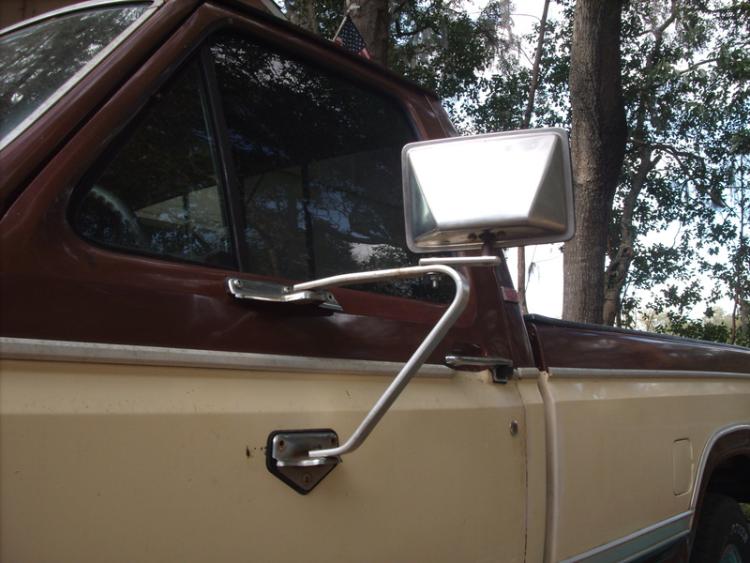 |
| Edit this page |

