Search Forum
'Rufus Maximus' - Build Thread
12345678


12345678
|
Onto the wires. I felt spongy wire and knew it was fuse link. That's all going away for blade fuses.
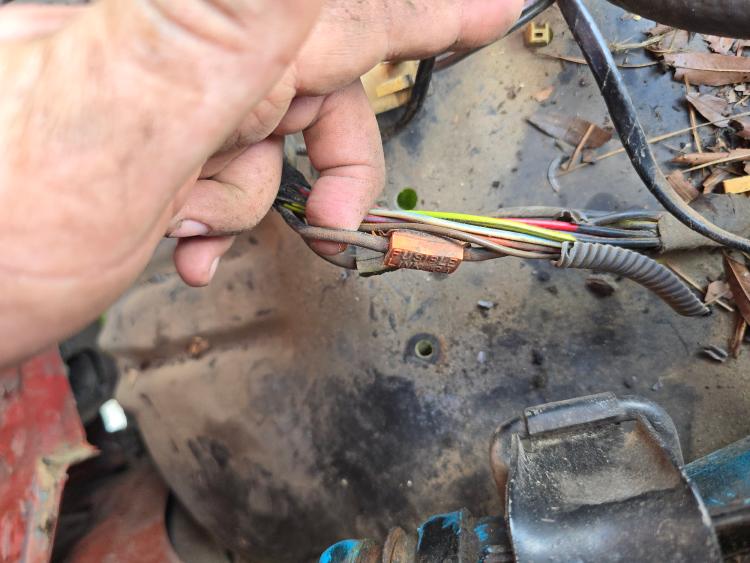 This fuse link on the passenger side is toasted. 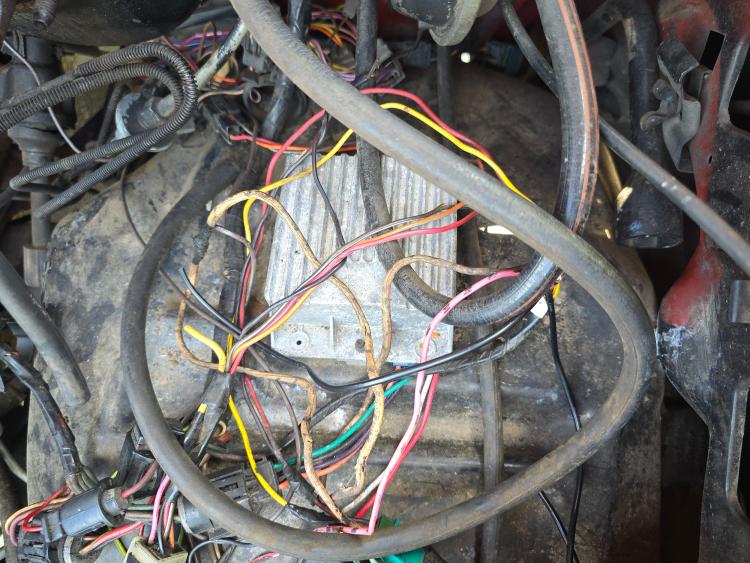 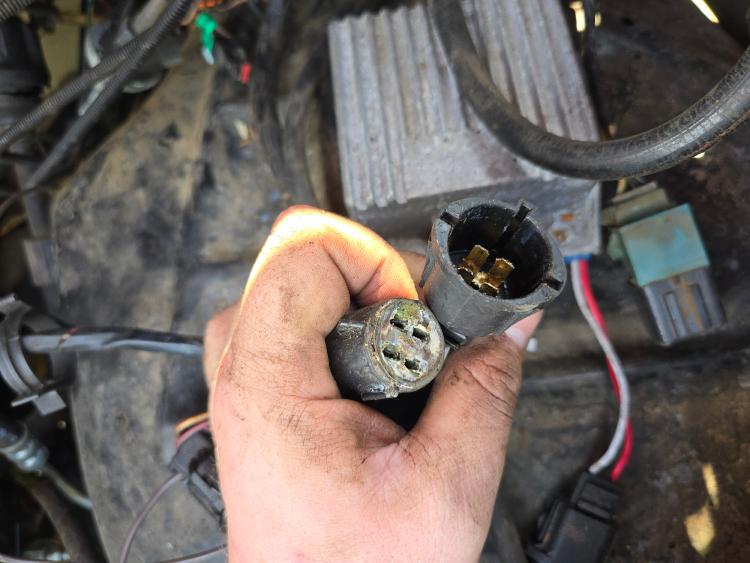 Jumping back to the driver side wheel well cover, I don't know what this is but it appears to be a converter of some sort. The connector here looks to be part of the engine fuel/air control and is not staying together. Will rewire. 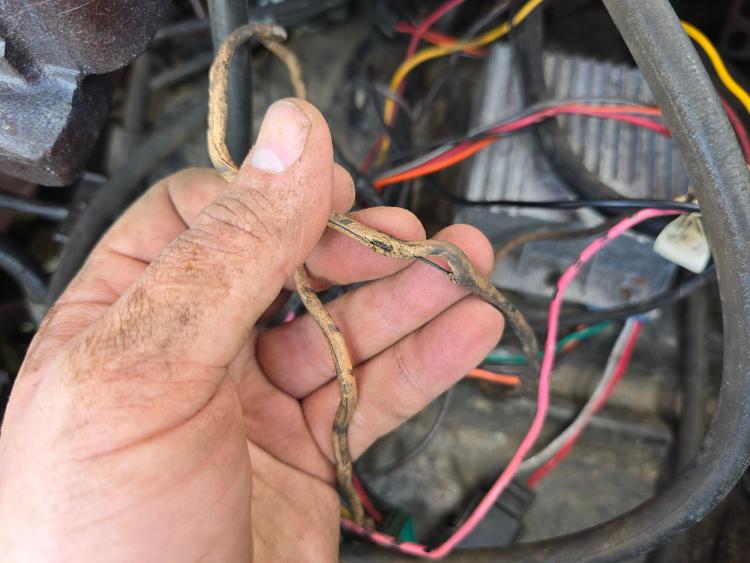 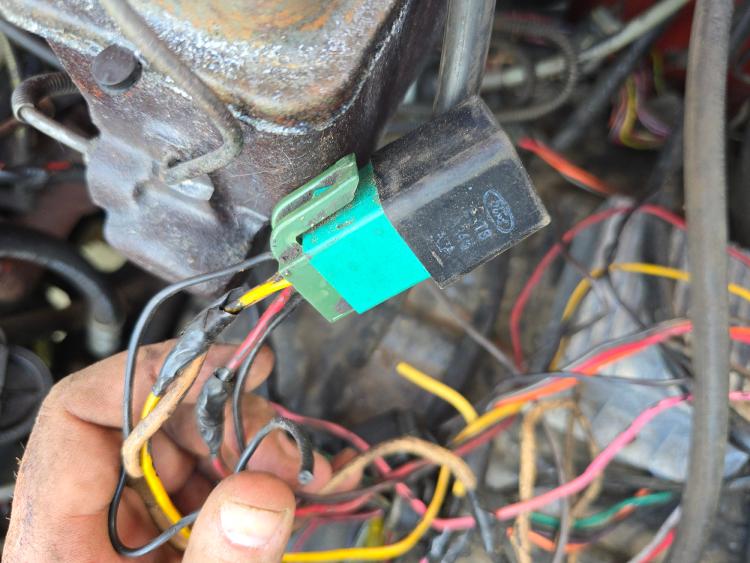 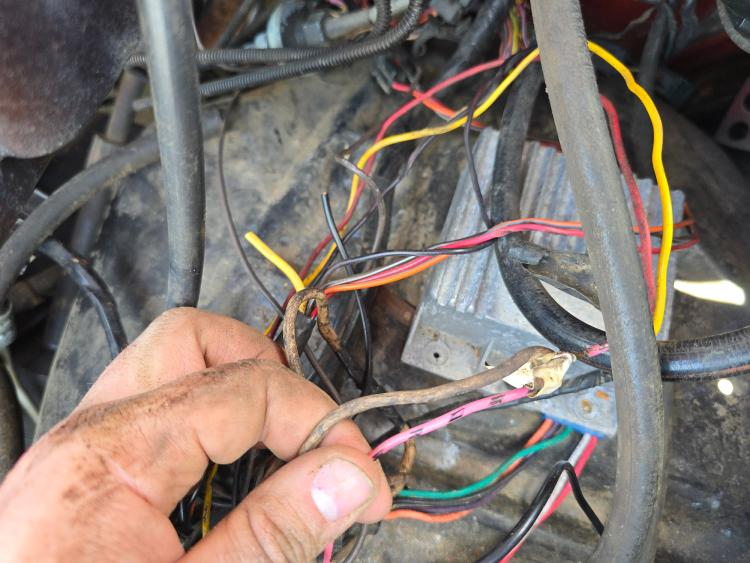 This brown fuse link is very much toast. This all appears to be part of the fuel delivery system. Many cut, bypassed and missing wire. Ground splices cut open and just left to corrode and short to ground randomly at the splice. Lots of exposed conductors to short while driving and allow corrosion to wick down the wires. All of this is going to be rebuilt. The yellow and black dashed red wire go above the radiator and connect to the I terminal on the contractor solenoid then into the harness that goes to the fuel tank selector in the cab. There is also another fuse link from the connector on the passenger side that is just flapping in the breeze. 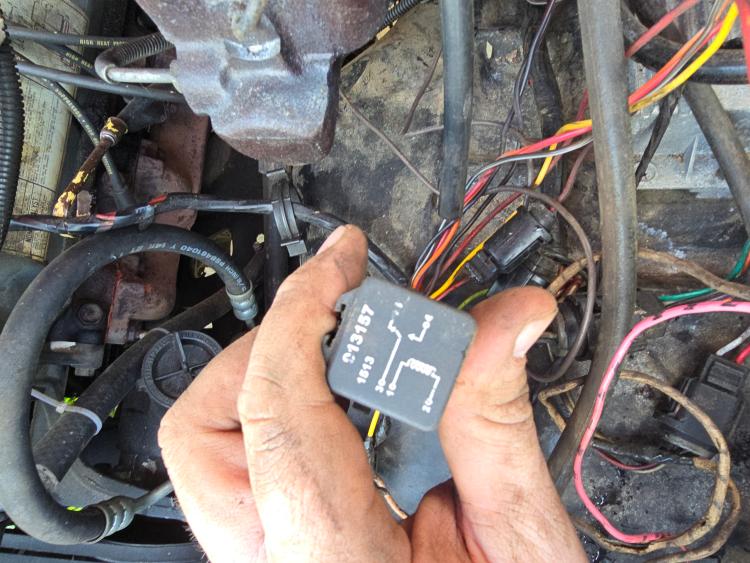 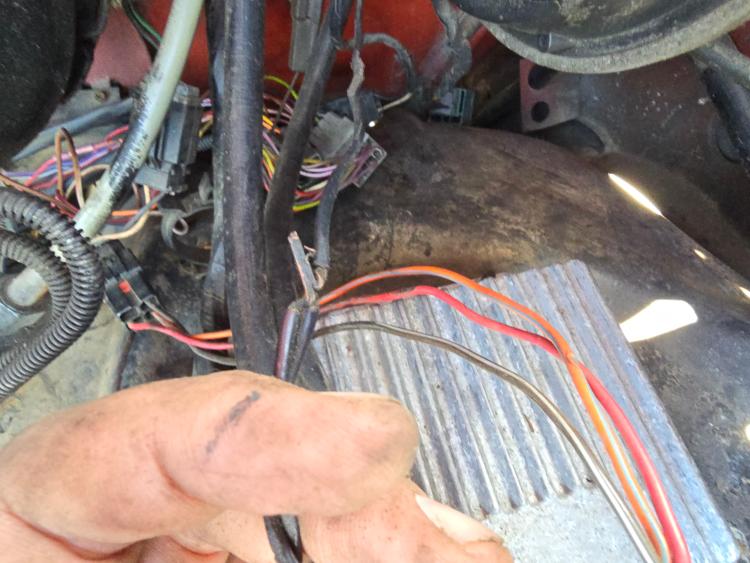 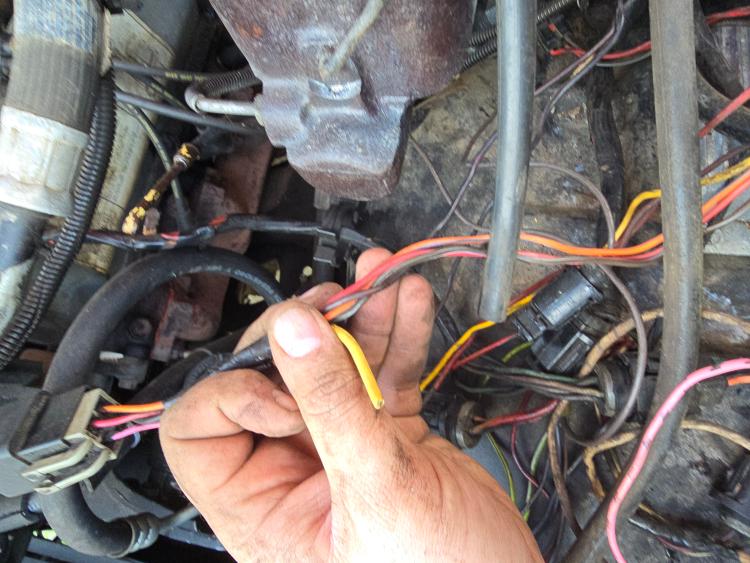 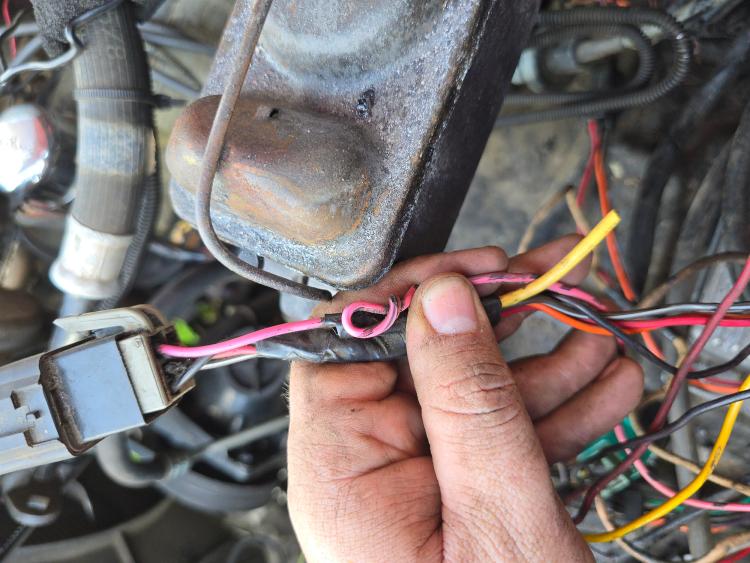 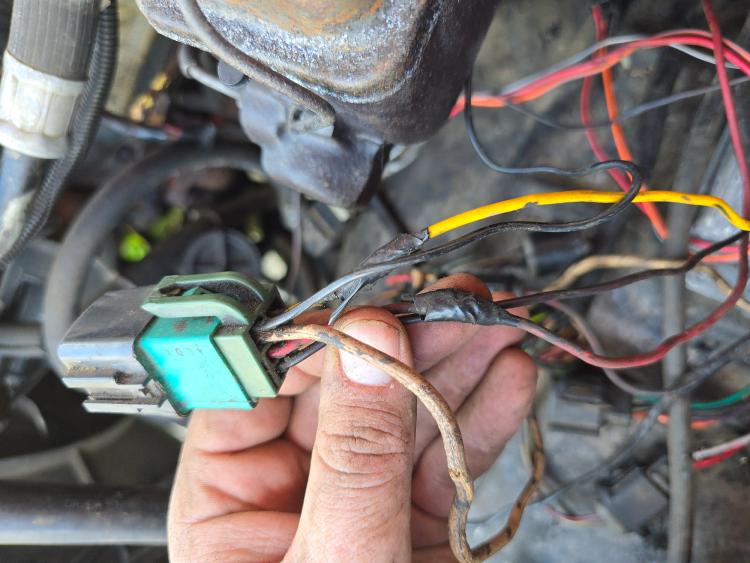 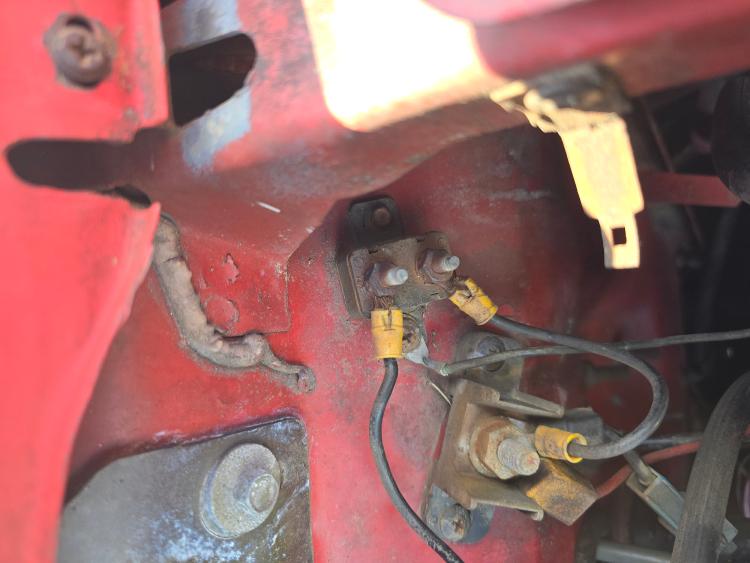 Idk what this terminal block is above on the driver side, but it's hosting a ground screw.  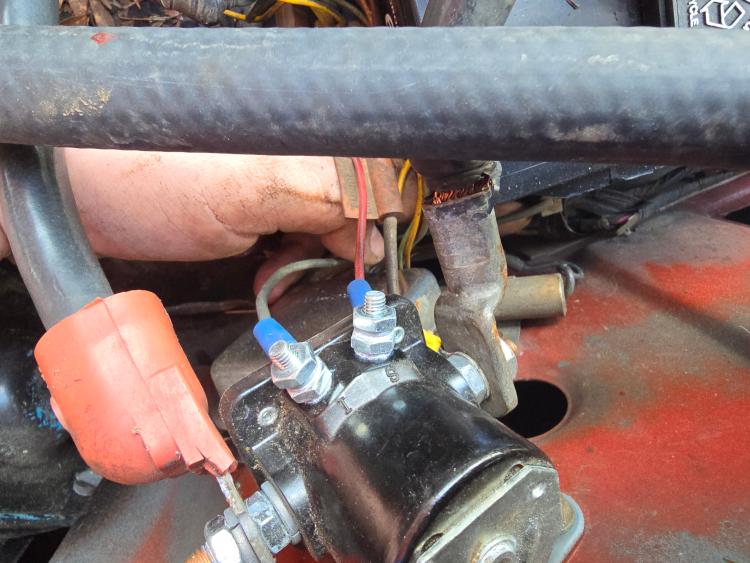 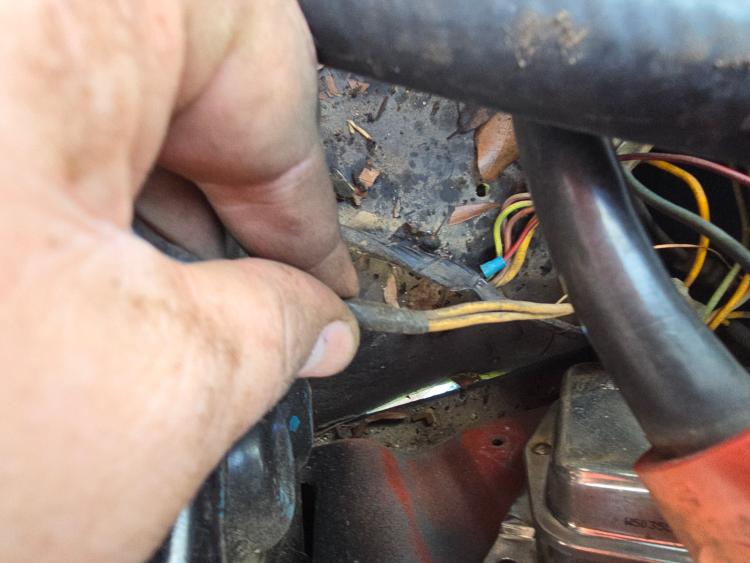 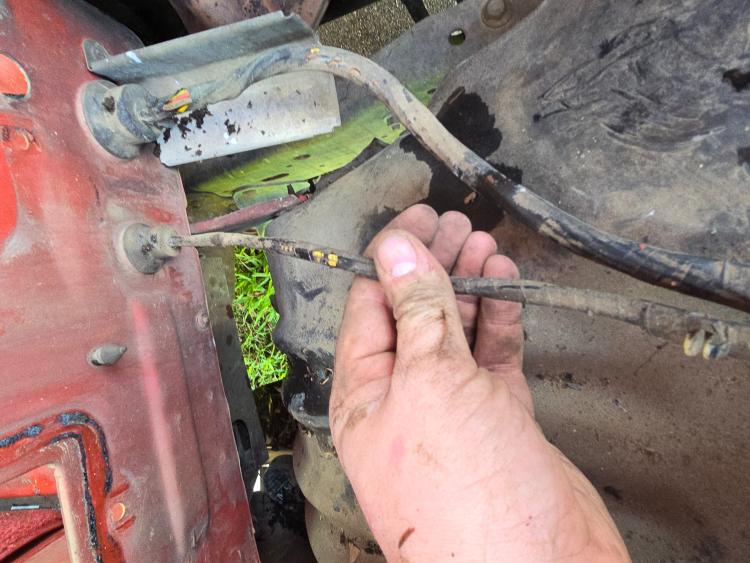 Ground wire from battery appears to be crudely spliced instead of fully replaced. The other end a the starter? I assume is pretty frayed. So I will be replacing this too. 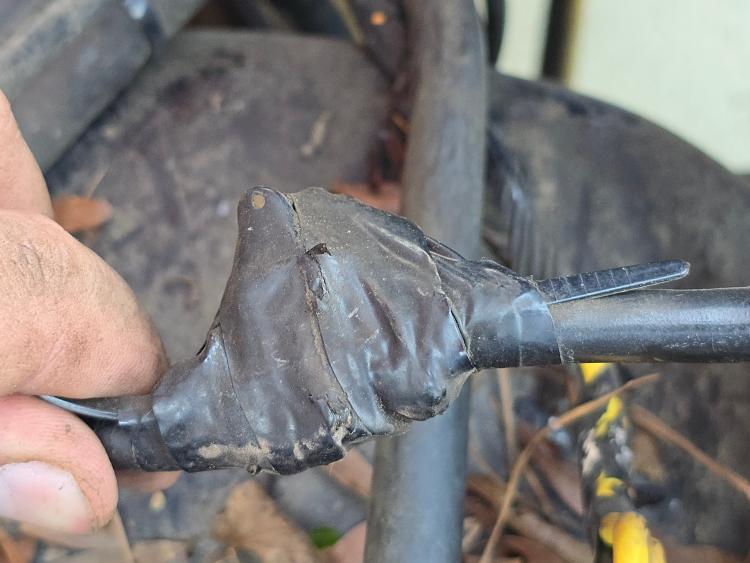 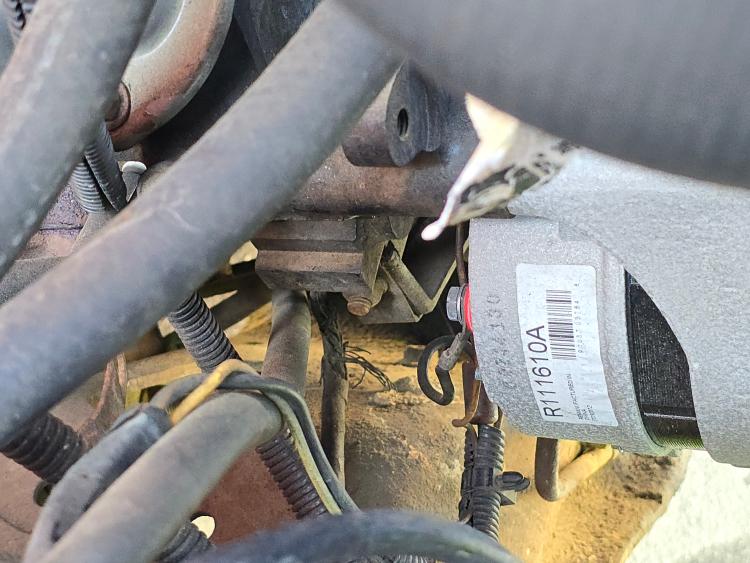 It's hot, I have gone inside to post this and work this wire harness. I need to identify connectors relays and wire gauges from the EVTM then order new wire and build a new harness. I have a marine grade fuse/relay box that is going in the truck that these relays will route to. 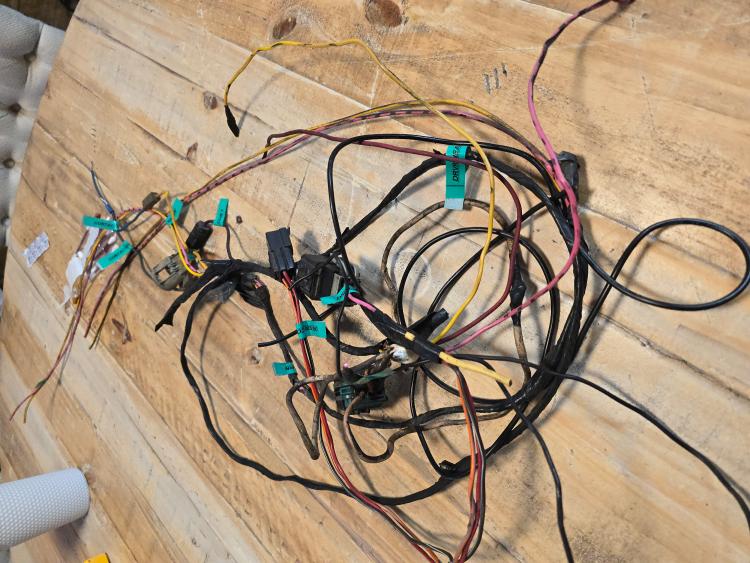
1985 F-350 XL | 460 | C6 | "Rufus Maximus"
1986 F-150|Standard Cab|4x2|300Six|C6Transmission w/3.08 rear|Name:TBD 2021 Ranger XLT Super Crew | Cactus Grey | black out package | max tow |
|
This post was updated on .
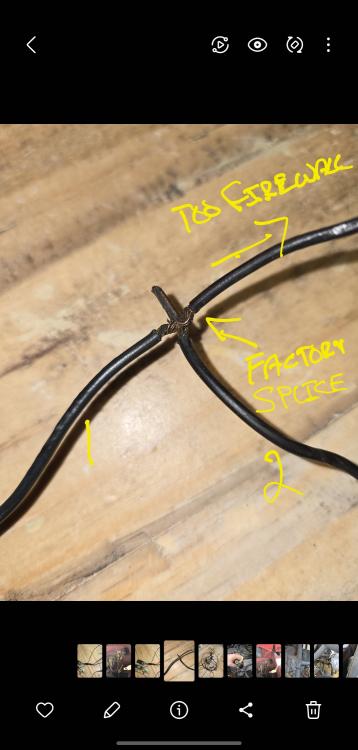
Here is that factory ground splice that has been cut open all of this is toast. Jackets melted and corrosion set in. You can feel it in the flexibility of the wire.
 It is one of the ground wires for these two relays. 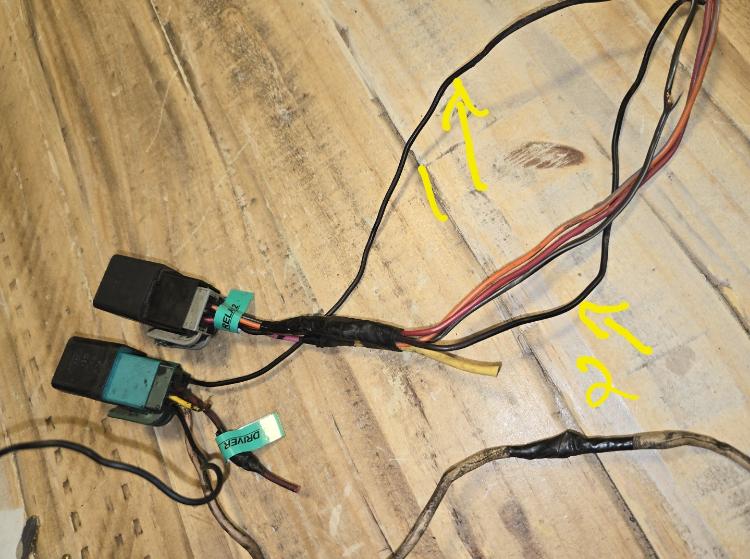 That goes to this module on the driver side cowl area firewall. 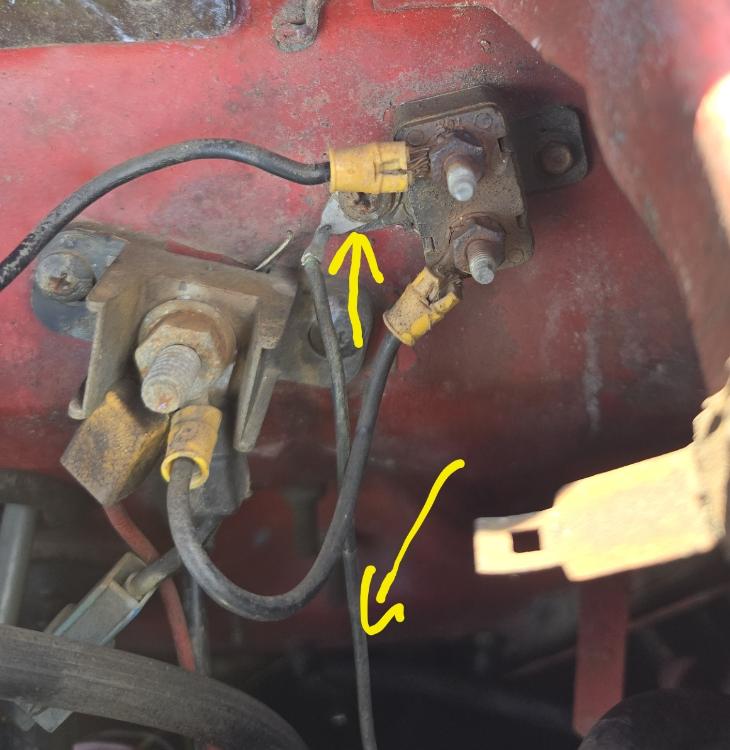 Going to bust out my circuit schematic app and start laying this out. I can't read some of this stuff and taking a picture of bad numbers our phones software cleans and sharpens them up. What I am calling Driver Relay #2 looks like this. 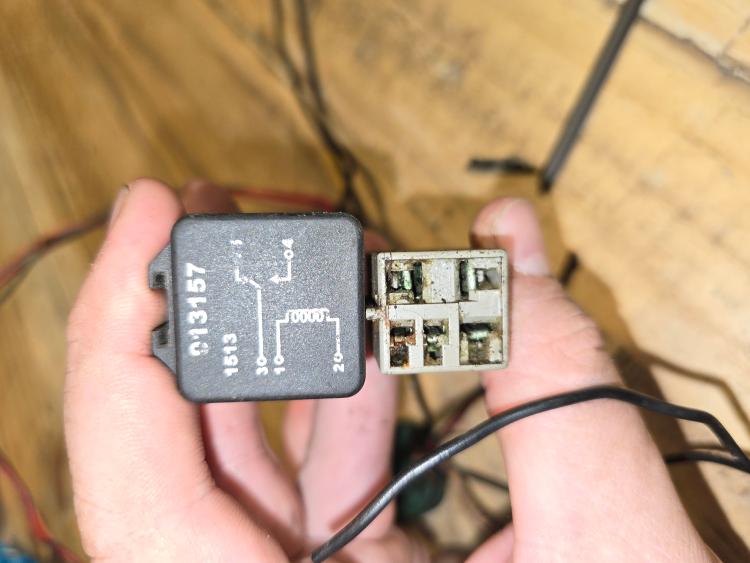 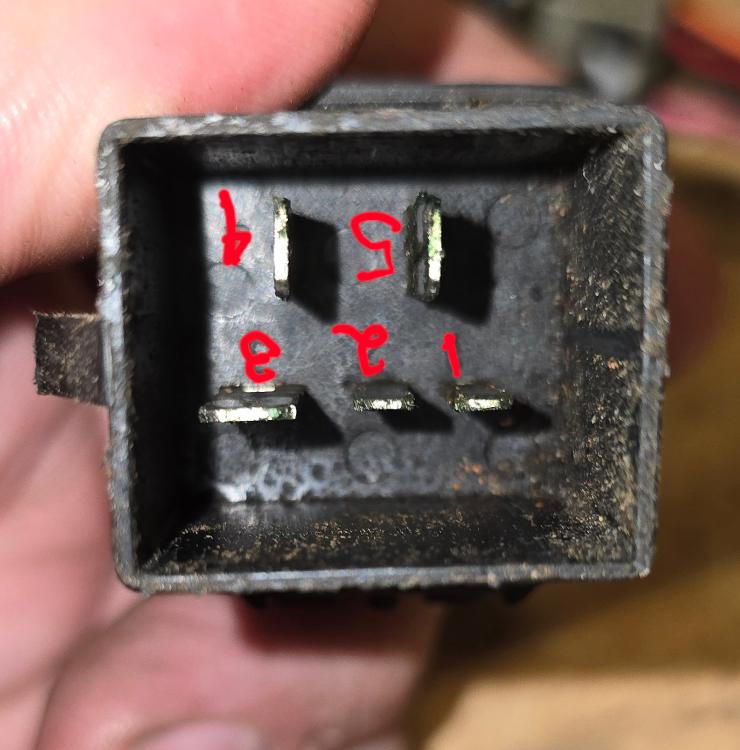 Terminal 3 is a Pink with black hash marks. Someone spliced a large gauge yellow wire to it. Then cut that wire loose. 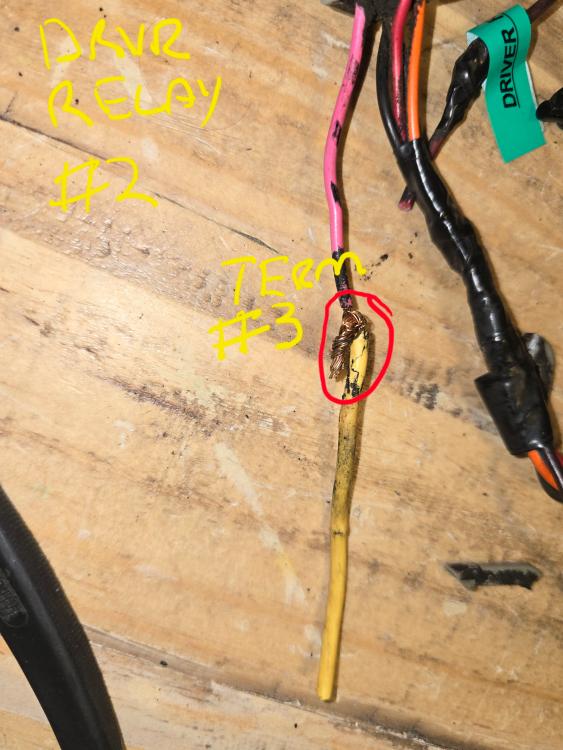 Terminal 2 is brown with a white stripe going to what I'm calling Driver connector 2 It was crudldy spliced under 4000 layers of electrical tape and corroded to the point it was not even connected. 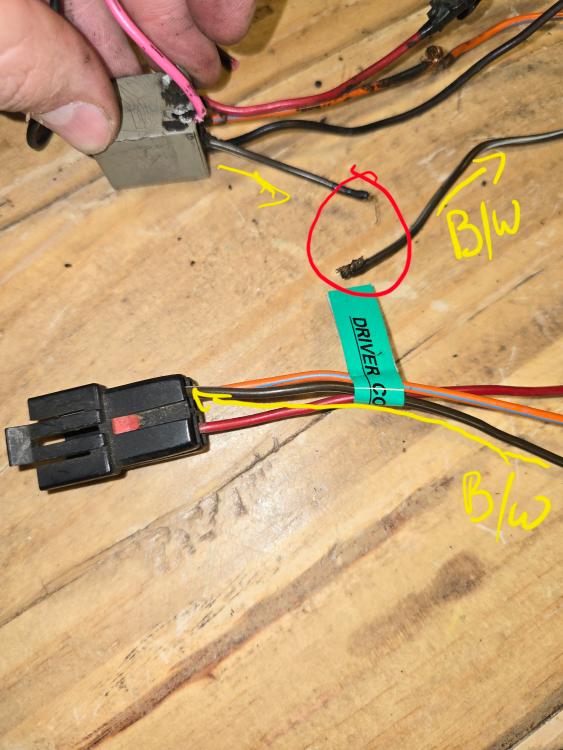 Terminal 1 is that ground from before. Terminal 4 is again crudely spliced under layers of tape. It's the red wire to the same connector (this connector is near to the firewall closer to the engine.) Terminal 5 is the orange/blue stripe to same connector. Again spliced. Wires are stiff with melted jackets corrosion a concern, full replacement. 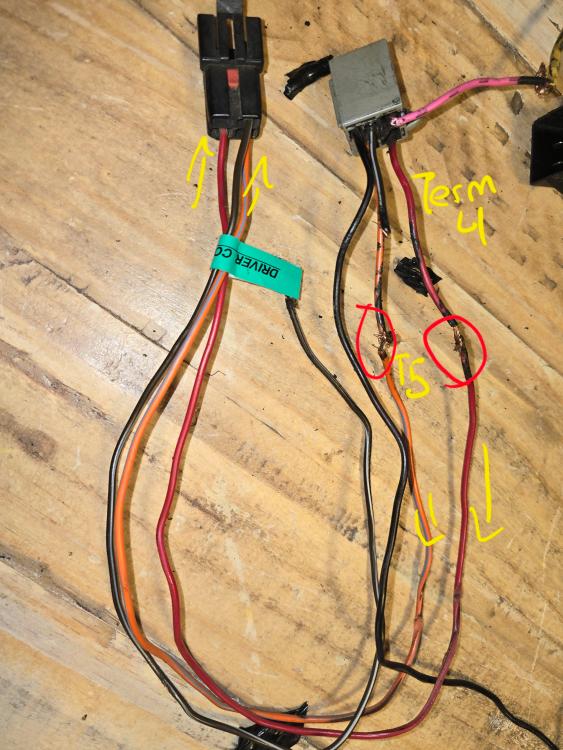 Here's it on the truck
1985 F-350 XL | 460 | C6 | "Rufus Maximus"
1986 F-150|Standard Cab|4x2|300Six|C6Transmission w/3.08 rear|Name:TBD 2021 Ranger XLT Super Crew | Cactus Grey | black out package | max tow |
Re: 'Rufus Maximus' - Build Thread
|
Administrator
|
Please go to the EVTM and familiarize yourself with the Hot Fuel Handling system.
Pk/bl should be bypass safety while cranking.Fuselink (T) hot in start... It comes after the pump relay and the resistor. But before the inertia switch The oil pressure safety provides pulldown for the fuel pump relay, it's fed by fuse 18 and grounds at G801. The pump power relay is fed by fuse link (S) and passes to a resistor before feeding the inertia switch The inertia switch is on the passenger side of the transmission tunnel and feeds the selector switch on the dash. At least this is what it looks like in my EVTM.
Jim,
Lil'Red is a '87 F250 HD, 4.10's, 1356 4x4, Zf-5, 3G, PMGR, Saginaw PS, desmogged with a Holley 80508 and Performer intake. Too much other stuff to mention. |
|
Yep got a copy, just documenting as I go. These relays are not going back in I have a box and will be running new wire to at least the factory connectors on this end.
Got the passenger wheel well liner out. Had to cut these two fasteners at the rad support because the nut plate rotted away. Also one screw at the bottom of the fender by the bumper. 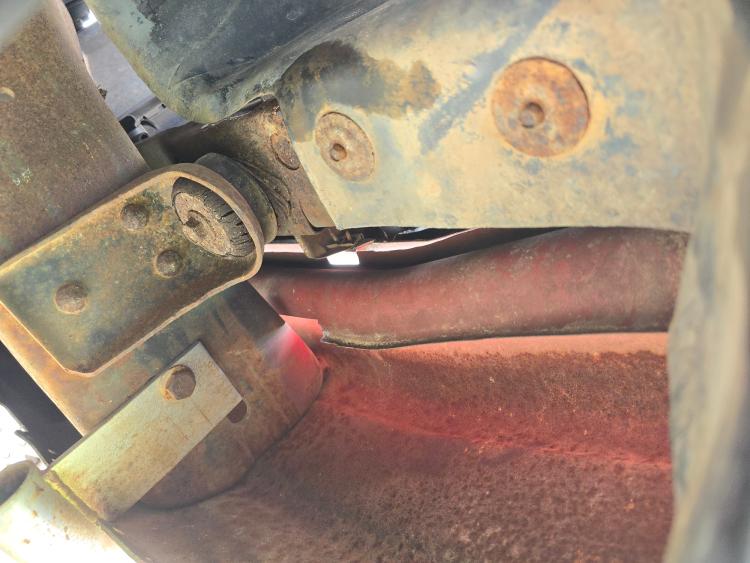 This one here was pointless the liner is worn right through. 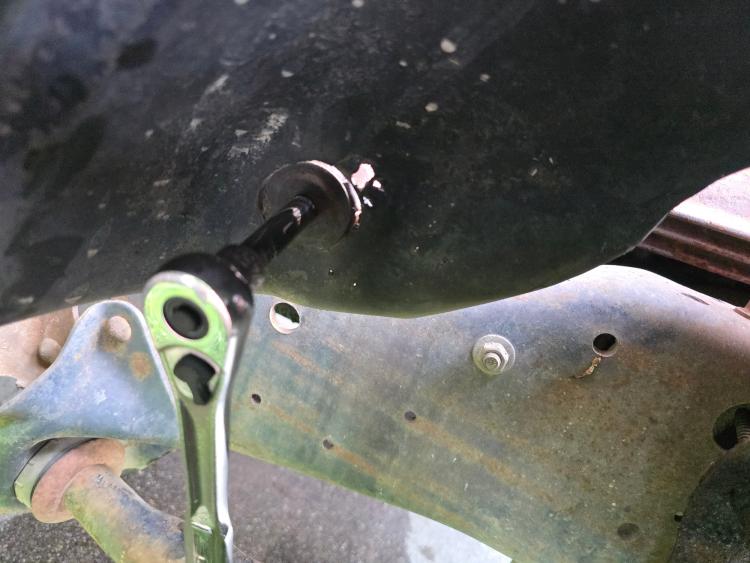 This water channel created by the wheel liner with no sealant damn is screaming for rust issues. 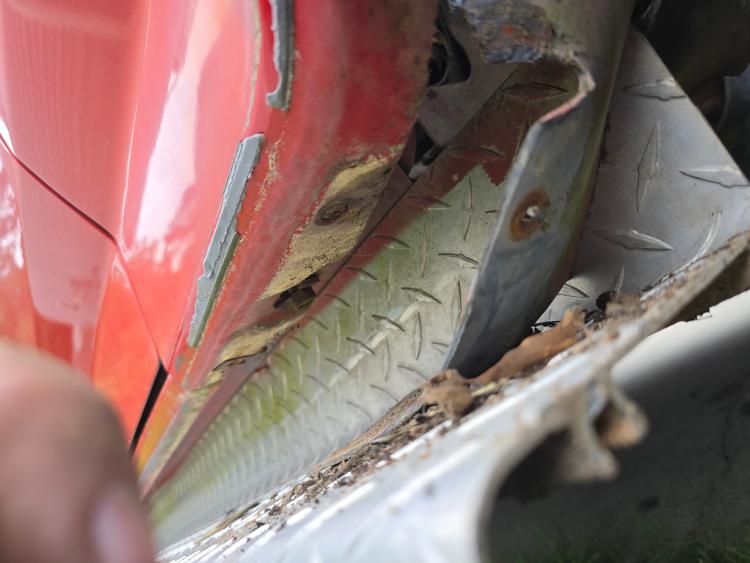 Disconnected the rest of the harness from the lights and contactor. Lots of tap splices to deal with. The charging system harness is chopped up a bit. 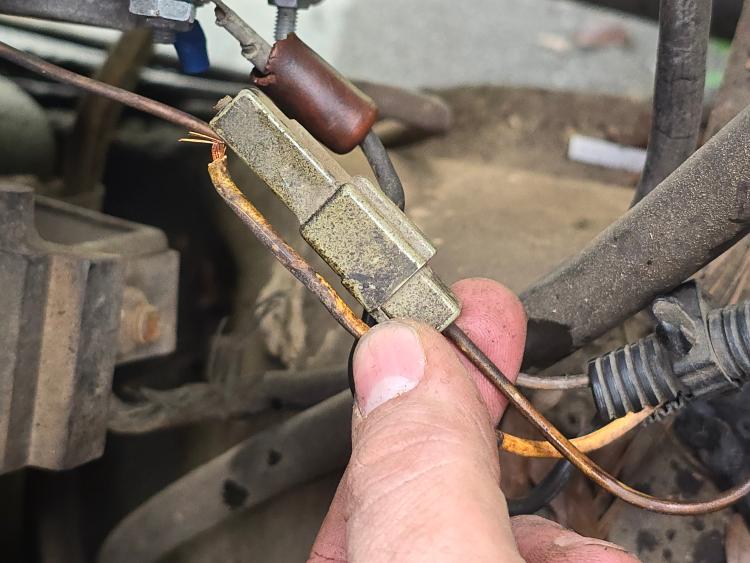 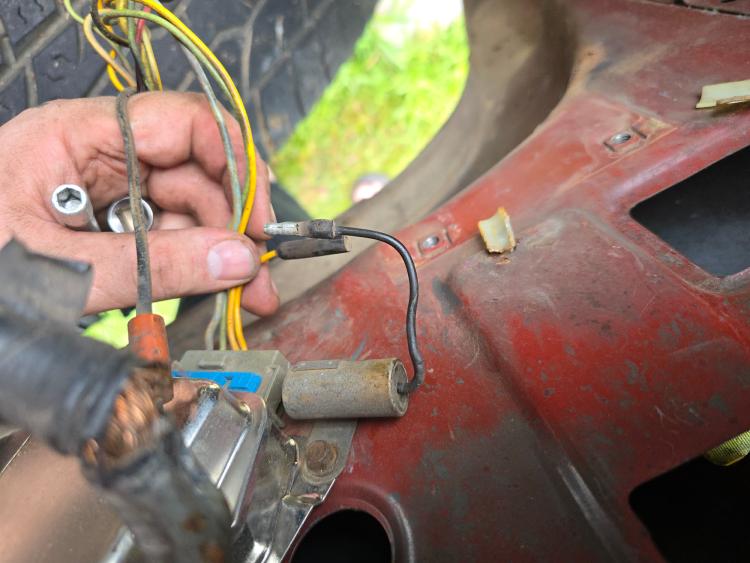 The spot down here must have had a grommet at some point. With the wheel well liner gone I should be able to get in here easier and clean it out. I think this is the other side where the body mounts are. 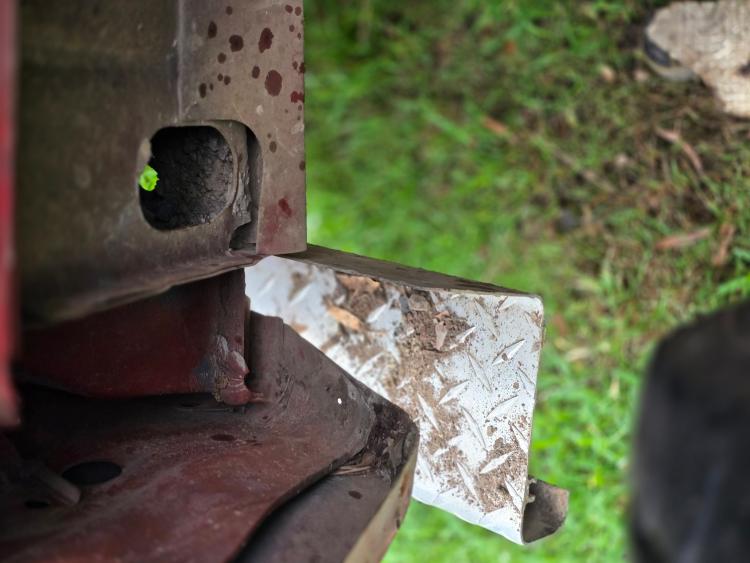 Going to leave this guy here for now. 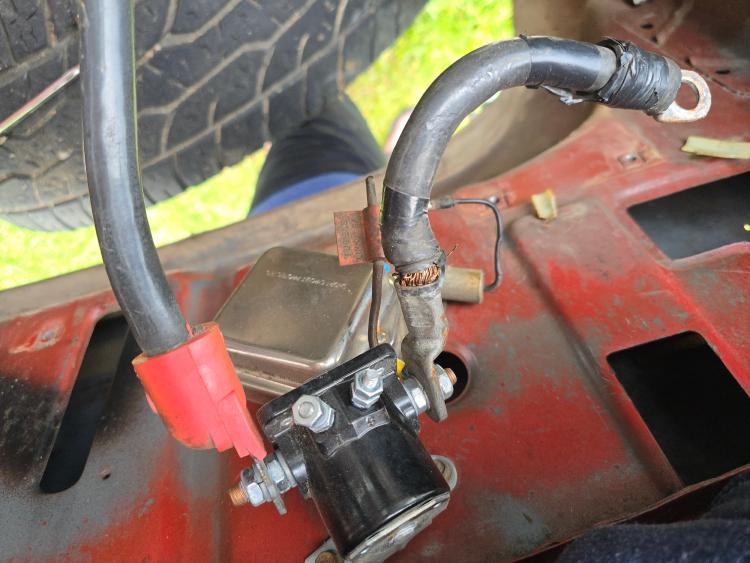 Passenger side was chirping at me last ride home on 26. I don't think I should have expected it to look any better than this. I need to chip off these mud nests and blast this dirt away, it's looking pretty rough so probably a good idea to take this suspension apart while I have everything out on this side. 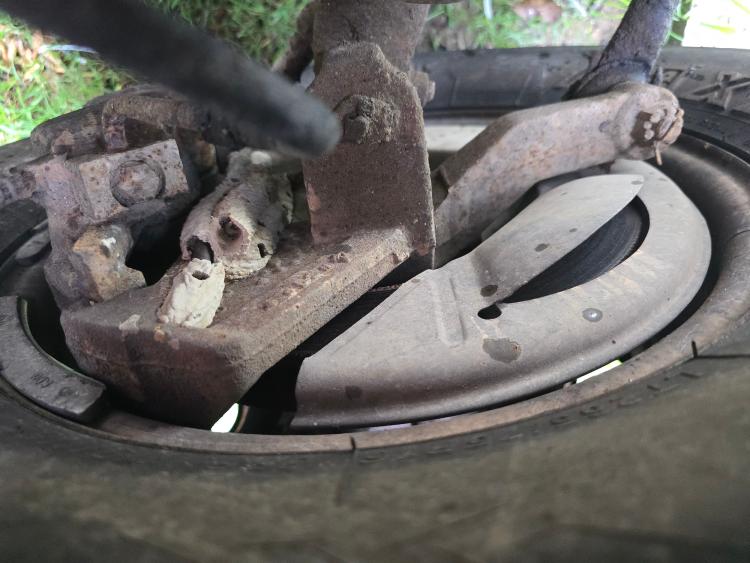 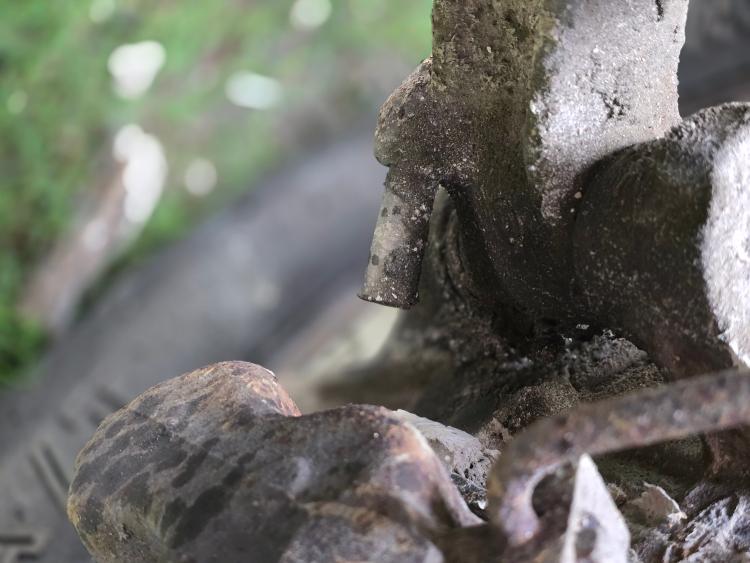 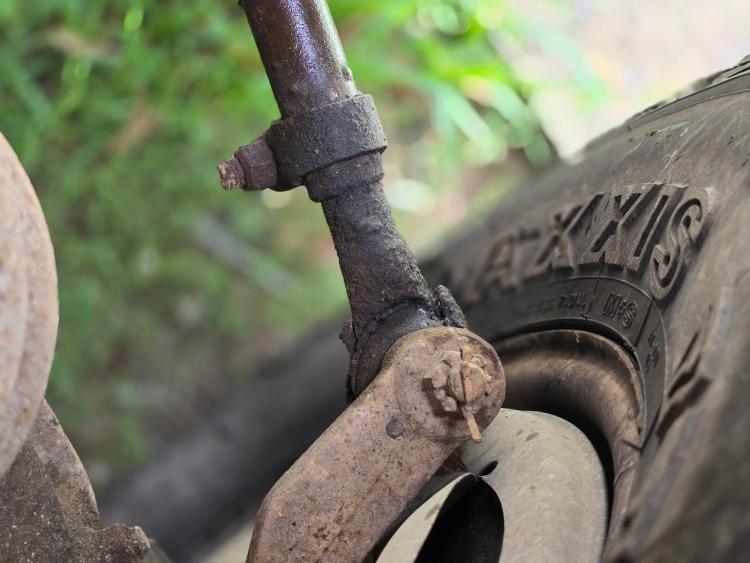 Gas pedal assembly is out of the parts cleaner and looking good. I need to drive out the pin for the pedal so I can paint it. Figured I would go ahead and drop this diamond plate piece in and see how it turns out. 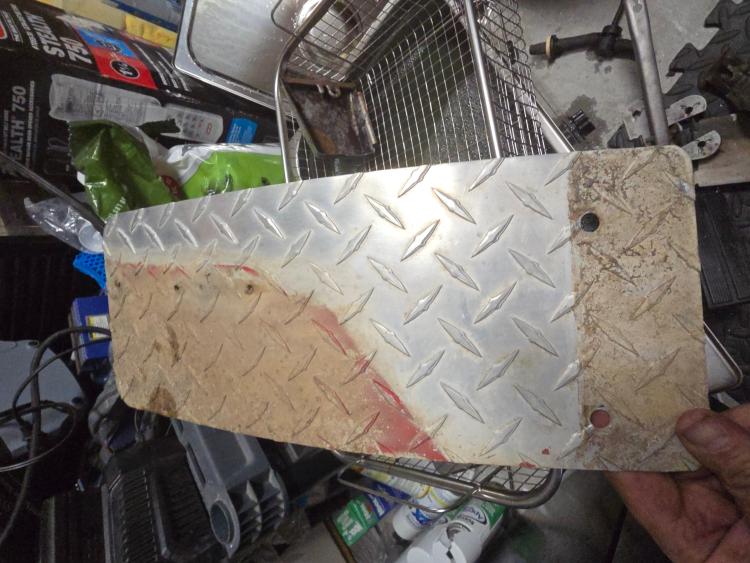 Slightly different Jack than I have pulled previously from the junk yard. I like the blue. I think I am going to clean this thing up, test it, and check the shelves. I may have a can of Ford blue left around. 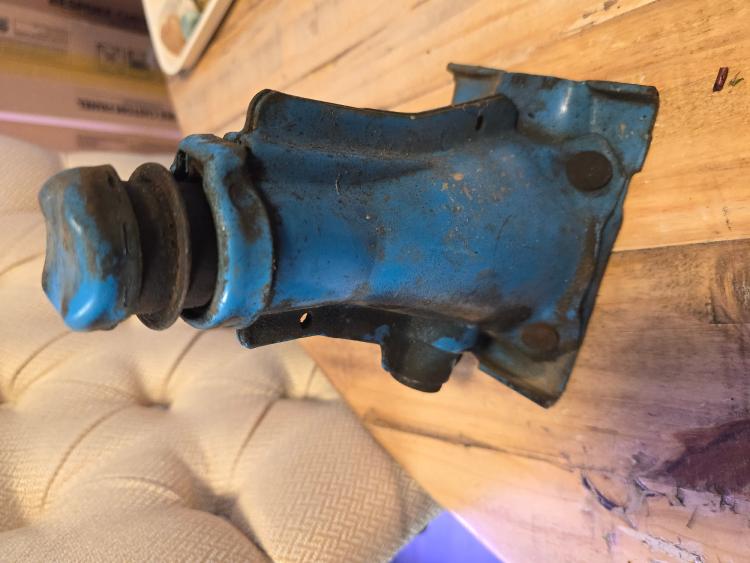
1985 F-350 XL | 460 | C6 | "Rufus Maximus"
1986 F-150|Standard Cab|4x2|300Six|C6Transmission w/3.08 rear|Name:TBD 2021 Ranger XLT Super Crew | Cactus Grey | black out package | max tow |
Re: 'Rufus Maximus' - Build Thread
|
Administrator
|
The rubber duckbill of the cowl drain should be farther up, at about the level of the kick access panel.
One thing to be mindful of with those Ford jacks, while they may work with 15" 150 tires they annoyingly allow you to get a flat 235/85 R-16 off.... but they don't go high enough to put a filled tire back on! DAMHIK!!! 😡 Get yourself a 3" thick chunk of wood big enough to provide a stable platform and toss it in the bed. Maybe a doubled up piece of 2x8 or10 pressure treated? (I have a chunk of 12/4 mahogany) Far better than having to put the flat back on while you go searching for a flat rock on the side of the road. 💡
Jim,
Lil'Red is a '87 F250 HD, 4.10's, 1356 4x4, Zf-5, 3G, PMGR, Saginaw PS, desmogged with a Holley 80508 and Performer intake. Too much other stuff to mention. |
Oh geez yea, that would be no good. Some scrubbing and WD40 for it cleaned up pretty good. Worse case scenario it's just for looks lol. I have a 48" farm jack in the garage maybe I need to make a mount for that. 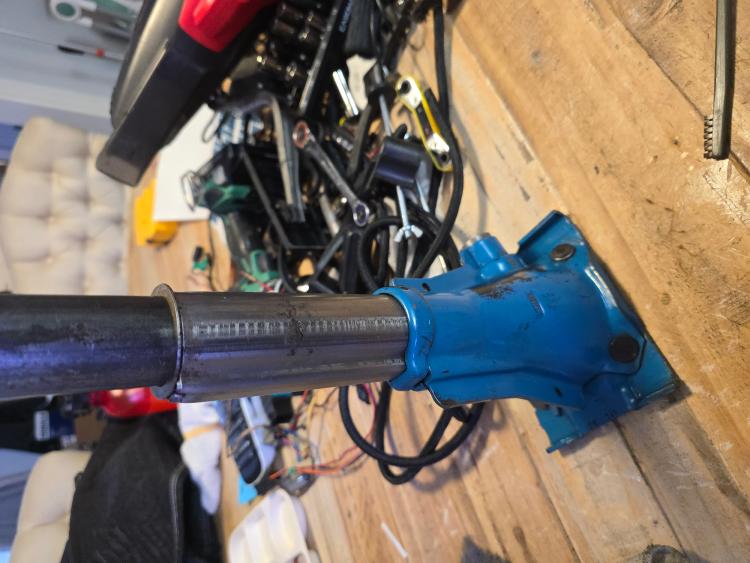
1985 F-350 XL | 460 | C6 | "Rufus Maximus"
1986 F-150|Standard Cab|4x2|300Six|C6Transmission w/3.08 rear|Name:TBD 2021 Ranger XLT Super Crew | Cactus Grey | black out package | max tow |
Re: 'Rufus Maximus' - Build Thread
|
Administrator
|
I suppose you could get away with the front, because of the TTB, (if you can get under it!) but the 10.25 rear axle is just too high for me to get my (stock sized) tires on.
Granted, I've only had 2 flats in 37 years, as I get older and more broken I begin to loath that tire carrier. It certainly didn't make it easy for me to change my tank last year!
Jim,
Lil'Red is a '87 F250 HD, 4.10's, 1356 4x4, Zf-5, 3G, PMGR, Saginaw PS, desmogged with a Holley 80508 and Performer intake. Too much other stuff to mention. |
Haha yea maybe just a AAA membership for most places and sit in the AC. Heck cars now don't even carry a spare just fix a flat. I carry a plug kit and air in every vehicle. My ranger found a drywall screw somewhere and I actually used one of these screws plugs. It's been holding solid for 5k miles. They have seal on them. I used a screwdriver to unscrew the one out of the tire and then the same screwdriver to screw one of these plugs in. Granted none of these work for a full blown out or sidewall damage 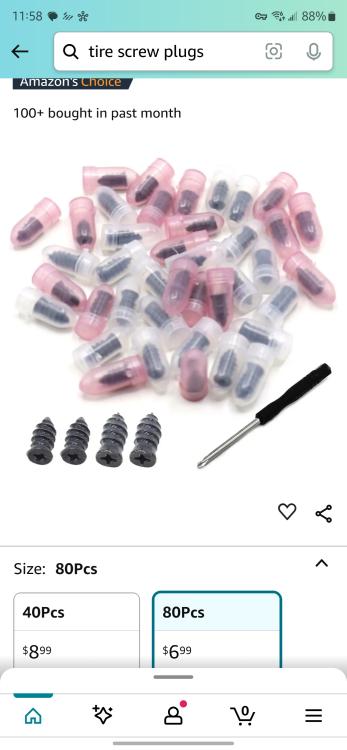
1985 F-350 XL | 460 | C6 | "Rufus Maximus"
1986 F-150|Standard Cab|4x2|300Six|C6Transmission w/3.08 rear|Name:TBD 2021 Ranger XLT Super Crew | Cactus Grey | black out package | max tow |
Re: 'Rufus Maximus' - Build Thread
|
Administrator
|
Appreciate that!
 I used to go do tire changes (thankfully NOT for AAA) Tesla has to have the specific rim (TPMS) remotely programmed to the car, then they want that wheel brought to a service center for evaluation and repair. The only time anything ever got through my load E steel plys was a short length of angle iron on the highway. I kept driving to the job site.... 🤷♂️
Jim,
Lil'Red is a '87 F250 HD, 4.10's, 1356 4x4, Zf-5, 3G, PMGR, Saginaw PS, desmogged with a Holley 80508 and Performer intake. Too much other stuff to mention. |
Re: 'Rufus Maximus' - Build Thread
|
Administrator
|
In reply to this post by ArdWrknTrk
Jim, Darth's jack will lift the 10.25" rear axle high enough to get a blow 215/85R-16 off and on. It also worked pretty well to get the spare down on it's carrier (remembering that I have the dually rims with their deep offset).
Bill AKA "LOBO" Profile
"Getting old is inevitable, growing up is optional" Darth Vader 1986 F350 460 converted to MAF/SEFI, E4OD 12X3 1/2 rear brakes, traction loc 3:55 gear, 160 amp 3G alternator Wife's 2011 Flex Limited Daily Driver 2009 Flex Limited with factory tow package Project car 1986 Chrysler LeBaron convertible 2.2L Turbo II, modified A413 |
Re: 'Rufus Maximus' - Build Thread
|
Administrator
|
I'm not sure why my jack won't unscrew far enough to lift a stock 32" tire.
Maybe my jack has erectile dysfunction? 
Jim,
Lil'Red is a '87 F250 HD, 4.10's, 1356 4x4, Zf-5, 3G, PMGR, Saginaw PS, desmogged with a Holley 80508 and Performer intake. Too much other stuff to mention. |
Maybe it's the wrong jack? The blue one that was in the F-350 was definitely bigger than the one I pulled from an 83 F-150 in the junk yard. The blue one is stamped SMP the grey one from the F-150 is stamped with an "A". Gary is going to need a sub section in the documents for jacks lol. 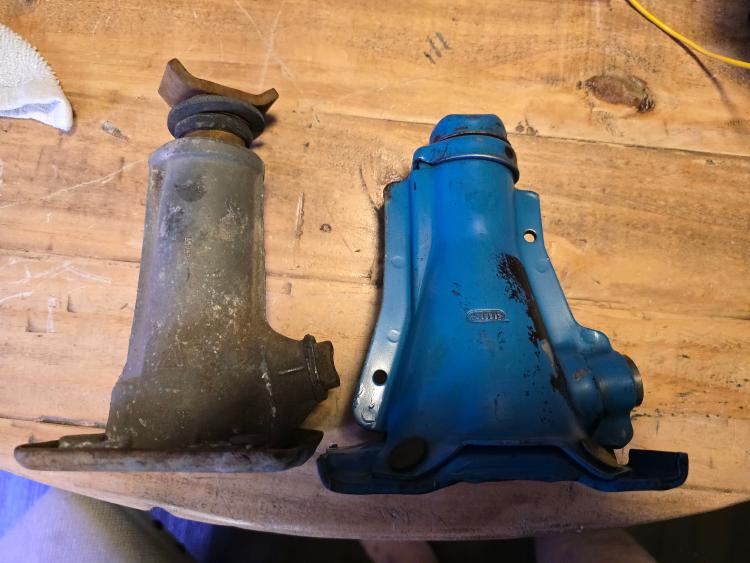
1985 F-350 XL | 460 | C6 | "Rufus Maximus"
1986 F-150|Standard Cab|4x2|300Six|C6Transmission w/3.08 rear|Name:TBD 2021 Ranger XLT Super Crew | Cactus Grey | black out package | max tow |
|
In reply to this post by ArdWrknTrk

Vivek
- BB 2WD - 1984 F350 RWD 460/C6 - 1978 Bronco with a 460 from an 86 Bullnose/C6 |
Re: 'Rufus Maximus' - Build Thread
|
Administrator
|
In reply to this post by Danny G
It's the one it rolled off the line with. 🤷♂️
I'm not sure if bigger wheels got bigger jacks, and they just screwed up on my truck? Hardly makes any sense to have multiple models. 
Jim,
Lil'Red is a '87 F250 HD, 4.10's, 1356 4x4, Zf-5, 3G, PMGR, Saginaw PS, desmogged with a Holley 80508 and Performer intake. Too much other stuff to mention. |
|
In reply to this post by Danny G
Working this harness that Inpulled out. The yellow wires I have marked up with areas of concern. Either damaged or the twist/bends seem compromising. I have a full 1000ft of SXL 16AWG in 10 colors (100' ea) enroute.
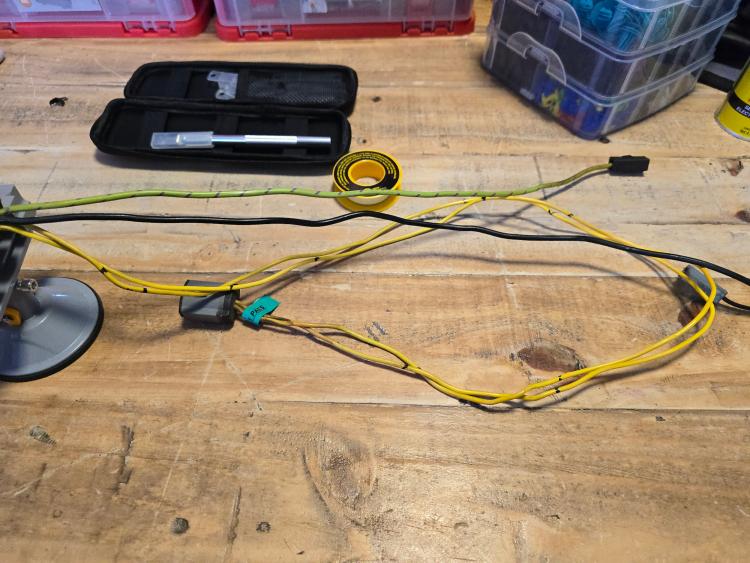 These yellow wires(W37) are the ones that go to the inertia interrupter switch in the cab to cut off the fuel pumps. They run right from the switch through the firewall grommet to connecter C144. 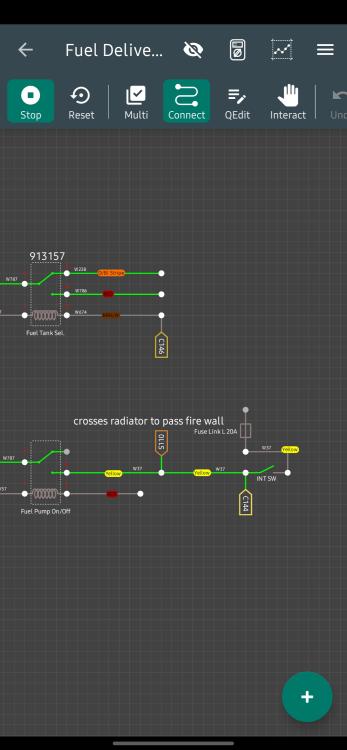 Because the jacket damage goes through into the conductor about 3 inches from the grommet, AND I want to pot the grommet when I'm done for fluid protection, I am going to splice in a repair wire on the cab side. C144 is corroded and crumbly so I'll replace that with a waterproof 2 pin connector. It drives me nuts that most of these single wire connectors are just glorified blade terminals completely exposed to the elements. If possible I will replace these to, but I think they are required in this configuration. If I remember correctly this green and purple stripe wire and black wire go to a connector that was by the accumulator (label fell off). 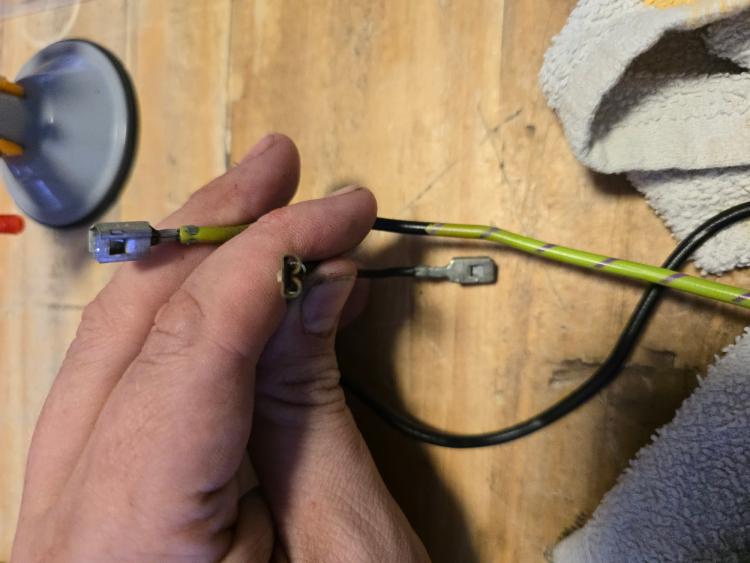 I depinned the "connectors" because the blade terminals were rusted and wire was corroding. I have had these corrode completely through and it's hard to remove. Not to mention water will wick down the wire strands compromising the wire. This is why all the open wires, or jacket nicks to troubleshoot are so detrimental. Corrosion= resistance=heat/badsignal=fire or electricak failures. 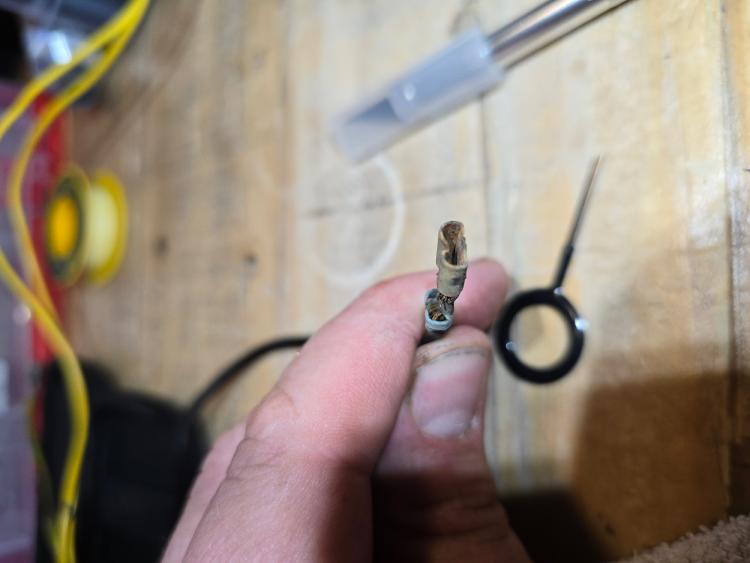 Any open connector left is getting cleaned and then the dielectric treatment. 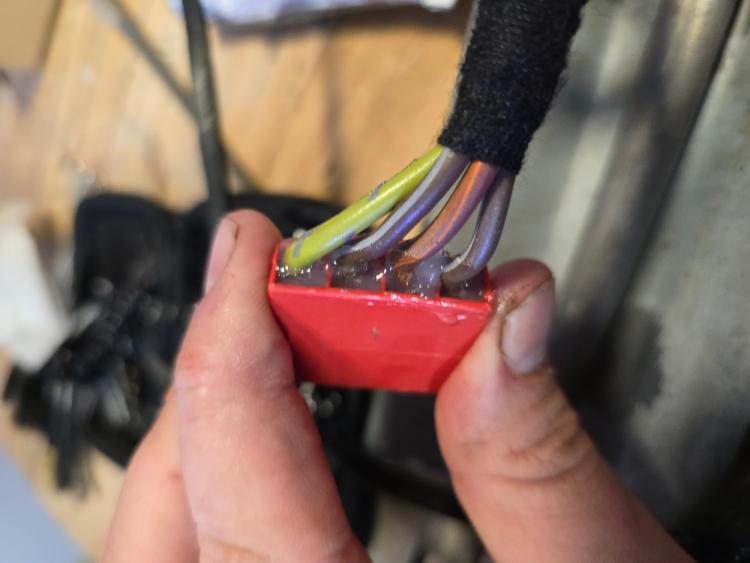 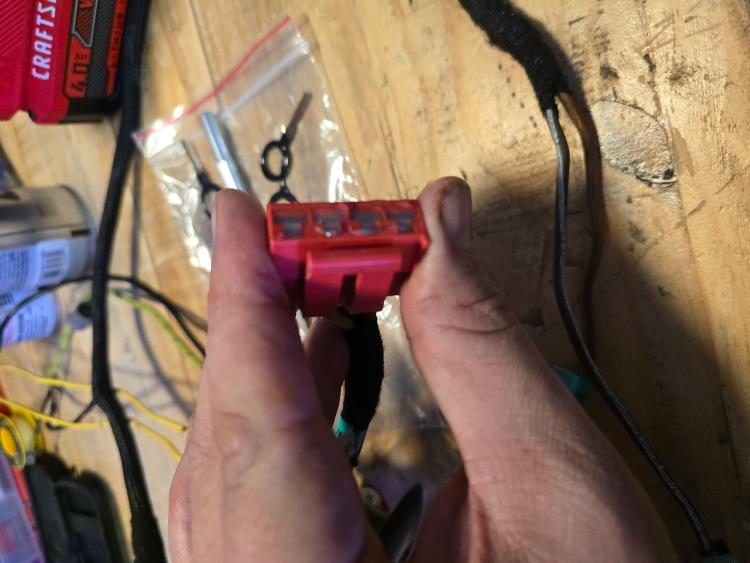 My original school of thought was a harness disconnect at the firewall. I still want to do that but I want to put it in a more ergonomic spot. Essentially everything under the hood at a minimum is going to be custom but still color coded as close as possible. I want to control the routes and keep them clean and direct instead of just laying over everything.
1985 F-350 XL | 460 | C6 | "Rufus Maximus"
1986 F-150|Standard Cab|4x2|300Six|C6Transmission w/3.08 rear|Name:TBD 2021 Ranger XLT Super Crew | Cactus Grey | black out package | max tow |
|
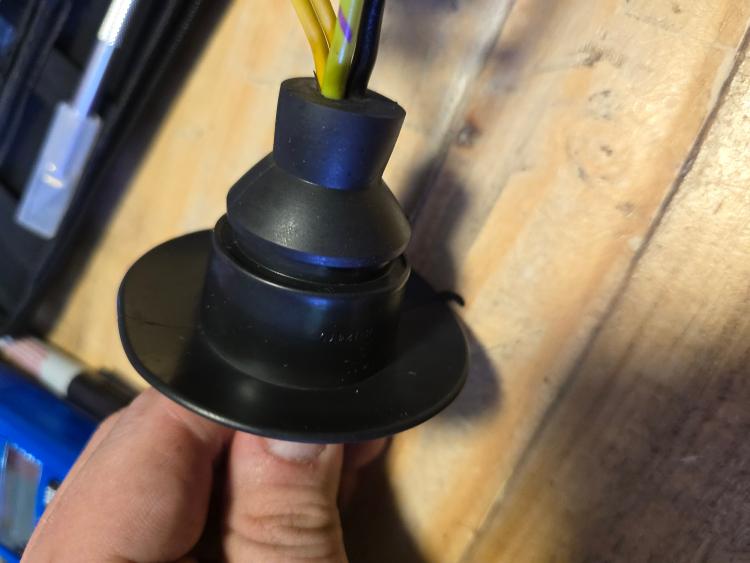
Armorall cleaning wipes do well in the grommets. Flexibility is back and it looks darn near new.
1985 F-350 XL | 460 | C6 | "Rufus Maximus"
1986 F-150|Standard Cab|4x2|300Six|C6Transmission w/3.08 rear|Name:TBD 2021 Ranger XLT Super Crew | Cactus Grey | black out package | max tow |
|
Well got this what I'll call a fuel harness sorted out and piece mealed back together.
The tan striped wire is very much the pink striped resistance wire. It caught fire at some point. The yellow wire is the cut off form the interior switch. It should be fuse linked at the starter contactor but it was just cut and hanging. So that wire had no power. At some part near that relay it should be at a splice with a run going to the ignition switch (S110). I'll have to crawl under the hood and sniff that out. Essentially 3 splices in this harness (S110, S112 and S160) were either cut open and corroded or just plain cut out. There is a black wire in the same terminal as the pink and black hashed wire of the cut off relay. I have not found any documentation on what this one was for. 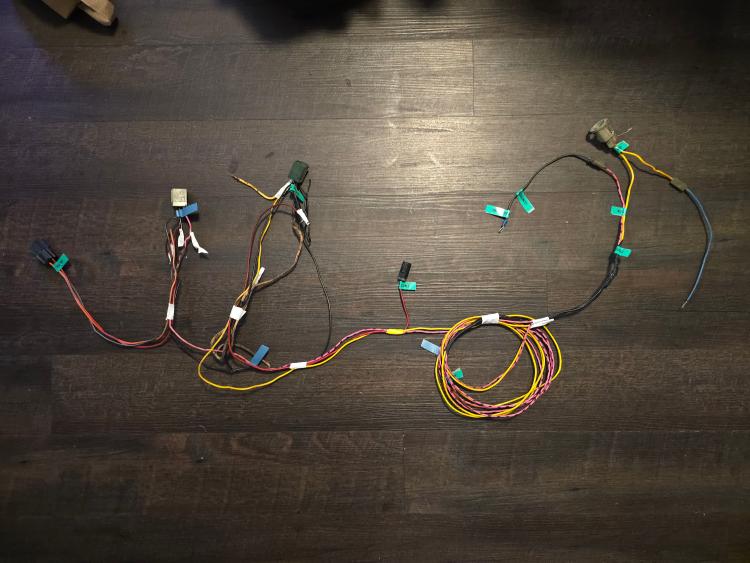 S160 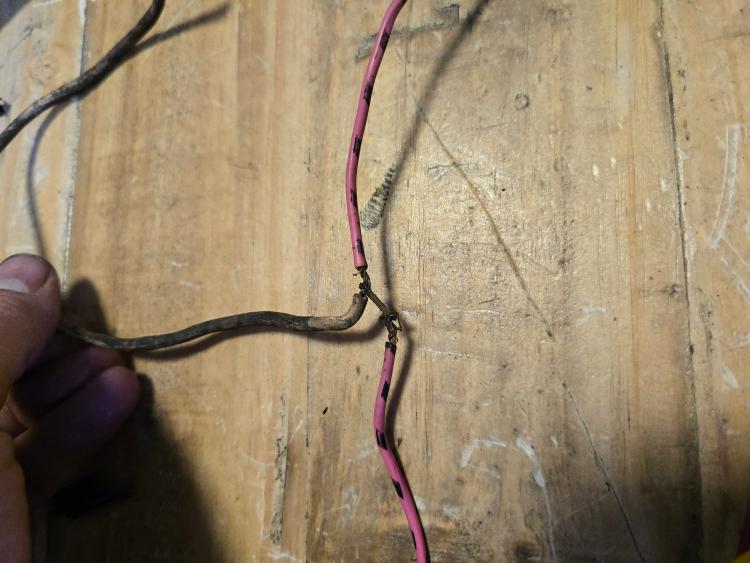 S112 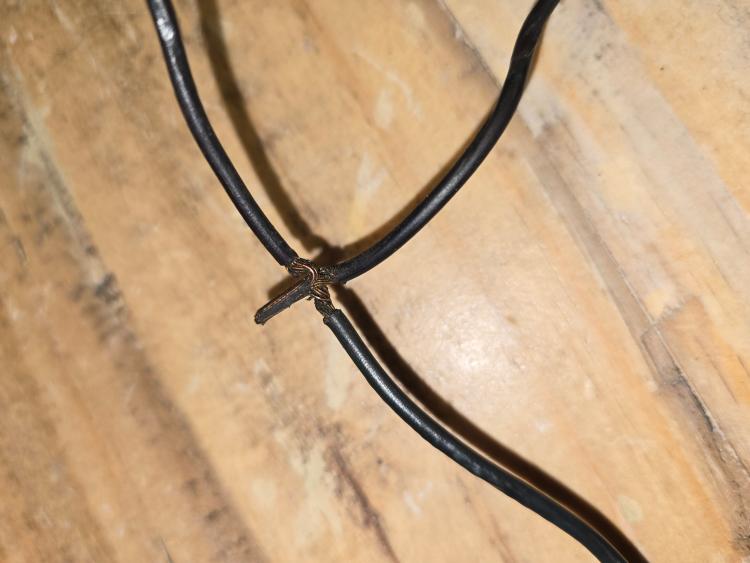 S110 - completely gone but these wires 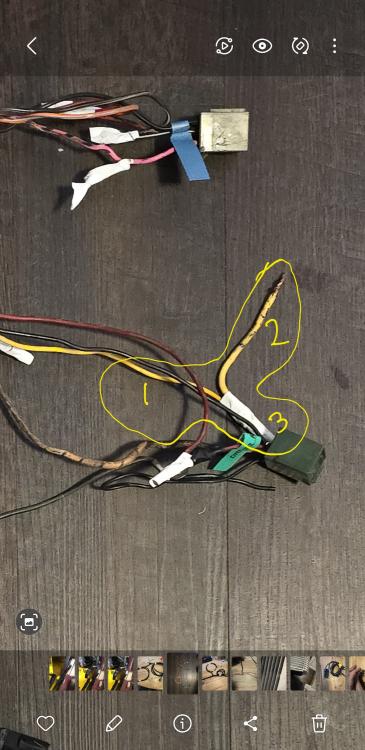
1985 F-350 XL | 460 | C6 | "Rufus Maximus"
1986 F-150|Standard Cab|4x2|300Six|C6Transmission w/3.08 rear|Name:TBD 2021 Ranger XLT Super Crew | Cactus Grey | black out package | max tow |
|
For some reason Ford chose to run this harness around the front of the engine bay over the radiator. It's not going back in that way. The pink and yellow wires hook up to the starter contactor and then can make their way into the firewall.
I am going to be adding a fuse/relay box on the passenger side which will facilitate this even more. This keeps the yellow wire from needing to cross the engine bay at all because the relay is on the same side.
1985 F-350 XL | 460 | C6 | "Rufus Maximus"
1986 F-150|Standard Cab|4x2|300Six|C6Transmission w/3.08 rear|Name:TBD 2021 Ranger XLT Super Crew | Cactus Grey | black out package | max tow |
|
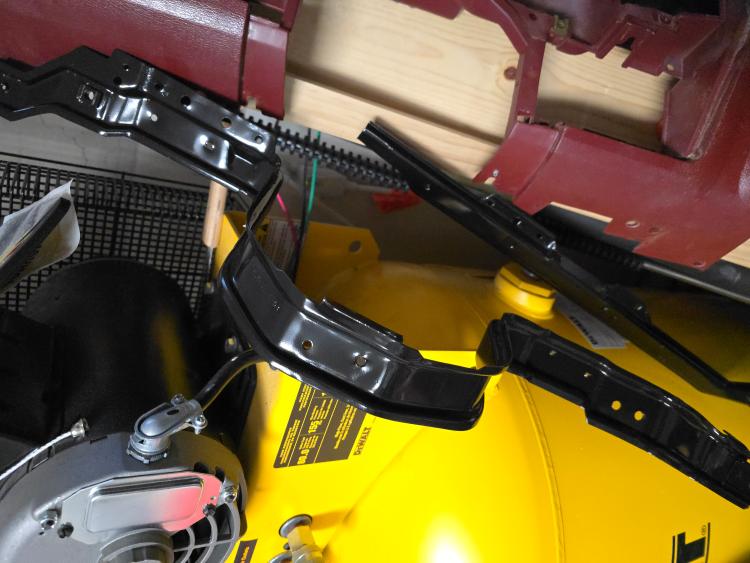
I'm really digging how these dash frames are looking. I have the support bars and the heat shield for the passenger fire wall harness drying now.
1985 F-350 XL | 460 | C6 | "Rufus Maximus"
1986 F-150|Standard Cab|4x2|300Six|C6Transmission w/3.08 rear|Name:TBD 2021 Ranger XLT Super Crew | Cactus Grey | black out package | max tow |
Re: 'Rufus Maximus' - Build Thread
|
Administrator
|
In reply to this post by Danny G
That's one tricky thing about the EVTM. In order to 'simplify' it only shows the wires of the circuit being discussed. There may be connectors that have multiple circuits, or cases where a splice is shown, but they usually show a wire circuit # and "see pg 123" with a figure like a triangle. Someone really went to town! 🤡 🙄 I don't know how it could have run with the inertia switch disconnected. Be glad they weren't a meth fiend looking for where it was possessed! 🤣 We used to have an avionics guy that was really good at building harnesses. Vipertech was his username, I think...
Jim,
Lil'Red is a '87 F250 HD, 4.10's, 1356 4x4, Zf-5, 3G, PMGR, Saginaw PS, desmogged with a Holley 80508 and Performer intake. Too much other stuff to mention. |
Bullnose Enthusiasts Forum
›
Projects
|
1 view|%1 views
| Edit this page |

