Instrument Bezel Control Panel - 3D Printed
|
Administrator
|
Jim - just watched his video on inserts. Really good. I am printing a simple test right now to see how the plastic threads do in 6mm and depending upon that I will order a pack of the inserts or not.
Jon - agreed, not a huge fan of the gvod dash panel. Your idea of the fuel selector switch is a great one and the shift indicator would be a nice relevant reuse-of-factory fit. I'd actually thought of putting a few of those fuel selector switches in a panel like this one for in the cubby but after looking at the back of the switch I don't think I could have squeezed many in there. Would be a great stock look though.
Scott
'Camano' 1986 F250 Supercab XLT Lariat 460/C6 'Chanute' 1980 F350 C&C 400/NP 435 - Gin Pole But there ain't nothin' wrong with the radio |
Re: Instrument Bezel Control Panel - 3D Printed
|
Administrator
|
I LIKE IT!!!!! I wonder how many I could squeeze in? Hmmmmmmm......
Gary, AKA "Gary fellow": Profile
Dad's: '81 F150 Ranger XLT 4x4: Down for restomod: Full-roller "stroked 351M" w/Trick Flow heads & intake, EEC-V SEFI/E4OD/3.50 gears w/Kevlar clutches
|
|
Administrator
|
Haha, it looks great in the mind's eye, right? Would complement the headlight knobs on the left. I pulled a few of the switches from the jy not long ago to play around with for this but never got further than just eyeballing the size. Now that we have the main panel though, it wouldn't be hard to replace the button holes with slots.
Scott
'Camano' 1986 F250 Supercab XLT Lariat 460/C6 'Chanute' 1980 F350 C&C 400/NP 435 - Gin Pole But there ain't nothin' wrong with the radio |
|
Administrator
|
In reply to this post by Gary Lewis
Gary, seems like we discussed the possibility of a modified fog light switch bezel for the right side of the column that read “overdrive” but it would have to be narrowed. The whole right side (from column to right side of the pocket) could potentially be made into a multi-switch face plate modeled after the fog lamp bezel, but it would need to be tall enough to cover the bead around the pocket.
SHORT BED 4-DOOR DIESEL: 1986 F350 4x4 under construction-- 7.3 IDIT ZF5+GVOD
STRAIGHT SIX 4X4: 1981 F150 2wd to 4x4-- 300 I6 close ratio diesel T19, hydroboost brakes, Saginaw steering BIG F: 1995 F-Superduty under construction— converting to 6.9L IDI diesel ZF5+DNE2 |
Re: Instrument Bezel Control Panel - 3D Printed
|
Administrator
|
In reply to this post by kramttocs
Not to hijack this thread, and I can move these comments if you want, Scott.
The tank switches are ~1" wide, and the pocket is ~4 3/4 wide so 4 switches would fit, if we could figure out the mounting. That's because they have that arm hanging off of them, as shown below. Someone can surely figure out how to do that? Perhaps remove the cover, drill the spot welds to remove the arm, then put studs on the cover? And that way they might work for fog light switches? As for the height, the two switches below are farther back than we'd want as the knob is almost inside the pocket. So that works. Or, if we could just find a switch that has an arm like that and has reasonable mounting? Boy, it would look factory! 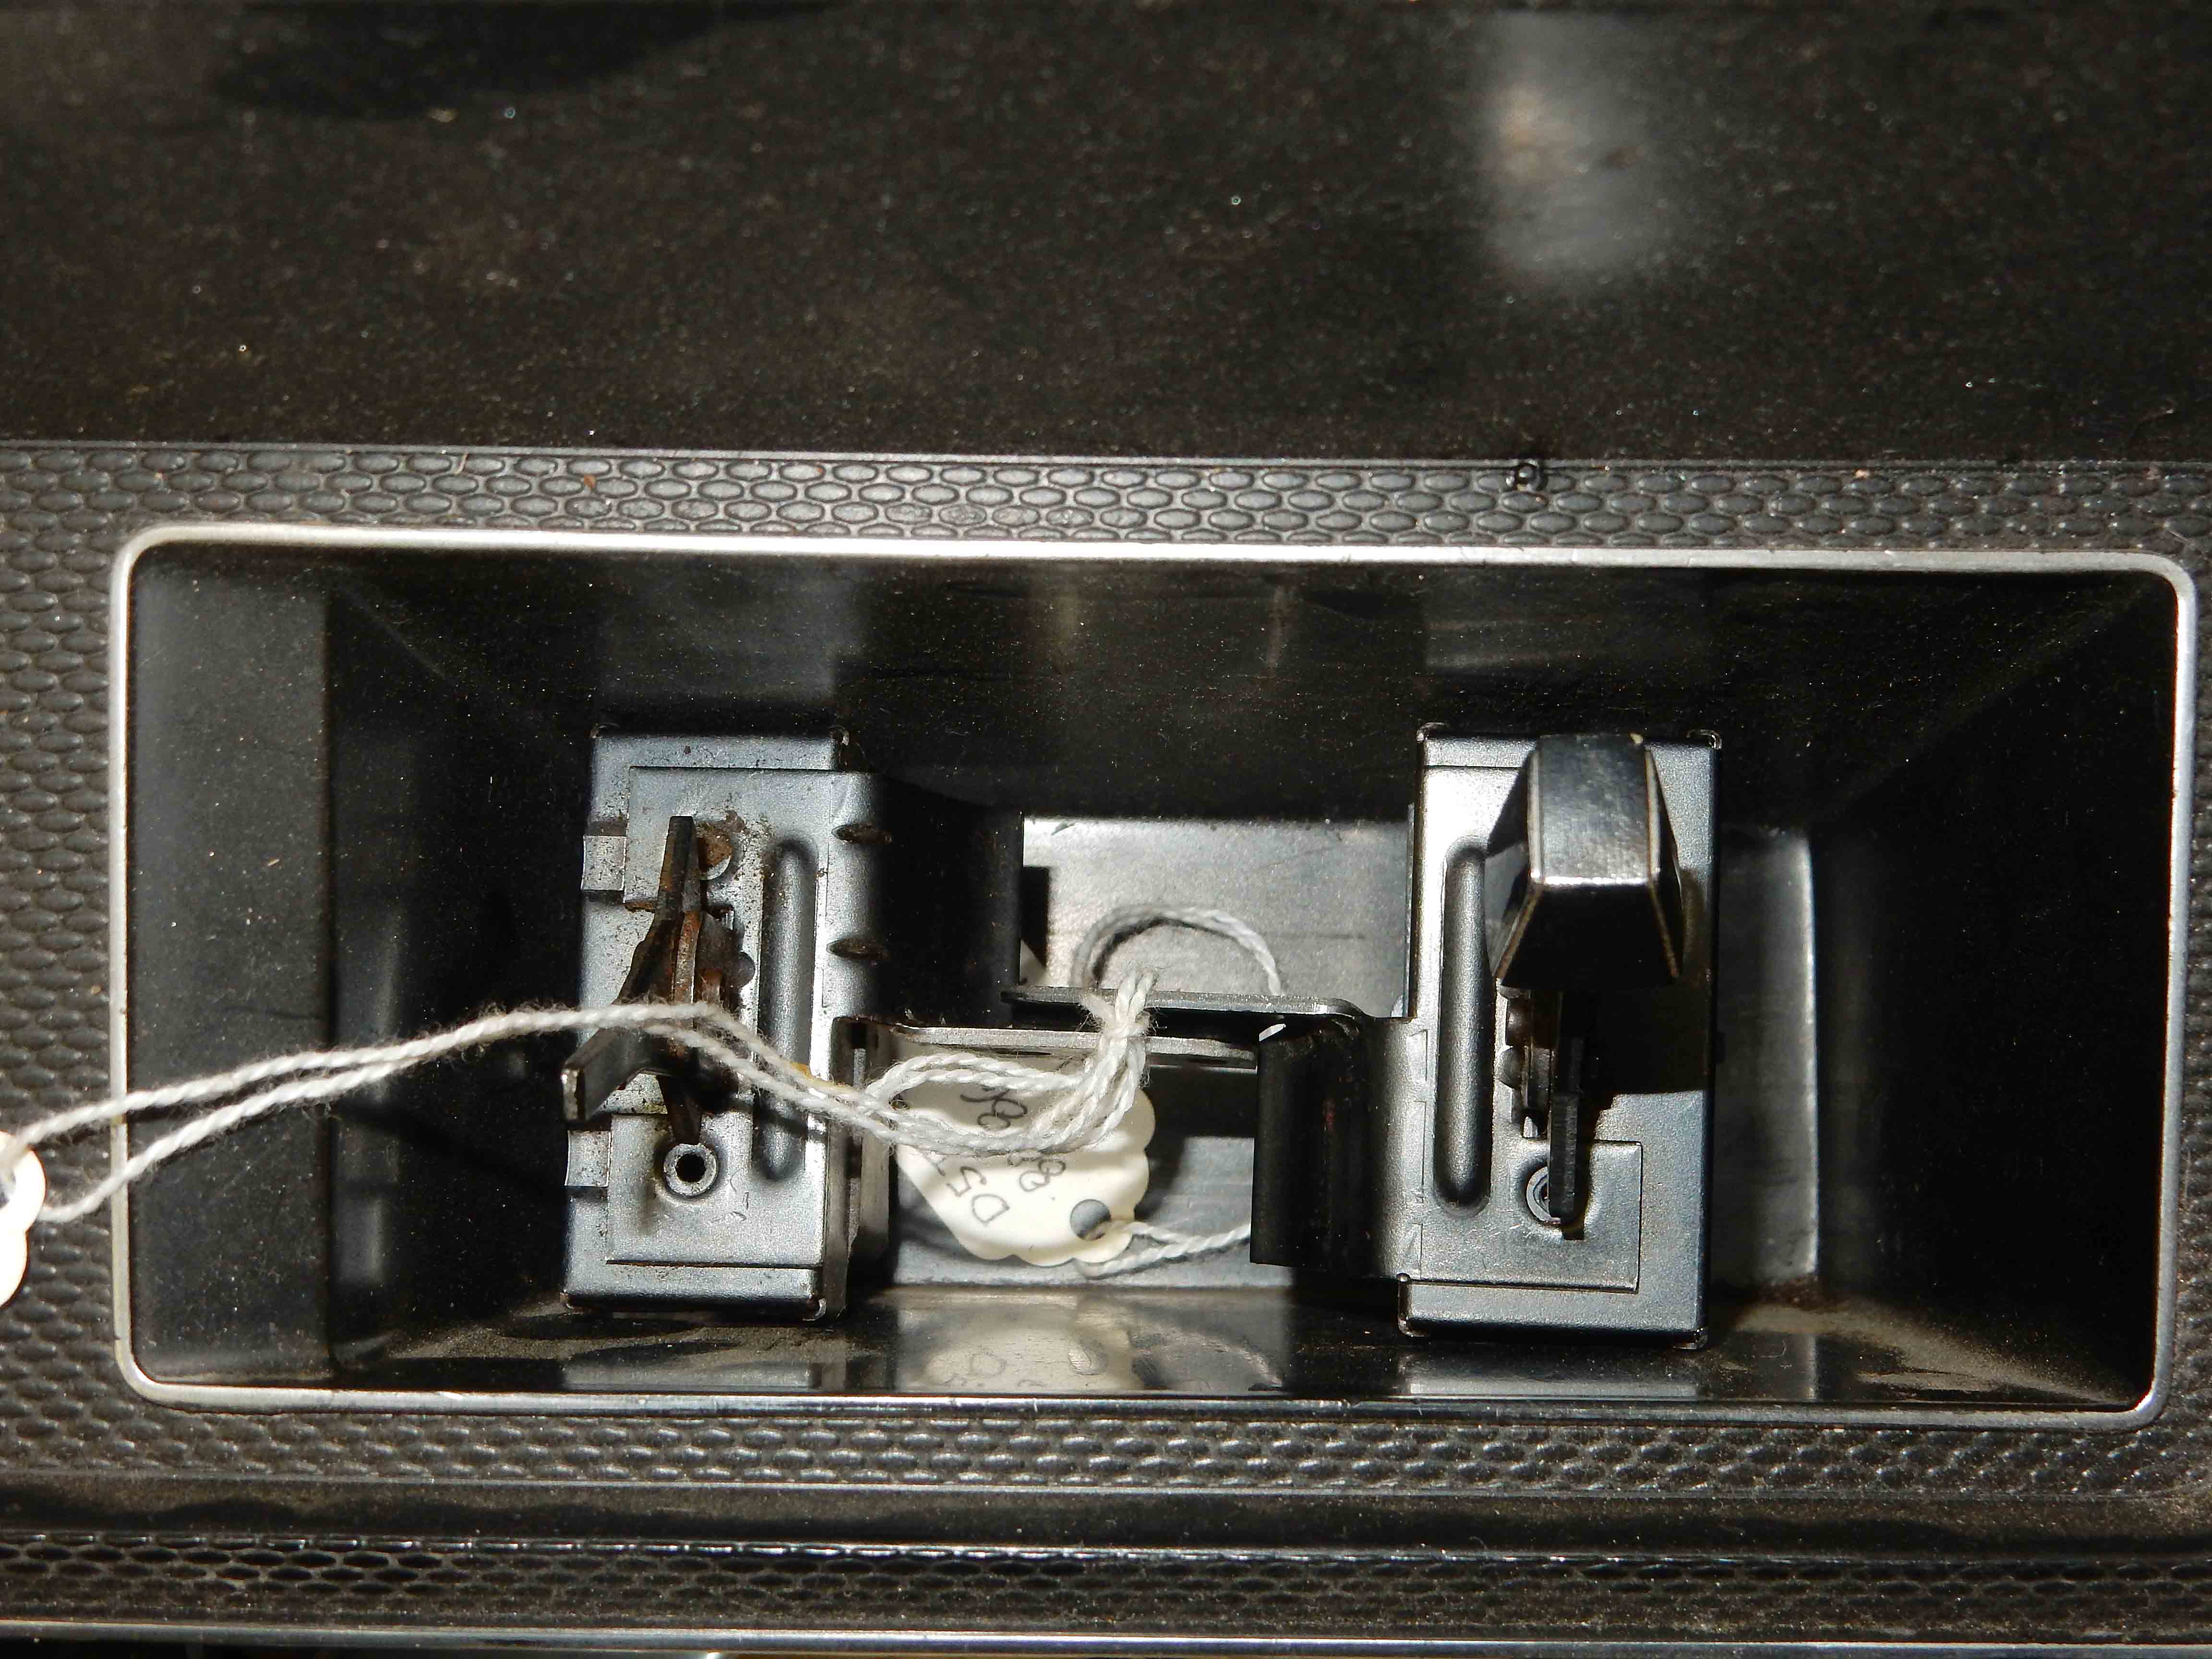 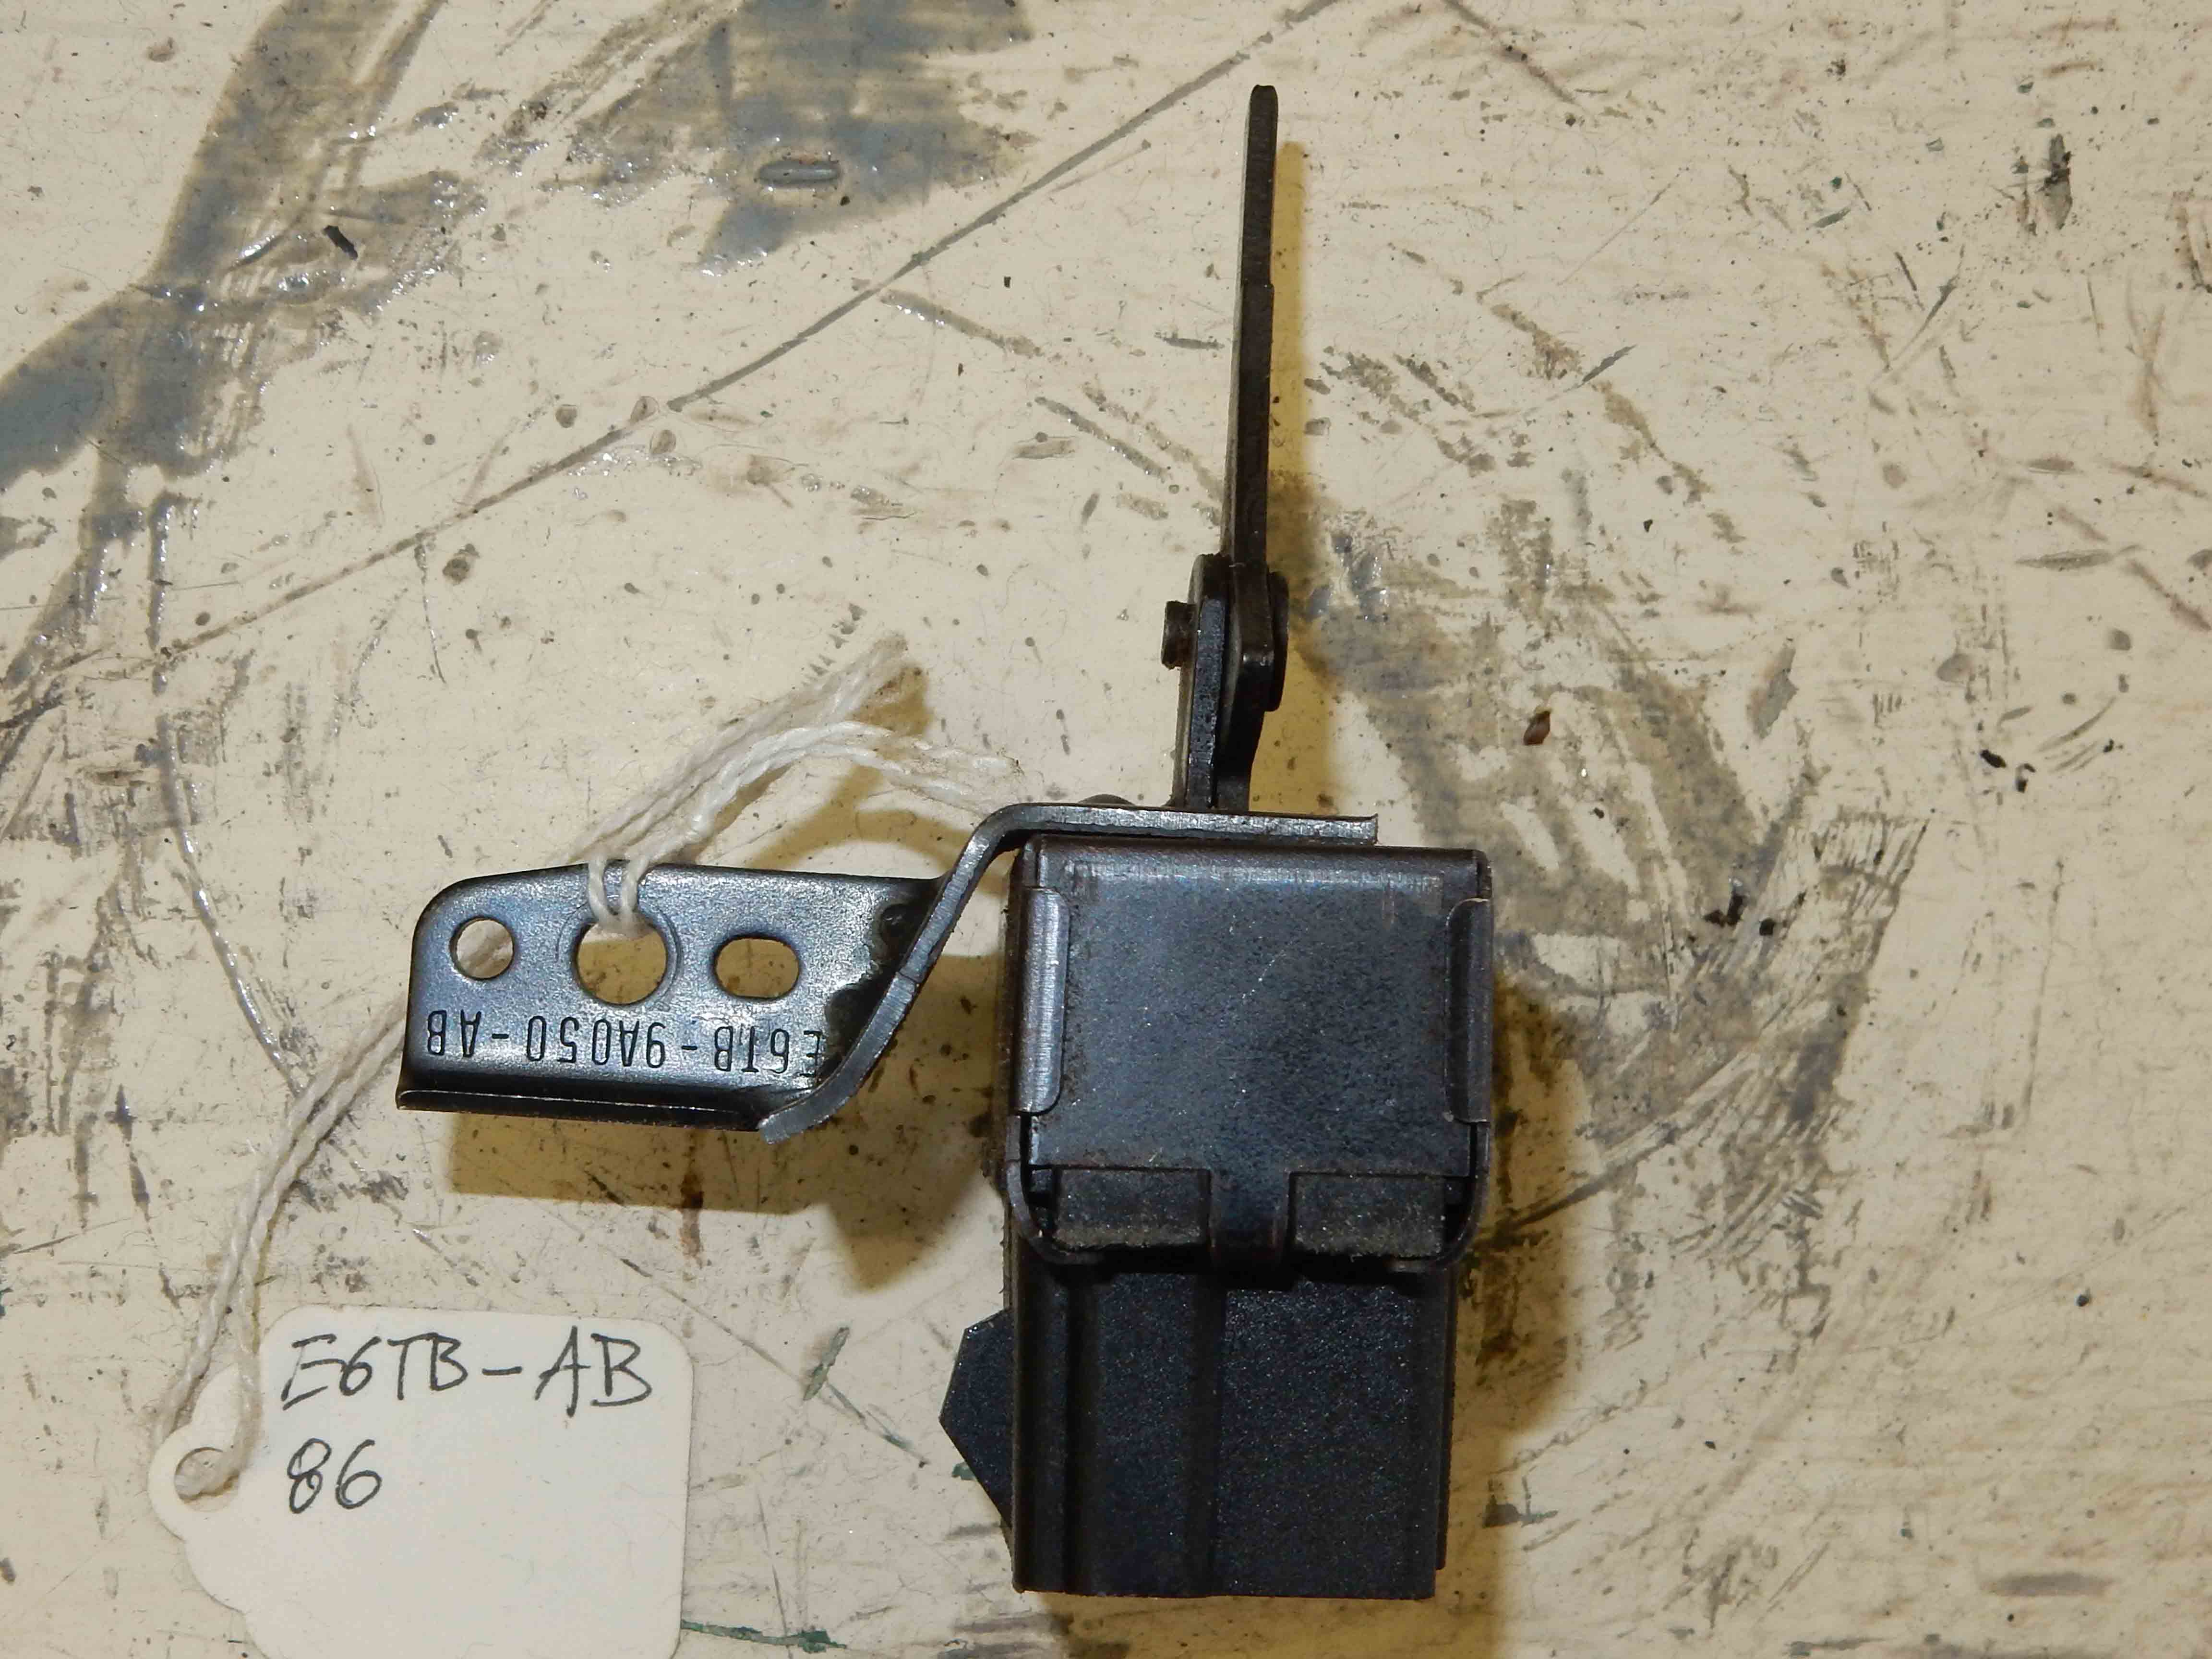
Gary, AKA "Gary fellow": Profile
Dad's: '81 F150 Ranger XLT 4x4: Down for restomod: Full-roller "stroked 351M" w/Trick Flow heads & intake, EEC-V SEFI/E4OD/3.50 gears w/Kevlar clutches
|
Re: Instrument Bezel Control Panel - 3D Printed
|
Administrator
|
In reply to this post by Ford F834
I'm thinking it would look just like the fog light switch and fit in the pocket, retaining the bead: 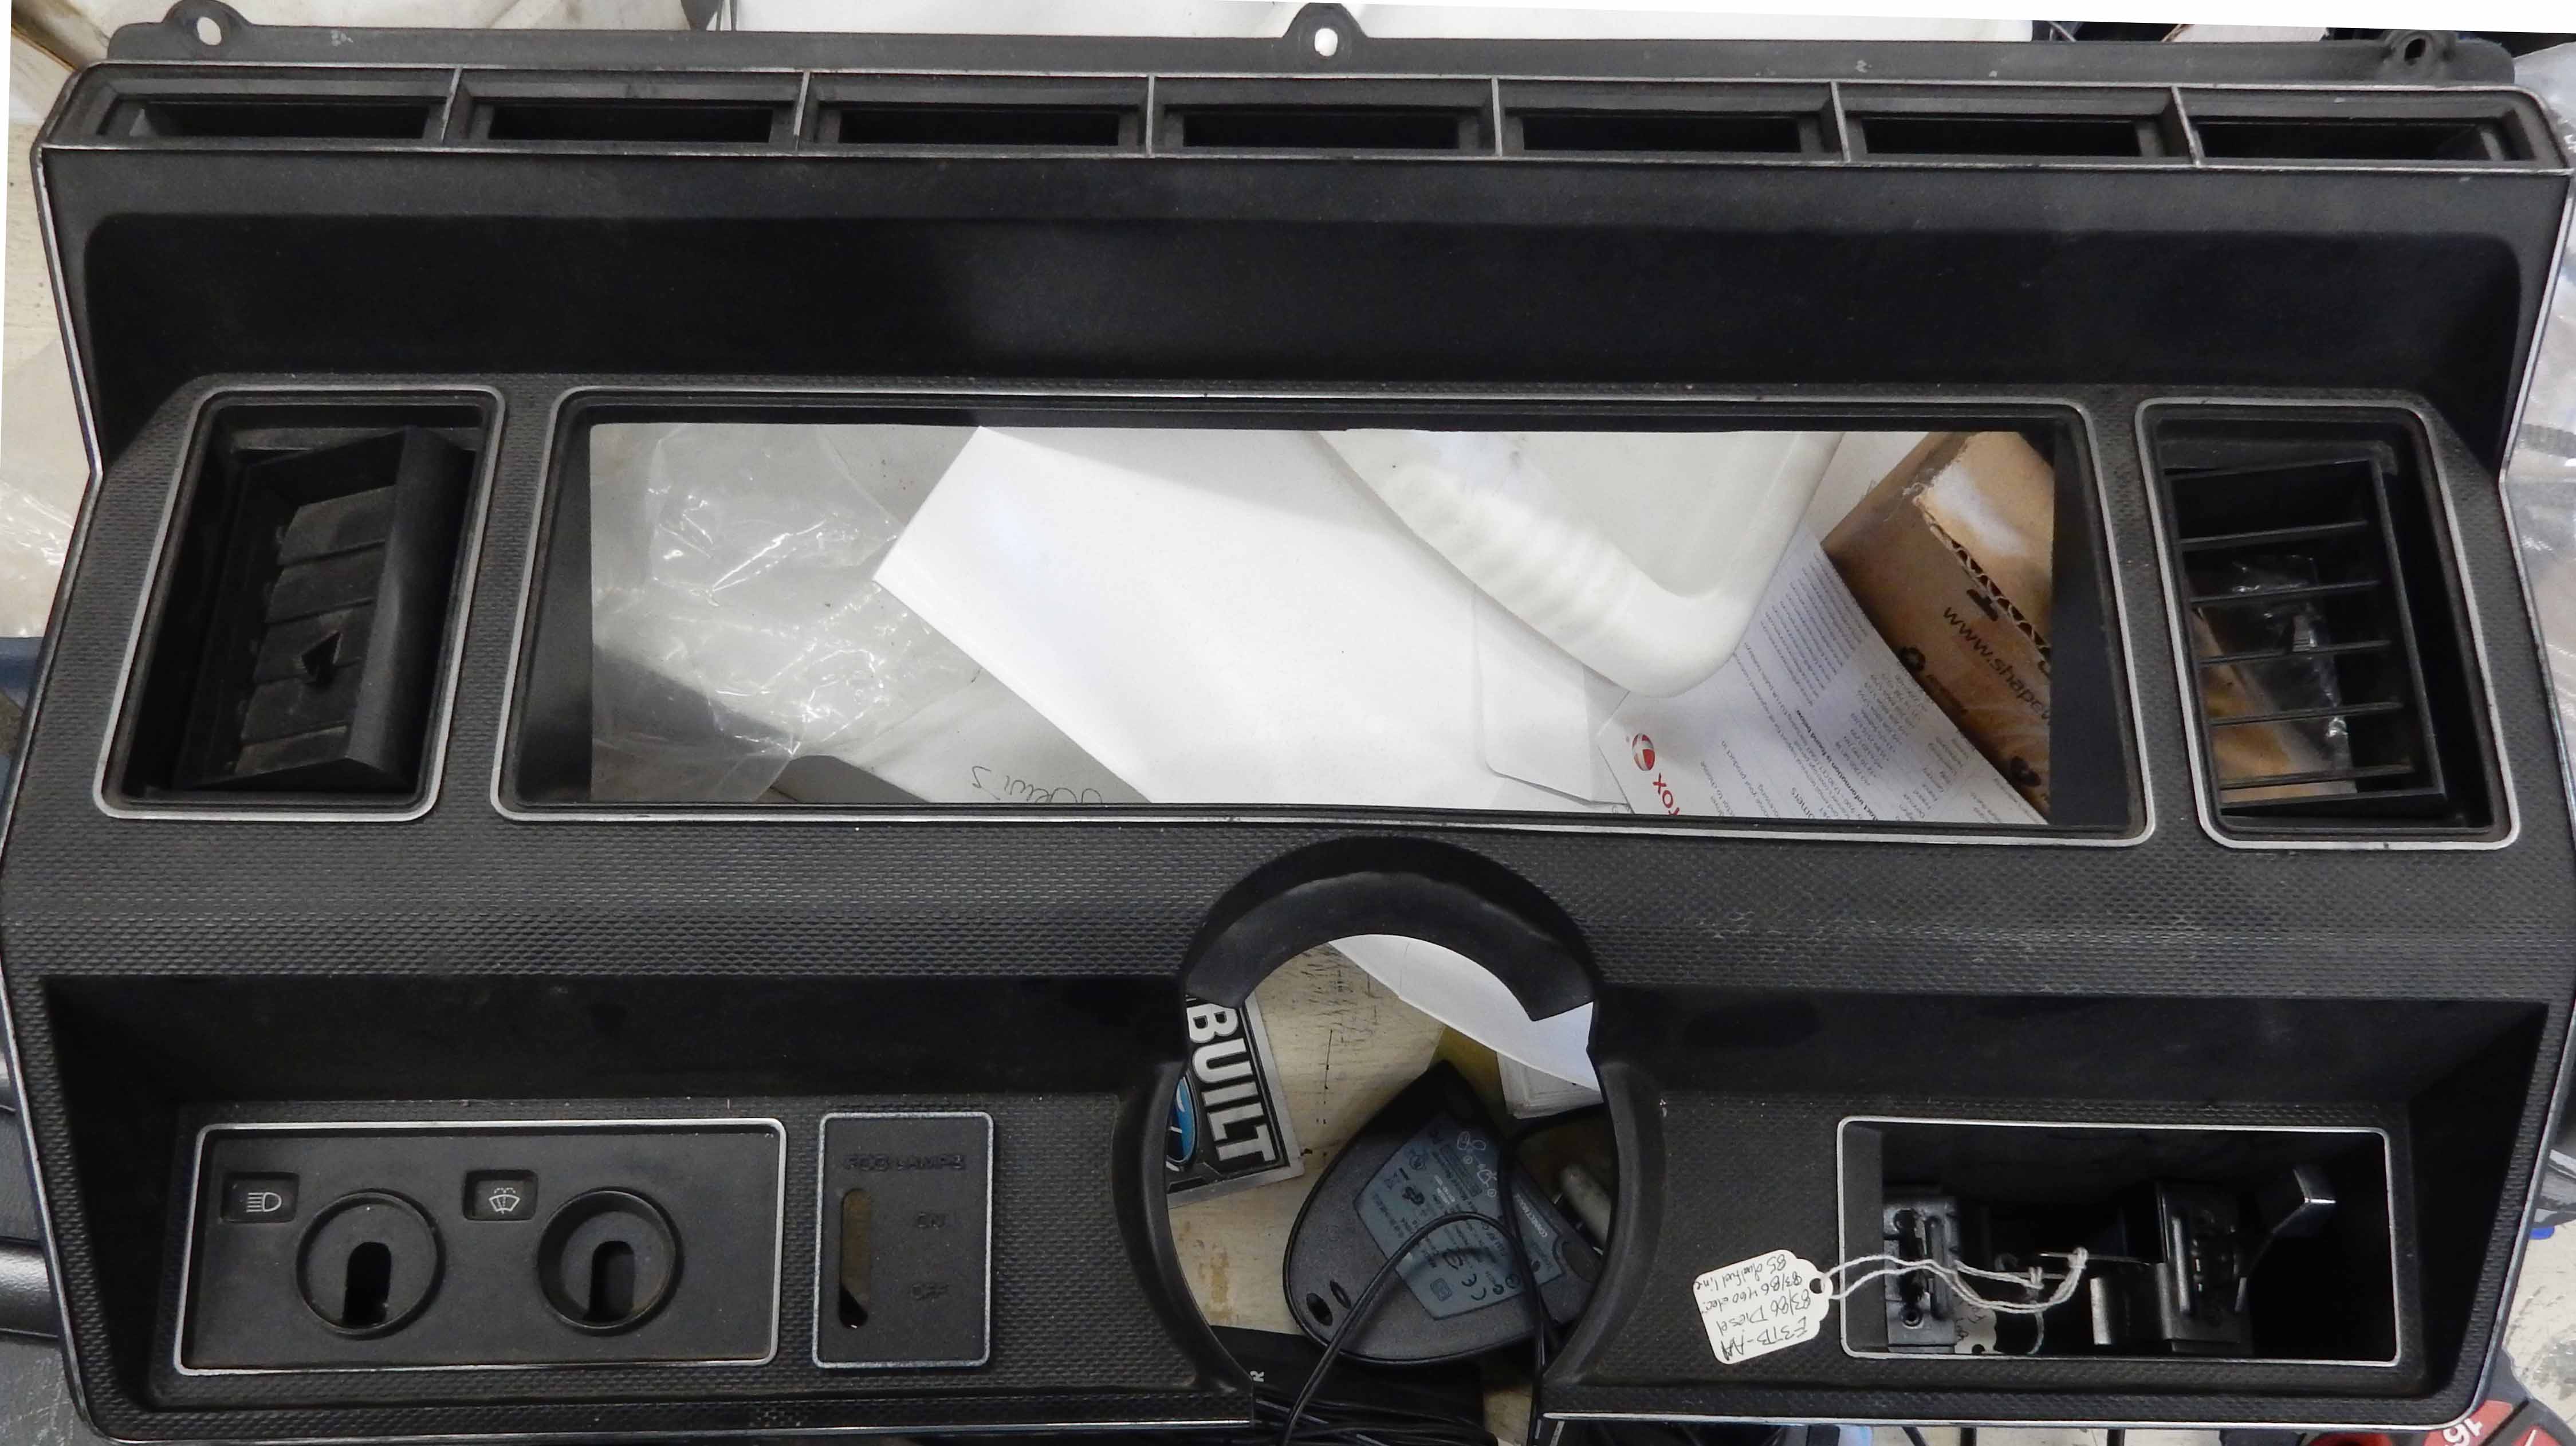
Gary, AKA "Gary fellow": Profile
Dad's: '81 F150 Ranger XLT 4x4: Down for restomod: Full-roller "stroked 351M" w/Trick Flow heads & intake, EEC-V SEFI/E4OD/3.50 gears w/Kevlar clutches
|
|
Administrator
|
In reply to this post by Gary Lewis
Nope, fine by me to have it here. I think it would be great if we can figure it out.
In addition to the fuel selector switch, throw in a fan control and you've got a multipurpose/multi-state switch  Not sure on the mounting. Pushing the square buttons take very little force and that force is pushing against a thick ledge of the plastic. Those levers have a bit more resistance to them not to mention the leverage of the arm. I don't think there will be enough room on top and bottom of the switch to tack an ear on there with a hole to bolt into the panel from behind. Or even tacking the switches together and putting ears on the sides. Hmm... Maybe making a back plate for the panel that would attach to the front plate with bolts and sandwich the switches between them? Afraid room might get tight really fast though. Like Jon mentioned, with the dealer a/c dash controls they cut the back 3/4 of the cubby off and the panel is clipped onto the remaining lip top and bottom. Doubt any of us want to cut the cubby off but it would give more room. Guess it depends upon how nice it turns out 
Scott
'Camano' 1986 F250 Supercab XLT Lariat 460/C6 'Chanute' 1980 F350 C&C 400/NP 435 - Gin Pole But there ain't nothin' wrong with the radio |
Re: Instrument Bezel Control Panel - 3D Printed
|
Administrator
|
I think you just hit on the mounting approach - sandwich the switches between the front panel and a 3D printed back panel. Ron and I did something like that on the dash patch and it can make a very solid mount.
Print the back of the front panel such that the tank switches just nestle in and are captured by raised lands around them. Come over the back of the switches with a collar that goes around the switches and is then screwed to the front panel. In fact, I think the switch is made such that the collar could go up against those tabs that secure the metal front to the plastic back. Once you have the unit complete you slide it into the pocket. But, those connectors for the switches are big, so I'm afraid the back of the pocket would have to go as I can't see getting them through any other way. And, as I think about this approach for mounting, I don't see why it wouldn't work for the fog light as well.  
Gary, AKA "Gary fellow": Profile
Dad's: '81 F150 Ranger XLT 4x4: Down for restomod: Full-roller "stroked 351M" w/Trick Flow heads & intake, EEC-V SEFI/E4OD/3.50 gears w/Kevlar clutches
|
|
Administrator
|
Played around a little last night to see how the switches would work out. It's a quick, rough draft but the measurements of the 'stalls' and slots should be close enough for a test print. Ultimately the objects should be combined better and the front could be flowed around the stalls for a more solid fit in the cubby.
  Will be stuck in the house most of the weekend so going to see what kind of paint I can find locally to test for the letters/borders.
Scott
'Camano' 1986 F250 Supercab XLT Lariat 460/C6 'Chanute' 1980 F350 C&C 400/NP 435 - Gin Pole But there ain't nothin' wrong with the radio |
Re: Instrument Bezel Control Panel - 3D Printed
|
Administrator
|
 That's pretty much what I was envisioning, although I was thinking the sides would be the same all the way back so there's no chance it'll rock as you flip the switches. But, as I'm sure you've discovered, those sides aren't parallel nor square. Probably for casting purposes, there's a taper to the pocket so your print has to account for that - and probably already does.  Does the back of that piece accept the switches, or is this just the conceptualized version? When it does, all you need is a collar piece that will go down over the backs of the switches and clamp them to the front piece. And speaking of that, I did a bit of playing with one of those switches, my instrument bezel with the fog lamp bezel on it, and a spare dash I have in the attic. It looks to me like a tank switch w/o the mounting arm could be mounted to the back of the dash using the collar approach. It may take a spacer in front to get the pivot point just right, but that spacer could be glued to the backside of the dash and have threads or studs on it to accept the collar, thereby capturing the switch.
Gary, AKA "Gary fellow": Profile
Dad's: '81 F150 Ranger XLT 4x4: Down for restomod: Full-roller "stroked 351M" w/Trick Flow heads & intake, EEC-V SEFI/E4OD/3.50 gears w/Kevlar clutches
|
|
Administrator
|
I concur - that was the 'flowing' part. You would want the panel to fit tight against all four sides as far back as possible.
The measurements here for the switches should be pretty accurate to where if you remove that mounting tab they will fit in with the correct amount protruding through the front. The measurements are where they will go in far enough to where that ledge is flush that you mentioned earlier. So add the collar piece that form fits around the plastic female connector on the back of the switch and it should hold them. That collar will also add some strength to the whole stall section. Got lucky with the paint or at least I think so. Ran to the box store this evening and picked up some sterling silver acrylic paint and some detail brushes. As I was leaving the aisle I glanced over and saw the paint pens (also acrylic). Lo and behold they had a fine tipped one in 'Metallic'. The color on the cap was close enough to warrant a try. These are with two coats of the pen although the second coat didn't really have a visual impact. After drying I used my fingernail and it took significant pressure before it was damaged. Even then it just dulled - it never fully flaked off down to black in my tests. It flowed and applied extremely easy. The painted one is an early iteration but I did paint the brake 'boost' numbers that will be on the final version to see how they would come out. Won't even bother with the bottle of paint or brushes. 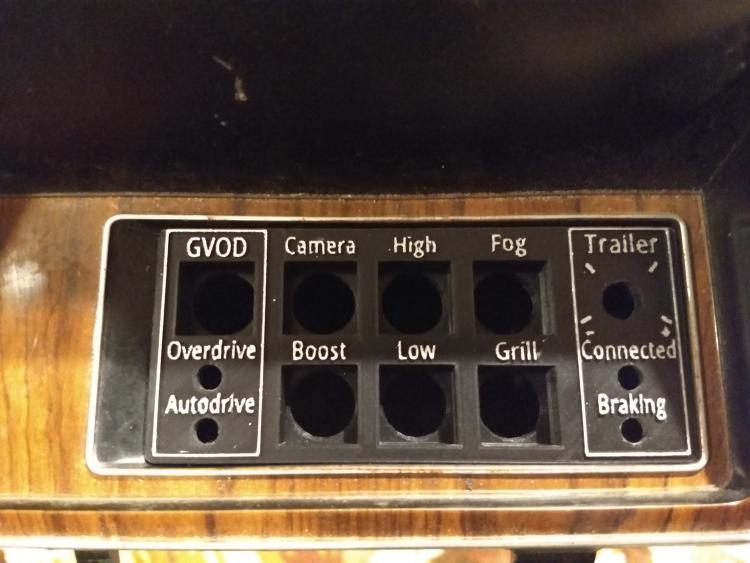 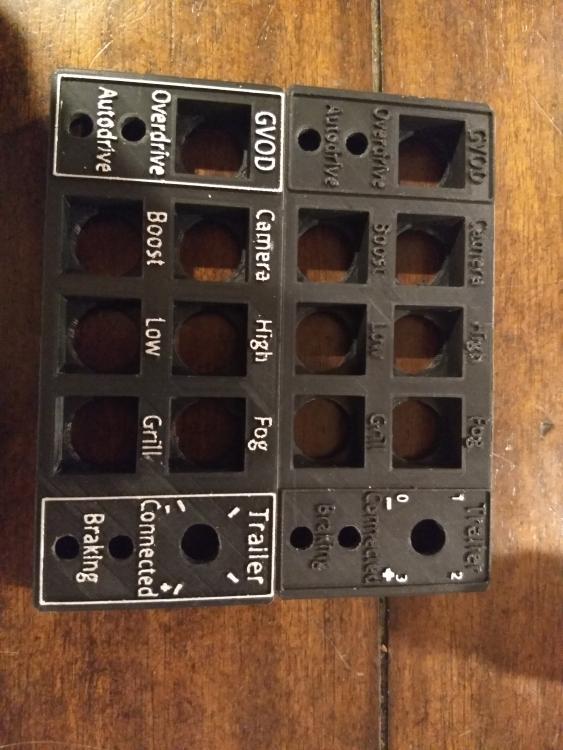 I think the size of the letters is pushing it with my printer (or I just don't know how to fully tweak it yet) so the paint emphasizes any defects there but definitely falls into the good enough category for me. May end up rounding the corners of the two frames a bit more though.
Scott
'Camano' 1986 F250 Supercab XLT Lariat 460/C6 'Chanute' 1980 F350 C&C 400/NP 435 - Gin Pole But there ain't nothin' wrong with the radio |
Re: Instrument Bezel Control Panel - 3D Printed
|
Administrator
|
That looks Great, Scott!
 Going to be very integrated looking when you're done.
Jim,
Lil'Red is a '87 F250 HD, 4.10's, 1356 4x4, Zf-5, 3G, PMGR, Saginaw PS, desmogged with a Holley 80508 and Performer intake. Too much other stuff to mention. |
Re: Instrument Bezel Control Panel - 3D Printed
|
Administrator
|
In reply to this post by kramttocs
I think we are on the same page re the tank switches. Should work quite well.
And your paint pen test worked wonderfully. I'm loving it. 
Gary, AKA "Gary fellow": Profile
Dad's: '81 F150 Ranger XLT 4x4: Down for restomod: Full-roller "stroked 351M" w/Trick Flow heads & intake, EEC-V SEFI/E4OD/3.50 gears w/Kevlar clutches
|
|
Dang...That looks really good, I had thought of small oil/etc gauges there but none available that I like, may do a switch panel there with an LED voltmeter.
Gary, you have created an awesome site for our trucks...Thanks. Bill
1983 F100 XL 300, 6 cyl, aod, long bed
1961 E100 pickup, 289,C4 |
Re: Instrument Bezel Control Panel - 3D Printed
|
Administrator
|
Welcome, Bill. But it is the rest of y'all that have made this site what it is.
As for gauges, have you seen this: http://www.garysgaragemahal.com/gauge-pocket.html
Gary, AKA "Gary fellow": Profile
Dad's: '81 F150 Ranger XLT 4x4: Down for restomod: Full-roller "stroked 351M" w/Trick Flow heads & intake, EEC-V SEFI/E4OD/3.50 gears w/Kevlar clutches
|
|
In reply to this post by kramttocs
I was going to put rockers in mine, but I like the retro 80"s appeal of your square ones. Link us up with where you got them.
1985 F-350 XL | 460 | C6 | "Rufus Maximus"
1986 F-150|Standard Cab|4x2|300Six|C6Transmission w/3.08 rear|Name:TBD 2021 Ranger XLT Super Crew | Cactus Grey | black out package | max tow |
Re: Instrument Bezel Control Panel - 3D Printed
|
In reply to this post by kramttocs
Wow, Ive really only looked at the first pics buy holy cow thats cool.
Sam
1984 F250. 460. C6. 4x4. MSD Ignition. Airbag rear suspension Whole buncha problems |
|
Administrator
|
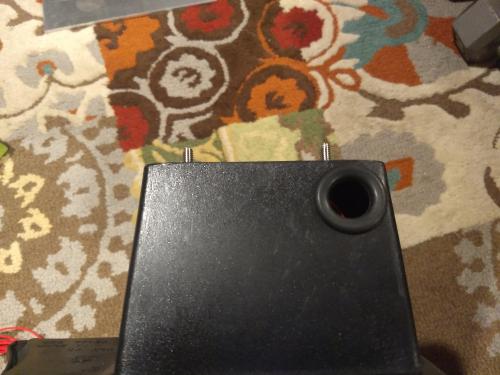
Thanks. Thought it turned out pretty good. Printed the final one the other day. I ordered some heated inserts but since I had the 6mm x 100mm stainless steel rods available, I just increased the thickness of the hole perimeters in the print settings and then tapped them. Drilled the holes in the cubby for the rods as well as for the wires. Picture only shows the one hole on top but there is also one in the center in the back. Did this because the one on top is primarily for the trailer dial. There is going to be quite a bit of wiring shoved in what little is left of the cubby so letting it come straight out the back will be the easiest.
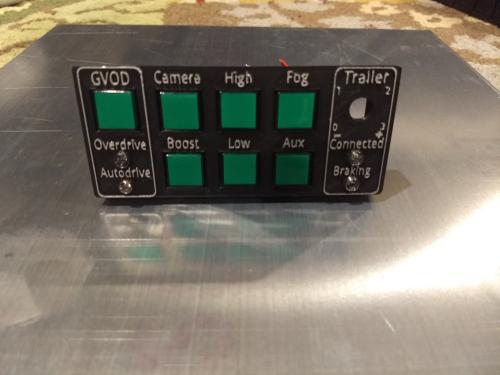 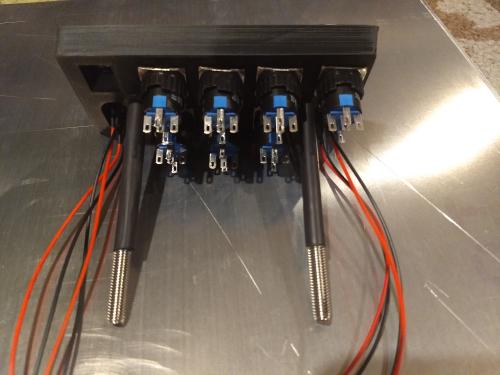 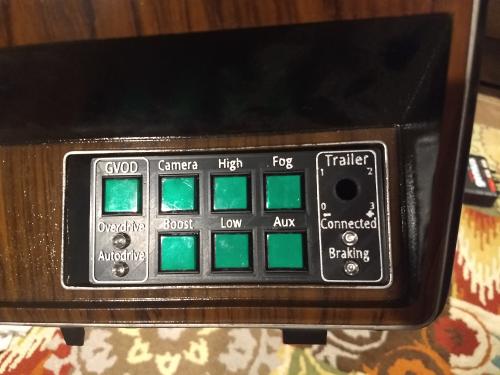  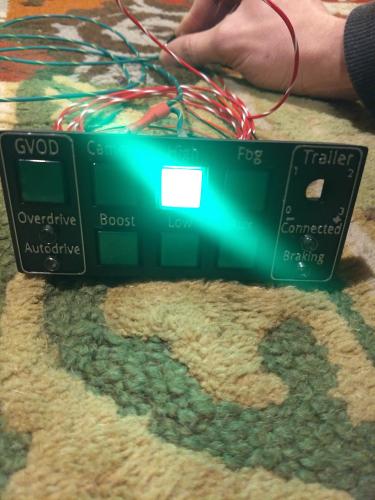 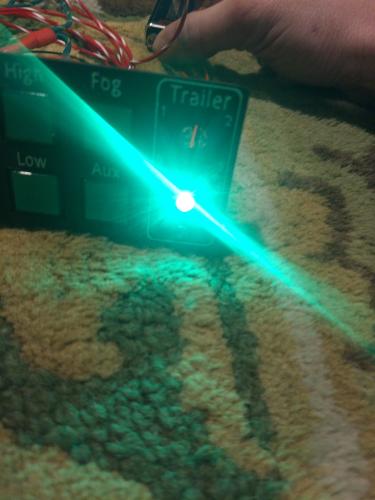 I would provide a direct link to the buttons and leds but these seem like those things that is sold by one seller today and another tomorrow. If you search on eBay for "12v square momentary latching button" you'll see them. A few color choices in both the momentary and the latching. For the leds search for "3mm 12v led indicator" Hard to tell in the photos but even just hooked up to 9v, the leds are really, really bright so I may play around with some nail polish down the road if they are too much at night.
Scott
'Camano' 1986 F250 Supercab XLT Lariat 460/C6 'Chanute' 1980 F350 C&C 400/NP 435 - Gin Pole But there ain't nothin' wrong with the radio |
|
Nice job!
Dane
1986 F250HD SC XLT Lariat 4x4 460 C6-Sold 1992 Bronco XLT 4x4 351W E4OD 1998 GMC Sierra SLE K1500 350 4L60E Arizona |
Re: Instrument Bezel Control Panel - 3D Printed
|
Administrator
|
In reply to this post by kramttocs
Looks great, Scott!
 Do you have heat shrink around the rods back to about where they'll hit the back of the cubby? That's a great idea. As for all the wiring, that's where things start getting tricky. But it looks like you have that sorted.
Gary, AKA "Gary fellow": Profile
Dad's: '81 F150 Ranger XLT 4x4: Down for restomod: Full-roller "stroked 351M" w/Trick Flow heads & intake, EEC-V SEFI/E4OD/3.50 gears w/Kevlar clutches
|
| Edit this page |

