Front end rebuild 1981 F350 2WD, Brakes kingpins, spindle
|
Late last summer I rebuilt the front under my 1981 F350 truck. When purchased, I drove it to the shop that inspects (inspection required to get tags) and left it for the night. Next morning they couldn't get it started without a jump as I later learned that the alternator was faulty, apparently the seller had charged it prior to my arrival. They started the truck and backed it up while turning the steering and one employee on the ground could see the wheels "crabbing" due to worn kingpins and bushings, so right off, the adventure began. when it failed inspection.
Only two auto shops in town that would do kingpin work. The one that did mine has since closed. Engine rebuild was done after kingpin replacement and it became obvious that the pivot bushing for the right axle was very fatigued. Won't get into how the work process had gone with the kingpin rebuild, but will say that it took 6 weeks to get the truck back, so one has an idea. Just seems while this piece was laying on the work bench, they might have replaced the less than $50 worth of bushings. I never asked a price, so they were not in any kind of a box. Even if they were, a call would have netted the additional sale. I used the truck over the summer to haul some gravel for a french drain system around the new shop building that was being erected at home. It was noted that the front brake power had faded, though in general, I am easy on brakes. I think it had a poor quality set, which holds with other replacements that were evident from the prior owner. Still, a load downhill requires what is required to stop. I like to do work once and done, move on to something else to work on for the next time, so wanted decent rotors. If American made rotors exist for this truck, I couldn't find them. Local O'Rielly's only offered a standard rotor. So ordered some Stop Tech drilled/slotted/cryogenically treated rotors and waited three months to get them. These are clearly are made in China, says so on the boxes. I had not expected different. I never have a completely "good" feeling regarding Chinese made parts. Standards seem lower, quality seems inconsistent. Sadly, with old vehicles where parts prices are sensitive, that seems about all that is available in too many cases. While doing rotors, I decided to replace the pivot bushings while in. Disassembly revealed about 1/2" or play in right wheel, noticed while removing the right hand tie rod nut. Play due to i-beam moving on pivot bushing. Once apart, center of bushing fell out as the rubber had separated. For those wondering, 6,000 miles since the shop had "rebuilt" the kingpins and had the I-beams out from under and on the bench. I can nit pick a few other points of the work that had been done, but this and the pivot bolt that was worn about 20% through and had not been replaced would be the biggest issues found related to the prior king pin repair. Right hand spindle also had been run for a period with a seized thrust bearing and had worn the thrust surface on the spindle close to .080". That was not replaced during the prior shops repair. In addition the wear was somewhat "bowl" shaped and not offering a flat surface for the thrust bearing. Several options were looked at, finally found a good used spindle from an F250. I-beam wear measured negligible as compared to the left I-beam with regards to thrust wear. Spindles came with American standard threaded clip/caliper retainer bolt. Threads on right spindle had been damaged at some point and a metric bolt had been jammed in. Threads were not holding all that good and bolt had no shoulder as needed to allow the clip to not bind. Used spindle also resolved this issue. While underneath it, I have never had experience with POR-15 and decided to paint the parts that were removed, and the parts of the frame from cab forward that I could reach. Loose parts were cleaned in a blast cabinet. Frame was cleaned with wire brush, putty knife, and POR-15 prep. When engine is out later, will add more detail to engine bay. POR-15 was brushed on, dries very glossy and when new, shows no brush marks. After a few reuses, as POR-15 built up in the lid groove, some of the components of the paint began to evaporate and brush marks were more common. I did the paint over several days, as such, even when I attempted to keep the lid groove clean, the lid eventually welded itself to the can and the can was more or less destroyed getting the lid off. By then, thinner was required to activate it again and even then, it did not work quite as before, leaving brush marks in places. Radius rod threaded ends were severely damaged in the areas that are out of sight and covered by the rubber bushings. Welds were ground out to separate them from the stamping they weld into. New rod material made from A36 steel, threaded to same depth. Before separating a spacer had been made to distance the threads when nut was bottomed out so new threaded rods could be distanced the same. New I-beam pivot bushings, new radius rod bushings were installed. Kingpins were removed for parts blasting. As they had been apart not long ago, they were easily separated. King pins already showed signs of rust and quite honestly, the thrust bearings, especially the one that had been installed on the right spindle and used on the not-flat thrust surface, was binding and cleaning and oiling did not free it. NOS Ford kingpin kits were found, and at a savings to current offerings and installed after painting. Probably no issue resolved here beyond thrust bearings that didn't bind, but I did notice that when greasing the grease with the factory type is pushed through the thrust bearing. With the prior, which are the same brand thrust bearing, grease on neither side came out through the thrust bearing. Not sure what that is about, but nice to know the thrust gets grease. Wheels installed and front of truck was sat on the ground before Radius rods, I-beam pivot bolts and Spring seat bolts were torqued to specs. One Monroe shock had nearly no dampening, so both were replaced with Bilstein. I chose EBC Yellow brake pads. Toe in was adjusted to 1/8" in. Even with the more squared type front tire treads, this truck drives amazingly well after all this! I never loved the way the I-beams drove. New bolts were used. Grade 8 as factory in suspension retention mounts, grade 5 elsewhere. Not saying work was perfect, as there is room to "grow" as my thinking becomes more complete, but was very happy with the end result. I am amazed at how well this thing drives! 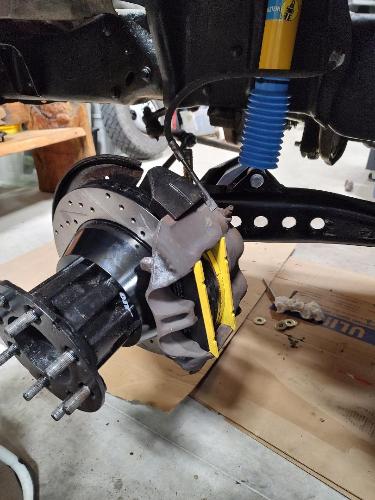 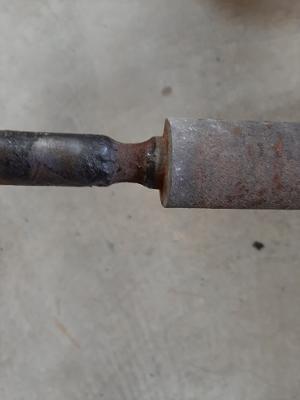 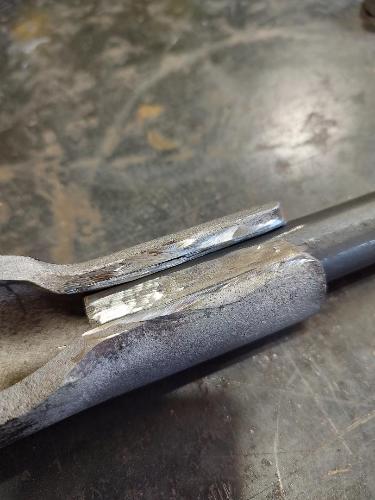 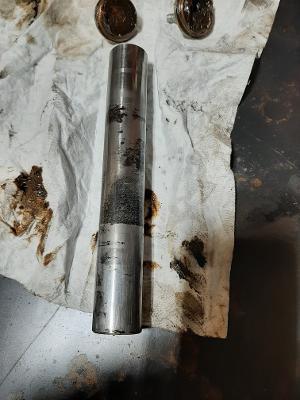 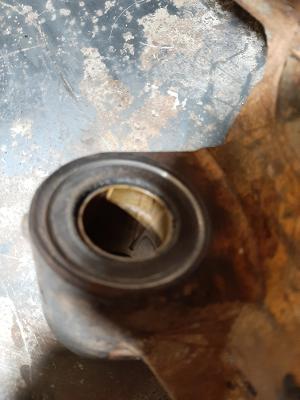 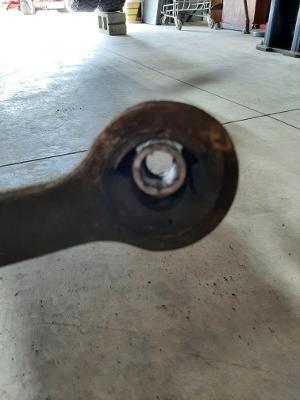 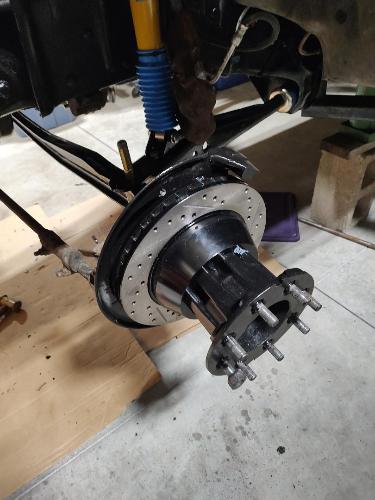 |
Re: Front end rebuild 1981 F350 2WD, Brakes kingpins, spindle
|
Administrator
|
You've had quite the experience! And, you figured out why the shop went out of business.
But it looks like you've also figured out how to do your own work, and do it well I might add.  On the POR-15 cans, put a piece of wax paper or Saran wrap between the lid and the can before replacing the lid. That way it won't stick. And always use a proper paint can opener, not a screwdriver, to get the lid off. Anyway, glad you got the truck driving so well. When set up properly these trucks really do nicely.
Gary, AKA "Gary fellow": Profile
Dad's: '81 F150 Ranger XLT 4x4: Down for restomod: Full-roller "stroked 351M" w/Trick Flow heads & intake, EEC-V SEFI/E4OD/3.50 gears w/Kevlar clutches
|
|
Thank you! There were some "family" problems that destroyed the shop that did the front end. Truth seems, most don't want to work on older stuff. There are more surprises, less desire for the customer to spend the money than when working on newer. Not giving them a free pass, just the reality, to a degree, with service. Doing it myself, right or wrong, it gets done the way I want. If not, I still learn and can go back and get it right, eventually. It'll be a work in progress, but working on it is not nearly as bad as the newer cars and trucks. Guess it's all what one is used to. If I had the garage at home when I bought it, it would have been done here then. If it wasn't right after that, no one to yell at other than myself....
Thanks for the tip on the POR-15. I have a buddy that has pushed that stuff towards me for 5 or 6 years. First time I ever used it. Neat stuff! |
Re: Front end rebuild 1981 F350 2WD, Brakes kingpins, spindle
|
Administrator
|
POR-15 is good stuff. But I can't get a good coverage with just one coat, so usually put two of the base on. However, since the base is not UV stable and will turn chalky over time I like to top-coat it. But, I've given up using POR's top coat as it is usually brushed on and the brush marks get pretty bad. Instead, when the base coat is still tacky I hit it with a spray can of black. That covers completely and adheres nicely - w/o all of the brush marks.
Gary, AKA "Gary fellow": Profile
Dad's: '81 F150 Ranger XLT 4x4: Down for restomod: Full-roller "stroked 351M" w/Trick Flow heads & intake, EEC-V SEFI/E4OD/3.50 gears w/Kevlar clutches
|
Re: Front end rebuild 1981 F350 2WD, Brakes kingpins, spindle
|
Administrator
|
In reply to this post by Greg Hall
Excellent write up! Eventually I am going to have to that on Darth. He still has the original factory installed king pins at 140,000 + miles, but they have been regularly greased since April 1994 when I bought him. First time was interesting, I don't think they had been done in years if at all and getting grease into them was mission impossible. I ended up unscrewing the top plugs and filling the resulting cavity with penetrating oil and letting it sit. Axle beams were on jack stands and wheels off. After about a day the penetrating oil did it's trick and it ran out between spindle and beam. Lower side took grease well and it oozed out of the thrust bearing.
I need to replace my rotors, but on a dually it isn't a fun, nor easy job.
Bill AKA "LOBO" Profile
"Getting old is inevitable, growing up is optional" Darth Vader 1986 F350 460 converted to MAF/SEFI, E4OD 12X3 1/2 rear brakes, traction loc 3:55 gear, 160 amp 3G alternator Wife's 2011 Flex Limited Daily Driver 2009 Flex Limited with factory tow package Project car 1986 Chrysler LeBaron convertible 2.2L Turbo II, modified A413 |
|
In reply to this post by Gary Lewis
Thank you Gary! Good to know regarding the POR-15. Learning is continuous...
|
|
In reply to this post by 85lebaront2
It wasn't on mine, either as mine is also a dually. It helps only as the truck is a spare/toy, relatively speaking. Thus if I can plan the down time, I can work around it. Sure would not be enjoyable in any way if the truck was regular use. Best of luck!
|
| Edit this page |

