E4OD For Dad’s Truck
|
Administrator
|
Thanks, Jonathan. I certainly does feel good. And, with any luck the engine and tranny will be sitting in the frame for the show in Sept. And, I hope to have the Trick Flow intake plenums on the engine as well. Plus the front suspension back in so it is sitting on all four wheels.
Gary, AKA "Gary fellow": Profile
Dad's: '81 F150 Ranger XLT 4x4: Down for restomod: Full-roller "stroked 351M" w/Trick Flow heads & intake, EEC-V SEFI/E4OD/3.50 gears w/Kevlar clutches
|
|
Administrator
|
That does look impressive! It will look very nice on the 408.
Bill AKA "LOBO" Profile
"Getting old is inevitable, growing up is optional" Darth Vader 1986 F350 460 converted to MAF/SEFI, E4OD 12X3 1/2 rear brakes, traction loc 3:55 gear, 160 amp 3G alternator Wife's 2011 Flex Limited Daily Driver 2009 Flex Limited with factory tow package Project car 1986 Chrysler LeBaron convertible 2.2L Turbo II, modified A413 |
|
In reply to this post by Gary Lewis
Are you going to paint it the other gray color you have been using for the other stuff like the transfer case?
Whitey: 1996 F 250 XL CCLB 4X4 7.3 DI ZF5 (The Work Horse) Lots of power mods
Whitey Jr: AKA Jr 1982 F 150 CCLB 4X4 351W C6 (Jr Work Horse) respectable power, but not over the top The Bronco: 1987 Bronco XLT 351W C6 (needs work) Lots of off road mods and plenty of power mods The Dodge: 2006 Ram 2500 CCSB 4X4 5.9 HO Cummins (The reliable ride that cant keep an AC in itself) (5th AC go around almost complete) |
|
Administrator
|
I'm not sure yet. I need to get it beside the transfer case and see how much difference there is. But I think it is going to be very close and I may not have to repaint it.
Gary, AKA "Gary fellow": Profile
Dad's: '81 F150 Ranger XLT 4x4: Down for restomod: Full-roller "stroked 351M" w/Trick Flow heads & intake, EEC-V SEFI/E4OD/3.50 gears w/Kevlar clutches
|
|
Administrator
|
In reply to this post by Bruno2
I moved the E4OD out of my new truck and onto an engine stand today. Here's a shot mid-transfer:
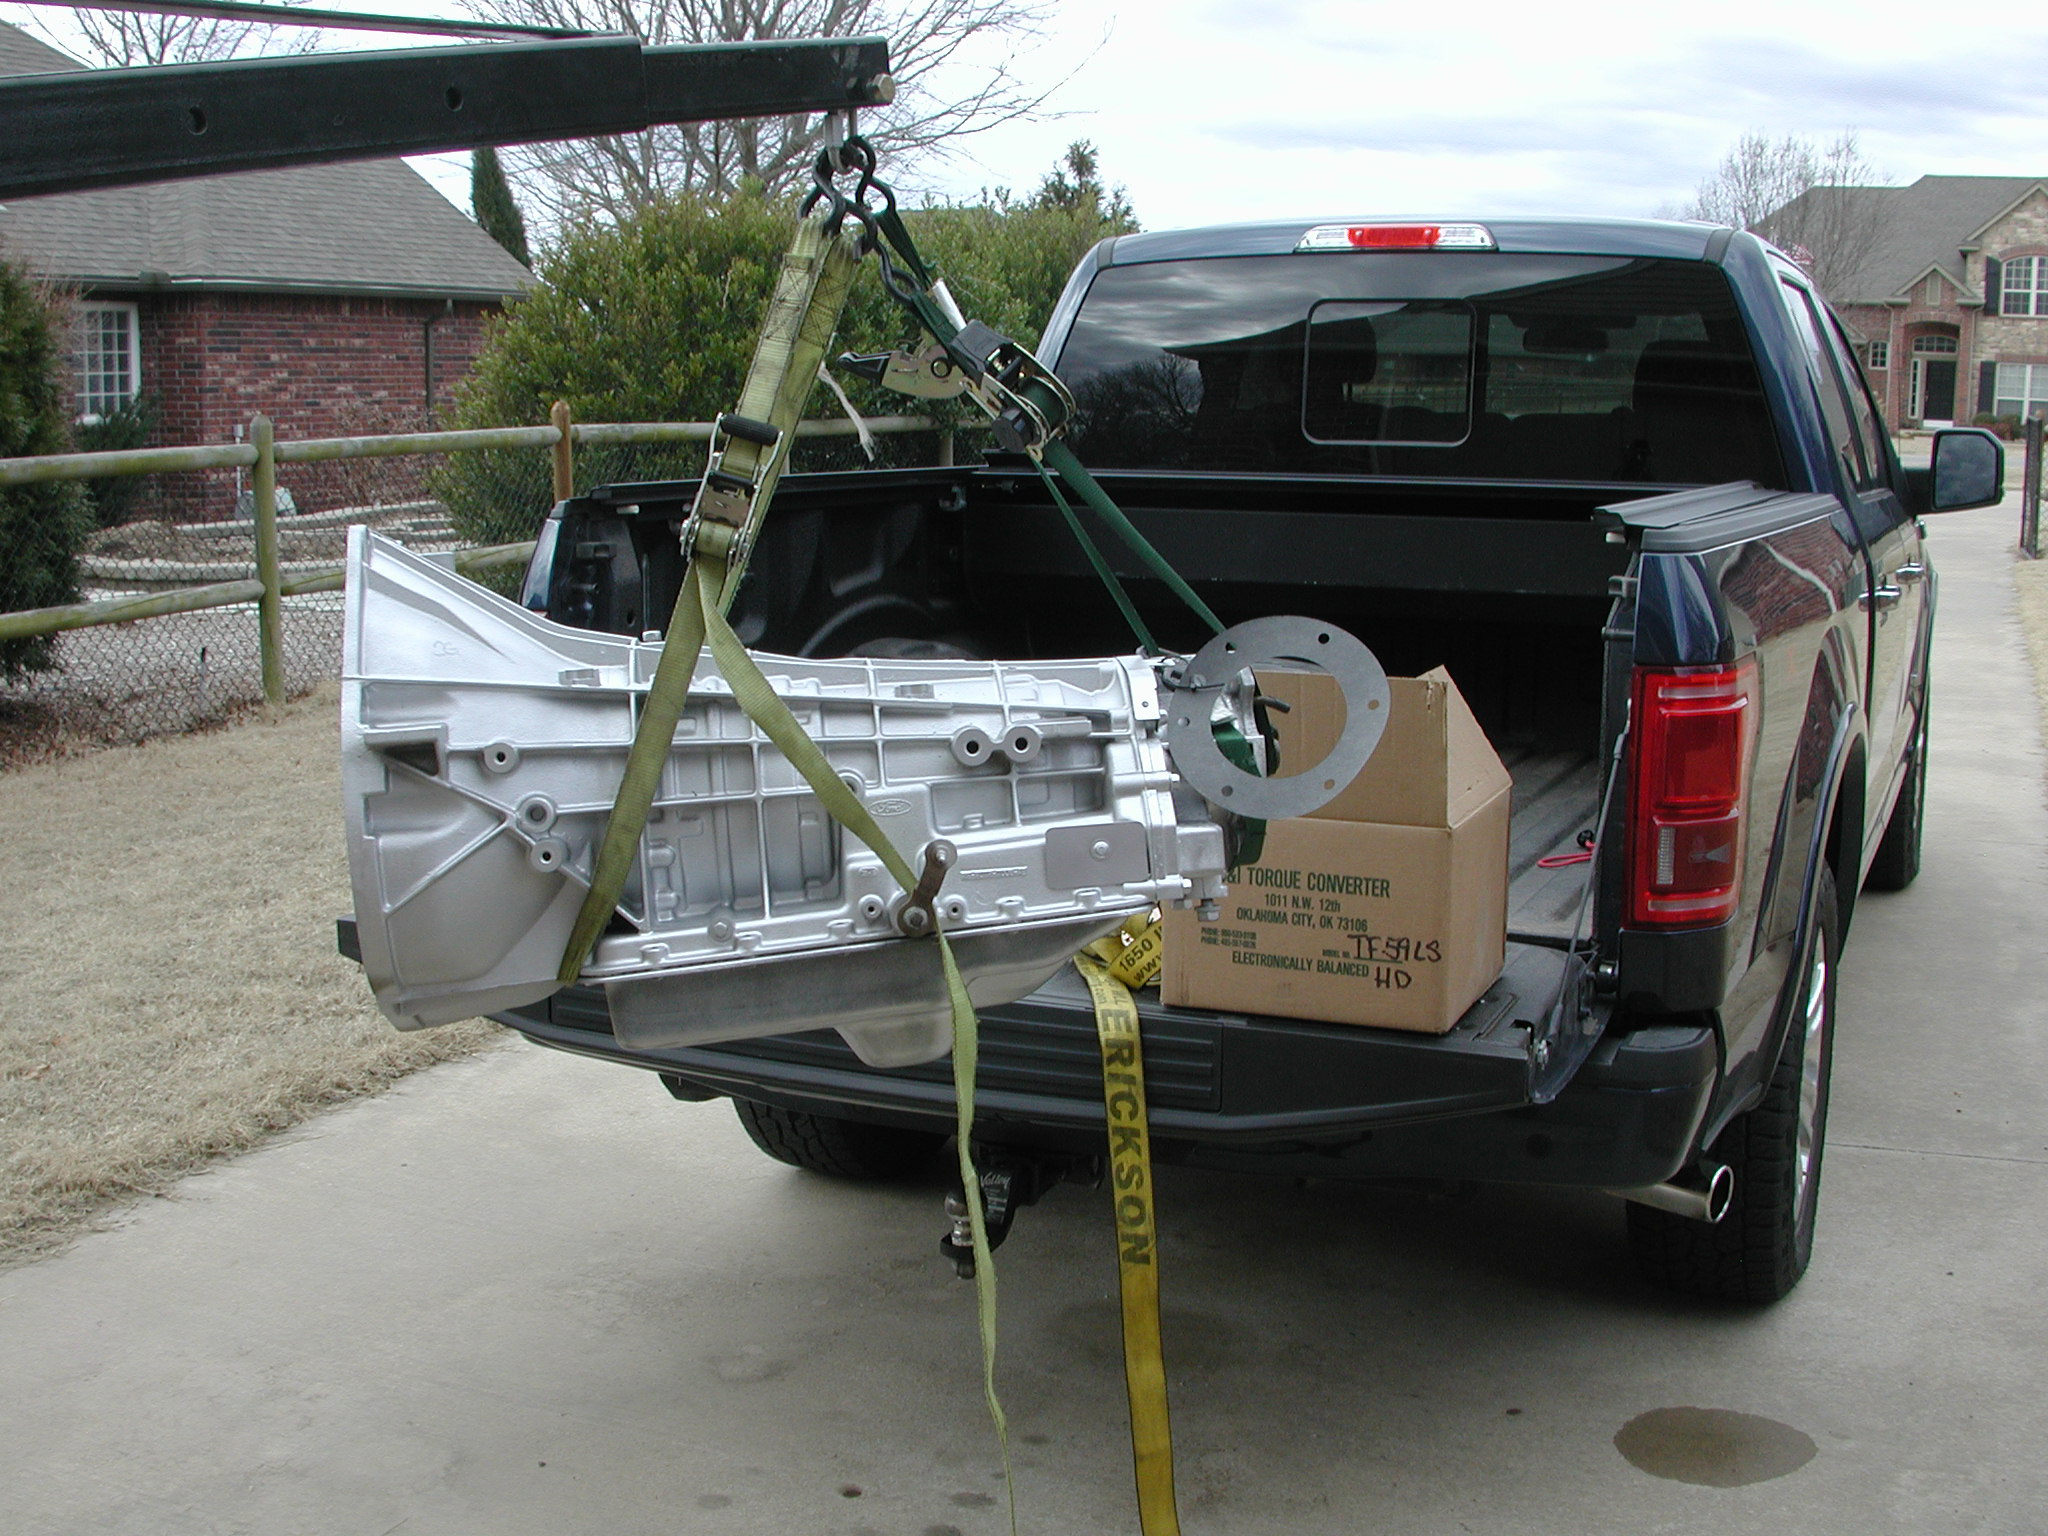 And here it is on the engine stand, where I discovered that it had been painted from "above". In other words, the part you won't be able to see when it is installed was fairly well painted, and the part you can see from below had a very thin coat. 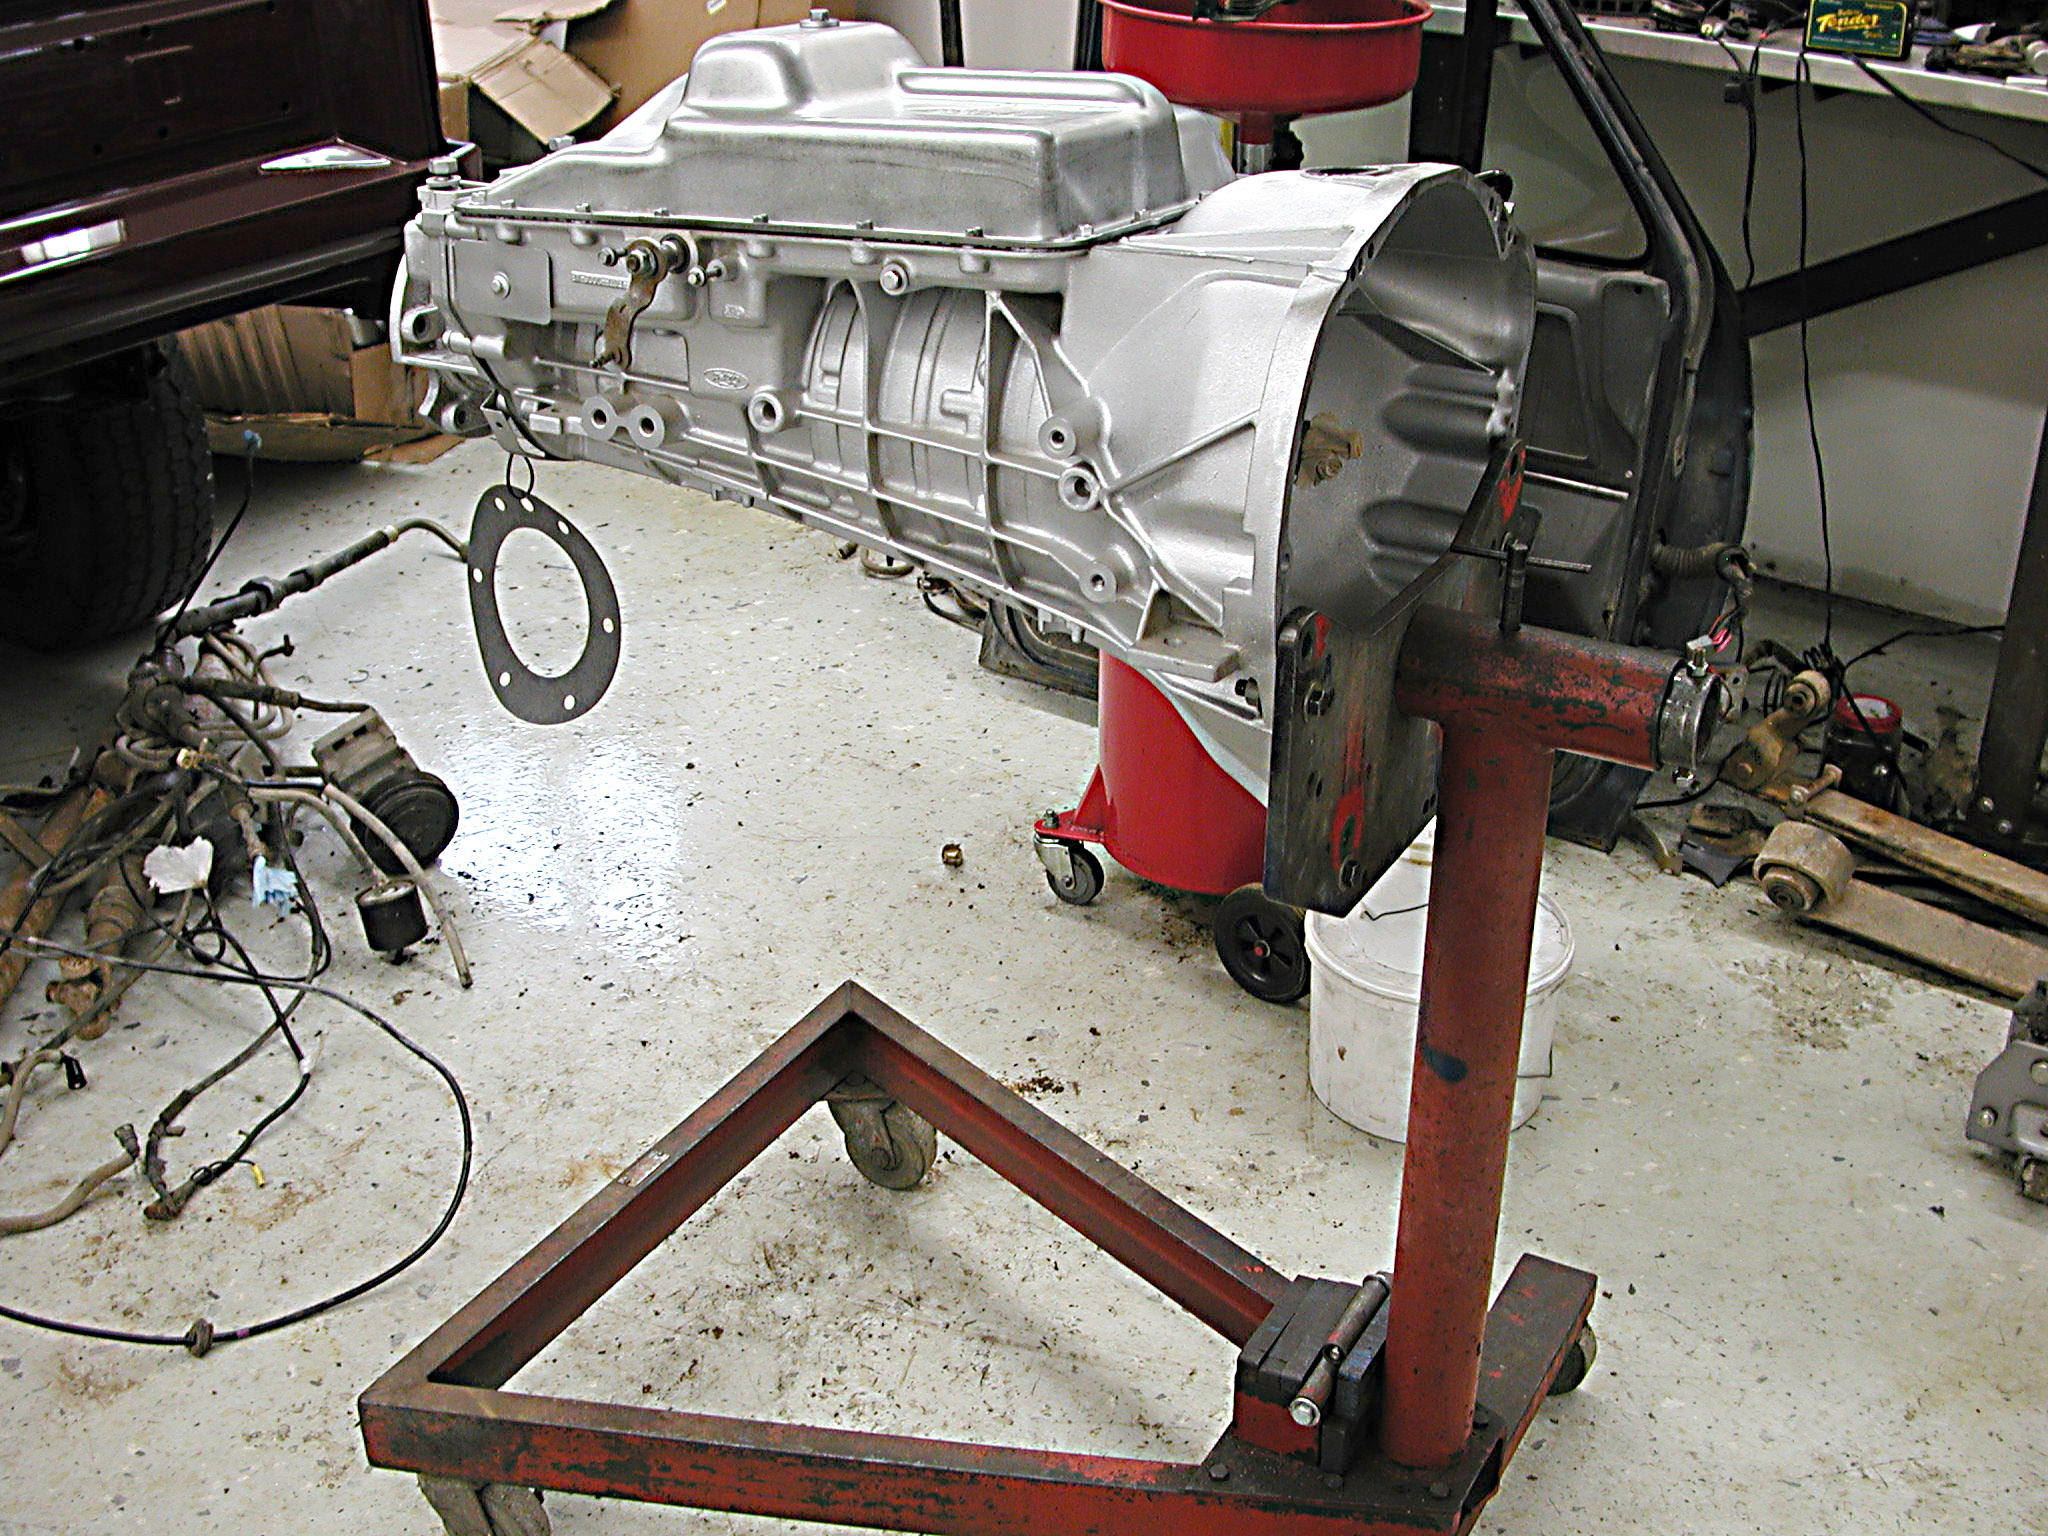 So, to answer Brandon's question, I did have to paint the tranny to make it match the transfer case as well as to put a bit more paint on the bottom. And, the engine stand certainly facilitated that project. I put on about one full can of Eastwood's Detail Gray. Here's the bottom view: 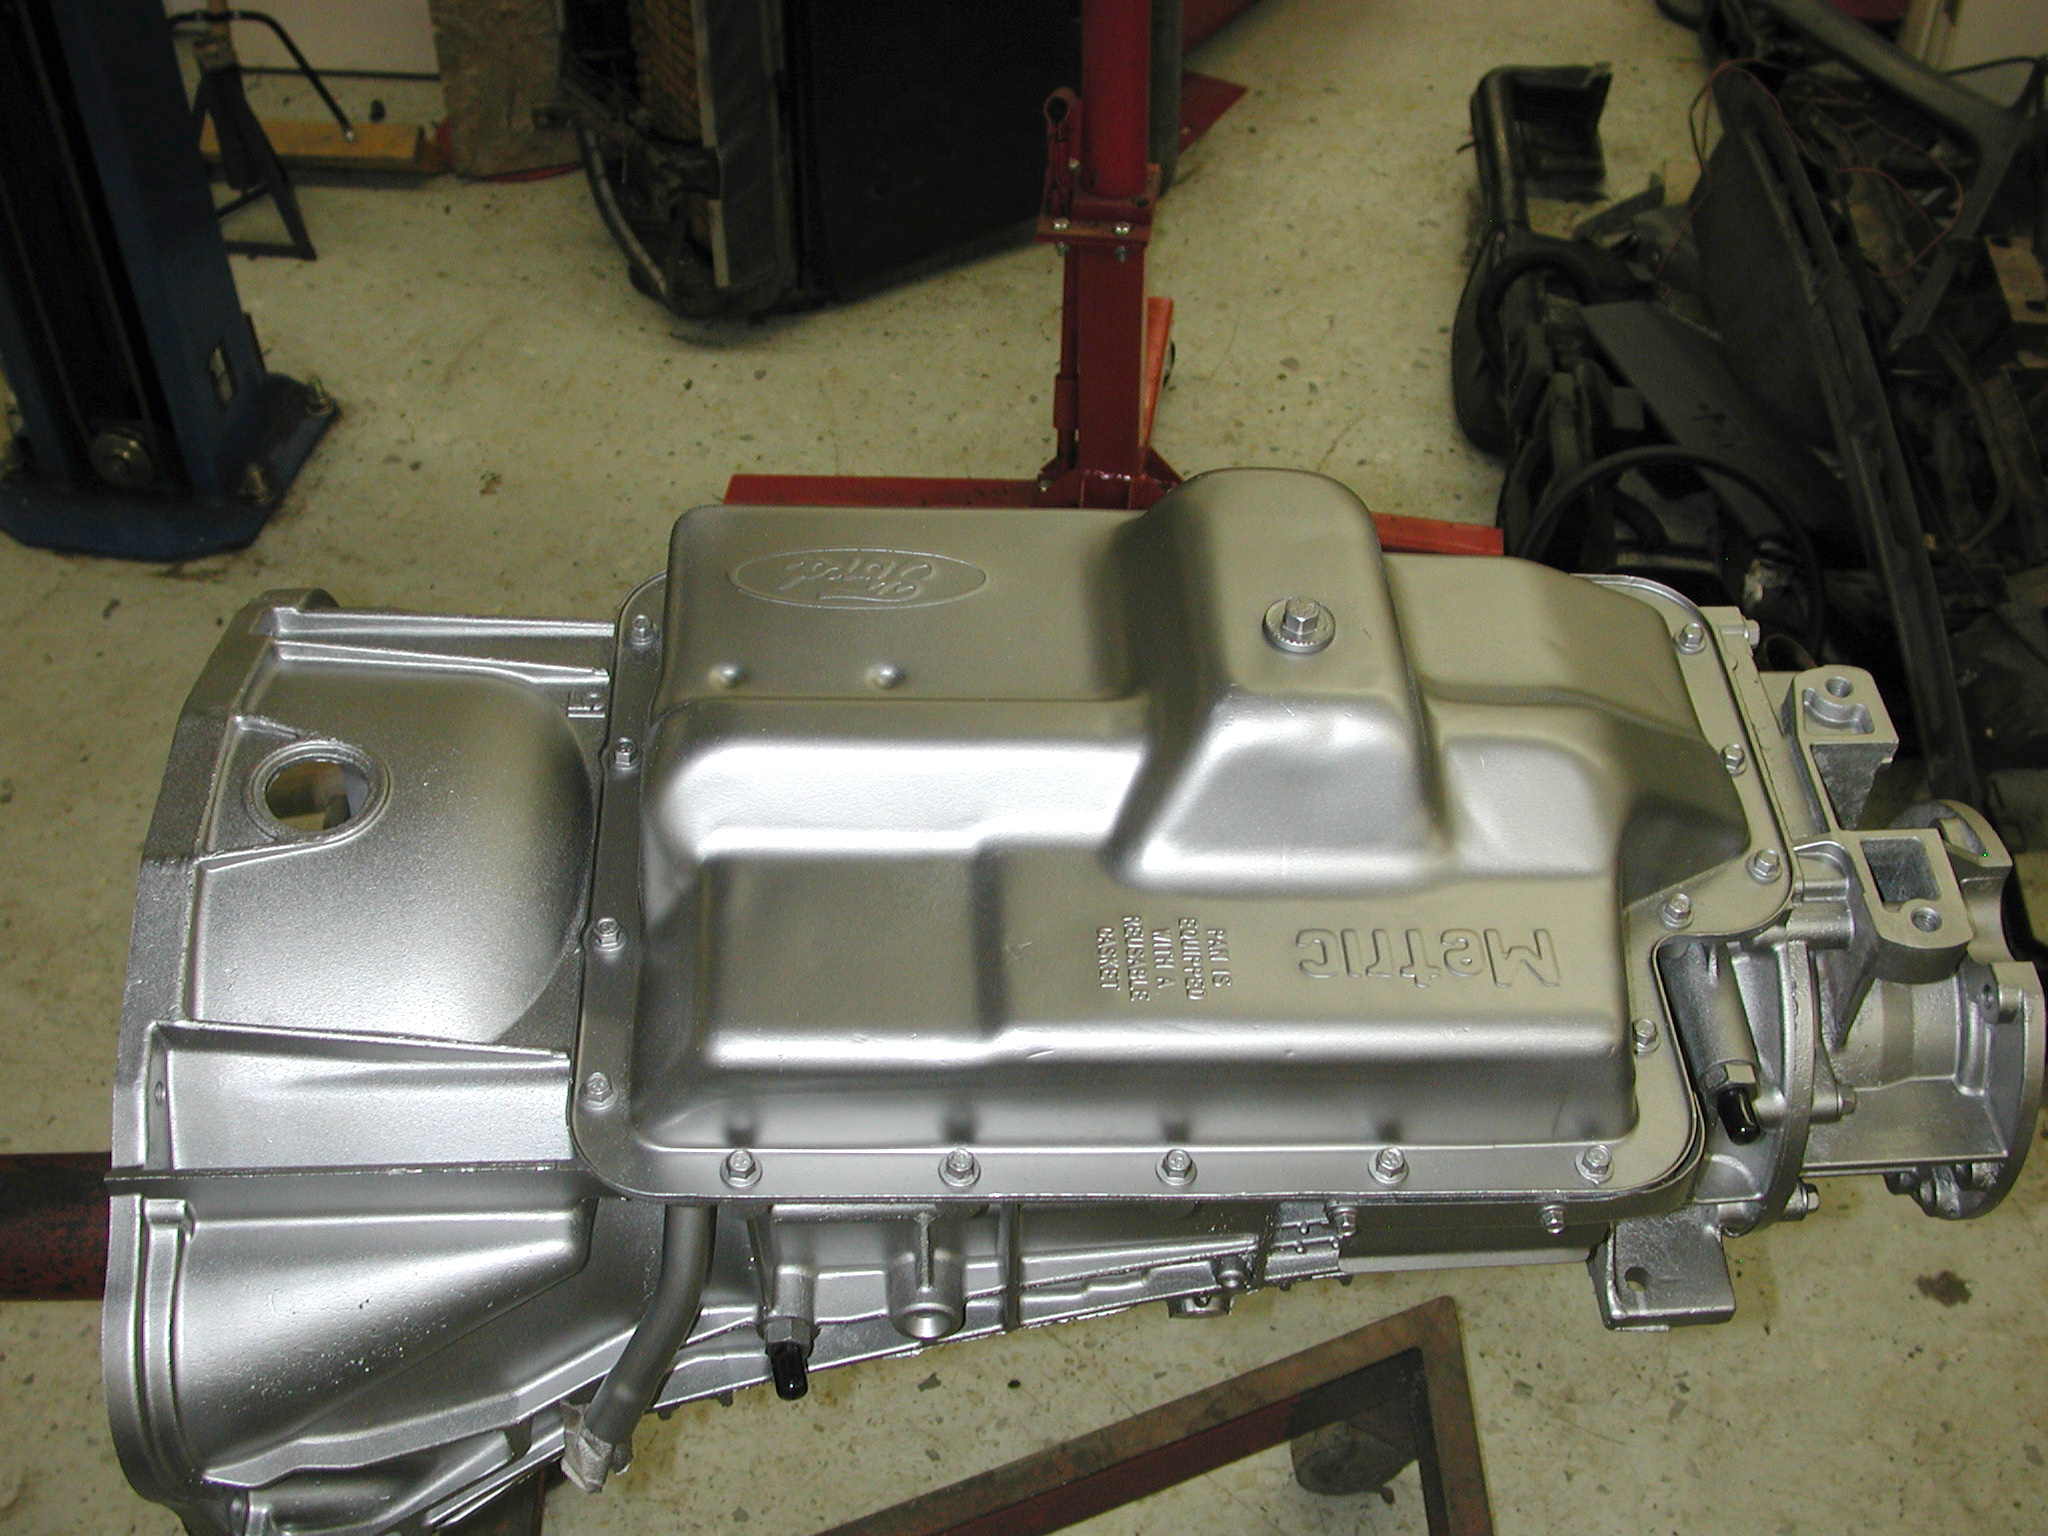 And here's a top-side view: 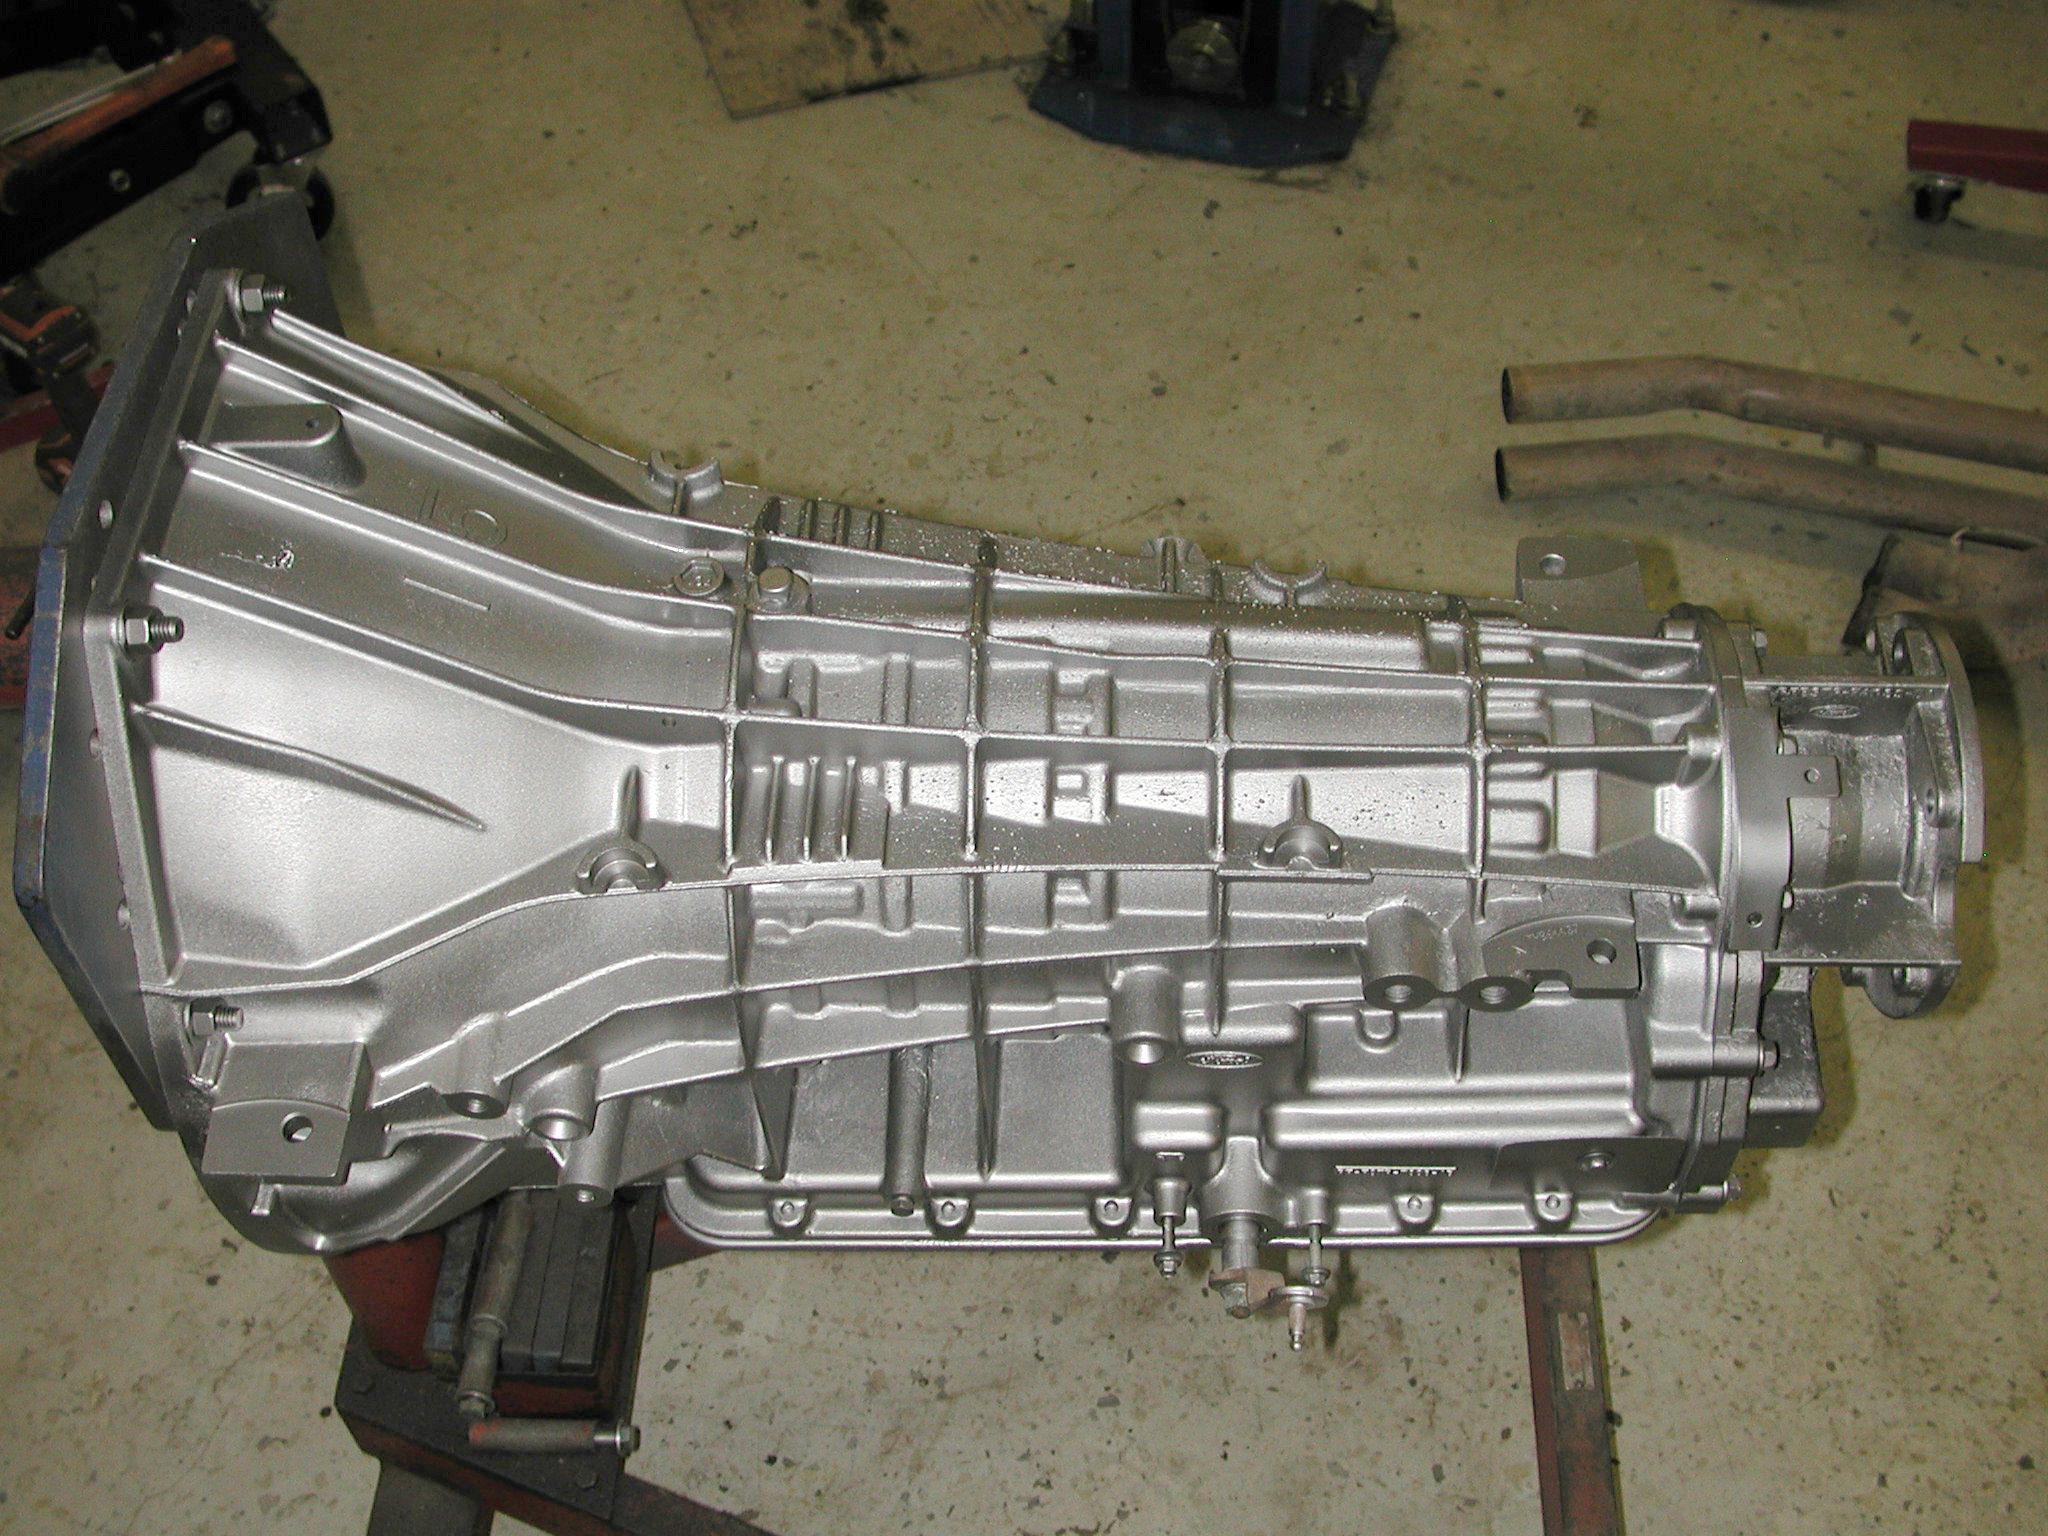
Gary, AKA "Gary fellow": Profile
Dad's: '81 F150 Ranger XLT 4x4: Down for restomod: Full-roller "stroked 351M" w/Trick Flow heads & intake, EEC-V SEFI/E4OD/3.50 gears w/Kevlar clutches
|
|
Administrator
|
Looks very good!

|
|
Administrator
|
Thanks, David.
I just have to get Huck out of the shop and off to the scrap metal place and then I can start installing the front end on Dad's truck. Most of the parts are powder coated or painted, so that should go fairly smoothly. Then comes the real fun - lift the cab off and install the engine and tranny as a unit. Along the way I'll have to prop the back of the tranny up while I mark and drill the holes for the E4OD-specific crossmember that also came from Huck. Then the cab can sit down and it'll look like some progress has been made. 
Gary, AKA "Gary fellow": Profile
Dad's: '81 F150 Ranger XLT 4x4: Down for restomod: Full-roller "stroked 351M" w/Trick Flow heads & intake, EEC-V SEFI/E4OD/3.50 gears w/Kevlar clutches
|
|
Administrator
|
"Then the cab can sit down and it'll look like some progress has been made."
And, progress is good! 
|
|
Administrator
|
In reply to this post by Gary Lewis
Transmission looks too pretty to even drive it once it's together.
Bill AKA "LOBO" Profile
"Getting old is inevitable, growing up is optional" Darth Vader 1986 F350 460 converted to MAF/SEFI, E4OD 12X3 1/2 rear brakes, traction loc 3:55 gear, 160 amp 3G alternator Wife's 2011 Flex Limited Daily Driver 2009 Flex Limited with factory tow package Project car 1986 Chrysler LeBaron convertible 2.2L Turbo II, modified A413 |
|
Administrator
|
In reply to this post by 1986F150Six
You beat Jim to it.
 John Keeline, the paint/body man, was down recently and we discussed the plan to put the cab back on the frame. He's quite invested in this truck and I'm thinking that if it is close I'll ask him to come down and help me. However, if I chock the wheels it should go back from whence it came. And, I have fender covers and towels that could be used to pad the front of the bed, so it shouldn't be a problem.
Gary, AKA "Gary fellow": Profile
Dad's: '81 F150 Ranger XLT 4x4: Down for restomod: Full-roller "stroked 351M" w/Trick Flow heads & intake, EEC-V SEFI/E4OD/3.50 gears w/Kevlar clutches
|
|
Administrator
|
In reply to this post by 85lebaront2
Bill - I think this thing will deserve to be in a museum. I once thought I'd never have a "trailer queen". Perhaps as a truck it'll be a "trailer king"?
Gary, AKA "Gary fellow": Profile
Dad's: '81 F150 Ranger XLT 4x4: Down for restomod: Full-roller "stroked 351M" w/Trick Flow heads & intake, EEC-V SEFI/E4OD/3.50 gears w/Kevlar clutches
|
|
Administrator
|
In reply to this post by Gary Lewis
That looks awesome Gary! I like that paint job. It looks super clean without being overly bright and shiny. It's perfect! 👍
SHORT BED 4-DOOR DIESEL: 1986 F350 4x4 under construction-- 7.3 IDIT ZF5+GVOD
STRAIGHT SIX 4X4: 1981 F150 2wd to 4x4-- 300 I6 close ratio diesel T19, hydroboost brakes, Saginaw steering BIG F: 1995 F-Superduty under construction— converting to 6.9L IDI diesel ZF5+DNE2 |
|
Administrator
|
In reply to this post by Gary Lewis
Unless in keeping with today's world. it's transgender.

Bill AKA "LOBO" Profile
"Getting old is inevitable, growing up is optional" Darth Vader 1986 F350 460 converted to MAF/SEFI, E4OD 12X3 1/2 rear brakes, traction loc 3:55 gear, 160 amp 3G alternator Wife's 2011 Flex Limited Daily Driver 2009 Flex Limited with factory tow package Project car 1986 Chrysler LeBaron convertible 2.2L Turbo II, modified A413 |
|
Administrator
|
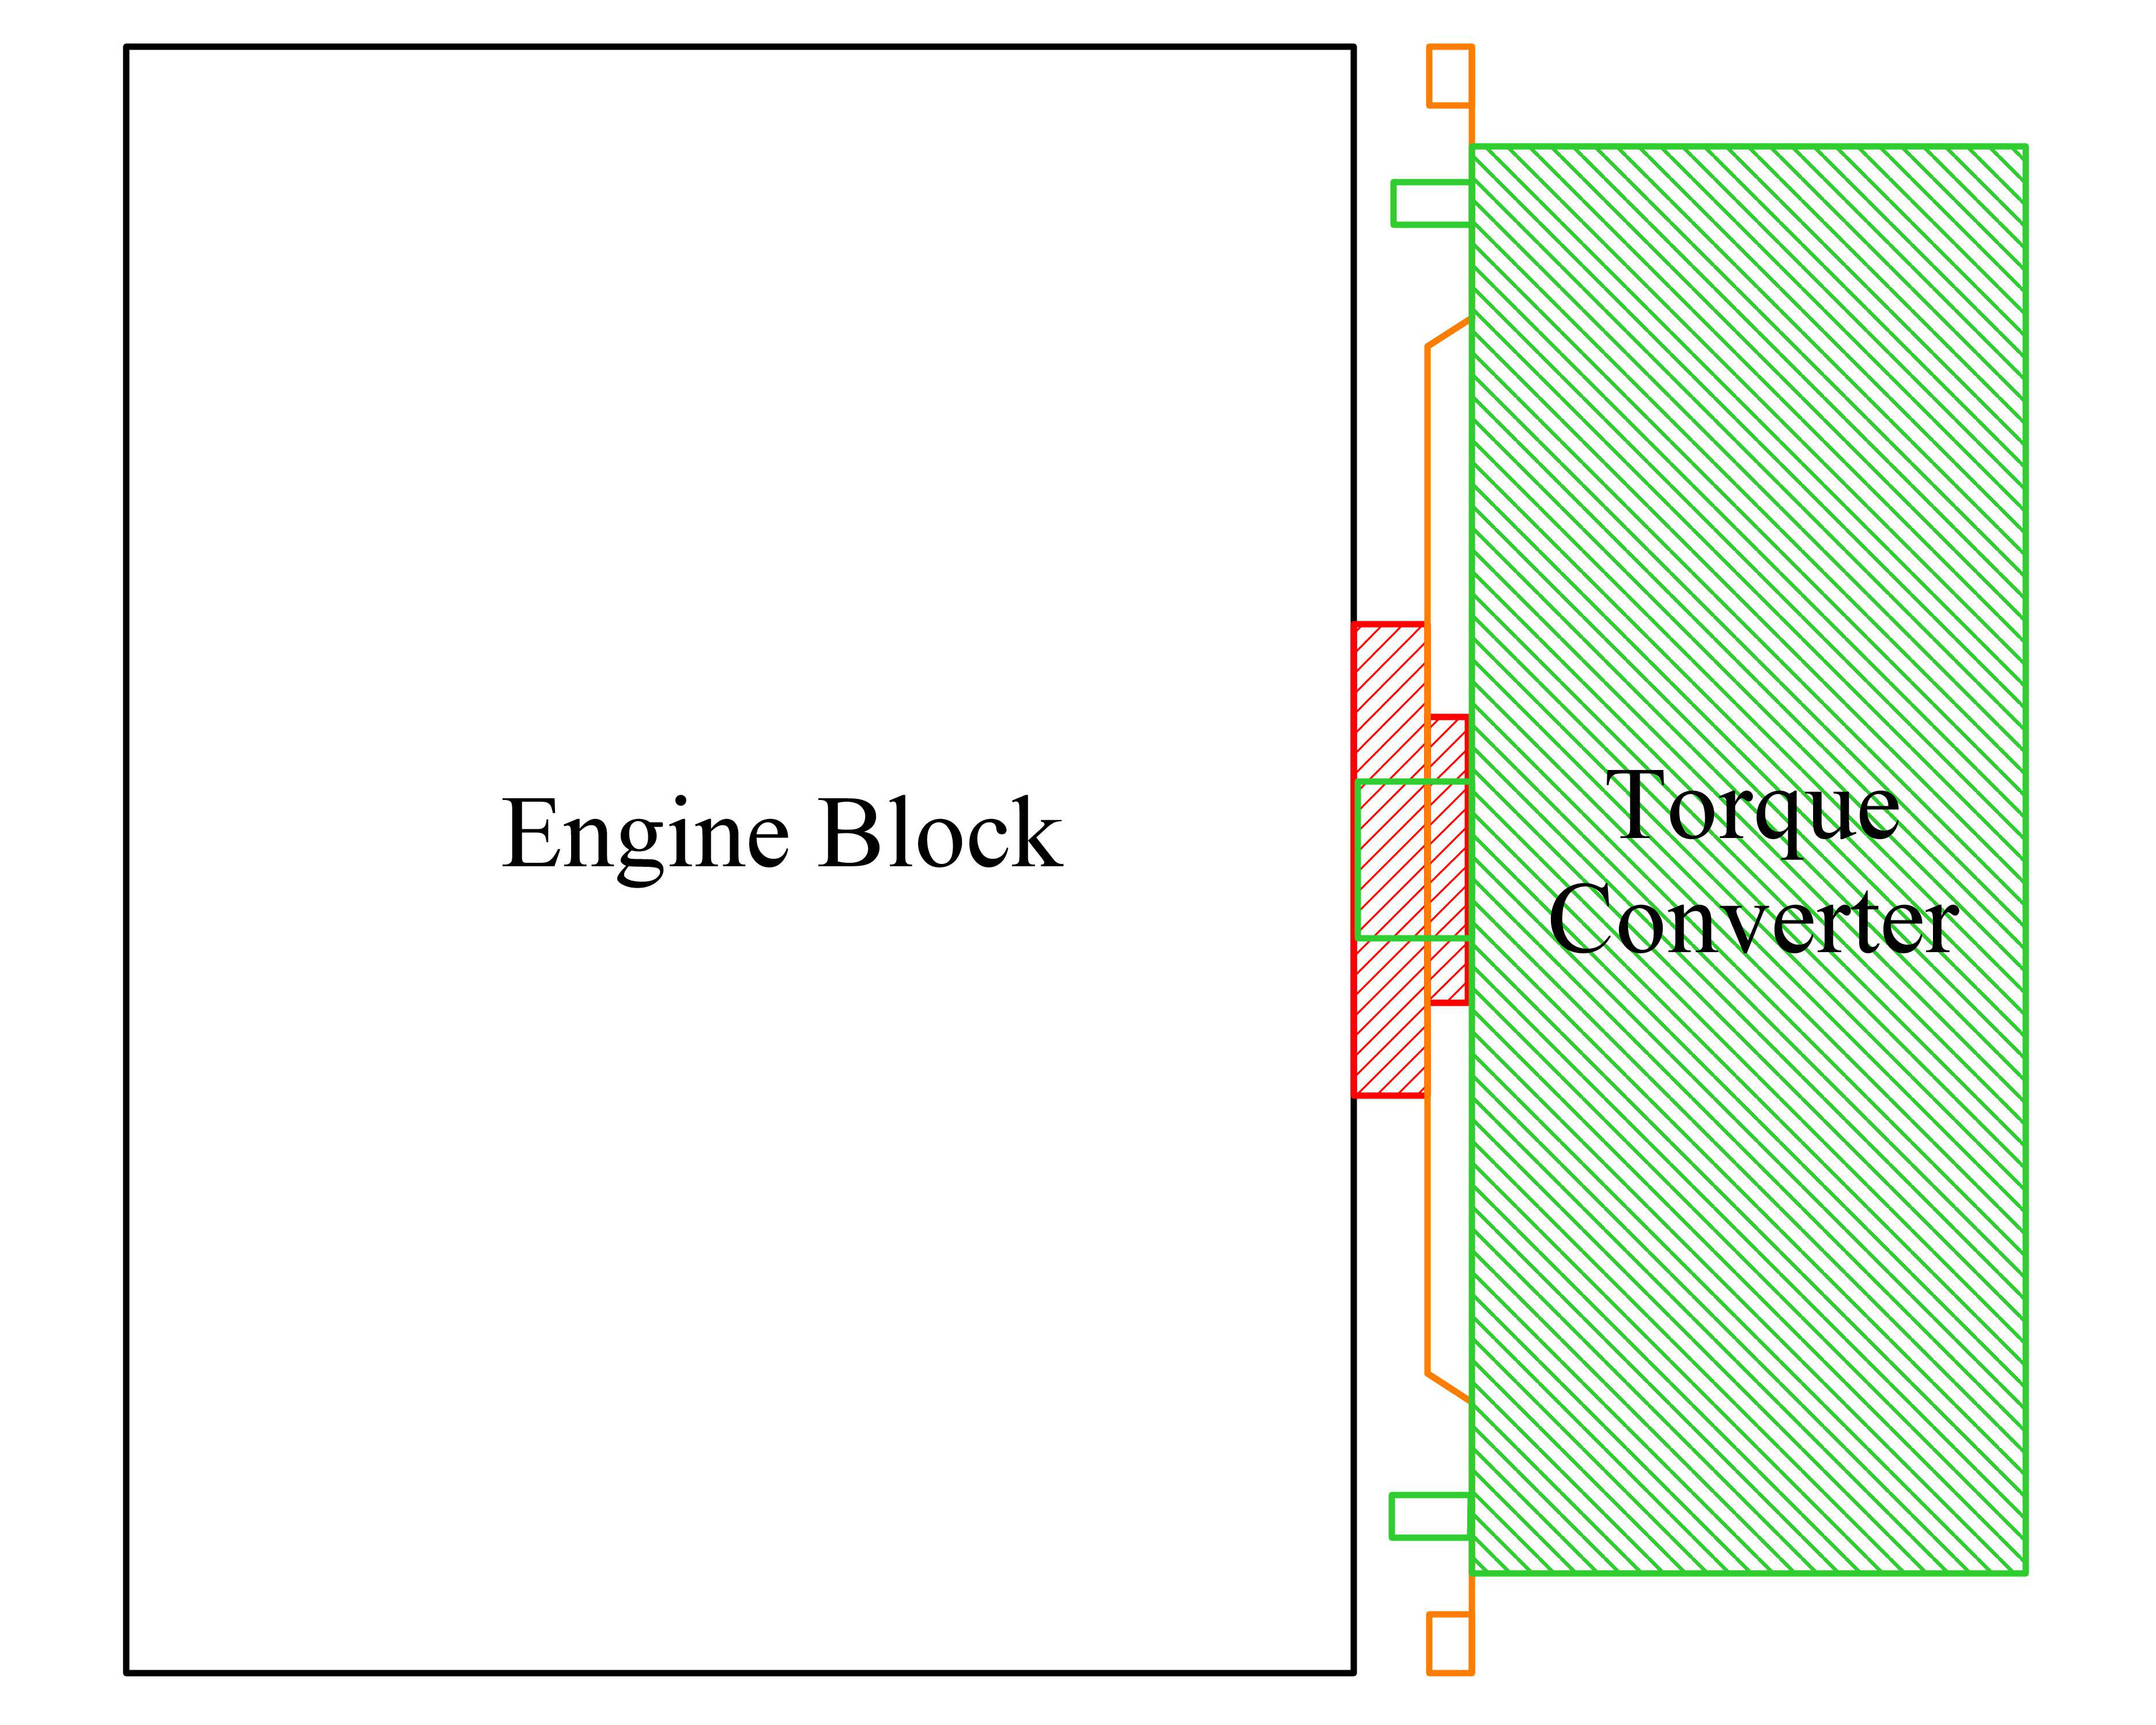
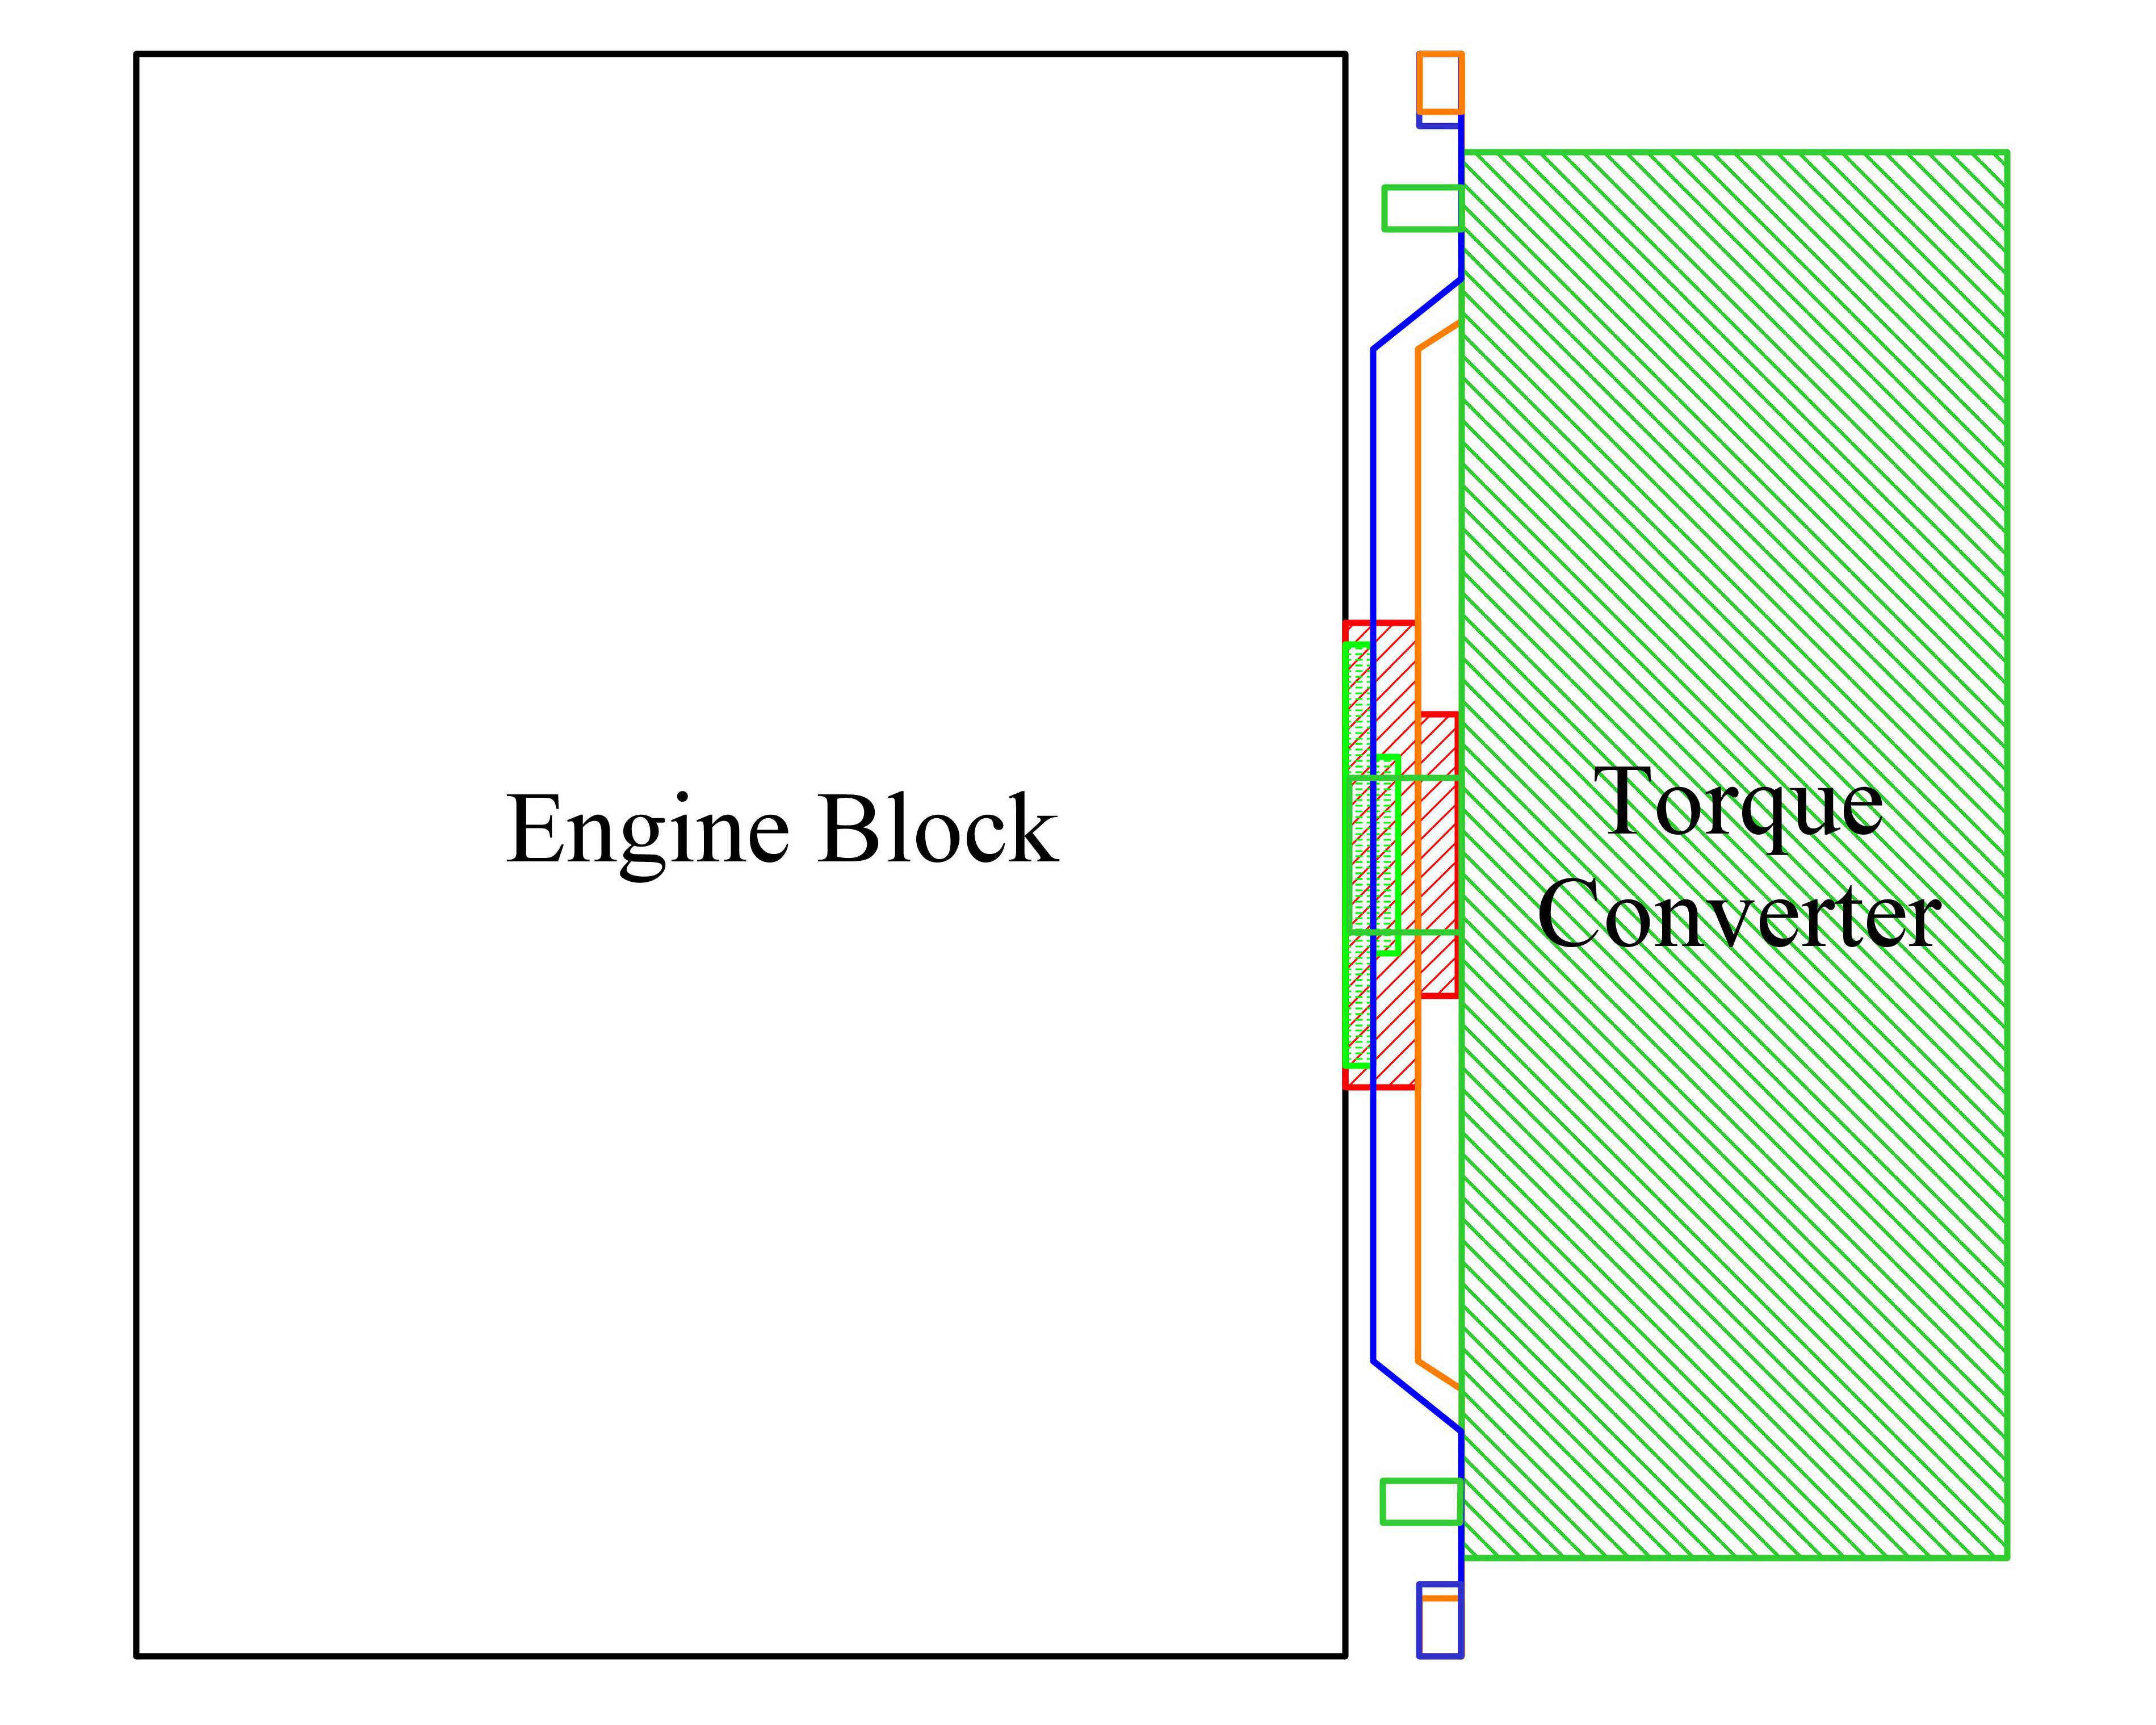
Let's re-open this thread in order to capture some details about installing an E4OD behind an M-block. With the help of Steve/FoxFord33 we took copious measurements from the 460 on the stand and the 400 in Dad's truck. Then we drew what we'd seen up in CAD and discovered that an E4OD is a perfect fit behind an M-block, unlike the ZF5.
The drawing on the left below is of the 460, and you can see the crank (red), the flexplate with ring gear (orange), and the torque converter (green). Then the drawing on the right introduces the 400's crank and flexplate, both of which are blue. And one thing to note is that the two flexplates and ring gears are essentially in the same place, although the 400's is .006" further forward than the 460's. Big deal. That says that the torque converter will bolt up perfectly to the 400's flexplate. And that either the M-block starter or a starter for a 460 with an auto tranny will work. Another thing to notice is that the pilot of the torque converter does go into the 400's crank, although only .332" as opposed to the .862" it engages the 460's crank. But according to Dale, of B&I Torque Converters in OKC, the .332" is quite adequate. All that is needed is to center the torque converter, and that will do it. Last, note that the torque converter doesn't butt up against the end of the crank when bolted to a 400 like it does on a 460. According to Dale, some E4OD torque converters have bulged under high pressure, and w/o support there on the 400 there could be a problem. Fortunately the torque converter they built for me has a "billet back" and he was sure that it will have no problems even though it won't touch the crank. But, had I not gone for the HD converter with the billet back he thought there might be a problem.
Gary, AKA "Gary fellow": Profile
Dad's: '81 F150 Ranger XLT 4x4: Down for restomod: Full-roller "stroked 351M" w/Trick Flow heads & intake, EEC-V SEFI/E4OD/3.50 gears w/Kevlar clutches
|
|
Administrator
|
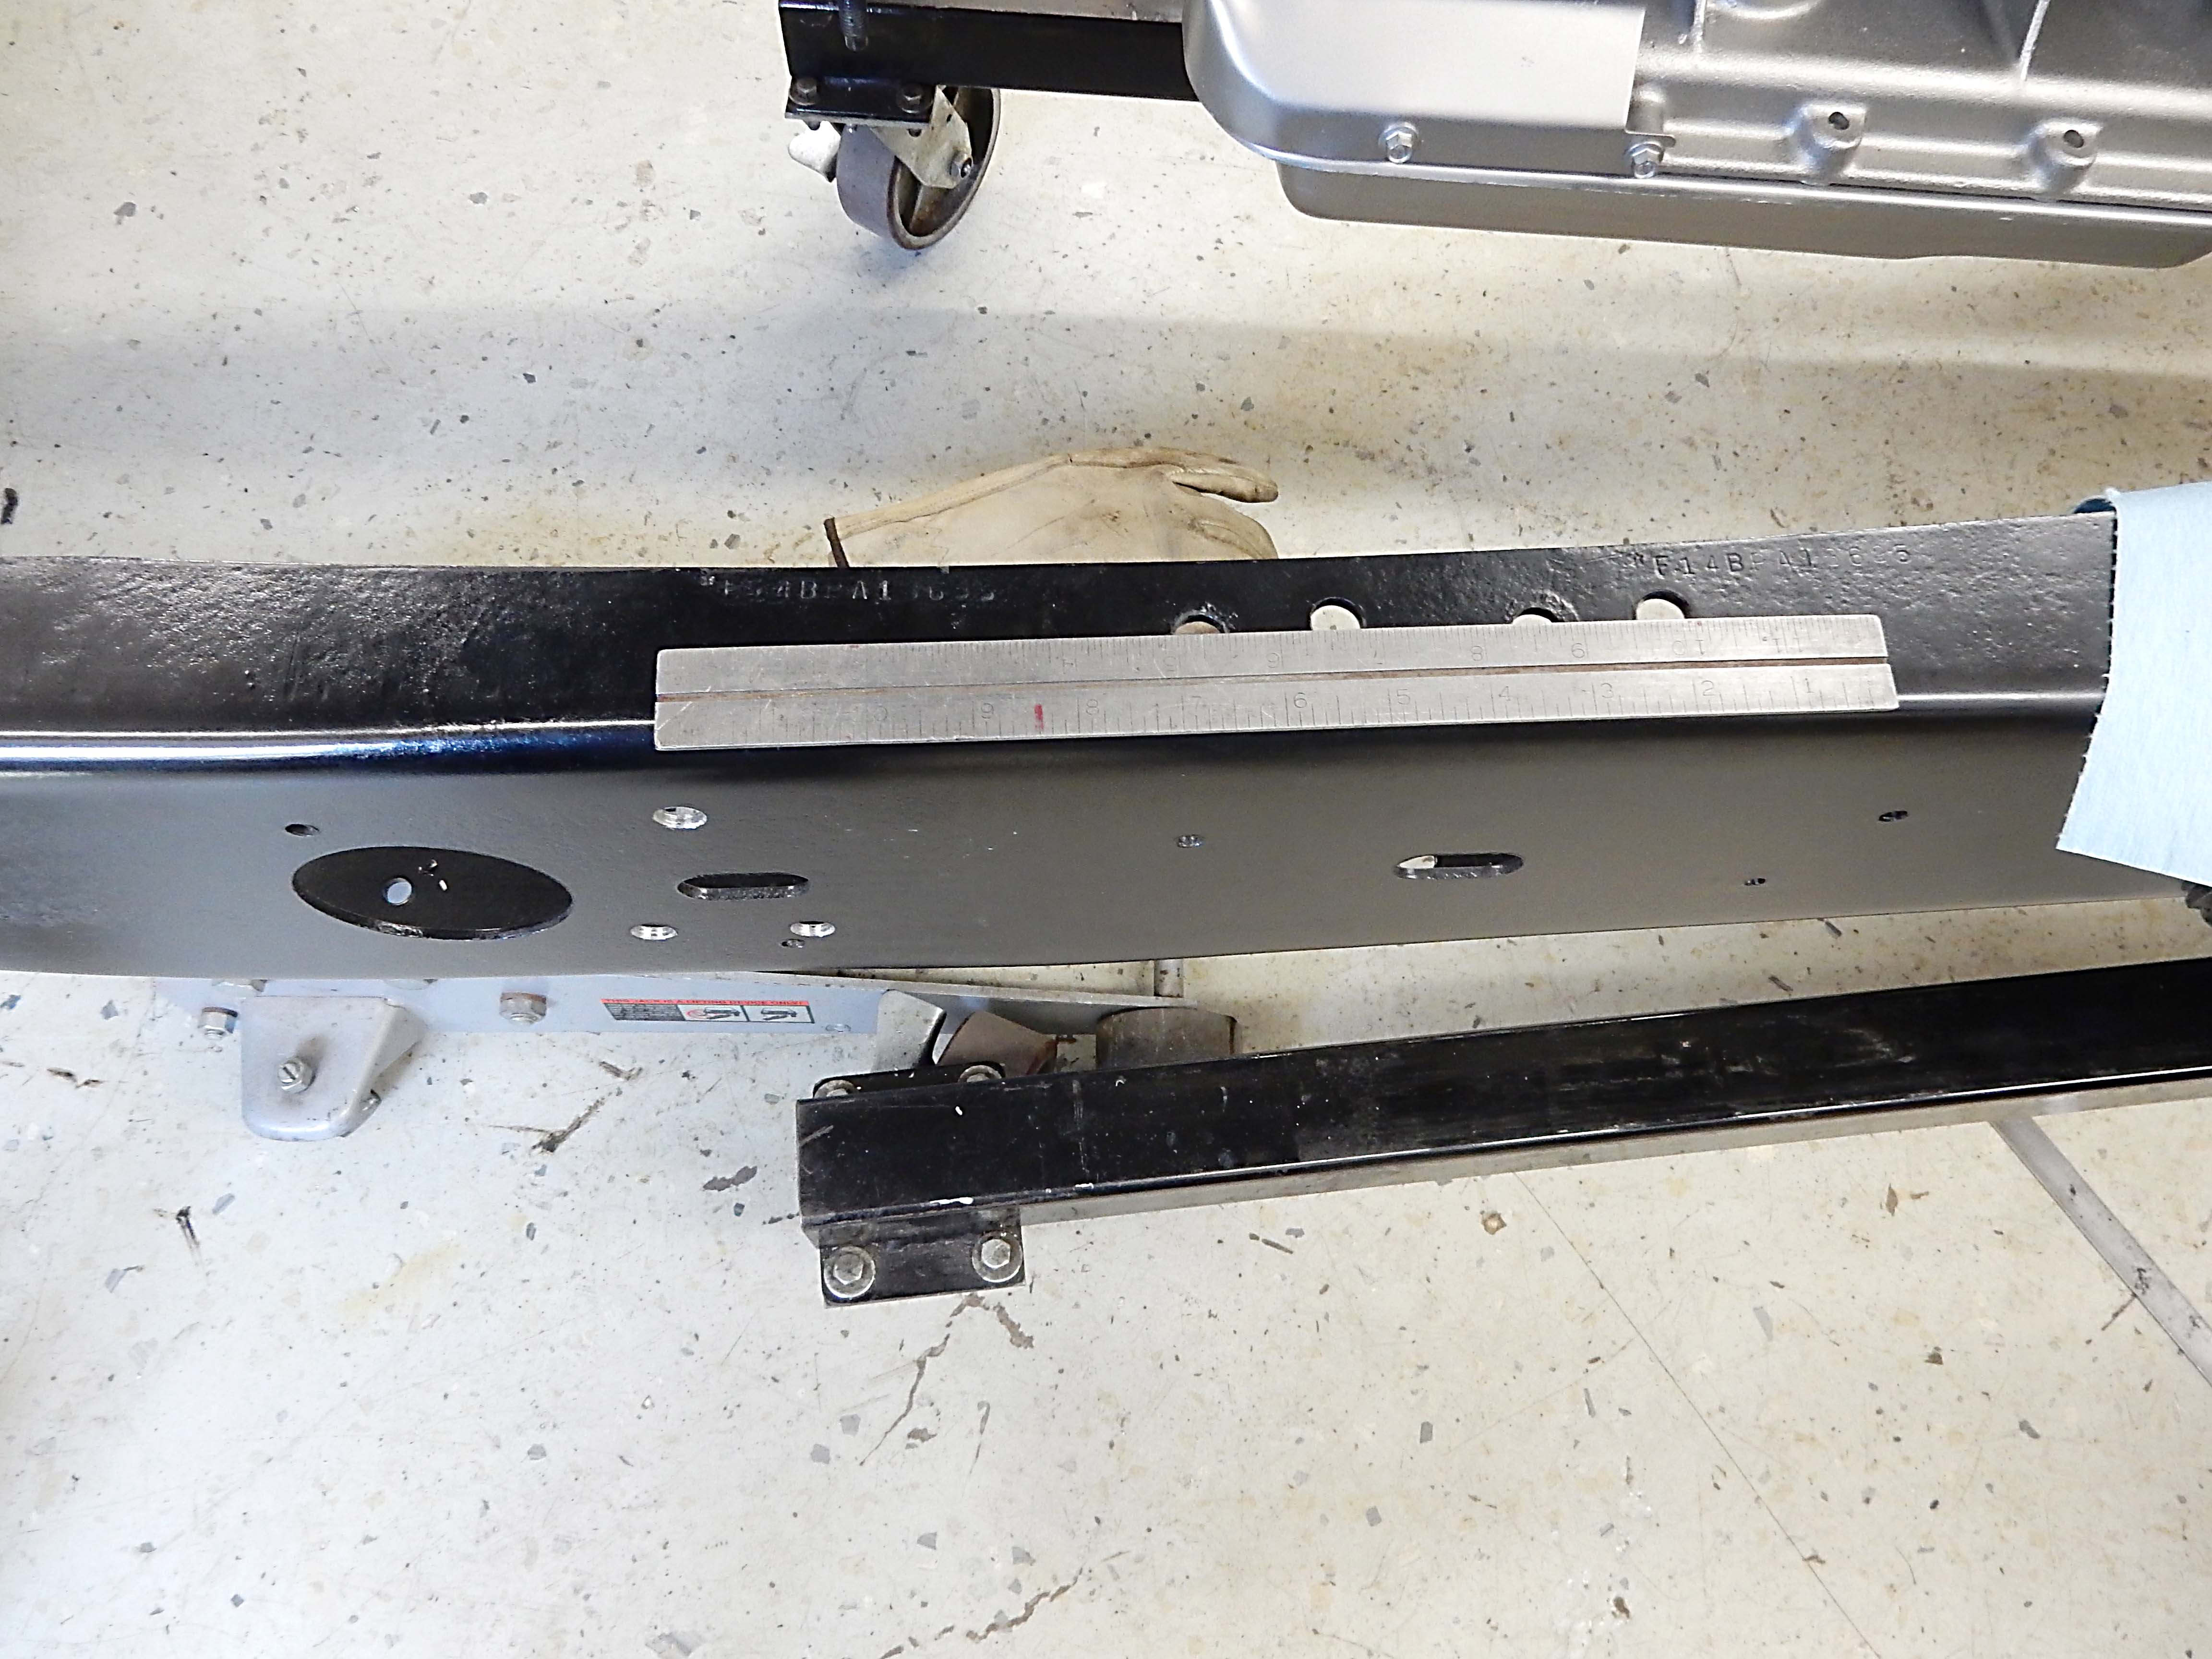
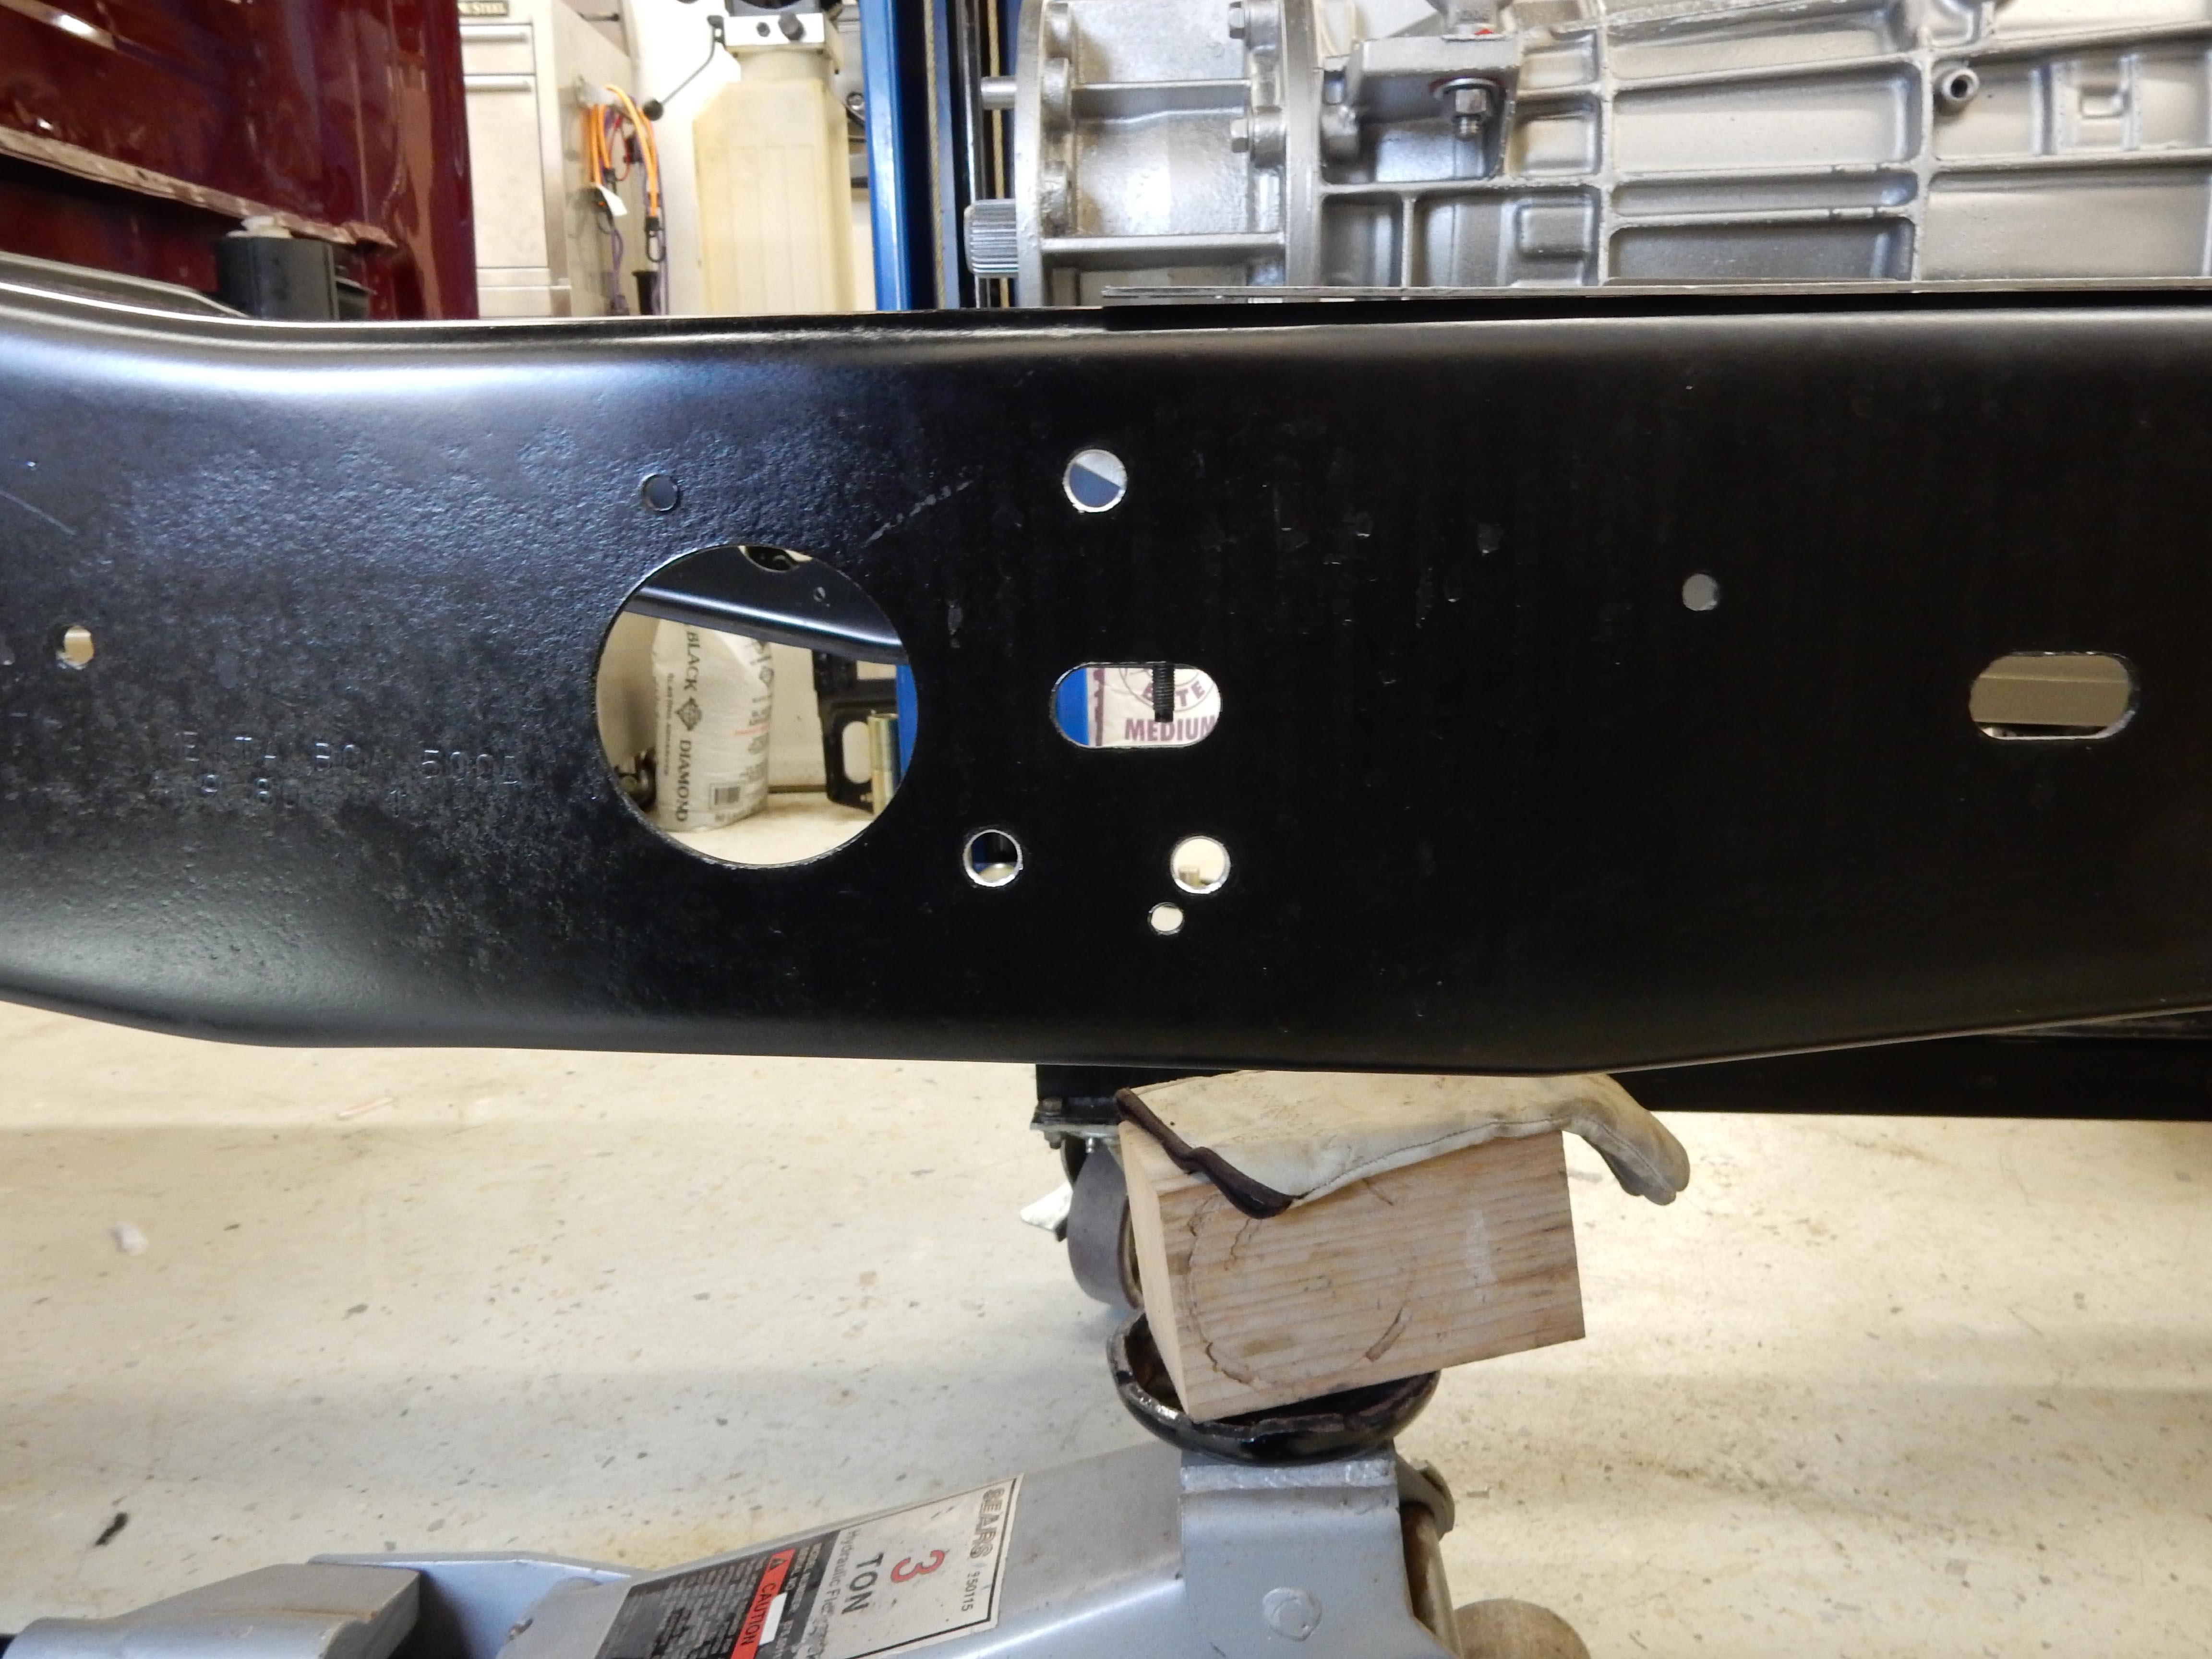
Now let's talk about crossmembers. The E4OD uses a crossmember that is very different than any used in the Bullnose trucks in that it mounts in the normal fashion on the left, meaning it rests on the bottom flange of the frame and has a gusset up to the top flange, but it actually goes outside of the frame on the right. Here's a pic of the right end of mine installed:
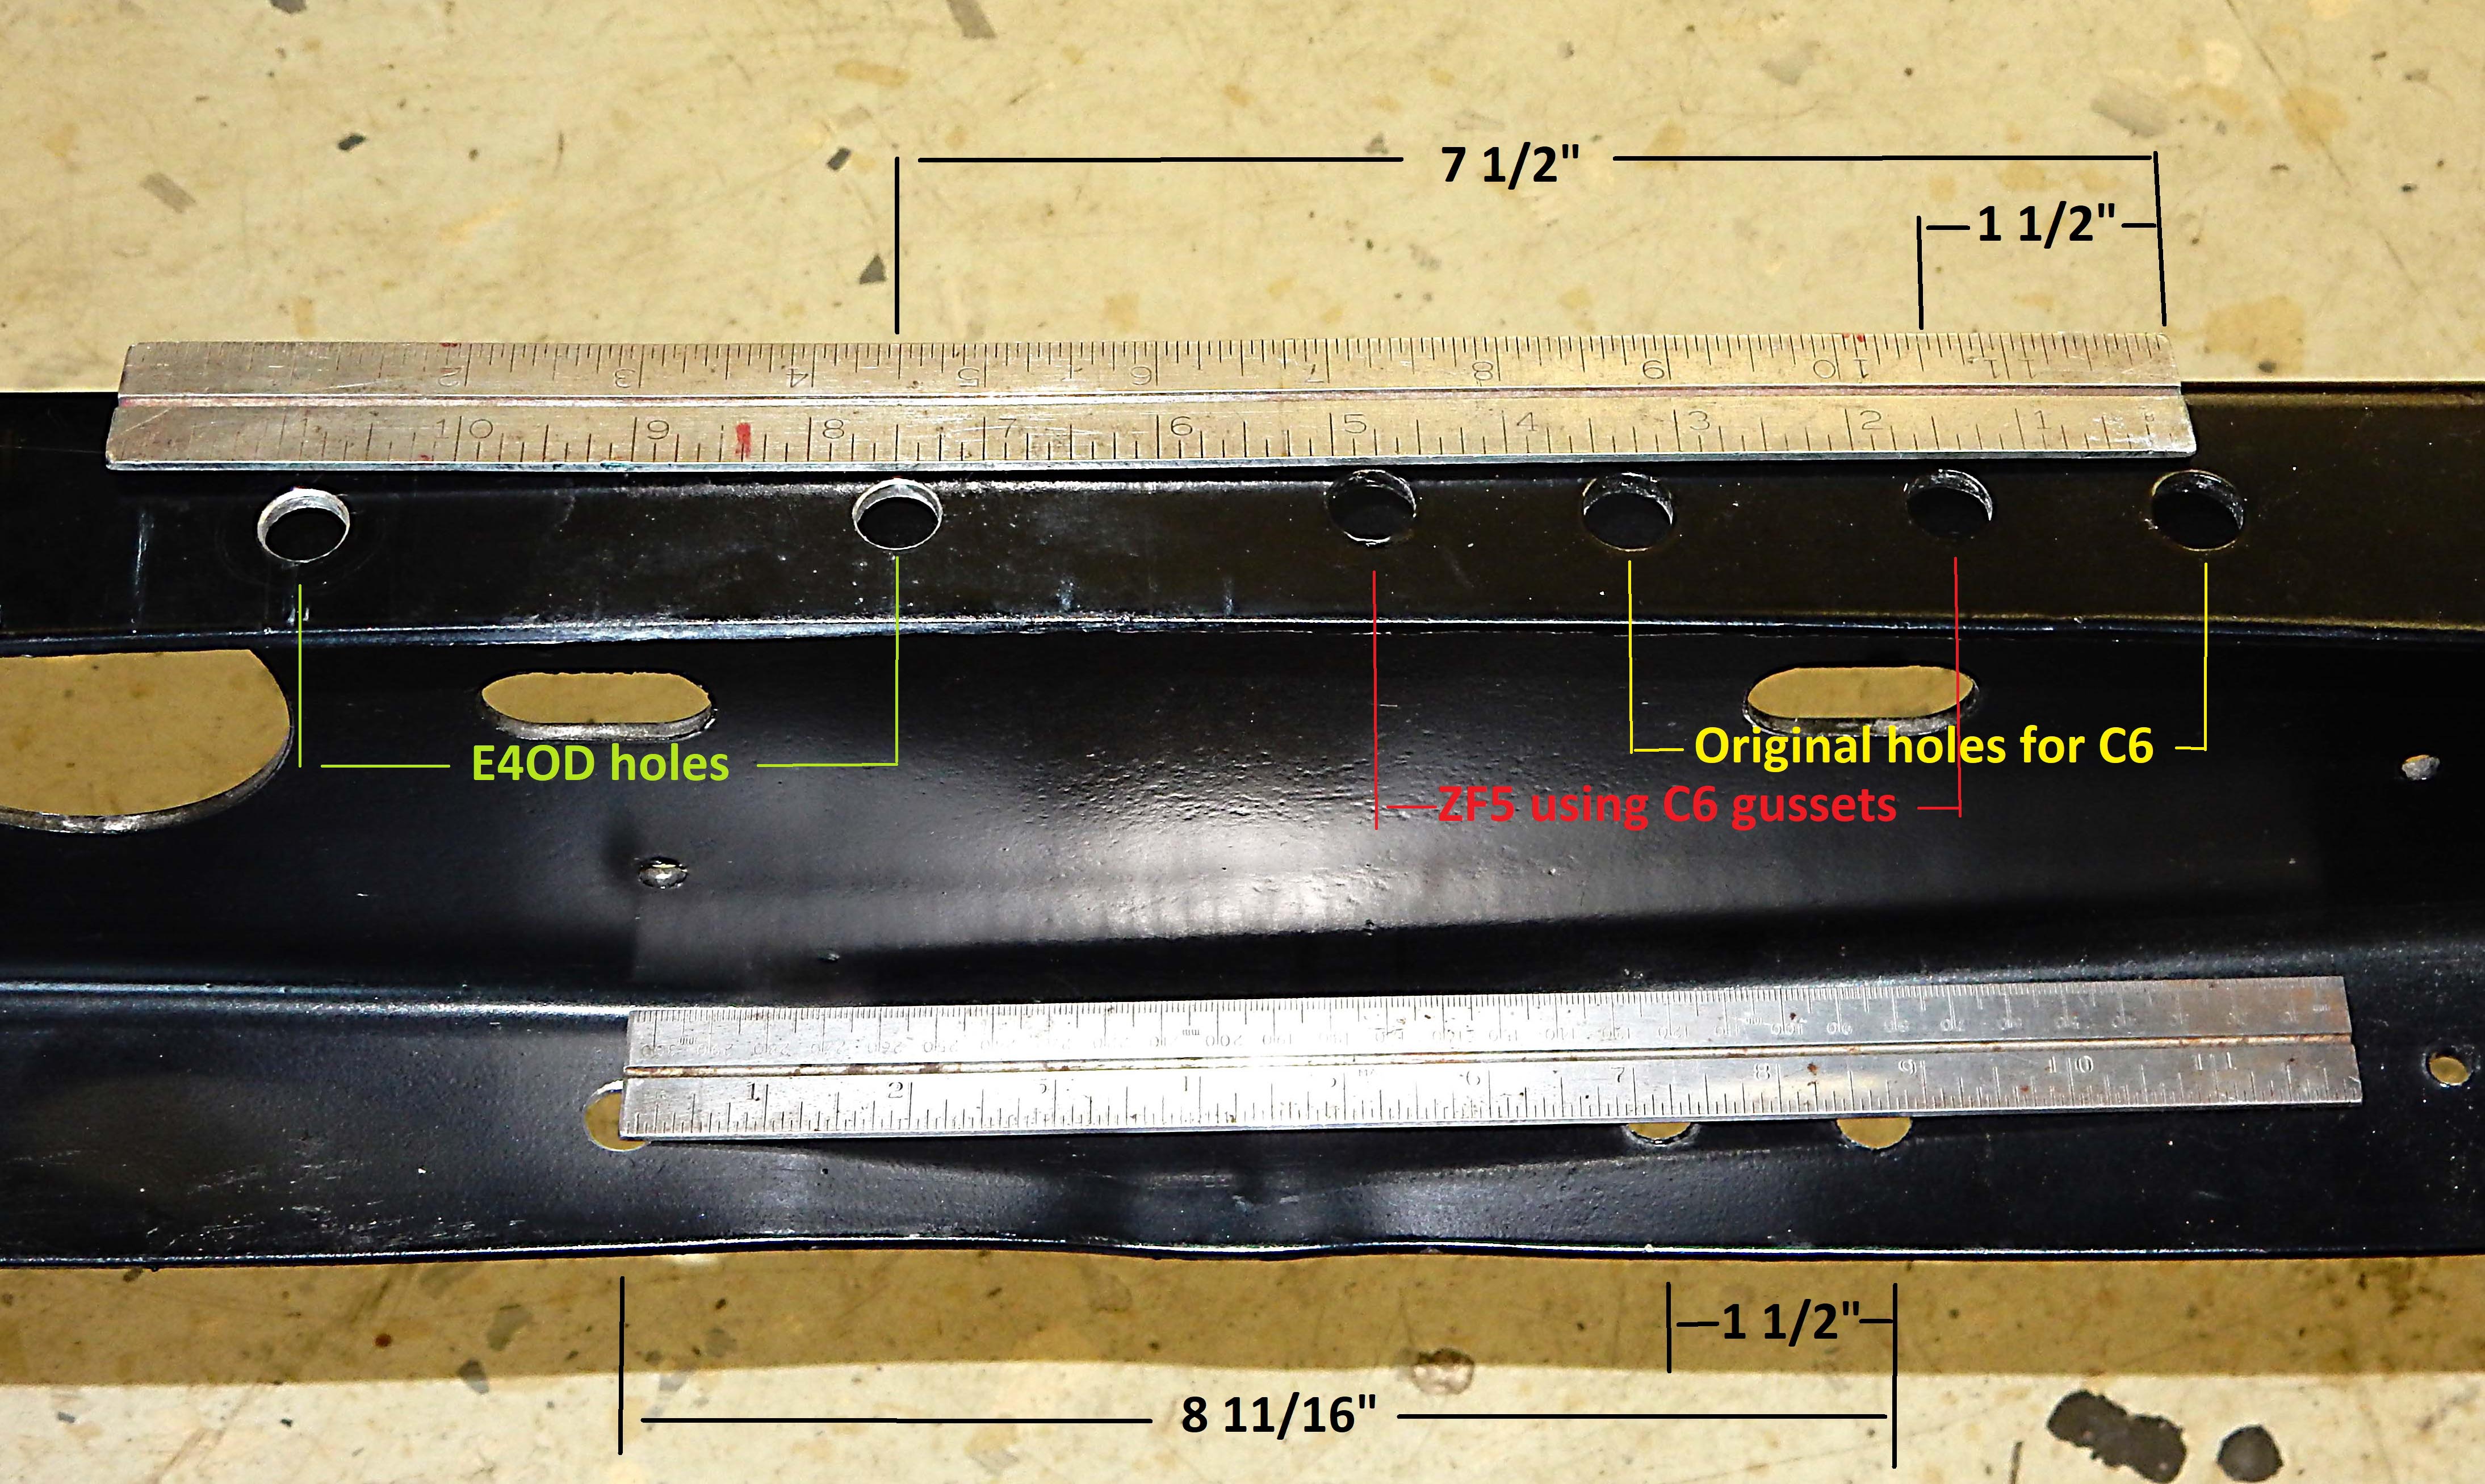
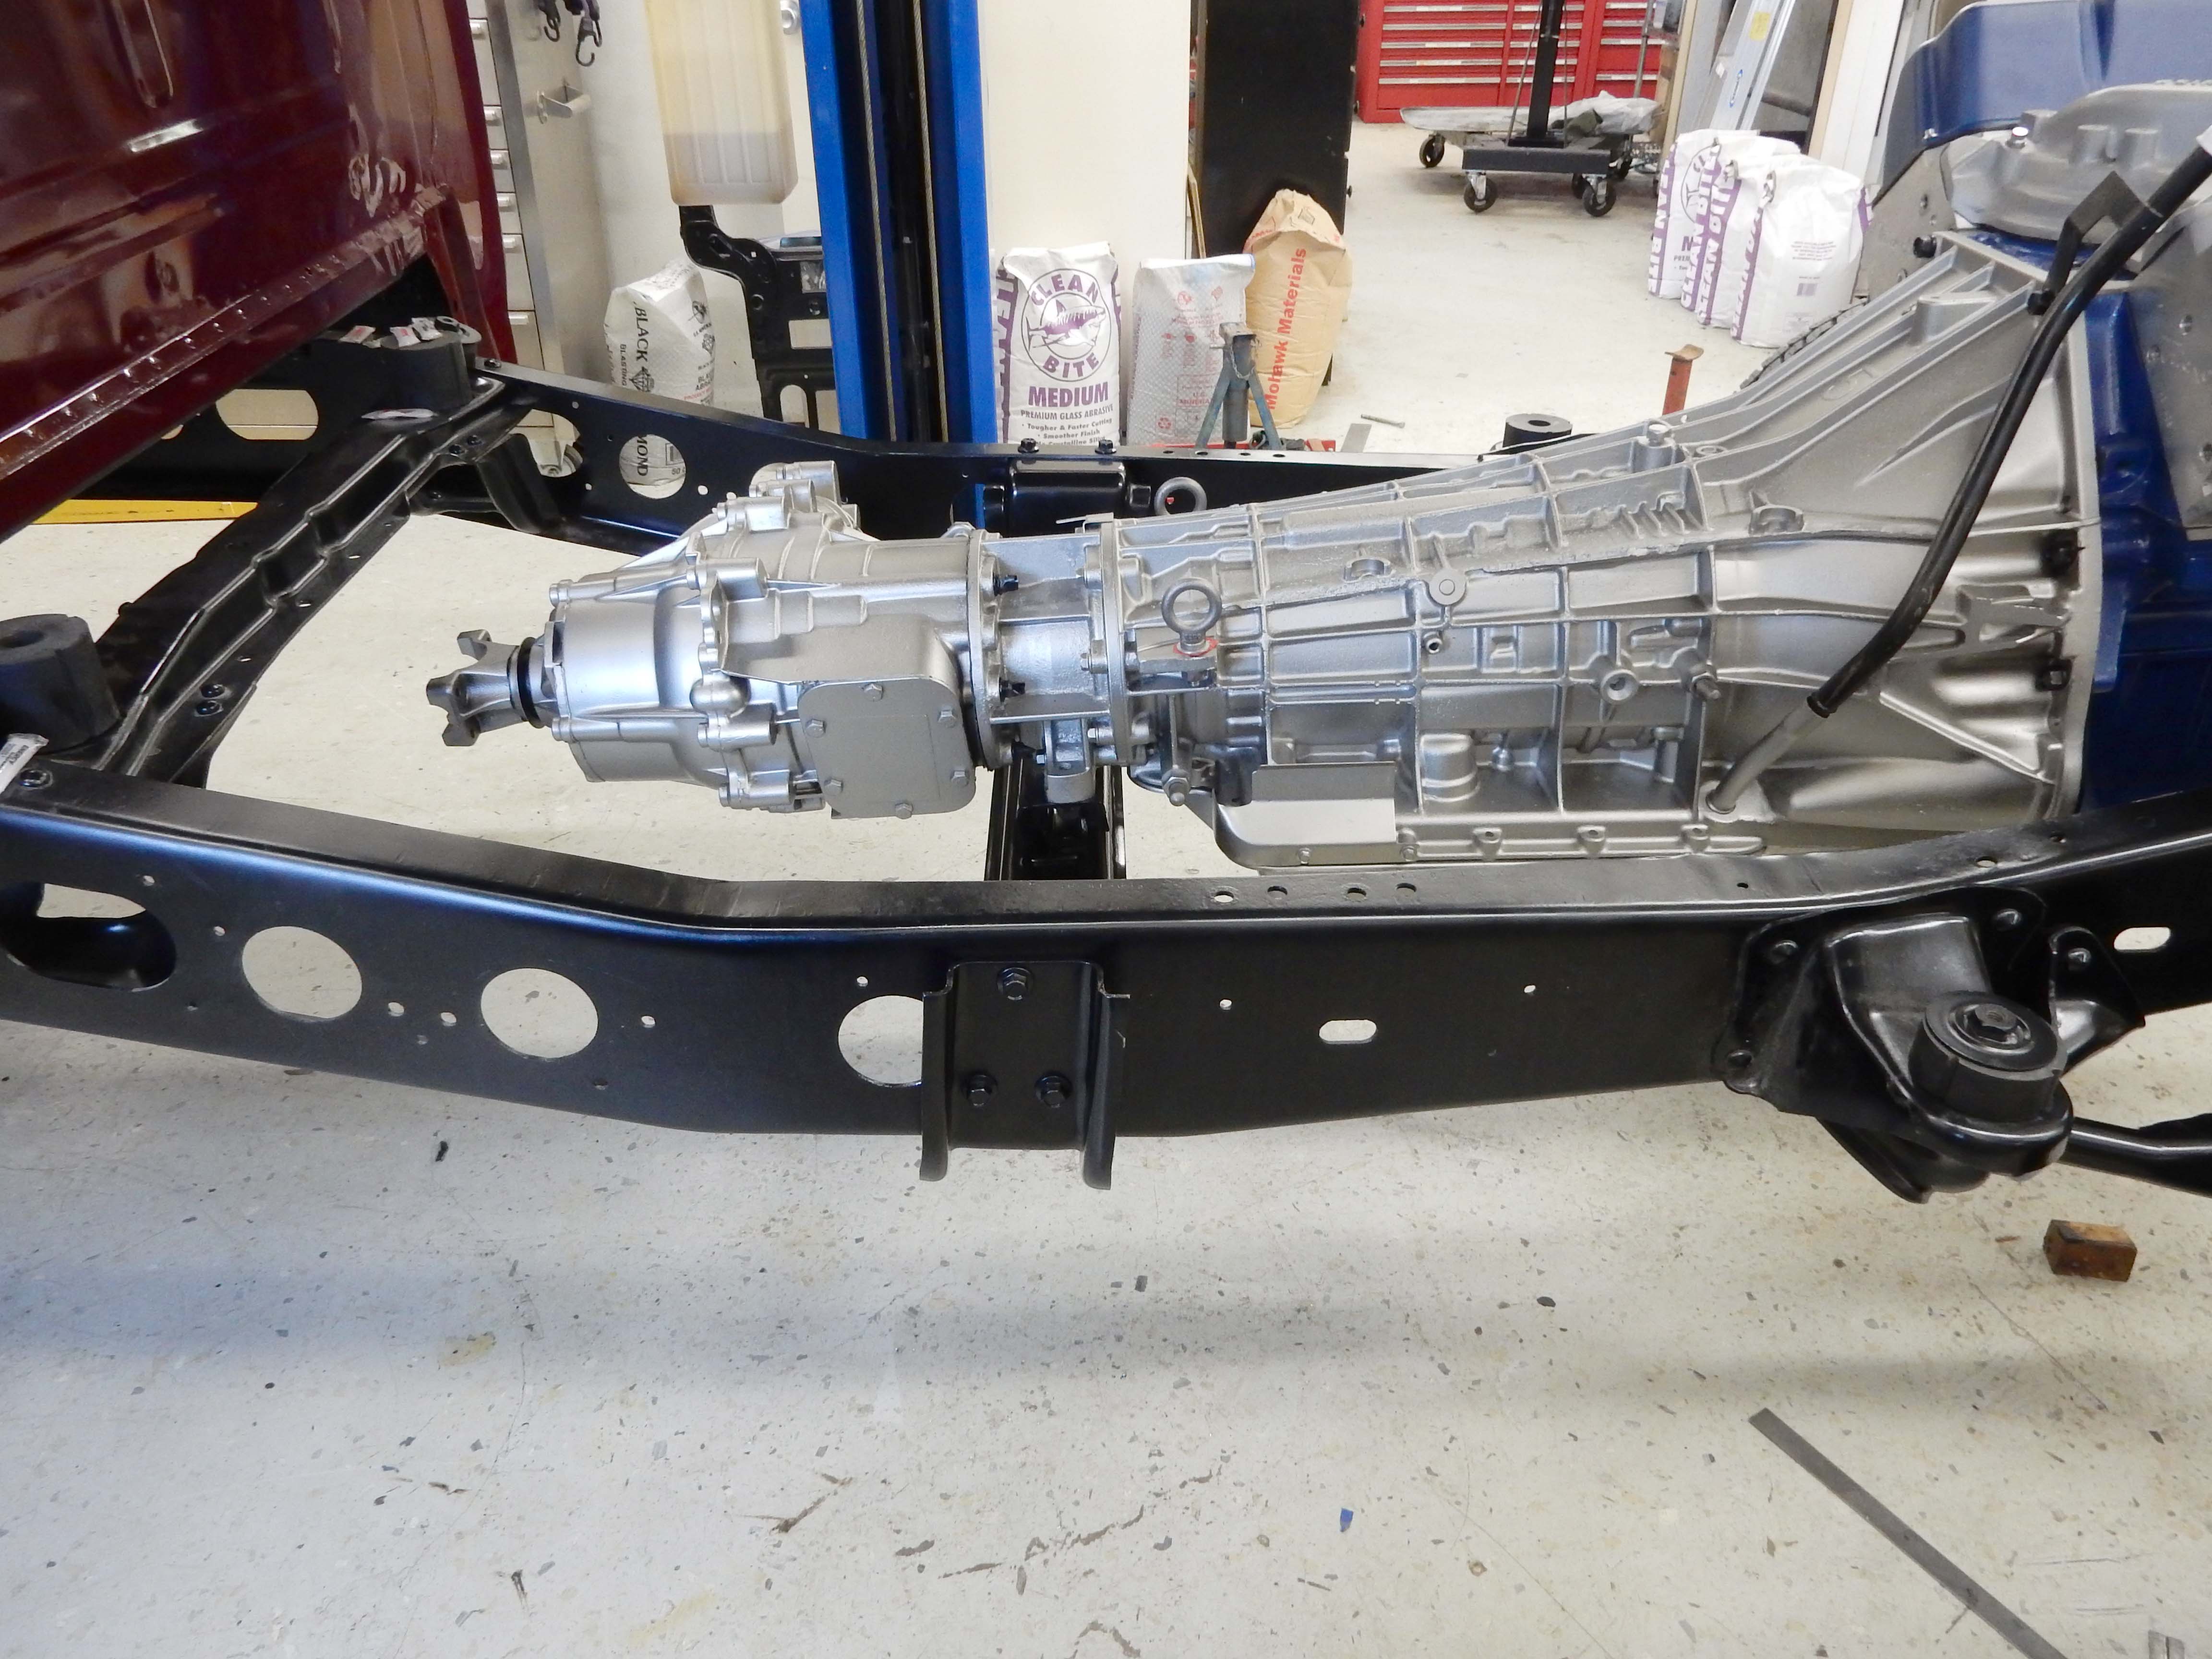 But the question becomes how to determine where to put the crossmember. I wrestled with that for quite a while today as the frame rails aren't parallel and the crossmember has a dog-leg in it, so measuring just didn't work. Finally I decided that I'd position it so that the studs on the transmission's mount were centered in the slots on the crossmember, and that worked. In fact, there was an existing hole on the bottom rail of Dad's truck's left frame rail that was perfectly located for the bottom bolt. So I put a alignment pin in there and checked the right side - and it was about right as well. So I clamped the crossmember in place and marked all of the holes. Then I drilled the holes and test-fit the crossmember - perfect. And, thinking that the shiny metal would make it easier for you to see where the holes are, here's a pic of the left side. And, here's a bit of explanation: The "Original for C6" holes were what the truck came with, and probably should have just been marked "Original" since all of the transmission crossmembers used them.The "ZF5 using C6 gussets" holes were ones I drilled to install a ZF5 using, as it says, the gussets that were used with the C6 crossmember. But there were different gussets for the ZF5 that allow using the original crossmember and the ZF5 gussets w/o drilling new holes. But I didn't know that at the time.
|
|
Administrator
|
Impressive work and documentation.

|
|
Administrator
|
Thanks, David. I'd done the CAD work for my own benefit so thought I should share them in case it would help others. And taking the measurements seemed a natural thing to do. But, I wonder if I should condense this thread into a web page when the project is done?
Having said that, one thing I haven't said and probably should is that drilling those holes in the top of the frame rail would be a problem if the cab is on the truck. But it can be done w/o fully removing the cab. I have a Ridgid Jobmax right angle drill and I was able to get in between the rails with a countersink to clean up the bottom of the holes with it. So, you should be able to drill the holes with it if you have a short bit. And, I've done it with a right angle air drill and a short bit. But, even if you do get the holes drilled you can't get the old bolts out nor new bolts in with the cab in place. So there are at least two solutions there:
Leave the old bolts and put a nut on the bottom of them so they don't rattle. And put the new bolts in from the bottom with nuts on top. However, you'll have to have very short bolts or they'll hit the cab.
Lift the cab. If you get lucky you can pull the four bolts holding the cab on w/o breaking one of them and then raise the cab about 4". The wiring will follow, but you might have to remove any linkage to the transmission or clutch. And, watch the brake lines to see that they aren't going to kink. But I was able to do this on Dad's truck to install the ZF5.
Gary, AKA "Gary fellow": Profile
Dad's: '81 F150 Ranger XLT 4x4: Down for restomod: Full-roller "stroked 351M" w/Trick Flow heads & intake, EEC-V SEFI/E4OD/3.50 gears w/Kevlar clutches
|
| Edit this page |


