Dad's Truck Build
|
Administrator
|
Not a whole lot to report today, but bits and pieces.
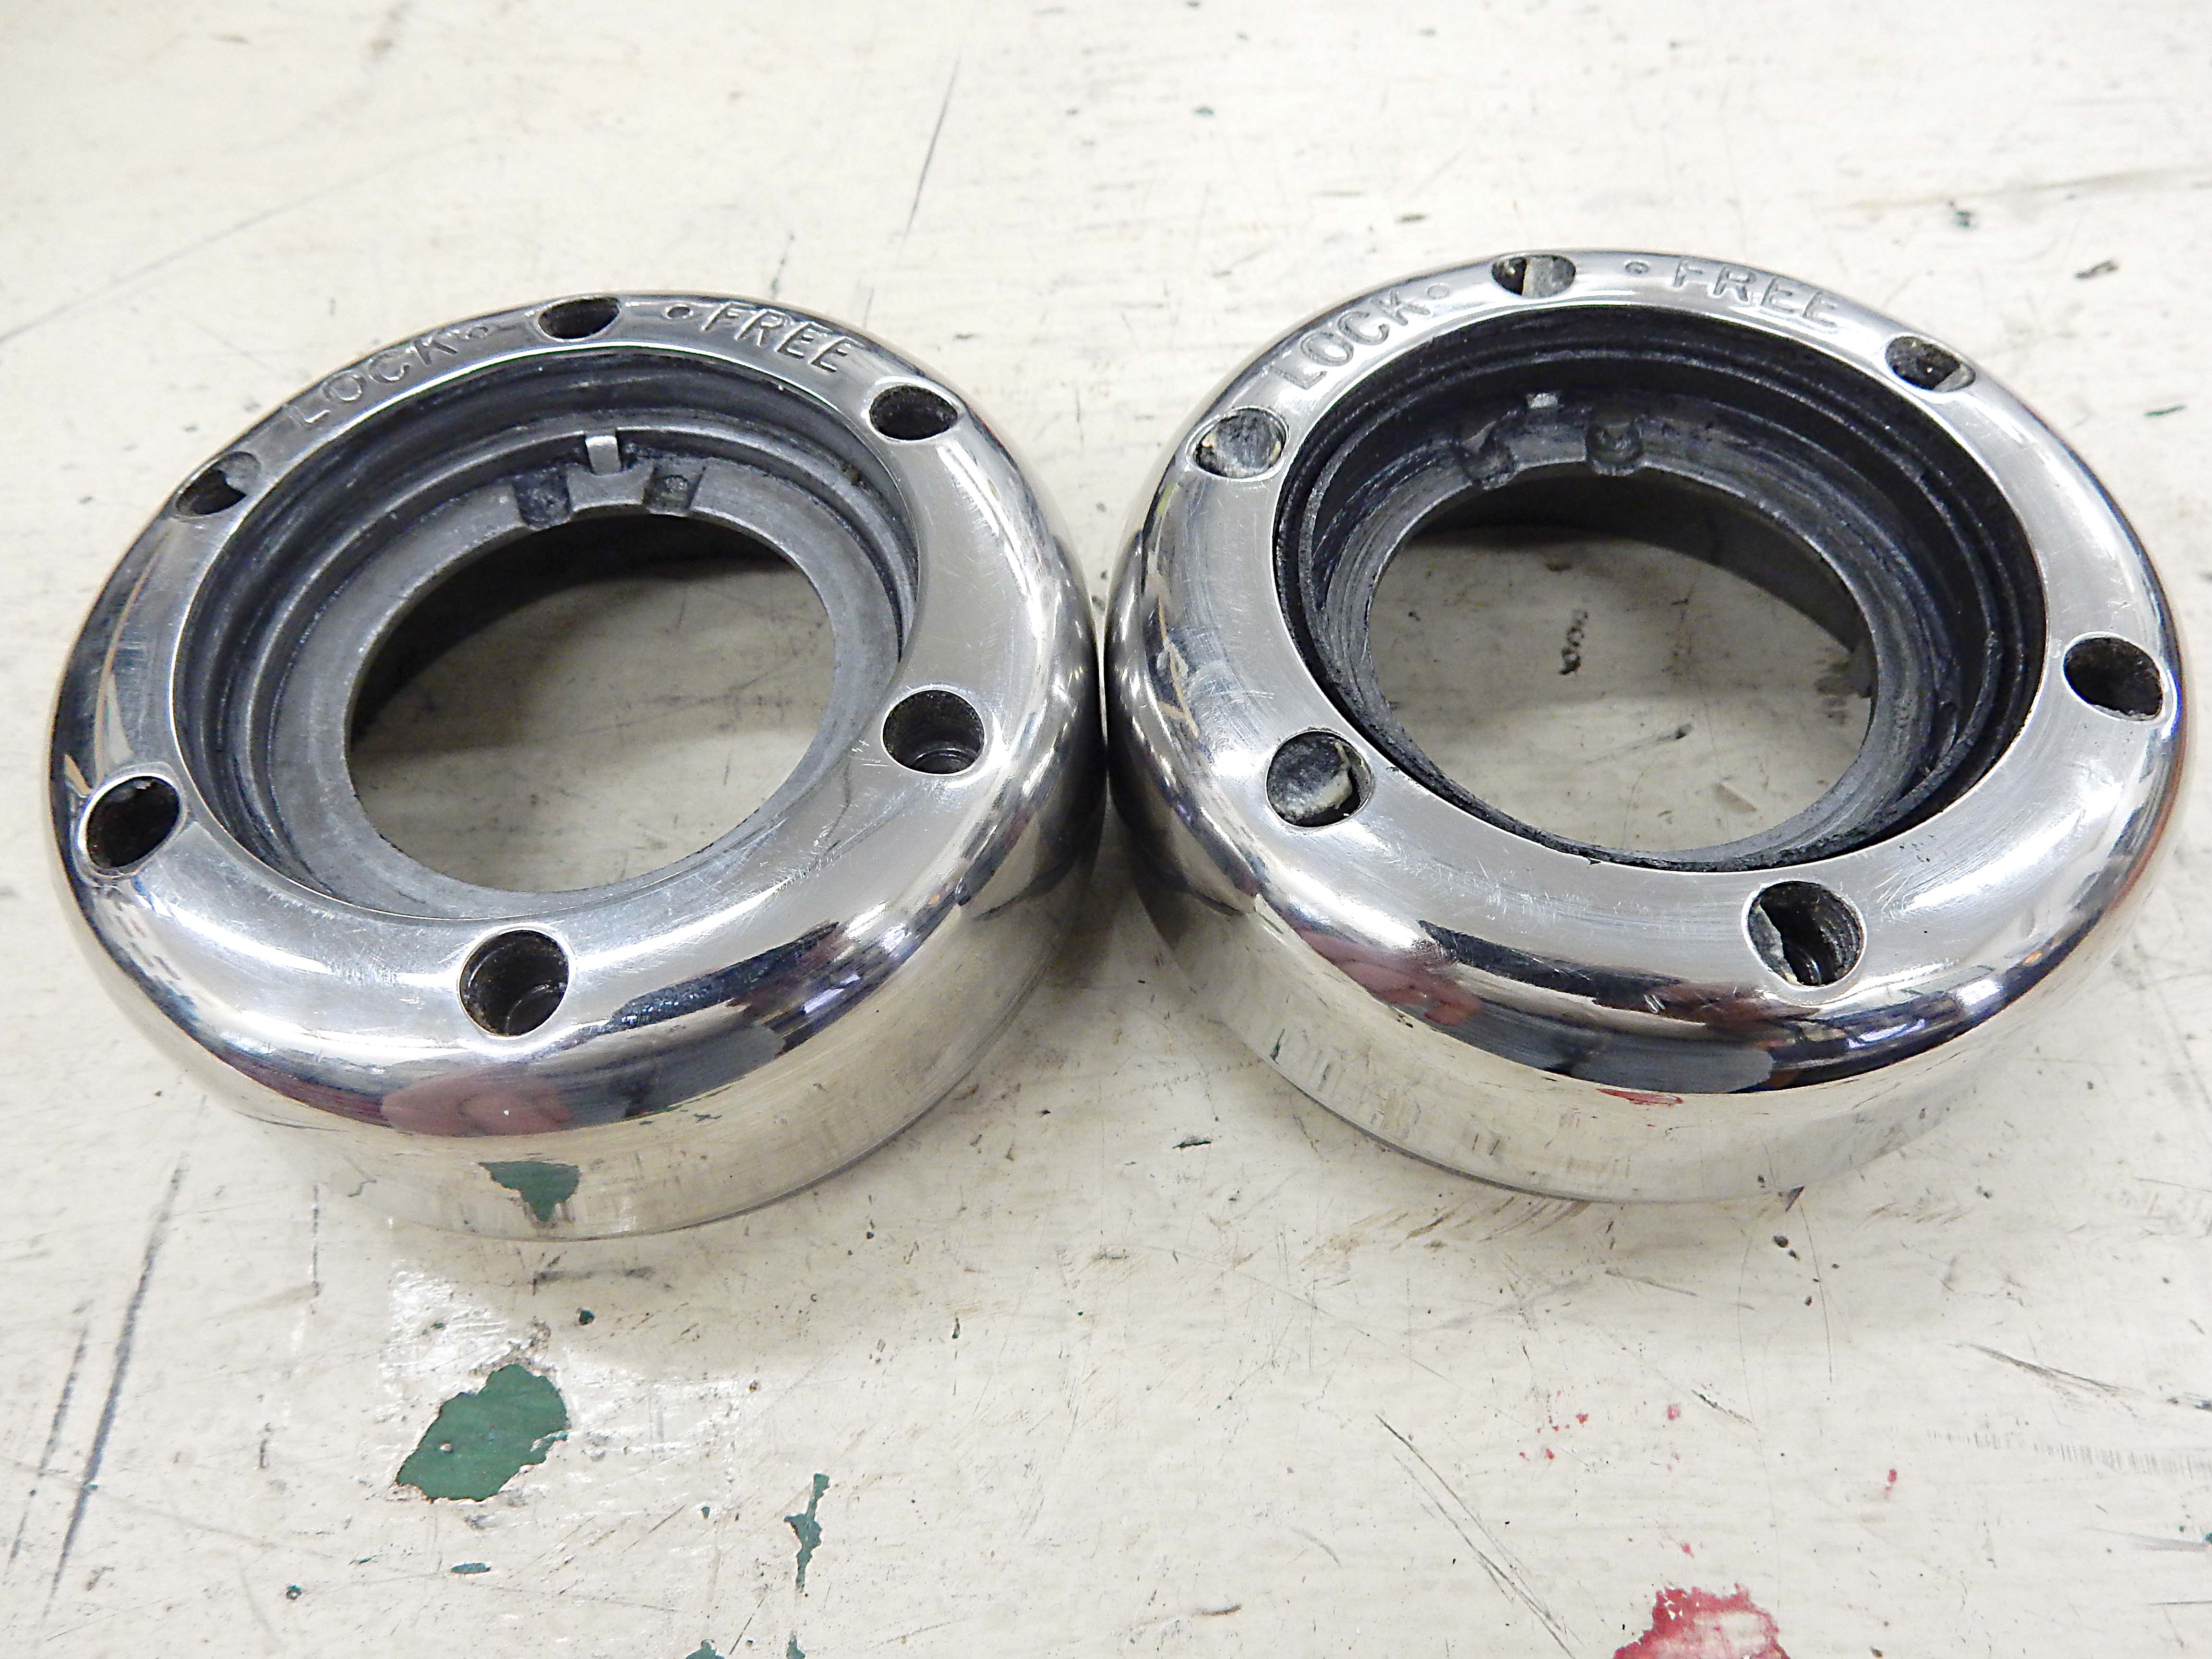
First, Dorman 81025 U-Joint Retainers kit is, indeed, somewhat universal. Instead of what it appeared in the online picture it has 4 different sizes of retainers: 2 each of two different external clips, and 2 each of two different sizes of c-clips. I bought three kits, so wound up with 6 of the right c-clips, which put me one short of having enough new ones to finish the job, so I put another old one in service. But, I did get all of the u-joint retainers in. And then I spent a bit cleaning up the grease and touching up the paint on the u-joints. The press and c-clamp hadn't been gentle enough, so there was a bit missing on the tops of each cap. All that is drying now and I'll be poised to put the driveshafts in tomorrow. And, I called Mile Marker and got the service kit on order for the hubs. One of the o-rings was damaged, so I'll be replacing all of them. And, for reference, the hubs I have are there older style 402's. Anyway, I put the outside part of the hubs on the lathe and used metal polish on them. (I have a bit of cleanup to do when the polish dries.  ) )
 And, while I was at it with the credit card I ordered new gloves and window protective film for the blast cabinet from Grizzly. That's 'cause I'll be doing a bit more blasting in the near future, and the fingers on my left hand are complaining about getting hit with the media. Plus the protective film is getting hard to see through. So I thought I'd get these parts coming in while I put the driveline together. Then I pulled out the front sway bar and front crossmember, and played with them to find out how they mount, what fasteners they need, etc. Turns out there isn't a good depiction of the F/U150 4wd swaybar with quad shocks in the MPC. So, once I got the way it all goes together figured out I captured the following pics for posterity. And, as said, I have quite a bit of blasting and powder coating to do in the near future. That would include the sway bar, front cross member, and transmission cross member, plus all the accompanying fasteners. A quick count says that's 48 more parts. Have I ever cautioned anyone about following in my tracks and blasting and painting or powder coating each and every part?  So, what do y'all think about what color to use on the various parts? I'm thinking black for the cross member and all the fasteners, but use the Silver Lining that you see on the already-mounted sway bar brackets under the springs on the sway bar itself just to interject some color. Thoughts? 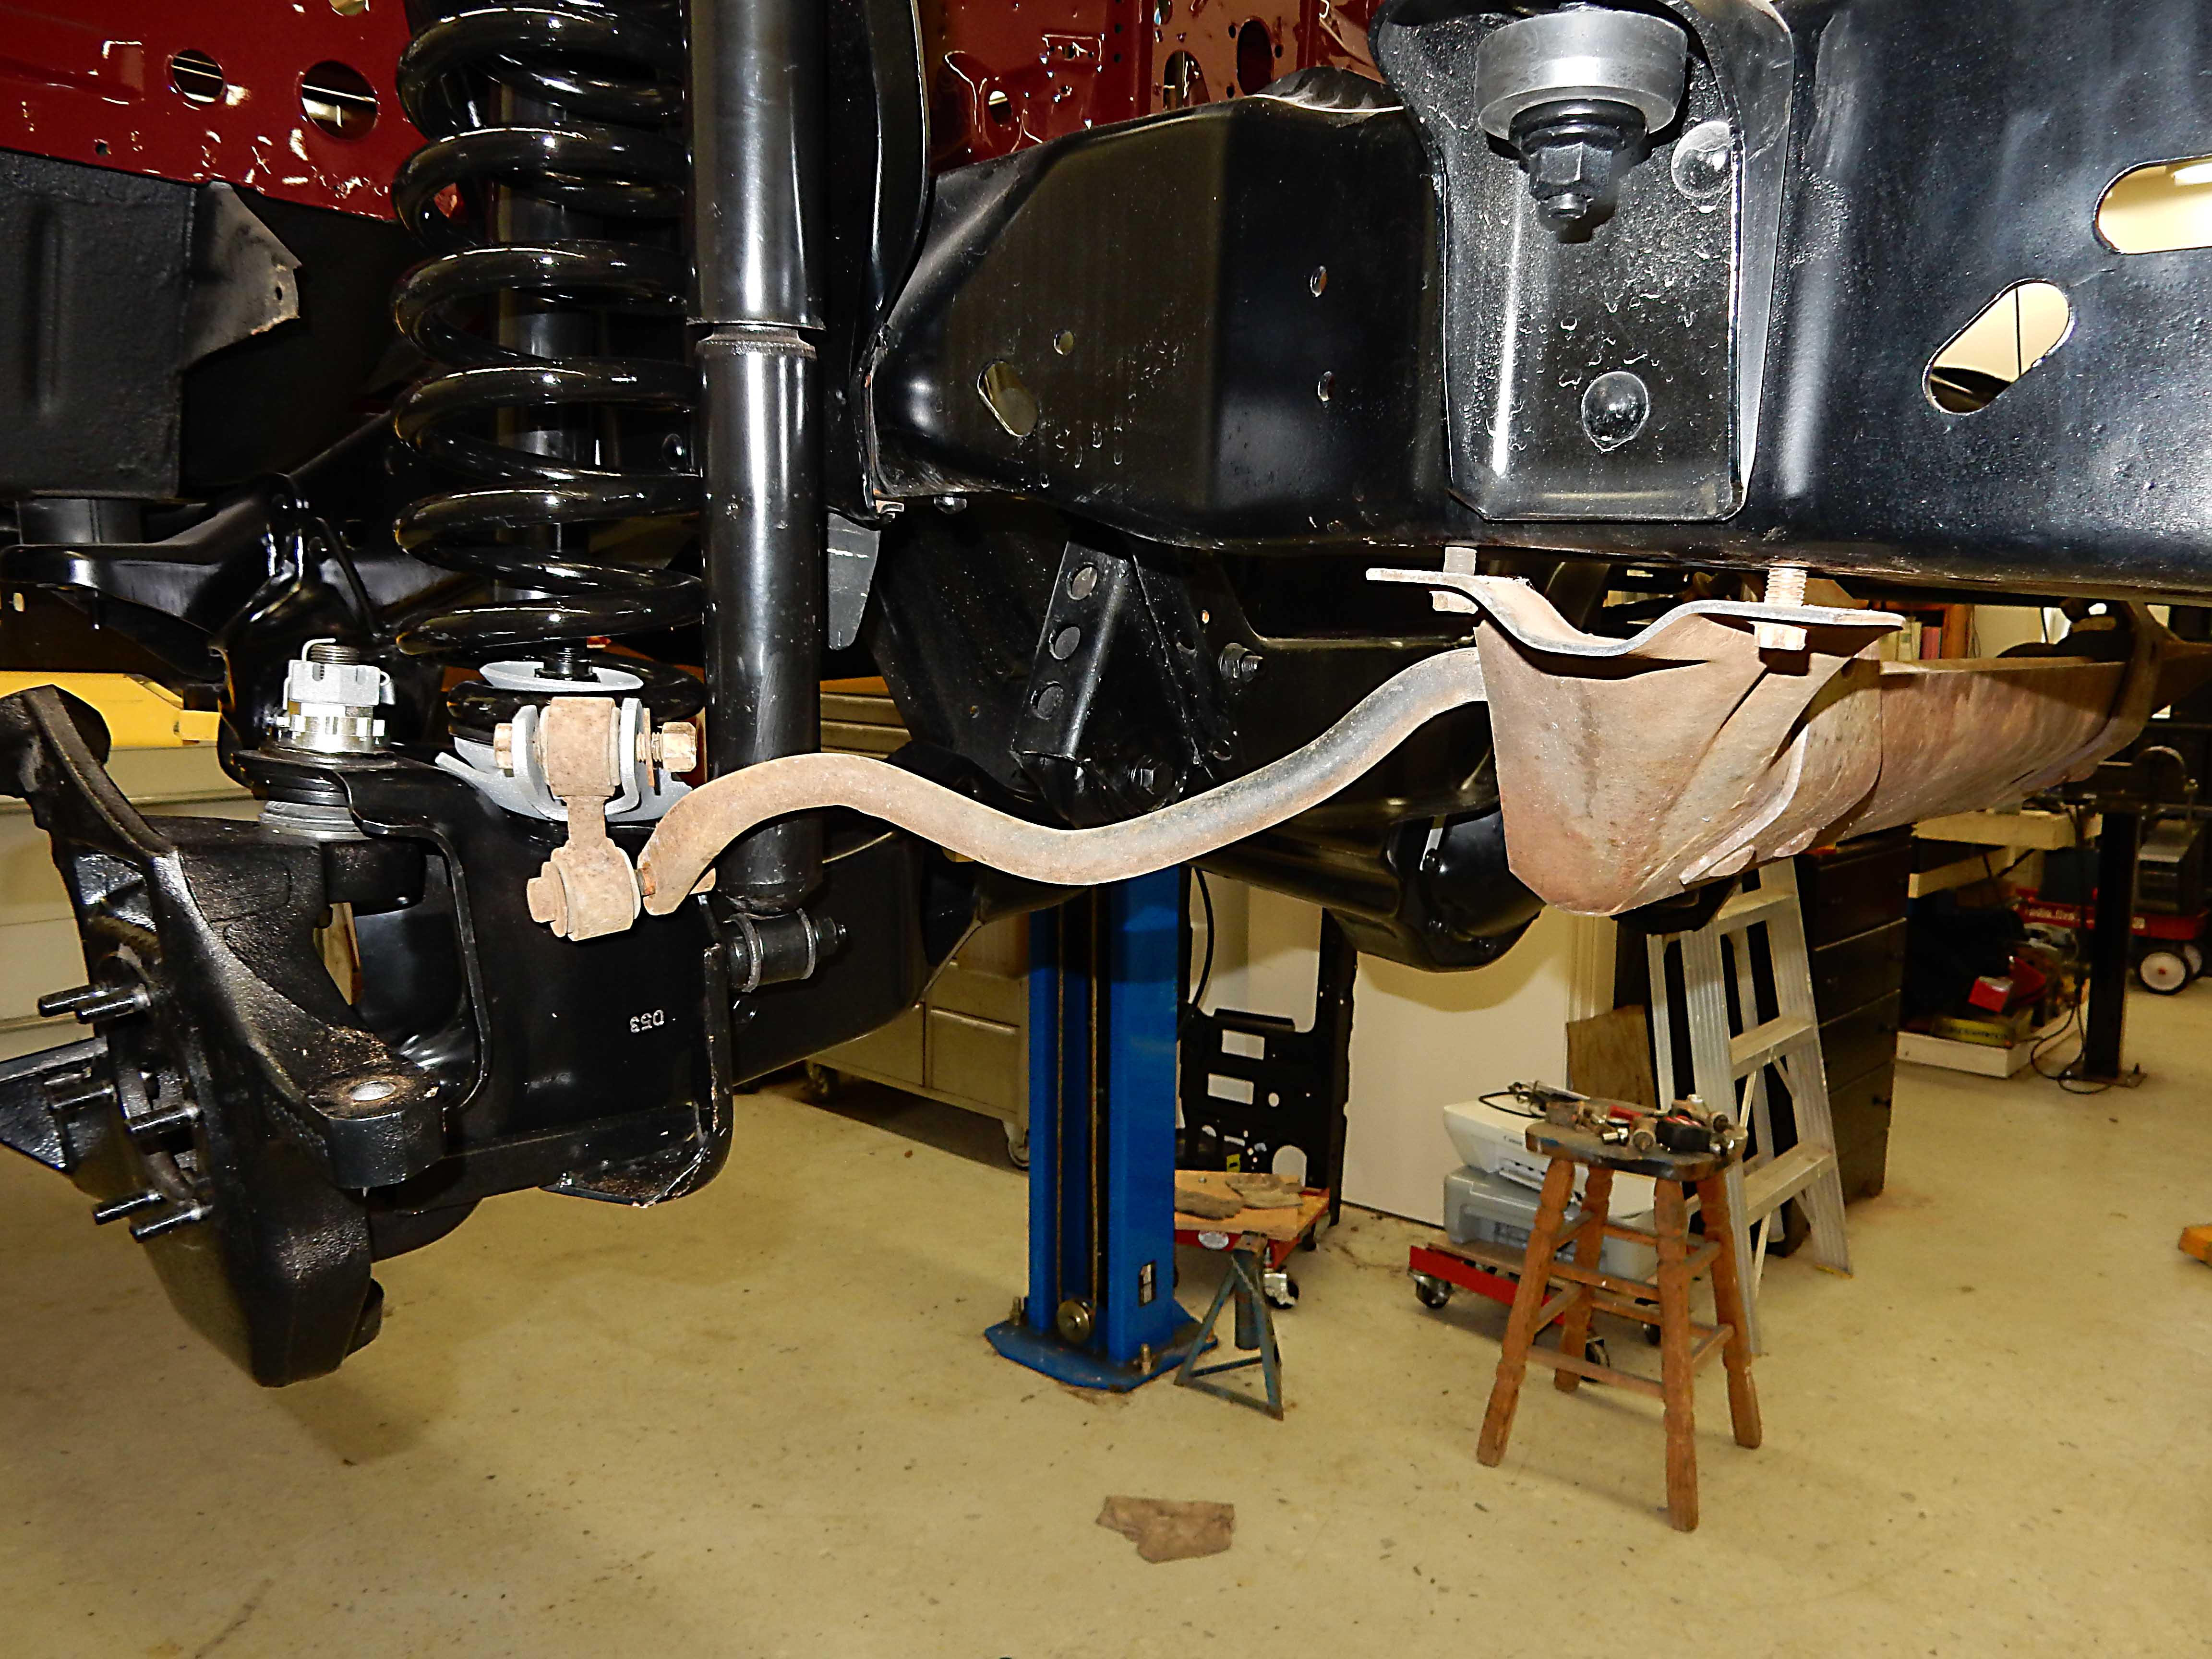 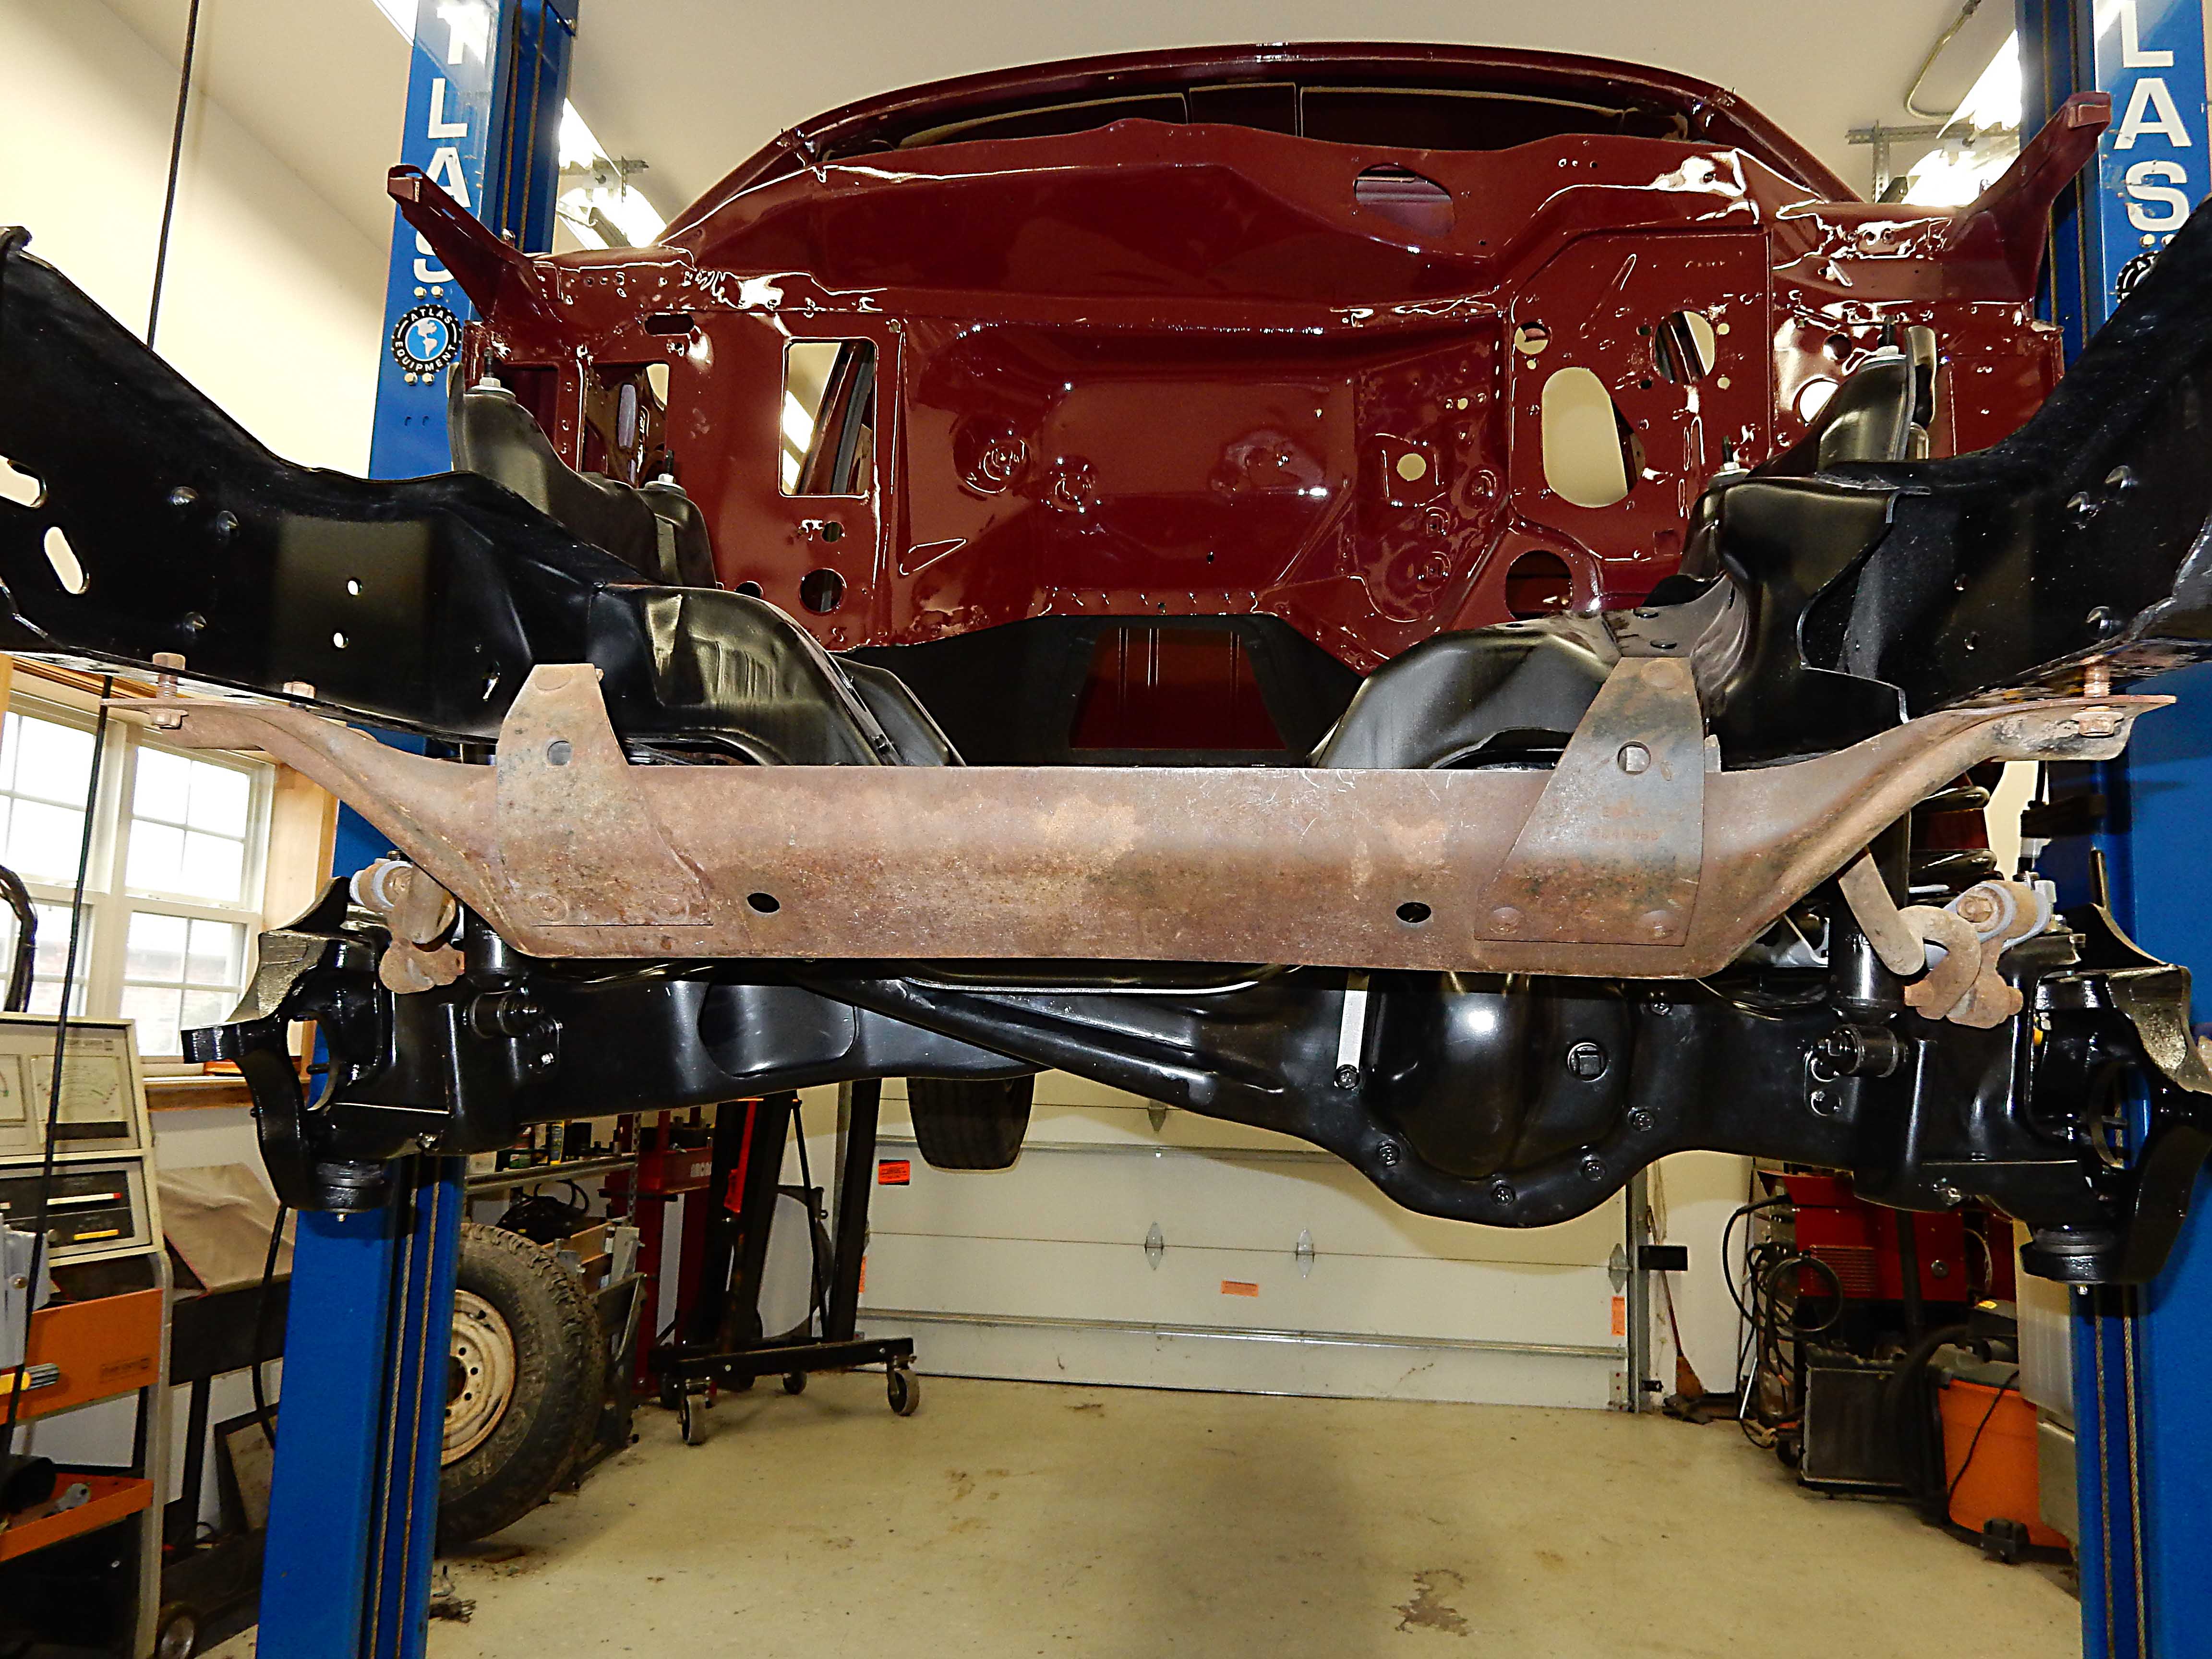  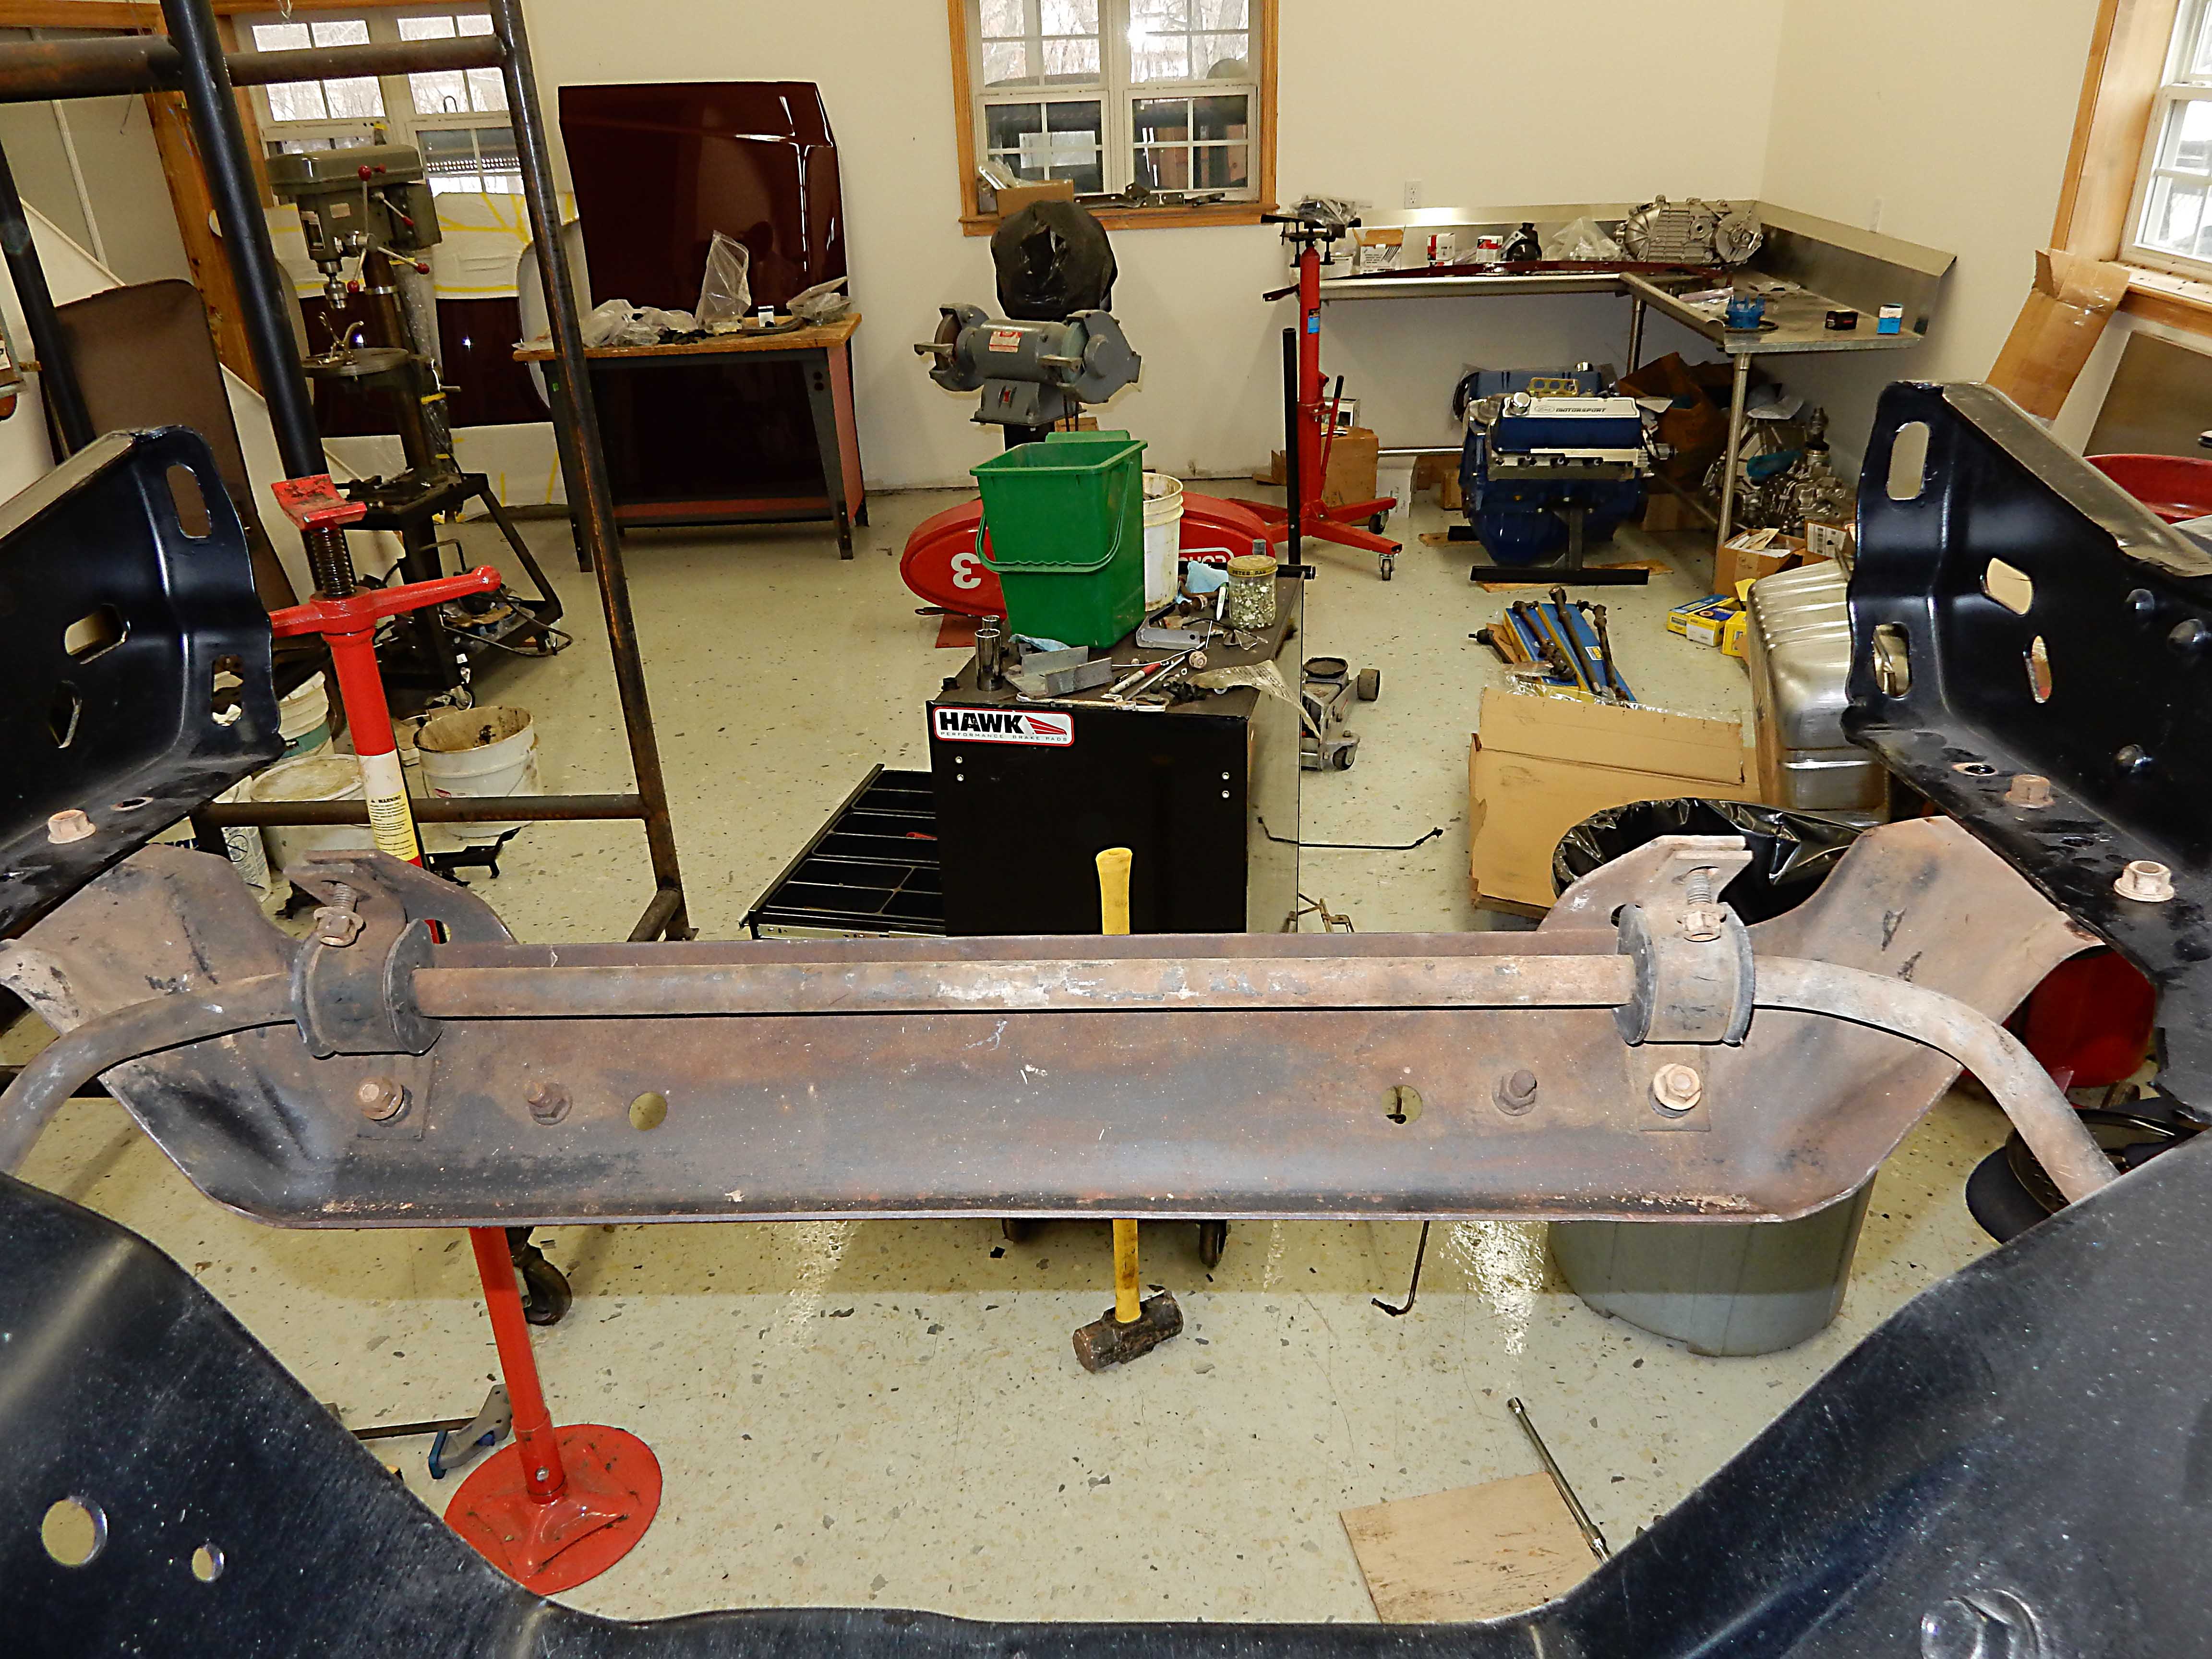
Gary, AKA "Gary fellow": Profile
Dad's: '81 F150 Ranger XLT 4x4: Down for restomod: Full-roller "stroked 351M" w/Trick Flow heads & intake, EEC-V SEFI/E4OD/3.50 gears w/Kevlar clutches
|
|
Administrator
|
Nice work Gary, I like your color scheme plan!
So if you had to do this over again would you choose to paint everything instead of powder coat?
SHORT BED 4-DOOR DIESEL: 1986 F350 4x4 under construction-- 7.3 IDIT ZF5+GVOD
STRAIGHT SIX 4X4: 1981 F150 2wd to 4x4-- 300 I6 close ratio diesel T19, hydroboost brakes, Saginaw steering BIG F: 1995 F-Superduty under construction— converting to 6.9L IDI diesel ZF5+DNE2 |
|
Administrator
|
Thanks, Jonathan. But, let me ask another question before I answer yours. In the pic below you can see that the rear sway bar is black. Should I carry that theme over to the front?
That would make it "symmetrical", but there aren't as many pieces to the front that can be PC'd Silver Lining as there are in the back, so it would mean a lot of black. And, the attaching bracket that is under the spring is silver, so it would be appropriate to make the link black and then the sway bar itself silver. Thoughts? 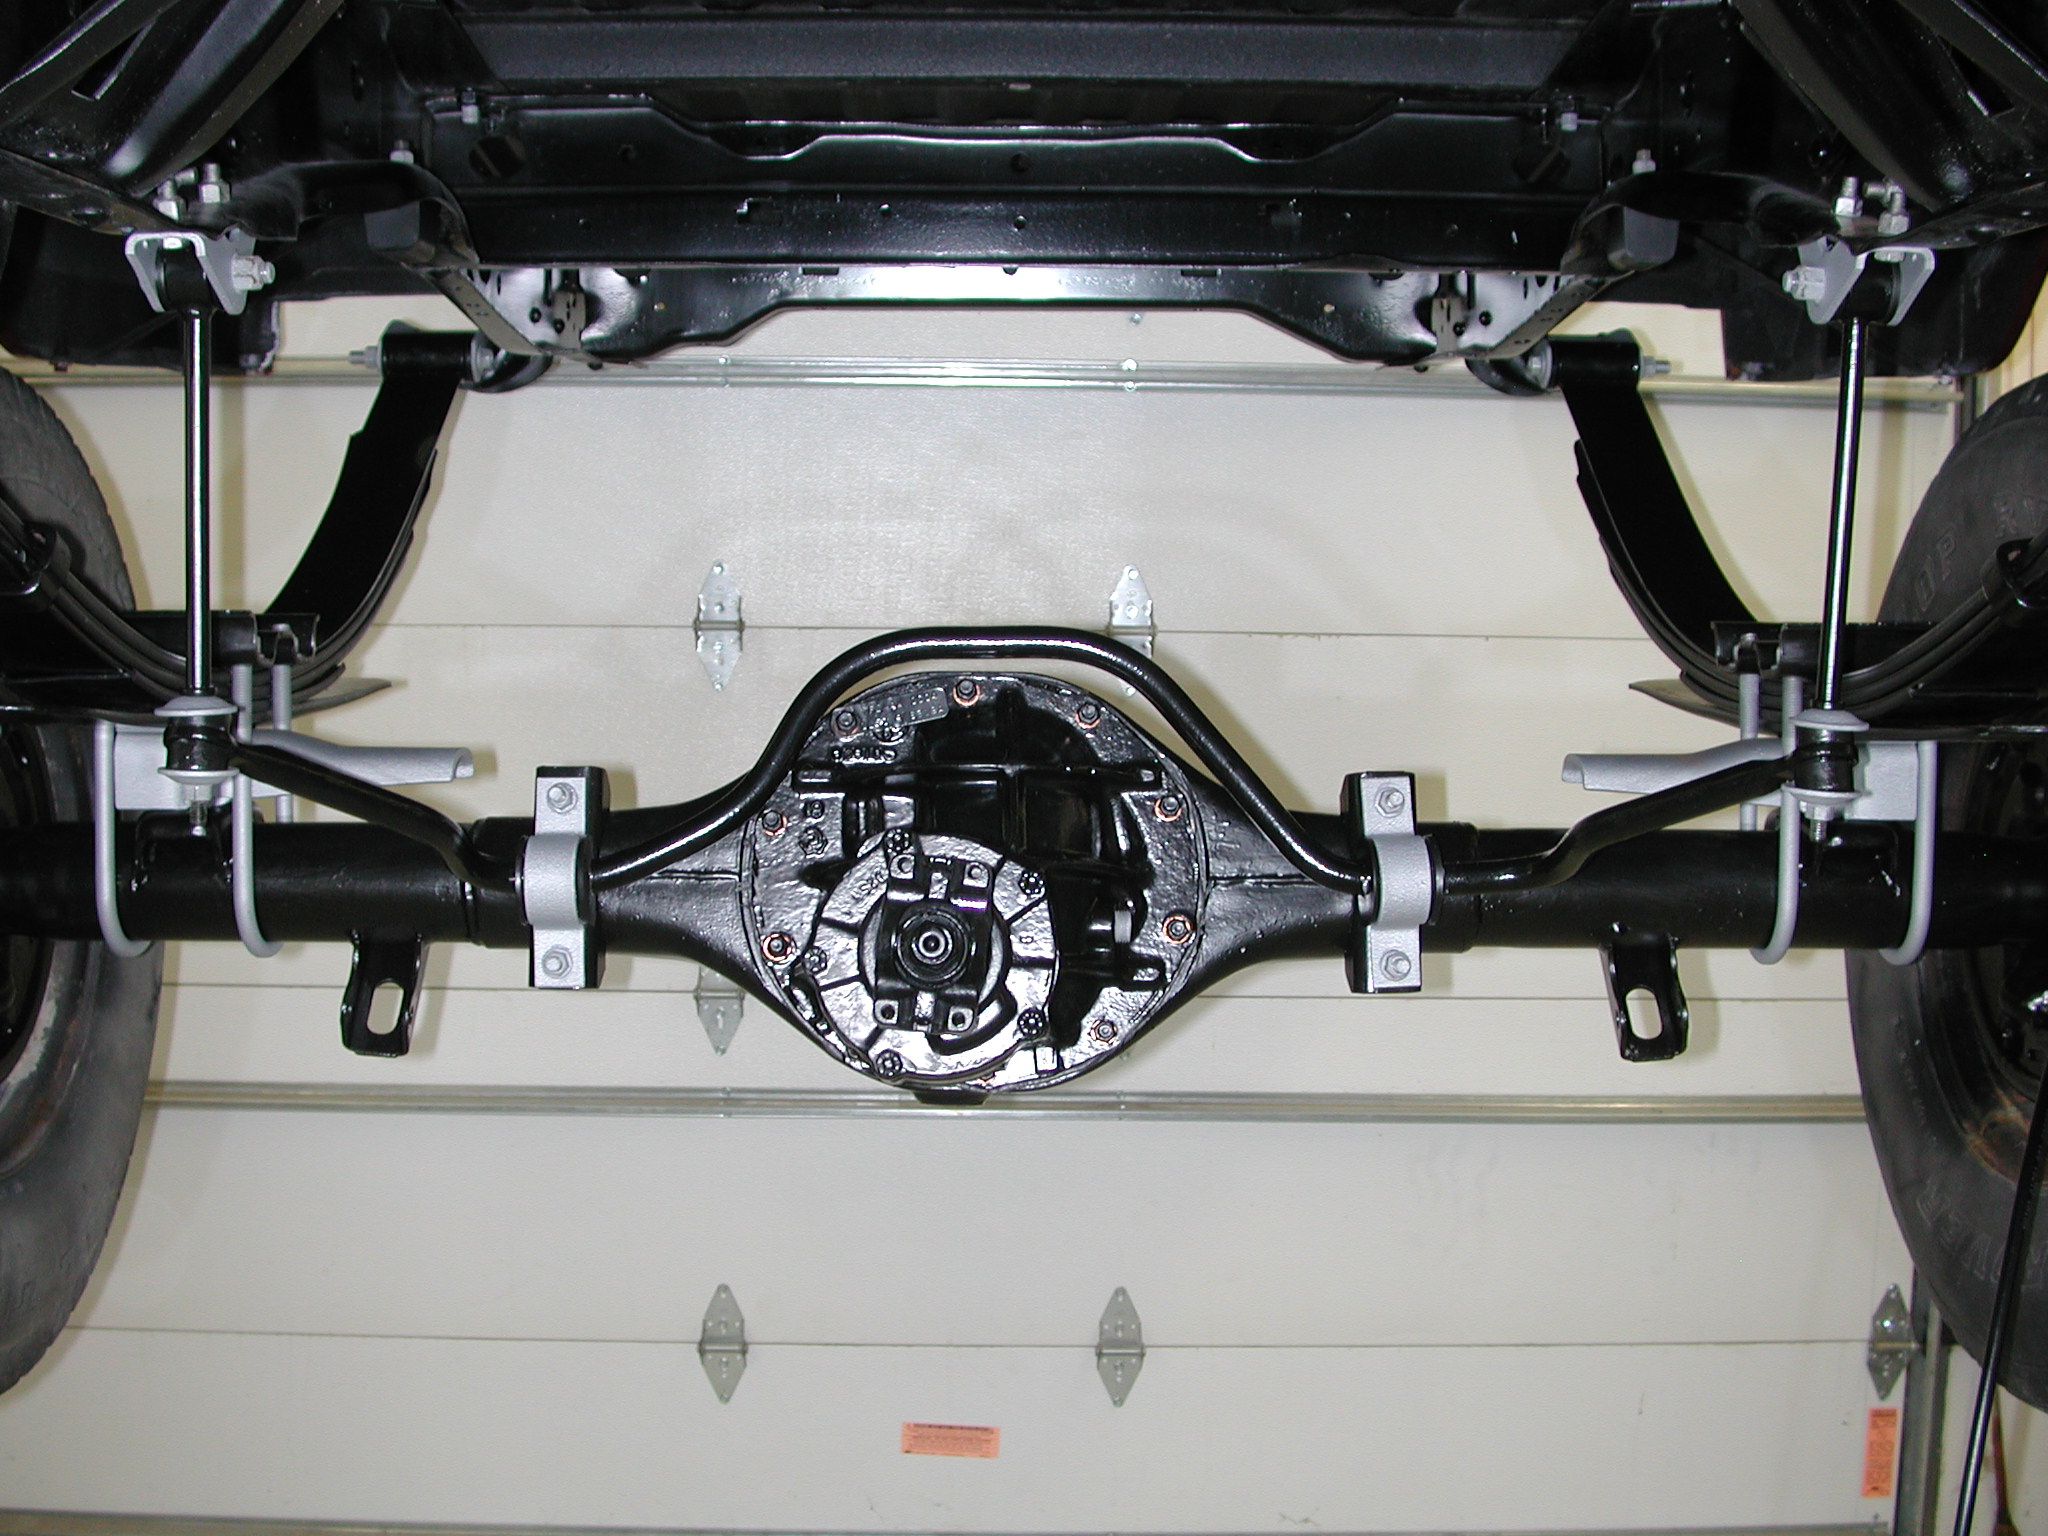 As for painting rather than PC'ing, if you are going down the road of coating everything, which is a questionable approach in and of itself, then you are going to have to media blast everything. And once you've spent that time on each part you want some coating that is very durable. But a rattle can top coat by itself isn't very durable. So you'll need to prime and then top coat. In comparison, powder is one coat. You prep the part the same as paint, but then spray and bake. So that part is easier. And, in some ways it is faster since from the time you turn the oven on until you can handle the part is less than two hours. But if you were painting you'd still be applying the top coat and then it would have to dry. Of course there are issues with powder coating some things, like things that can't be heated to 400 degrees, such as springs or parts with seals. Which then brings me back to the question about the sway bar. In reality it is a long spring, and probably shouldn't be heated. So, like the rear sway bar, I probably should paint it. And, I've been using black POR15 for most things like that. And, if I've going to have a painting party with POR I want to paint a lot of parts. So, I'll want to prep the new tie rods and paint them at the same time.
Gary, AKA "Gary fellow": Profile
Dad's: '81 F150 Ranger XLT 4x4: Down for restomod: Full-roller "stroked 351M" w/Trick Flow heads & intake, EEC-V SEFI/E4OD/3.50 gears w/Kevlar clutches
|
|
Short links silver, sway bar black, sway bar cover/mount silver.
All black except the sway bar cover/mount silver, you can always repaint if it doesn't suit you. I agree with you about the heat on the bar, stuff like that seems to go wacky around extreme heat. my 2 cents worth, Bill Did the cluster LEDs, painted the needles yesterday,much brighter, the one @ oil needs to be reversed, LEDs only work one way. 
1983 F100 XL 300, 6 cyl, aod, long bed
1961 E100 pickup, 289,C4 |
|
Administrator
|
In reply to this post by Gary Lewis
Gary, I hadn’t thought about the rear sway bar... that’s a little tougher... whether to balance the symmetry of matching the bars or matching the visual amount of silver to black. I guess I would probably lean towards both bars being black but it is a tough call. Painting it silver wouldn’t look “wrong” either...
SHORT BED 4-DOOR DIESEL: 1986 F350 4x4 under construction-- 7.3 IDIT ZF5+GVOD
STRAIGHT SIX 4X4: 1981 F150 2wd to 4x4-- 300 I6 close ratio diesel T19, hydroboost brakes, Saginaw steering BIG F: 1995 F-Superduty under construction— converting to 6.9L IDI diesel ZF5+DNE2 |
|
In reply to this post by Gary Lewis
I vote for black myself. The call is yours of course. Whatever you do, it will look great. It already looks better than when it was new.
1981 F 150 Custom 300 ci with a fully rebuilt 1968 240 head Carter YFA T-18 3.25 9" rear 2WD
dual gas tanks 1990 Lincoln Town Car 5.0 AOD Home town Mc Kenzie, TN |
|
Administrator
|
In reply to this post by Ford F834
Guys - Thanks. I think we are in agreement - bar and cross member black and bushing covers and links silver. And I'll paint the bar and tie rods with POR15, all in one go.
Bill - I usually hook up the cluster w/o actually mounting it to see which LED's need to be reversed. And, with a 50/50 chance, there are always some. And, here's my late-morning report: At least one step back today, but hopefully two steps forward. I've already taken one forward - I got the left-side front axle shafts in and the stub torqued down to the knuckle. But that wasn't w/o issue as it turns out the inside bore of the knuckle is a close fit with the part of the stub that goes into it. And the little bit of powder I'd put on both parts wouldn't allow the stub to go in. I'll post a pic later of one stub with the powder on and one with it gone so you'll see where 'tis. But I chucked the stub in the lathe and used a file and then sandpaper to remove the powder. And even then it took a bit of "persuasion", as Dad would have said, to get it to go in. But, when I started to put the right side axle shafts in I discovered that the retainer flange for the differential stub is too big to go through the bore in the knuckle. And the slinger on the outboard end is too big to go through the hole in the swing arm.  So, this break is to contemplate my next step, which I think is to see if the ball joints will pop out so I can remove the right knuckle. That will cause the least damage to paint or powder, I think, but we shall see.
Gary, AKA "Gary fellow": Profile
Dad's: '81 F150 Ranger XLT 4x4: Down for restomod: Full-roller "stroked 351M" w/Trick Flow heads & intake, EEC-V SEFI/E4OD/3.50 gears w/Kevlar clutches
|
I've heard that you always need to top-coat over POR-15, something about it not being UV-resistant. Seems to me that shouldn't be much of an issue on under carriage parts, but as I said, I've heard that you always need to top-coat it (and the advice, whether it's necessary or not, has included under carriage applications).
Bob
Sorry, no '80 - '86 Ford trucks "Oswald": 1997 F-250HD crew cab short box, 460, E4OD, 4.10 gears "Pluto": 1971 Bronco, 302, NV3550 5 speed, Atlas 4.3:1 transfer case, 33" tires "the motorhome": 2015 E-450-based 28' class C motorhome, 6.8L V-10 "the Dodge": 2007 Dodge 2500, 6.7L Cummins |
|
Administrator
|
Yep, POR15's gloss base coat needs to be top-coated to protect it from UV. I've read that it'll turn white otherwise. And, for the most part I've used POR's Chassis Black top coat. But, I know I missed a few places, like on the springs, as I can see some gloss in some places. But, on the sway bar I'll top-coat it well as it will probably see some UV.
Anyway, I'm at a stopping point for the day. And it was a day of doing the dance where you step forward and then backward, and repeat the process several times. Forward: As previously said, I got the driver's side axle shafts on, but then discovered that the passenger's side wouldn't go through the various passages in the swing arm and steering knuckle, so I took a late-morning break to contemplate things.Backward: The first step backward came when I came back out after the break and realized I hadn't put the brake dust shield under the stub on the driver's side. Remember the conversation about having to take the powder off to get the stub on? Well, it not only didn't want to go on easily, it certainly didn't want to come off.
Forward: I put the dust shield on, then the stub, and torqued the nuts down, again.Backward: Then I took off the passenger's side steering knuckle, albeit not quite that easy. And then discovered that the retaining flange for the differential's output shaft won't go through the swing arm. So I put the steering knuckle back on.Forward: Fortunately I realized that the slip joint in the middle of the right side would come apart, so I put the outside splines in the vise (protected by 2x4's) and gave a yank. Sure enough, it came apart. And, better yet, the output shaft and associated slip yoke went into the diff easily. Further, the outside shafts went back into the slip joint nicely and the seal popped home on the yoke.But now I'm done for the day. However, I promised you a pic of the stubs with and w/o the powder, so here they are: 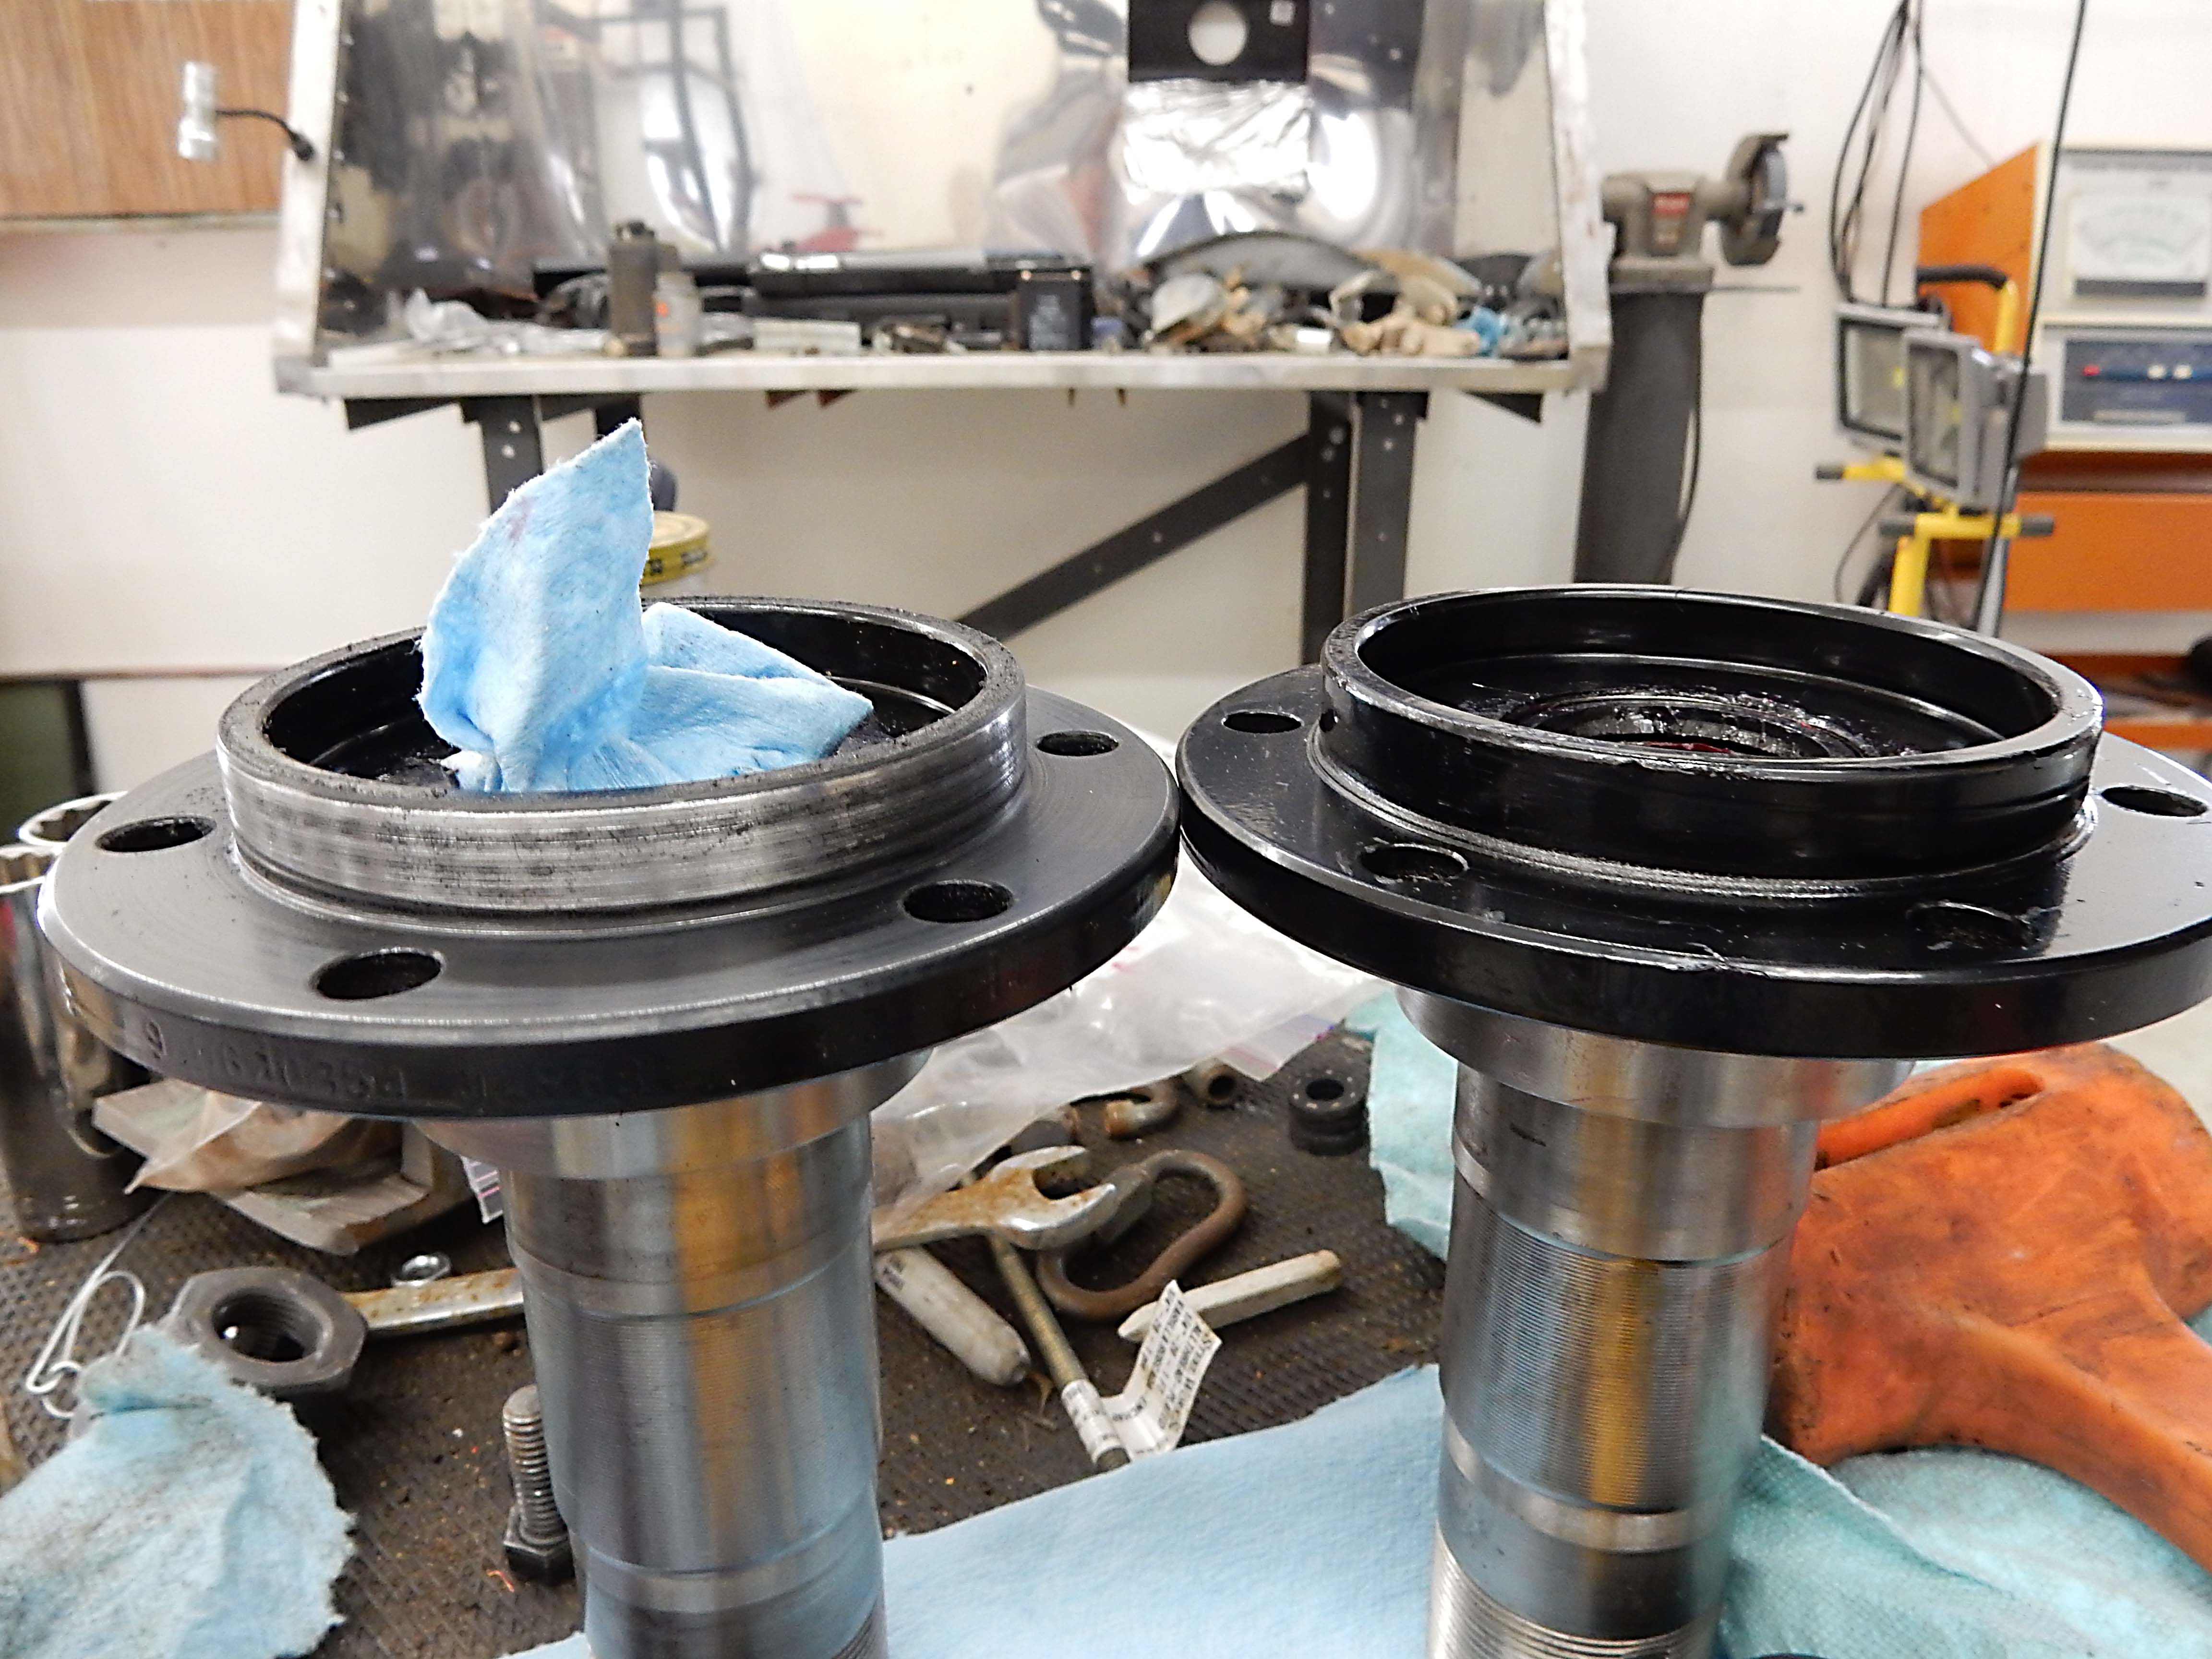 And, here are some shots of what it looks like with the axles in: 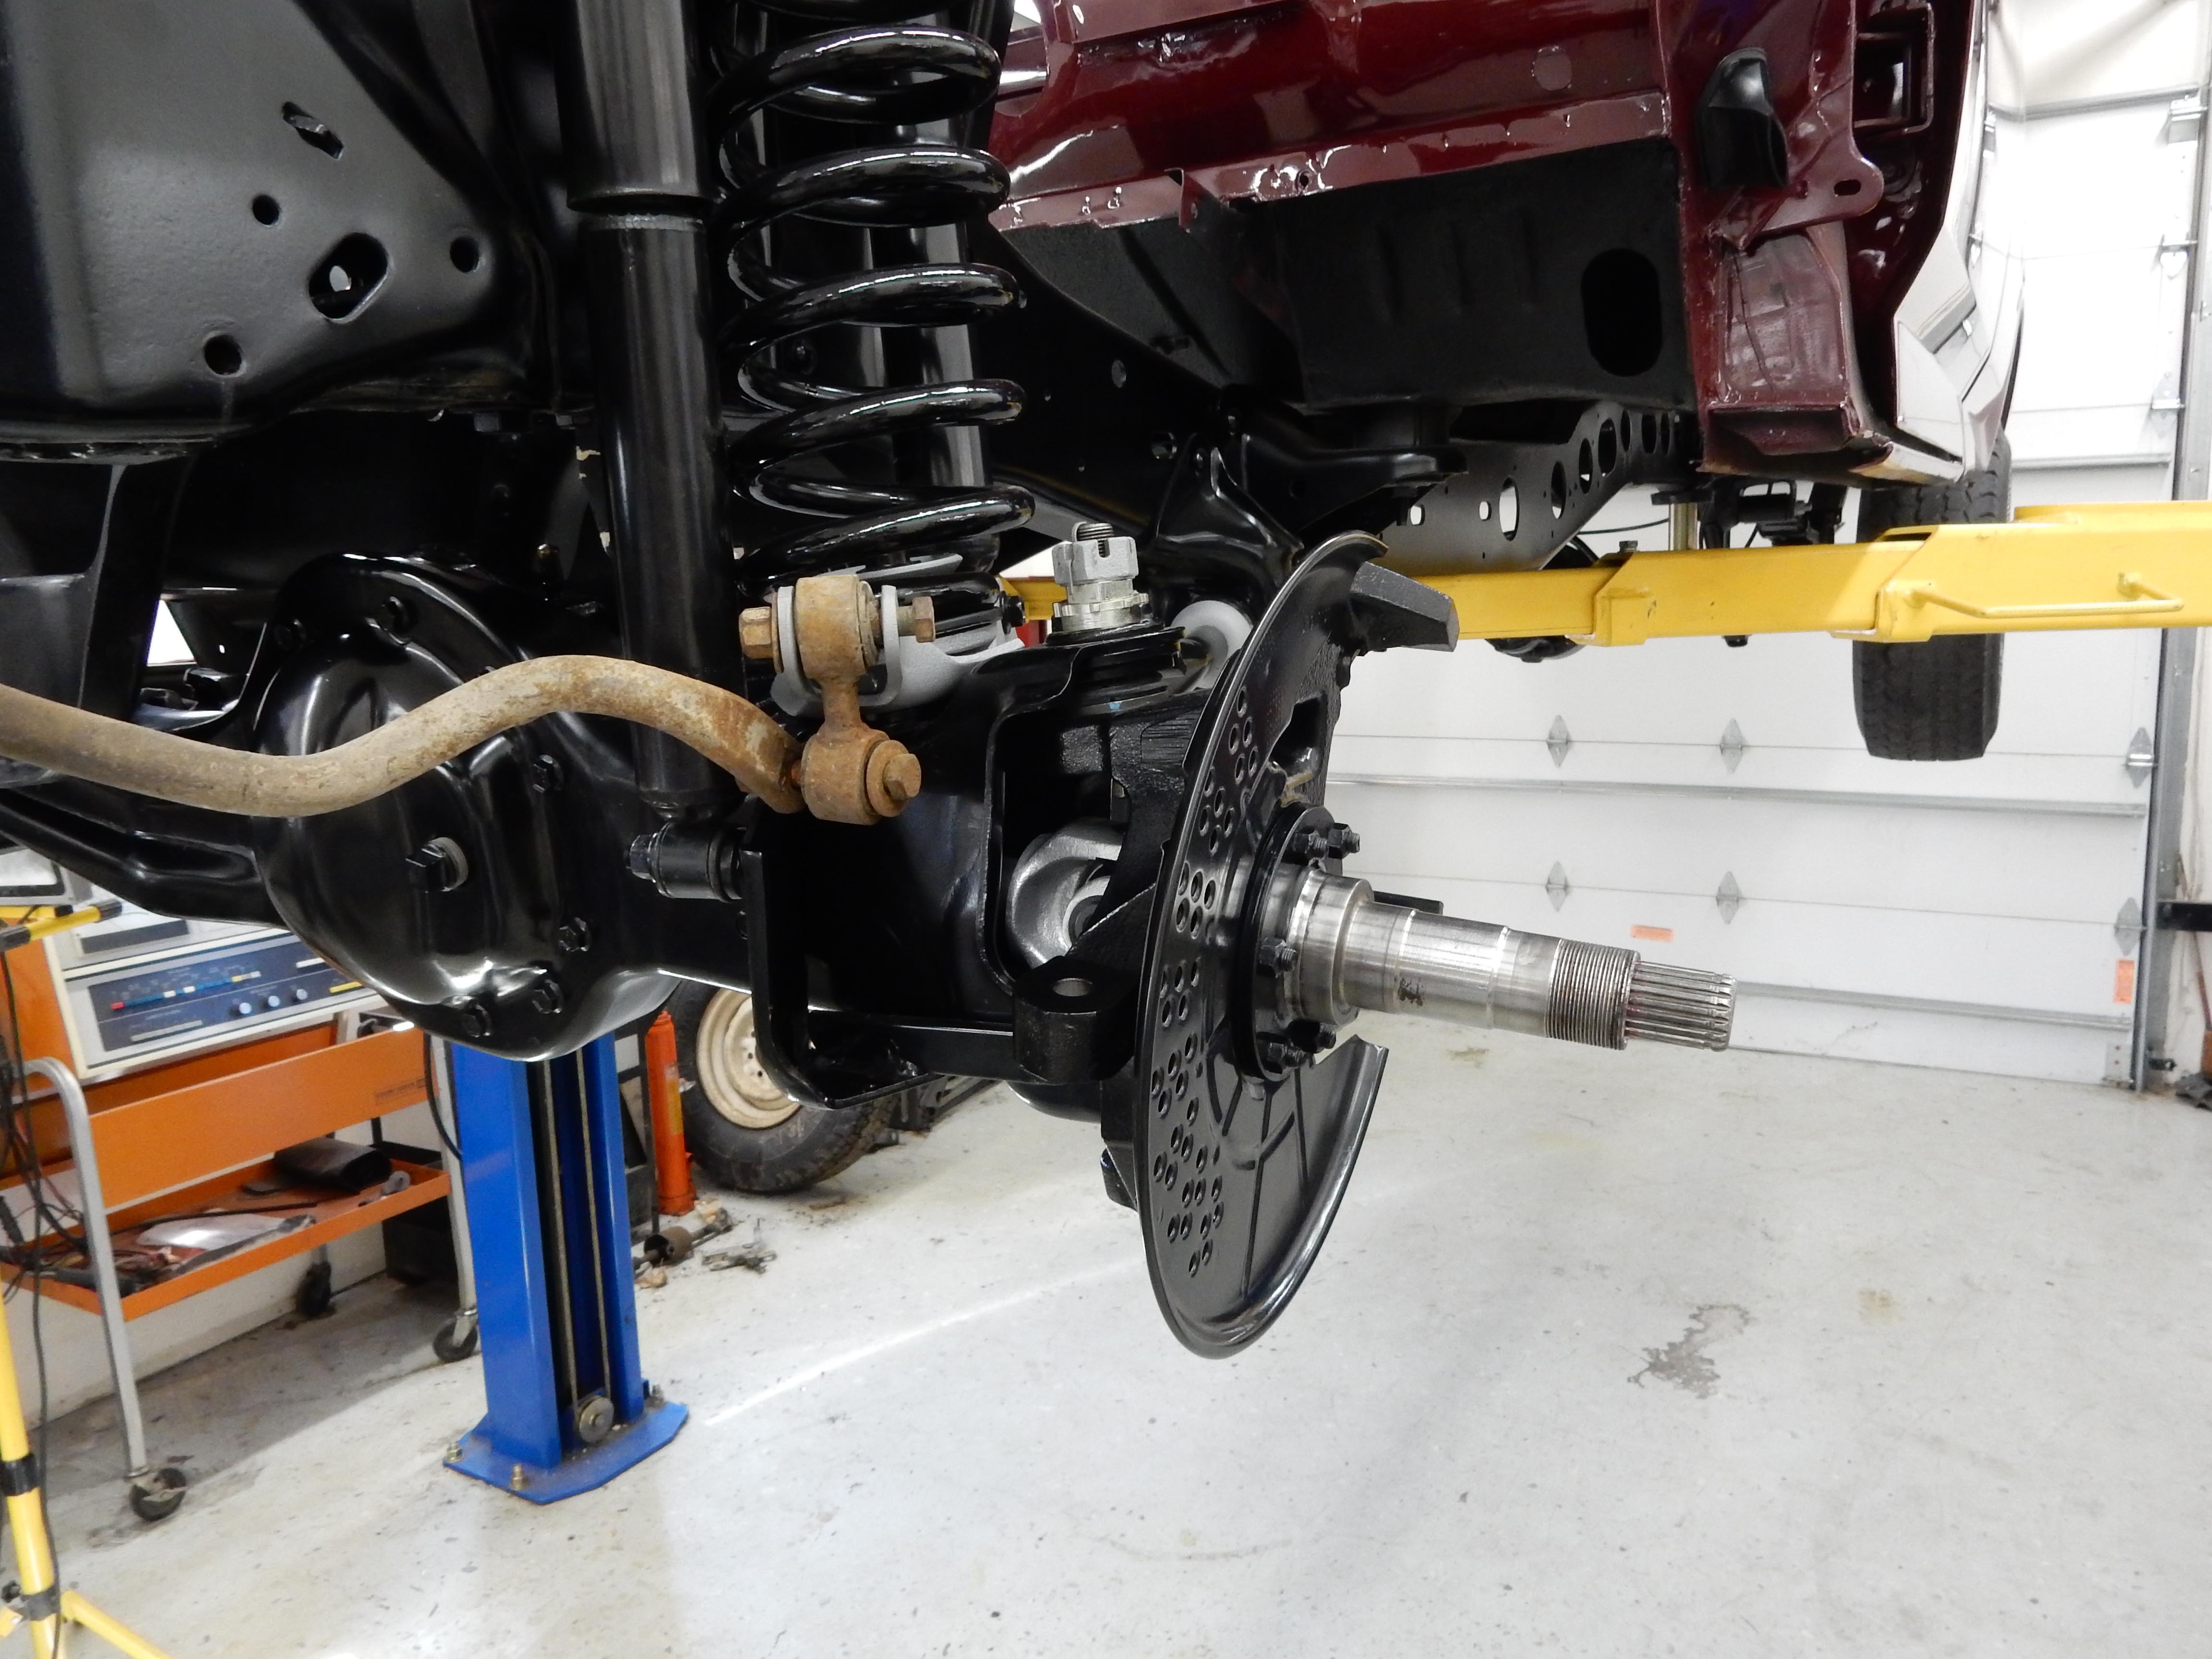 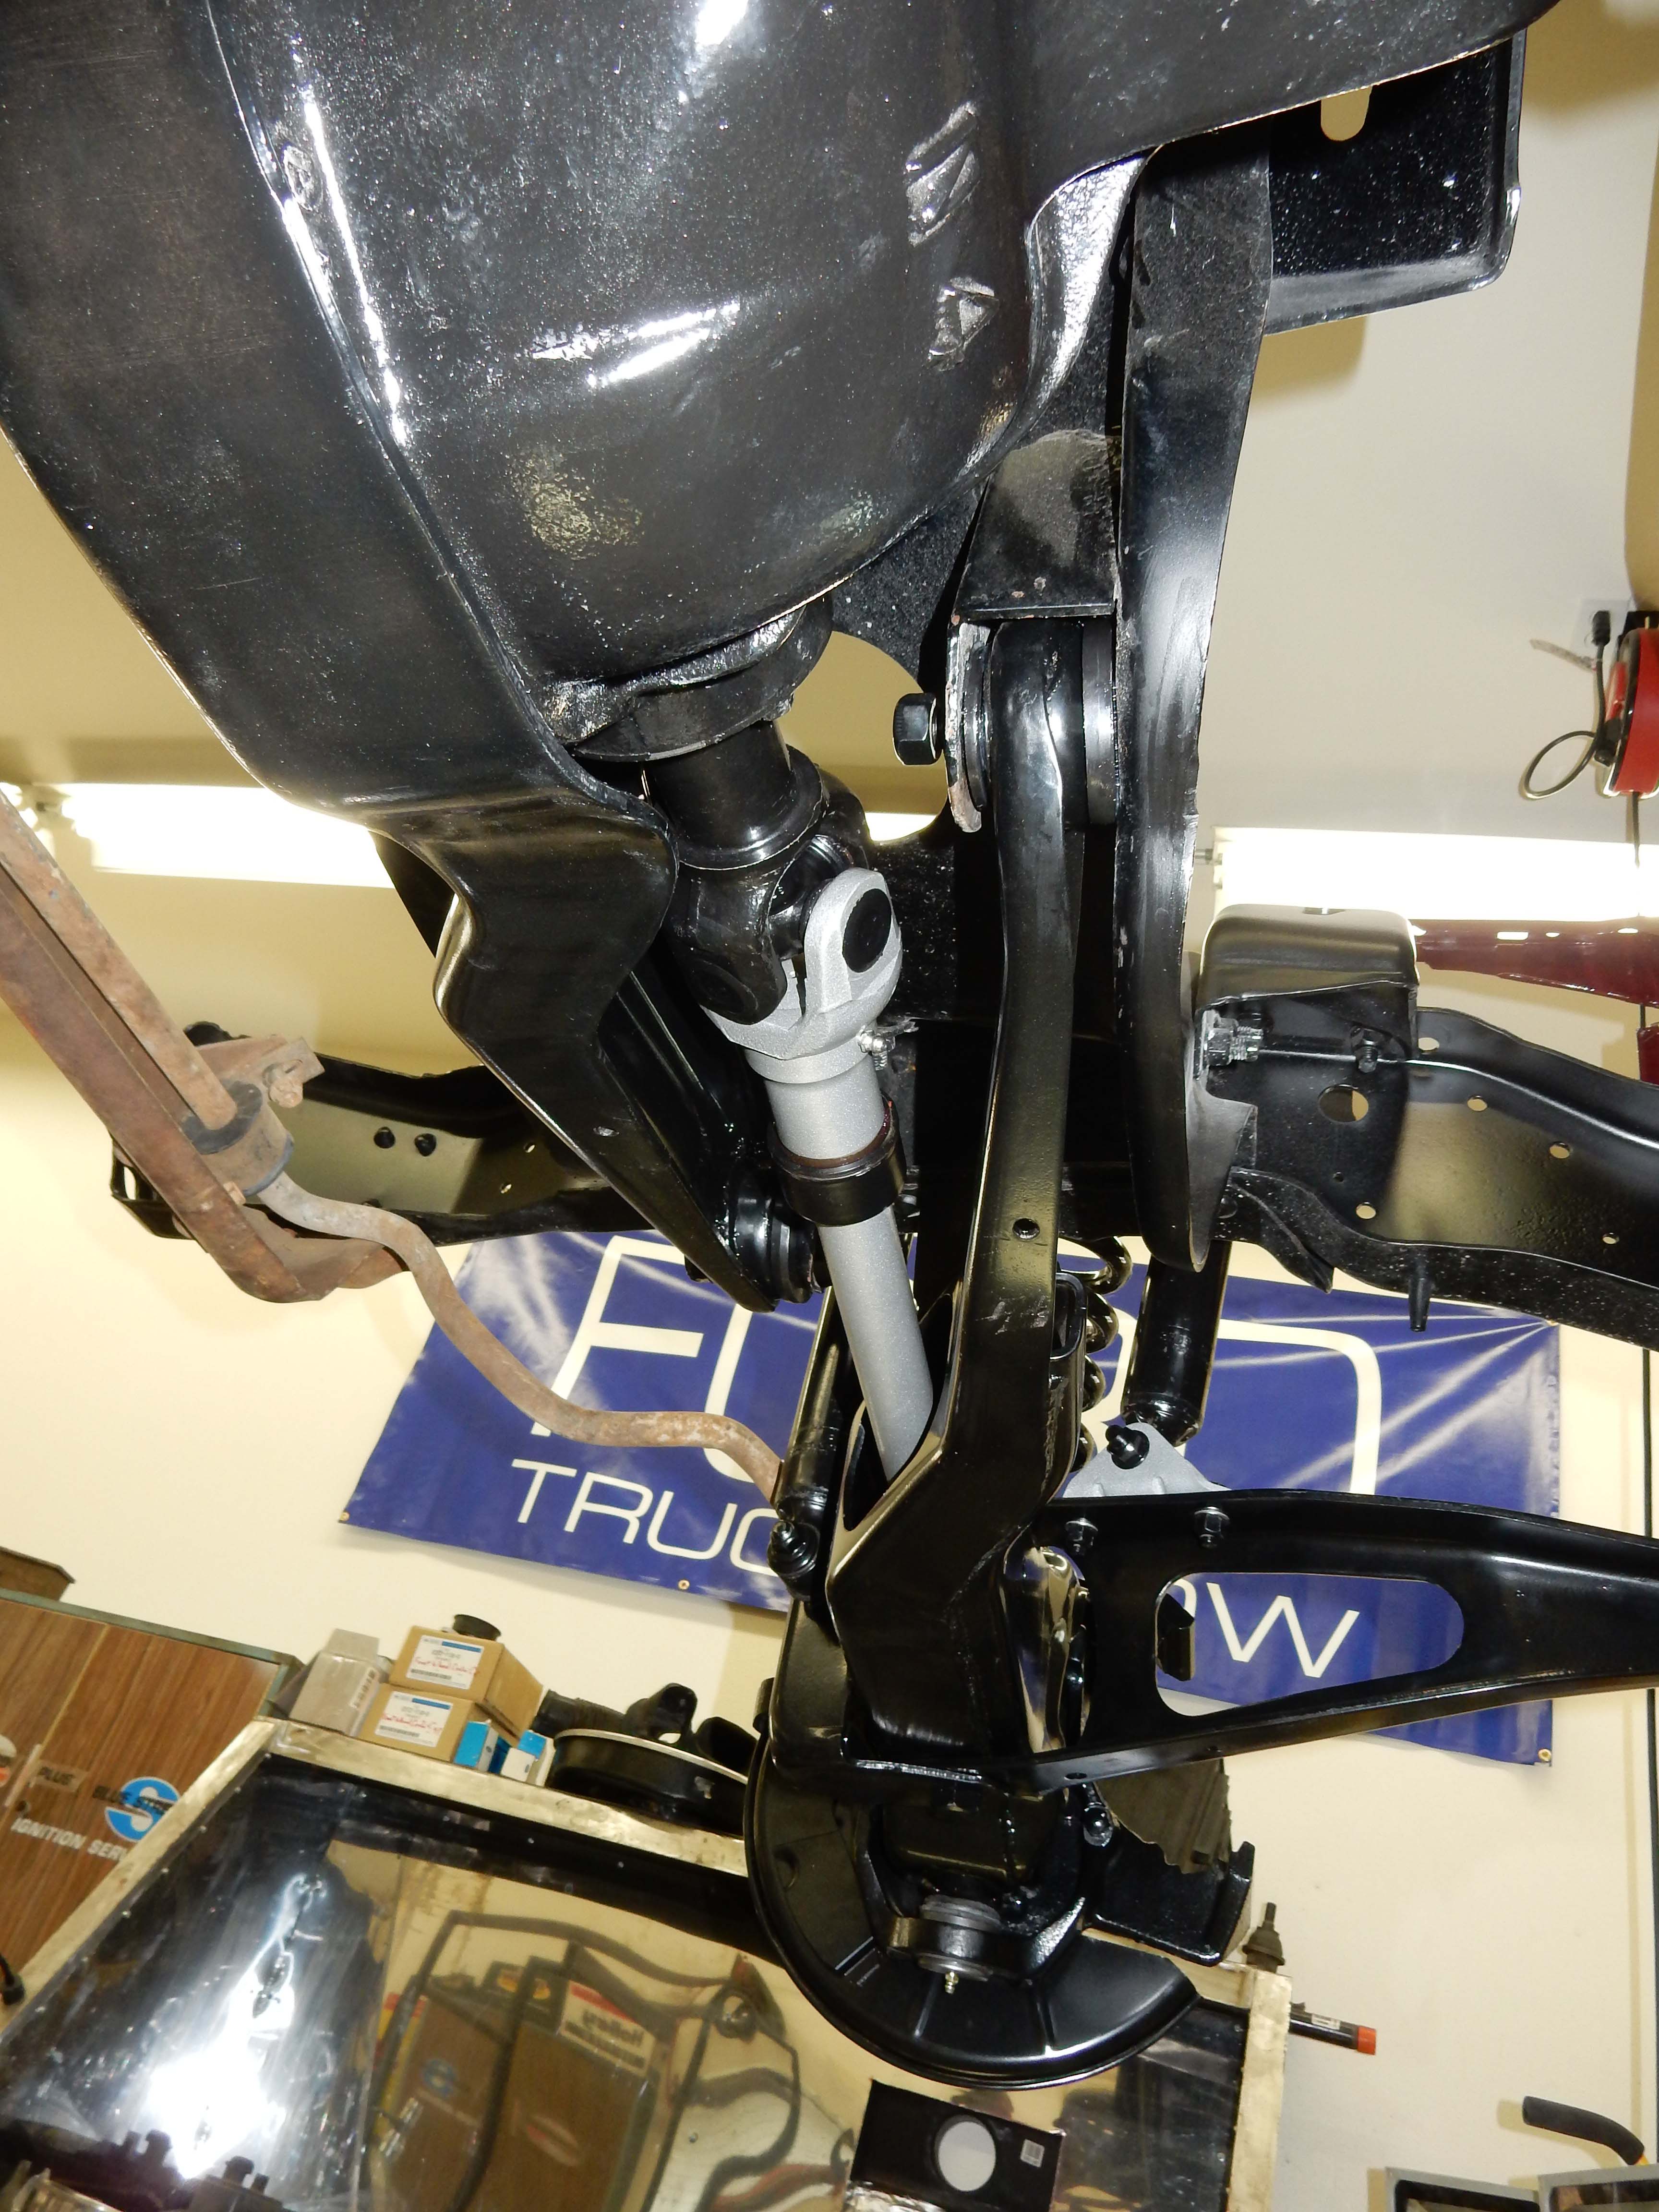 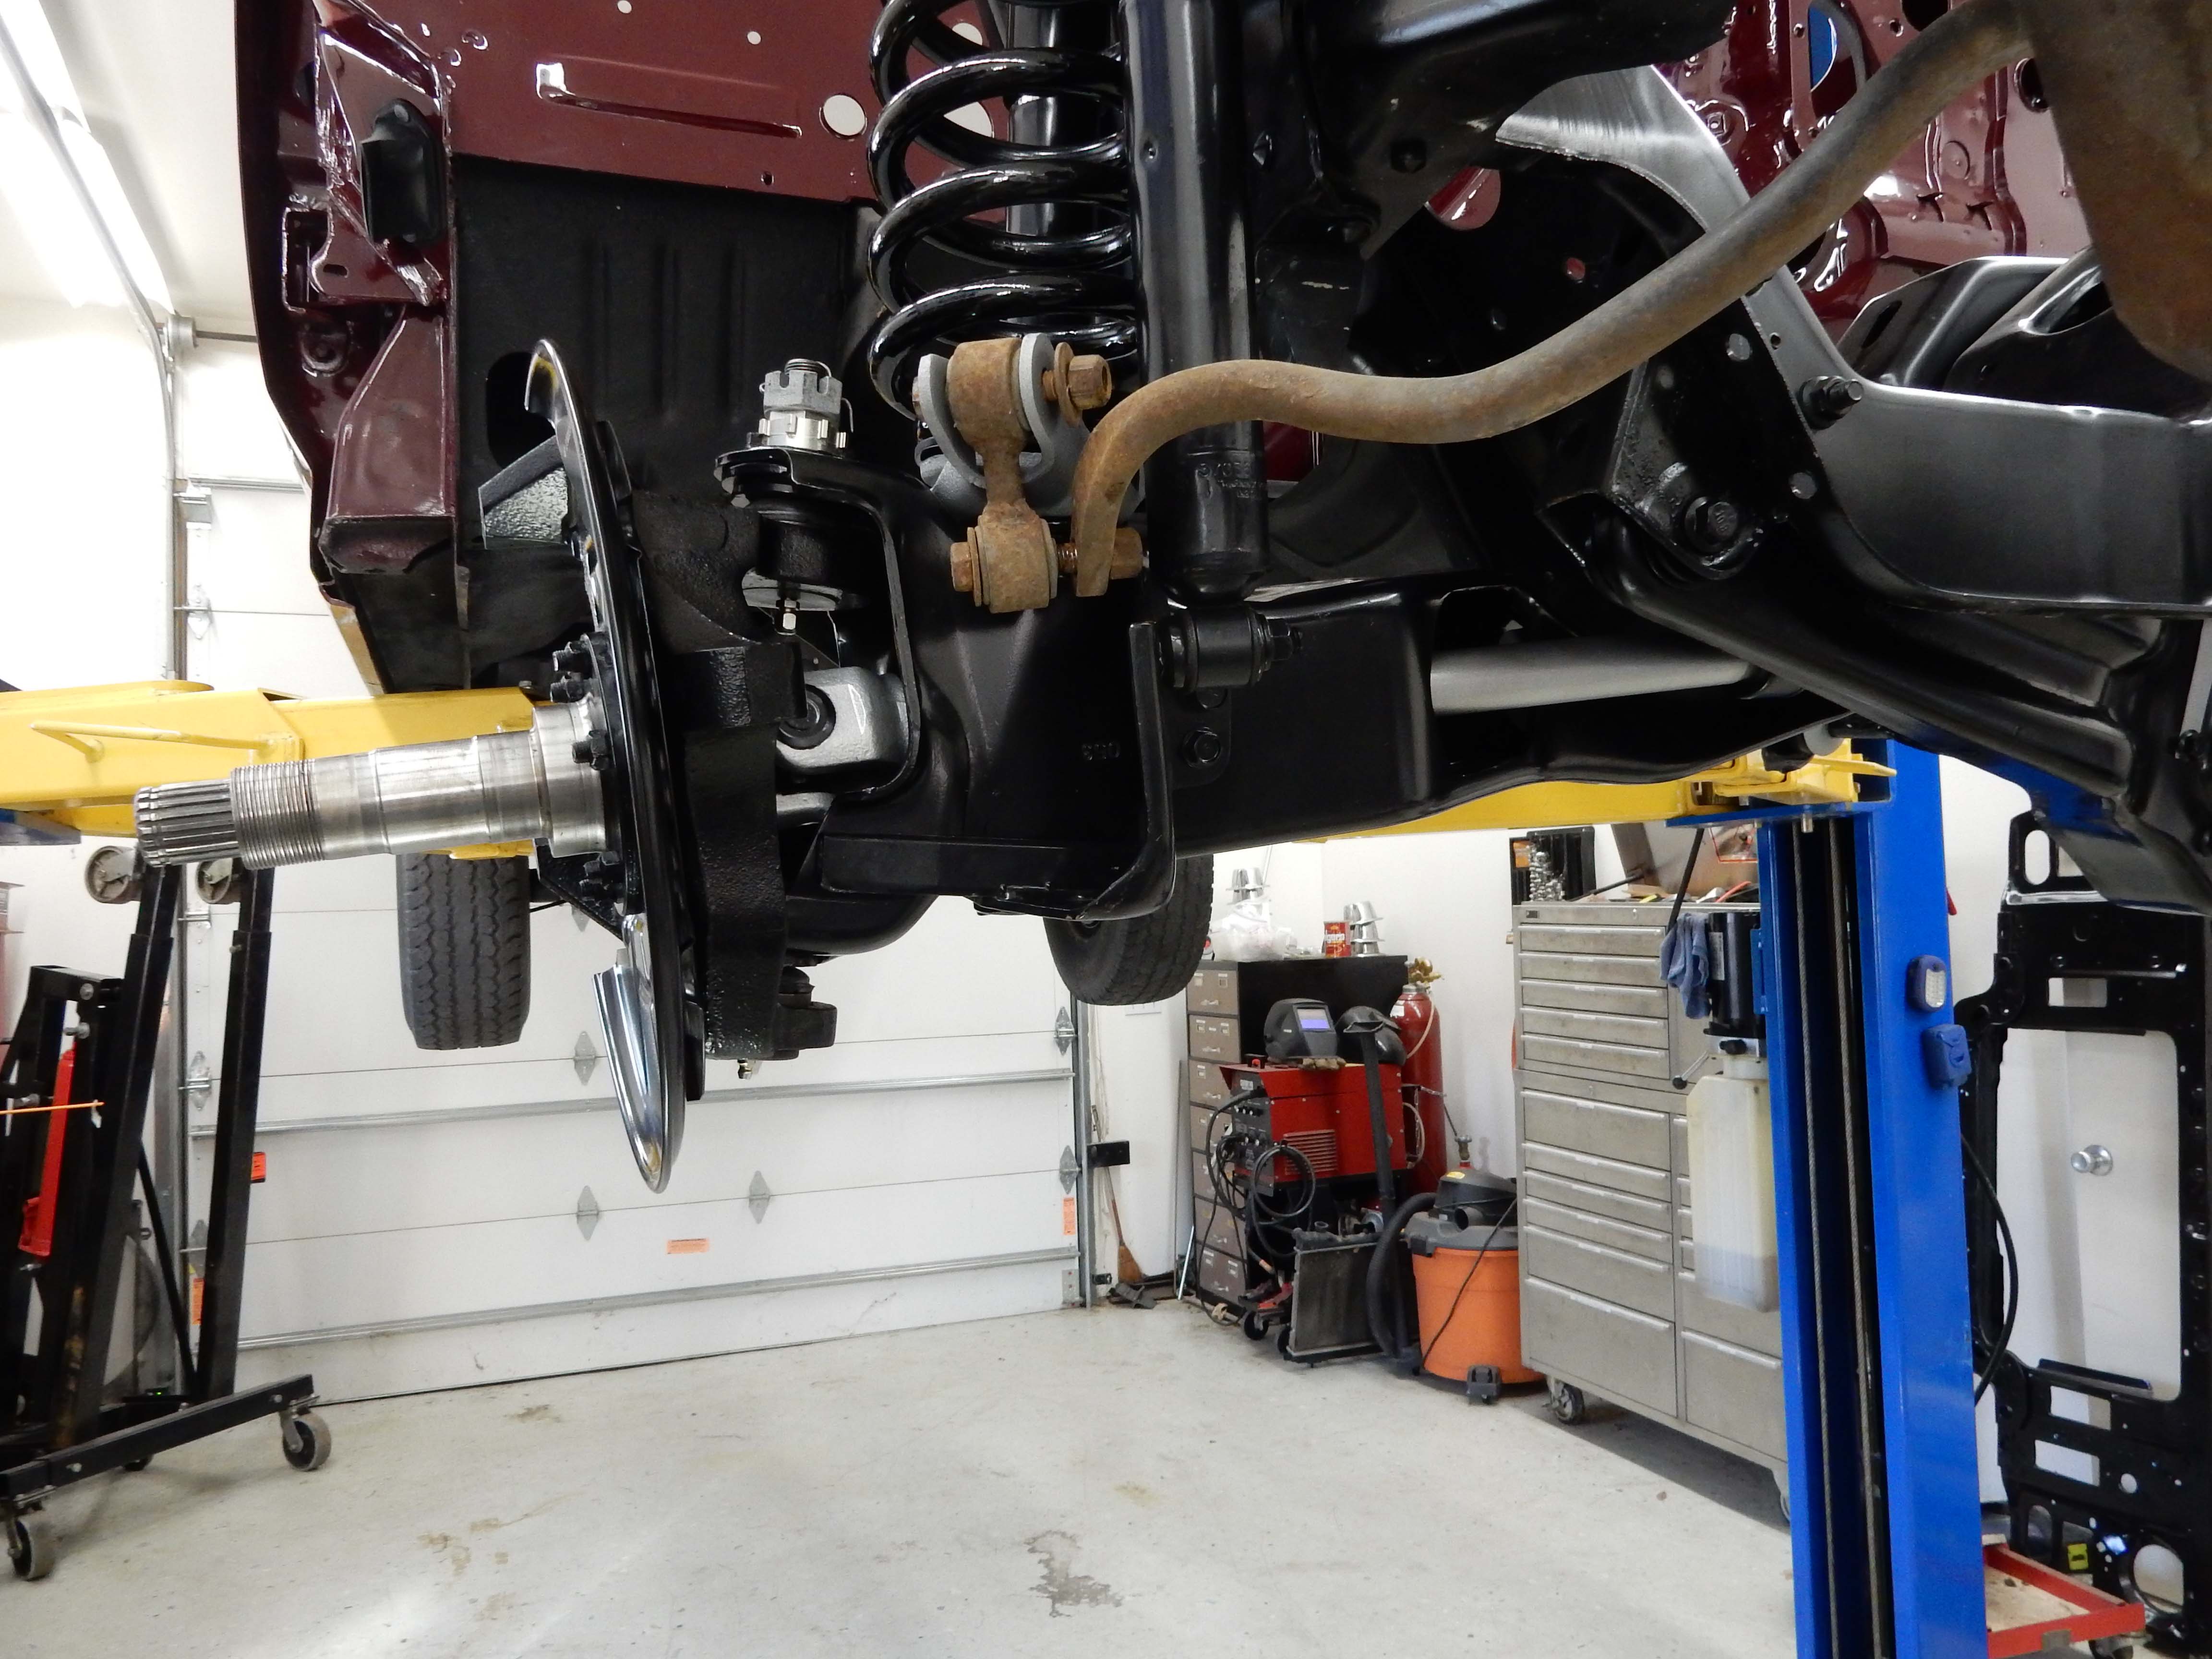 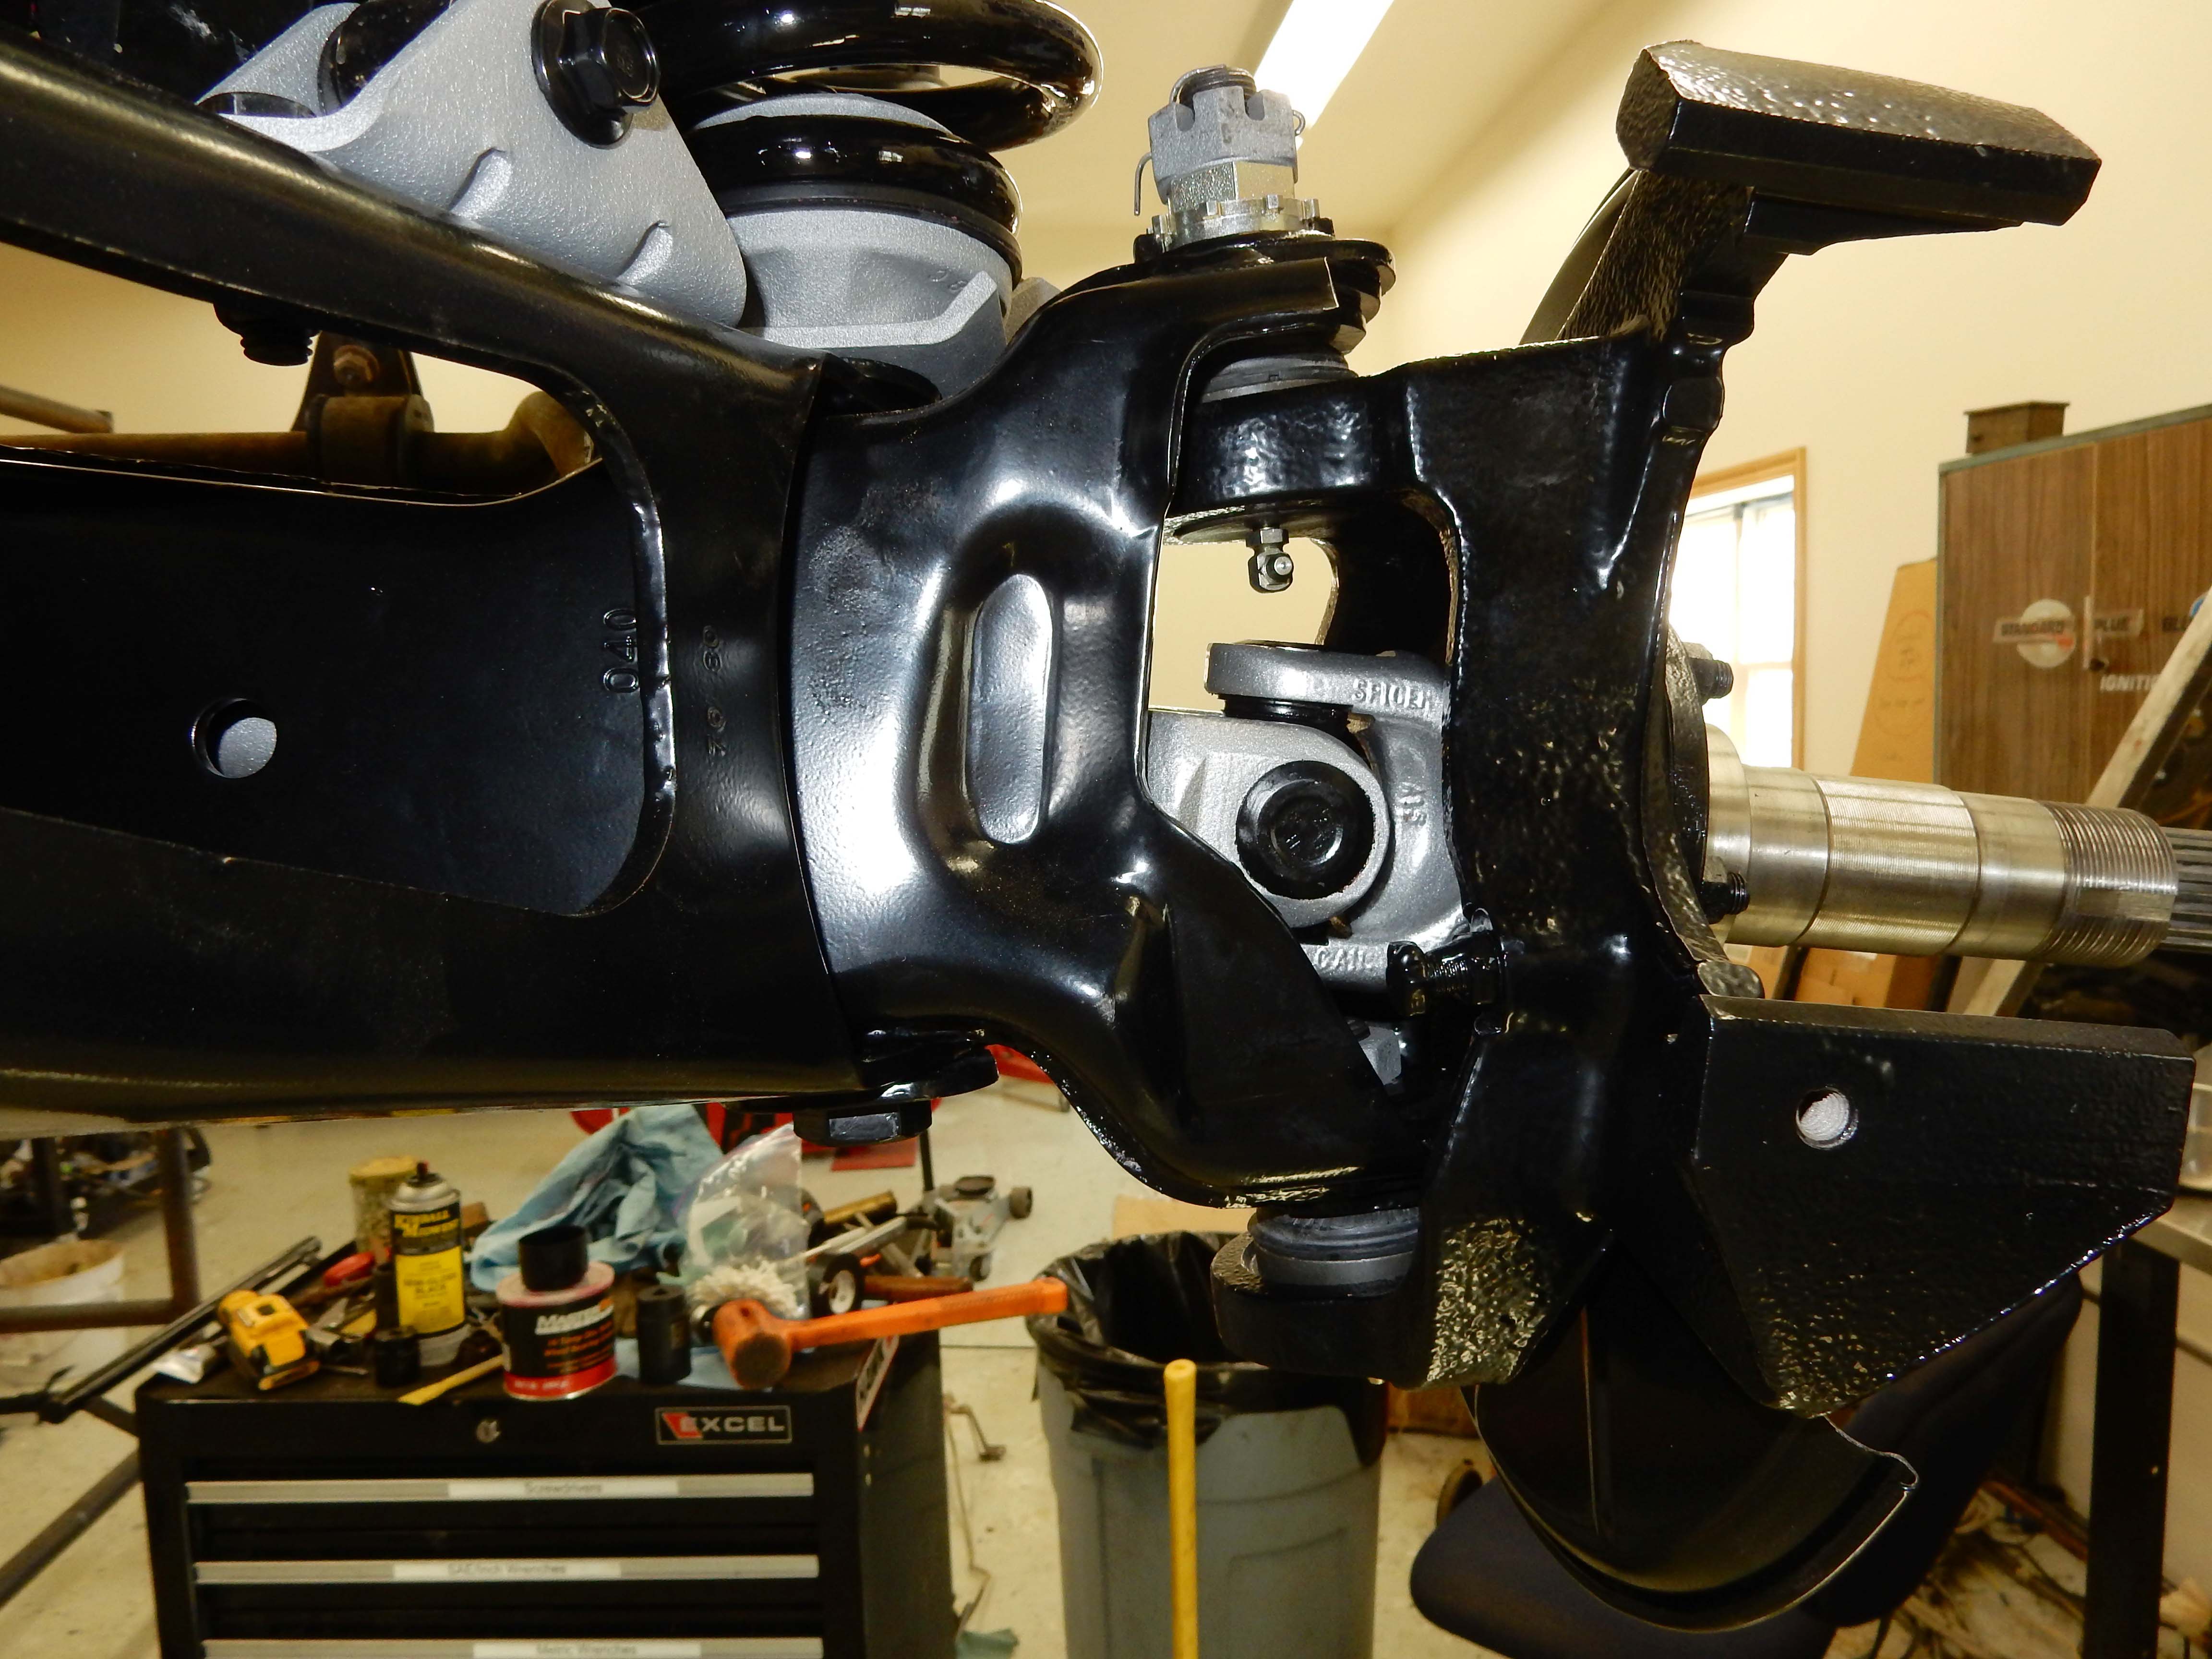
Gary, AKA "Gary fellow": Profile
Dad's: '81 F150 Ranger XLT 4x4: Down for restomod: Full-roller "stroked 351M" w/Trick Flow heads & intake, EEC-V SEFI/E4OD/3.50 gears w/Kevlar clutches
|
|
Administrator
|
Great job. Beautiful!
|
|
Administrator
|
Thanks, David.
 Well, not lots to report today. Must remember that two steps forward and one back is still progress.  First, I took a step forward and got the wheel studs installed: 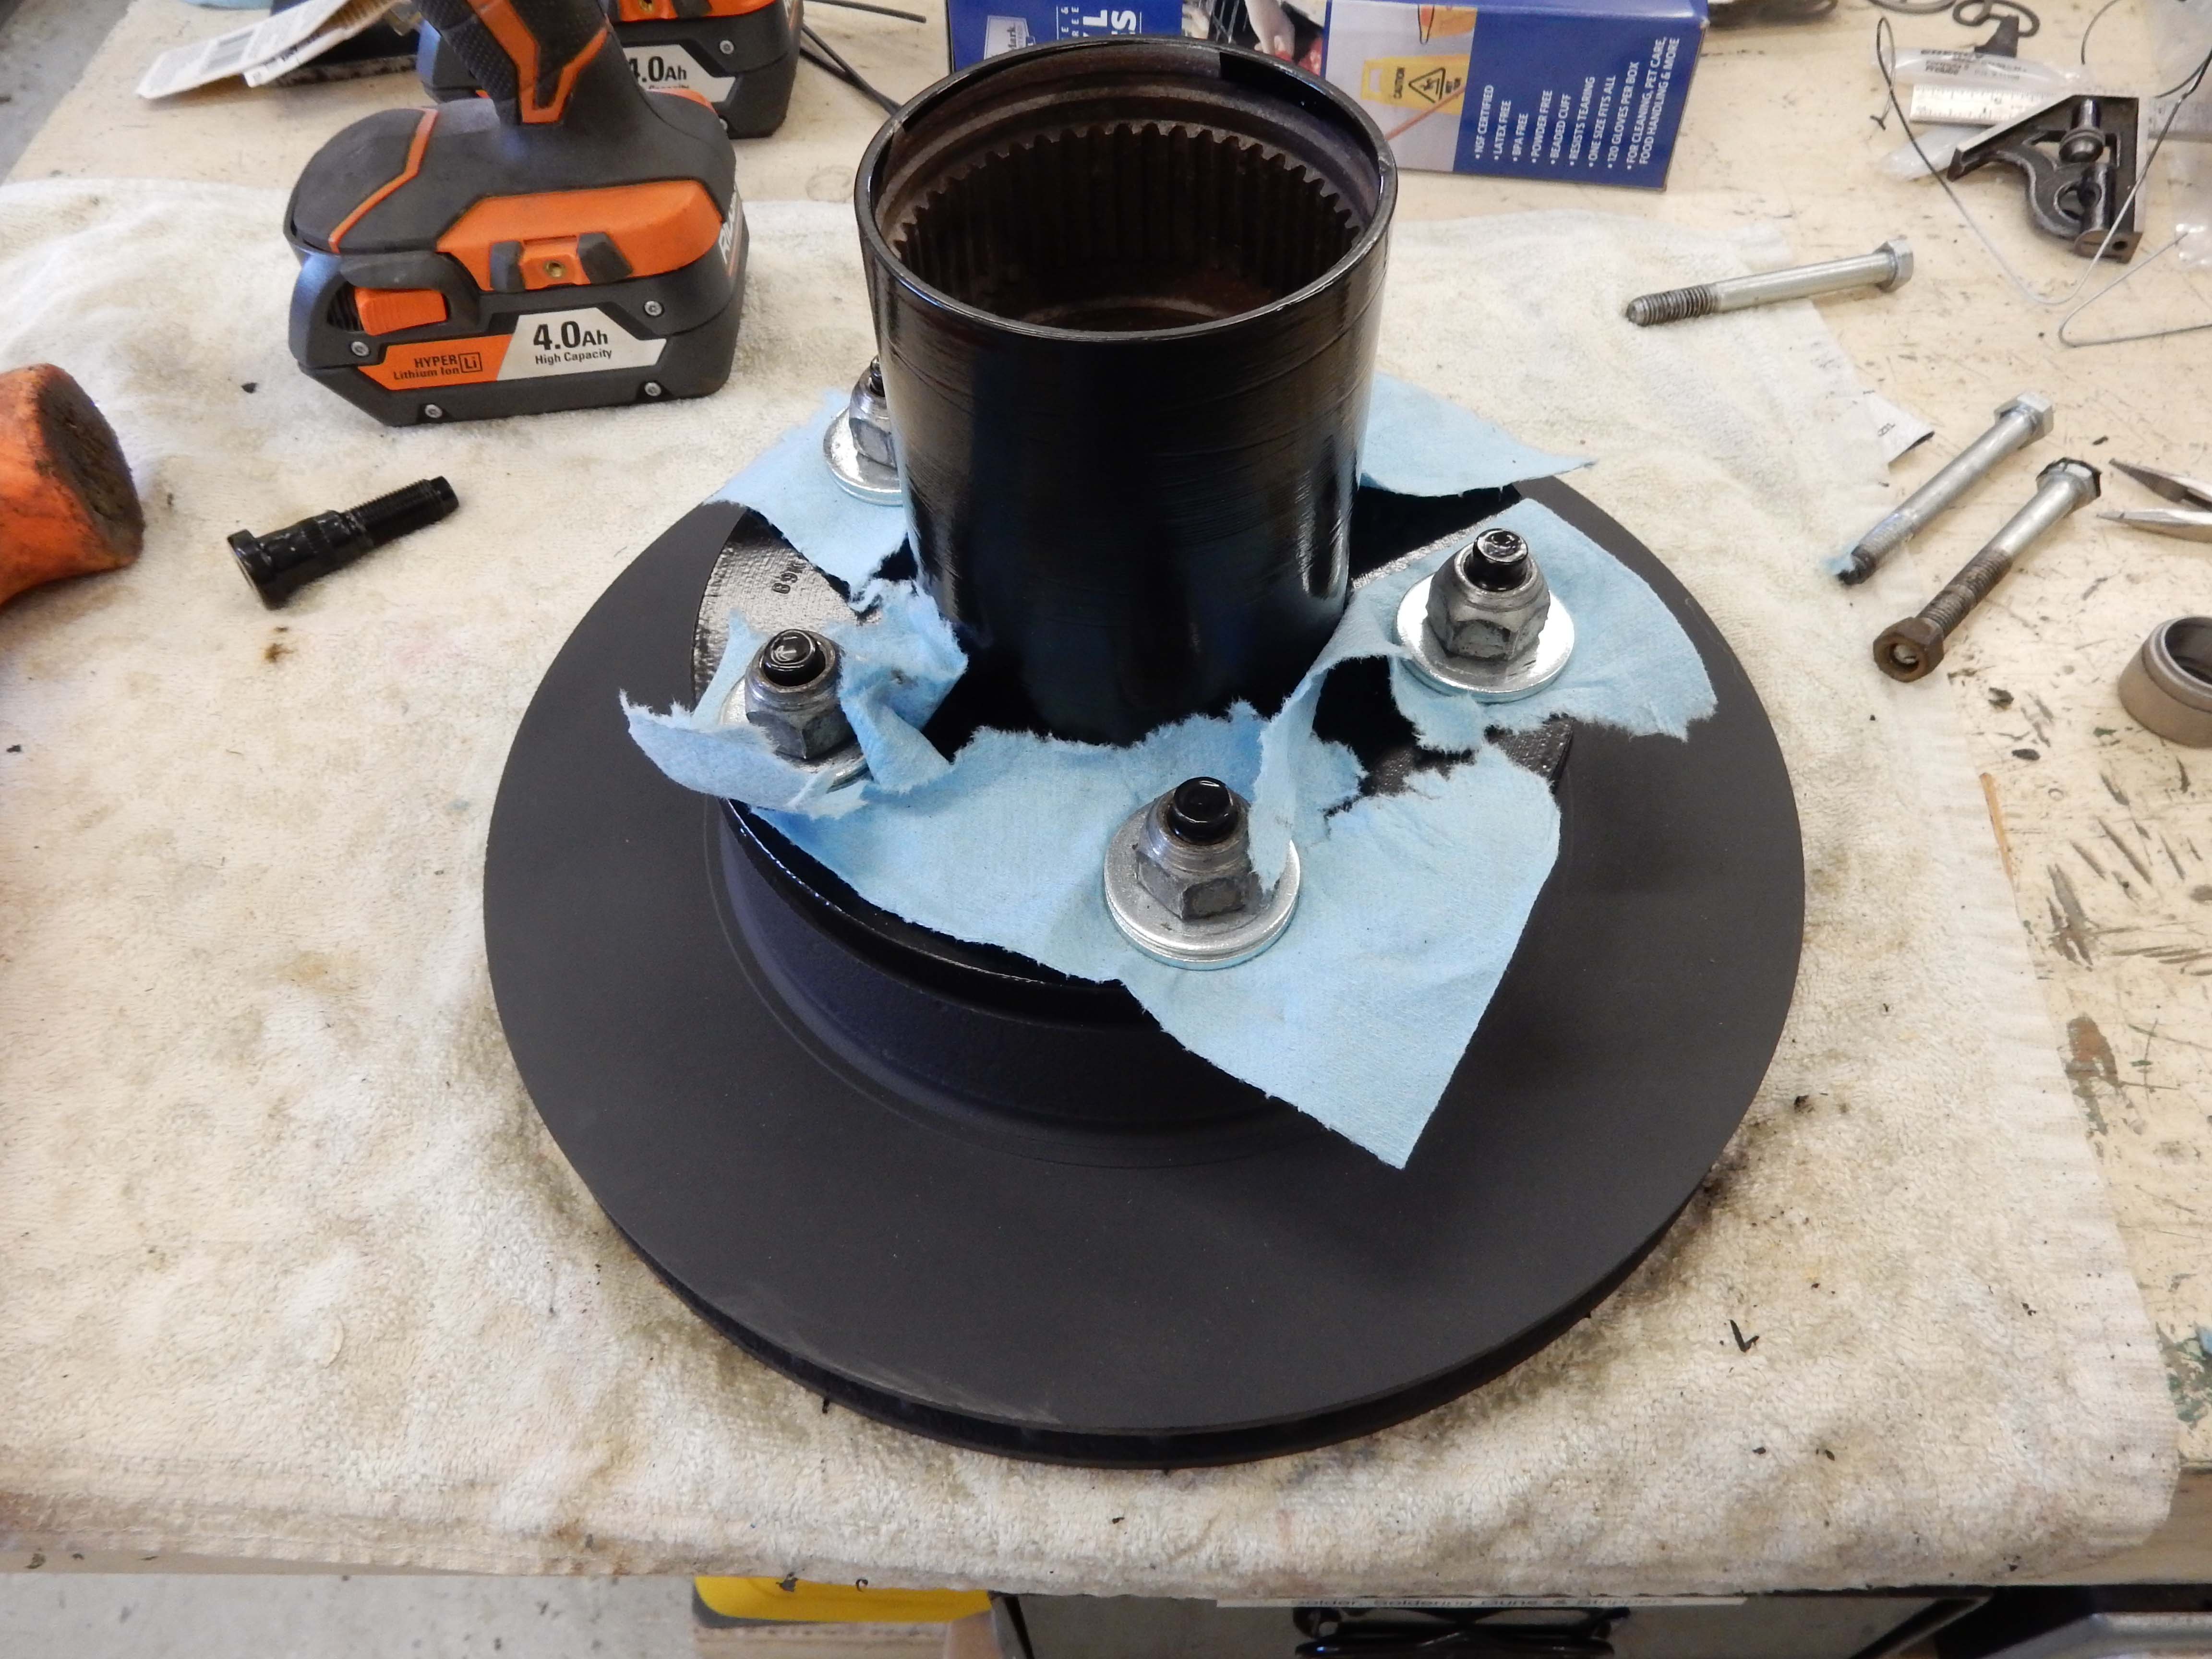 Then came the step backward - I was going to install the wheel bearings and seal and discovered that I ordered the right outer wheel bearing set, but had ordered the wrong inner bearing and seal. With lots of measuring and consulting the Timken site I've determined that the truck takes: Outer bearing & race: SET45Inner bearing & race: SET37Inner seal: 4250So the inner ones are now on order, but won't be in until next week, and the wrong ones will be returned tomorrow - on our way to T-town for a day "off". (We are taking Blue to the dealer's collision service to have his wounds from the encounter with the deer taken care of. And otherwise having a day together.) Then, given that I was stymied on getting the front wheels on it, I turned to the front sway bar and cross member. While the parts washer was heating up I pressed the bushings out of the links: 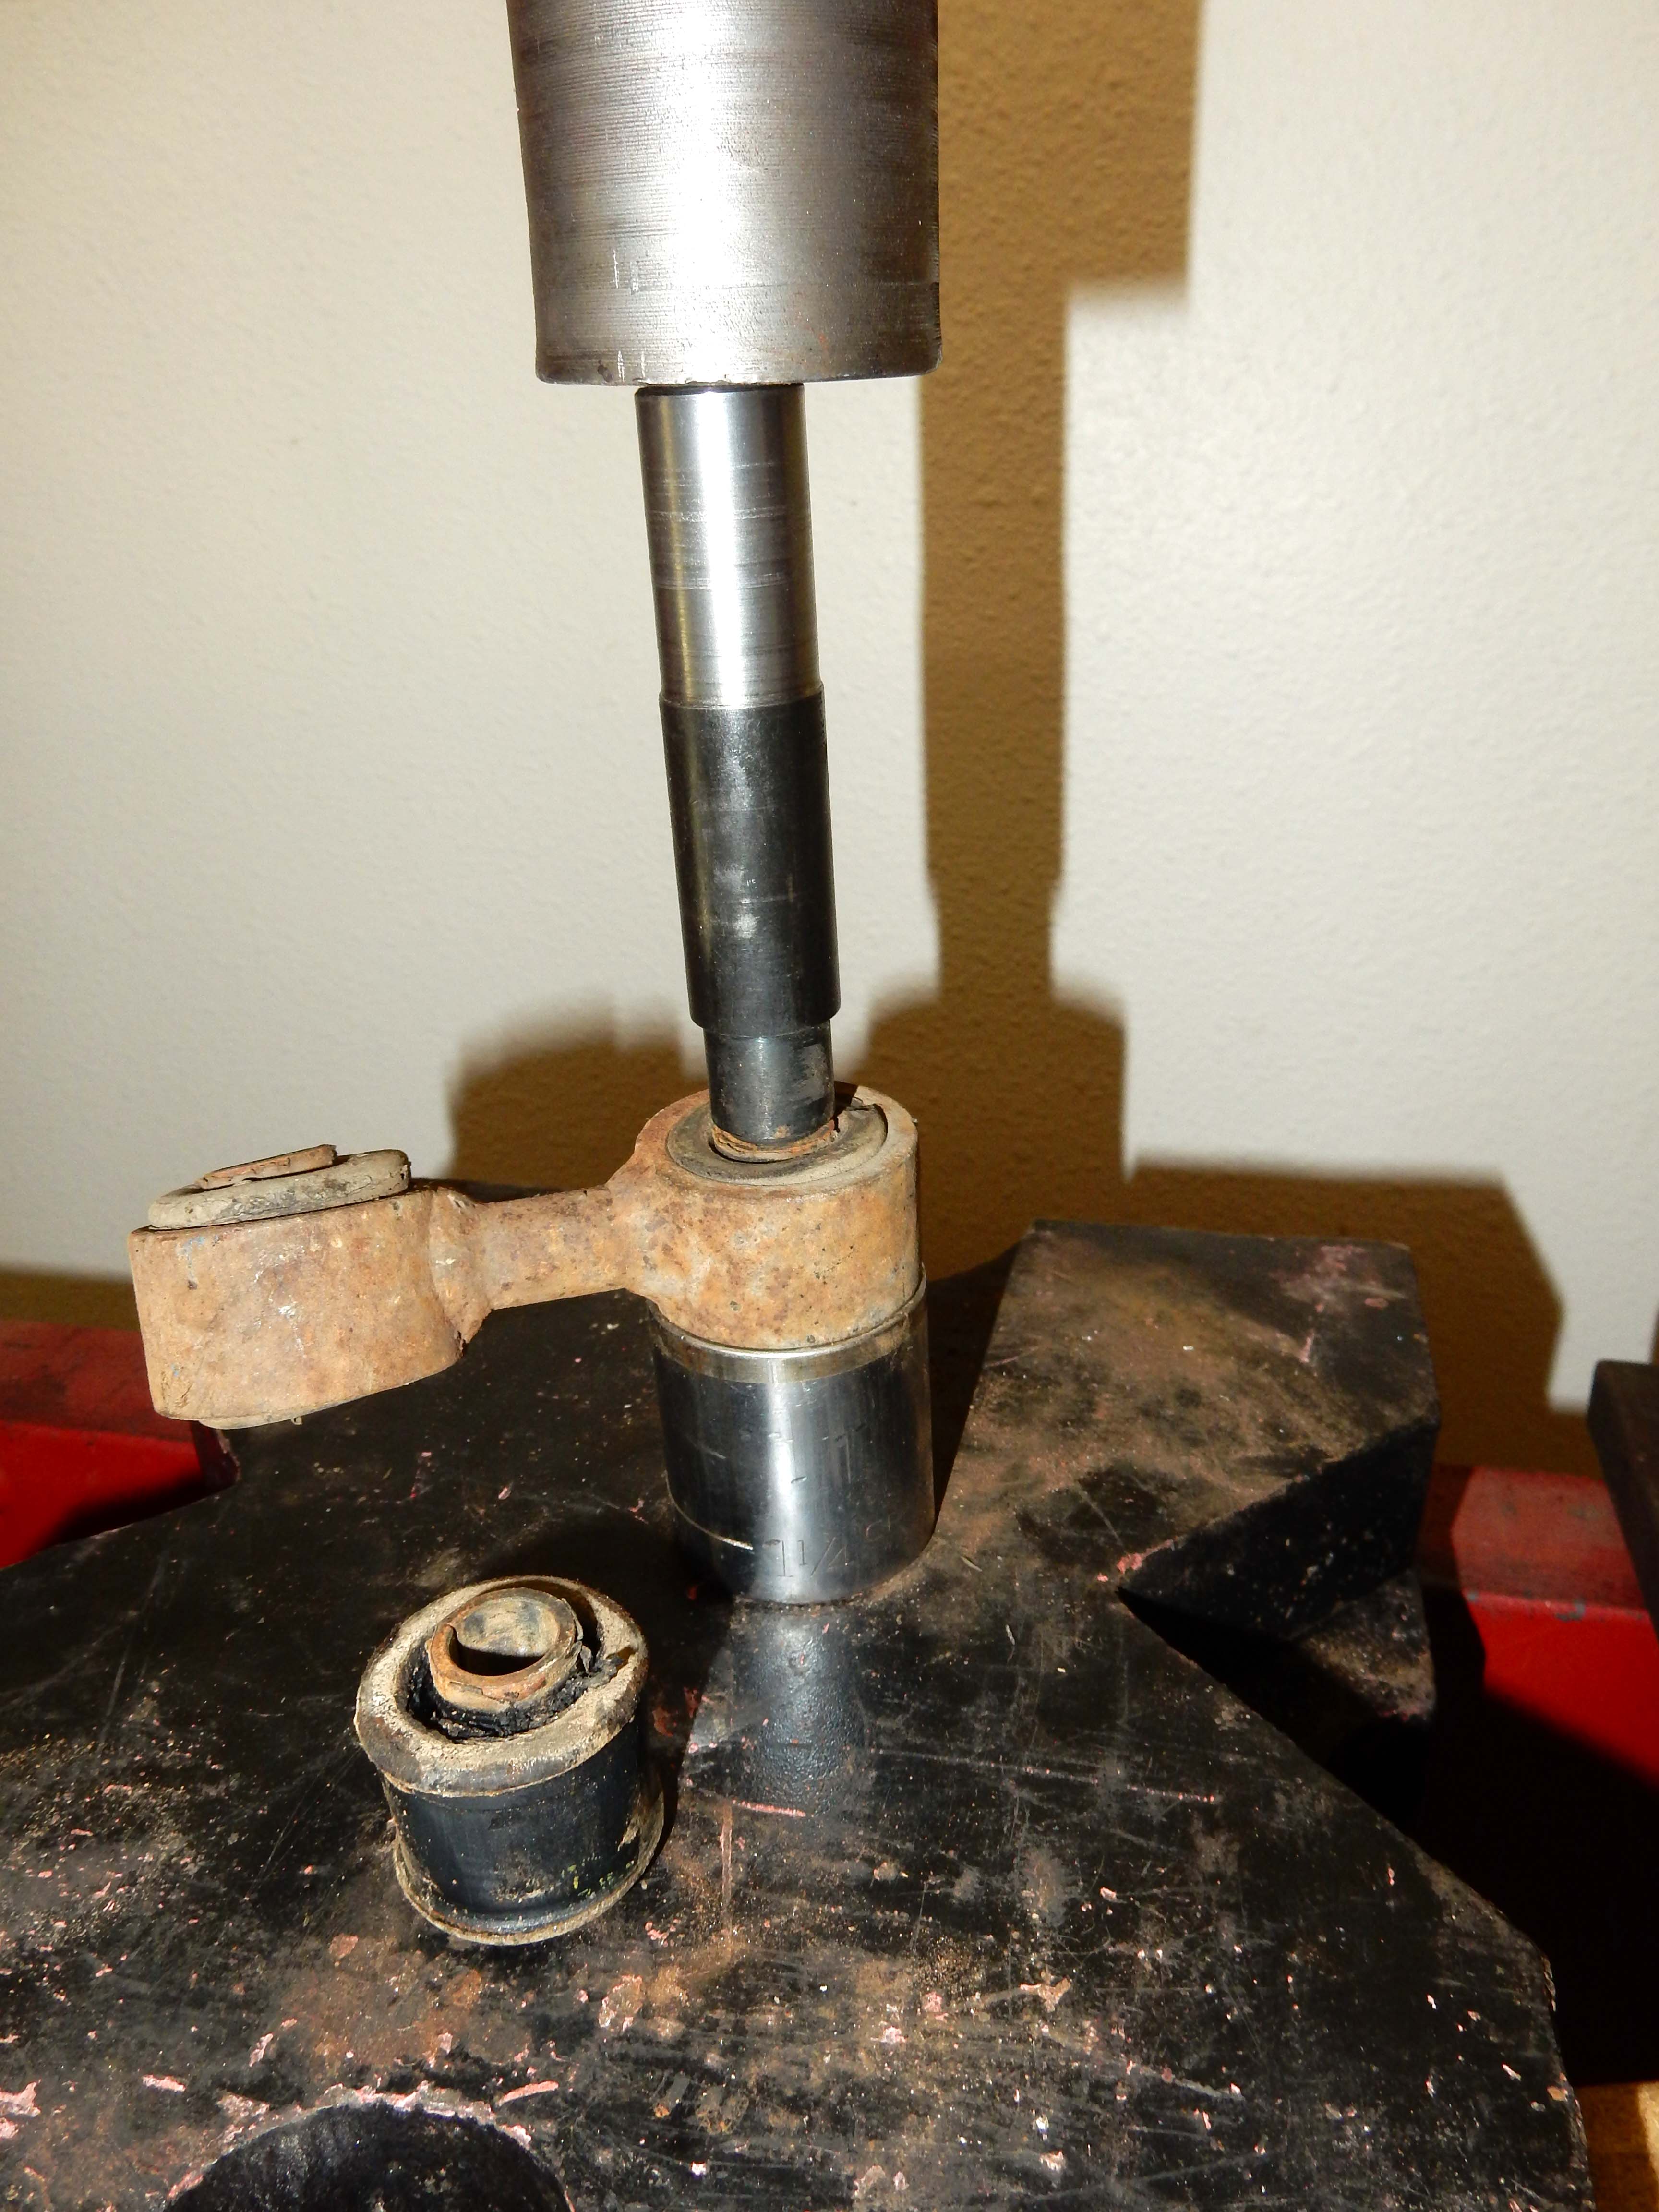 And, then it was to the blast cabinet. It is interesting what you find under some of that rust and grime: 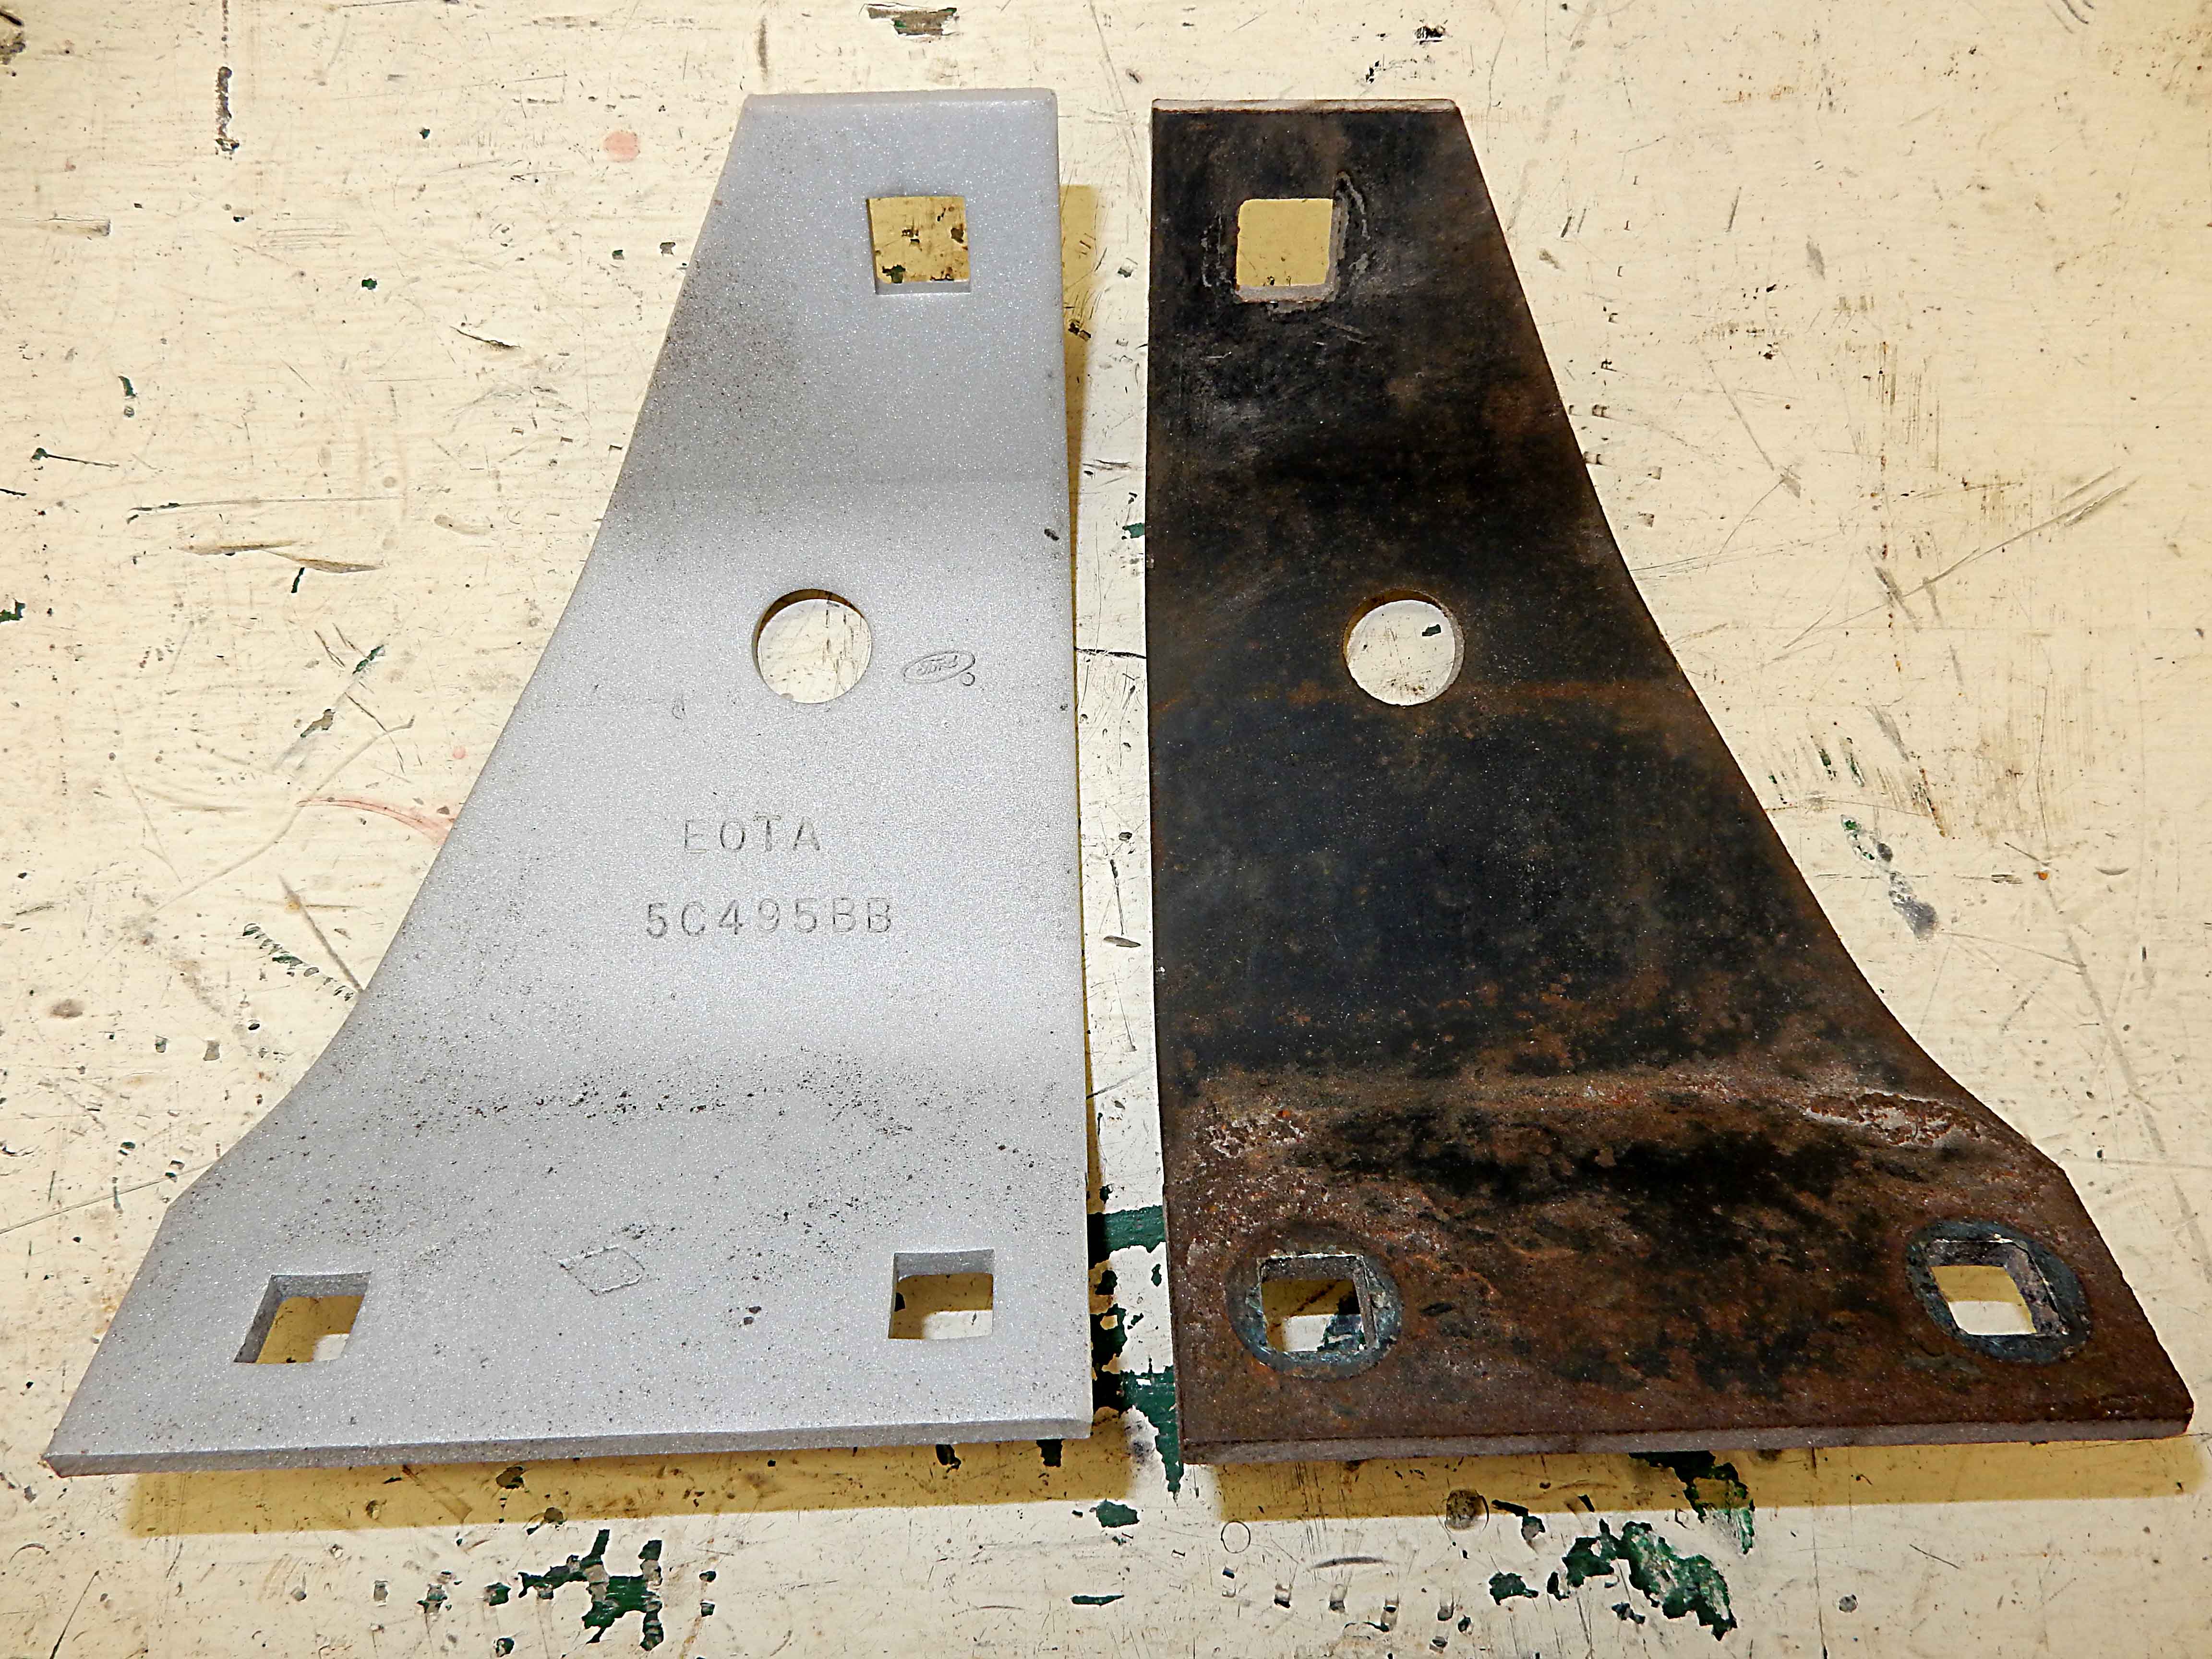 Doubt I'll get everything blasted clean today, and with tomorrow off for the outing to Tulsa and Friday off for a funeral, it may be Saturday before I get to finish the blasting and powder coat a few things.
Gary, AKA "Gary fellow": Profile
Dad's: '81 F150 Ranger XLT 4x4: Down for restomod: Full-roller "stroked 351M" w/Trick Flow heads & intake, EEC-V SEFI/E4OD/3.50 gears w/Kevlar clutches
|
 Looking Good Gary. Looking Good Gary.
1983 F100 XL 300, 6 cyl, aod, long bed
1961 E100 pickup, 289,C4 |
|
Banned User
|
In reply to this post by Gary Lewis
I'm not a fan, for several reasons. I don't really like to draw attention to the undercarriage - it's just bare, rough mechansisms. And I wheel mine hard - so I need to be able to touch it up quickly & affordably. But I'd never use a light color because it would show stains too easily: either grease/oil stains, or rust, or dirt (there's a lot of Iron in the soil around here, so many things acquire a reddish hue). Since no one will ever see the whole underside of the truck at once, I don't see that as a real consideration. This was pretty difficult, and it's the only time I've ever done it:  The temper (eutectic) point for steel is far above that, so you're safe to PC any spring. If it breaks afterward, it had NOTHING to do with being in the oven. I'd use anti-seize lube. But if it's tough now when it's perfectly clean, it'll be nearly impossible next time it needs to come apart. So I'd shave a little metal off somewhere to make a little more clearance (not slop). |
|
Administrator
|
This post was updated on .
Bill - Thanks!
Steve - I understand your thinking, but this has turned into a show truck, and I don't like the monotonous black I see on most vehicles. So I'm adding a bit of Silver Lining here and there just to break up the black. As for the temp of the metal, I had the same class you apparently did: Mechanics Of Materials. And a year ago I'd have agreed that 400 degrees won't hurt a spring. But, that was before having a long conversation with tech support at a spring company, and that guy strongly recommended that I not powder coat springs. So, I don't. Anyway, here's today's blasting results. Looks like a little bit of touch-up here and there is needed, but overall not bad - 47 pieces in half a day. Just have to get the sway bar and cross member blasted and it'll be powder coating time! 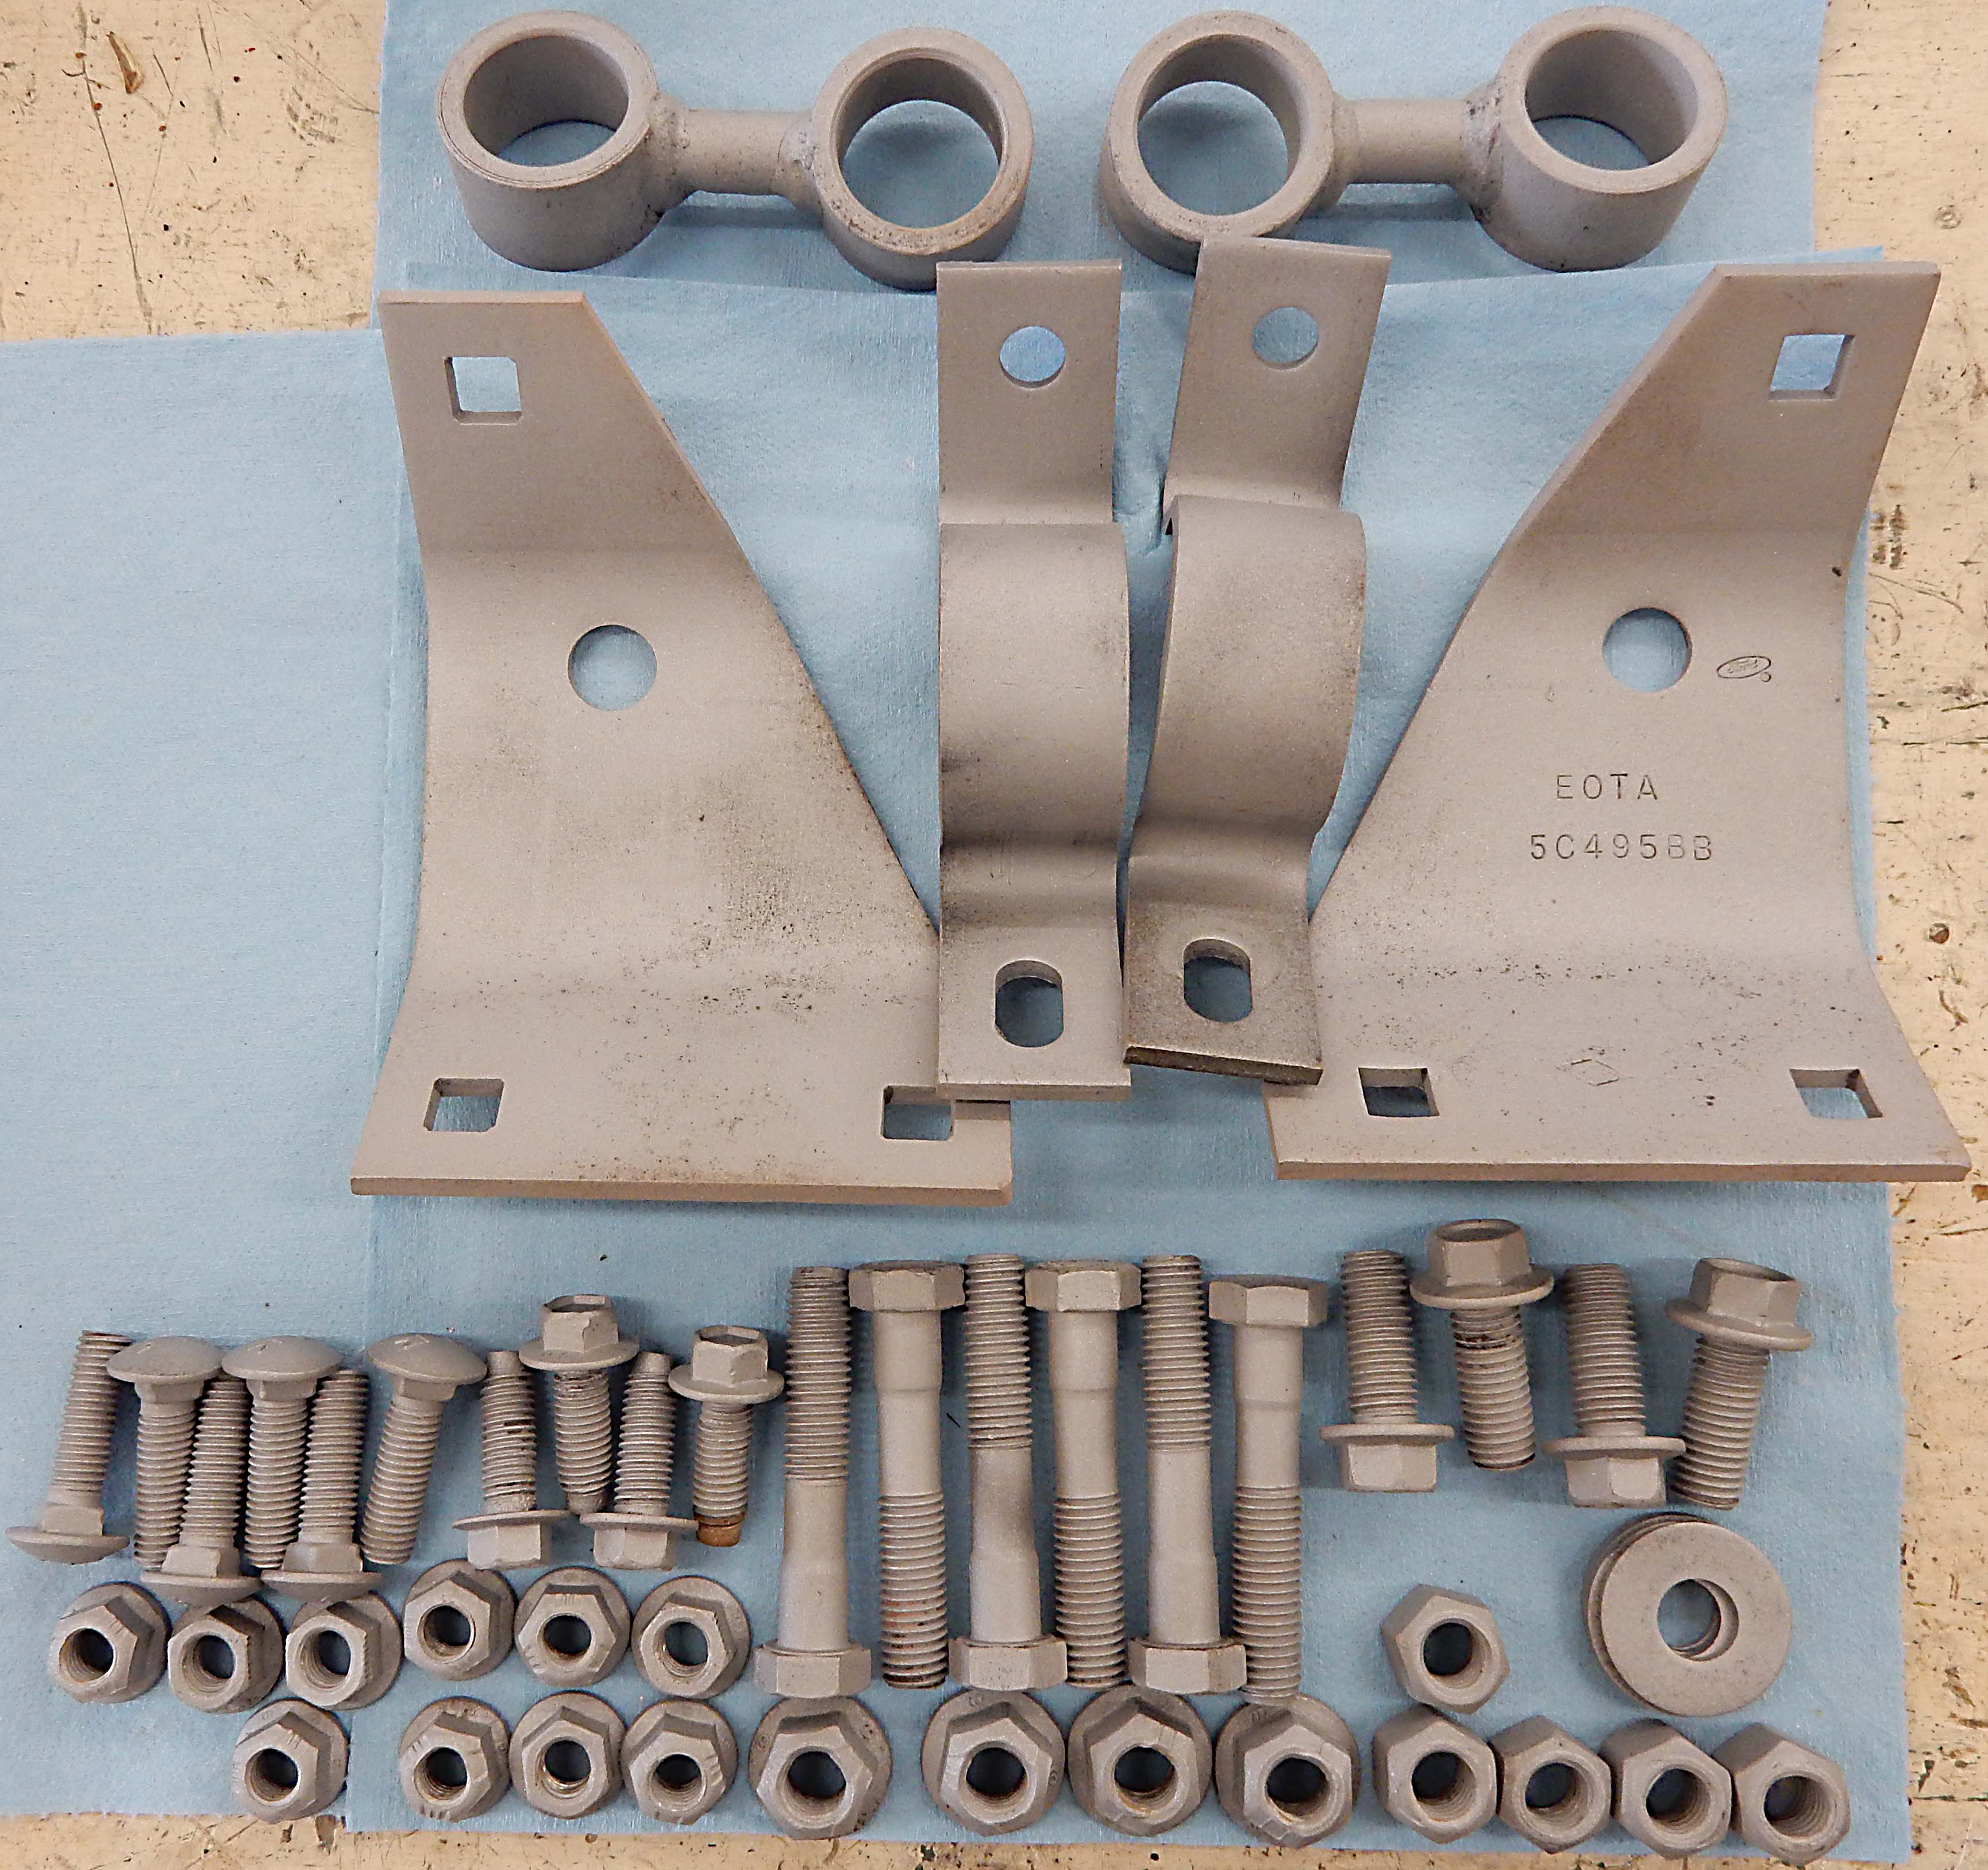 EDIT: Steve - I meant to say that I wish I'd have thought of anti-seize instead of grease. 
Gary, AKA "Gary fellow": Profile
Dad's: '81 F150 Ranger XLT 4x4: Down for restomod: Full-roller "stroked 351M" w/Trick Flow heads & intake, EEC-V SEFI/E4OD/3.50 gears w/Kevlar clutches
|
|
Banned User
|
Did you get the impression that he had ever taken a materials class? Did he mention the temperature at which they temper their springs, and for how long? If you have any spares, I'd paint one, powder the other, and then drive on the powdered one until it breaks. I bet it'll take a long time. |
|
Administrator
|
No, I didn't get the impression he'd had a class. But, he was emphatic that I need to keep the temp below 300 degrees, if I remember correctly, and powder has to go to 425 and then back to 400 for 20 minutes. So I've POR15'ed all the springs.
The spare that I have is for an F250 and is twice as thick and is of a different shape, so won't work. But, I agree with you - it doesn't make sense given what I've been taught about steel.
Gary, AKA "Gary fellow": Profile
Dad's: '81 F150 Ranger XLT 4x4: Down for restomod: Full-roller "stroked 351M" w/Trick Flow heads & intake, EEC-V SEFI/E4OD/3.50 gears w/Kevlar clutches
|
|
Administrator
|
In reply to this post by Steve83
My concern (I worked in a materials testing laboratory for 30 years) would be changing the temper in the springs, not necessarily causing them to fail, but changing the load characteristics. We were asked at one point to do hardness tests on springs, after discussing it with our metallurgist and engineering, we did them on the tails only, not the main active portion, as even the small indent of a Rockwell C diamond indenter could create a stress point and lead to a failure.
Bill AKA "LOBO" Profile
"Getting old is inevitable, growing up is optional" Darth Vader 1986 F350 460 converted to MAF/SEFI, E4OD 12X3 1/2 rear brakes, traction loc 3:55 gear, 160 amp 3G alternator Wife's 2011 Flex Limited Daily Driver 2009 Flex Limited with factory tow package Project car 1986 Chrysler LeBaron convertible 2.2L Turbo II, modified A413 |
|
Administrator
|
Yes, it is the temper that is the issue. I wouldn't have thought 400 degrees would be an issue, but he sure did. He's tech support at a spring manufacturer and I had a college-level class 50+ years ago. So I'm playing it safe.
Gary, AKA "Gary fellow": Profile
Dad's: '81 F150 Ranger XLT 4x4: Down for restomod: Full-roller "stroked 351M" w/Trick Flow heads & intake, EEC-V SEFI/E4OD/3.50 gears w/Kevlar clutches
|
|
My company makes springs (a small part of our business). We stress relieve most of them around 450 F, so heating them again to 400 shouldn't do much, if anything to them. But you can see that it's pretty close. And that's what we do, I'm not saying that all other springs are done the same.
Bob
Sorry, no '80 - '86 Ford trucks "Oswald": 1997 F-250HD crew cab short box, 460, E4OD, 4.10 gears "Pluto": 1971 Bronco, 302, NV3550 5 speed, Atlas 4.3:1 transfer case, 33" tires "the motorhome": 2015 E-450-based 28' class C motorhome, 6.8L V-10 "the Dodge": 2007 Dodge 2500, 6.7L Cummins |
|
Administrator
|
In reply to this post by Steve83
To each their own, but I completely disagree. Maybe it is just a left-brain romance with the running gear, but I have really come to love the look of certain stout Ford components like the 9” center chunk, webbed ZF main case, mono beam D60 kingpin caps or the straight six timing cover. And yeah... I want to see ‘em and show them off. I get what you are saying about spending too much time putting trendy colors under a trail rig, but for the average use truck it just does not take that much extra effort to use some accent color to show off your gear... 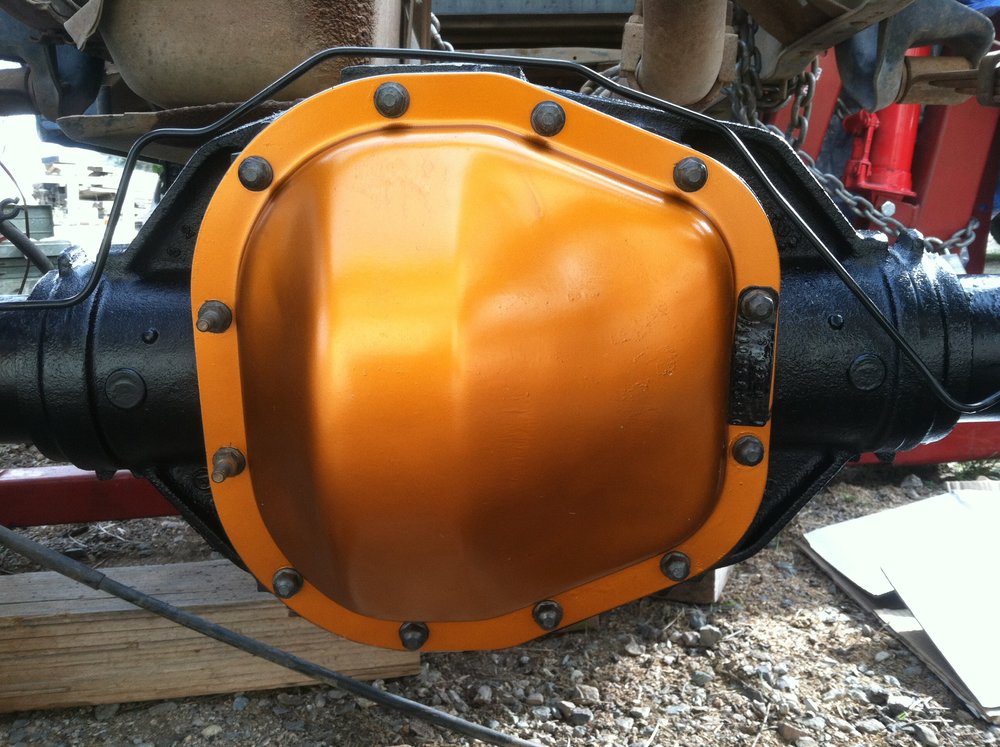 It can easily be over-done, but one contrast color (especially a metal tone) looks classy, I think. No sense arguing aesthetics since there is no right answer, but to me the engine bay and drive train are every bit something to look at as the body lines and trim.
SHORT BED 4-DOOR DIESEL: 1986 F350 4x4 under construction-- 7.3 IDIT ZF5+GVOD
STRAIGHT SIX 4X4: 1981 F150 2wd to 4x4-- 300 I6 close ratio diesel T19, hydroboost brakes, Saginaw steering BIG F: 1995 F-Superduty under construction— converting to 6.9L IDI diesel ZF5+DNE2 |
| Edit this page |

