1985F20 SuperCab "REDRUM"
|
This post has been a long time coming. I've been documenting my progress on Instagram and Facebook for the most part, but wanted to also post it here since I have been leveraging this site for information since I purchased the truck.
Meet REDERUM: 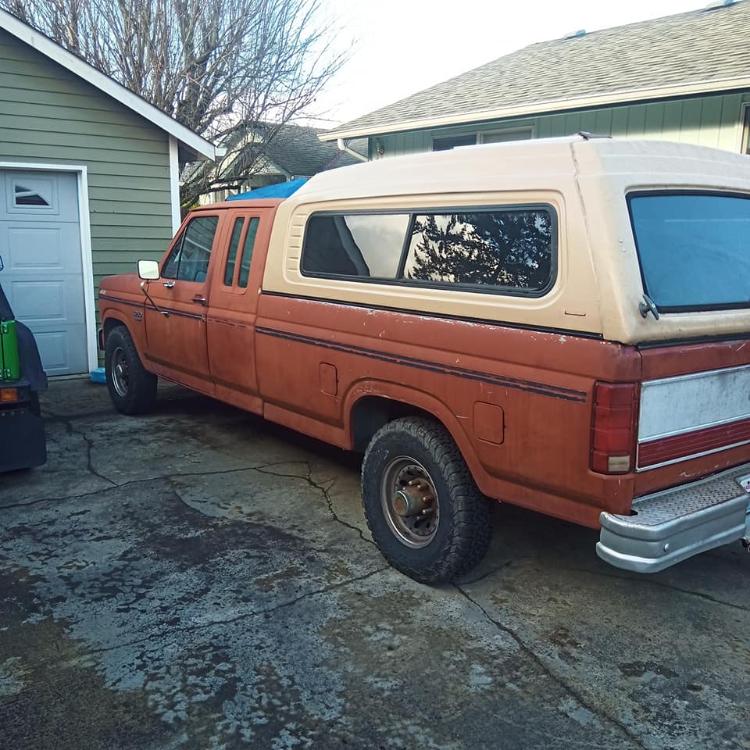 I purchased this 1985 F250 Supercab for $1500 about a year ago. It came with truck box full of parts that I had to sort through.  These parts included: front and rear gas tanks, front axle, driveshafts, spare hood, leaf springs, air overloads, captains seats, spare rear seat, a multitude of smaller parts that were inside a truck box tool box that was also included. There was also a whole bunch of bracketry from the F350 for the 4x4 conversion including the center section of an engine cross member. Not the whole thing, just the center section hacked out of the old truck :/ 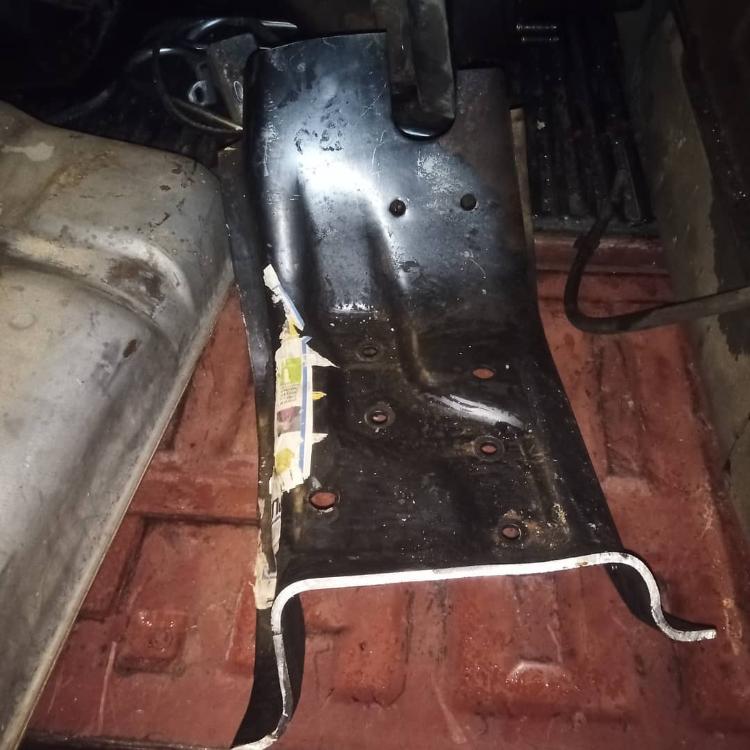 I bought it because the listing said that it was a running and driving truck with recent engine work done by the owner before the one I bought it from. I have paperwork from the shop that did the work, which included installing a rebuilt 460 just 4 years ago. The total bill for that work was ~$6k. My family had recently bought a house and since all the siding is rough cut cedar and the deck is made out of wood, I figured having a truck to be able to make dump runs and pick up stuff from Home Depot would be useful. To give some context here, my daily driver is a 1988 Suzuki Samurai and my wife's car is a 2018 Kia Sorento so neither is terribly good for hauling junk. The previous owner of the truck had started swapping it from 2WD to 4WD, but stopped before swapping the front end so it's still 2WD, but has the transfercase. They also swapped from C6 to ZF5. From what I can remember the parts truck was a 1989 F350 SuperCab. Once I got the truck home it sat outside and I kept noticing water on the floor after rainfall. One night I decided to sit in it and see where it was coming from. Queue it's raining inside the truck: 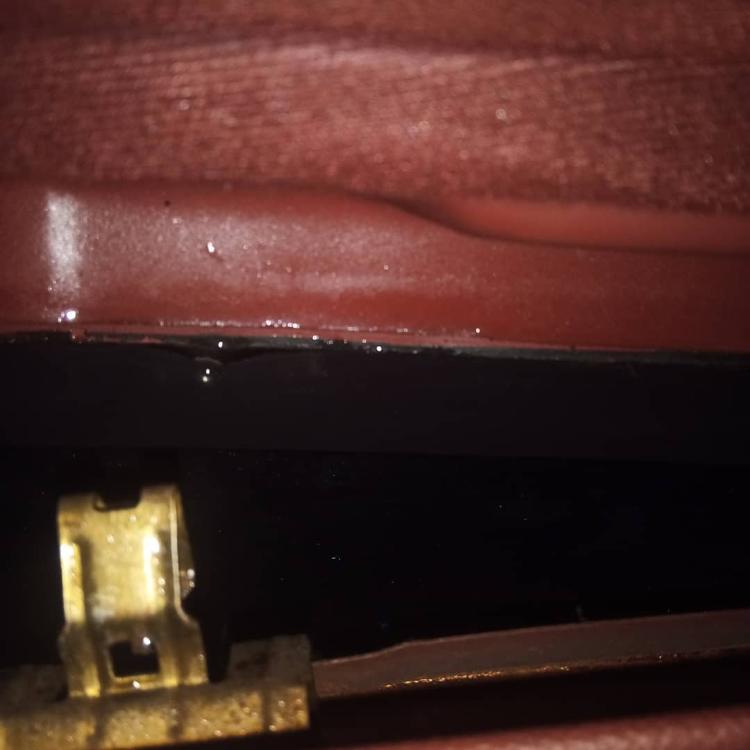 This is around when I started looking around the forum for answers and stumbled on the check your drip rails thread. I managed to squeeze the truck into my 2 car tandem garage, I had to drop the rear tire pressure to 10psi to get the topper to clear the garage door. I pushed the truck in so that I could feel if it was hanging up on anything. 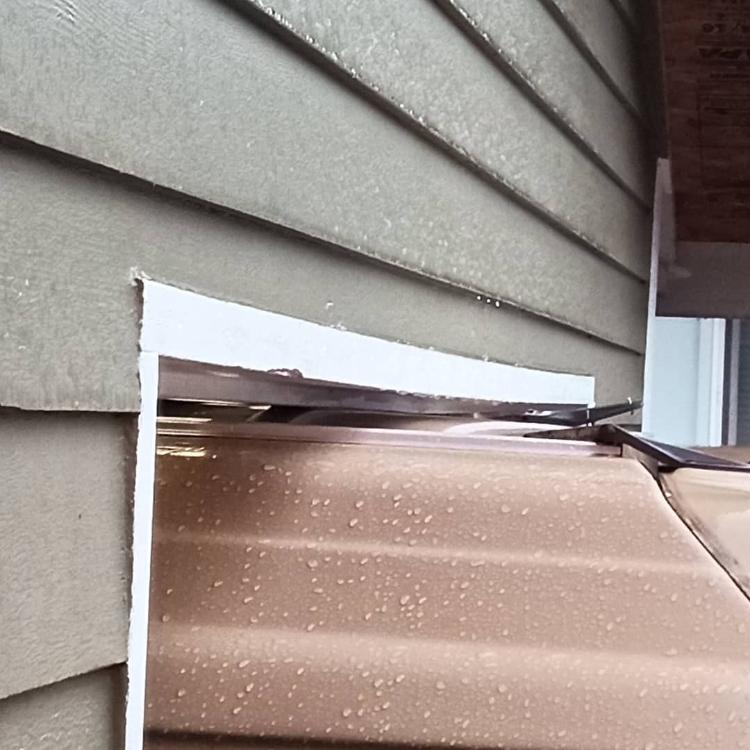 Now that the truck was inside so that it could dry out I starting crawling around it and under it. That's when I discovered that someone loved scotchloks and crimp connectors and that they ran out of proper clamps for the fuel system nightmare. This 460 has the hot fuel option so dual in tank pumps and the return line in the engine bay. What I found was the original fuel selector valve replaced with two smaller ones, and the in tank pumps disconnected and replaced with a single pump on the frame rail. 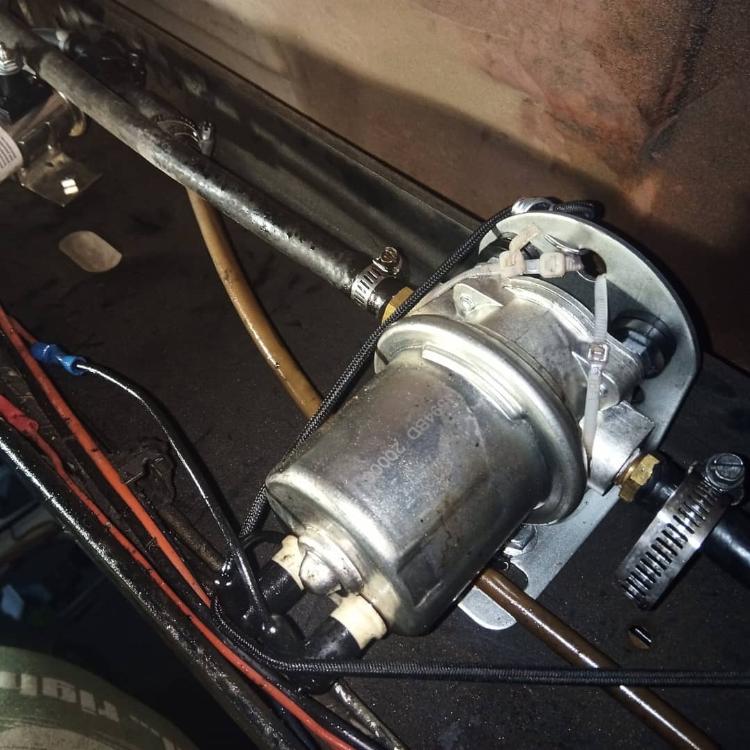 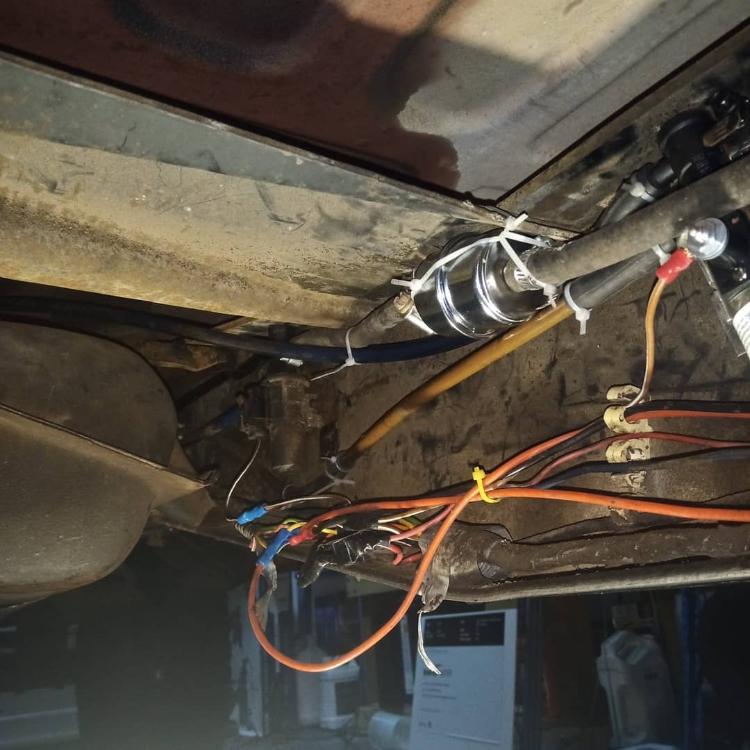 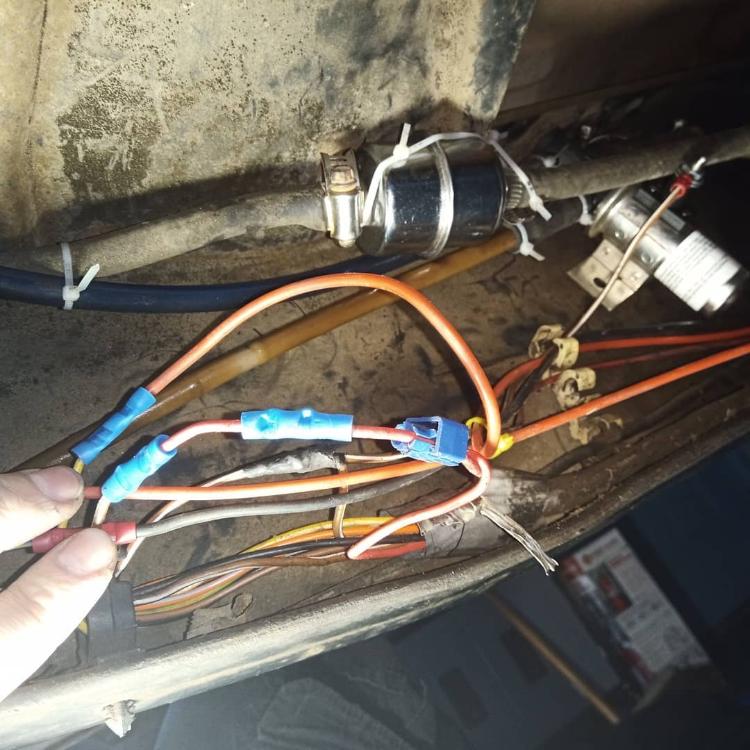 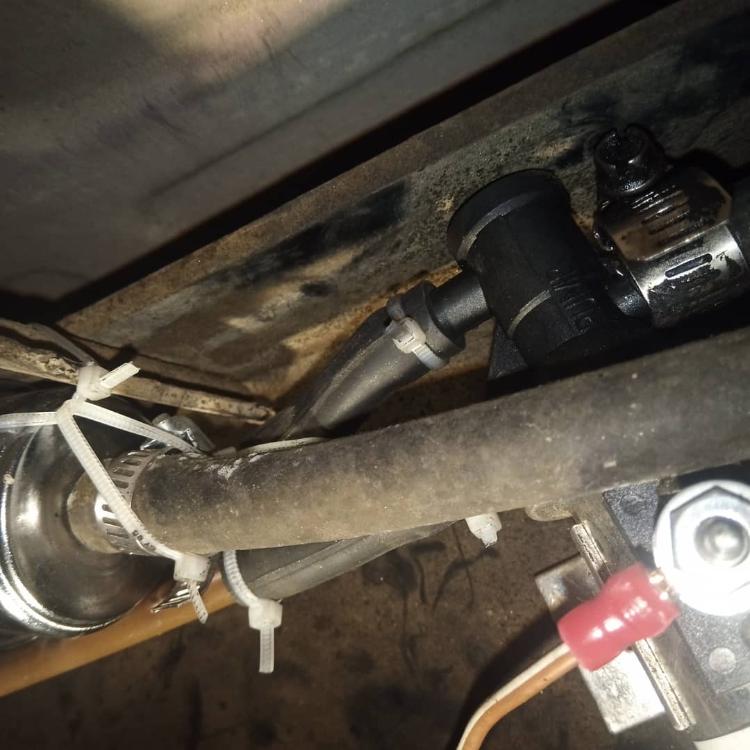 I know the fuel pressures are low, but c'mon man. I tidied up the wiring with proper soldered connections and heat shrunk as well. I also looked at re connecting the in tank pumps, but I found their wires cut at the tank connector. I was able to fish out the front tank connector and repair that wiring, but I can't get my hand onto the top of the rear tank to fish the wiring out to fix it. I have no idea why the PO cut the power wires in multiple inconvenient places, but they did.... I've left the rest of the fuel system for now as I am still deciding on what I want to do in terms of replacing the nylon lines that have been hacked up to fit this scabbed system. I'm tempted to run rubber line inside the frame rail instead of the nylon that was used, or run some hard line for the straight sections. While checking the fuel system I also found that either the PO or PPO had replaced some of the hard lines that run along the block, but they didn't secure them with anything so the whole system was just flopping around. I whipped up a bracked to secure the new hardlines that I bend up to replace their scabbed system. 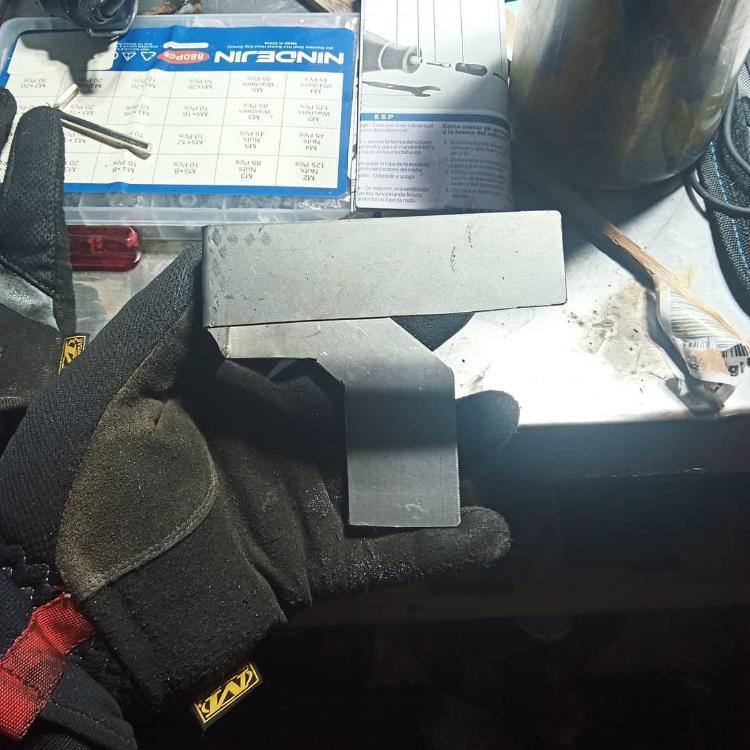 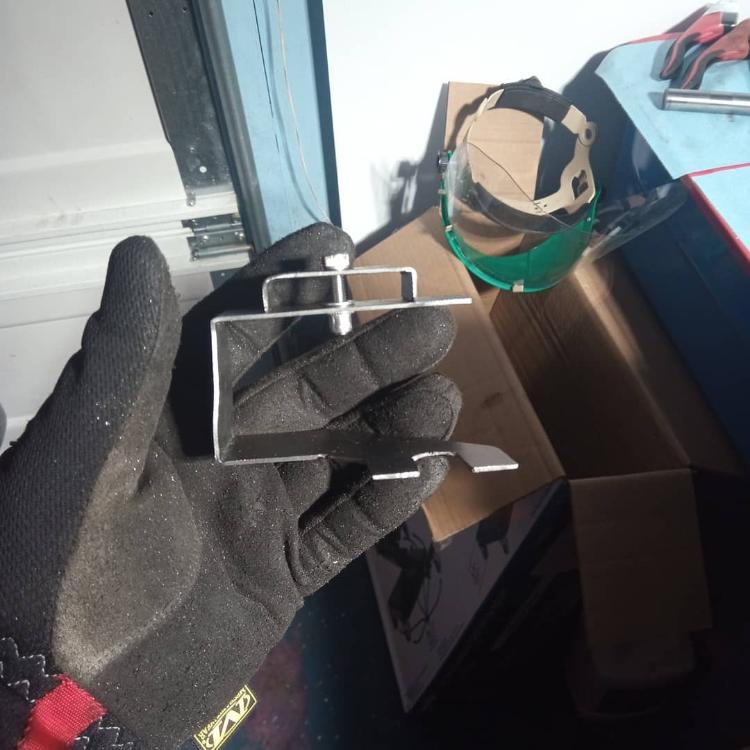 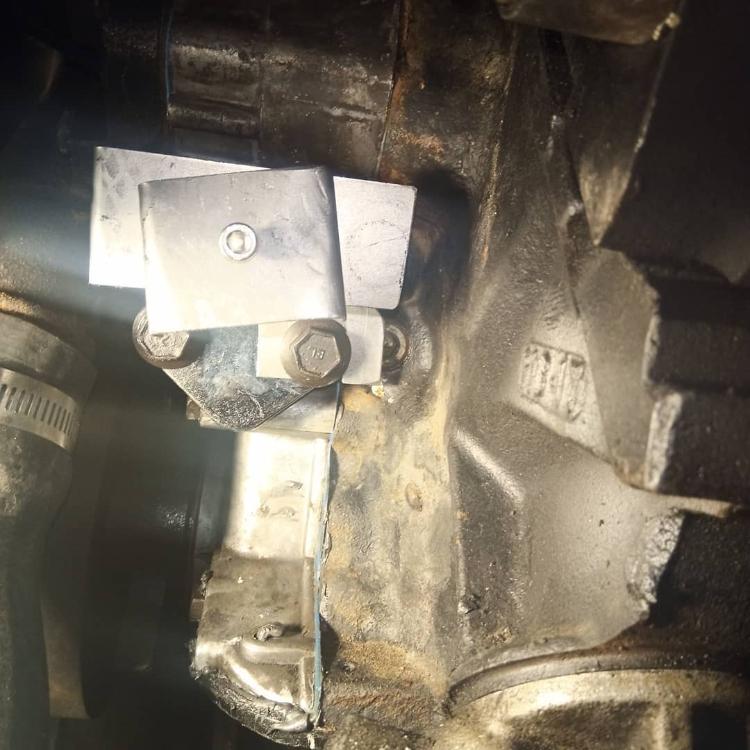 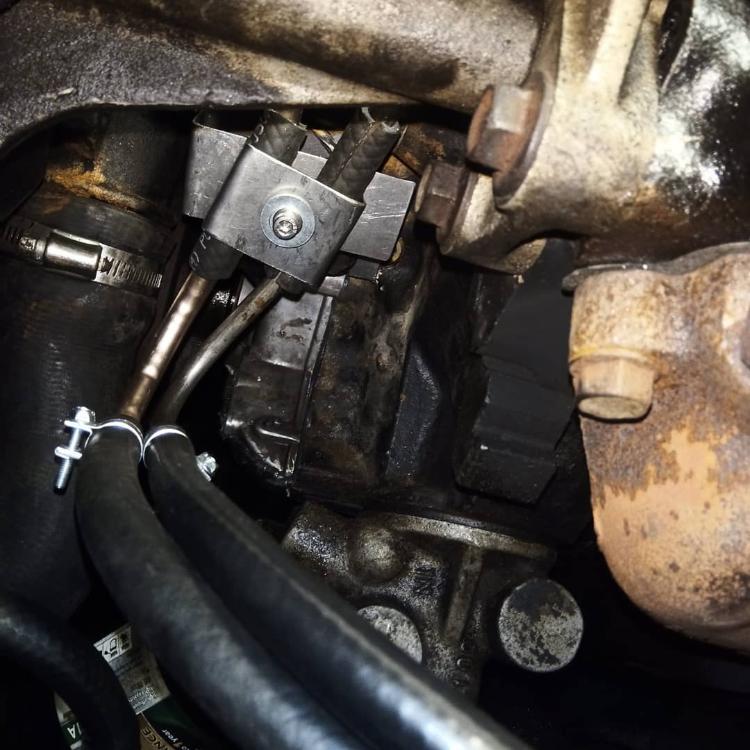 I based the design off of the factory bracket that I didn't know was a thing. Once that was done I turned my attention to the leaking power steering. I was able to swap that out without too much issue, though I feel sorry for the Napa parts guy that had to search for a matched pair of belts for me. It did give me a chance to play with my laser pulley alignment tool. 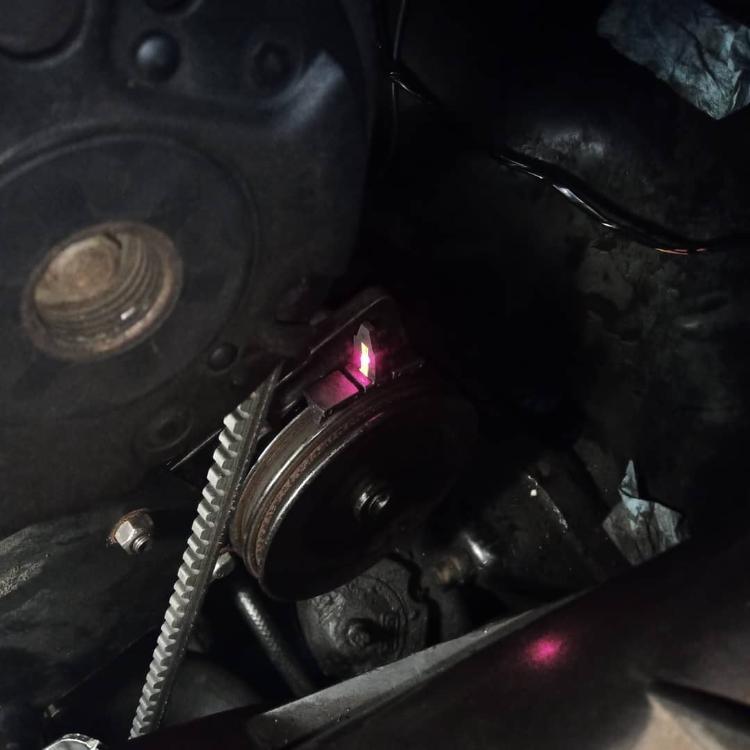 Since I had to remove the alternator belt to get at the power steering belts I took the time to have a look at the alternator, which is when I discovered that someone had cobbled an adjuster instead of installing the adjuster in the correct location. Thankfully I was able to loosen the smog bracket and get the adjuster in the right location. 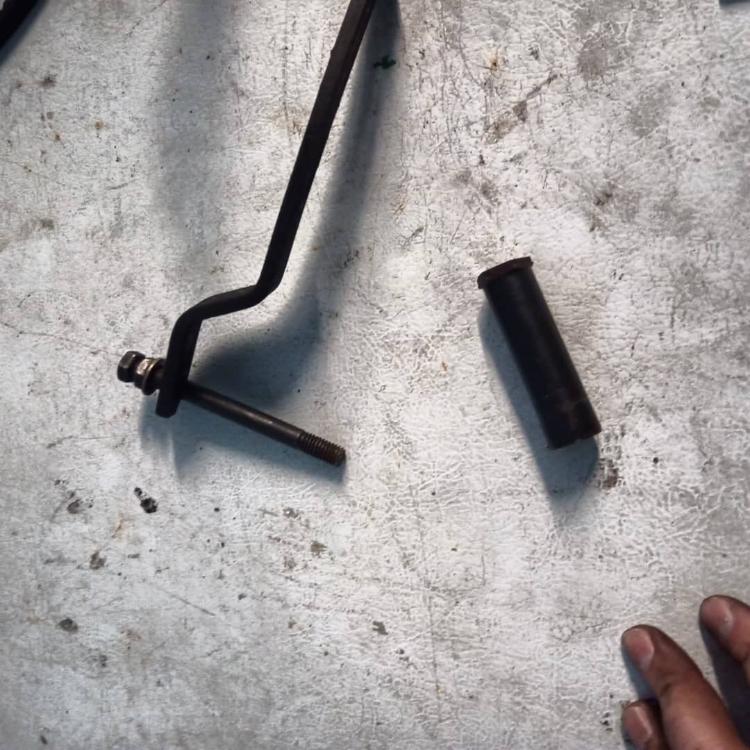 Since I was on the passenger side of the truck I had a look under the hood and noticed that the wiring was quite rough. I found some melted headlight wires and the main power and ground wires were rock hard. I spent some time fixing the wiring and made new ground wires and power wires using 2AWG welding cable and a cheap Harbor Freight hydrolic crimper. 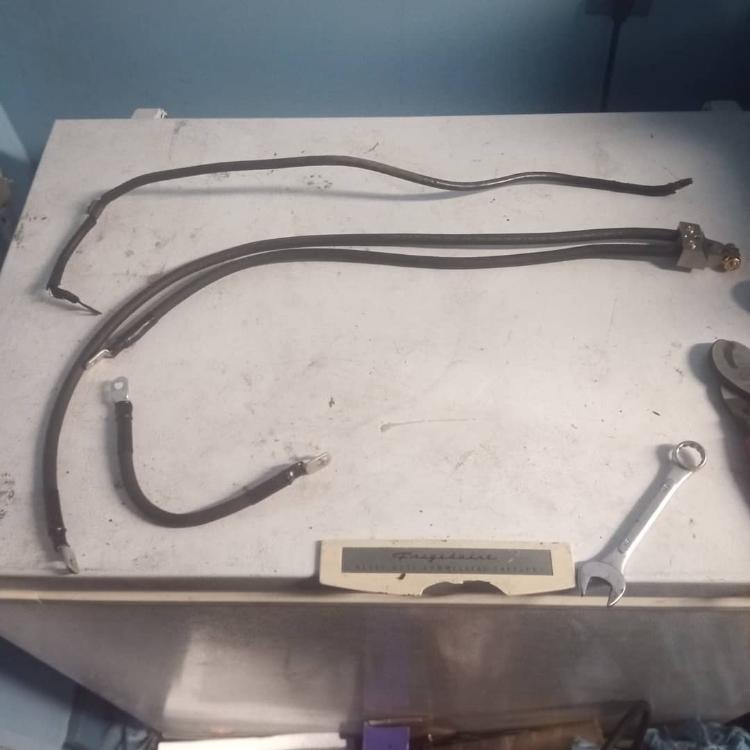 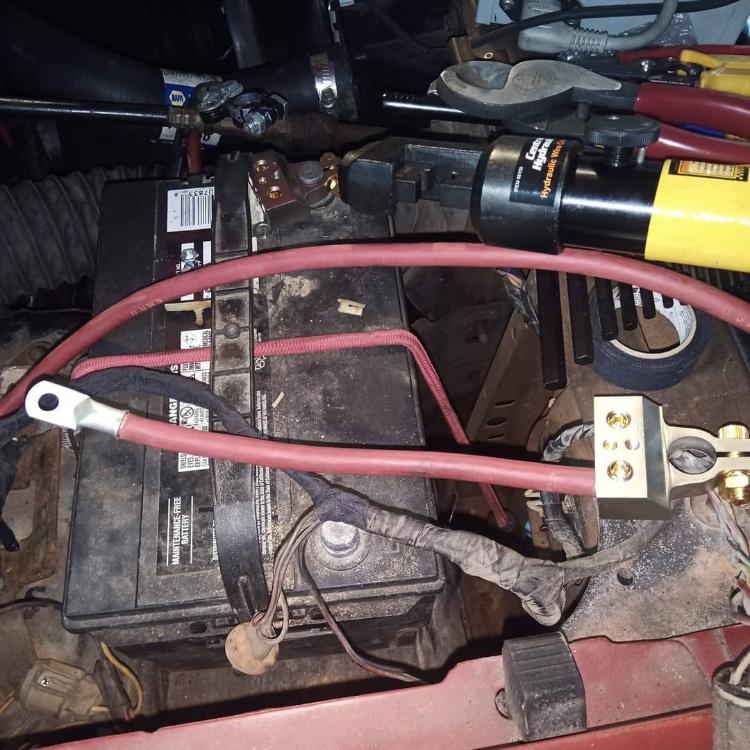 I plan on replacing the fusible links with 30A maxi fuses and added an auxiliary fuse box with relays to shift the headlight power off of the factory harness so that there is less current running through the headlight switch. It was at this point I decided to strip the interior because I really didn't want to deal with the drip rails yet. I found the floor of the truck to be in very good shape. 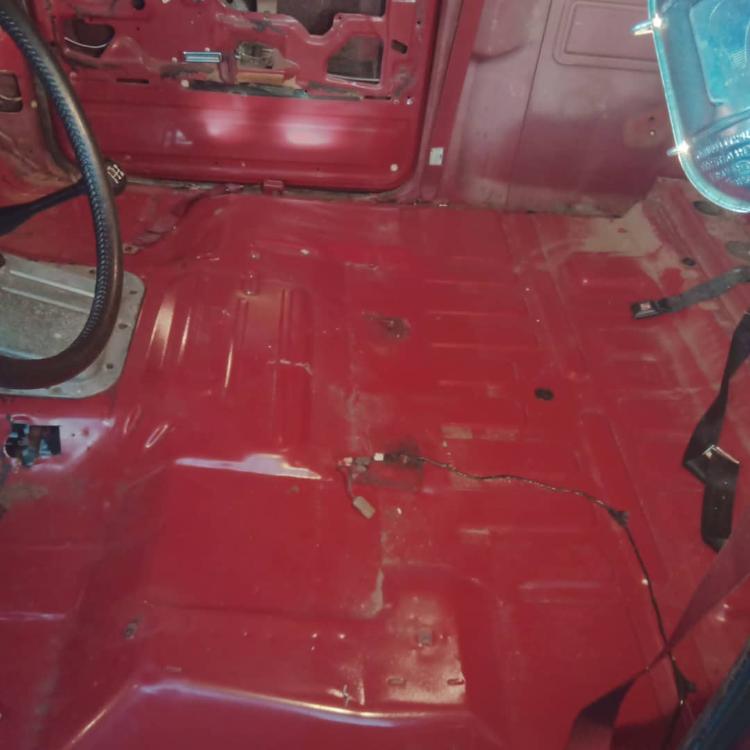 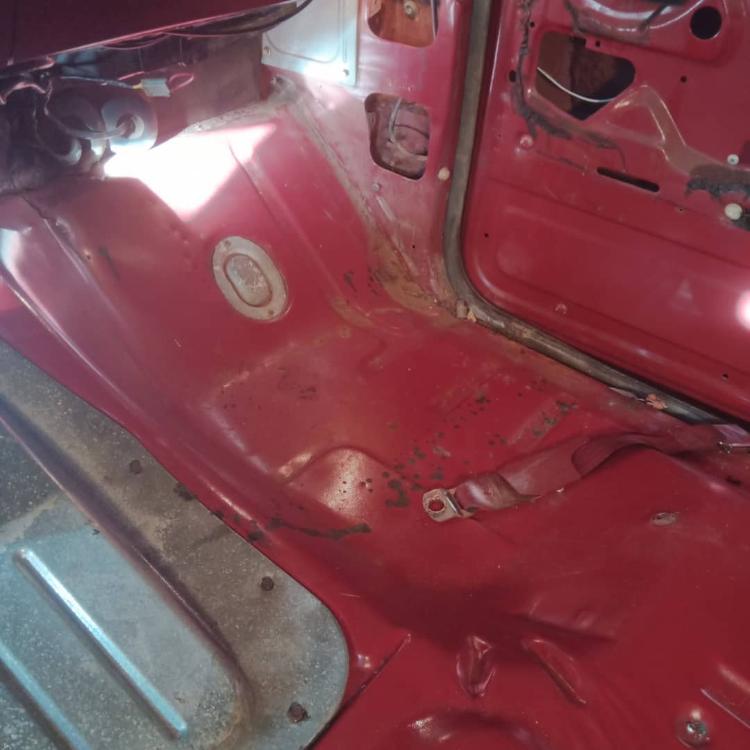 In the first picture you can see where the PO had cut a hole in the floor to make room for the BW1356 transfercase shifter. I now finally decided to dig into the drip rails.. ugh. 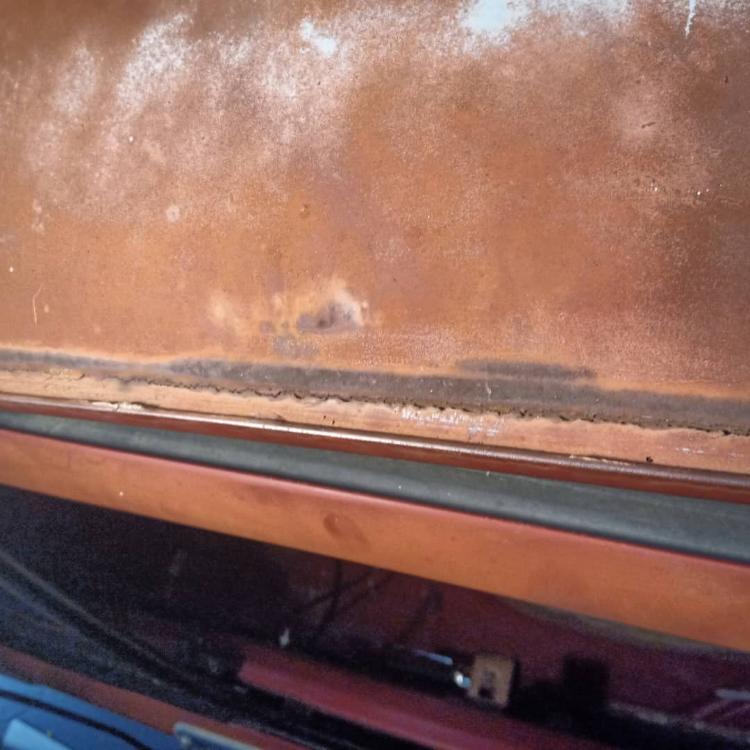 Lot of rust and shrinkage. I decided to wire wheel it out and that's when this happened. 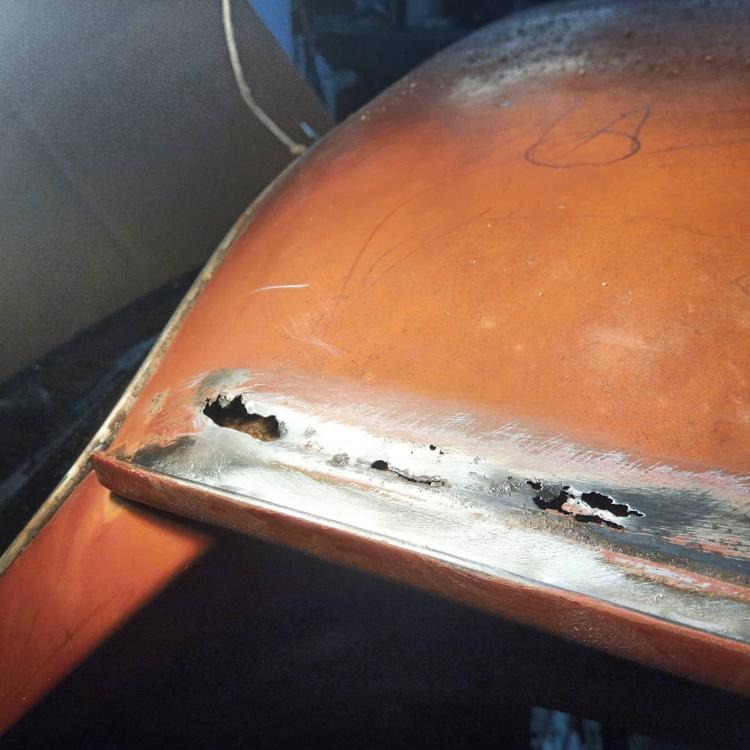 This is the driver side and then the passenger side. 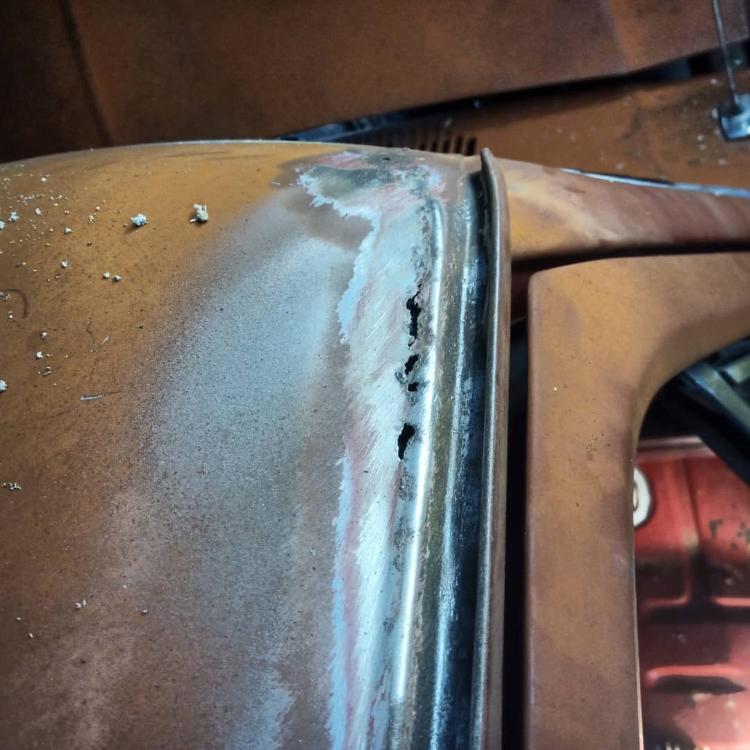 It was now that I decided I should learn to weld. 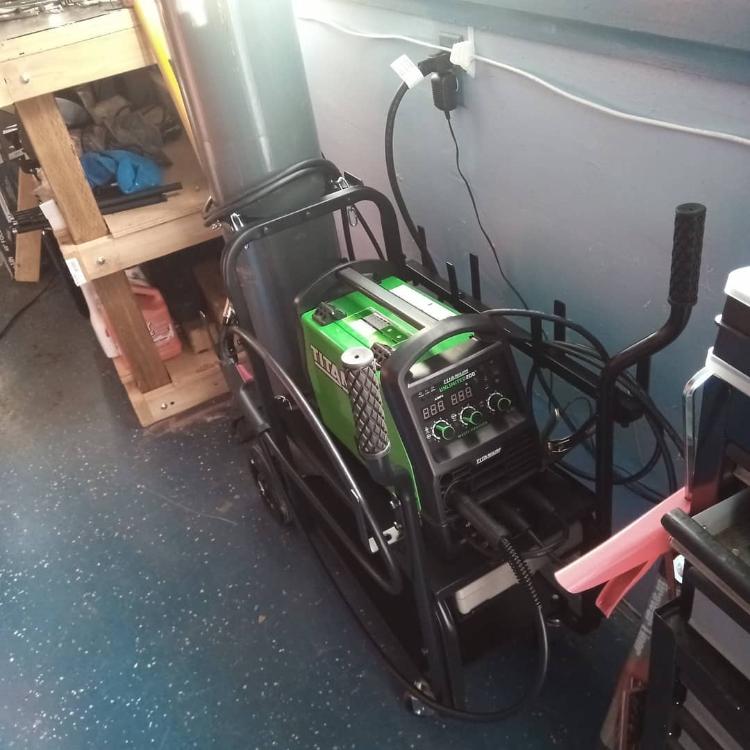 Harbor Freight Titanium Unlimited 200 multiprocess welder and a bottle of mig mix that is too big for my welding cart. 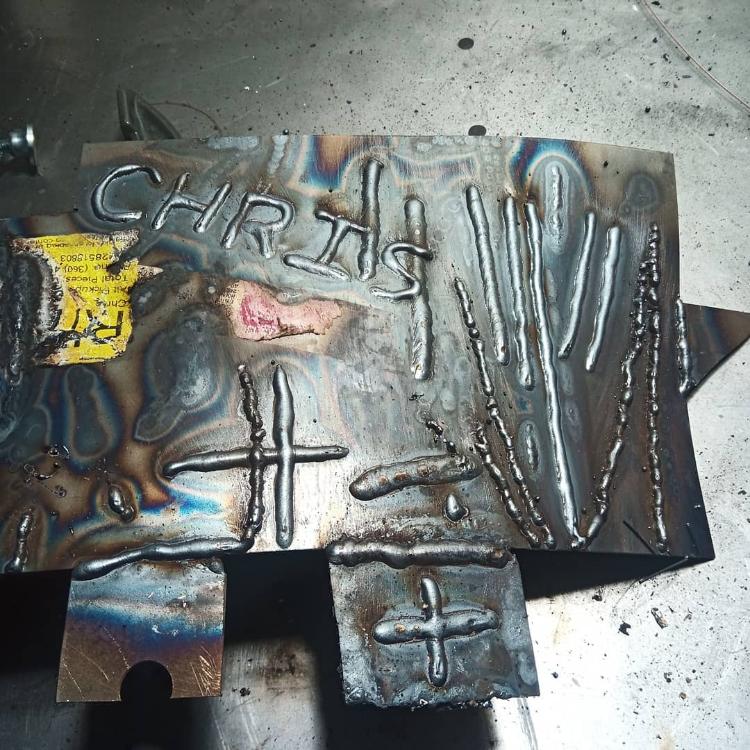 Practice welds Now the real thing. Not too bad for my first try. Lots of grinding was needed though. 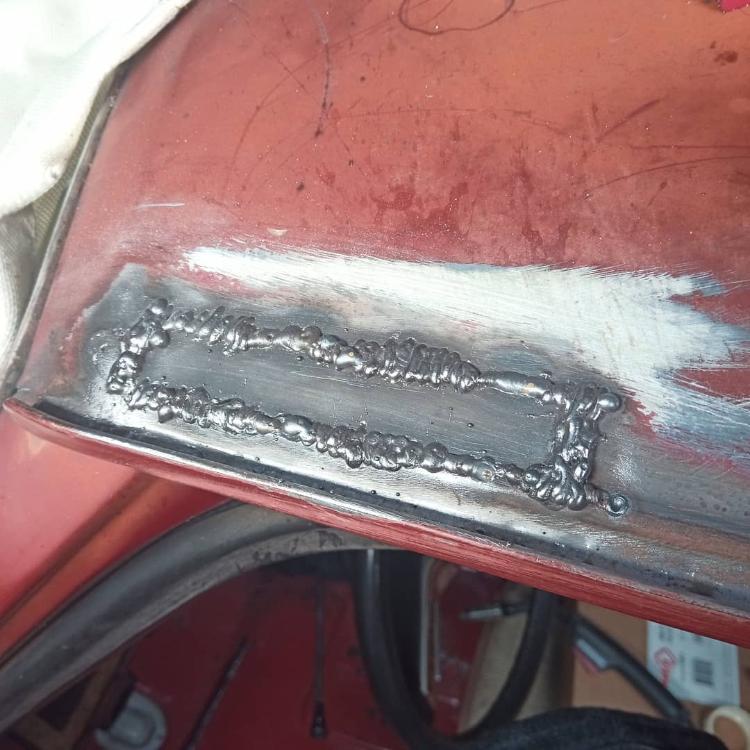 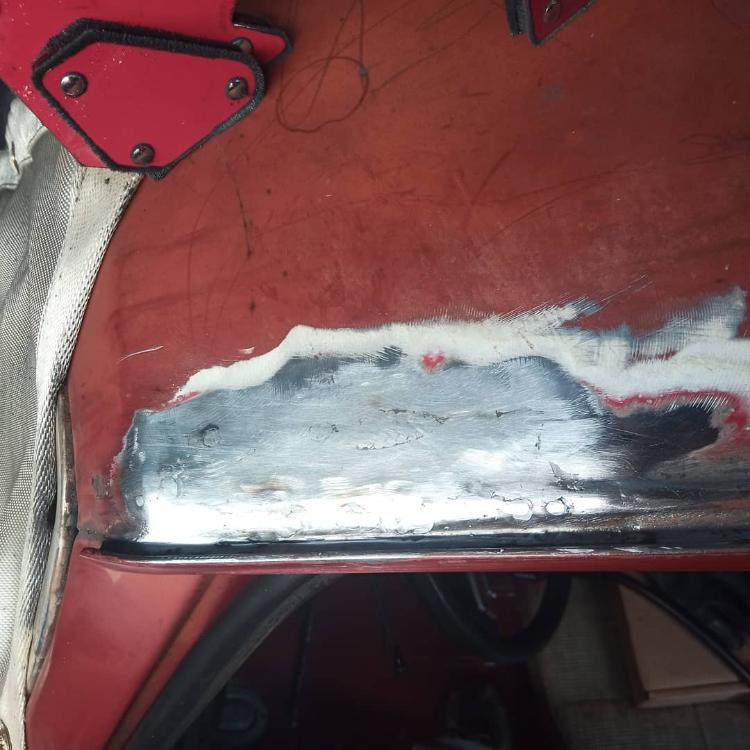 I did better on the passenger side. I also remembered to take pictures of the rust after cutting the bad metal out. 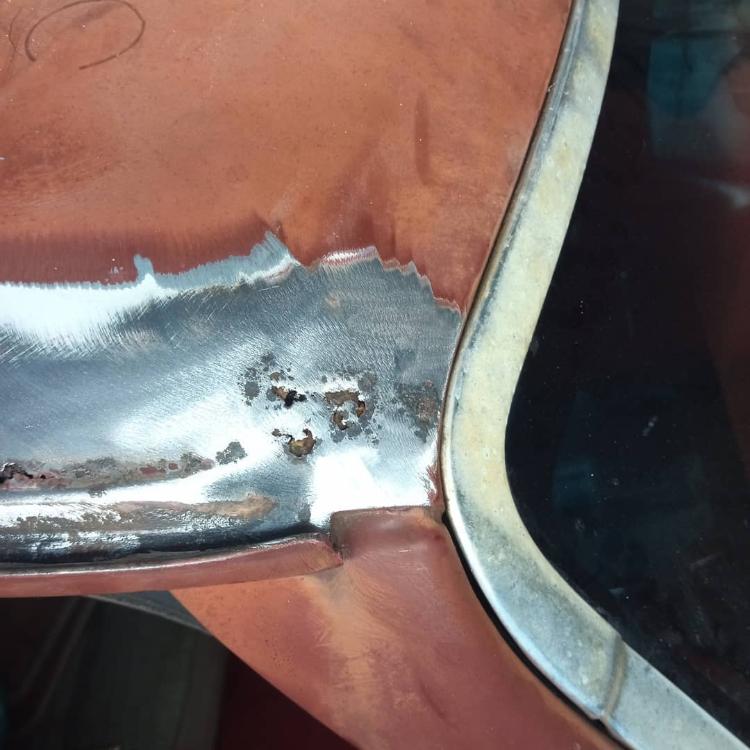 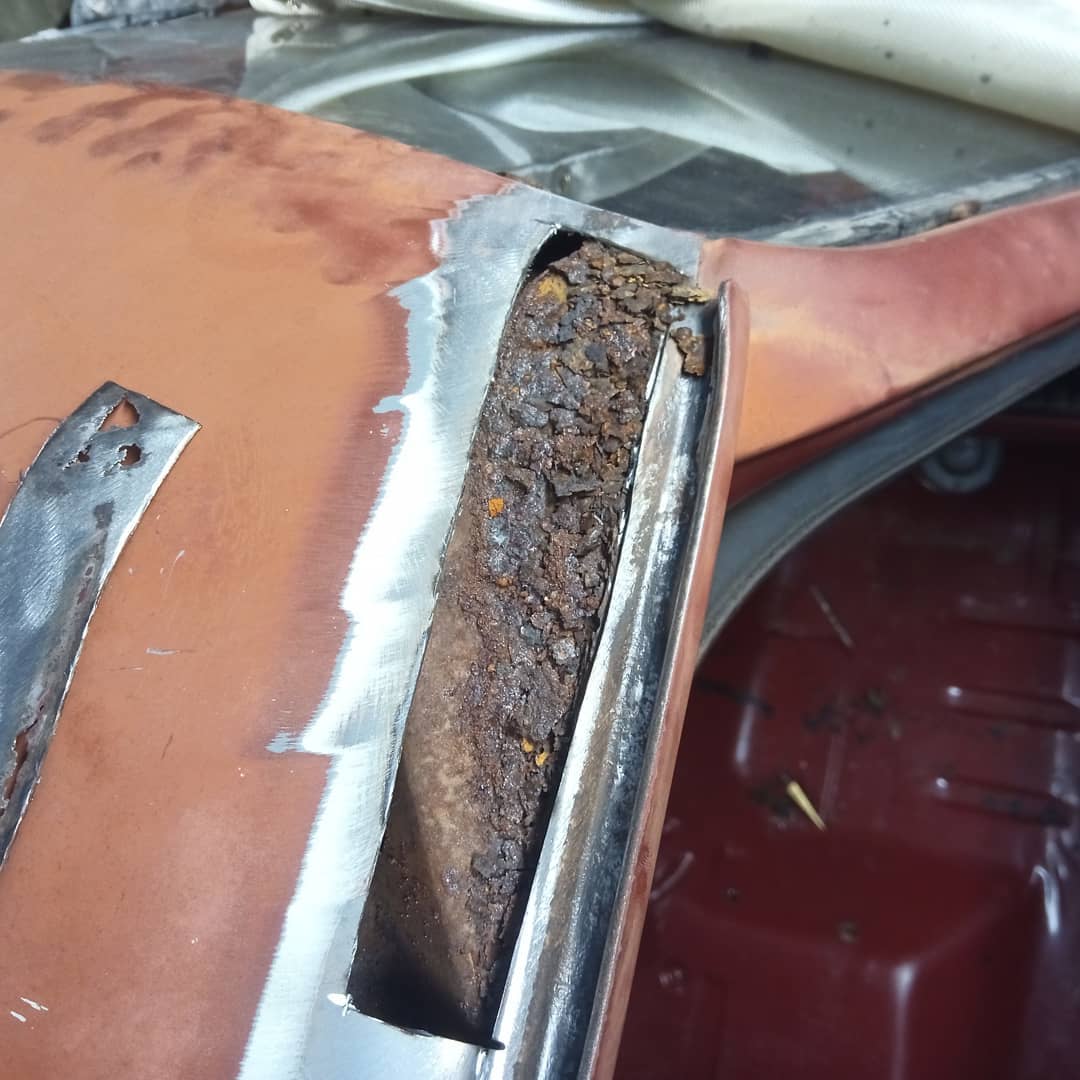 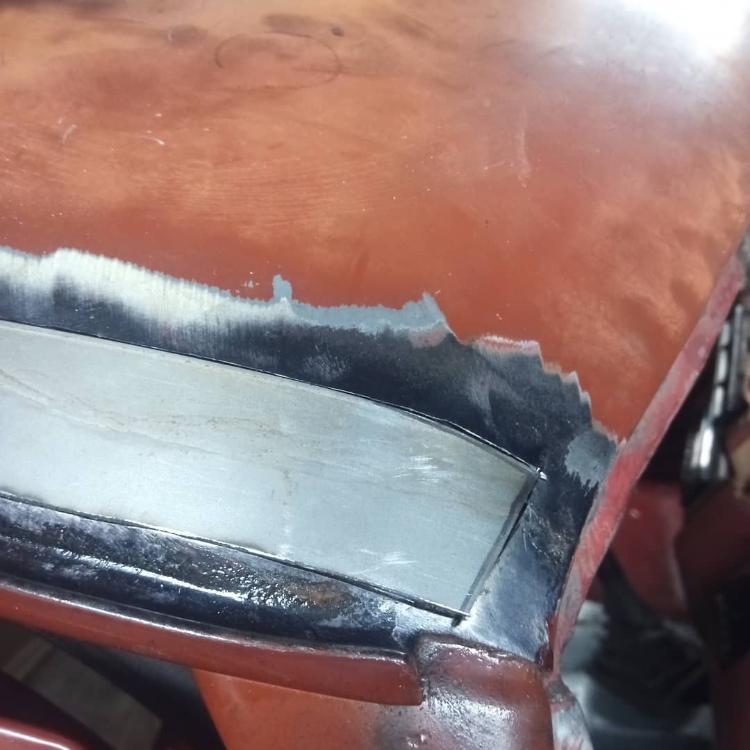 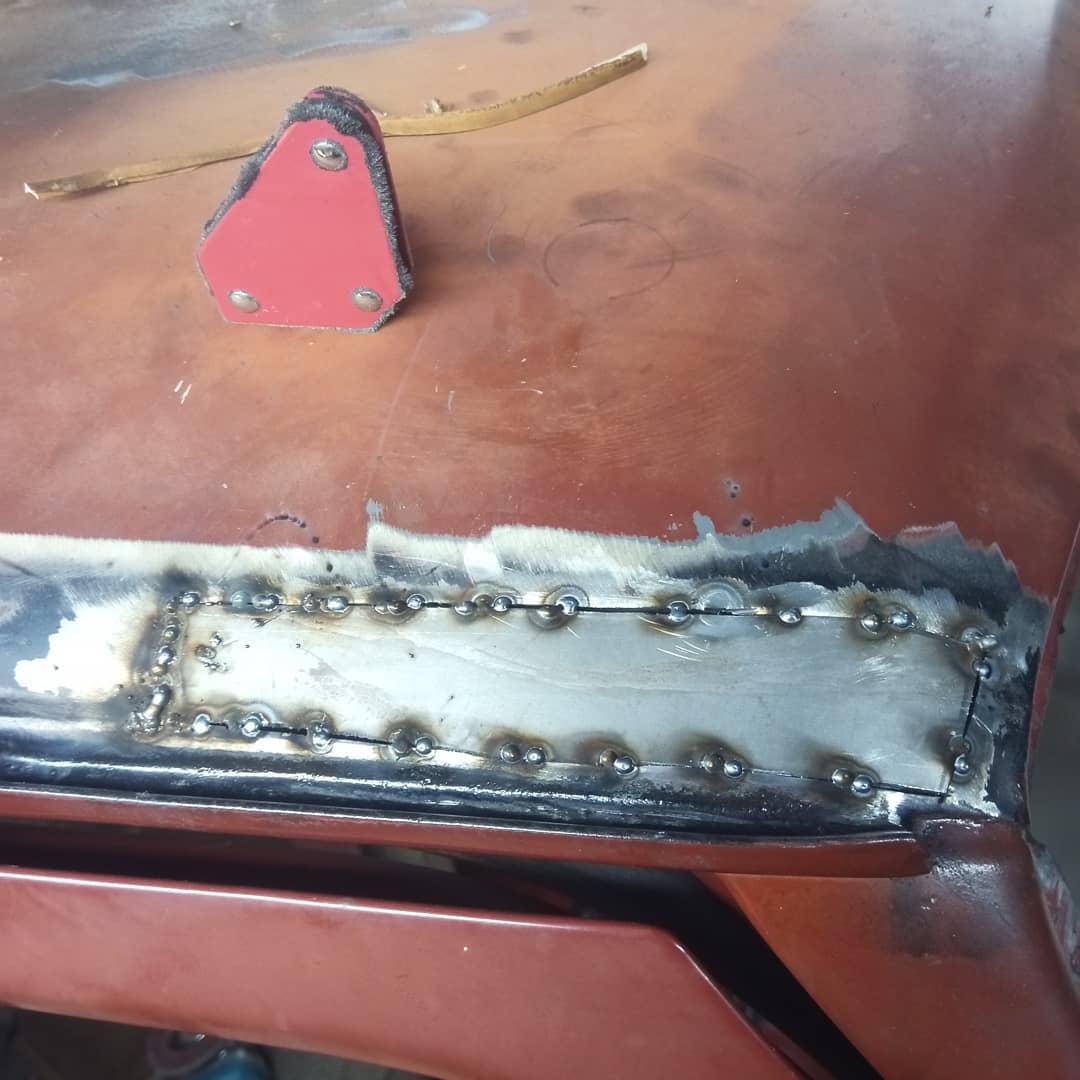 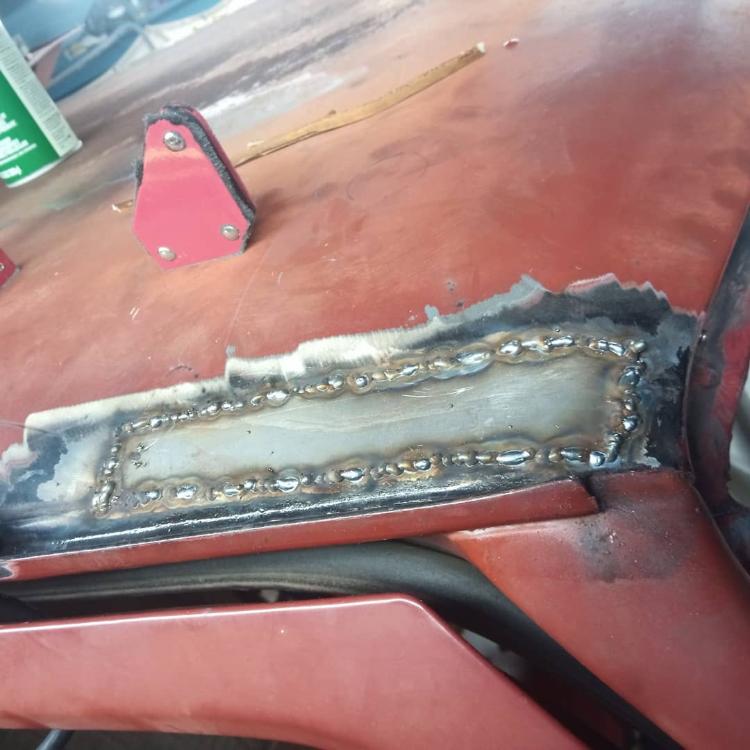 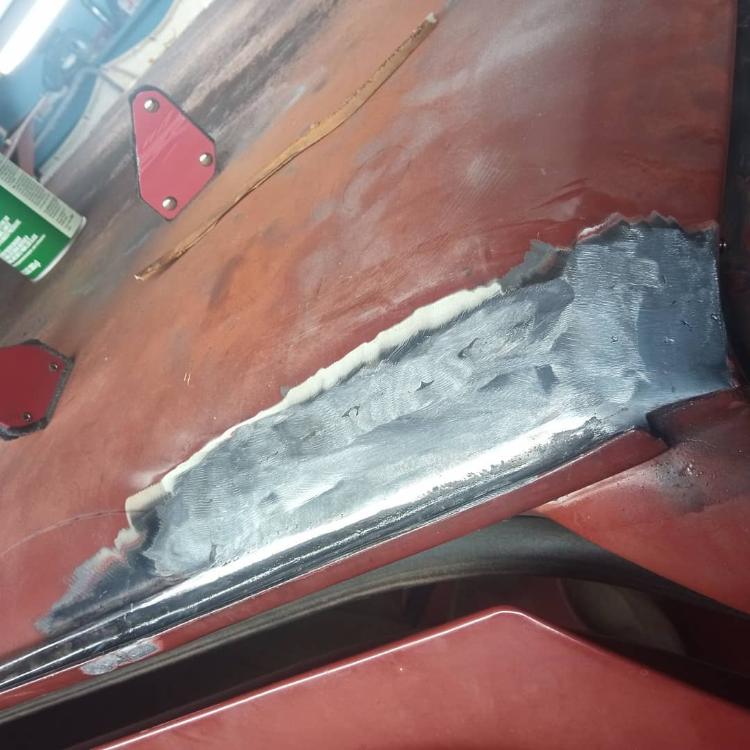 I figured that I should have a look at the windshield lip so I pulled off the chrome trim (carefully and with the right tools) and found a bunch more rust holes. I did not manage to get the windshield out in one piece. 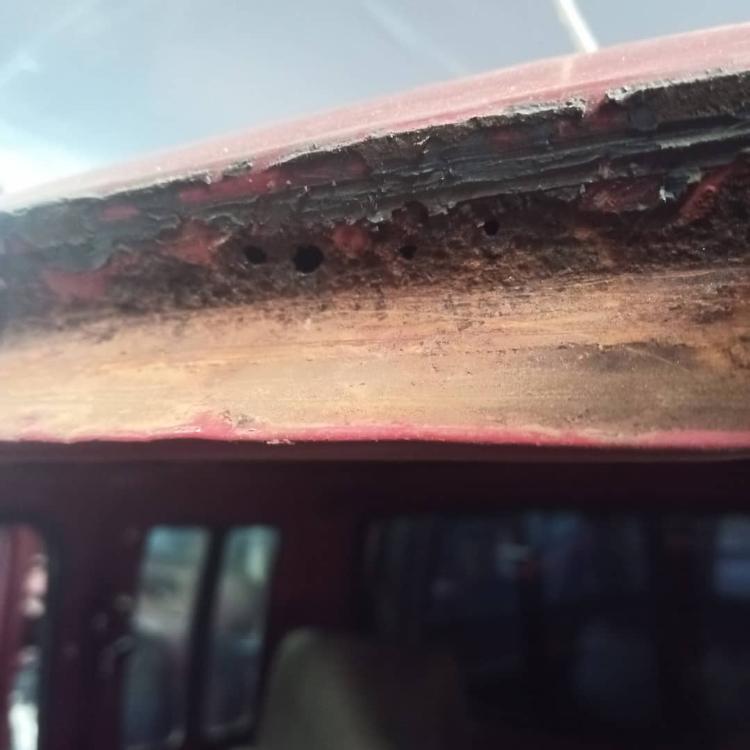 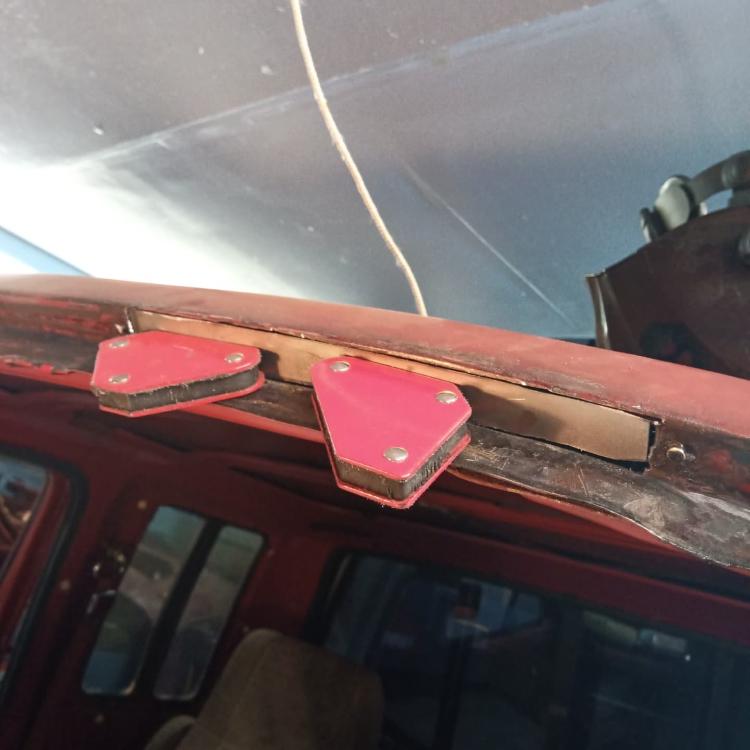 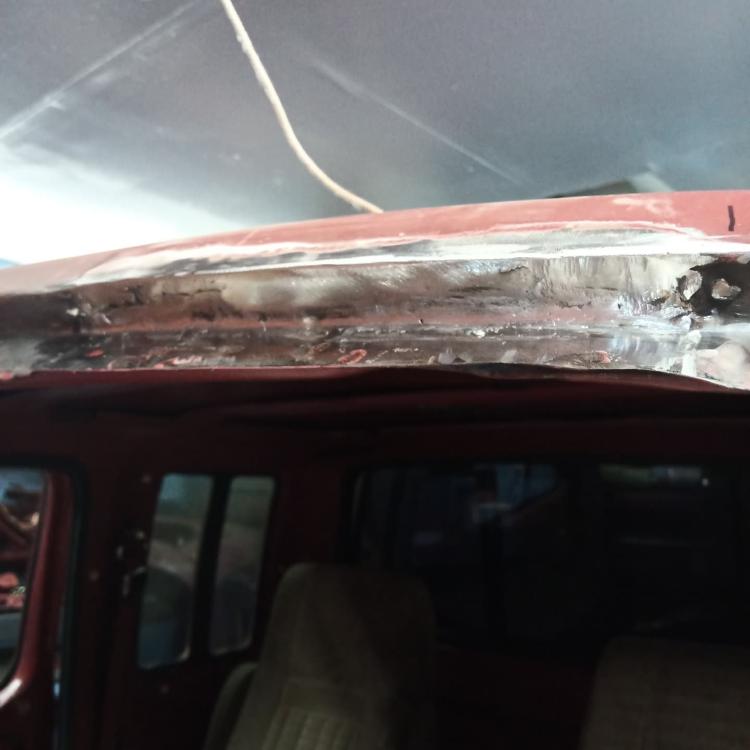 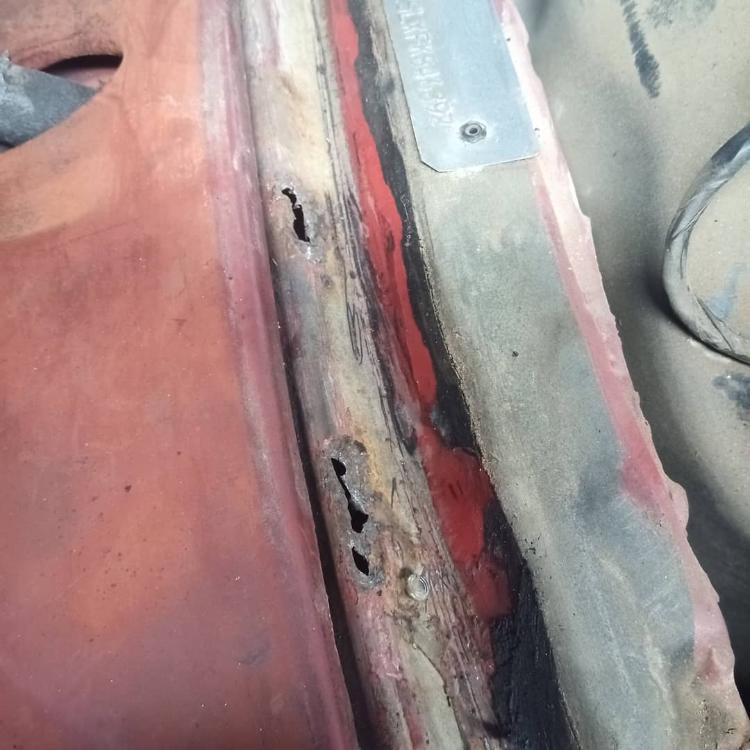 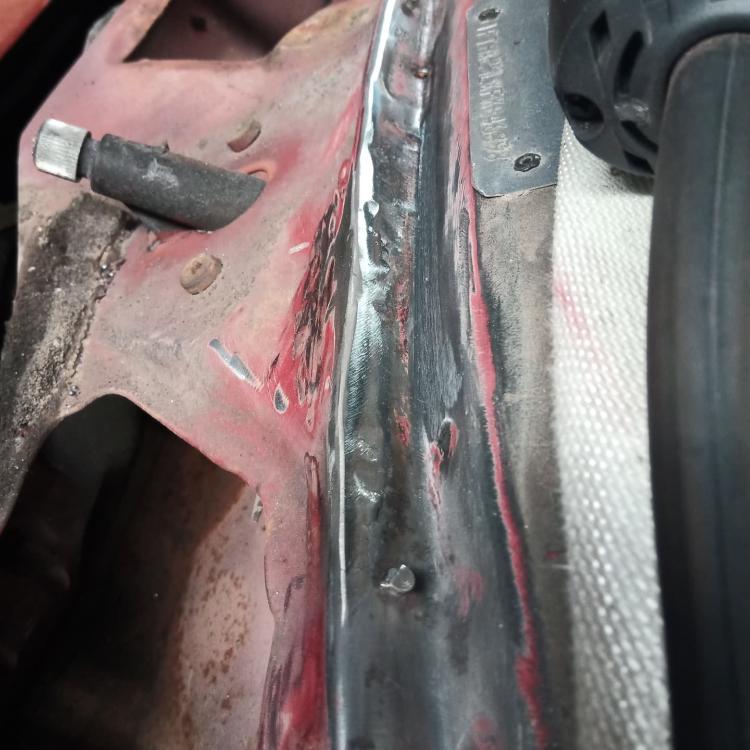 I will continue this in the next post starting with the sound deadening of the interior
Chris
1985 Ford F250 XLT SuperCab ZF5-42 swapped 460 hot fuel, factory AC. Part way through 4WD swap. 1988 Suzuki Samurai -- Daily Driver 1968 Dodge Dart -- Project car 1957 Chevy 4400 Flat Bed -- Collector Project 1955 Buick Century -- Collector Cruiser |
|
This post was updated on .
Sound deadening the interior. I ended up going with Noico. I used ~1.5 boxes throughout the truck.
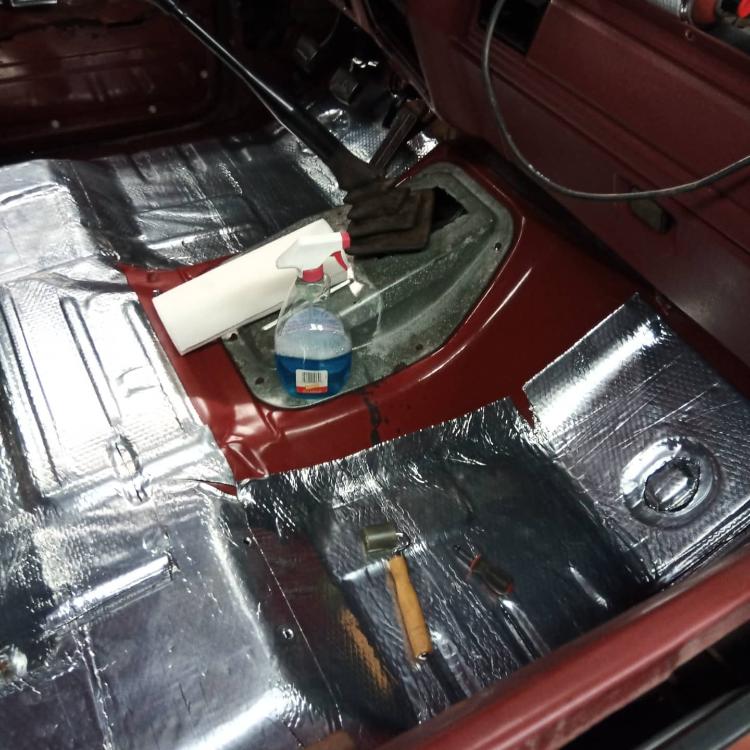 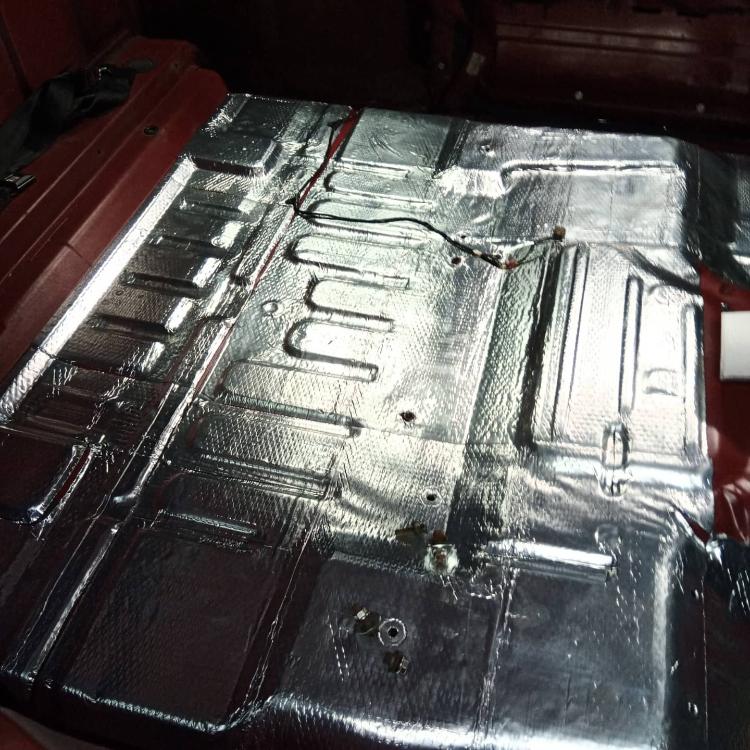 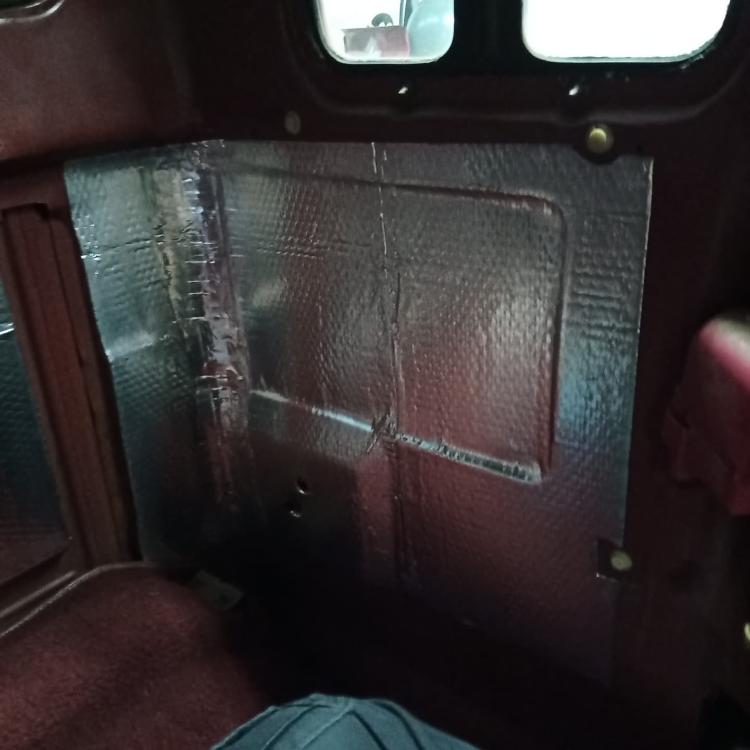 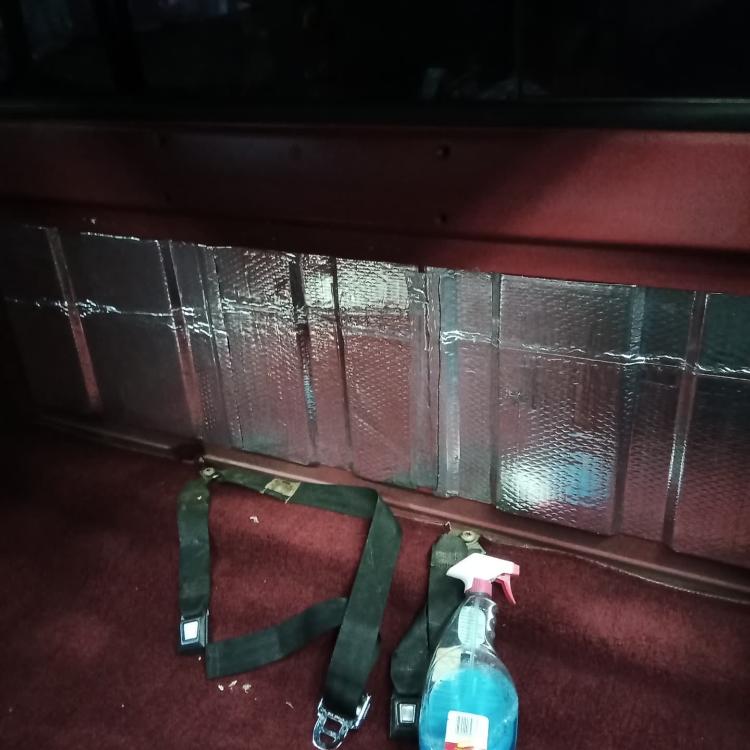  Now I was able to start reinstalling the interior and at the same time recovering the sagging headliner. 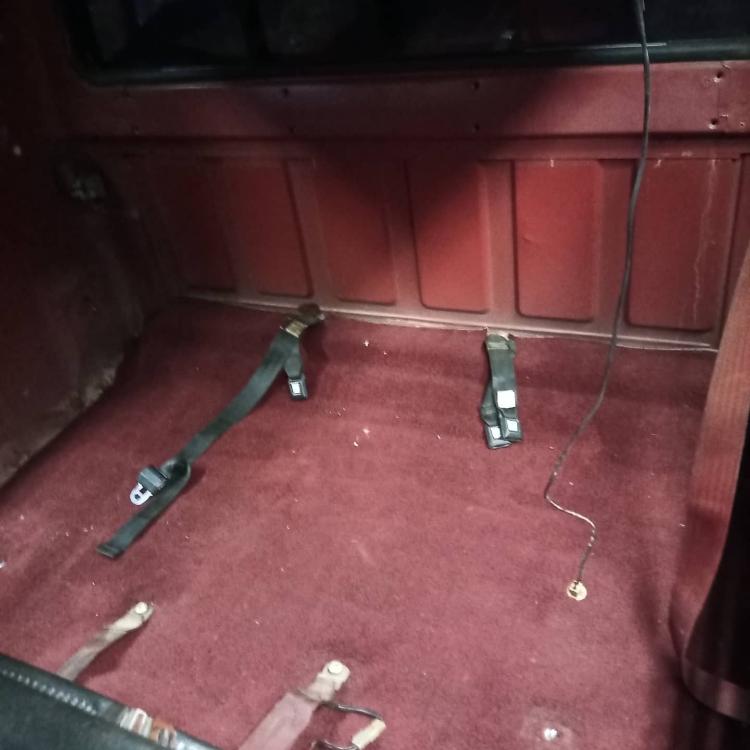 This comes to how the truck got the name REDRUM. My wife and I enjoy horror films and one that we both enjoy is the Shining. Going off of this I searched Amazon and found blankets that had the carpet pattern from the Overlook Hotel in the movie. I cleaned the old headliner off with a wire wheel on my drill. 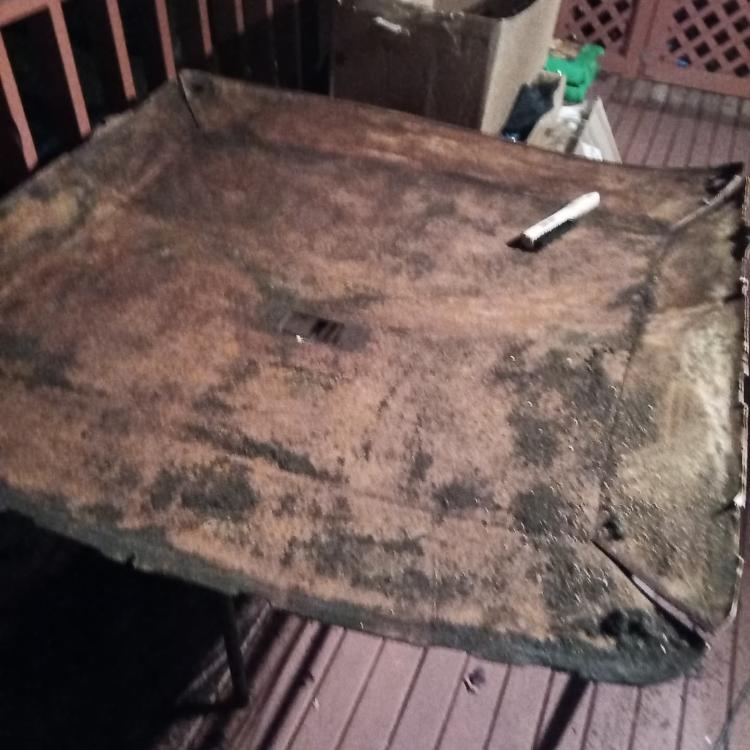 I then laid out the blanket to get an idea if it would fit. 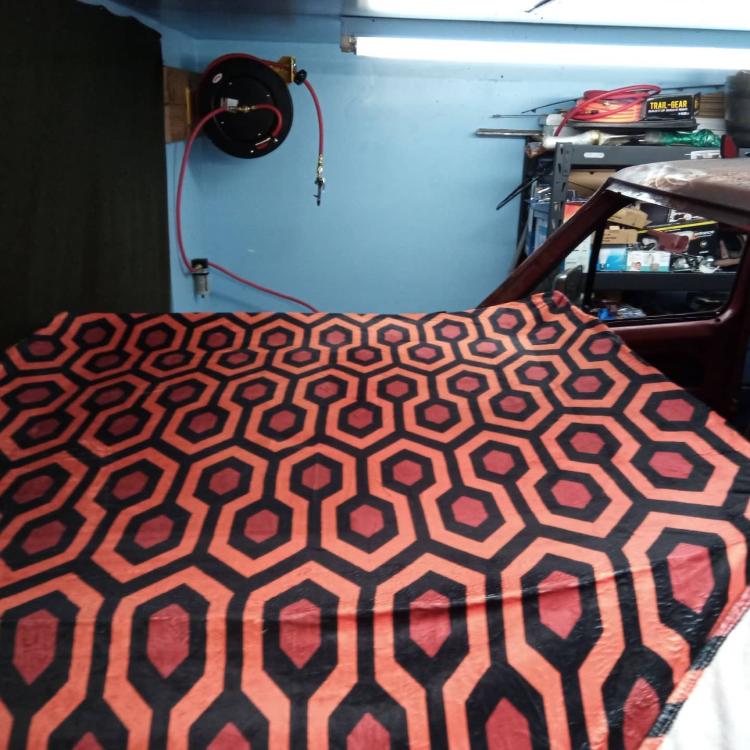 and to cut things short, after using copious amounts of spray glue and some liberal cursing I arrived at this: 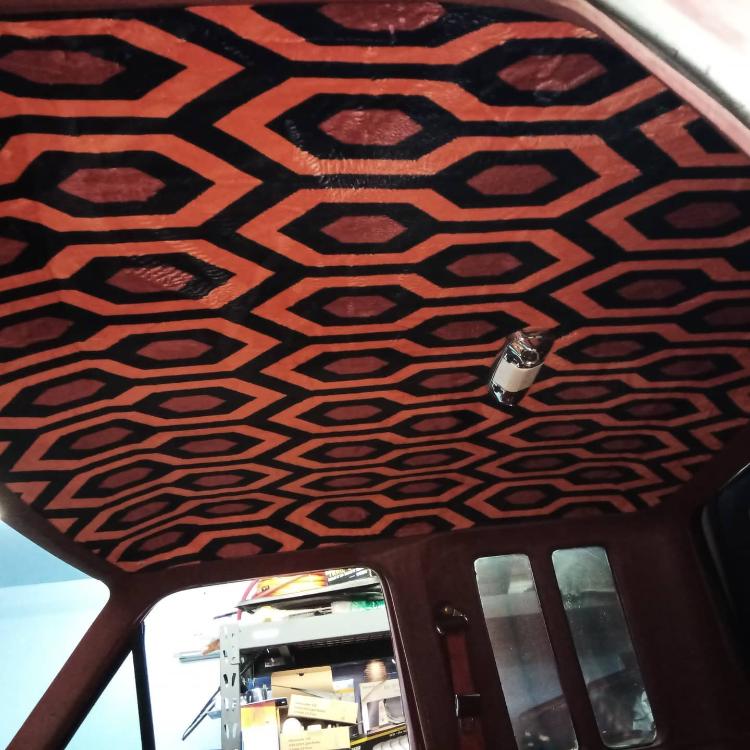 I also took the time to recover the door carpets. I ended up using door panels from a coworkers truck that he scrapped. They were in way better shape than mine but were power windows and locks. I used the backerboard from my manual window panels instead. 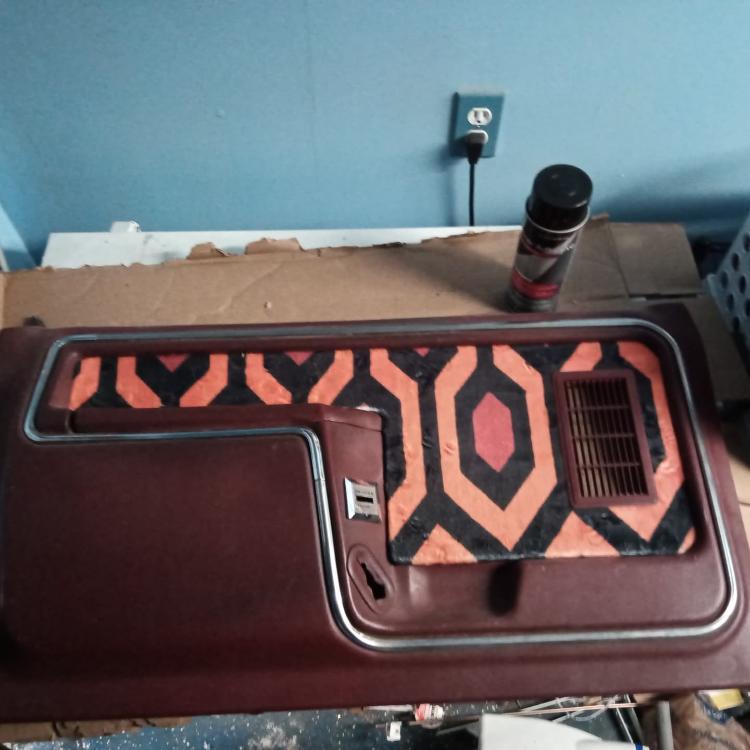 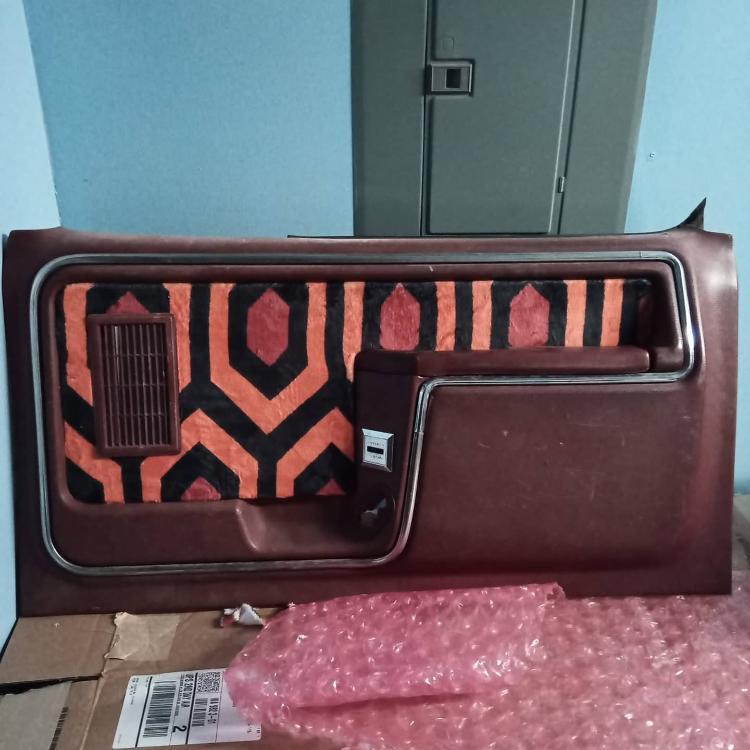 Next I turned my attention to the sound system. The truck came with a terrible kenwood CD player and some Pioneer speakers with no low end. The same coworker with the scrapped bull gave me some JBL 6.5's and an 8" polk audio subwoofer to used since he didn't have a use for them anymore. When searching for decks my coworker pointed me towards ATOTO which he was using in his Jeep. I then also discovered that kramttocs was using an ATOTO headunit in his project "The Camano Experience" I followed his lead and cut out the lower metal dash brace but I did not replace it, I just left it out since I did the cutting while the dash was still in the truck. 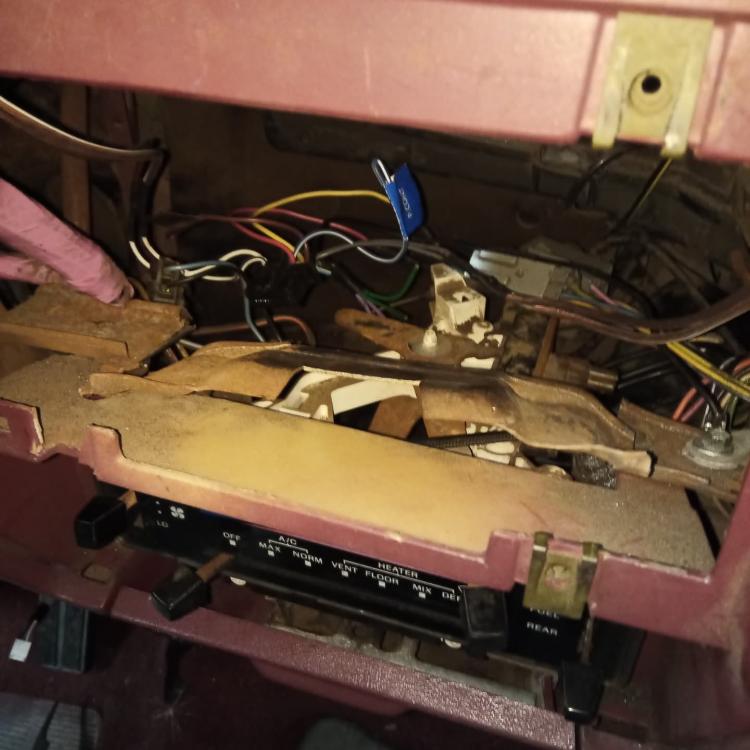 I also trimmed the lower plastic to get the deck to fit. There wasn't a good way to mount the deck so I modified the brackets that came with the deck and used some 19" server rack hardware to secure it. 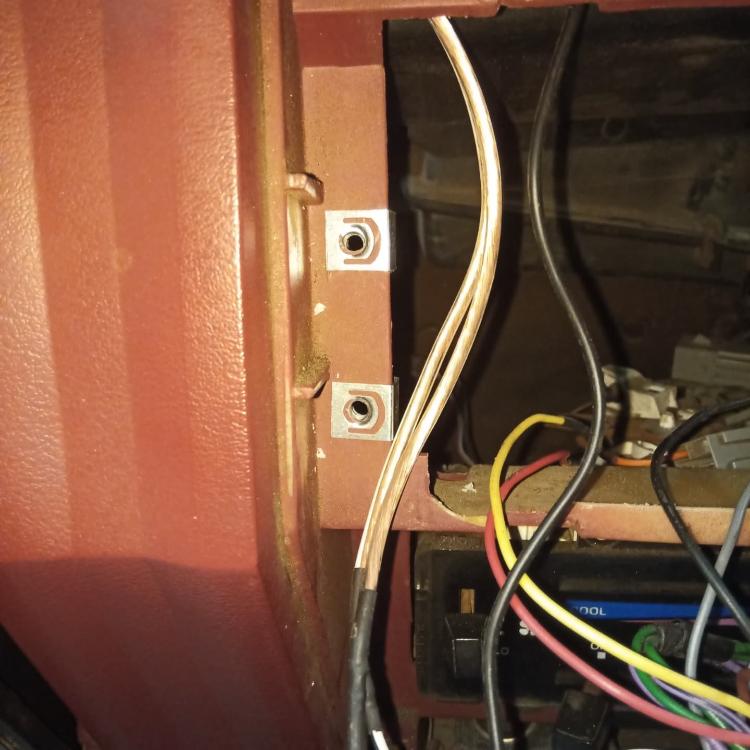 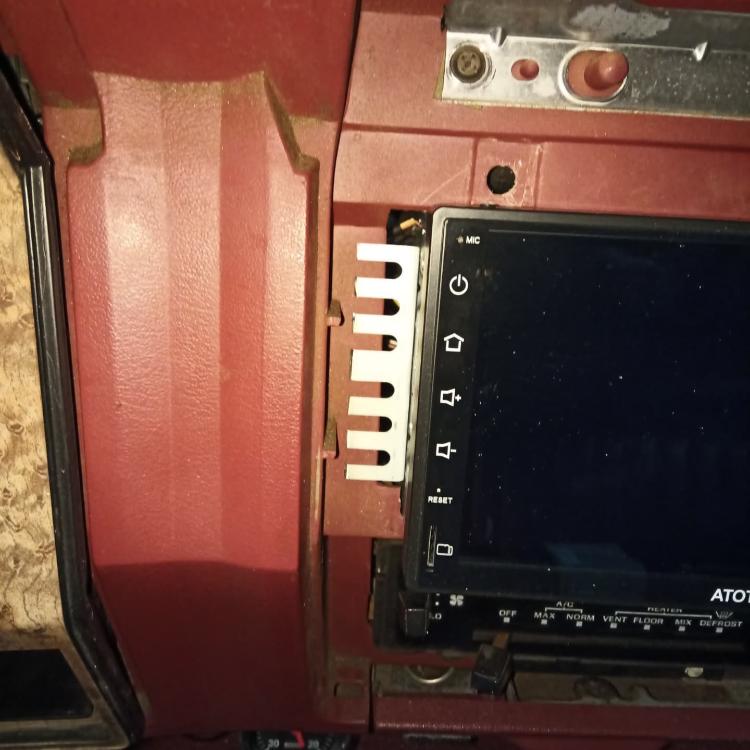 I have multiple surrounds for the stereo so I hacked up the worst shape one, but neglected to take a photo. I needed space to install the subwoofer so I decided to build a box for a center console. 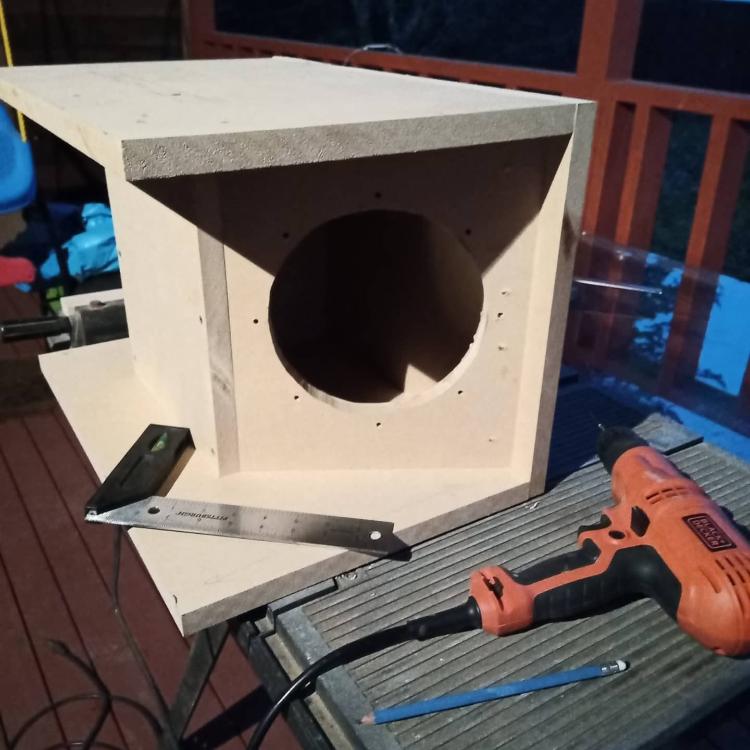 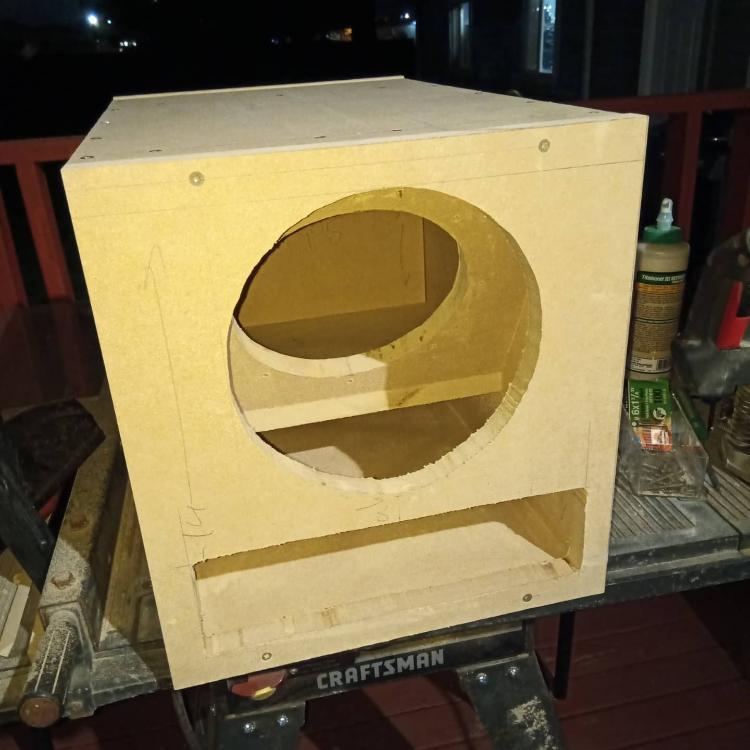 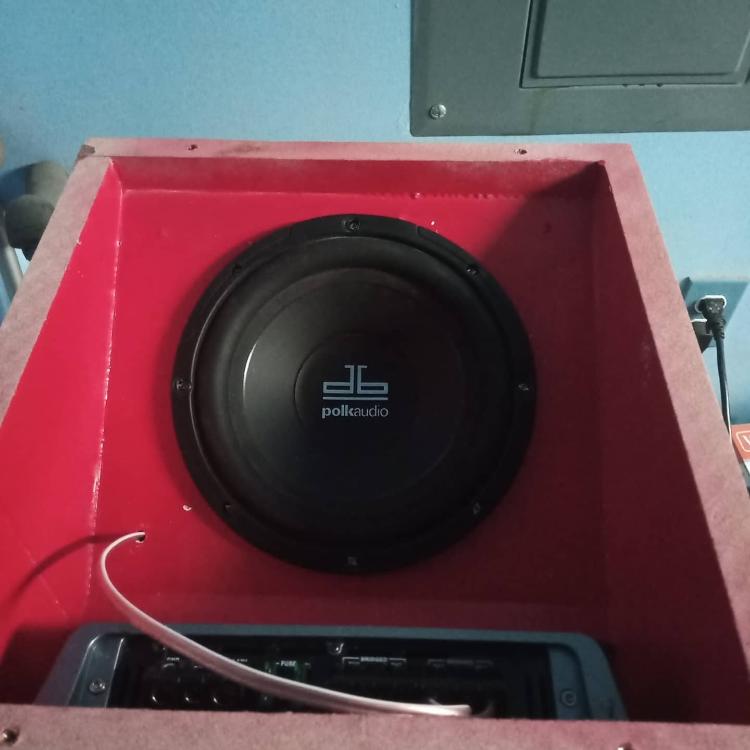 I used an old Kenwood 450.4 amplifier that I had left over from my Samurai so I have 2 channels running the door speakers and the remaining 2 channels bridged to run the subwoofer. I also wrapped the console in the same blanket as the doors and headliner. 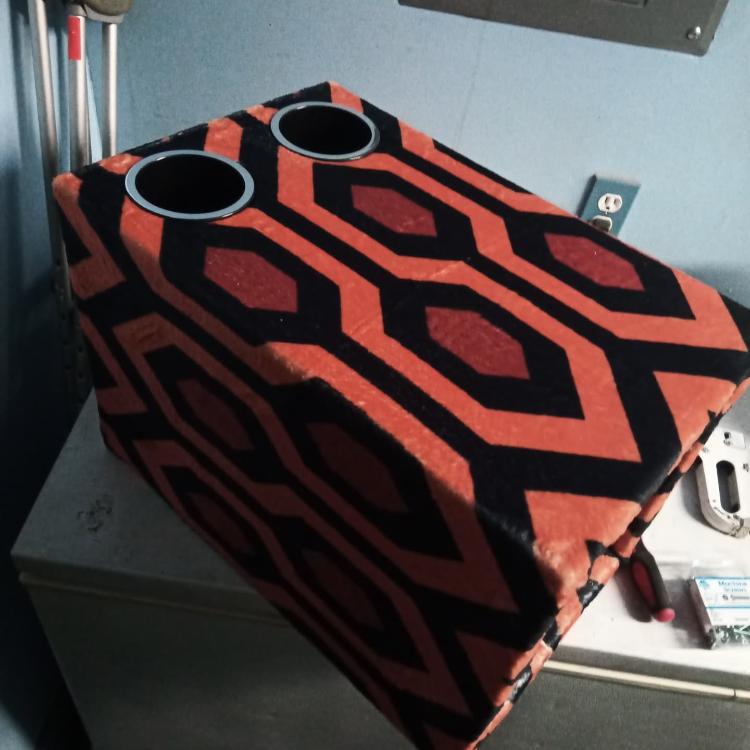 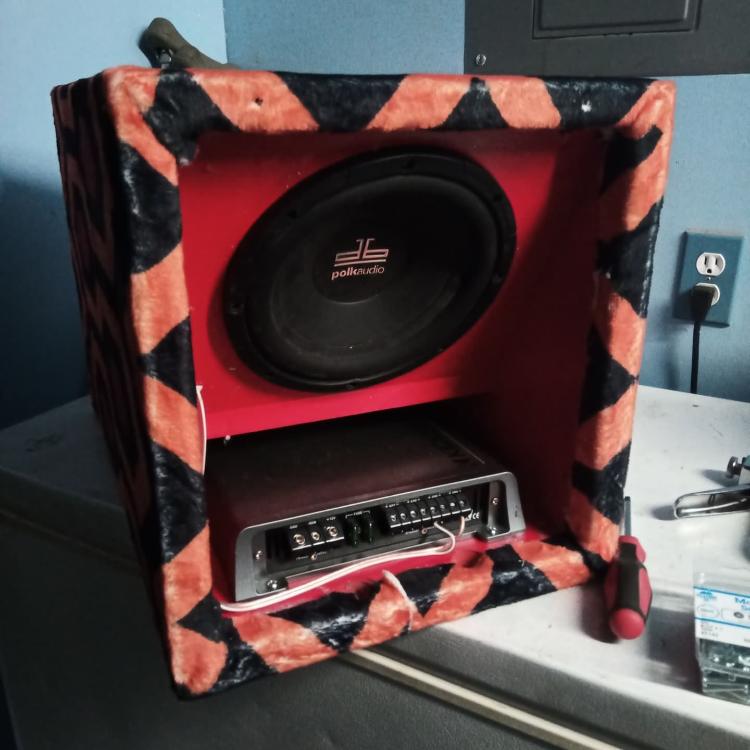 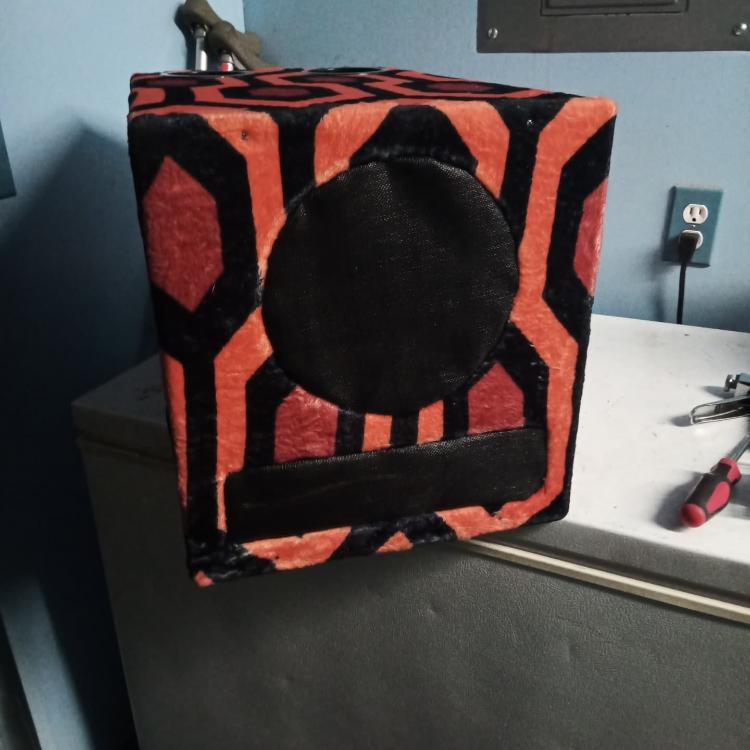 With the sub box installed I started working on the next issue. The ZF5 shifter contacts the box in 4th and reverse and 2nd is wedged between the box and my knee. My solution was to cut a wedge out of the shift lever and bend it to clear. I don't have any good photos yet, but will when I make my next instagram post. 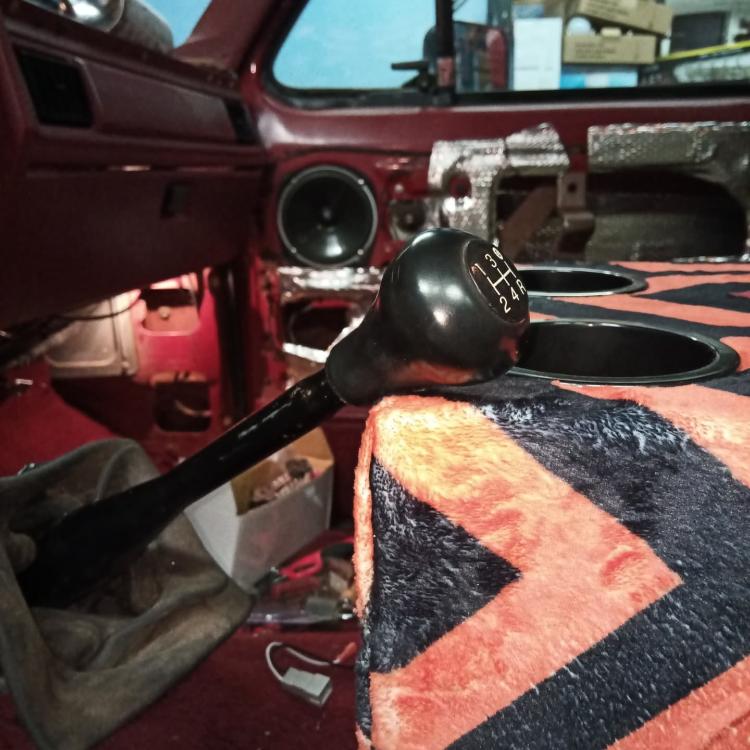
Chris
1985 Ford F250 XLT SuperCab ZF5-42 swapped 460 hot fuel, factory AC. Part way through 4WD swap. 1988 Suzuki Samurai -- Daily Driver 1968 Dodge Dart -- Project car 1957 Chevy 4400 Flat Bed -- Collector Project 1955 Buick Century -- Collector Cruiser |
|
Dang! A lot of work! Good job!
Dane
1986 F250HD SC XLT Lariat 4x4 460 C6-Sold 1992 Bronco XLT 4x4 351W E4OD 1998 GMC Sierra SLE K1500 350 4L60E Arizona |
|
This post was updated on .
In reply to this post by CRittaler
hmm it would seem that some pictures broke while I was making the post. I'll work on fixing them.
EDIT: Fixed
Chris
1985 Ford F250 XLT SuperCab ZF5-42 swapped 460 hot fuel, factory AC. Part way through 4WD swap. 1988 Suzuki Samurai -- Daily Driver 1968 Dodge Dart -- Project car 1957 Chevy 4400 Flat Bed -- Collector Project 1955 Buick Century -- Collector Cruiser |
|
In reply to this post by grumpin
thanks! there's still A LOT to do.
Chris
1985 Ford F250 XLT SuperCab ZF5-42 swapped 460 hot fuel, factory AC. Part way through 4WD swap. 1988 Suzuki Samurai -- Daily Driver 1968 Dodge Dart -- Project car 1957 Chevy 4400 Flat Bed -- Collector Project 1955 Buick Century -- Collector Cruiser |
|
Administrator
|
Wow! That really is a LOT of work! And good work at that. Your ability to weld is amazing. And your "can do" attitude is serving you well.
 Glad you repaired the wiring correctly. And the mounting bracket is ingenious. As for the t-case linkage, it looks like you have the later linkage that comes through the floor. But you can adapt the Bullnose linkage to that t-case and bring the linkage through the transmission floor cover. And the load of stuff in the bed is a huge windfall. However, I'm not sure what the use of the cutoff crossmember is. And are you installing the captain's chairs? Anyway, that is a whole lot of progress, and progress is good. 
Gary, AKA "Gary fellow": Profile
Dad's: '81 F150 Ranger XLT 4x4: Down for restomod: Full-roller "stroked 351M" w/Trick Flow heads & intake, EEC-V SEFI/E4OD/3.50 gears w/Kevlar clutches
|
|
Administrator
|
In reply to this post by CRittaler
Subscribed!
That console, wrapped in the 'carpet', is incredible 
Scott
'Camano' 1986 F250 Supercab XLT Lariat 460/C6 'Chanute' 1980 F350 C&C 400/NP 435 - Gin Pole But there ain't nothin' wrong with the radio |
|
In reply to this post by Gary Lewis
Thanks! I didn't know about adapting the linkage, I've already to the interior together so that will have to wait for another day. I think the cross member was because the PO was swapping to 4WD. I was under the impression that the 4x4 cross members were different from the 2WD ones. Why they hacked it out though I'll never know. I did swap to captaions chairs, bit I don't have much in the way of pictures. 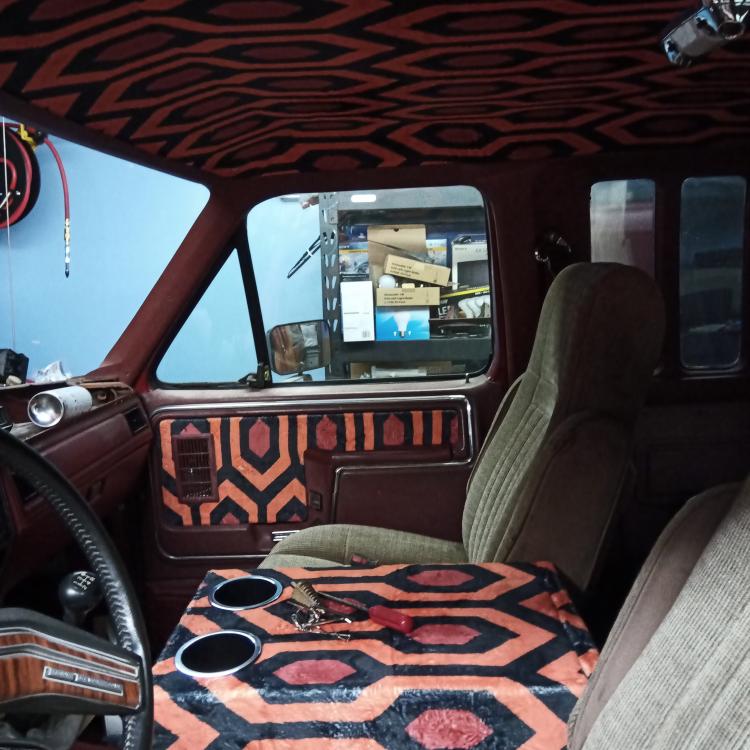 Here's the current interior shot. I was able to utilize the 2 outer bench holes on the driver side, I then had to drill the inners. I welded nuts to the floor to make installing easier. The inner rear bolt on the driver side landed on the seat belt reinforcement plate so I didn't need to add any strength to the floor. For the passenger side only the outer front bench hole could be reused. I was also not able to weld the nuts on this side because of all the heat shielding, but I was able to use large fender washers and nuts. It was just more of a bear needing to hold a wrench on the bottom as well.
Chris
1985 Ford F250 XLT SuperCab ZF5-42 swapped 460 hot fuel, factory AC. Part way through 4WD swap. 1988 Suzuki Samurai -- Daily Driver 1968 Dodge Dart -- Project car 1957 Chevy 4400 Flat Bed -- Collector Project 1955 Buick Century -- Collector Cruiser |
|
In reply to this post by kramttocs
Thanks! I'm happy with how it turned out!
Chris
1985 Ford F250 XLT SuperCab ZF5-42 swapped 460 hot fuel, factory AC. Part way through 4WD swap. 1988 Suzuki Samurai -- Daily Driver 1968 Dodge Dart -- Project car 1957 Chevy 4400 Flat Bed -- Collector Project 1955 Buick Century -- Collector Cruiser |
|
In reply to this post by CRittaler
Managed a little bit of work on REDRUM while I wait for my tattoo to heal.
After installing the sub box I had interference with the shifter in 2nd 4th and reverse. I didn't get many pictures of the cutting process, just after that point The ZF5 shifter is very straight and transitions from a wide base to the more narrow shaft. Where this transition ends is where I gut a wedge out of the tube. I after removing the wedge I put the shifter in my vice and closed the gap 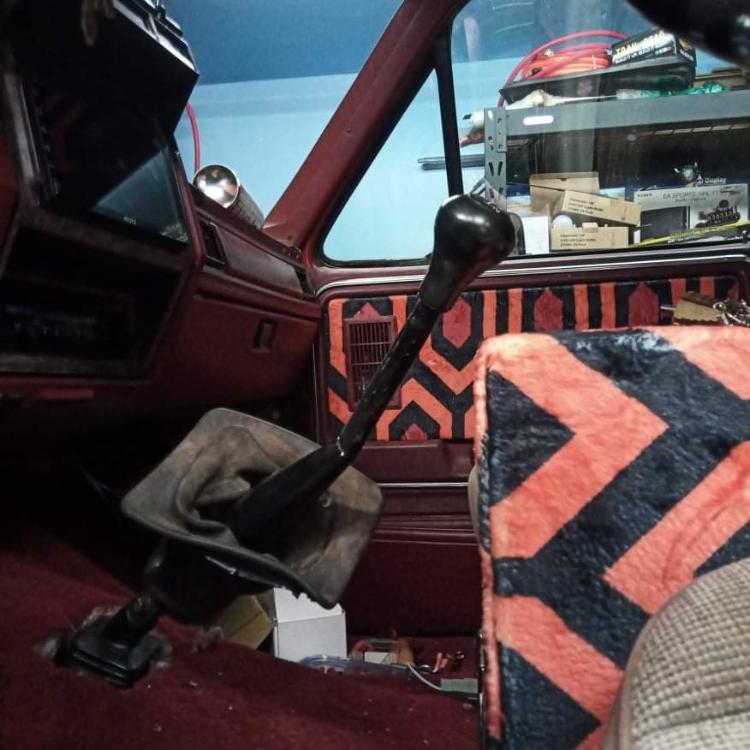 I test fit the shifter a few time to make sure there was lots of clearance between the box as well as the dash. I then ground off some paint and welded up the cut. 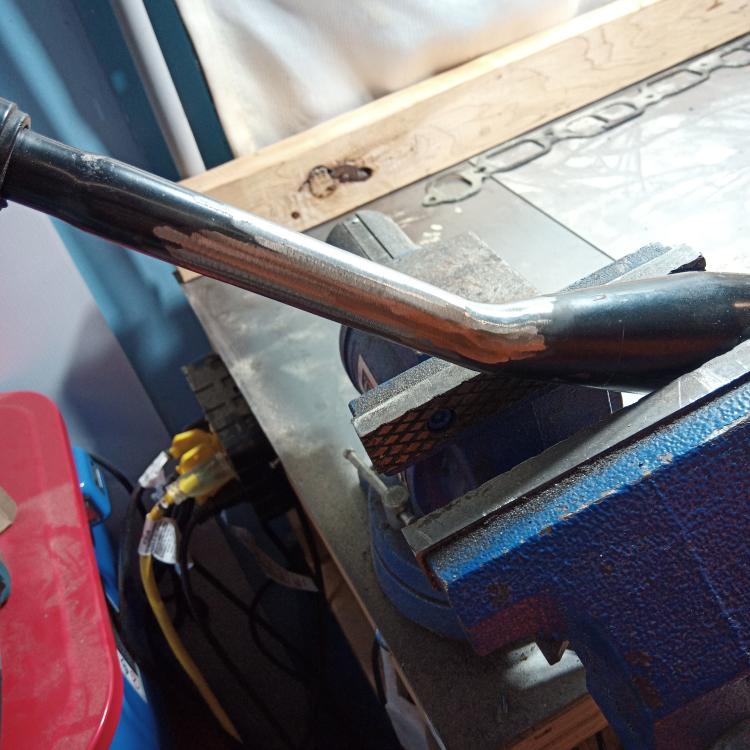 I then painted it with some leftover BBQ paint that the previous owner of my house left behind. 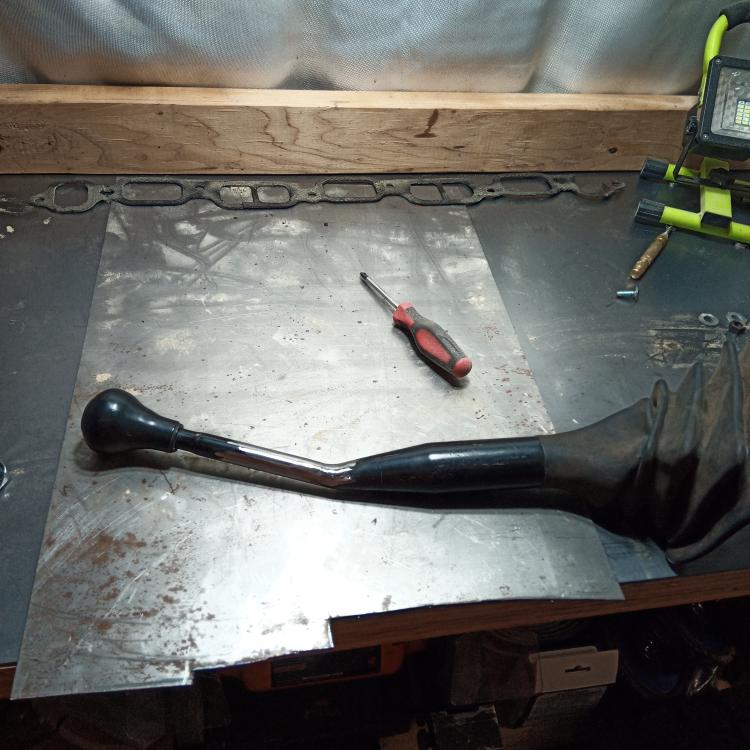 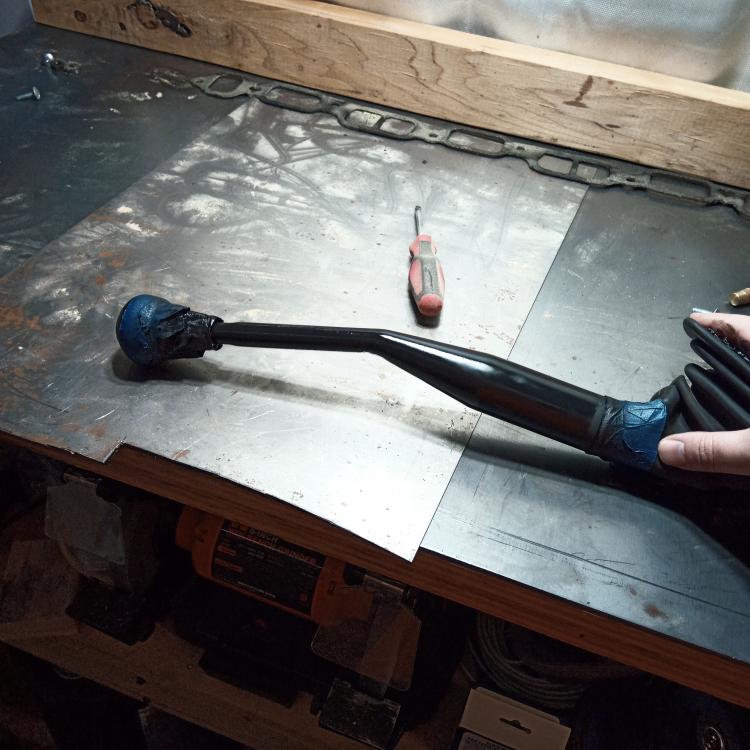 Just waiting for the paint to dry before I reinstall it.
Chris
1985 Ford F250 XLT SuperCab ZF5-42 swapped 460 hot fuel, factory AC. Part way through 4WD swap. 1988 Suzuki Samurai -- Daily Driver 1968 Dodge Dart -- Project car 1957 Chevy 4400 Flat Bed -- Collector Project 1955 Buick Century -- Collector Cruiser |
|
Administrator
|
Well done! That ZF5 shifter is looooong, so I can easily see it hitting things. For instance, I'm going to try a pair of captain's chairs with arm rests in Big Blue and worry that the arm rest will interfere with the shifter, or at least my ability to use the shifter. Now I know how to "fix" that.
Gary, AKA "Gary fellow": Profile
Dad's: '81 F150 Ranger XLT 4x4: Down for restomod: Full-roller "stroked 351M" w/Trick Flow heads & intake, EEC-V SEFI/E4OD/3.50 gears w/Kevlar clutches
|
It is quite long. Even without the box there I was probably going to bend it a little. 2nd gear was basically wedged against my knee/thigh with the captains chairs all the way back. 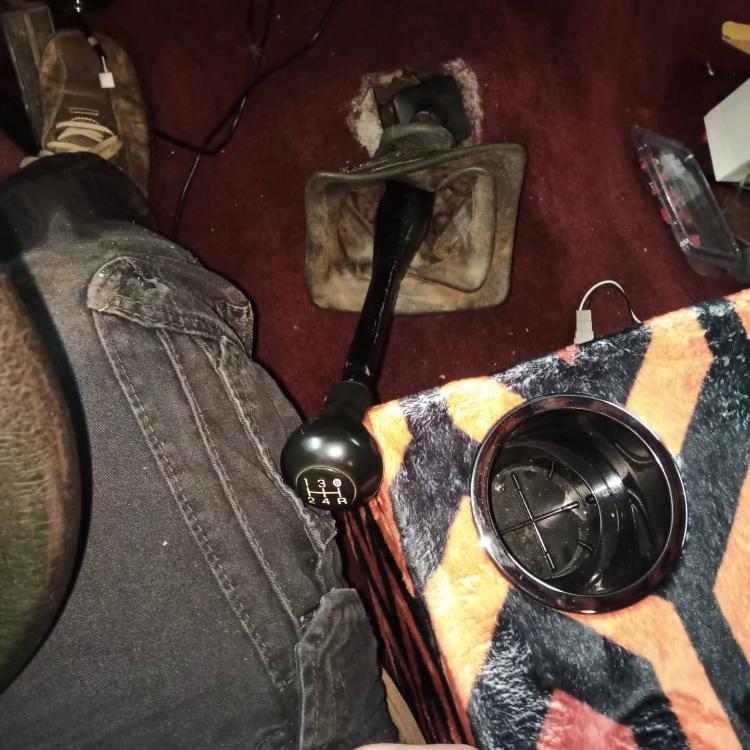 Here you can see where it landed when I set it in 2nd.
Chris
1985 Ford F250 XLT SuperCab ZF5-42 swapped 460 hot fuel, factory AC. Part way through 4WD swap. 1988 Suzuki Samurai -- Daily Driver 1968 Dodge Dart -- Project car 1957 Chevy 4400 Flat Bed -- Collector Project 1955 Buick Century -- Collector Cruiser |
|
Administrator
|
So, you have the high-backed captain's chairs? Do they have the arm rests? If so, do they give problems shifting?
Gary, AKA "Gary fellow": Profile
Dad's: '81 F150 Ranger XLT 4x4: Down for restomod: Full-roller "stroked 351M" w/Trick Flow heads & intake, EEC-V SEFI/E4OD/3.50 gears w/Kevlar clutches
|
Correct, I have high back captains with arm rests now. Let me check what shifting is like when I put my shifter back on tonight. I only get an hour or two to tinker in the evenings once my son is down for bed. Unfortunately I didn't check that before I modified the shifter, but I'll try and visualize where it would land. When I bought the truck it was a bench seat so I didn't have any issues aside from it resting against my leg in 2nd.
Chris
1985 Ford F250 XLT SuperCab ZF5-42 swapped 460 hot fuel, factory AC. Part way through 4WD swap. 1988 Suzuki Samurai -- Daily Driver 1968 Dodge Dart -- Project car 1957 Chevy 4400 Flat Bed -- Collector Project 1955 Buick Century -- Collector Cruiser |
|
Administrator
|
That would help. I've planned to installed the captain's chairs that are for Dad's truck in Big Blue for our trip next week, but if I can't shift...
Gary, AKA "Gary fellow": Profile
Dad's: '81 F150 Ranger XLT 4x4: Down for restomod: Full-roller "stroked 351M" w/Trick Flow heads & intake, EEC-V SEFI/E4OD/3.50 gears w/Kevlar clutches
|
I'll preface this with my phone takes garbage pictures, but I didn't have any issues with the shifter. Unmodified the worst it would be for me is it would hit my leg in 2nd gear, but that was the same with the bench that was there before I swapped the shift knob to one that was included in the parts that came with the truck. 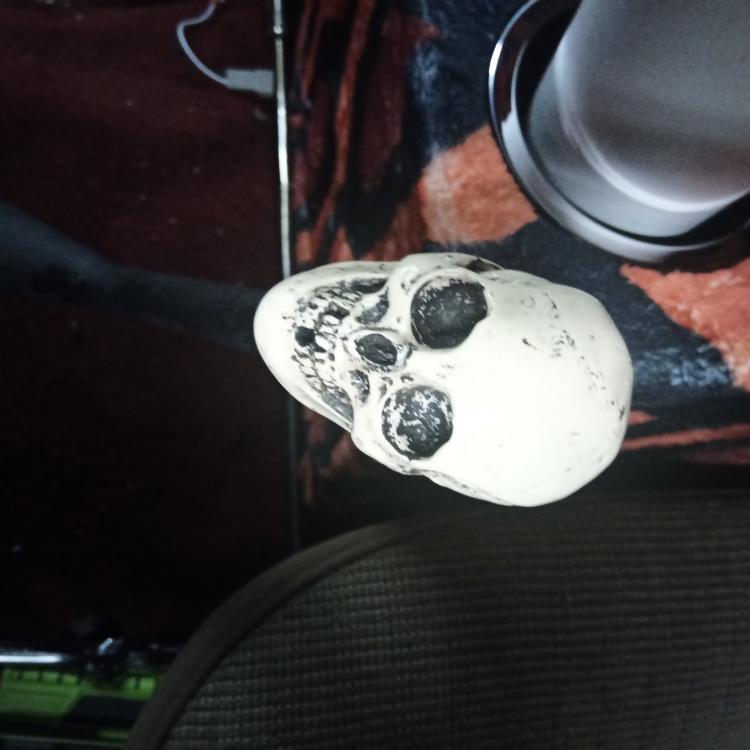 The following pictures are with the transmission engaged in 2nd gear. You can kind of see where the unmodified shifter sits in an earlier picture in the thread. 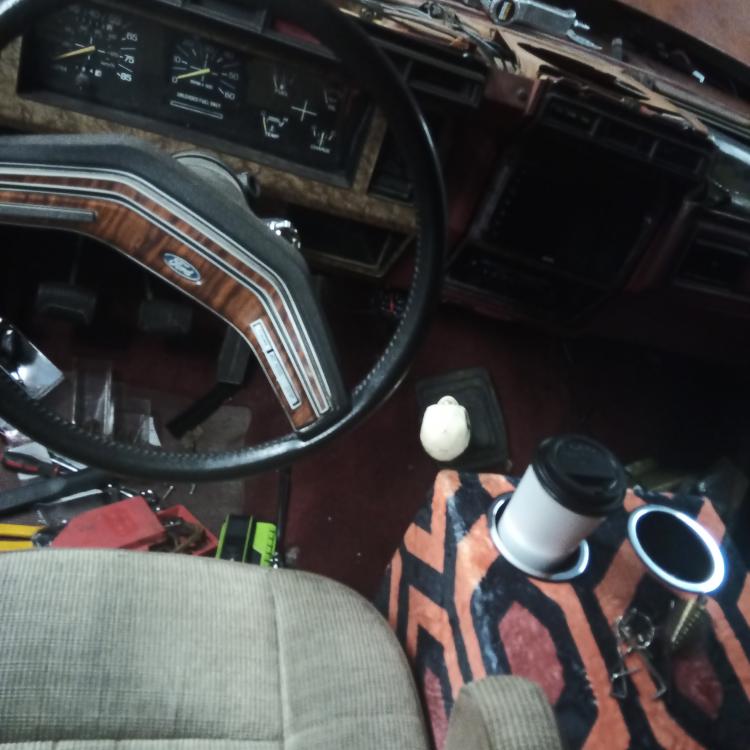 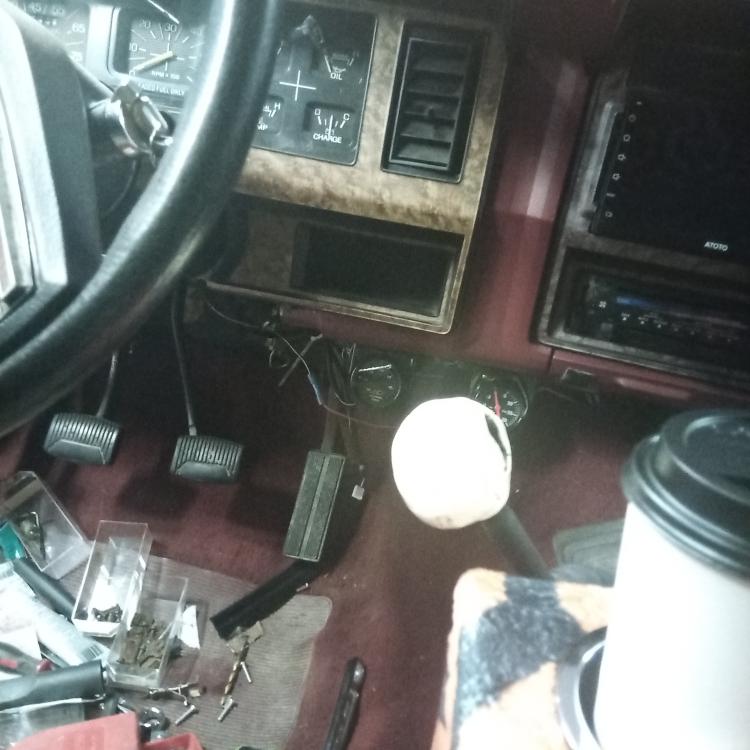 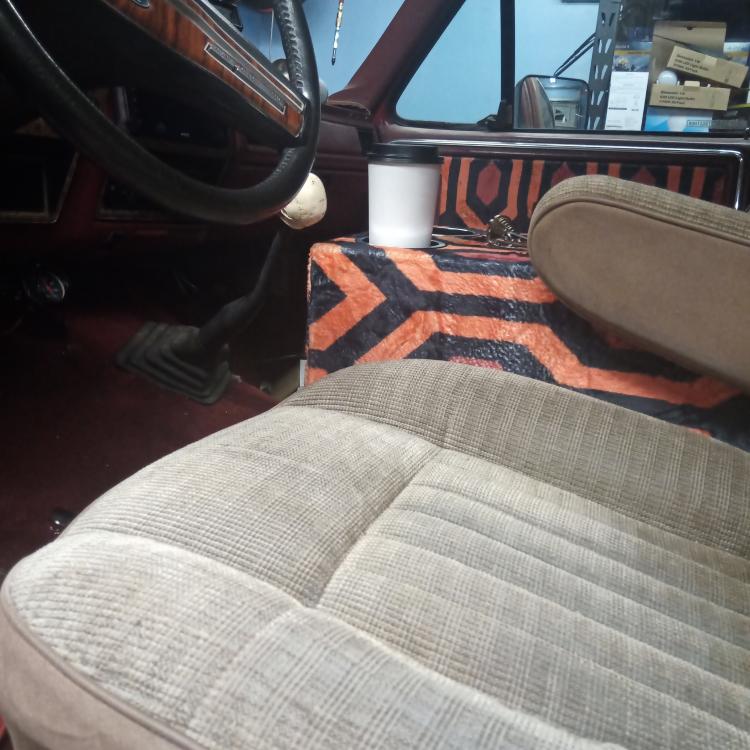 A rough estimate to me would be that there is about 5" between the edge of the seat and where the shifter sits in 2nd gear. Here are some measurements I took from my now modified shifter. Seat slid fully back and fully forward. 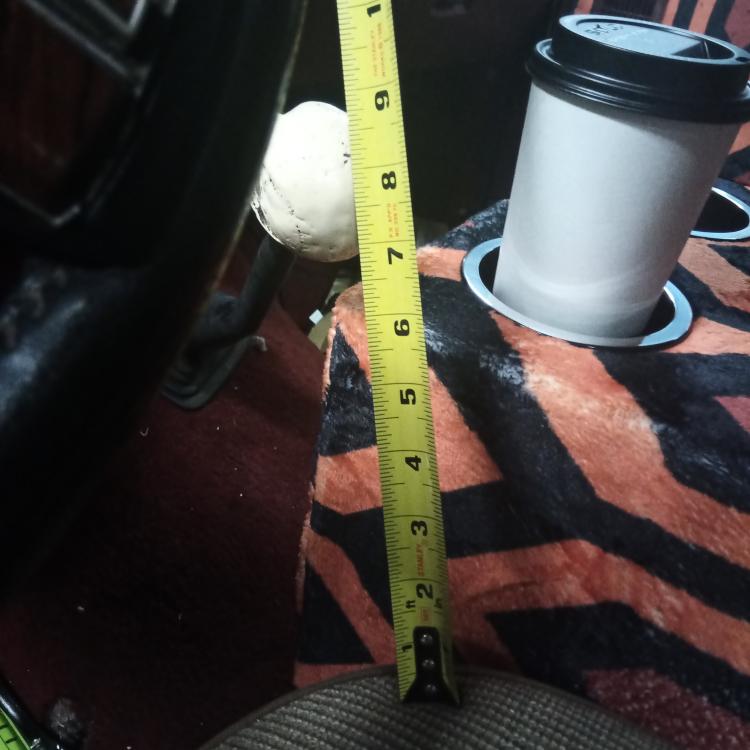 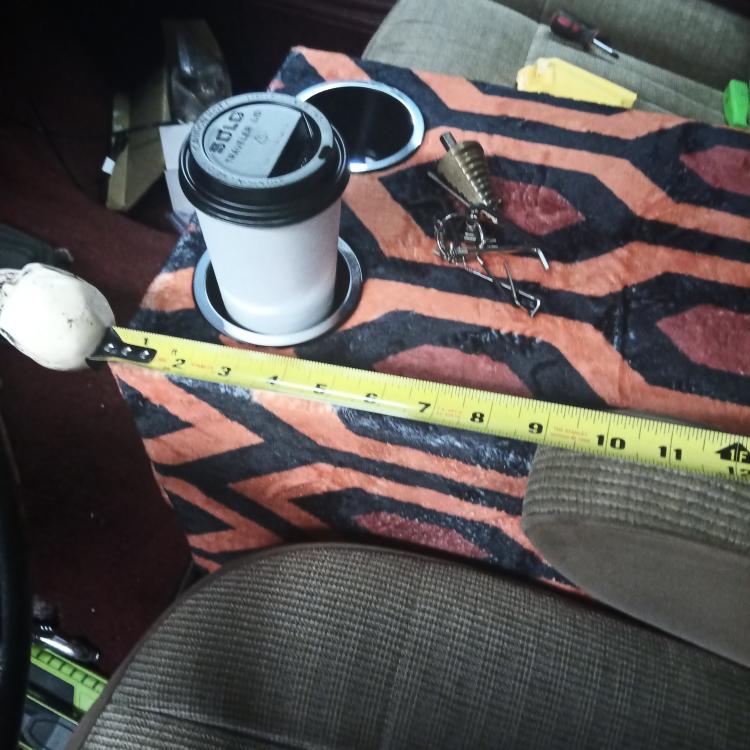 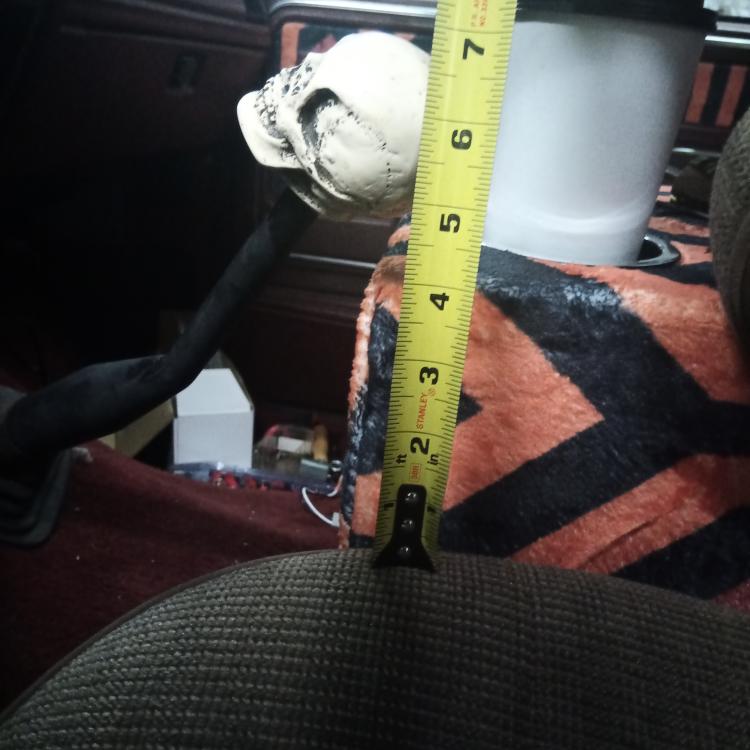 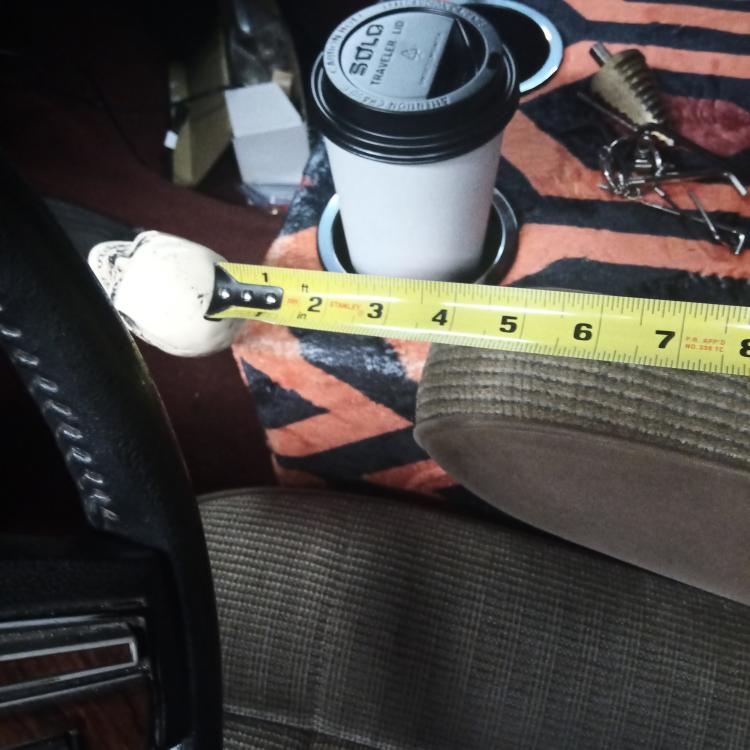
Chris
1985 Ford F250 XLT SuperCab ZF5-42 swapped 460 hot fuel, factory AC. Part way through 4WD swap. 1988 Suzuki Samurai -- Daily Driver 1968 Dodge Dart -- Project car 1957 Chevy 4400 Flat Bed -- Collector Project 1955 Buick Century -- Collector Cruiser |
|
Administrator
|
Thanks, Chris. That helps. And it looks like it'll work with the captain's chair. I'll give it a try!

Gary, AKA "Gary fellow": Profile
Dad's: '81 F150 Ranger XLT 4x4: Down for restomod: Full-roller "stroked 351M" w/Trick Flow heads & intake, EEC-V SEFI/E4OD/3.50 gears w/Kevlar clutches
|
|
In reply to this post by CRittaler
Got the transfercase shifter installed but forgot to take pictures.
Started working on gauges, moving gauges that the PO installed. I knew the PO wired in the 4wd indicator, but I didn't expect a standard bulb socket with the wires zip tied to the holder.... 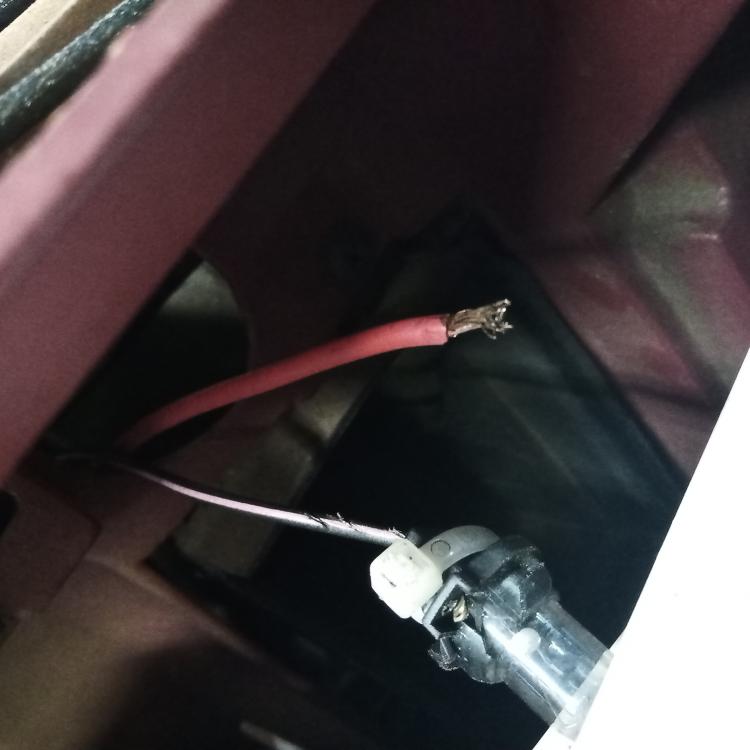 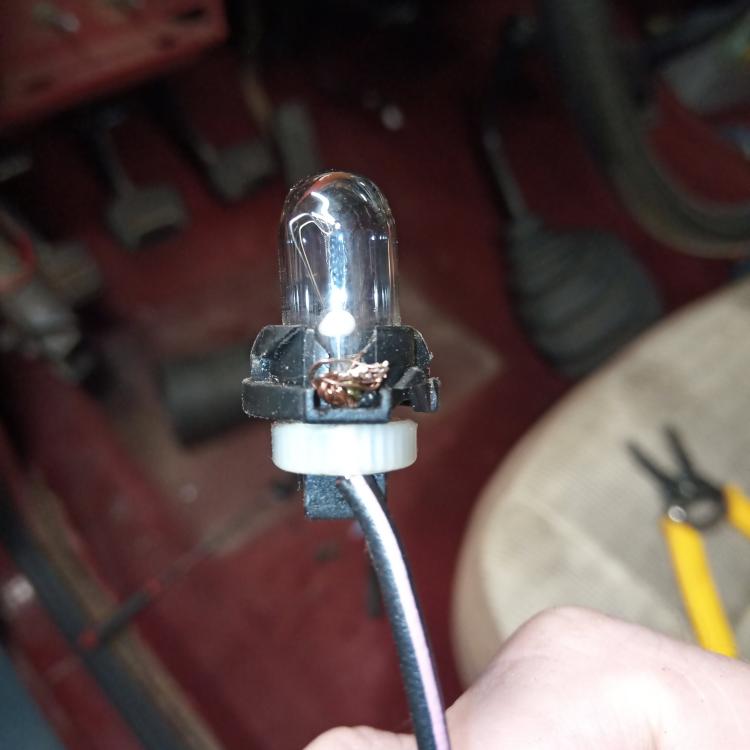 I traced the red wire through the firewall to a junction at the wiper motor. This same connection was used for the 4WD indicator, power for the AFR meter and power for the electric choke :/. None of the joints were soldered. I'm going to have to depin the wiper connector to heat shrink it properly. 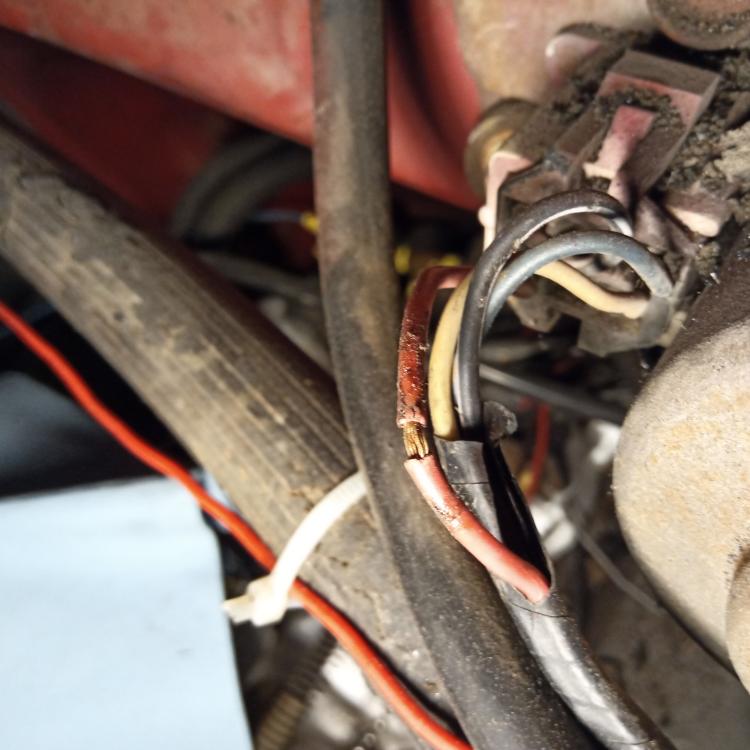  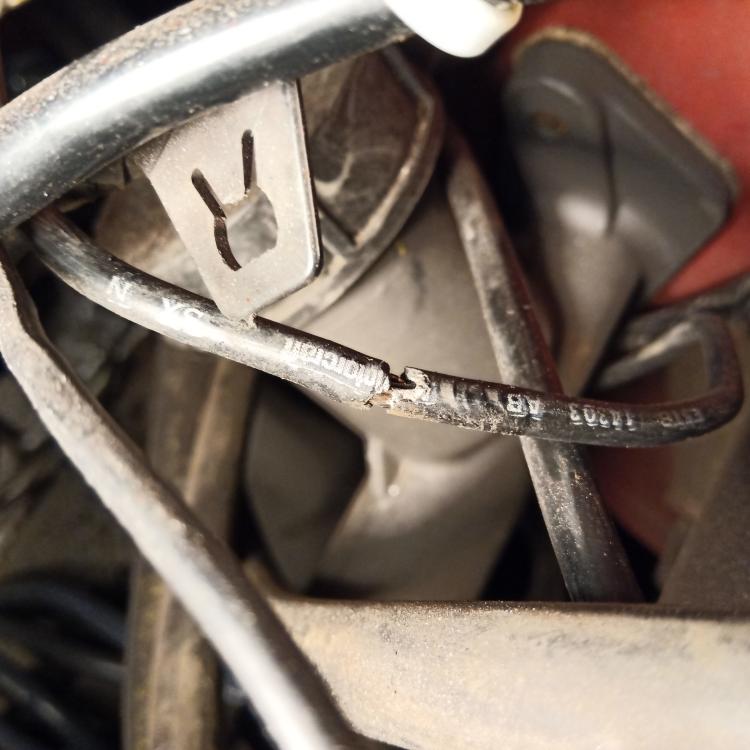 I also discovered that a bunch of wiring was pulled through the firewall without a grommet so I've been undoing that mess too. 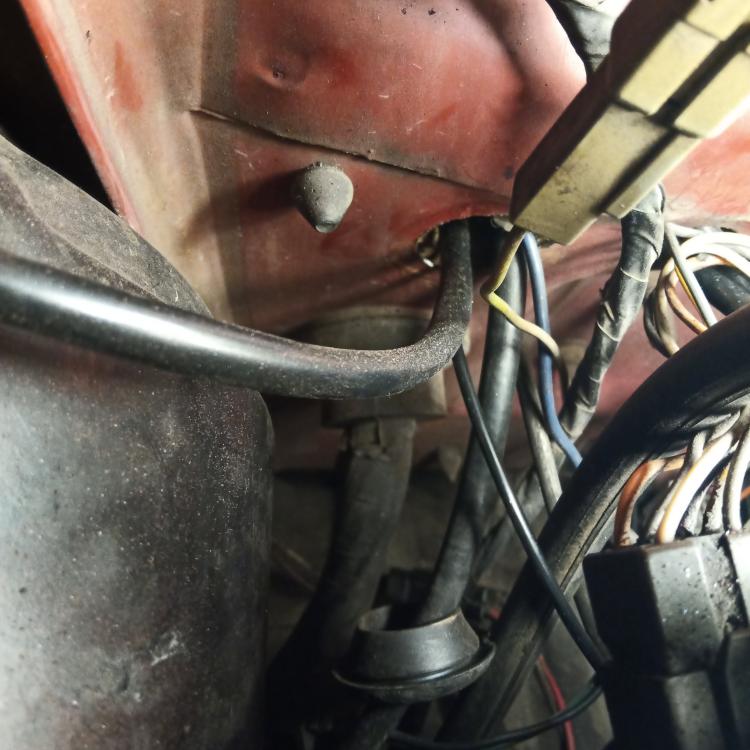 I dug deeper into the dash too and found a connection for the trailer brake controller that I need to redo. 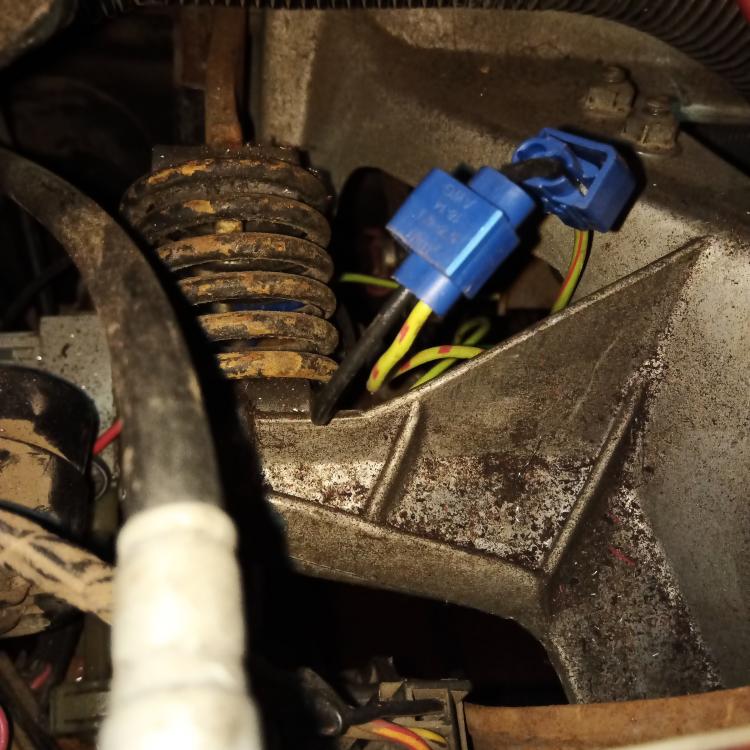 Ugh :/
Chris
1985 Ford F250 XLT SuperCab ZF5-42 swapped 460 hot fuel, factory AC. Part way through 4WD swap. 1988 Suzuki Samurai -- Daily Driver 1968 Dodge Dart -- Project car 1957 Chevy 4400 Flat Bed -- Collector Project 1955 Buick Century -- Collector Cruiser |
|
Administrator
|
Some people shouldn't be allowed to work on vehicles.
 It isn't unusual to find some of those issues in a truck, but you seem to have hit the mother lode! Wow, what was he thinking? Oh wait, he wasn't!  But at least you are finding them before they cause all sorts of problems. And when you are done with all of the inexpensive but painful work the truck should be solid.
Gary, AKA "Gary fellow": Profile
Dad's: '81 F150 Ranger XLT 4x4: Down for restomod: Full-roller "stroked 351M" w/Trick Flow heads & intake, EEC-V SEFI/E4OD/3.50 gears w/Kevlar clutches
|
|
The PO and whoever helped him are those people for sure.
On a side note, I'm working on an auxiliary power distribution setup to put near the battery. For on in Run/Acc I plan on utilizing fuse location 14 (Power Windows) since I don't have those there's no fuse installed, but I can install one and wire to it and use that to trigger my key-on relays. My intention is to have a High beam relay, low beam relay, horn relay, auxiliary gauges relay, electric choke relay and maybe a couple others. I only have 2 fusible links by the battery so those will be replaced with 30A Maxi fuses. Eventually I plan to either swap to a 3G or to a Powermaster 1 wire so I also have a 175A ANL fuse+holder that I will be mounting and I will be cleaning up the stereo amplifier B+ wiring to make it all nice and neat. I think this will all be on a sheet metal plate that will fasten to the plastic inner fender and to the body where my battery grounds to. I plan on drawing all this up before starting so I'll likely post the drawings.
Chris
1985 Ford F250 XLT SuperCab ZF5-42 swapped 460 hot fuel, factory AC. Part way through 4WD swap. 1988 Suzuki Samurai -- Daily Driver 1968 Dodge Dart -- Project car 1957 Chevy 4400 Flat Bed -- Collector Project 1955 Buick Century -- Collector Cruiser |
| Edit this page |

